AnyCloud WiFi Template + WiFi Helper Library (Part 3): A New Modus Toolbox Library

Summary

Instructions to create a new Modus Toolbox / AnyCloud library including modifying your master middleware manifest and updating the dependencies.  The new library and dependencies will then be available in your library browser and new project creator.

Article
(Part 1) Create Basic Project & Add Cypress Logging Functionality
(Part 2) Create New Thread to manage WiFi using the Wireless Connection Manager
(Part 3) Create a New Middleware Library with WiFi helper functions
(Part 4) Add WiFi Scan
Add WiFi Connect
Add WiFi Disconnect
Add WiFi Ping
Add Gethostbyname
Add MDNS
Add Status
Add StartAP
Make a new template project (update manifest)

Story

In the previous article we discussed the steps to turn on the WiFi chip in your project using the Wireless Connection Manager Anycloud (WCM) library.  When something happens with the WCM it will give you a callback to tell you what happened.  In my example code there were three printf’s that were commented out for the conditions:

  • CY_WCM_EVENT_IP_CHANGED
  • CY_WCM_EVENT_STA_JOINED_SOFTAP
  • CY_WCM_EVENT_STA_LEFT_SOFTAP

The question you might have is “What is the new Ip Address”” or “What is the MAC address of the Station which joined the SoftAp?”

        case CY_WCM_EVENT_IP_CHANGED:           /**< IP address change event. This event is notified after connection, re-connection, and IP address change due to DHCP renewal. */
 //               cy_wcm_get_ip_addr(wifi_network_mode, &ip_addr, 1);
                printf("Station IP Address Changed: %s\n",wifi_ntoa(&ip_addr));
        break;
        case CY_WCM_EVENT_STA_JOINED_SOFTAP:    /**< An STA device connected to SoftAP. */
//            printf("STA Joined: %s\n",wifi_mac_to_string(event_data->sta_mac));
        break;
        case CY_WCM_EVENT_STA_LEFT_SOFTAP:      /**< An STA device disconnected from SoftAP. */
//            printf("STA Left: %s\n",wifi_mac_to_string(event_data->sta_mac));

So I wrote “standard” functions to

  • Convert an IP address structure to a string (like ntoa in Linux)
  • Convert a MAC address to a string

I essentially got these from the code example where they were redundantly repeatedly repeated.  After tweaking them to suit my liking I wanted to put them in a library.

Make the C-Library

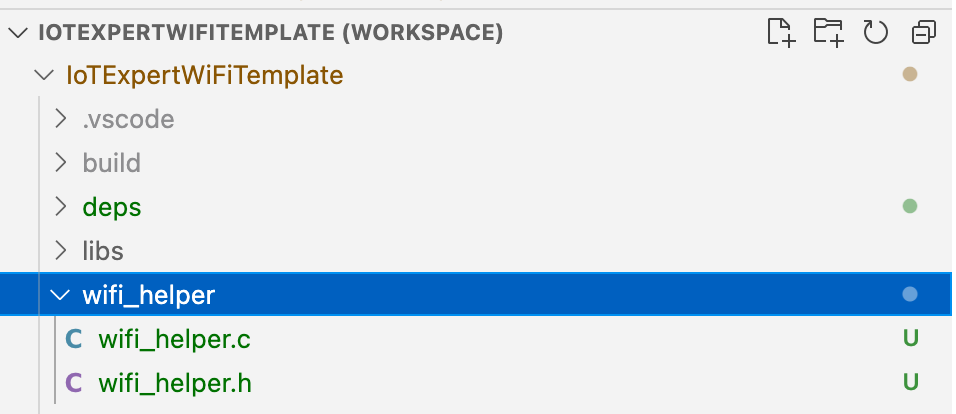
Follow these steps to make the c-library.  First, make a new directory in your project called “wifi_helper”.  You can do this in Visual Studio Code by pressing the folder button with the plus on it.

Then create the files wifi_helper.h and wifi_helper.c

In “wifi_helper.h” type in the public interface.  Specifically, that we want a function that takes a mac address returns a char*.  And another function that takes an IP address and returns a char*

#pragma once

#include "cy_wcm.h"

char *wifi_mac_to_string(cy_wcm_mac_t mac);

char *wifi_ntoa(cy_wcm_ip_address_t *ip_addr);


All right Hassane… yes these functions need comments.  Notice that I allocated a static buffer inside of these two function.  That means that these functions are NOT NOT NOT thread safe.  However, personally I think that is fine as I think that it is unlikely that they would ever be called from multiple threads.

#include "wifi_helper.h"
#include "cy_wcm.h"
#include <stdio.h>
#include "cy_utils.h"
#include "cy_log.h"

char *wifi_mac_to_string(cy_wcm_mac_t mac)
{
    static char _mac_string[] = "xx:xx:xx:xx:xx:xx";
    sprintf(_mac_string,"%02X:%02X:%02X:%02X:%02X:%02X",mac[0],mac[1],mac[2],mac[3],mac[4],mac[5]);
    return _mac_string; 
}


char *wifi_ntoa(cy_wcm_ip_address_t *ip_addr)
{
    static char _netchar[32];
    switch(ip_addr->version)
    {
        case CY_WCM_IP_VER_V4:
            sprintf(_netchar,"%d.%d.%d.%d", (uint8_t)ip_addr->ip.v4,
                (uint8_t)(ip_addr->ip.v4 >> 8), (uint8_t)(ip_addr->ip.v4 >> 16),
                (uint8_t)(ip_addr->ip.v4 >> 24));        break;
        case CY_WCM_IP_VER_V6:
            sprintf(_netchar,"%X:%X:%X:%X", (uint8_t)ip_addr->ip.v6[0],
                (uint8_t)(ip_addr->ip.v6[1]), (uint8_t)(ip_addr->ip.v6[2]),
                (uint8_t)(ip_addr->ip.v6[3]));
        break;
    }
    CY_ASSERT(buff[0] != 0); // SOMETHING should have happened
    return _netchar;
}

Git Repository

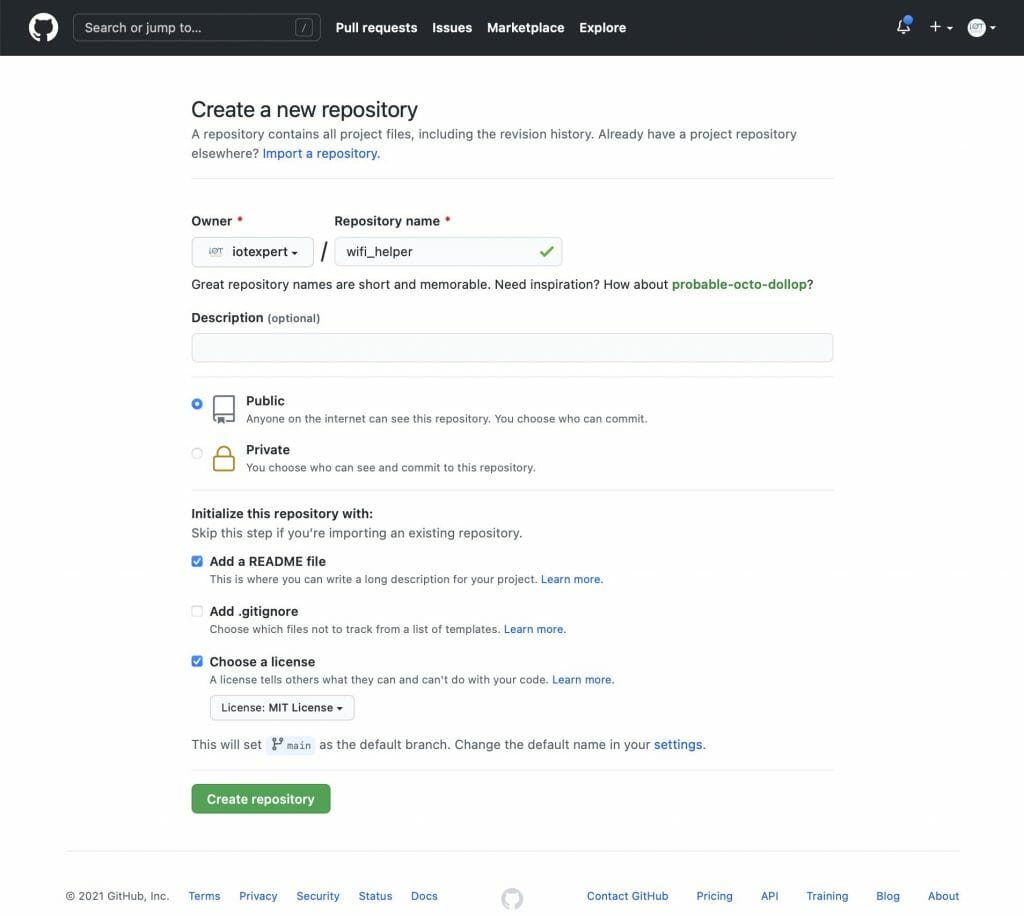
Now that I have the files I need in the library, I want to create a place on GitHub to hold the library.

Now we need to integrate the files into Git.  To do this you need to

  1. Initialize a new git repository (git init .)
  2. Add a remote (git remote add origin git@github.com:iotexpert/wifi_helper.git)
  3. Pull the remote files (README and LICENSE) with (git pull origin main)
  4. Add the wifi_helper files (git add wifi_helper.*)
  5. Commit the changes (git commit -m “added initial c files”)
  6. Push them to the remote (git push -u origin main)
arh (master *+) wifi_helper $ pwd
/Users/arh/proj/elkhorncreek3/IoTExpertWiFiTemplate/wifi_helper
arh (master *+) wifi_helper $ git init .
Initialized empty Git repository in /Users/arh/proj/elkhorncreek3/IoTExpertWiFiTemplate/wifi_helper/.git/
arh (main #) wifi_helper $ git remote add origin git@github.com:iotexpert/wifi_helper.git
arh (main #) wifi_helper $ git pull origin main
remote: Enumerating objects: 4, done.
remote: Counting objects: 100% (4/4), done.
remote: Compressing objects: 100% (4/4), done.
remote: Total 4 (delta 0), reused 0 (delta 0), pack-reused 0
Unpacking objects: 100% (4/4), 1.28 KiB | 436.00 KiB/s, done.
From iotexpert.github.com:iotexpert/wifi_helper
 * branch            main       -> FETCH_HEAD
 * [new branch]      main       -> origin/main
arh (main) wifi_helper $ git add wifi_helper.*
arh (main +) wifi_helper $ git commit -m "added initial c files"
[main f7d10b1] added initial c files
 2 files changed, 72 insertions(+)
 create mode 100644 wifi_helper.c
 create mode 100644 wifi_helper.h
arh (main) wifi_helper $ git push -u origin main
Enumerating objects: 5, done.
Counting objects: 100% (5/5), done.
Delta compression using up to 12 threads
Compressing objects: 100% (4/4), done.
Writing objects: 100% (4/4), 1.10 KiB | 1.10 MiB/s, done.
Total 4 (delta 0), reused 0 (delta 0), pack-reused 0
To iotexpert.github.com:iotexpert/wifi_helper.git
   3a1ad32..f7d10b1  main -> main
Branch 'main' set up to track remote branch 'main' from 'origin'.
arh (main) wifi_helper $ 

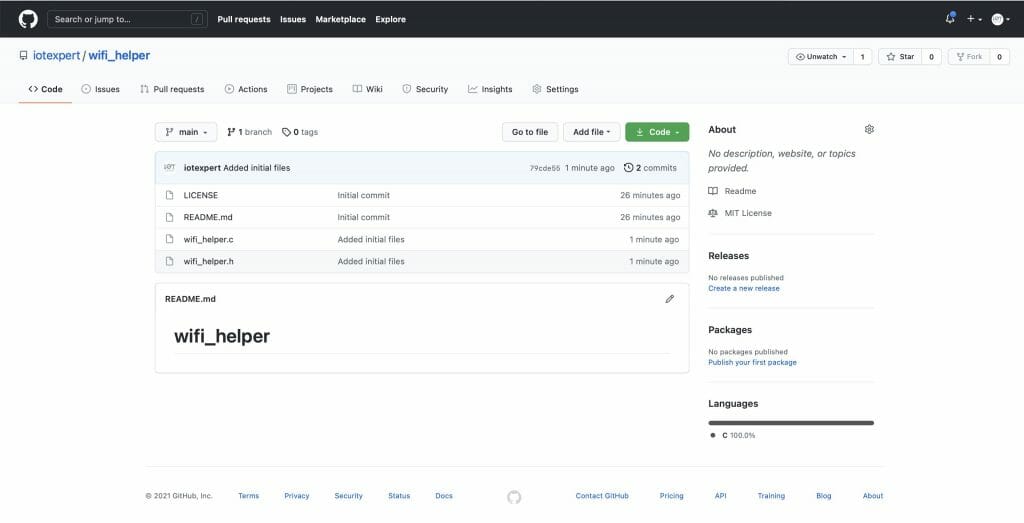
Now you will have something like this on GitHub.

Manifest Files

I would like to be able to have my new library show up in the library browser.  But how?  When the library browser starts up it needs to discover:

  1. Board Support Packages
  2. Template Projects
  3. Middleware Code Libraries

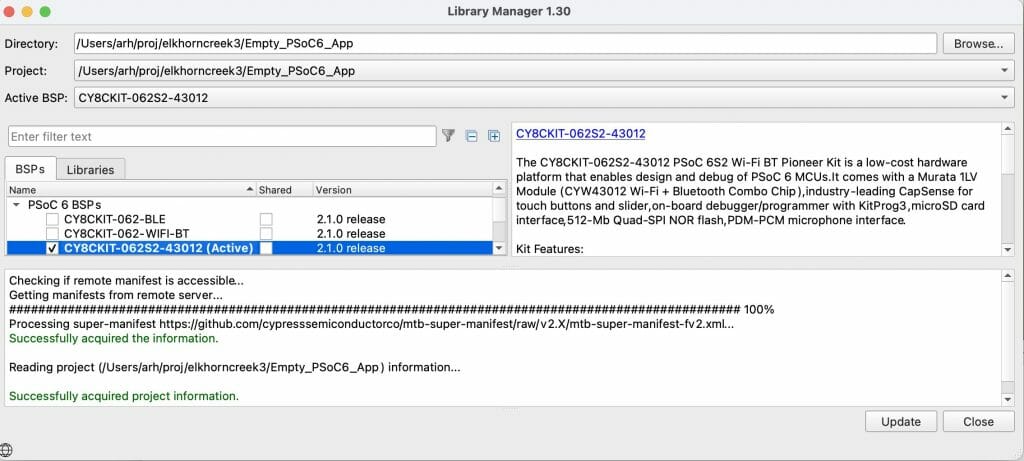
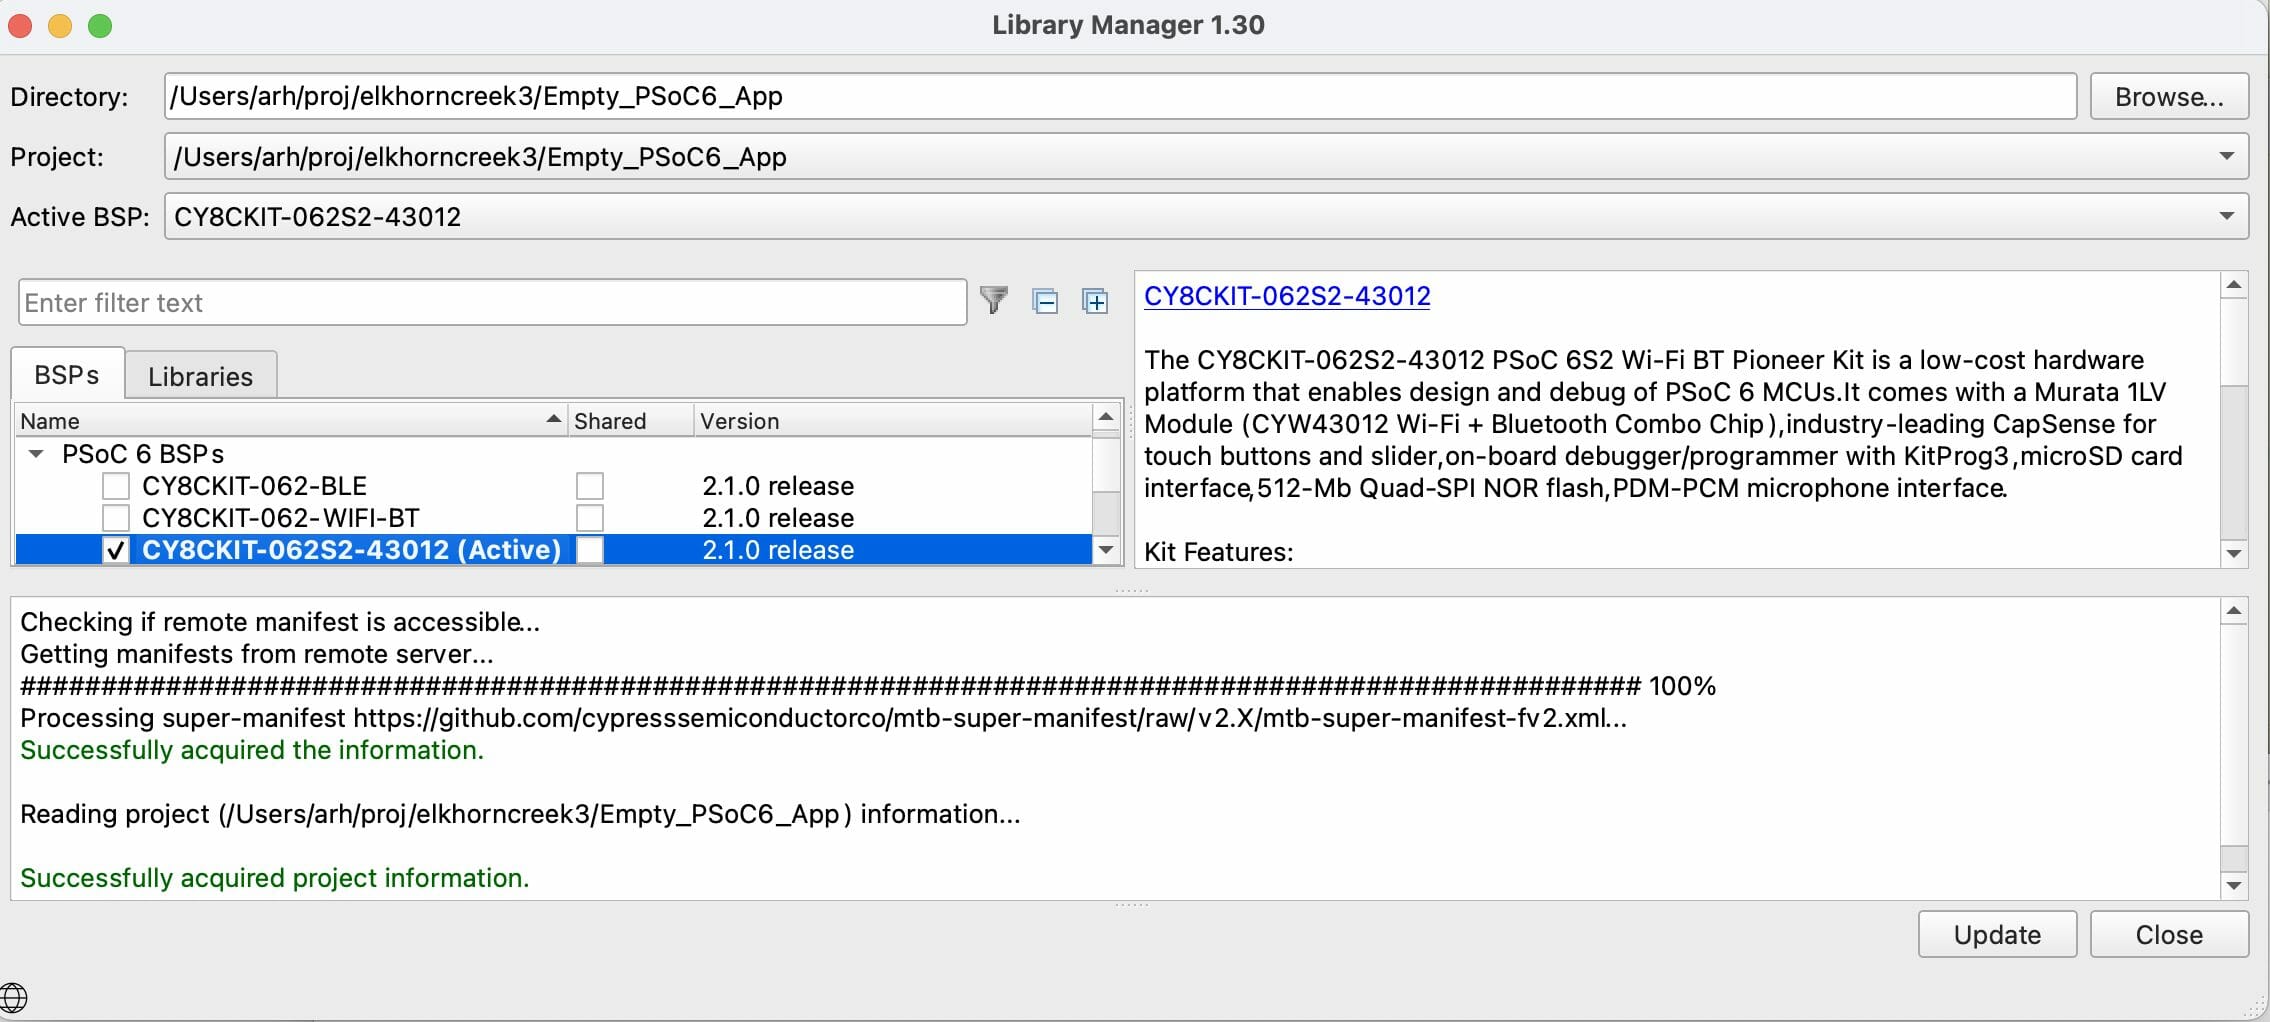
To do this, it reads a series of XML files called “manifests”.  These manifest files tell the library browser where to find the libraries.  If you have ever noticed the library browser (or the new project creator) it looks like this:

The message “Processing super-manifest …” give you a hint to go to https://raw.githubusercontent.com/cypresssemiconductorco/mtb-super-manifest/v2.X/mtb-super-manifest-fv2.xml

Here it is.  Notice that the XML scheme says that this file is a “super-manifest”.  Then notice that there are sections:

  • <board-manifest-list> these are BSPs
  • <app-manifest-list> these are template projects
  • <middleware-manifest-list> these are middleware code libraries
<super-manifest>
  <board-manifest-list>
    <board-manifest>
      <uri>https://github.com/cypresssemiconductorco/mtb-bsp-manifest/raw/v2.X/mtb-bsp-manifest.xml</uri>
    </board-manifest>
    <board-manifest dependency-url="https://github.com/cypresssemiconductorco/mtb-bsp-manifest/raw/v2.X/mtb-bsp-dependencies-manifest.xml">
      <uri>https://github.com/cypresssemiconductorco/mtb-bsp-manifest/raw/v2.X/mtb-bsp-manifest-fv2.xml</uri>
    </board-manifest>
    <board-manifest>
      <uri>https://github.com/cypresssemiconductorco/mtb-bt-bsp-manifest/raw/v2.X/mtb-bt-bsp-manifest.xml</uri>
    </board-manifest>
    <board-manifest dependency-url="https://github.com/cypresssemiconductorco/mtb-bt-bsp-manifest/raw/v2.X/mtb-bt-bsp-dependencies-manifest.xml">
      <uri>https://github.com/cypresssemiconductorco/mtb-bt-bsp-manifest/raw/v2.X/mtb-bt-bsp-manifest-fv2.xml</uri>
    </board-manifest>
  </board-manifest-list>
  <app-manifest-list>
    <app-manifest>
      <uri>https://github.com/cypresssemiconductorco/mtb-ce-manifest/raw/v2.X/mtb-ce-manifest.xml</uri>
    </app-manifest>
    <app-manifest>
      <uri>https://github.com/cypresssemiconductorco/mtb-ce-manifest/raw/v2.X/mtb-ce-manifest-fv2.xml</uri>
    </app-manifest>
    <app-manifest>
      <uri>https://github.com/cypresssemiconductorco/mtb-bt-app-manifest/raw/v2.X/mtb-bt-app-manifest.xml</uri>
    </app-manifest>
    <app-manifest>
      <uri>https://github.com/cypresssemiconductorco/mtb-bt-app-manifest/raw/v2.X/mtb-bt-app-manifest-fv2.xml</uri>
    </app-manifest>
  </app-manifest-list>
  <middleware-manifest-list>
    <middleware-manifest>
      <uri>https://github.com/cypresssemiconductorco/mtb-mw-manifest/raw/v2.X/mtb-mw-manifest.xml</uri>
    </middleware-manifest>
    <middleware-manifest dependency-url="https://github.com/cypresssemiconductorco/mtb-mw-manifest/raw/v2.X/mtb-mw-dependencies-manifest.xml">
      <uri>https://github.com/cypresssemiconductorco/mtb-mw-manifest/raw/v2.X/mtb-mw-manifest-fv2.xml</uri>
    </middleware-manifest>
    <middleware-manifest>
      <uri>https://github.com/cypresssemiconductorco/mtb-bt-mw-manifest/raw/v2.X/mtb-bt-mw-manifest.xml</uri>
    </middleware-manifest>
    <middleware-manifest dependency-url="https://github.com/cypresssemiconductorco/mtb-bt-mw-manifest/raw/v2.X/mtb-bt-mw-dependencies-manifest.xml">
      <uri>https://github.com/cypresssemiconductorco/mtb-bt-mw-manifest/raw/v2.X/mtb-bt-mw-manifest-fv2.xml</uri>
    </middleware-manifest>
    <middleware-manifest>
      <uri>https://github.com/cypresssemiconductorco/mtb-wifi-mw-manifest/raw/v2.X/mtb-wifi-mw-manifest.xml</uri>
    </middleware-manifest>
    <middleware-manifest dependency-url="https://github.com/cypresssemiconductorco/mtb-wifi-mw-manifest/raw/v2.X/mtb-wifi-mw-dependencies-manifest.xml">
      <uri>https://github.com/cypresssemiconductorco/mtb-wifi-mw-manifest/raw/v2.X/mtb-wifi-mw-manifest-fv2.xml</uri>
    </middleware-manifest>
  </middleware-manifest-list>
</super-manifest>

But you can’t modify this to add your own?  So what do you do now?  Cypress put in the capability for you to extend the system by creating a file called “~/.modustoolbox/manifest.loc”.  This file contains one or more URLs to super-manifest files (like the one above) where you can add whatever you want.

Here is the iotexpert manifest.loc

arh ~ $ cd ~/.modustoolbox/
arh .modustoolbox $ more manifest.loc
https://github.com/iotexpert/mtb2-iotexpert-manifests/raw/master/iotexpert-super-manifest.xml
arh .modustoolbox $

This file points to a super manifest file in a GitHub repository.  Here is the repository:

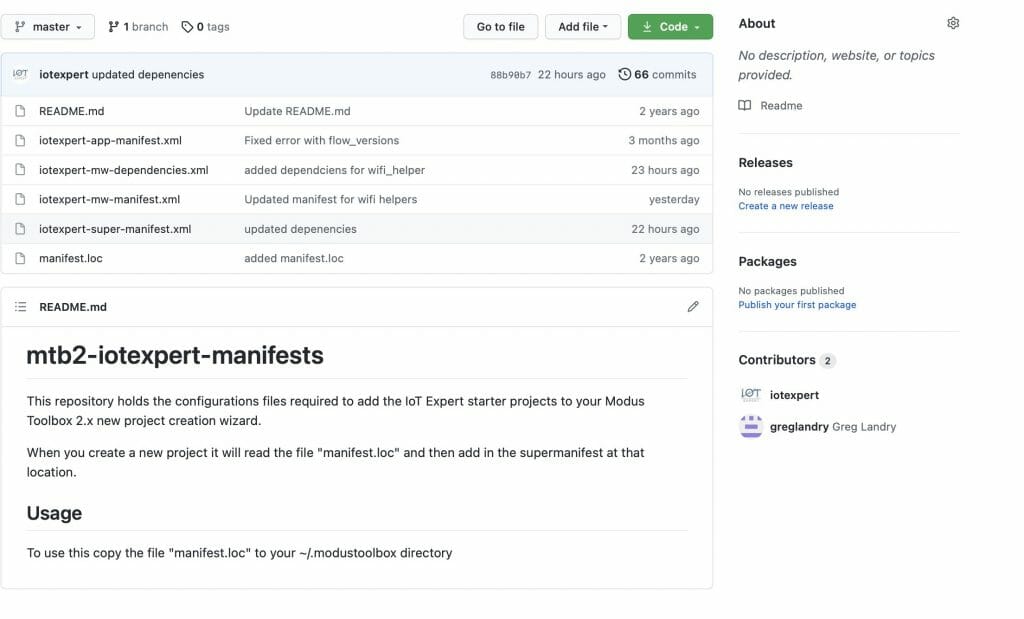
Notice that it has

  • iotexpert-super-manifest.xml – the top level iotexpert manifest
  • iotexpert-app-manifest.xml – my template projects
  • iotexpert-mw-manifest.xml – my middleware
  • manifest.loc – the file you need to put in your home directory
  • iotexpert-mw-dependencies.xml – a new file which I will talk about later

And the super manifest file that looks like this:

<super-manifest>
  <board-manifest-list>
  </board-manifest-list>
  
  <app-manifest-list>
    <app-manifest>
      <uri>https://github.com/iotexpert/mtb2-iotexpert-manifests/raw/master/iotexpert-app-manifest.xml</uri>
      </app-manifest>
   </app-manifest-list>
  <board-manifest-list>
  </board-manifest-list>
  <middleware-manifest-list>
    <middleware-manifest dependency-url="https://github.com/iotexpert/mtb2-iotexpert-manifests/raw/master/iotexpert-mw-dependencies.xml">
      <uri>https://github.com/iotexpert/mtb2-iotexpert-manifests/raw/master/iotexpert-mw-manifest.xml</uri>
    </middleware-manifest>
  </middleware-manifest-list>
</super-manifest>

To add the library we created above, I need to add the new middleware into my middleware manifest.  Modify the file “iotexpert-mw-manifest.xml” to have the new middleware.

<middleware>
  <name>WiFi Helper Utilties</name>
  <id>wifi_helper</id>
  <uri>https://github.com/iotexpert/wifi_helper</uri>
  <desc>A library WiFi Helper utilities (e.g. aton)</desc>
  <category>IoT Expert</category>
  <req_capabilities>psoc6</req_capabilities>
  <versions>
    <version flow_version="2.0">
      <num>main</num>
      <commit>main</commit>
      <desc>main</desc>
    </version>
  </versions>
</middleware>

If you recall I have the “wifi_helper” directory inside of my project.  Not what I want (because I want it to be pulled using the library browser).  So I move out my project directory.  Now, let’s test the whole thing by running the library browser.

arh (master *+) IoTExpertWiFiTemplate $ pwd
/Users/arh/proj/elkhorncreek3/IoTExpertWiFiTemplate
arh (master *+) IoTExpertWiFiTemplate $ mv wifi_helper/ ~/proj/
arh (master *+) IoTExpertWiFiTemplate $ make modlibs
Tools Directory: /Applications/ModusToolbox/tools_2.3
CY8CKIT-062S2-43012.mk: ./libs/TARGET_CY8CKIT-062S2-43012/CY8CKIT-062S2-43012.mk
Launching library-manager

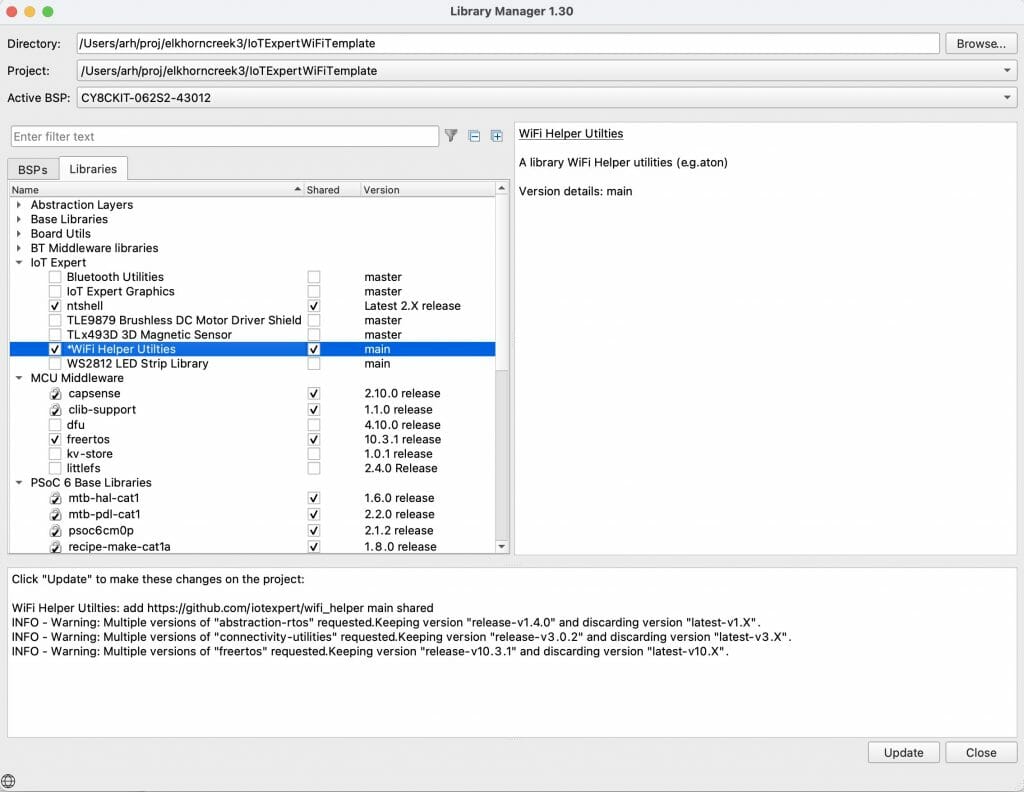
Excellent the WiFI Helper utilities show up.

And when I run the “update” the files show up in the project.

Add Dependencies

If you recall from the code I had this include:

#include "cy_wcm.h"

That means that I am dependent on the library “wifi-connection-manager”.  To make this work I create a new file called “iotexpert-mw-depenencies.xml”.  In that file I tell the system that “wifi_helper” is now dependent on “wcm”

<dependencies version="2.0">
  <depender>
    <id>wifi_helper</id>
    <versions>
      <version>
        <commit>main</commit>
        <dependees>
          <dependee>
            <id>wcm</id>
            <commit>latest-v2.X</commit>
          </dependee>
        </dependees>
      </version>
    </versions>
  </depender>
</dependencies>

Once I have that file, I add that depencency file to my middleware manifest file.

  <middleware-manifest-list>
    <middleware-manifest dependency-url="https://github.com/iotexpert/mtb2-iotexpert-manifests/raw/master/iotexpert-mw-dependencies.xml">
      <uri>https://github.com/iotexpert/mtb2-iotexpert-manifests/raw/master/iotexpert-mw-manifest.xml</uri>
    </middleware-manifest>
  </middleware-manifest-list>
</super-manifest>

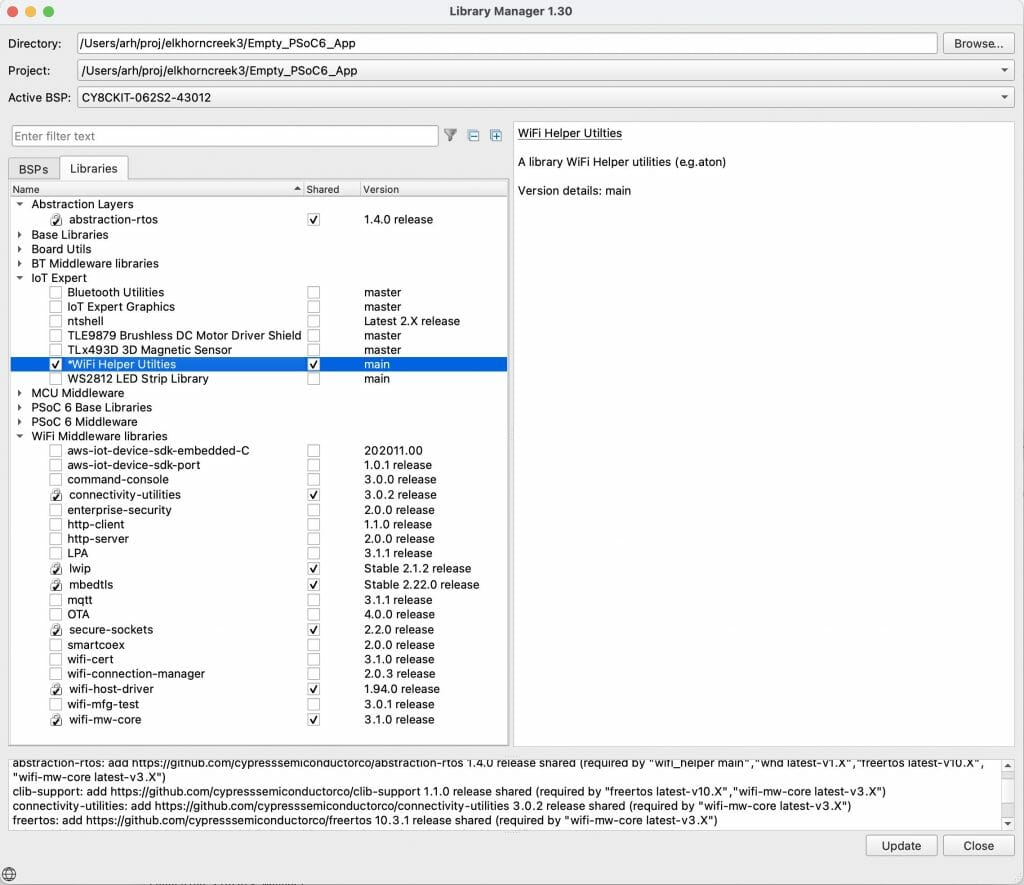
Now when I start the library browser and add the “WiFi Help Utilities” it will automatically add the wireless connection manager (and all of the libraries that the wcm is dependent on.

In the next article I will add Scanning functionality to the WiFi Task.
AnyCloud WiFi Template + WiFi Helper Library (Part 1): Introduction

Summary

The first article in a series that discusses building a new IoT project using Modus Toolbox and the AnyCloud SDK.  Specifically:

  1. The new-ish Error Logging library
  2. AnyCloud Wireless Connection Manager
  3. Creation of New Libraries and Template Projects
  4. Dual Role WiFi Access Point and Station using CYW43012
  5. MDNS

Story

I am working on a new implementation of my Elkhorn Creek IoT monitoring system.  In some of the previous articles I discussed the usage of the Influx Database and Docker as a new cloud backend.  To make this whole thing better I wanted to replace the Raspberry Pi (current system) with a PSoC 6 MCU and a CYW43012 WiFi Chip.  In order to do this, I need to make the PSoC 6 talk to the Influx Database using the WiFi and the Influx DB WebAPI.  I started to build this from my IoT Expert template, but quickly realized that I should make a template project with WiFi.

In this series of article I teach you how to use the Wireless Connection Manager, make new libraries and make new template projects.  Here is the agenda:

Article
(Part 1) Create Basic Project & Add Cypress Logging Functionality
(Part 2) Create New Thread to manage WiFi using the Wireless Connection Manager
(Part 3) Create a New Middleware Library with WiFi helper functions
(Part 4) Add WiFi Scan
Add WiFi Connect
Add WiFi Disconnect
Add WiFi Ping
Add Gethostbyname
Add MDNS
Add Status
Add StartAP
Make a new template project (update manifest)

Create Basic Project

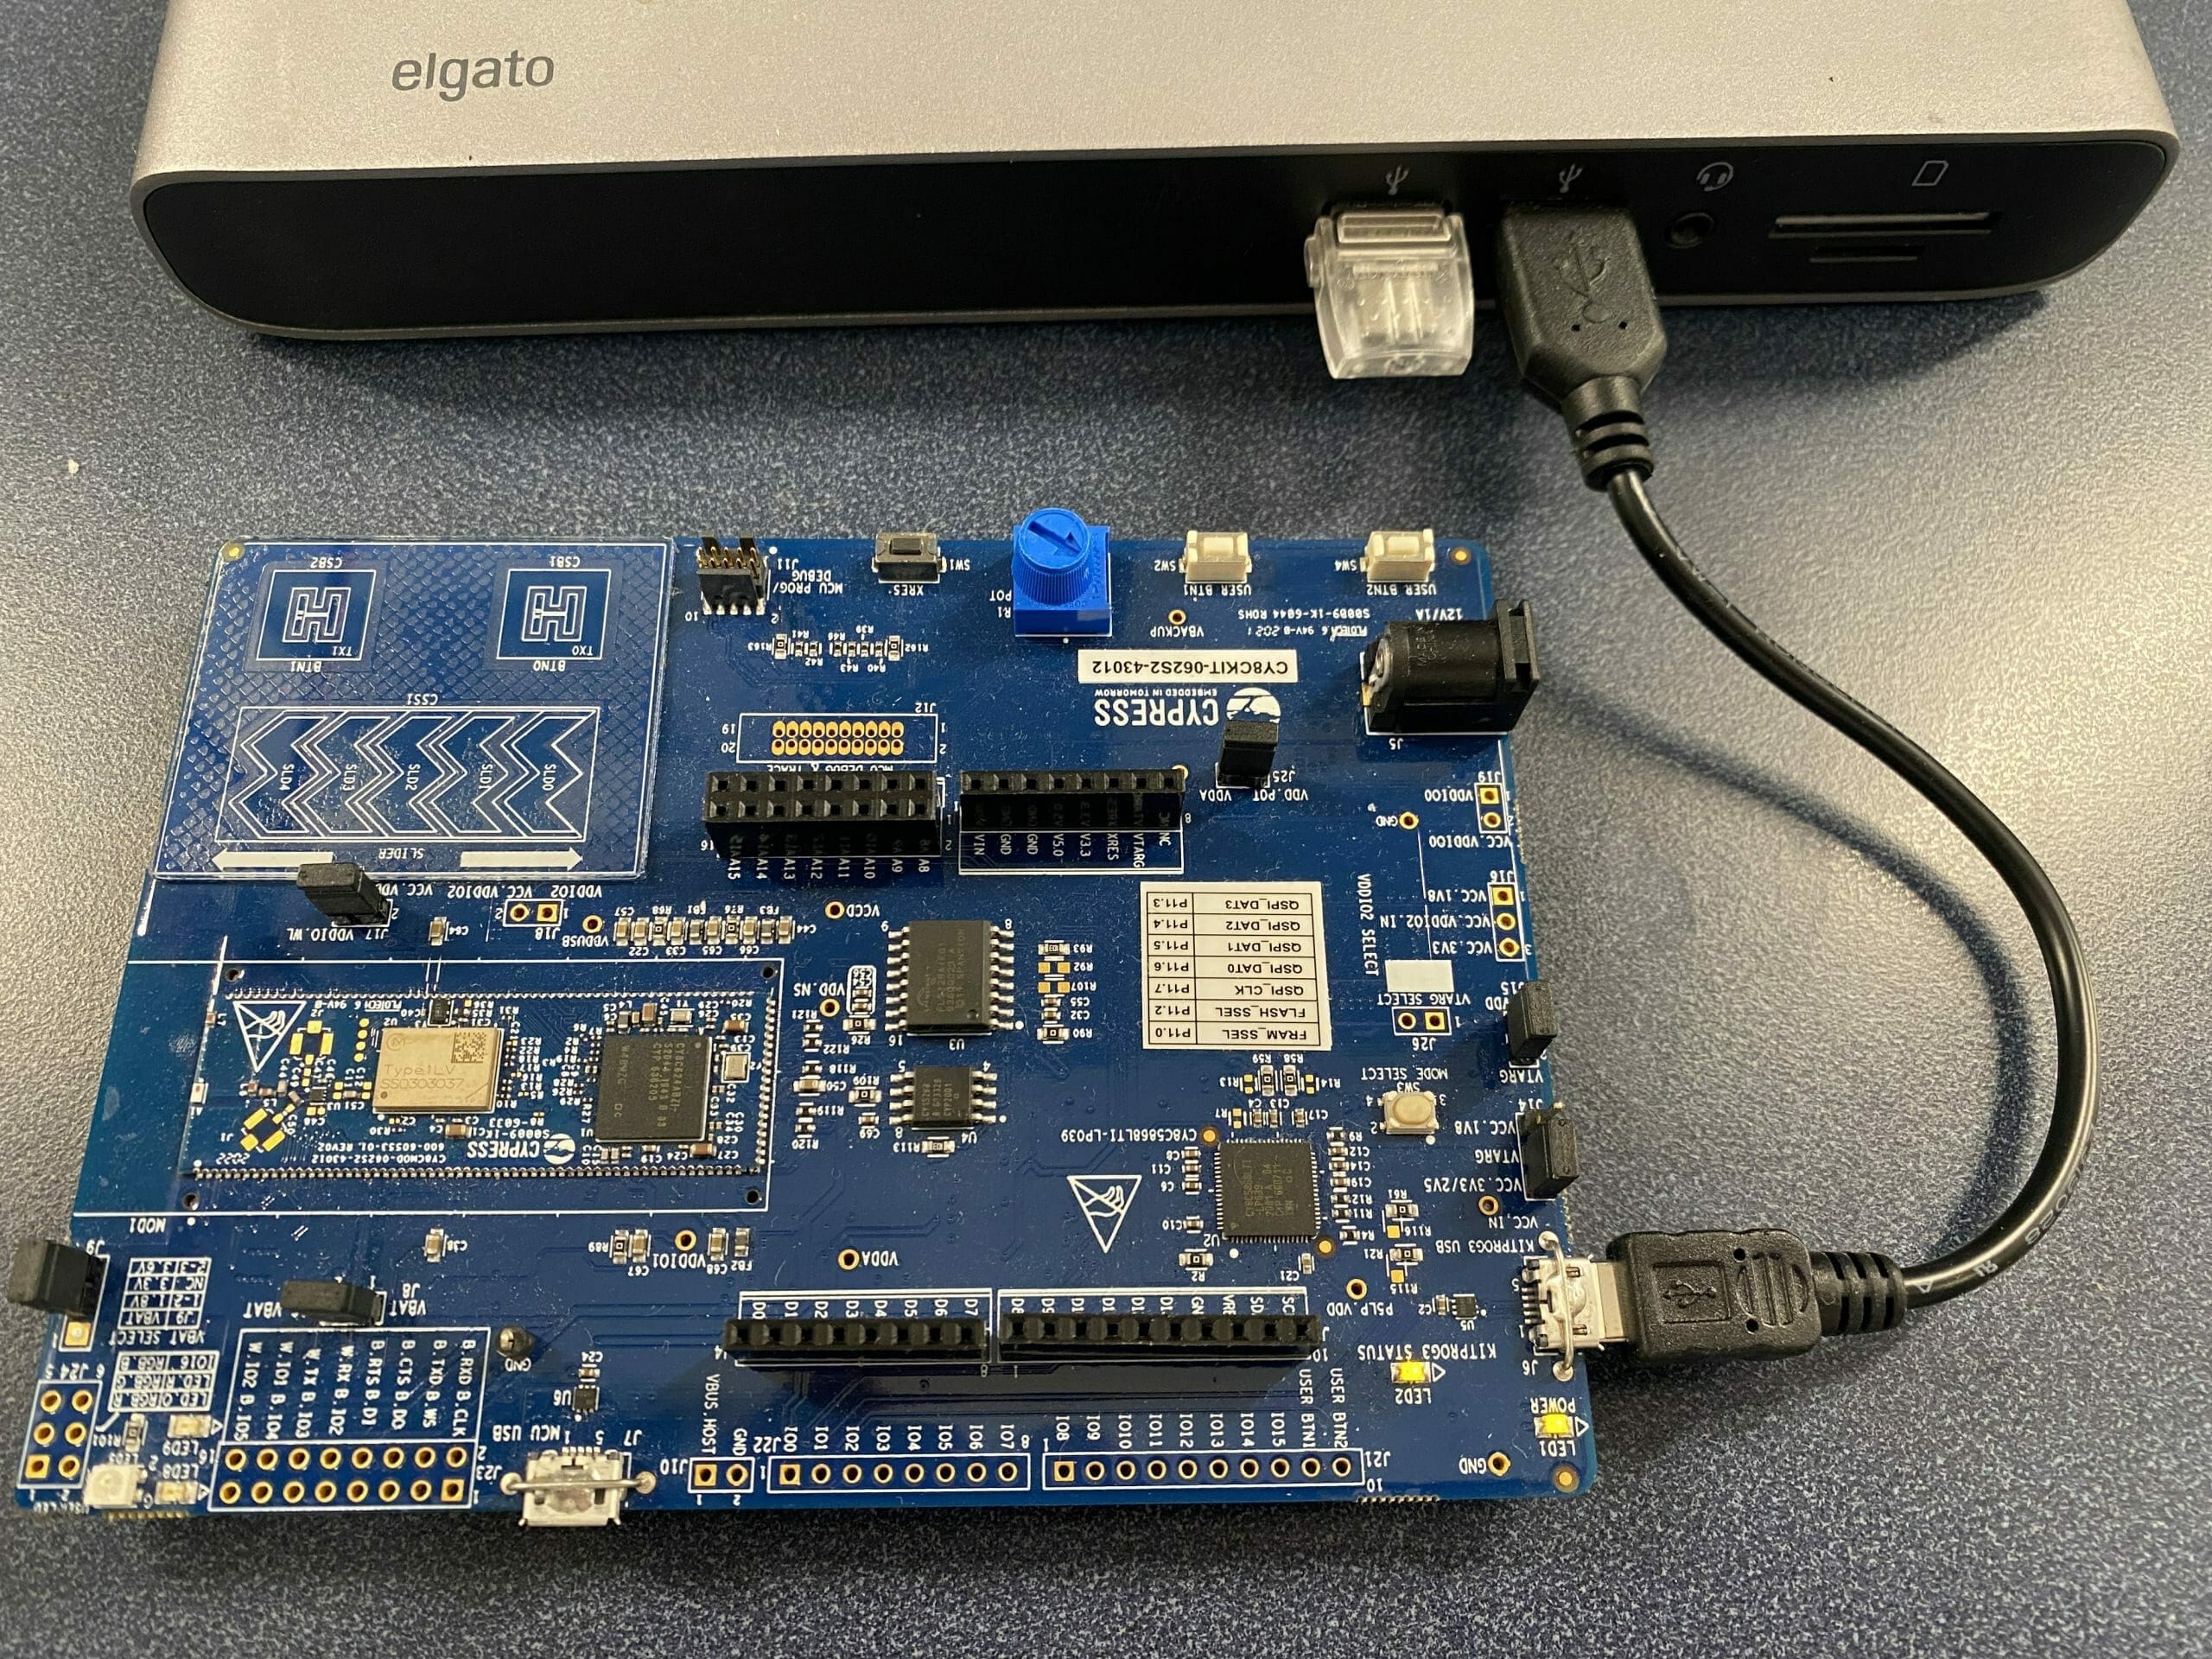
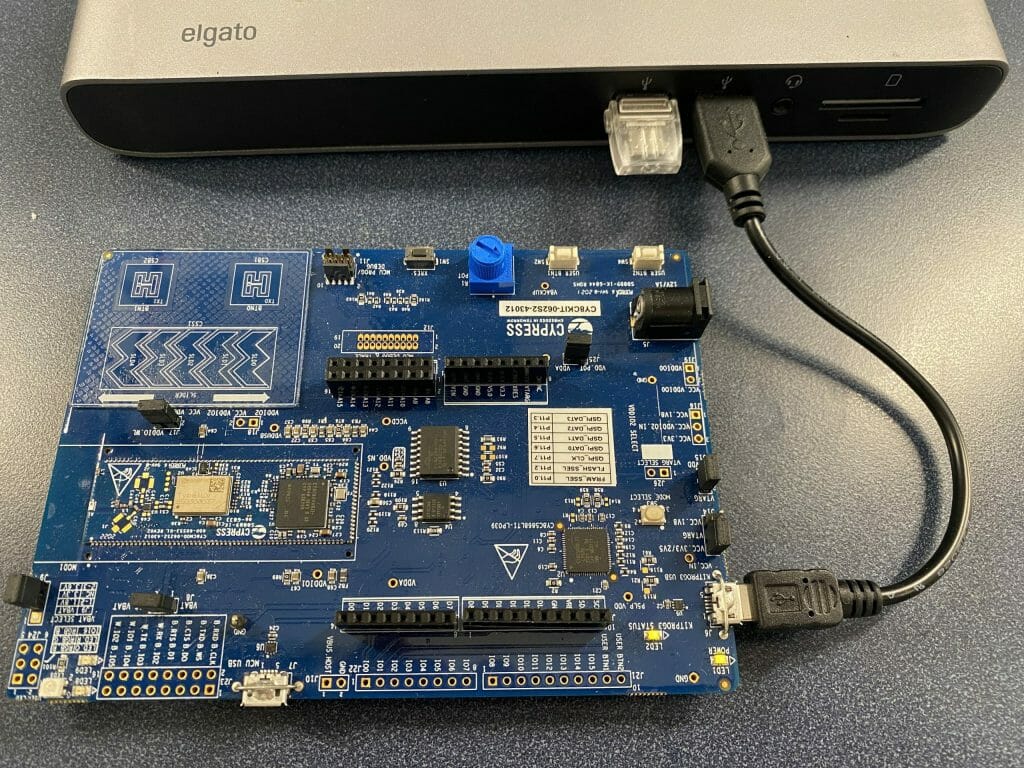
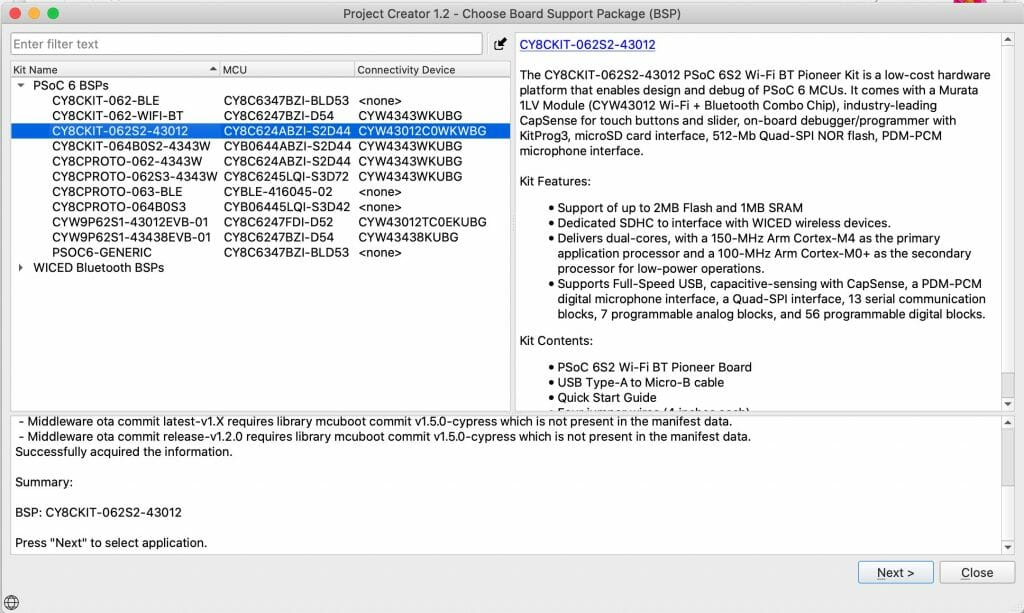
Today I happen to have a CY8CKIT-062S2-43012 on my desk.

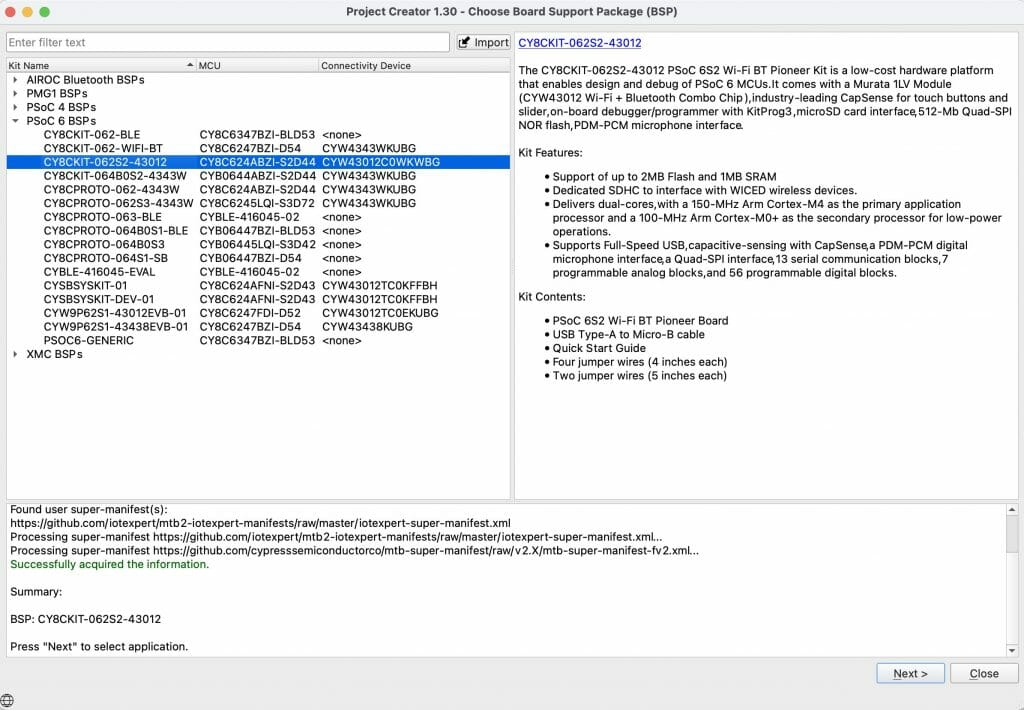
So that looks like a good place to start.  Pick that development kit in from the new project creator.

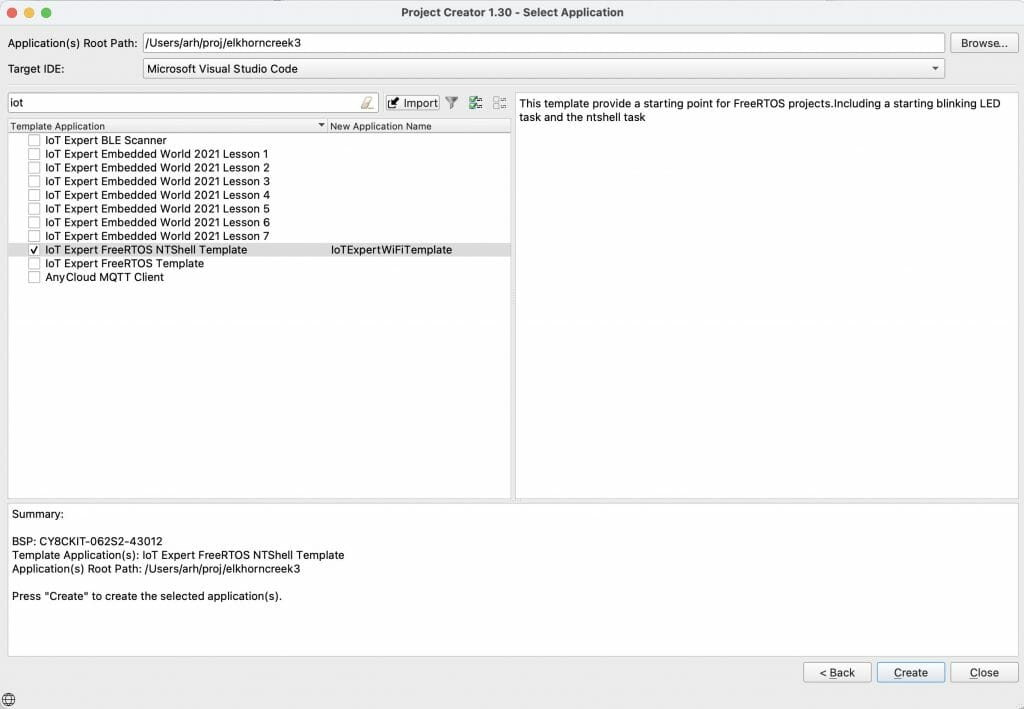
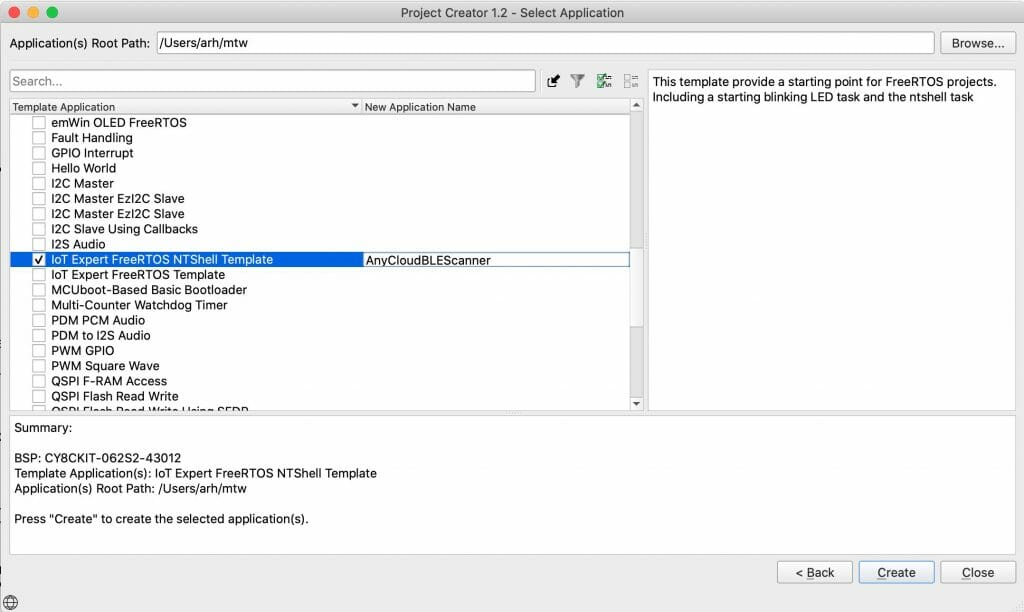
I want to start from my tried and true NT Shell, FreeRTOS Template.  If you use the filter window and type “iot” it will filter things down to just the IoT templates.  Notice that I selected that I want to get a “Microsoft Visual Studio Code” target workspace.

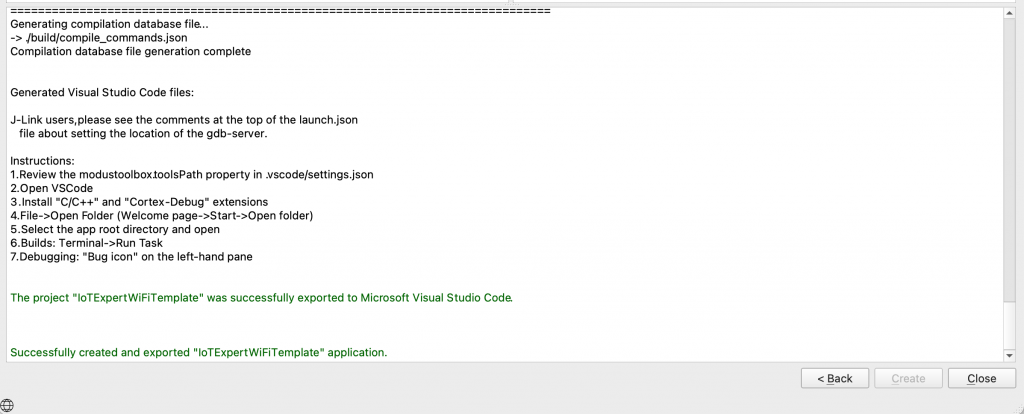
After clicking create you will get a new project.

Something weird happened.  Well actually something bad happened.  When I start Visual Studio Code I get the message that I have multiple workspace files.  Why is that?

So I pick the first one.

Now there is a problem.  In the Makefile for this project I find out that the “APPNAME” is MTBShellTemplate

# Name of application (used to derive name of final linked file).
APPNAME=MTBShellTemplate

By default when you run “make vscode” it will make a workspace file for you with the name “APPNAME.code-workspace”.  This has now created a problem for you.  Specifically, if you regenerate the workspace by running “make vscode” you will update the WRONG file.  When the new project creator runs the “make vscode” it uses the name you entered on that form, not the one in the Makefile.

To fix this, edit he Makefile & delete the old MTB…workspace.  Then re-run make vscode

APPNAME=IoTExpertWiFiTemplate

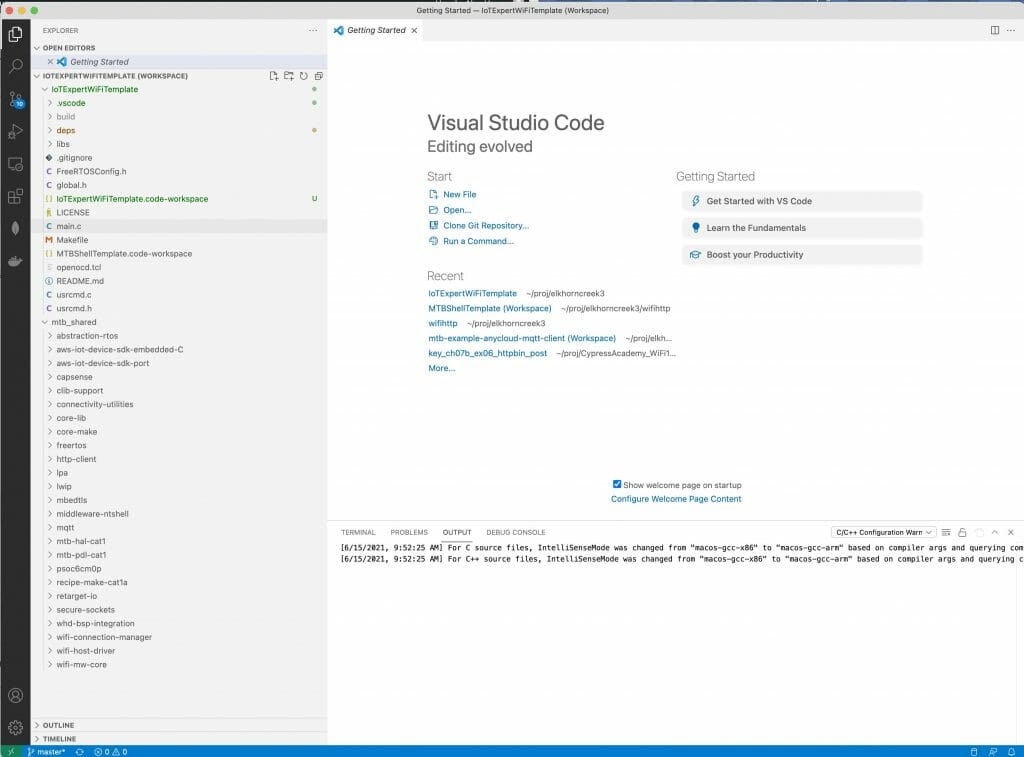
I have been checking in the *.code-workspace file, but that may not be exactly the right thing to do.  I am not sure.  Oh well.  Here is what you screen should look like now that you have Visual Studio Code going.

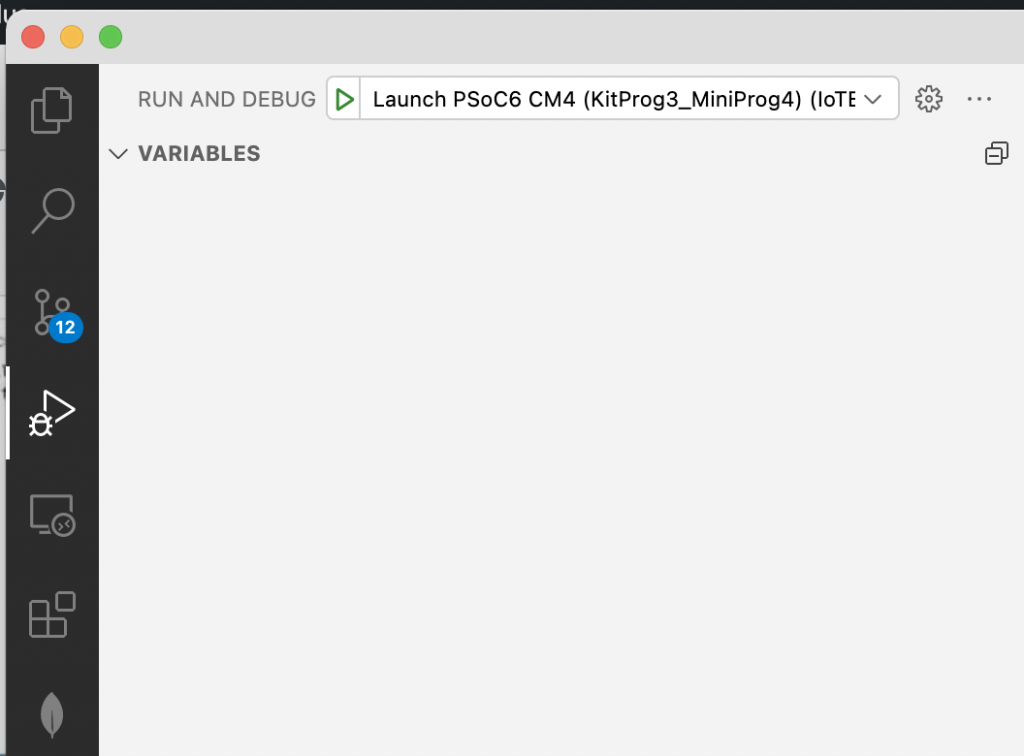
I always like to test things to make sure everything works before I start editing.  So, press the play button, then the green play button.

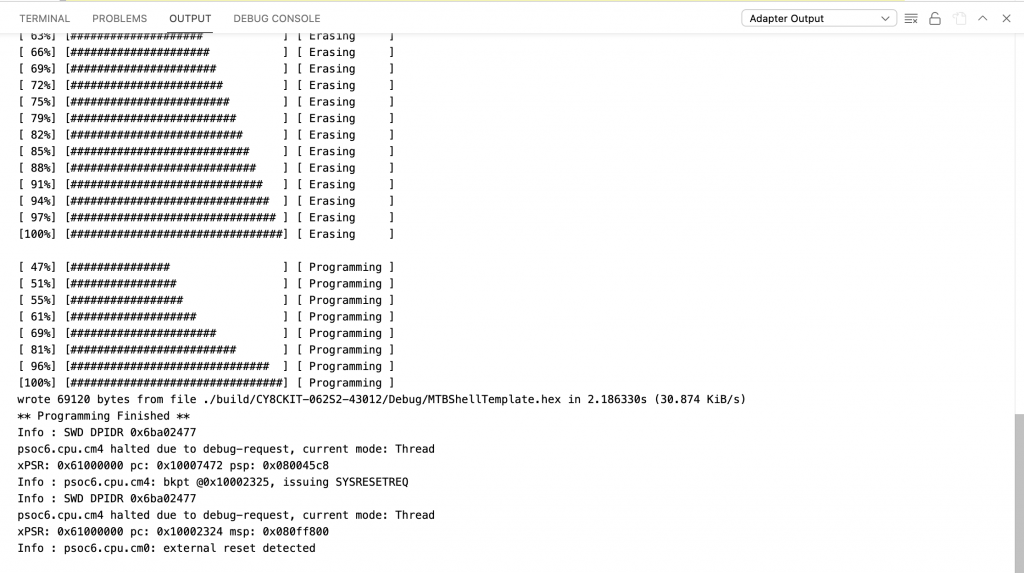
It should build and program the development kit.

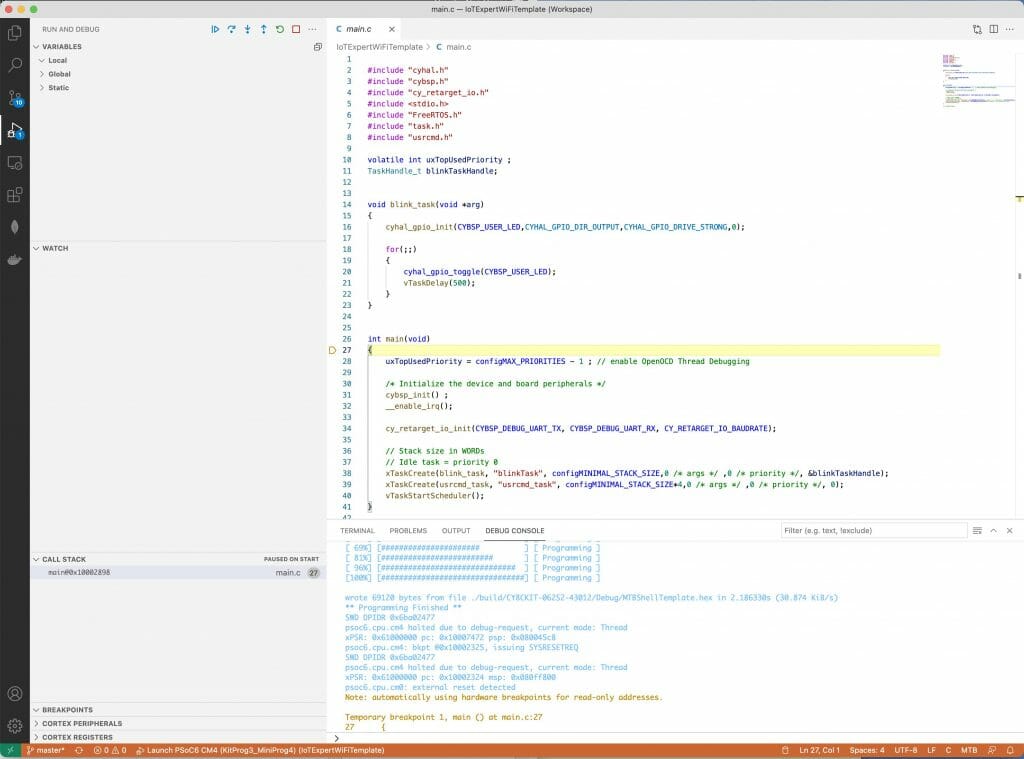
Then stop at main.

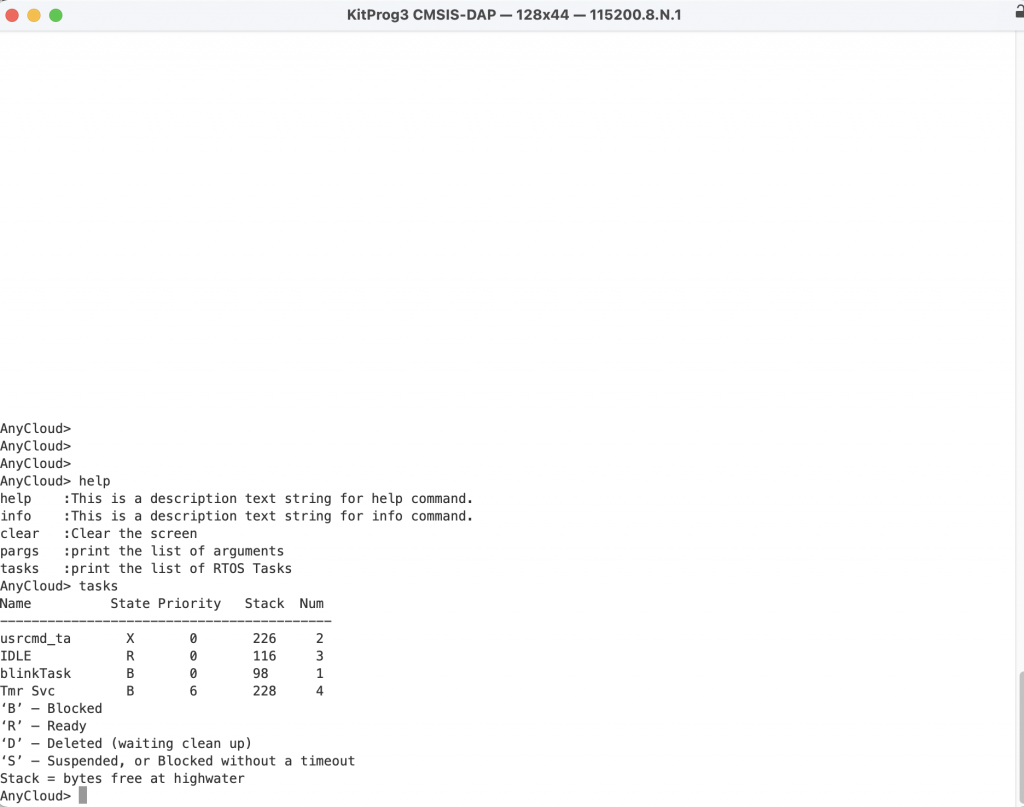
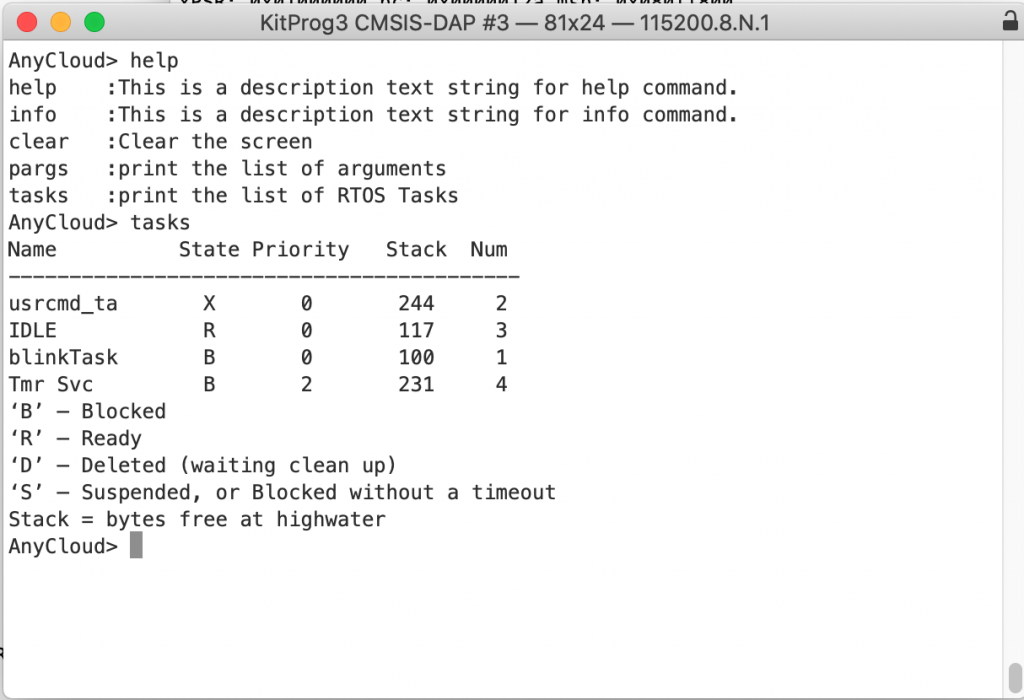
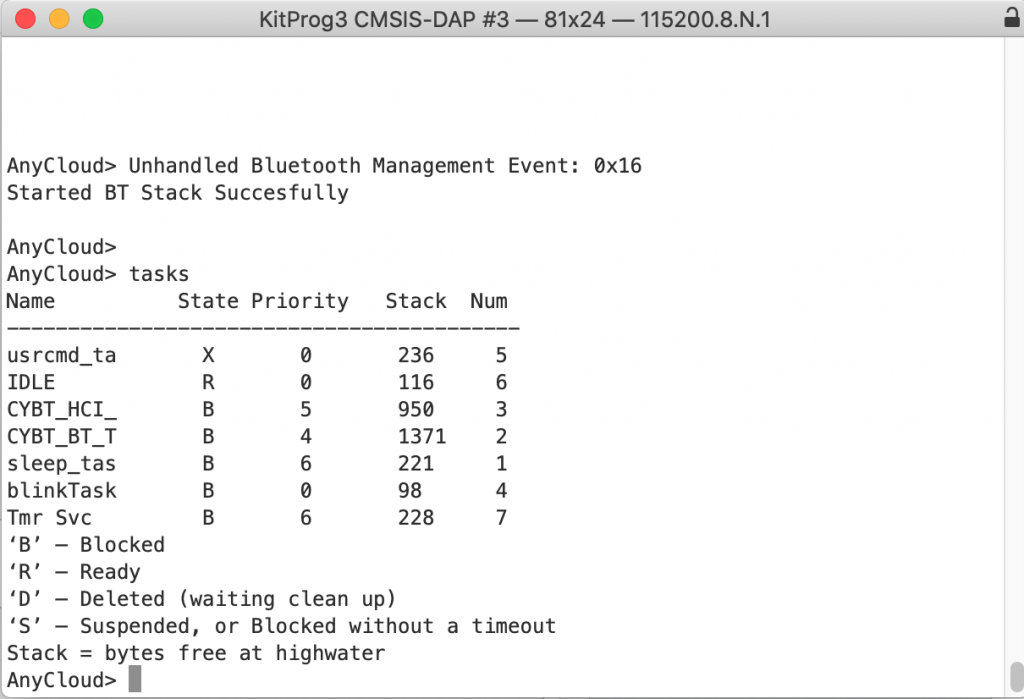
Press play and your terminal should look something like this.  Notice that I typed “help” and “tasks”

Add the Cypress Logging Functionality

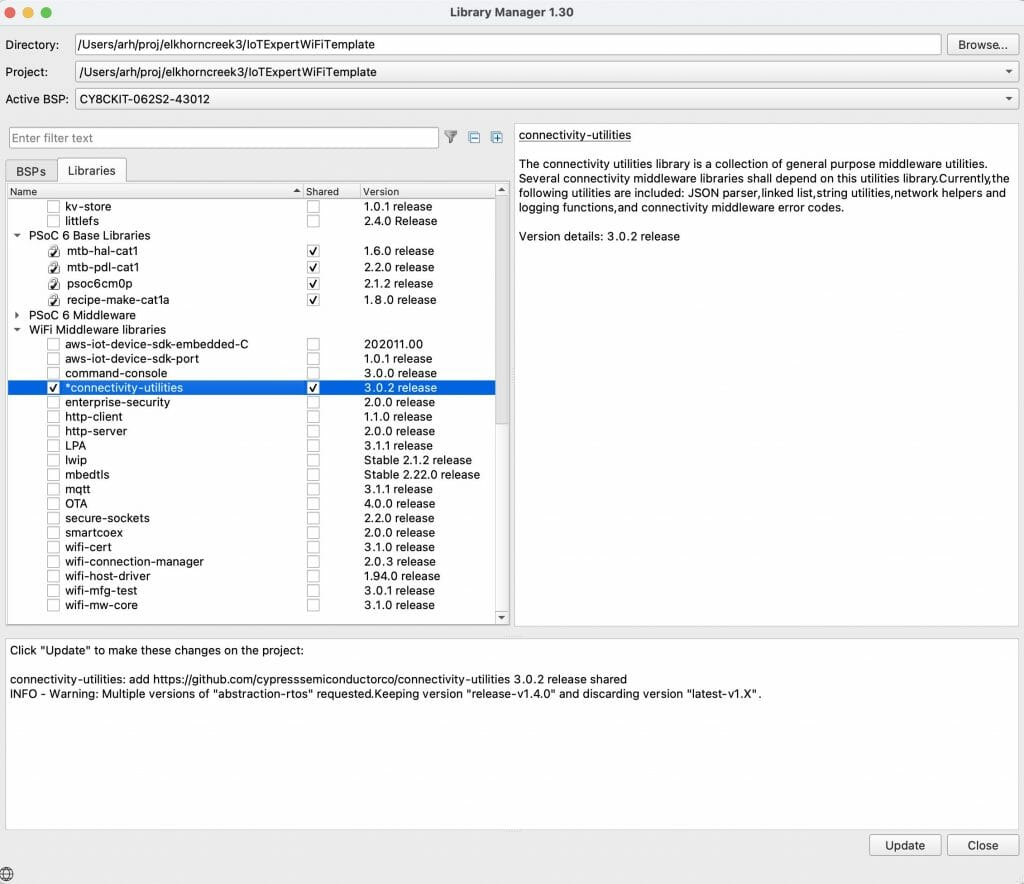
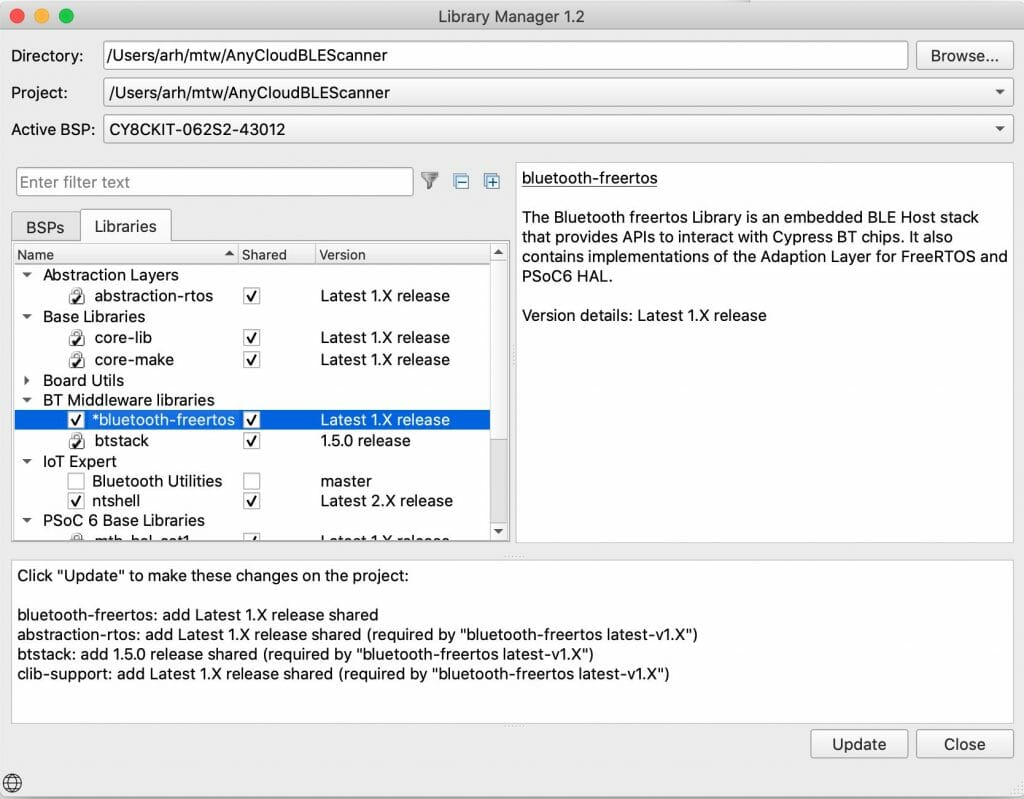
Sometime recently the Software team added a logging capability.  This seems like a good time to try that that.  Start the library browser by running “make modlibs”.  Then enable the “connectivity-utilities”.  For some silly reason that is where the logging functions were added.

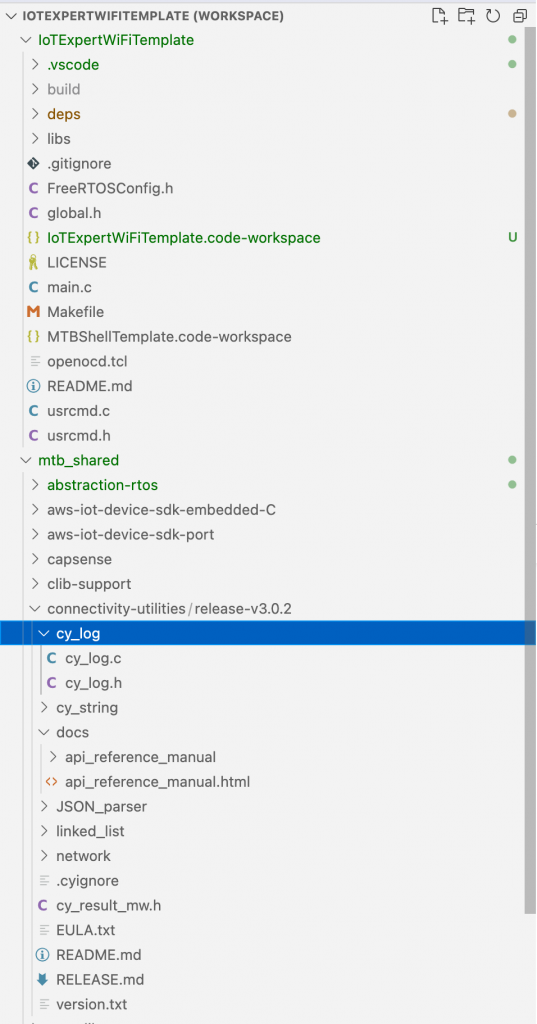
If you look in the “mtb_shared” you will now the cy_log directory.

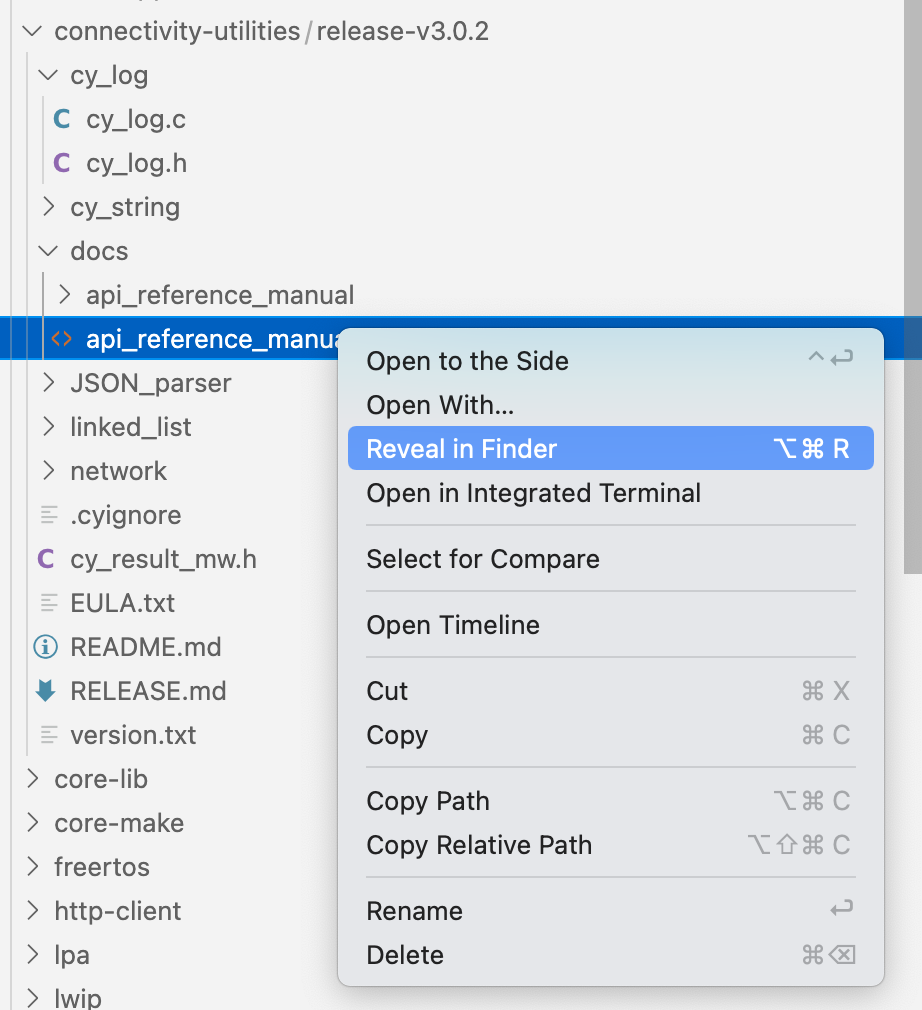
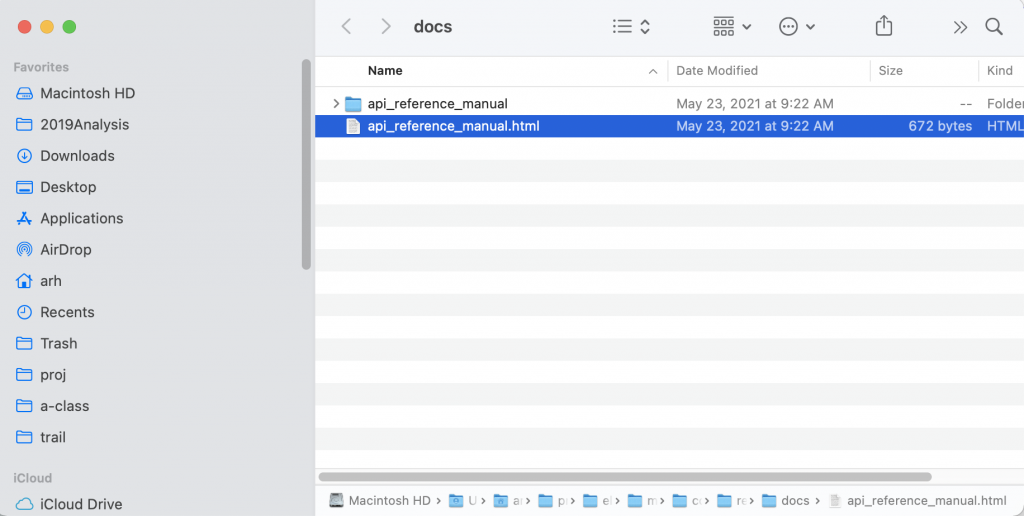
Then click on the “api_reference.html”

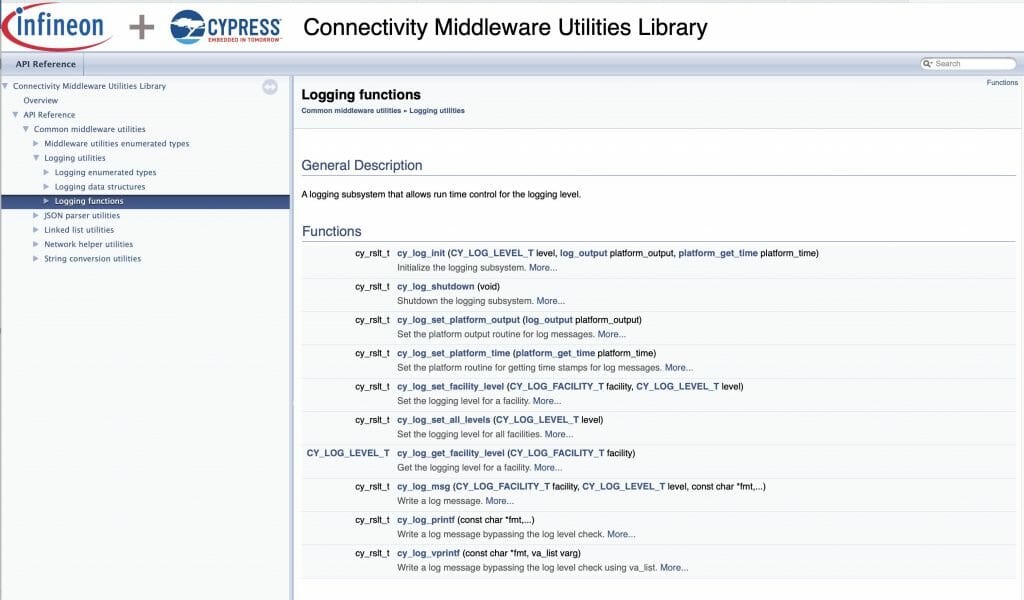
And open it.

Cool.  This gives you some insight into the capability.

A simple test will be to printout a “blink” message in sync with the default blinking led.  To do this, I modify the blink_task in main.c  Take the following actions

  1. Add the include “cy_log.h”
  2. Add the initialization call “cy_log_init”
  3. Printout a test message using “cy_log_msg”
  4. Fix the stack
#include "cyhal.h"
#include "cybsp.h"
#include "cy_retarget_io.h"
#include <stdio.h>
#include "FreeRTOS.h"
#include "task.h"
#include "usrcmd.h"
#include "cy_log.h"

volatile int uxTopUsedPriority ;
TaskHandle_t blinkTaskHandle;


void blink_task(void *arg)
{
    cyhal_gpio_init(CYBSP_USER_LED,CYHAL_GPIO_DIR_OUTPUT,CYHAL_GPIO_DRIVE_STRONG,0);

    for(;;)
    {
        cy_log_msg(CYLF_DEF,CY_LOG_INFO,"Blink Info\n");
    	cyhal_gpio_toggle(CYBSP_USER_LED);
    	vTaskDelay(500);
    }
}


int main(void)
{
    uxTopUsedPriority = configMAX_PRIORITIES - 1 ; // enable OpenOCD Thread Debugging

    /* Initialize the device and board peripherals */
    cybsp_init() ;
    __enable_irq();

    cy_retarget_io_init(CYBSP_DEBUG_UART_TX, CYBSP_DEBUG_UART_RX, CY_RETARGET_IO_BAUDRATE);

    cy_log_init(CY_LOG_INFO,0,0);


    // Stack size in WORDs
    // Idle task = priority 0
    xTaskCreate(blink_task, "blinkTask", configMINIMAL_STACK_SIZE*2,0 /* args */ ,0 /* priority */, &blinkTaskHandle);
    xTaskCreate(usrcmd_task, "usrcmd_task", configMINIMAL_STACK_SIZE*4,0 /* args */ ,0 /* priority */, 0);
    vTaskStartScheduler();
}

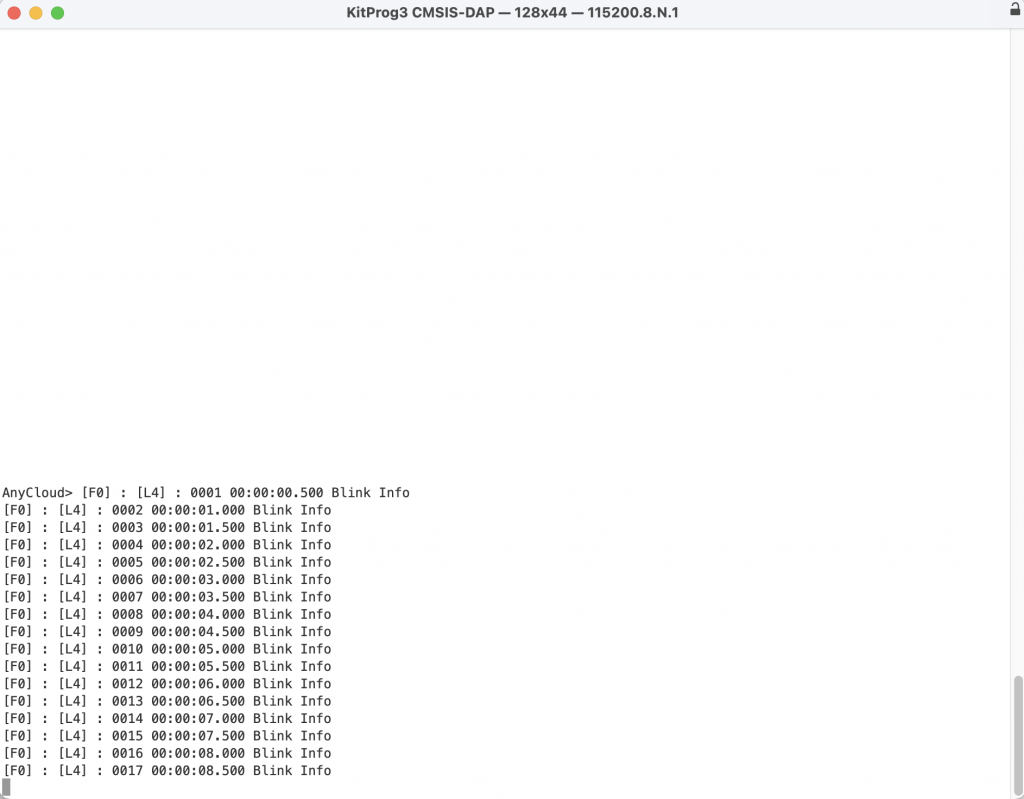
When you run this, you will get the message repeatedly coming on the screen (probably gonna-want-a delete this before you go on)

Now that we have a working project with logging, in the next article Ill add WiFi

The Creek 3.0: Docker & InfluxDB

Summary

Instructions for installing InfluxDB2 in a docker container and writing a Python program to insert data.

Story

I don’t really have a long complicated story about how I got here.  I just wanted to replace my Java, MySQL, Tomcat setup with something newer.  I wanted to do it without writing a bunch of code.  It seemed like Docker + Influx + Telegraph + Grafana was a good answer.  In this article I install Influx DB on my new server using Docker.  Then I hookup my Creek data via a Python script.

Docker & InfluxDB

I have become a huge believer in using Docker, I think it is remarkable what they did.  I also think that using docker-compose is the correct way to launch new docker containers so that you don’t loose the secret sauce on the command line when doing a “docker run”.  Let’s get this whole thing going by creating a new docker-compose.yaml file with the description of our new docker container.  It is pretty simple:

  1. Specify the influxdb image
  2. Map port 8086 on the client and on the container
  3. Specify the initial conditions for the Influxdb – these are nicely documented in the installation instructions here.
  4. Create a volume
version: "3.3"  # optional since v1.27.0
services:
  influxdb:
    image: influxdb
    ports:
      - "8086:8086"
    environment:
      - DOCKER_INFLUXDB_INIT_MODE=setup
      - DOCKER_INFLUXDB_INIT_USERNAME=root
      - DOCKER_INFLUXDB_INIT_PASSWORD=password
      - DOCKER_INFLUXDB_INIT_ORG=creekdata
      - DOCKER_INFLUXDB_INIT_BUCKET=creekdata
    volumes:
      - influxdb2:/var/lib/influxdb2

volumes:
  influxdb2:

Once you have that file you can run “docker-compose up”… and wait … until everything gets pulled from the docker hub.

arh@spiff:~/influx-telegraf-grafana$ docker-compose up
Creating network "influx-telegraf-grafana_default" with the default driver
Creating volume "influx-telegraf-grafana_influxdb2" with default driver
Pulling influxdb (influxdb:)...
latest: Pulling from library/influxdb
d960726af2be: Pull complete
e8d62473a22d: Pull complete
8962bc0fad55: Pull complete
3b26e21cfb07: Pull complete
f77b907603e3: Pull complete
2b137bdfa0c5: Pull complete
7e6fa243fc79: Pull complete
3e0cae572c4f: Pull complete
9a27f9435a76: Pull complete
Digest: sha256:090ba796c2e5c559b9acede14fc7c1394d633fb730046dd2f2ebf400acc22fc0
Status: Downloaded newer image for influxdb:latest
Creating influx-telegraf-grafana_influxdb_1 ... done
Attaching to influx-telegraf-grafana_influxdb_1
influxdb_1  | 2021-05-19T12:37:14.866162317Z	info	booting influxd server in the background	{"system": "docker"}
influxdb_1  | 2021-05-19T12:37:16.867909370Z	info	pinging influxd...	{"system": "docker"}
influxdb_1  | 2021-05-19T12:37:18.879390124Z	info	pinging influxd...	{"system": "docker"}
influxdb_1  | 2021-05-19T12:37:20.891280023Z	info	pinging influxd...	{"system": "docker"}
influxdb_1  | ts=2021-05-19T12:37:21.065674Z lvl=info msg="Welcome to InfluxDB" log_id=0UD9wCAG000 version=2.0.6 commit=4db98b4c9a build_date=2021-04-29T16:48:12Z
influxdb_1  | ts=2021-05-19T12:37:21.068517Z lvl=info msg="Resources opened" log_id=0UD9wCAG000 service=bolt path=/var/lib/influxdb2/influxd.bolt
influxdb_1  | ts=2021-05-19T12:37:21.069293Z lvl=info msg="Bringing up metadata migrations" log_id=0UD9wCAG000 service=migrations migration_count=15
influxdb_1  | ts=2021-05-19T12:37:21.132269Z lvl=info msg="Using data dir" log_id=0UD9wCAG000 service=storage-engine service=store path=/var/lib/influxdb2/engine/data
influxdb_1  | ts=2021-05-19T12:37:21.132313Z lvl=info msg="Compaction settings" log_id=0UD9wCAG000 service=storage-engine service=store max_concurrent_compactions=3 throughput_bytes_per_second=50331648 throughput_bytes_per_second_burst=50331648
influxdb_1  | ts=2021-05-19T12:37:21.132325Z lvl=info msg="Open store (start)" log_id=0UD9wCAG000 service=storage-engine service=store op_name=tsdb_open op_event=start
influxdb_1  | ts=2021-05-19T12:37:21.132383Z lvl=info msg="Open store (end)" log_id=0UD9wCAG000 service=storage-engine service=store op_name=tsdb_open op_event=end op_elapsed=0.059ms
influxdb_1  | ts=2021-05-19T12:37:21.132407Z lvl=info msg="Starting retention policy enforcement service" log_id=0UD9wCAG000 service=retention check_interval=30m
influxdb_1  | ts=2021-05-19T12:37:21.132428Z lvl=info msg="Starting precreation service" log_id=0UD9wCAG000 service=shard-precreation check_interval=10m advance_period=30m
influxdb_1  | ts=2021-05-19T12:37:21.132446Z lvl=info msg="Starting query controller" log_id=0UD9wCAG000 service=storage-reads concurrency_quota=1024 initial_memory_bytes_quota_per_query=9223372036854775807 memory_bytes_quota_per_query=9223372036854775807 max_memory_bytes=0 queue_size=1024
influxdb_1  | ts=2021-05-19T12:37:21.133391Z lvl=info msg="Configuring InfluxQL statement executor (zeros indicate unlimited)." log_id=0UD9wCAG000 max_select_point=0 max_select_series=0 max_select_buckets=0
influxdb_1  | ts=2021-05-19T12:37:21.434078Z lvl=info msg=Starting log_id=0UD9wCAG000 service=telemetry interval=8h
influxdb_1  | ts=2021-05-19T12:37:21.434165Z lvl=info msg=Listening log_id=0UD9wCAG000 service=tcp-listener transport=http addr=:9999 port=9999
influxdb_1  | 2021-05-19T12:37:22.905008706Z	info	pinging influxd...	{"system": "docker"}
influxdb_1  | 2021-05-19T12:37:22.920976742Z	info	got response from influxd, proceeding	{"system": "docker"}
influxdb_1  | Config default has been stored in /etc/influxdb2/influx-configs.
influxdb_1  | User	Organization	Bucket
influxdb_1  | root	creekdata	creekdata
influxdb_1  | 2021-05-19T12:37:23.043336133Z	info	Executing user-provided scripts	{"system": "docker", "script_dir": "/docker-entrypoint-initdb.d"}
influxdb_1  | 2021-05-19T12:37:23.044663106Z	info	initialization complete, shutting down background influxd	{"system": "docker"}
influxdb_1  | ts=2021-05-19T12:37:23.044900Z lvl=info msg="Terminating precreation service" log_id=0UD9wCAG000 service=shard-precreation
influxdb_1  | ts=2021-05-19T12:37:23.044906Z lvl=info msg=Stopping log_id=0UD9wCAG000 service=telemetry interval=8h
influxdb_1  | ts=2021-05-19T12:37:23.044920Z lvl=info msg=Stopping log_id=0UD9wCAG000 service=scraper
influxdb_1  | ts=2021-05-19T12:37:23.044970Z lvl=info msg=Stopping log_id=0UD9wCAG000 service=tcp-listener
influxdb_1  | ts=2021-05-19T12:37:23.545252Z lvl=info msg=Stopping log_id=0UD9wCAG000 service=task
influxdb_1  | ts=2021-05-19T12:37:23.545875Z lvl=info msg=Stopping log_id=0UD9wCAG000 service=nats
influxdb_1  | ts=2021-05-19T12:37:23.546765Z lvl=info msg=Stopping log_id=0UD9wCAG000 service=bolt
influxdb_1  | ts=2021-05-19T12:37:23.546883Z lvl=info msg=Stopping log_id=0UD9wCAG000 service=query
influxdb_1  | ts=2021-05-19T12:37:23.548747Z lvl=info msg=Stopping log_id=0UD9wCAG000 service=storage-engine
influxdb_1  | ts=2021-05-19T12:37:23.548788Z lvl=info msg="Closing retention policy enforcement service" log_id=0UD9wCAG000 service=retention
influxdb_1  | ts=2021-05-19T12:37:29.740107Z lvl=info msg="Welcome to InfluxDB" log_id=0UD9wj2l000 version=2.0.6 commit=4db98b4c9a build_date=2021-04-29T16:48:12Z
influxdb_1  | ts=2021-05-19T12:37:29.751816Z lvl=info msg="Resources opened" log_id=0UD9wj2l000 service=bolt path=/var/lib/influxdb2/influxd.bolt
influxdb_1  | ts=2021-05-19T12:37:29.756974Z lvl=info msg="Checking InfluxDB metadata for prior version." log_id=0UD9wj2l000 bolt_path=/var/lib/influxdb2/influxd.bolt
influxdb_1  | ts=2021-05-19T12:37:29.757053Z lvl=info msg="Using data dir" log_id=0UD9wj2l000 service=storage-engine service=store path=/var/lib/influxdb2/engine/data
influxdb_1  | ts=2021-05-19T12:37:29.757087Z lvl=info msg="Compaction settings" log_id=0UD9wj2l000 service=storage-engine service=store max_concurrent_compactions=3 throughput_bytes_per_second=50331648 throughput_bytes_per_second_burst=50331648
influxdb_1  | ts=2021-05-19T12:37:29.757099Z lvl=info msg="Open store (start)" log_id=0UD9wj2l000 service=storage-engine service=store op_name=tsdb_open op_event=start
influxdb_1  | ts=2021-05-19T12:37:29.757149Z lvl=info msg="Open store (end)" log_id=0UD9wj2l000 service=storage-engine service=store op_name=tsdb_open op_event=end op_elapsed=0.051ms
influxdb_1  | ts=2021-05-19T12:37:29.757182Z lvl=info msg="Starting retention policy enforcement service" log_id=0UD9wj2l000 service=retention check_interval=30m
influxdb_1  | ts=2021-05-19T12:37:29.757187Z lvl=info msg="Starting precreation service" log_id=0UD9wj2l000 service=shard-precreation check_interval=10m advance_period=30m
influxdb_1  | ts=2021-05-19T12:37:29.757205Z lvl=info msg="Starting query controller" log_id=0UD9wj2l000 service=storage-reads concurrency_quota=1024 initial_memory_bytes_quota_per_query=9223372036854775807 memory_bytes_quota_per_query=9223372036854775807 max_memory_bytes=0 queue_size=1024
influxdb_1  | ts=2021-05-19T12:37:29.758844Z lvl=info msg="Configuring InfluxQL statement executor (zeros indicate unlimited)." log_id=0UD9wj2l000 max_select_point=0 max_select_series=0 max_select_buckets=0
influxdb_1  | ts=2021-05-19T12:37:30.056855Z lvl=info msg=Listening log_id=0UD9wj2l000 service=tcp-listener transport=http addr=:8086 port=8086
influxdb_1  | ts=2021-05-19T12:37:30.056882Z lvl=info msg=Starting log_id=0UD9wj2l000 service=telemetry interval=8h

After everything is rolling you can open up a web browser and go to “http://localhost:8086” and you should see something like this:  (I will sort out the http vs https in a later post – because I don’t actually know how to fix it right now.

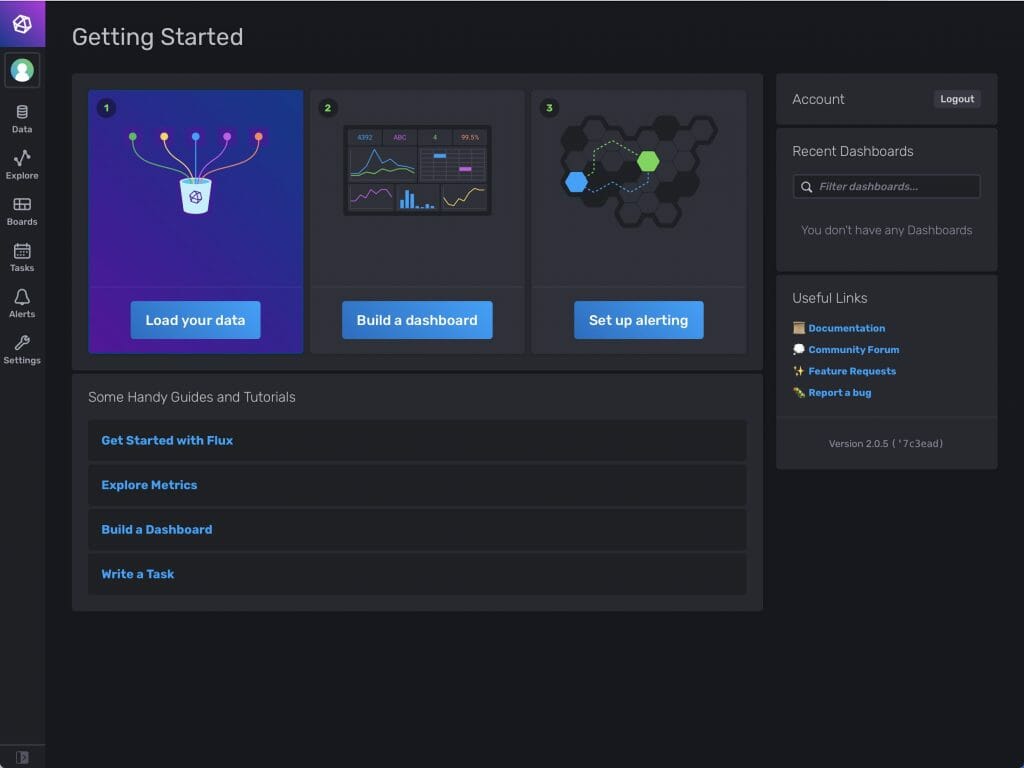
Once you enter the account and password (that you configured in the docker-compose.yaml” you will see this screen and you are off to the races.

InfluxDB Basics

Before we go too much further lets talk about some of the basics of the Influx Database.  An Influx Database also called a “bucket” has the following built in columns:

  • _timestamp: The time for the data point stored in epoch nanosecond format (how’s that for some precision)
  • _measurement: A text string name for the a group of related datapoints
  • _field: A text string key for the datapoint
  • _value: The value of the datapoint

In addition you can add “ad-hoc” columns called “tags” which have a “key” and a “value”

Organization A group of users and the related buckets, dashboards and tasks
Bucket A database
Timestamp The time of the datapoint measured in epoch nanoseconds
Field A field includes a field key stored in the _field column and a field value stored in the _value column.
Field Set A field set is a collection of field key-value pairs associated with a timestamp.
Measurement A measurement acts as a container for tags fields and timestamps. Use a measurement name that describes your data.
Tag Key/Value pairs assigned to a datapoint.  They are used to index the datapoints (so searches are faster)

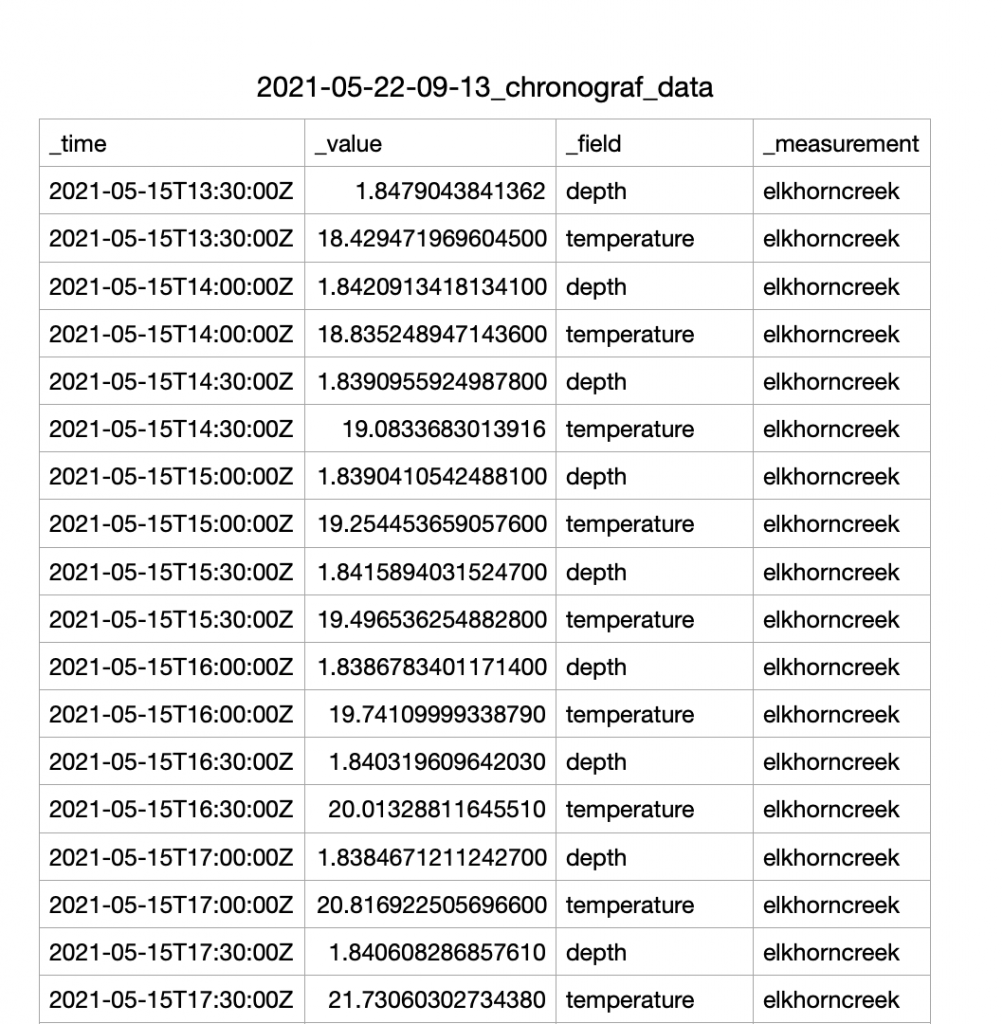
Here is a snapshot of the data in my Creek Influx database.  You can see that I have two fields

  • depth
  • temperature

I am saving all of the datapoints in the “elkhorncreek” _measurement.  And there are no tags (but I have ideas for that in the future)

InfluxDB Line Protocol

There are a number of different methods to insert data into the Influx DB.  Several of them rely on “Line Protocol“.  This is simply a text string formatted like this:

For my purposes a text string like this will insert a new datapoint into the “elkhorncreek” measurement with a depth of 1.85 fee and a temperature of 19c (yes we are a mixed unit household)

  • elkhorncreek depth=1.85,temperature=19.0

Python & InfluxDB

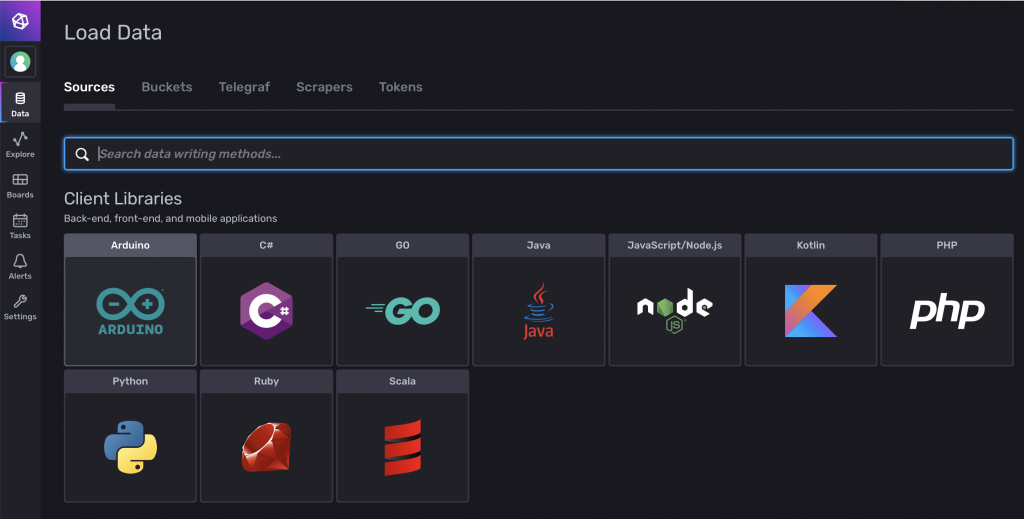
I know that I want to run a Python program on the Raspberry Pi which gets the sensor data via I2C and then writes it into the cloud using the InfluxAPI.  It turns out that when you log into you new Influx DB that there is a built in webpage which shows you exactly how to do this.  Click on “Data” then “sources” then “Python”

You will see a screen like this which has exactly the Python code you need (almost).

To make this code work on your system you need to install the influxdb-client library by running “pip install influxdb-client”

(venv) pi@iotexpertpi:~/influx-test $ pip install influxdb-client
Looking in indexes: https://pypi.org/simple, https://www.piwheels.org/simple
Collecting influxdb-client
  Using cached https://files.pythonhosted.org/packages/6b/0e/5c5a9a2da144fae80b23dd9741175493d8dbeabd17d23e5aff27c92dbfd5/influxdb_client-1.17.0-py3-none-any.whl
Collecting urllib3>=1.15.1 (from influxdb-client)
  Using cached https://files.pythonhosted.org/packages/09/c6/d3e3abe5b4f4f16cf0dfc9240ab7ce10c2baa0e268989a4e3ec19e90c84e/urllib3-1.26.4-py2.py3-none-any.whl
Collecting pytz>=2019.1 (from influxdb-client)
  Using cached https://files.pythonhosted.org/packages/70/94/784178ca5dd892a98f113cdd923372024dc04b8d40abe77ca76b5fb90ca6/pytz-2021.1-py2.py3-none-any.whl
Collecting certifi>=14.05.14 (from influxdb-client)
  Using cached https://files.pythonhosted.org/packages/5e/a0/5f06e1e1d463903cf0c0eebeb751791119ed7a4b3737fdc9a77f1cdfb51f/certifi-2020.12.5-py2.py3-none-any.whl
Collecting rx>=3.0.1 (from influxdb-client)
  Using cached https://files.pythonhosted.org/packages/e2/a9/efeaeca4928a9a56d04d609b5730994d610c82cf4d9dd7aa173e6ef4233e/Rx-3.2.0-py3-none-any.whl
Collecting six>=1.10 (from influxdb-client)
  Using cached https://files.pythonhosted.org/packages/d9/5a/e7c31adbe875f2abbb91bd84cf2dc52d792b5a01506781dbcf25c91daf11/six-1.16.0-py2.py3-none-any.whl
Requirement already satisfied: setuptools>=21.0.0 in ./venv/lib/python3.7/site-packages (from influxdb-client) (40.8.0)
Collecting python-dateutil>=2.5.3 (from influxdb-client)
  Using cached https://files.pythonhosted.org/packages/d4/70/d60450c3dd48ef87586924207ae8907090de0b306af2bce5d134d78615cb/python_dateutil-2.8.1-py2.py3-none-any.whl
Installing collected packages: urllib3, pytz, certifi, rx, six, python-dateutil, influxdb-client
Successfully installed certifi-2020.12.5 influxdb-client-1.17.0 python-dateutil-2.8.1 pytz-2021.1 rx-3.2.0 six-1.16.0 urllib3-1.26.4
(venv) pi@iotexpertpi:~/influx-test $

Now write a little bit of code.  If you remember from the previous post I run a cronjob that gets the data from the I2C.  It will then run this program to do the insert of the data into the Influxdb.  Notice that I get the depth and temperature from the command line.   The “token” is an API key which you must include with requests to identify you are having permission to write into the database (more on this later).  The “data” variable is just a string formatted in “Influx Line Protocol”

import sys
from datetime import datetime
from influxdb_client import InfluxDBClient, Point, WritePrecision
from influxdb_client.client.write_api import SYNCHRONOUS

if len(sys.argv) != 3:
    sys.exit("Wrong number of arguments")

# You can generate a Token from the "Tokens Tab" in the UI
token = "UvZvrrnk8yXvlVm1yrMmH2ZE706dZ14kpqSoE2u0COnDdqmQFTmIWPMjk0U2tO_GqmjzCupi_EaYP65RP4bELQ=="
org = "creekdata"
bucket = "creekdata"

client = InfluxDBClient(url="http://linux.local:8086", token=token)

write_api = client.write_api(write_options=SYNCHRONOUS)

data = f"elkhorncreek depth={sys.argv[1]},temperature={sys.argv[2]}"
write_api.write(bucket, org, data)
#print(data)

Now I update my getInsertData.sh shell script to run the Influx as well as the original MySQL insert.

#!/bin/bash

cd ~/influxdb
source venv/bin/activate
vals=$(python getData.py)
#echo $vals
python insertMysql.py $vals
python insertInflux.py $vals

InfluxDB Data Explorer

After a bit of time (for some inserts to happen) I go to the data explorer in the web interface.  You can see that I have a number of readings.  This is filtering for “depth”

This is filtering for “temperature”

Influx Tokens

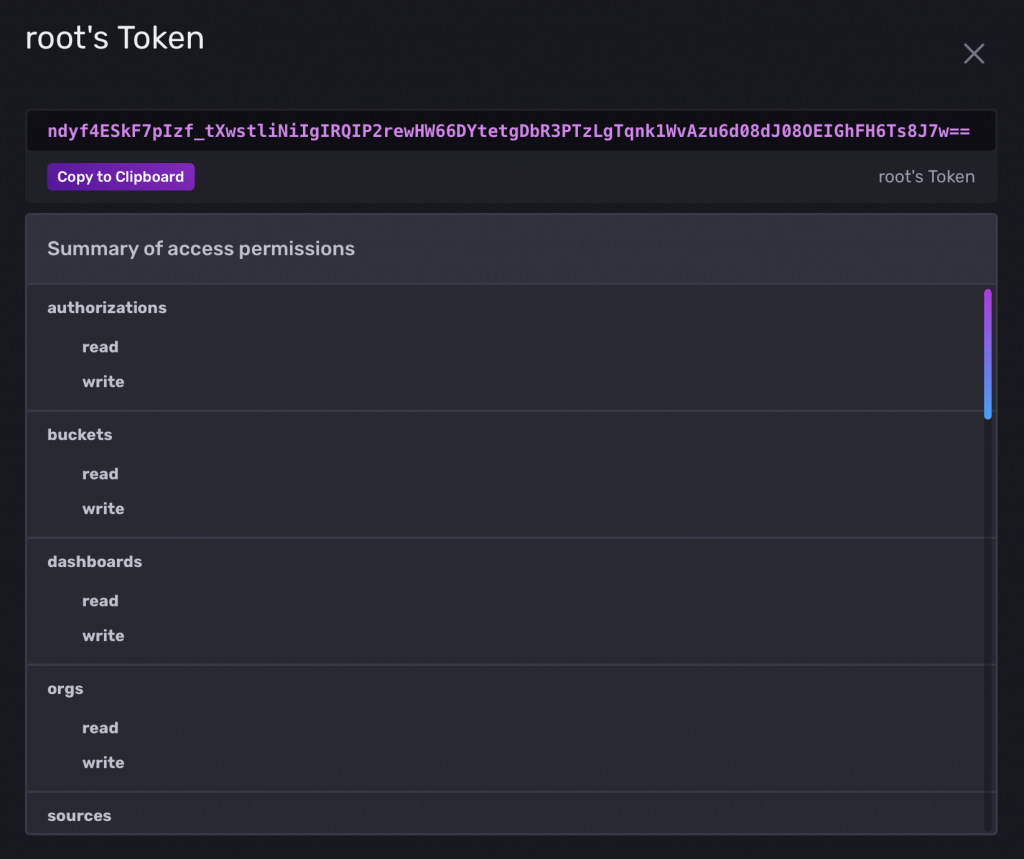
To interact with an instance of the InfluxDB you will need an API key, which they call a token.  Press the “data” icon on the left side of the screen.  Then click “Tokens”.  You will see the currently available tokens, in this case just the original token.  You can create more tokens by pressing the blue + generate Token icon.

Clock on the token.  Then copy it to your clipboard.

The Creek 3.0: A Docker MySQL Diversion – Part 2.5

Summary

A discussion of reading I2C data from a sensor and sending it to a MySQL instance in the cloud using Python.

I was originally planning only one article on the MySQL part of this project.  But things got really out of control and I ended up splitting the article into two parts.  I jokingly called this article “Part 2.5”.  In today’s article I’ll take the steps to have Python and the libraries running on the Raspberry Pi to read data and send it to my new Docker MySQL Server.

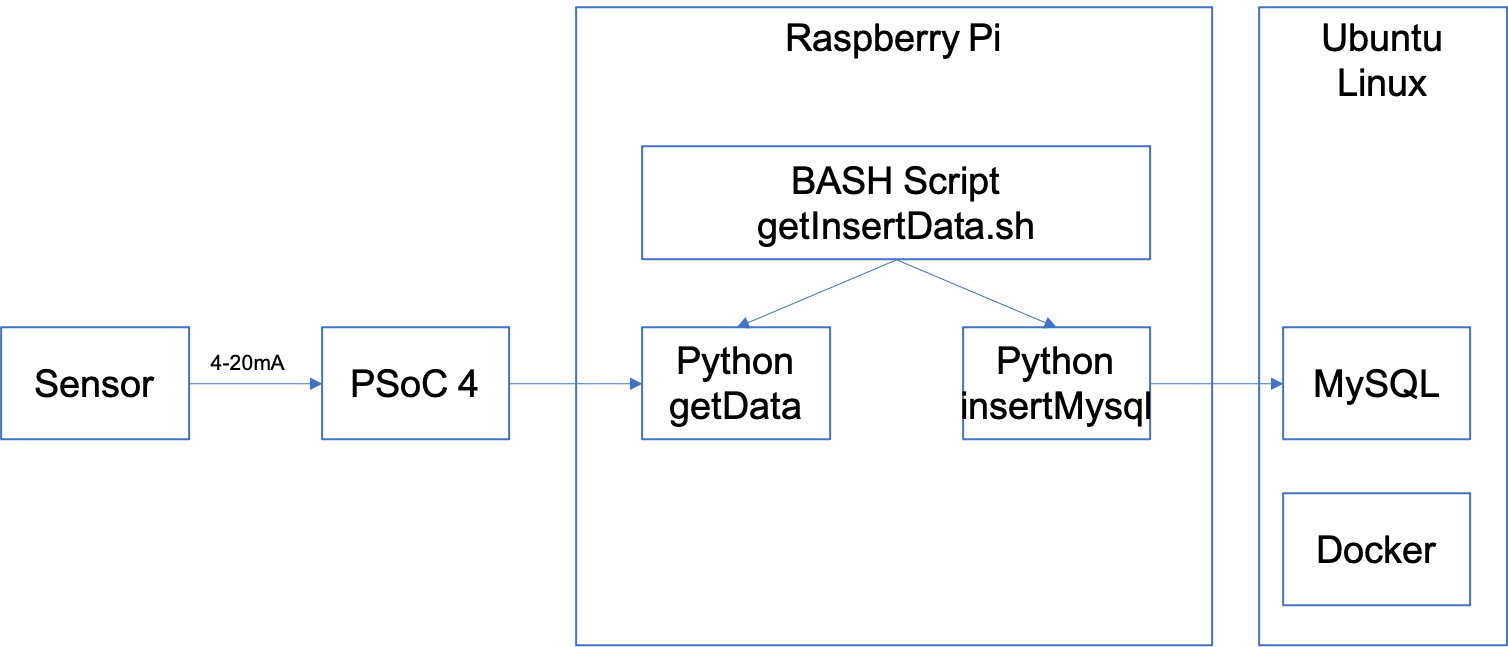
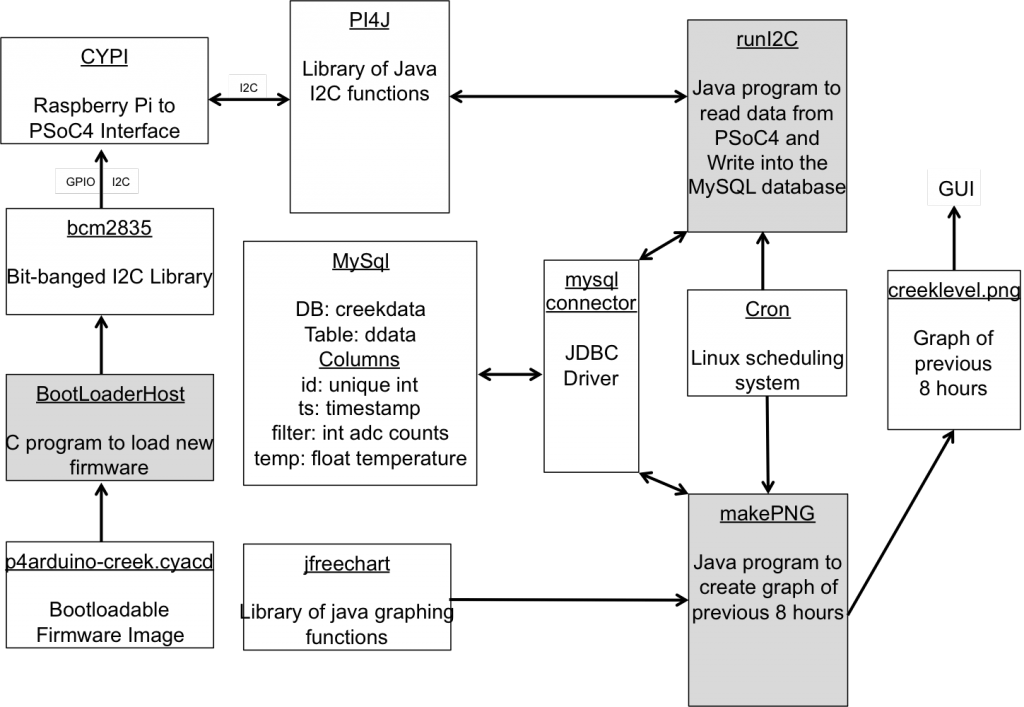
Here is what the picture looks like:

Build the Python Environment w/smbus & mysql-connector-python

I typically like to build a Python virtual environment with the specific version of python and all of the required packages.  To do this you need to

  1. python3 -m venv venv
  2. source venv/bin/activate
  3. pip install smbus
  4. pip install mysql-connector-python
pi@iotexpertpi:~ $ mkdir mysql-docker
pi@iotexpertpi:~ $ python3 -m venv venv
pi@iotexpertpi:~ $ source venv/bin/activate
(venv) pi@iotexpertpi:~ $ pip install smbus
Looking in indexes: https://pypi.org/simple, https://www.piwheels.org/simple
Collecting smbus
  Using cached https://www.piwheels.org/simple/smbus/smbus-1.1.post2-cp37-cp37m-linux_armv6l.whl
Installing collected packages: smbus
Successfully installed smbus-1.1.post2
(venv) pi@iotexpertpi:~ $ pip install mysql-connector-python
Looking in indexes: https://pypi.org/simple, https://www.piwheels.org/simple
Collecting mysql-connector-python
  Using cached https://files.pythonhosted.org/packages/2a/8a/428d6be58fab7106ab1cacfde3076162cd3621ef7fc6871da54da15d857d/mysql_connector_python-8.0.25-py2.py3-none-any.whl
Collecting protobuf>=3.0.0 (from mysql-connector-python)
  Downloading https://files.pythonhosted.org/packages/6b/2c/62cee2a27a1c4c0189582330774ed6ac2bfc88cb223f04723620ee04d59d/protobuf-3.17.0-py2.py3-none-any.whl (173kB)
    100% |████████████████████████████████| 174kB 232kB/s 
Collecting six>=1.9 (from protobuf>=3.0.0->mysql-connector-python)
  Using cached https://files.pythonhosted.org/packages/d9/5a/e7c31adbe875f2abbb91bd84cf2dc52d792b5a01506781dbcf25c91daf11/six-1.16.0-py2.py3-none-any.whl
Installing collected packages: six, protobuf, mysql-connector-python
Successfully installed mysql-connector-python-8.0.25 protobuf-3.17.0 six-1.16.0
(venv) pi@iotexpertpi:~

Once that is done you can see that everything is copasetic by running “pip freeze” where you can see the mysql-connector-python and the smbus.

(venv) pi@iotexpertpi:~ $ pip freeze
mysql-connector-python==8.0.25
pkg-resources==0.0.0
protobuf==3.17.0
six==1.16.0
smbus==1.1.post2

Python: Get Data SMBUS

If you remember from the original design that the PSoC 4 acts as a register file with the data from the temperature and pressure sensor.  It has 12 bytes of data as

  1. 2-bytes formatted as a 16-bit unsigned ADC counts from the Pressure Sensor
  2. 2-bytes formatted as a 16-bit signed pressure in “centiTemp”
  3. 4-bytes float as the depth in Feet
  4. 4-bytes float as the temperature in Centigrade

This program:

  1. Reads the I2c for 12-bytes
  2. Converts it into an array
  3. Prints out the values
import struct
import sys
import smbus
from datetime import datetime
from influxdb_client import InfluxDBClient, Point, WritePrecision
from influxdb_client.client.write_api import SYNCHRONOUS


######################################################
#Read the data from the PSoC 4
######################################################
bus = smbus.SMBus(1)
address = 0x08

# The data structure in the PSOC 4 is:
# uint16_t pressureCount ; the adc-counts being read on the pressure sensor
# int16_t centiTemp ; the temperaure in 10ths of a degree C
# float depth ; four bytes float representing the depth in Feet
# float temperature ; four byte float representing the temperature in degrees C

numBytesInStruct = 12
block = bus.read_i2c_block_data(address, 0, numBytesInStruct)

# convert list of bytes returned from sensor into array of bytes
mybytes = bytearray(block)
# convert the byte array into
# H=Unsigned 16-bit int
# h=Signed 16-bit int
# f=Float 
# this function will return a tuple with pressureCount,centiTemp,depth,temperature
vals = struct.unpack_from('Hhff',mybytes,0)
# prints the tuple
depth = vals[2]
temperature = vals[3]
print(f"{depth} {temperature}")

Python: MySQL

I created a separate Python program to insert the data into the MySQL database.  This program does the following things

  1. Makes sure the command line arguments make sense
  2. Makes a connection to the server
  3. Creates the SQL statement
  4. Runs the inserts
import mysql.connector
import sys
from datetime import datetime


if len(sys.argv) != 3:
    sys.exit("Wrong number of arguments")

mydb = mysql.connector.connect(
    host="spiff.local",
    user="creek",
    password="donthackme",
    database="creekdata",
    auth_plugin='mysql_native_password')

now = datetime.now()
formatted_date = now.strftime('%Y-%m-%d %H:%M:%S')
sql = "insert into creekdata.creekdata (depth,temperature,created_at) values (%s,%s,%s)"
vals = (sys.argv[1],sys.argv[2],formatted_date)


mycursor = mydb.cursor()

mycursor.execute(sql, vals)

mydb.commit()

Shell Script & Crontab

I created a simple bash shell script to

  1. Activate the virtual enviroment
  2. Run the get data python program
  3. Run the insert program
#!/bin/bash

cd ~/influxdb
source venv/bin/activate
vals=$(python getData.py)
#echo $vals
python insertMysql.py $vals

Finally, a cronjob to run the program every 5 minutes.

# Edit this file to introduce tasks to be run by cron.
# 
# Each task to run has to be defined through a single line
# indicating with different fields when the task will be run
# and what command to run for the task
# 
# To define the time you can provide concrete values for
# minute (m), hour (h), day of month (dom), month (mon),
# and day of week (dow) or use '*' in these fields (for 'any').
# 
# Notice that tasks will be started based on the cron's system
# daemon's notion of time and timezones.
# 
# Output of the crontab jobs (including errors) is sent through
# email to the user the crontab file belongs to (unless redirected).
# 
# For example, you can run a backup of all your user accounts
# at 5 a.m every week with:
# 0 5 * * 1 tar -zcf /var/backups/home.tgz /home/
# 
# For more information see the manual pages of crontab(5) and cron(8)
# 
# m h  dom mon dow   command
0,5,10,20,25,30,35,40,45,50,55 * * * * /home/pi/influxdb/getInsertData.sh

Test with MySQL WorkBench

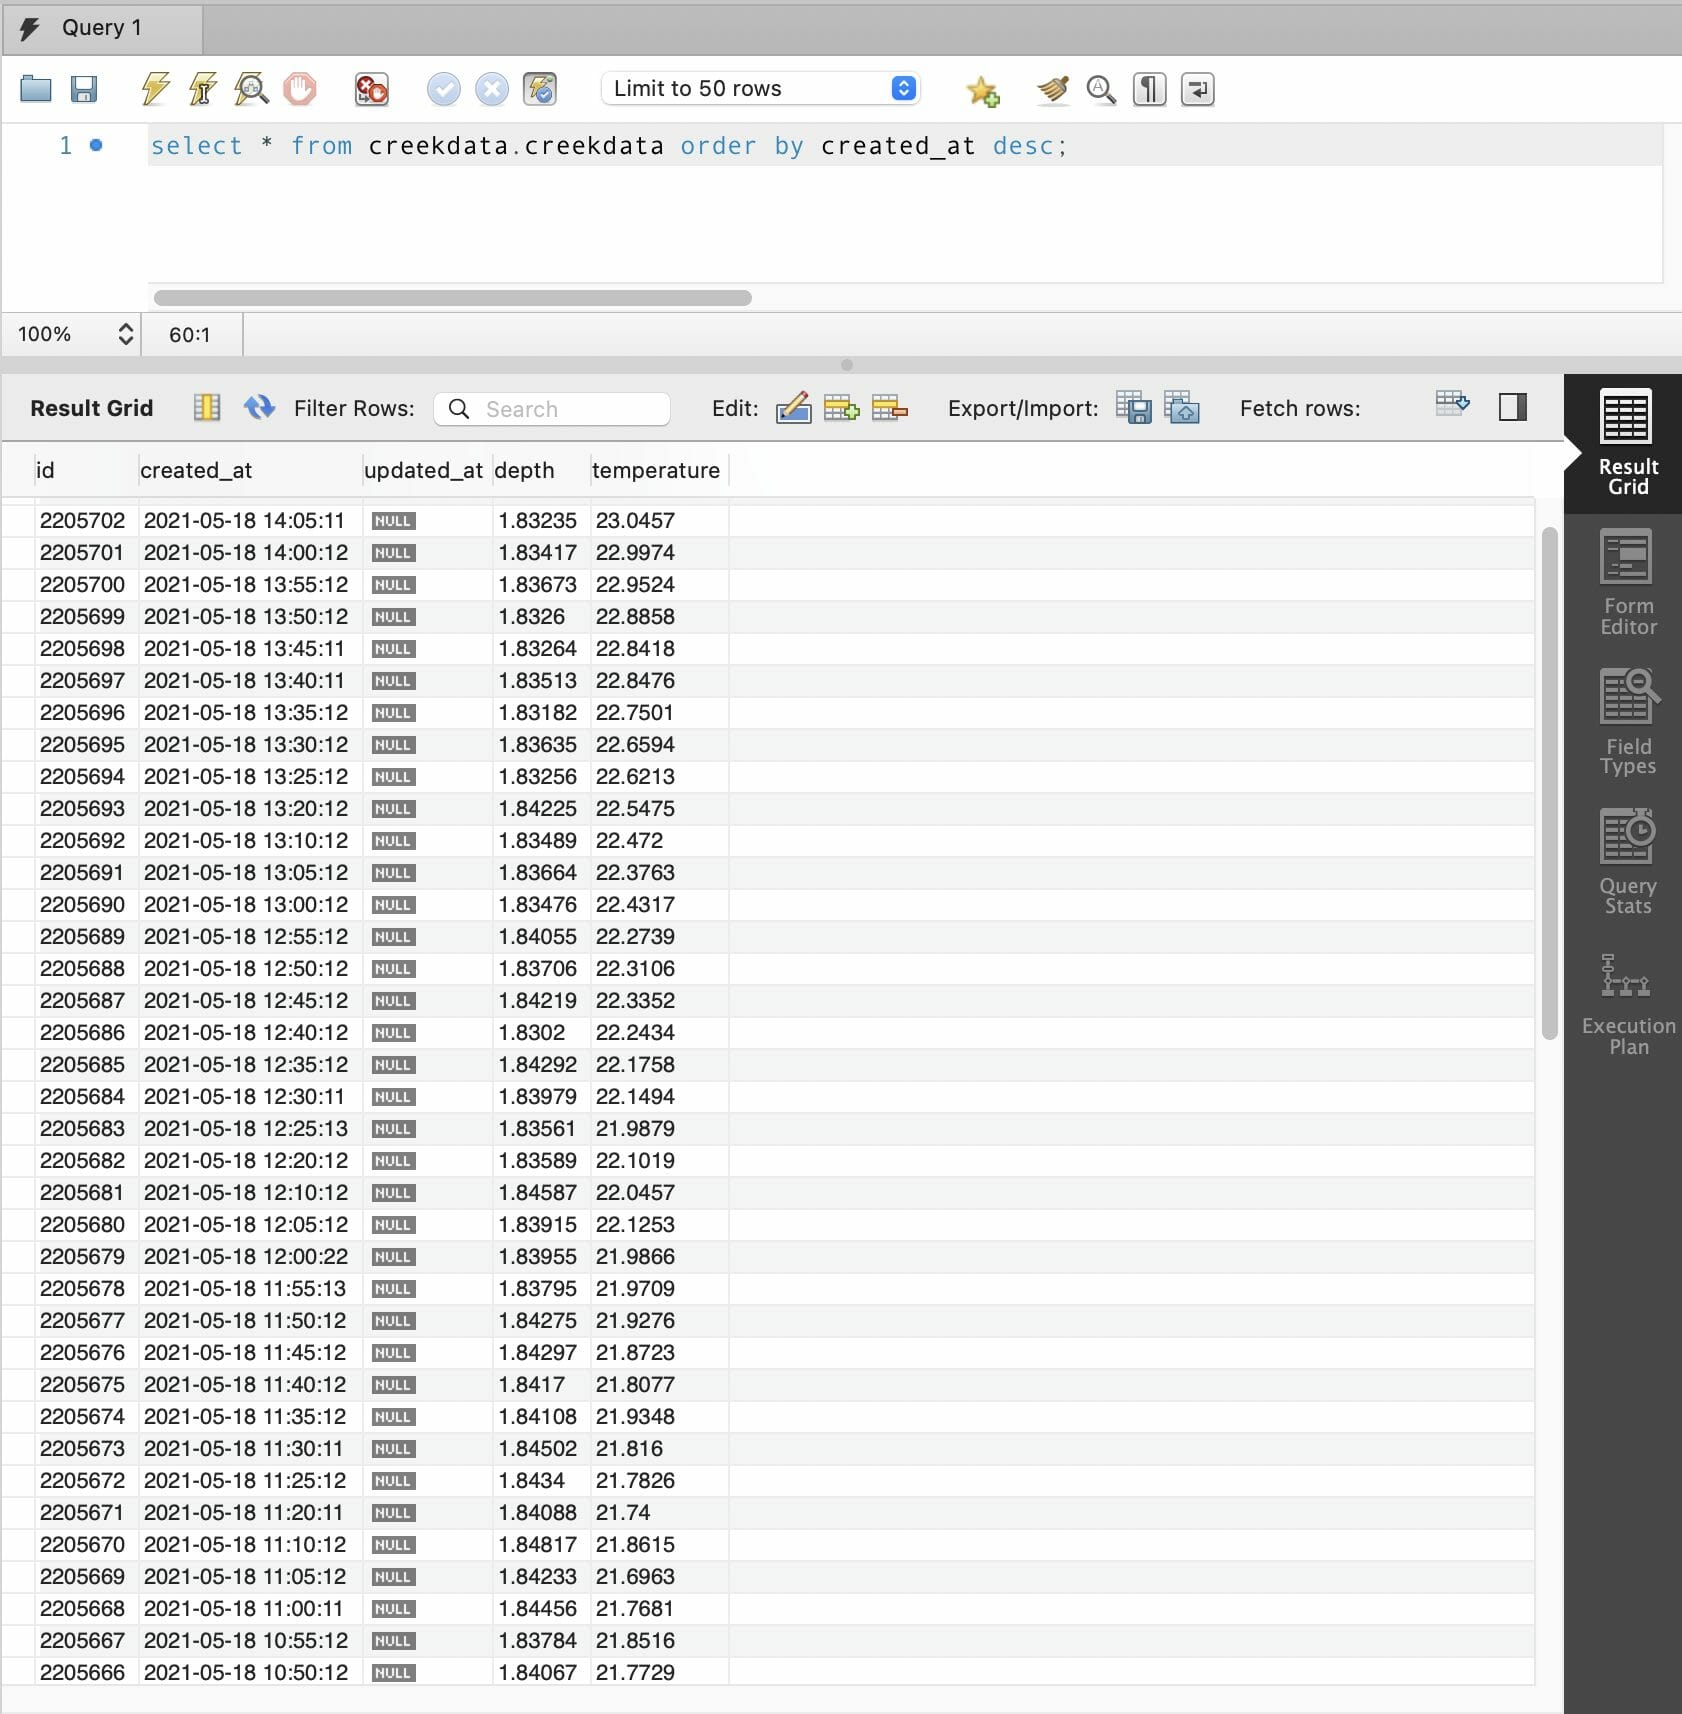
Now when I load the data from the MySQL Workbench I can see the inserts are happening.  Kick ass.

The Creek 3.0: A Docker MySQL Diversion – Part 2

Summary

A tutorial on running MySQL in an instance of Docker on Ubuntu Linux.  Then creating a Raspberry Pi Python interface from a sensor to insert data over the network to the new MySQL Server.

Story

As I said in the introduction, this whole process has been a bit chaotic.  So here we go.  The Raspberry Pi that runs the current creek system has been in my barn since at least 2013 running on the same SD Card and never backed up.  I suppose that it wouldn’t have really mattered if I lost the old flood data, but it would have been annoying.  Also, that Raspberry Pi is very slow running queries given the 2.2M records that now exist in the database.

To fix this I decided that I want to start by moving the MySQL server to a new computer that runs Docker.  Here is the original configuration (from the original article)

When I set out to do in this article the plan was to move the MySQL Instance from the Raspberry Pi to a new Linux box.  Unfortunately while I was doing this, I broke the operating system on the Raspberry Pi and ended up having to rebuild the interface to the PSoC 4.  Here is what I ended up building:

This article will walk you through the following steps.

  1. Build a new Linux machine & Install Ubuntu Server
  2. Install Docker & MySQL
  3. Migrate the Data from the original Raspberry Pi MySQL Database
  4. Build the Python Environment (Part 2.5)
  5. Python: Get Data SMBUS (Part 2.5)
  6. Python: Insert MySQL (Part 2.5)
  7. Shell Script & Crontab (Part 2.5)
  8. Test using MySQL WorkBench (Part 2.5)

Build a new Linux Box with Ubuntu Server

I wanted to have a local to my lan server running MySQL.  My lab assistant suggested that I find something fairly inexpensive on ebay.  Here is what I bought:


And… for sure it needed an SSD.

Then I downloaded Ubuntu Server 20.04 from https://ubuntu.com/download/server

After the file was downloaded I created a bootable sdcard by running: dd if=ubuntu-20.04.2-live-server-amd64.iso of=/dev/rdisk4 bs=1m

arh Downloads $ sudo diskutil unmountDisk /dev/disk4
Unmount of all volumes on disk4 was successful
arh Downloads $ sudo dd if=ubuntu-20.04.2-live-server-amd64.iso of=/dev/rdisk4 bs=1m
1158+1 records in
1158+1 records out
1215168512 bytes transferred in 32.400378 secs (37504763 bytes/sec)
arh Downloads $ diskutil list /dev/disk4
/dev/disk4 (external, physical):
   #:                       TYPE NAME                    SIZE       IDENTIFIER
   0:     Apple_partition_scheme                        *31.1 GB    disk4
   1:        Apple_partition_map ⁨⁩                        4.1 KB     disk4s1
   2:                  Apple_HFS ⁨⁩                        4.1 MB     disk4s2

After doing the installation (I dont have screen captures of that, but it is easy).  I installed the avahi daemon.  What is that?  Avahi is program that enables mDNS – a part of no configuration networking that helps you manage “names”.  Specifically in my case it will create a DNS-like name for this computer without having to actually configure the DNS.  That name is “linux.local”.

To install avahi run sudo apt install avahi-daemon

arh@spiff:~$ systemctl status avahi-daemon
● avahi-daemon.service - Avahi mDNS/DNS-SD Stack
     Loaded: loaded (/lib/systemd/system/avahi-daemon.service; enabled; vendor preset: enabled)
     Active: active (running) since Sat 2021-05-01 14:20:40 UTC; 2 weeks 1 days ago
TriggeredBy: ● avahi-daemon.socket
   Main PID: 713 (avahi-daemon)
     Status: "avahi-daemon 0.7 starting up."
      Tasks: 2 (limit: 14105)
     Memory: 2.8M
     CGroup: /system.slice/avahi-daemon.service
             ├─713 avahi-daemon: running [spiff.local]
             └─757 avahi-daemon: chroot helper

May 11 11:26:26 spiff avahi-daemon[713]: Registering new address record for fe80::4409:73ff:fe08:4c75 on veth72ac3b7.*.
May 11 11:26:26 spiff avahi-daemon[713]: Joining mDNS multicast group on interface br-18a7431f8090.IPv6 with address fe80::42:beff:fe8c:e24.
May 11 11:26:26 spiff avahi-daemon[713]: New relevant interface br-18a7431f8090.IPv6 for mDNS.
May 11 11:26:26 spiff avahi-daemon[713]: Registering new address record for fe80::42:beff:fe8c:e24 on br-18a7431f8090.*.
May 11 11:26:43 spiff avahi-daemon[713]: Interface veth72ac3b7.IPv6 no longer relevant for mDNS.
May 11 11:26:43 spiff avahi-daemon[713]: Leaving mDNS multicast group on interface veth72ac3b7.IPv6 with address fe80::4409:73ff:fe08:4c75.
May 11 11:26:43 spiff avahi-daemon[713]: Withdrawing address record for fe80::4409:73ff:fe08:4c75 on veth72ac3b7.
May 11 11:26:48 spiff avahi-daemon[713]: Joining mDNS multicast group on interface veth5c71e0d.IPv6 with address fe80::4499:b0ff:feef:30fe.
May 11 11:26:48 spiff avahi-daemon[713]: New relevant interface veth5c71e0d.IPv6 for mDNS.
May 11 11:26:48 spiff avahi-daemon[713]: Registering new address record for fe80::4499:b0ff:feef:30fe on veth5c71e0d.*.
arh@spiff:~$ 

I also will be running MySQL in a Docker instance.  To install docker run: sudo apt install docker.io

arh@spiff:~$ systemctl status docker
● docker.service - Docker Application Container Engine
     Loaded: loaded (/lib/systemd/system/docker.service; enabled; vendor preset: enabled)
     Active: active (running) since Sat 2021-05-01 14:20:42 UTC; 2 weeks 1 days ago
TriggeredBy: ● docker.socket
       Docs: https://docs.docker.com
   Main PID: 758 (dockerd)
      Tasks: 26
     Memory: 142.1M
     CGroup: /system.slice/docker.service
             ├─   758 /usr/bin/dockerd -H fd:// --containerd=/run/containerd/containerd.sock
             └─240639 /usr/bin/docker-proxy -proto tcp -host-ip 0.0.0.0 -host-port 3306 -container-ip 172.18.0.2 -container-port 3306

May 02 13:39:42 spiff dockerd[758]: time="2021-05-02T13:39:42.754047181Z" level=info msg="ignoring event" container=4d2e6a3c8c779e01676e4fd8f748aa4581c9469d92398ff274a3800c5d3e98a2 module>
May 02 13:40:42 spiff dockerd[758]: time="2021-05-02T13:40:42.381681852Z" level=error msg="Error setting up exec command in container 4d2e6a3c8c77: Container 4d2e6a3c8c779e01676e4fd8f748a>
May 02 13:40:42 spiff dockerd[758]: time="2021-05-02T13:40:42.760184585Z" level=warning msg="error locating sandbox id 5e4b44ba78eacdb974bfd773ffabf46526177f4ff135ace09b667c3e497b3468: sa>
May 02 13:40:42 spiff dockerd[758]: time="2021-05-02T13:40:42.762228692Z" level=error msg="4d2e6a3c8c779e01676e4fd8f748aa4581c9469d92398ff274a3800c5d3e98a2 cleanup: failed to delete conta>
May 02 13:40:42 spiff dockerd[758]: time="2021-05-02T13:40:42.764274310Z" level=error msg="restartmanger wait error: network c6593d532df7651e3a38572e609d42f69f0daba3ac36263933ca0ae43504cc>
May 11 11:26:24 spiff dockerd[758]: time="2021-05-11T11:26:24.772660650Z" level=info msg="No non-localhost DNS nameservers are left in resolv.conf. Using default external servers: [namese>
May 11 11:26:24 spiff dockerd[758]: time="2021-05-11T11:26:24.772680359Z" level=info msg="IPv6 enabled; Adding default IPv6 external servers: [nameserver 2001:4860:4860::8888 nameserver 2>
May 11 11:26:42 spiff dockerd[758]: time="2021-05-11T11:26:42.994091472Z" level=info msg="ignoring event" container=bfd550cab791b061bbd4e26f3435165de7b3664373de9cbb80d2e78a0aff08e2 module>
May 11 11:26:46 spiff dockerd[758]: time="2021-05-11T11:26:46.212688536Z" level=info msg="No non-localhost DNS nameservers are left in resolv.conf. Using default external servers: [namese>
May 11 11:26:46 spiff dockerd[758]: time="2021-05-11T11:26:46.212708396Z" level=info msg="IPv6 enabled; Adding default IPv6 external servers: [nameserver 2001:4860:4860::8888 nameserver 2>
arh@spiff:~$

Docker Training

I knew that I wanted to try Docker, no kidding eh, but I didn’t know much of anything about it.  I am not really a “video” person for learning, but my son had talked me into trying a skill share class to learn how to edit video.  So, I thought that I would give it a try for Docker as well.  This class was OK but not great (like 2/5)  Here is a screenshot from the class:

I also watched this class, which is excellent…. especially if you watch it at 1.5x speed.

Docker Introduction

There are four basic ideas which you need to understand Docker.

Concept Description Commands
Image A runnable binary template that can be instantiated into a container (like a class in object oriented programming) docker image ls
Container An VM-like instance of an image (like an object i.e. an instance of a class in object oriented programming).  This includes network port mapping, volumes,network etc. docker ps -a
Volume A directory or file map between the host operating system and the docker container.  For example a directory X on the host is mapped to the directory Y inside of the container docker volume ls
Network A synthetic network that is created by the docker daemon to map one or more containers together.  This includes a dhcp, dns, routing etc. docker network ls

Docker Compose & MySQL

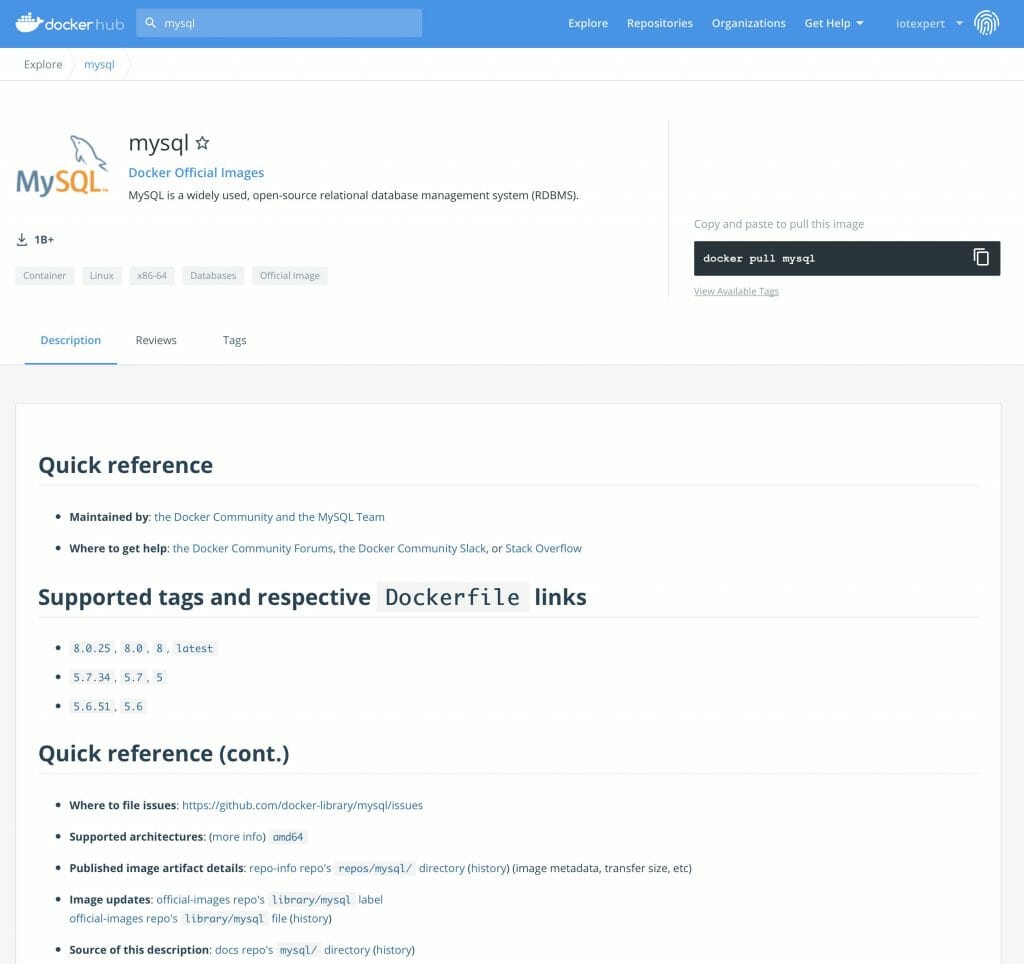
You can find new images at https://hub.docker.com.  In fact this is where I get everything that I need for mysql.

If you look a little bit later down on the docker hub you will find the specific instruction for “running” a docker mysql image.

These instructions will work.  However, there are two problems.

#1 by running it this way you will not expose the ip port 3306 from inside of the container to the outside work (on your computer or network).  This means you won’t be able to talk to the MySQL instance.  That is not very helpful

#2 all of the secret sauce you typed will be lost if you need to do that same command again.

The good news is that docker has a specific file format for saving this information called “docker-compose.yaml”.

My docker compose file looks like this.

  1. The image is “mysql” (use the official docker mysql image)
  2. Map the MySQL port 3306 from inside the container to the outside
  3. Make the root password “supersecret”
  4. Create a database called “creekdata”
  5. Create a user called “creek” with a password “asillypassword”
  6. Map the mysql data inside of the container at /var/lib/mysql to an outside volume called “mysql”
arh@spiff:~/mysql$ more docker-compose.yaml
version: '3.1'

services:

  db:
    image: mysql
    restart: always
    ports:
      - 3306:3306
    environment:
      MYSQL_ROOT_PASSWORD: supersecret
      MYSQL_DATABASE: creekdata
      MYSQL_USER: creek
      MYSQL_PASSWORD: asillypassword
    volumes:
      - mysql:/var/lib/mysql
      
volumes:
  mysql:

With this file I can create the container by running “docker-compose up”

linux$ docker-compose up
Creating network "mysql_default" with the default driver
Creating volume "mysql_mysql" with default driver
Pulling db (mysql:latest)...
latest: Pulling from library/mysql
69692152171a: Pull complete
1651b0be3df3: Pull complete
951da7386bc8: Pull complete
0f86c95aa242: Pull complete
37ba2d8bd4fe: Pull complete
6d278bb05e94: Pull complete
497efbd93a3e: Pull complete
f7fddf10c2c2: Pull complete
16415d159dfb: Pull complete
0e530ffc6b73: Pull complete
b0a4a1a77178: Pull complete
cd90f92aa9ef: Pull complete
Digest: sha256:d50098d7fcb25b1fcb24e2d3247cae3fc55815d64fec640dc395840f8fa80969
Status: Downloaded newer image for mysql:latest
Creating mysql_db_1 ... 
Creating mysql_db_1 ... done
Attaching to mysql_db_1
db_1  | 2021-05-17 20:01:20+00:00 [Note] [Entrypoint]: Entrypoint script for MySQL Server 8.0.25-1debian10 started.
db_1  | 2021-05-17 20:01:20+00:00 [Note] [Entrypoint]: Switching to dedicated user 'mysql'
db_1  | 2021-05-17 20:01:20+00:00 [Note] [Entrypoint]: Entrypoint script for MySQL Server 8.0.25-1debian10 started.
db_1  | 2021-05-17 20:01:20+00:00 [Note] [Entrypoint]: Initializing database files
db_1  | 2021-05-17T20:01:20.192621Z 0 [System] [MY-013169] [Server] /usr/sbin/mysqld (mysqld 8.0.25) initializing of server in progress as process 41
db_1  | 2021-05-17T20:01:20.196027Z 1 [System] [MY-013576] [InnoDB] InnoDB initialization has started.
db_1  | 2021-05-17T20:01:20.770999Z 1 [System] [MY-013577] [InnoDB] InnoDB initialization has ended.
db_1  | 2021-05-17T20:01:21.809117Z 6 [Warning] [MY-010453] [Server] root@localhost is created with an empty password ! Please consider switching off the --initialize-insecure option.
db_1  | 2021-05-17 20:01:24+00:00 [Note] [Entrypoint]: Database files initialized
db_1  | 2021-05-17 20:01:24+00:00 [Note] [Entrypoint]: Starting temporary server
db_1  | 2021-05-17T20:01:24.396505Z 0 [System] [MY-010116] [Server] /usr/sbin/mysqld (mysqld 8.0.25) starting as process 86
db_1  | 2021-05-17T20:01:24.415784Z 1 [System] [MY-013576] [InnoDB] InnoDB initialization has started.
db_1  | 2021-05-17T20:01:24.551463Z 1 [System] [MY-013577] [InnoDB] InnoDB initialization has ended.
db_1  | 2021-05-17T20:01:24.618191Z 0 [System] [MY-011323] [Server] X Plugin ready for connections. Socket: /var/run/mysqld/mysqlx.sock
db_1  | 2021-05-17T20:01:24.726805Z 0 [Warning] [MY-010068] [Server] CA certificate ca.pem is self signed.
db_1  | 2021-05-17T20:01:24.726923Z 0 [System] [MY-013602] [Server] Channel mysql_main configured to support TLS. Encrypted connections are now supported for this channel.
db_1  | 2021-05-17T20:01:24.728714Z 0 [Warning] [MY-011810] [Server] Insecure configuration for --pid-file: Location '/var/run/mysqld' in the path is accessible to all OS users. Consider choosing a different directory.
db_1  | 2021-05-17T20:01:24.738807Z 0 [System] [MY-010931] [Server] /usr/sbin/mysqld: ready for connections. Version: '8.0.25'  socket: '/var/run/mysqld/mysqld.sock'  port: 0  MySQL Community Server - GPL.
db_1  | 2021-05-17 20:01:24+00:00 [Note] [Entrypoint]: Temporary server started.
db_1  | Warning: Unable to load '/usr/share/zoneinfo/iso3166.tab' as time zone. Skipping it.
db_1  | Warning: Unable to load '/usr/share/zoneinfo/leap-seconds.list' as time zone. Skipping it.
db_1  | Warning: Unable to load '/usr/share/zoneinfo/zone.tab' as time zone. Skipping it.
db_1  | Warning: Unable to load '/usr/share/zoneinfo/zone1970.tab' as time zone. Skipping it.
db_1  | 2021-05-17 20:01:25+00:00 [Note] [Entrypoint]: Creating database creekdata
db_1  | 2021-05-17 20:01:25+00:00 [Note] [Entrypoint]: Creating user creek
db_1  | 2021-05-17 20:01:25+00:00 [Note] [Entrypoint]: Giving user creek access to schema creekdata
db_1  | 
db_1  | 2021-05-17 20:01:25+00:00 [Note] [Entrypoint]: Stopping temporary server
db_1  | 2021-05-17T20:01:25.775184Z 13 [System] [MY-013172] [Server] Received SHUTDOWN from user root. Shutting down mysqld (Version: 8.0.25).
db_1  | 2021-05-17T20:01:27.490685Z 0 [System] [MY-010910] [Server] /usr/sbin/mysqld: Shutdown complete (mysqld 8.0.25)  MySQL Community Server - GPL.
db_1  | 2021-05-17 20:01:27+00:00 [Note] [Entrypoint]: Temporary server stopped
db_1  | 
db_1  | 2021-05-17 20:01:27+00:00 [Note] [Entrypoint]: MySQL init process done. Ready for start up.
db_1  | 
db_1  | 2021-05-17T20:01:27.988961Z 0 [System] [MY-010116] [Server] /usr/sbin/mysqld (mysqld 8.0.25) starting as process 1
db_1  | 2021-05-17T20:01:27.999715Z 1 [System] [MY-013576] [InnoDB] InnoDB initialization has started.
db_1  | 2021-05-17T20:01:28.135399Z 1 [System] [MY-013577] [InnoDB] InnoDB initialization has ended.
db_1  | 2021-05-17T20:01:28.202245Z 0 [System] [MY-011323] [Server] X Plugin ready for connections. Bind-address: '::' port: 33060, socket: /var/run/mysqld/mysqlx.sock
db_1  | 2021-05-17T20:01:28.287968Z 0 [Warning] [MY-010068] [Server] CA certificate ca.pem is self signed.
db_1  | 2021-05-17T20:01:28.288087Z 0 [System] [MY-013602] [Server] Channel mysql_main configured to support TLS. Encrypted connections are now supported for this channel.
db_1  | 2021-05-17T20:01:28.290206Z 0 [Warning] [MY-011810] [Server] Insecure configuration for --pid-file: Location '/var/run/mysqld' in the path is accessible to all OS users. Consider choosing a different directory.
db_1  | 2021-05-17T20:01:28.300867Z 0 [System] [MY-010931] [Server] /usr/sbin/mysqld: ready for connections. Version: '8.0.25'  socket: '/var/run/mysqld/mysqld.sock'  port: 3306  MySQL Community Server - GPL.

Migrate the Data using MySQLWorkbench

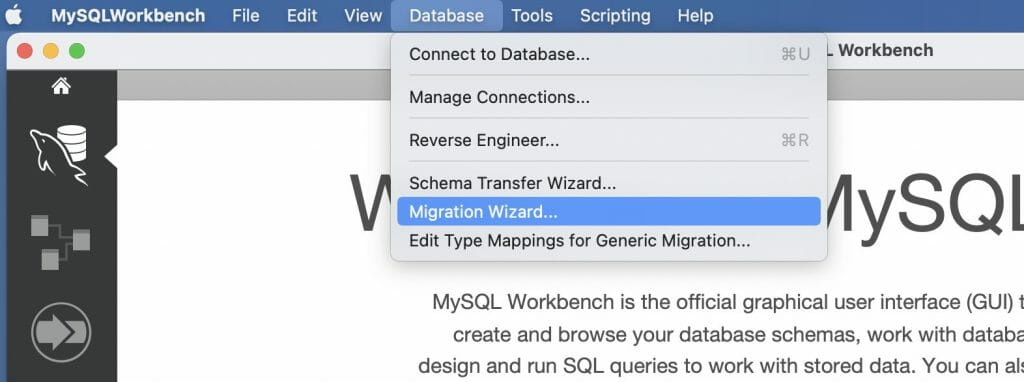
I have a BUNCH of data (2.2M rows or so) on the original Raspberry Pi.  I want this data in my newly created instance of MySQL.  To get it there I will use the MySQL Workbench migration wizard to move the data from the old to the new instance.

It starts with these nice instructions.

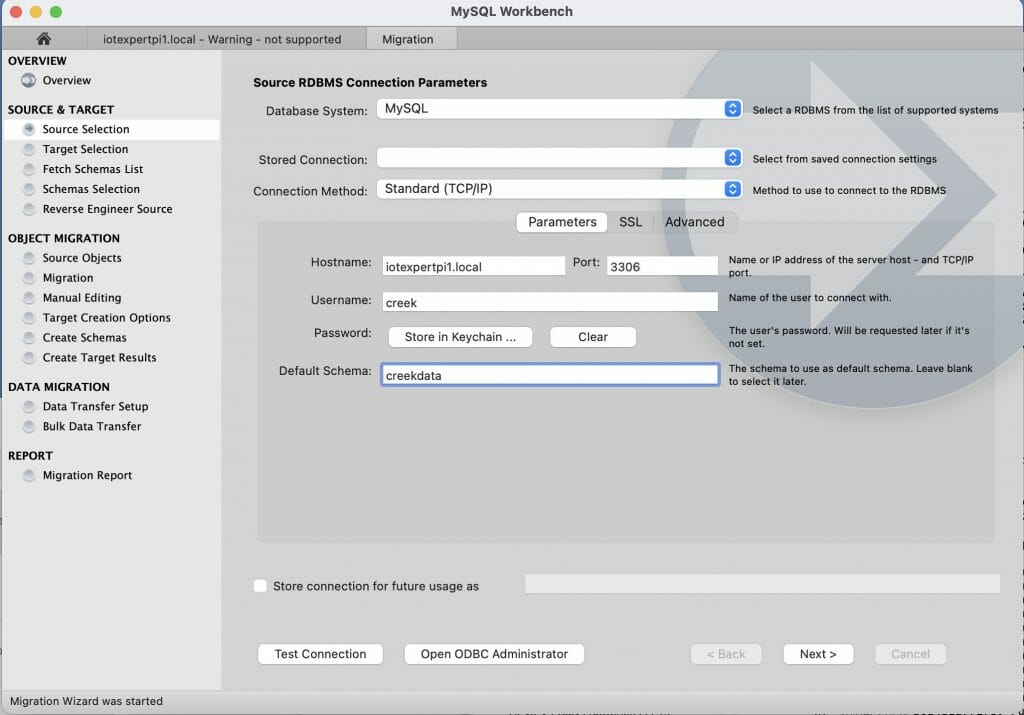
Then I specify the source (the original Raspberry Pi)

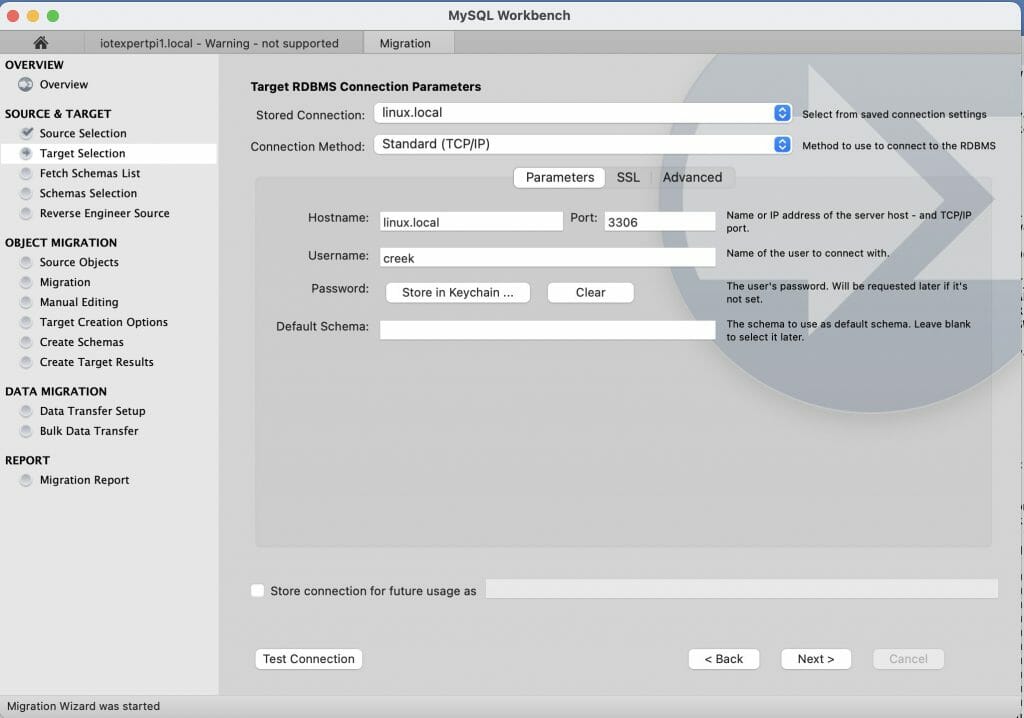
The target is specified next.

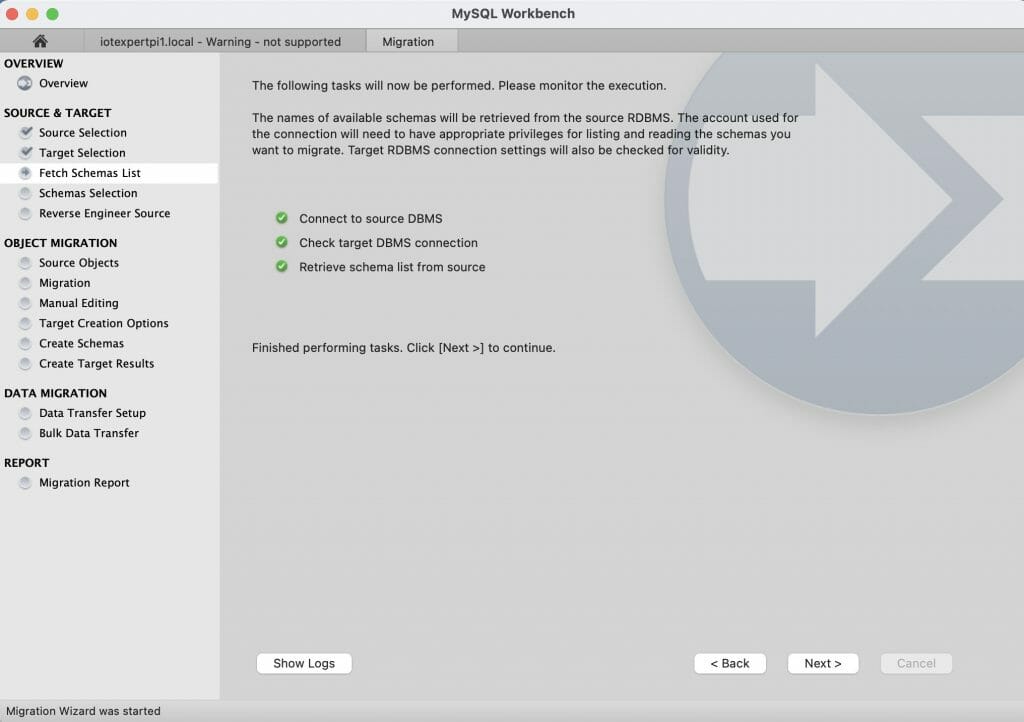
It then reads the database schema from the source and makes sure that it can talk to the target.

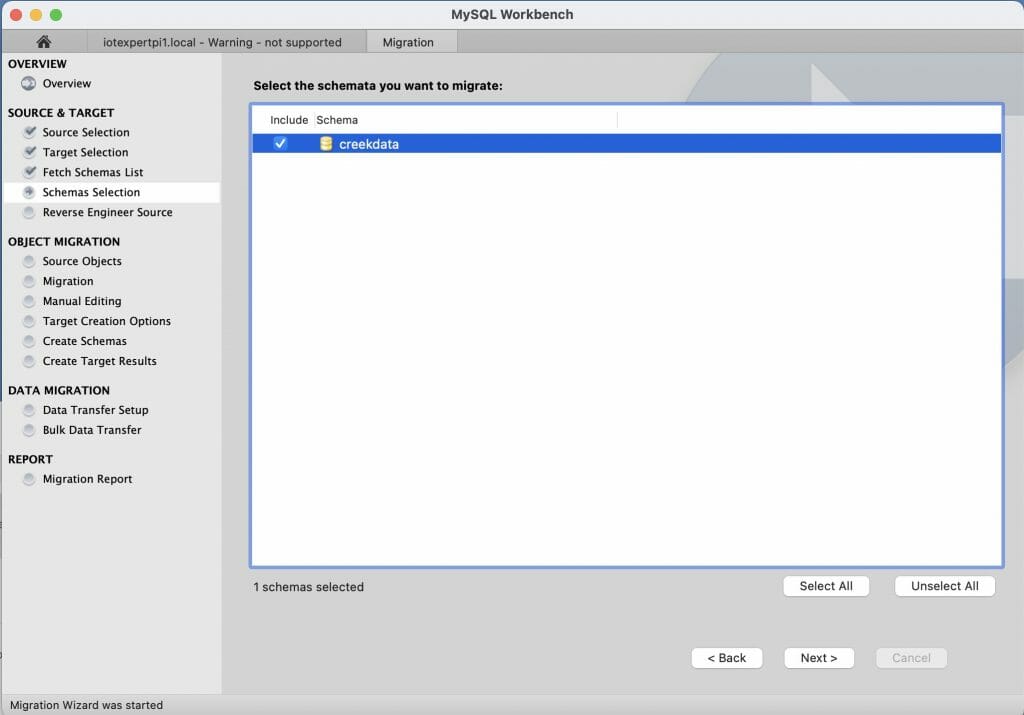
Then it asks me what I want to transfer.  There is only one database schema on the source, the “creekdata” database.

Next it reads the source schema and reverse engineers the tables etc.

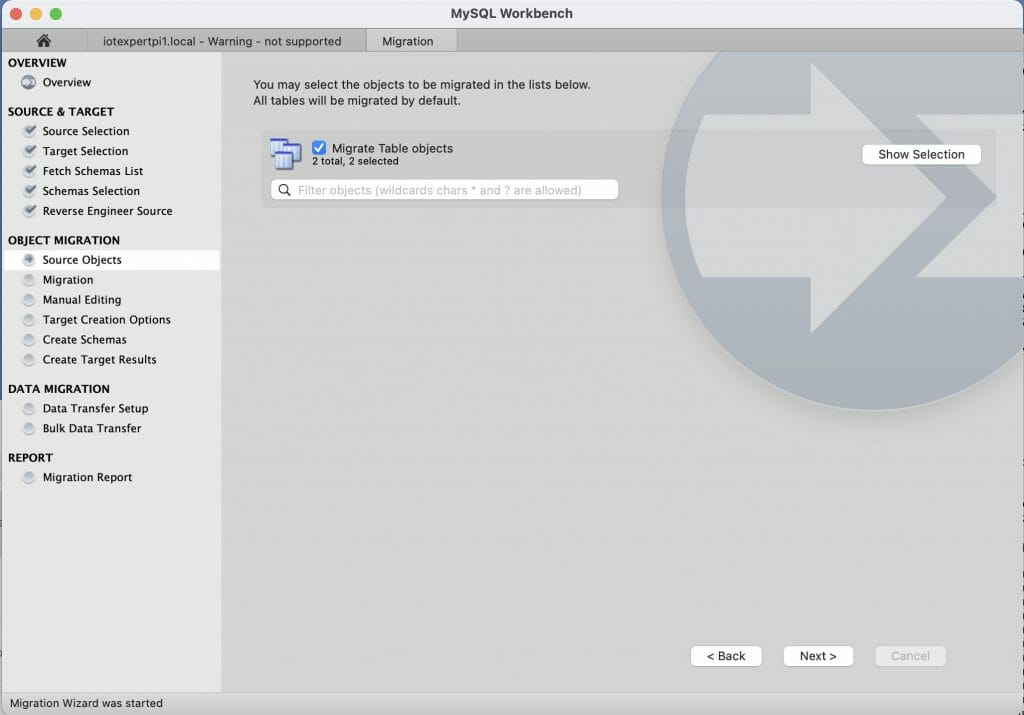
Now it asks specifically what you want to transfer.  For my case there are two tables in the creekdata database.

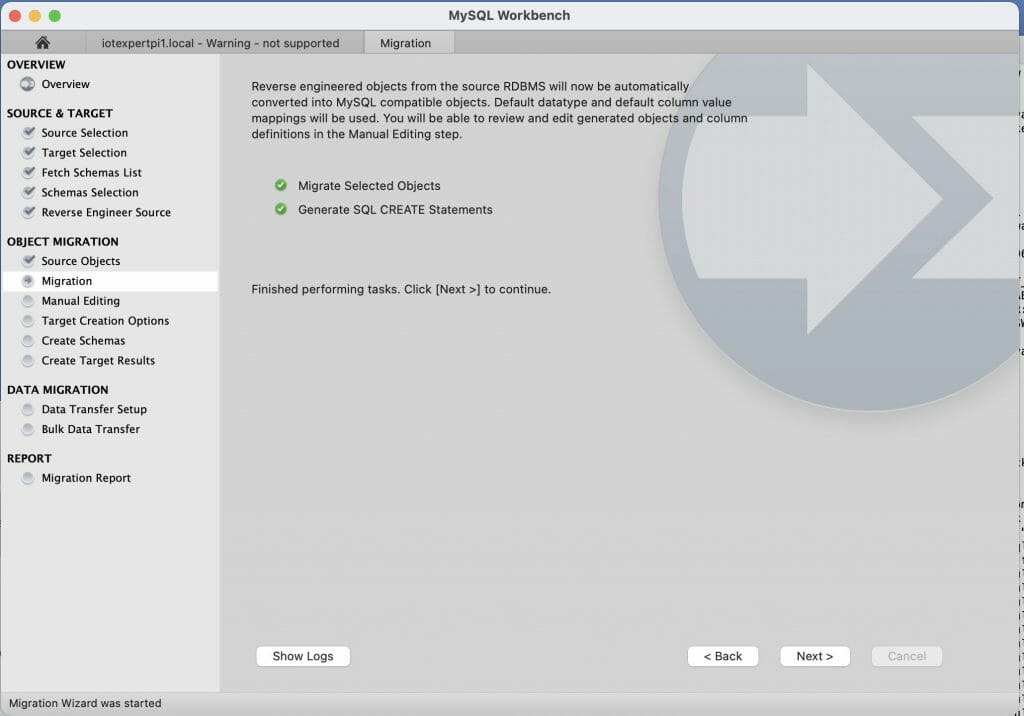
Then it generates the specific mysql commands required to recreate the schema

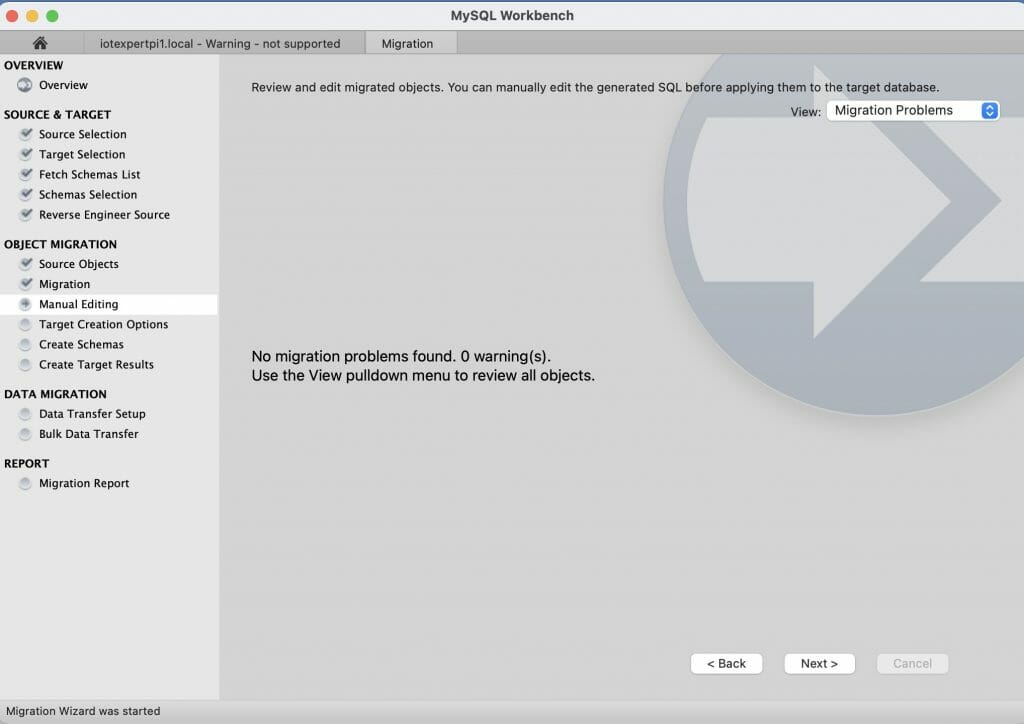
Gives the option of changing it.

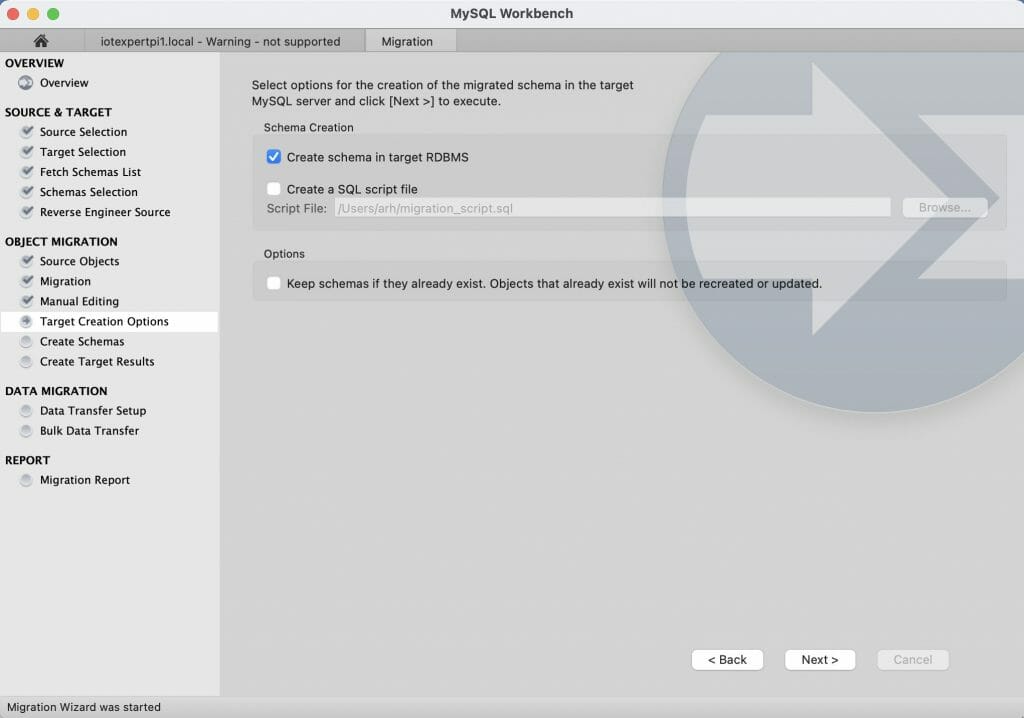
Now it asks you what method you want to use on the target.  I choose to have it do all of the work.

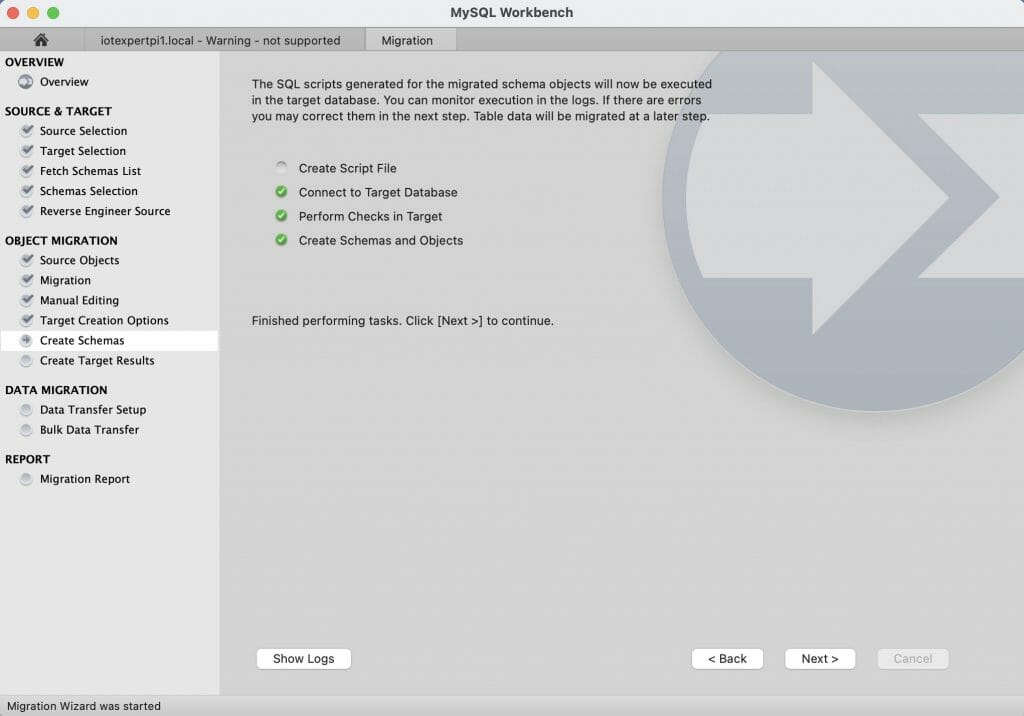
Then it creates the new database and tables.

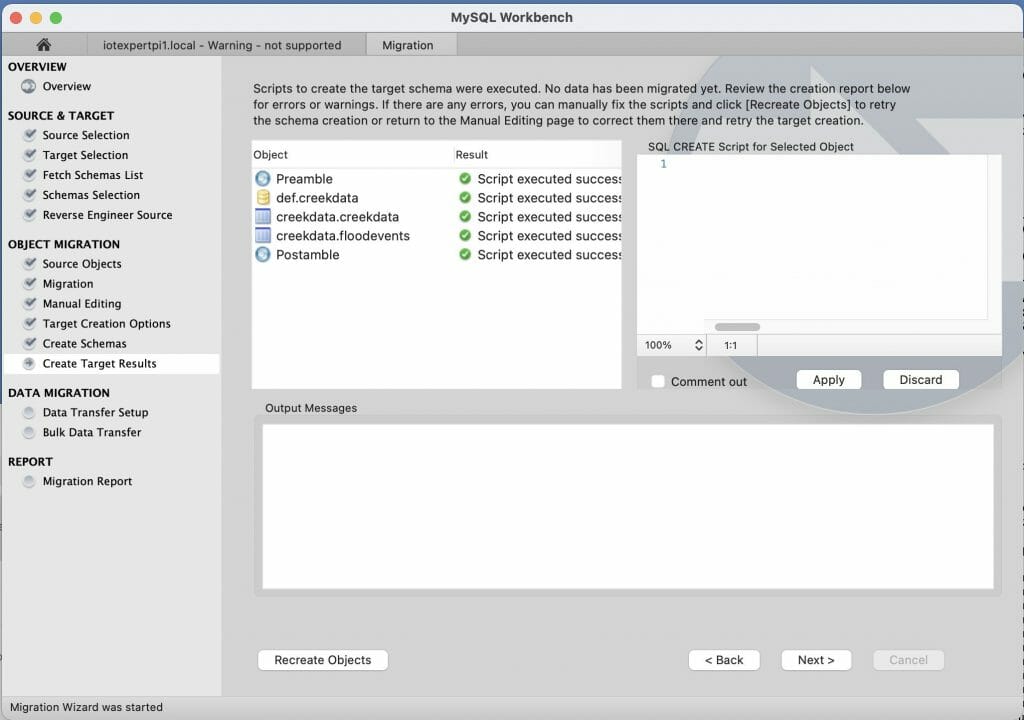
And you can see that it worked.

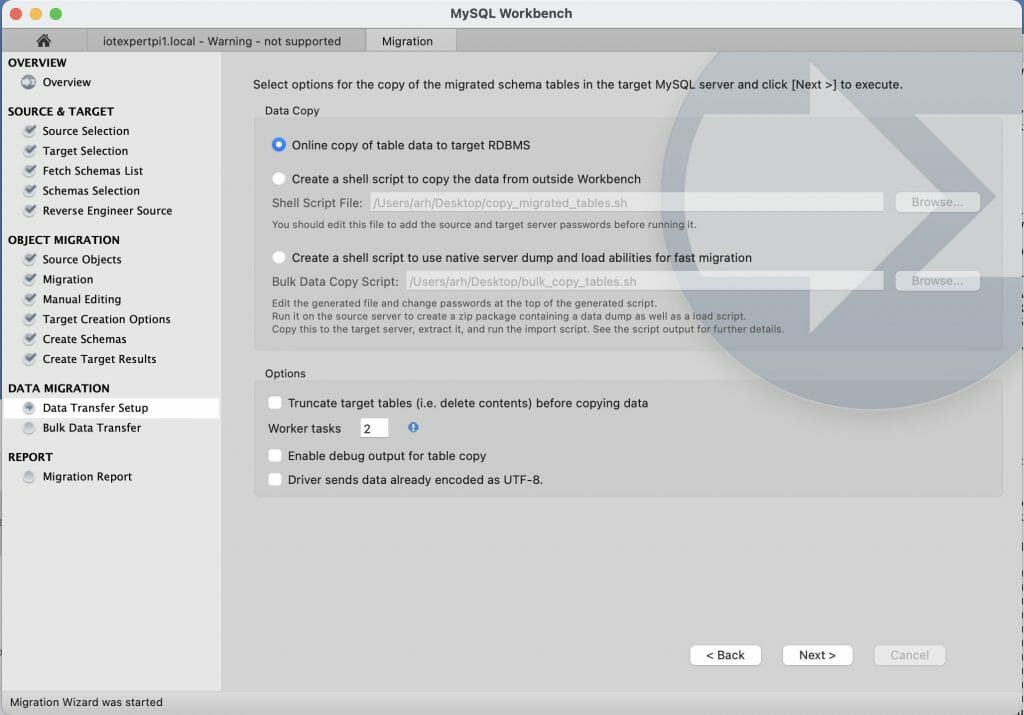
Then it asks how I want to copy the data.  I tell it to do all of the work for me.

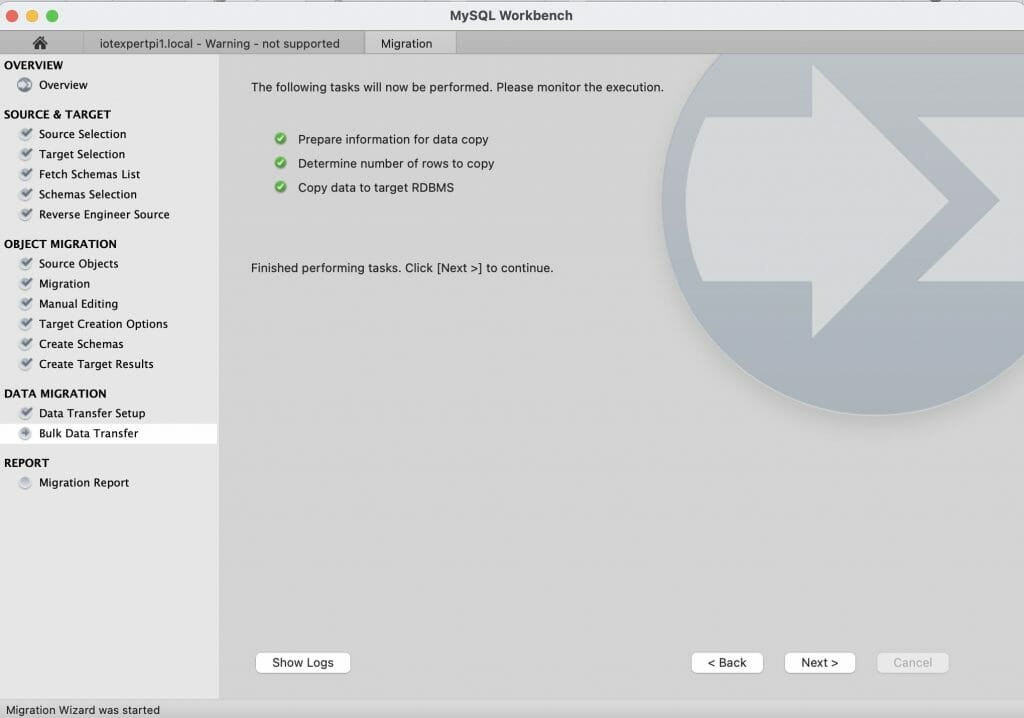
Then it runs a bulk transfer of the data.

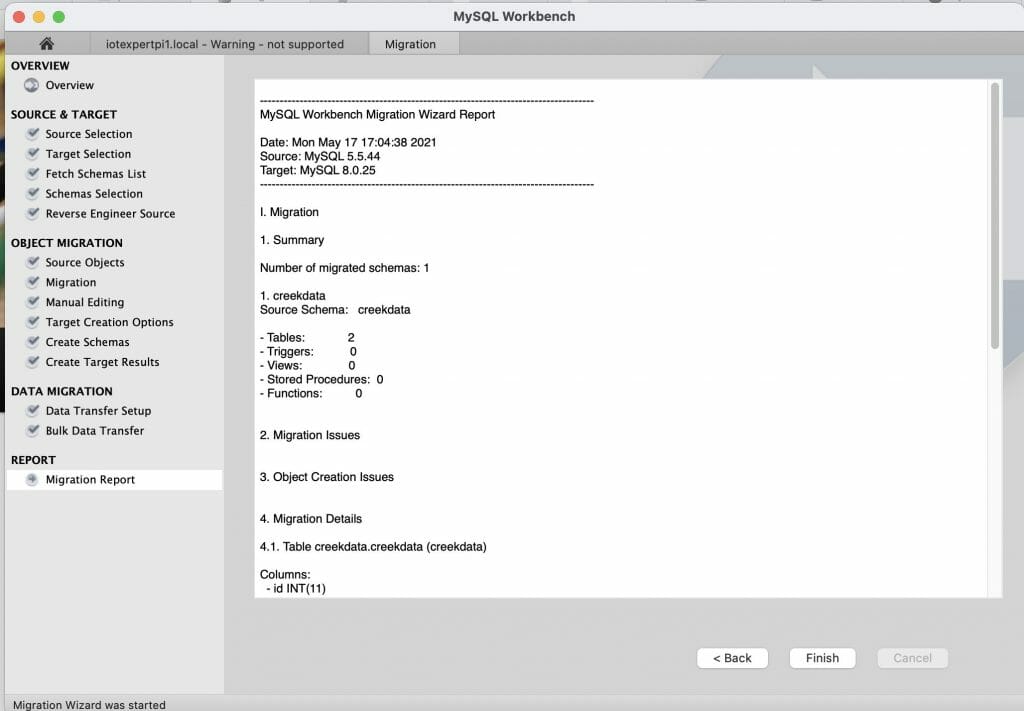
And give me a final report that things worked.  Kick ass.

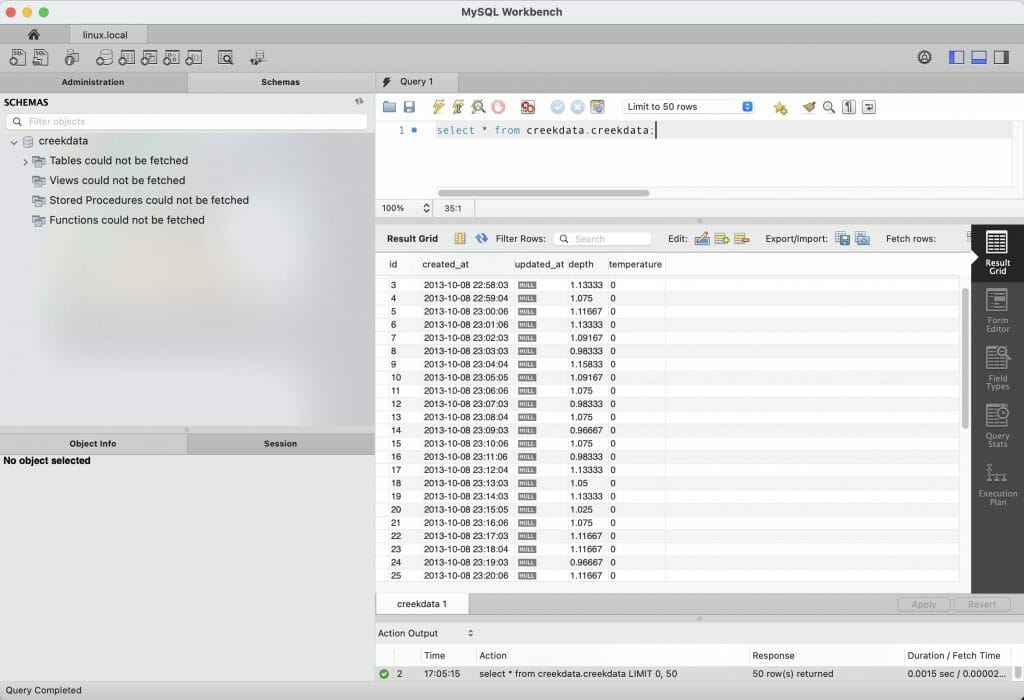
I can now make a connection to the new database.   And I see my old data back to 2013.

That is it for this article.  In the next article Ill do the Python Shell Script stuff to reconnect my data to the new MySql Server.

The Creek 3.0: Docker Telegraf, Influx, Grafana – Part 1

Summary

The architecture and first steps of a new IoT implementation using PSoC 6, CYW43012 WiFi, AnyCloud MQTT, Raspberry Pi, Python, Influx, Grafana, Telegraf and Docker.  Wow, sounds like a lot.

The Story

For quite some time, I have been wanting to replace my original Elkhorn Creek implementation because. … well …, it is old school and a bit tired.  I started an implementation which I called “The Creek 2.0” which used AWS IoT,  AWS Lambda, and MySQL.  I thought it was interesting to learn about all of the AWS stuff… but I never finished the user interface, nor did I replace the Raspberry Pi.  Also, this solution was going in the old school direction and I wanted to use more open source.

So, this time I am going to go all the way.  Here is the architecture:

There are a bunch of things that I have never used including:

  1. Docker
  2. Mosquito MQTT
  3. Telegraf
  4. Influx DB
  5. Grafana

Which is quite a bit of new stuff.  Almost every time I work on a series like this I do all of the work in advance of writing the first article.  That way I know how things are going to an end and what is going to go wrong.   This way I can fix them in advance of you guys having to suffer with me.  This time, well, not so much, so I am quite sure that there will be some drama.

To this point I have spend a bunch of time with:

  1. Learning Docker
  2. Trying out Influx DB and Grafana
  3. Making Telegraf work

There are still some things which are a bit unknown, including:

  1. I don’t like the Telegraf implementation of the mqtt_consumer, which is going to require me to spend time learning “Go”
  2. I don’t really know how to expose Grafana to the internet safely (is that going to be OK?)
  3. I am considering writing a “Influx Client Library” for PSoC to skip the MQTT?
  4. I am considering using “Influx Line Protocol” and not using MQTT

So over the next few weeks we will see how things evolves.  I also decided to purchase a new Linux box for my house to run the system so I will talk about what I did there.

Alan

AnyCloud Bluetooth Advertising Scanner (Part 10)

Summary

We have finally reached the end of the AnyCloud Bluetooth Advertising Scanner.  In this article I will add the ability to sort the database.  In addition I will add the ability to purge a device.  And finally, truly finally, a bit of commentary.

Story

I originally built this program to help me learn about the AnyCloud Bluetooth SDK.  Well, originally I built this functionality to try to find and talk to a specific device (in an upcoming series).  The problem is that there are so many devices at my house that are blasting out so much data it is hard to see what I am looking for.  What I realized would help is add the ability to sort the devices from newest to oldest.  In addition I noticed that occasionally my database would fill up… and it would be nice to purge out old entries.  So that is what we are going to do.

There are

Article Topic
AnyCloud Bluetooth Advertising Scanner (Part 1) Introduction to AnyCloud Bluetooth Advertising
AnyCloud Bluetooth Advertising Scanner (Part 2) Creating an AnyCloud Bluetooth project
AnyCloud Bluetooth Advertising Scanner (Part 3) Adding Observing functionality to the project
AnyCloud Bluetooth Utilities Library A set of APIs for enhancement of the AnyCloud Library
AnyCloud Bluetooth Advertising Scanner (Part 4) Adding a command line to the scanner
AnyCloud Bluetooth Advertising Scanner (Part 5) Adding a history database to the scanner
AnyCloud Bluetooth Advertising Scanner (Part 6) Decoding advertising packets
AnyCloud Bluetooth Advertising Scanner (Part 7) Adding recording commands to the command line
AnyCloud Bluetooth Advertising Scanner (Part 8) Adding filtering to the scanner
AnyCloud Bluetooth Advertising Scanner (Part 9) Improve the print and add packet age
AnyCloud Bluetooth Advertising Scanner (Part 10) Sort the database

All of the code can be found at git@github.com:iotexpert/AnyCloudBLEScanner.git and https://github.com/iotexpert/AnyCloudBLEScanner.git

There are git tags in place starting at part 5 so that you can look at just that version of the code.  "git tag" to list the tags.  And "git checkout part6" to look at the part 6 version of the code.

You can also create a new project with this is a template if you have the IoT Expert Manifest Files installed

Fix the Database Data Structure

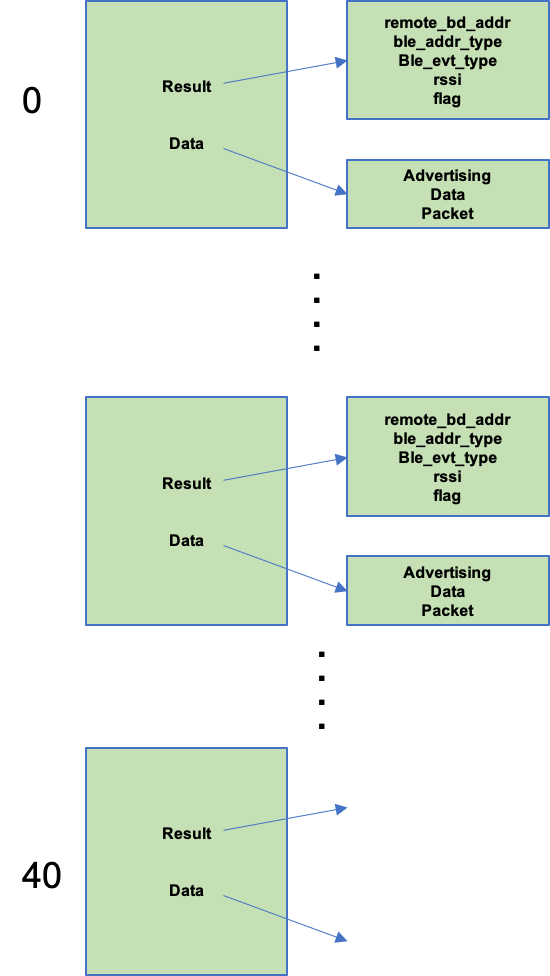
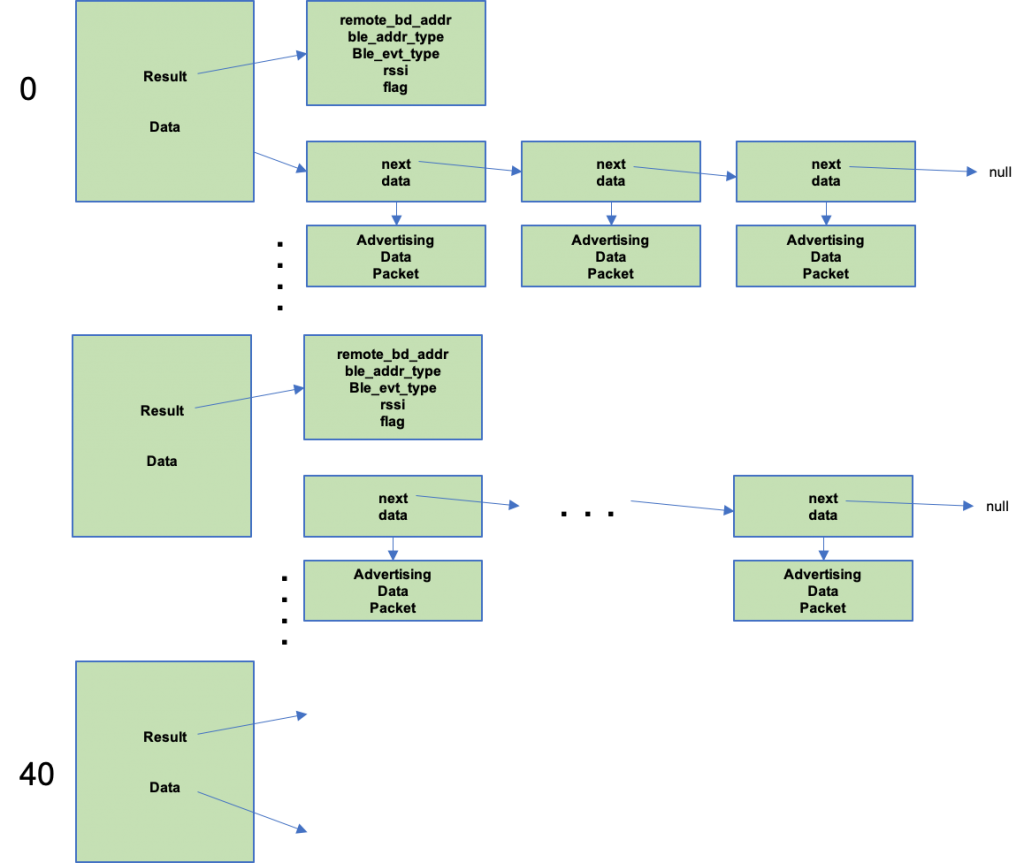
You might remember that the database was built as an array of structures.  This mean that any moving around of the data would be a require a replacement of the whole structure.

static adb_adv_t adb_database[ADB_MAX_SIZE];

To fix this problem I moved the database to a an array of pointers.

static adb_adv_t *adb_database[ADB_MAX_SIZE];

To support this, when I see a new device I malloc a block of memory to hold the actual structure.

    // If it is NOT found && you have room
    if(entry == -1)
    {
        adb_database[adb_db_count] = malloc(sizeof(adb_adv_t));

Then I had to fix all of the references to the structure.  And there were a bunch (actually 43 of them).  But the replacement was pretty simple

adb_database[…].xxx is replaced by adb_database[…]-> …. here are the three different cases

case 1: adb_database[adb_db_count].

case 2: adb_database[entry].

case 1: adb_database[i].

That was actually way less painful that I thought it was going to be.  Probably what would actually be best is a library of these data structures with an API that would not have changed when the key changed, but that I suppose, is for another day.

Add Two New Commands

Now I add the sort and purge commands to my command list.

typedef enum {
    ADB_ADD,
    ADB_PRINT_RAW,
    ADB_PRINT_DECODE,
    ADB_WATCH,
    ADB_ERASE,
    ADB_RECORD,
    ADB_FILTER,
    ADB_SORT,
    ADB_PURGE,
} adb_cmd_t;

Create the Sort Functionality

To sort, I will use the c-standard library function qsort.  It requires a function that compares two entries a/b and returns

  1. a negative number of a<b
  2. 0 if a=b
  3. a positive number if a>b

Here is the function.  Hey Hassane you like those pointers?

static int adb_sort_cmpfunc(const void * a, const void * b) 
{
    adb_adv_t *p1 = *((adb_adv_t **)a);
    adb_adv_t *p2 = *((adb_adv_t **)b);
        
    return p2->lastSeen - p1->lastSeen;
}

The sort is actually really simple now.  Just a call to sort (then I decided to print out the table)

                case ADB_SORT:
                    qsort(adb_database, adb_db_count, sizeof(adb_adv_t *), adb_sort_cmpfunc);
                    adb_db_print(ADB_PRINT_METHOD_BYTES,true,-1);
                break;

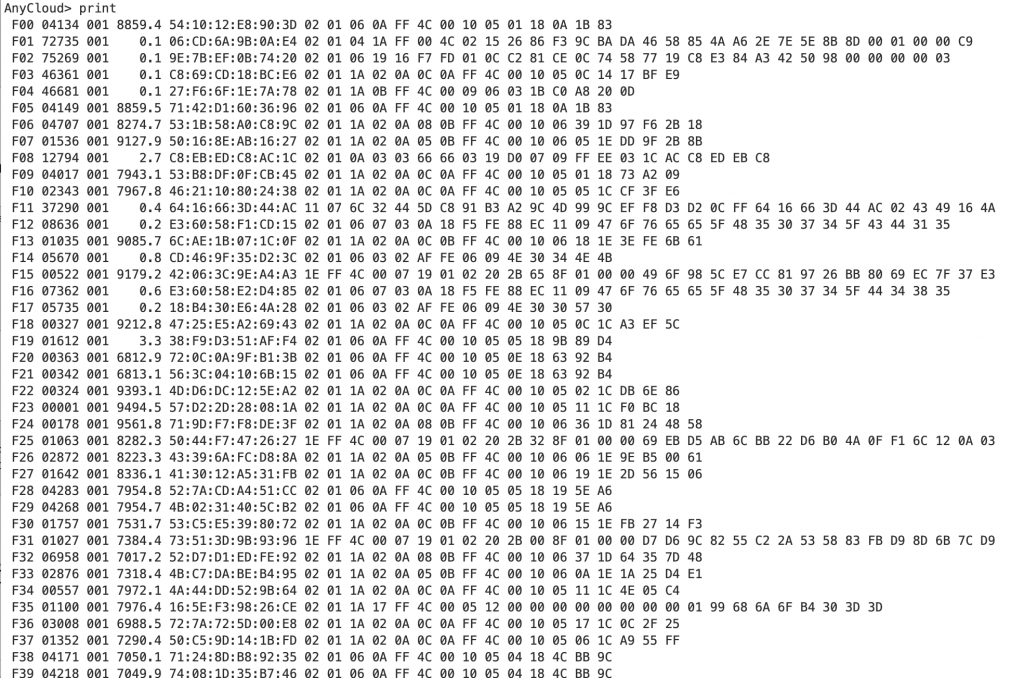
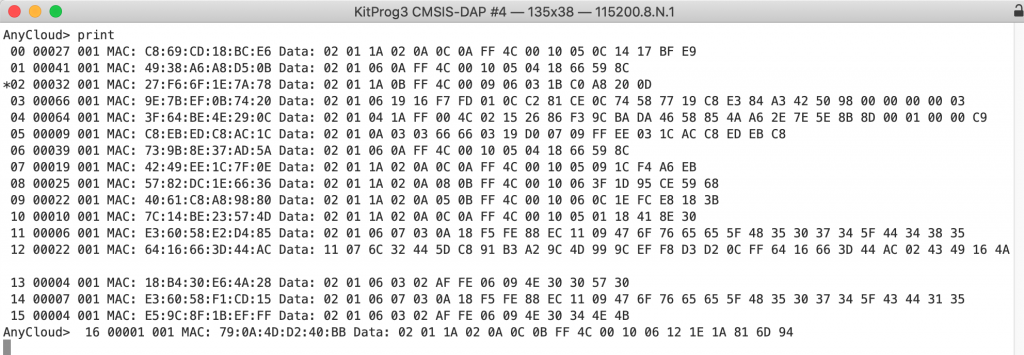
Now instead of this….

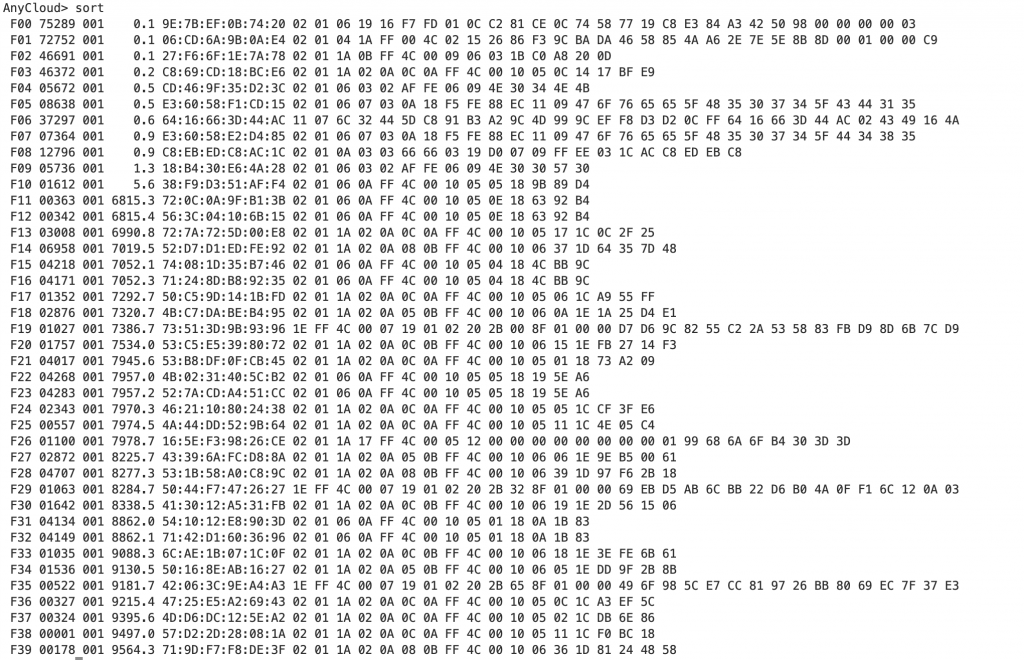
I get this…

Create the Purge Functionality

The purge function needs to do two things

  1. Free all of the memory from an entry
  2. Move the pointers so that the “purged” entry is gone.

First I erase all of the data in the linked list with the adb_eraseEntry function.

Then I free the head of the list

Then I free the actual structure

Then I move all of the pointers to squeeze the able.

static void adb_purgeEntry(int entry)
{

    adb_eraseEntry(entry);
    free(adb_database[entry]->list);
    free(adb_database[entry]->result);
    free(adb_database[entry]);
    adb_db_count -= 1;
    for(int i=entry;i<adb_db_count;i++)
    {
        adb_database[i] = adb_database[i+1];
    }
}

And you need to add the actual command.

                case ADB_PURGE:
                    if((int)msg.data0<0 || (int)msg.data0>=adb_db_count)
                    {
                        printf("Purge error %d\n",(int)msg.data0);
                        break;
                    }   
                    adb_purgeEntry((int)msg.data0);
                break;

The End & Commentary

I would like to add and maybe will one day:

  1. A connect function with a GATT browser
  2. A smarter way to deal with the fact that device change addresses

Finally a couple of comments about this

  1. You might notice that I don’t check very many possible errors.  I do this in the interest of simpler to read code.  This is a tradeoff that I make for “teaching” code.  I hope that you understand that if you want to do something like this in a real product that you need to be much more careful.
  2. I don’t have unit testing.  This falls into the same category as the error checking.  Really this is a bad idea as code without unit testing is obsolete the second it comes out of your fingers.  But, it is easier to read.
  3. I don’t have many comments.  This is something that my colleagues bitch about all of the time with me.  And I know that it must be a personality defect.
  4. I use malloc/free all over the place.  This is a religious war.  You can make a static allocation scheme, but it would be really complicated in this case.  I personally think that the tradeoff of using a battle worn and tested malloc/free is totally worthwhile against the complexity of custom static memory allocation schemes.

AnyCloud Bluetooth Advertising Scanner (Part 9)

Summary

In this series of articles I am building a Bluetooth Low Energy Scanner using the Cypress/Infineon AnyCloud SDK running on a PSoC 6 and CYW43xxx.  In Part 9, I will fix a memory leak, add packet age, and improve the printing.

Story

You might be starting to wonder if this series is ever going to end.  Well, this article and one more.  That is it.

This morning as I was looking at the serial console window I noticed that I had hit the limit of device in the buffer,  OK.  But that it had also crashed, gone, bye bye, so long … the long dark road.  That needs fixing.

I also was curious when I looked at the output, how long ago I had seen the packets/devices.  So I decided that having “age” in the database made sense.

There are

Article Topic
AnyCloud Bluetooth Advertising Scanner (Part 1) Introduction to AnyCloud Bluetooth Advertising
AnyCloud Bluetooth Advertising Scanner (Part 2) Creating an AnyCloud Bluetooth project
AnyCloud Bluetooth Advertising Scanner (Part 3) Adding Observing functionality to the project
AnyCloud Bluetooth Utilities Library A set of APIs for enhancement of the AnyCloud Library
AnyCloud Bluetooth Advertising Scanner (Part 4) Adding a command line to the scanner
AnyCloud Bluetooth Advertising Scanner (Part 5) Adding a history database to the scanner
AnyCloud Bluetooth Advertising Scanner (Part 6) Decoding advertising packets
AnyCloud Bluetooth Advertising Scanner (Part 7) Adding recording commands to the command line
AnyCloud Bluetooth Advertising Scanner (Part 8) Adding filtering to the scanner
AnyCloud Bluetooth Advertising Scanner (Part 9) Improve the print and add packet age
AnyCloud Bluetooth Advertising Scanner (Part 10) Sort the database

All of the code can be found at git@github.com:iotexpert/AnyCloudBLEScanner.git and https://github.com/iotexpert/AnyCloudBLEScanner.git

There are git tags in place starting at part 5 so that you can look at just that version of the code.  "git tag" to list the tags.  And "git checkout part6" to look at the part 6 version of the code.

You can also create a new project with this is a template if you have the IoT Expert Manifest Files installed

Fix the Memory Leak

I noticed that a while after I started getting the message “ADV Table Max Size” that things would crash.  But Why?  The answer is a memory leak – go figure. I originally thought when I get a new device I would just overwrite the last entry in the table.  But, when I overwrote the adb_database[adb_db_count]. record with a new scan_result and a new list, I left memory that was previously allocated, here is the code:

    if(entry == -1)
    {
        adb_database[adb_db_count].result = scan_result;
        adb_database[adb_db_count].listCount = 1;
        adb_database[adb_db_count].record = false;
        adb_database[adb_db_count].filter = true;
        adb_database[adb_db_count].numSeen = 1;

        adb_adv_data_t *current = malloc(sizeof(adb_adv_data_t));
        current->next = 0;
        current->data = data;
        current->count = 1;

        adb_database[adb_db_count].list = current;

        adb_db_count = adb_db_count + 1;
        if(adb_db_count == ADB_MAX_SIZE)
        {
            printf("ADV Table Max Size\n");
            adb_db_count = adb_db_count - 1;
        }
        else
        {    
            adb_db_print(ADB_PRINT_METHOD_BYTES,false,adb_db_count-1);
        }
    }

A cheap fix is to just stop making new entries when the database runs out of room.

    // If there is a new entry and you ran out of space
    if(entry == -1 && adb_db_count >= ADB_MAX_SIZE)
    {
        free(scan_result);
        free(data);
        return;
    }

Add Age

As I mentioned earlier I wanted to keep track of

  1. The last time I had seen a device
  2. When I saw that specific advertising packet

The FreeRTOS has a free running millisecond counter that starts a 0 and counts up to 2^32.  A really cheap way to keep track of time is just to use this counter. To do this the first step is add the time to the database.  Both in the device record and the packet record.

typedef struct {
    uint8_t *data;
    int count;
    TickType_t lastSeen;
    struct adb_adv_data_t *next;
} adb_adv_data_t;

typedef struct {
    wiced_bt_ble_scan_results_t *result;
    bool record;
    bool filter;
    int numSeen;
    int listCount;
    TickType_t lastSeen;
    adb_adv_data_t *list;
} adb_adv_t ;

Update the Printing

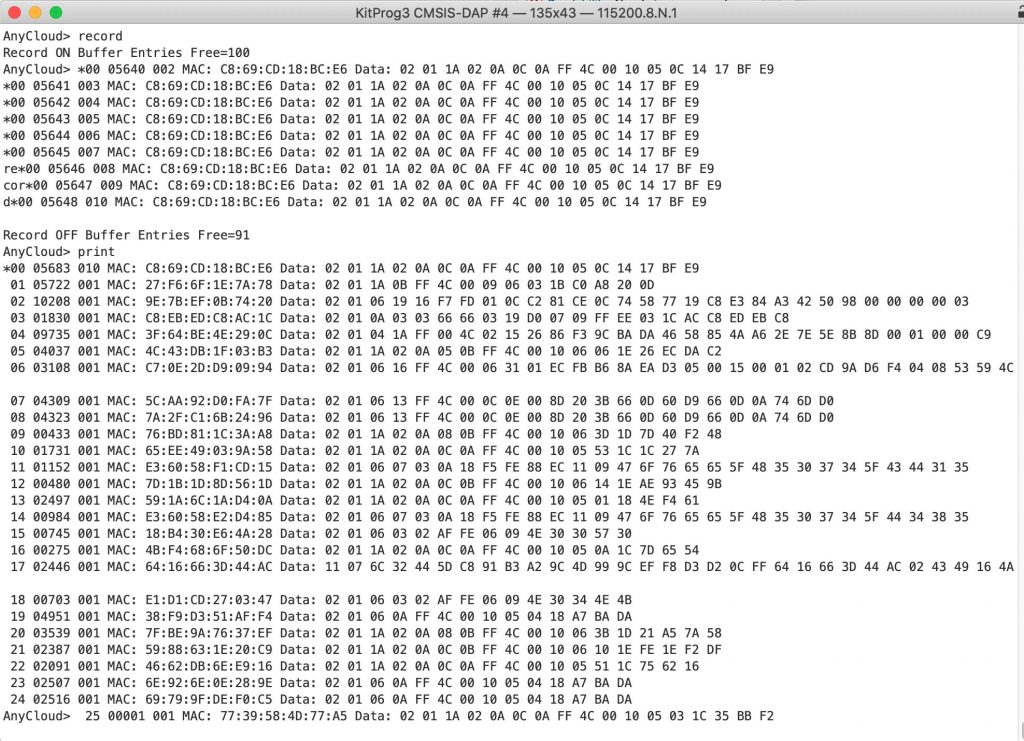
I am going to make the output look like this with a new column representing the seconds since I heard the packet.  In the picture below you can see that I heard 00 at 0.0 seconds ago…  Then you can see that I had a recording of device 5 where I have a bunch of packets that I heard back into time.

To do this I just add a time calculation like this:

static void adb_db_printEntry(adb_print_method_t method, int entry, adb_adv_data_t *adv_data)
{
    float time = ((float)xTaskGetTickCount() - (float)(adv_data->lastSeen))/1000;

    printf("%c%c%02d %05d %03d %6.1f ",adb_database[entry].watch?'W':' ',
    adb_database[entry].filter?'F':' ',
    entry,adb_database[entry].numSeen,adb_database[entry].listCount,
    time);

Fix up the Add

The next thing that I need to do is make the “add” function add the time.  The problem is that this function has gotten totally totally out of control.  It turns out that there are x different possibilities

  1. Ignore the packet (because the table is full)
  2. Add a new device & packet
  3. Update the head of the list with a new packet
  4. Insert a new packet at the head of the list
  5. If you are filtering update a duplicated packet count

The code for these branches all looked somewhat similar.  But, which branch to take depended on

  1. If you were “watching” that device
  2. If you were “filtering” that device
  3. If you were “recording”
  4. If you had seen that packet before (aka it was found)

I ended up making a truth table:

Watch Filter Recording Found Action
0 0 0 0 update the head
0 0 0 1 update the head
0 0 1 0 update the head
0 0 1 1 update the head
0 1 0 0 update the head
0 1 0 1 update the head
0 1 1 0 update the head
0 1 1 1 update the head
1 0 0 0 update the head
1 0 0 1 update the head
1 0 1 0 insert at the head
1 0 1 1 insert at the head
1 1 0 0 update the head
1 1 0 1 update the found
1 1 1 0 insert at the head
1 1 1 1 update the found

The case where you

  1. Had no room
  2. Saw a new device

Look like this:

static void adb_db_add(wiced_bt_ble_scan_results_t *scan_result,uint8_t *data)
{

    TickType_t timeSeen = xTaskGetTickCount();

    int entry = adb_db_find(&scan_result->remote_bd_addr);

    // If there is a new entry and you ran out of space
    if(entry == -1 && adb_db_count >= ADB_MAX_SIZE)
    {
        free(scan_result);
        free(data);
        return;
    }
    
    // If it is NOT found && you have room
    if(entry == -1)
    {
        adb_database[adb_db_count] = malloc(sizeof(adb_adv_t));
        adb_database[adb_db_count]->result = scan_result;
        adb_database[adb_db_count]->listCount = 1;
        adb_database[adb_db_count]->watch = false;
        adb_database[adb_db_count]->filter = true;
        adb_database[adb_db_count]->numSeen = 1;
        adb_database[adb_db_count]->lastSeen = timeSeen;

        adb_adv_data_t *current = malloc(sizeof(adb_adv_data_t));
        current->next = 0;
        current->data = data;
        current->numSeen = 1;
        current->lastSeen = timeSeen;

        adb_database[adb_db_count]->list = current;

        adb_db_count = adb_db_count + 1;    
        adb_db_print(ADB_PRINT_METHOD_BYTES,false,adb_db_count-1);

        return; 
    }

At this point in the code you know that you have seen this device before.  If you are filtering you should look in the linked list to see if you can find the specific packet (lines 1-15).

If you look at the truth table above you will see three cases where you should insert at the head of this list.  Those cases are identified with the sprawling if on lines 17-21).  Once you identify that scenario you do the needful.

    adb_adv_data_t *updateItem=0; 

    if(adb_database[entry].filter) // if filtering is on.
    {
        int len = btutil_adv_len(data); // ARH maybe a bug here
        
        for(adb_adv_data_t *list = adb_database[entry].list;list;list = (adb_adv_data_t *)list->next)
        {
            if(memcmp(list->data,data,len) == 0) // Found the data
            {
                updateItem = list;
                break;
            }
        }
    }

    // insert at the head
    if( (adb_database[entry].watch && !adb_database[entry].filter && adb_recording && !updateItem) ||
        (adb_database[entry].watch && !adb_database[entry].filter && adb_recording && updateItem) ||
        (adb_database[entry].watch && adb_database[entry].filter && adb_recording && !updateItem)
    )
    {
        adb_adv_data_t *updateItem = malloc(sizeof(adb_adv_data_t)); // make new data
        updateItem->next = (struct adb_adv_data_t *)adb_database[entry].list;
        updateItem->numSeen = 1;
        updateItem->data = data;
        updateItem->lastSeen = timeSeen;

        adb_database[entry].list = updateItem;
        adb_database[entry].numSeen += 1;
        adb_database[entry].lastSeen = timeSeen;
        adb_database[entry].listCount += 1;
        free(scan_result);
        
        adb_db_print(ADB_PRINT_METHOD_BYTES,false,entry);


        adb_recording_count += 1;
        if(adb_recording_count == ADB_RECORD_MAX)
        {
            adb_recording = false;
            printf("Recording buffer full\n");
        }
        return;
    }

The final case happens when you are just going to update a found packet.

    if(updateItem == 0)
        updateItem = adb_database[entry].list;


    adb_database[entry].numSeen += 1;
    adb_database[entry].lastSeen = timeSeen;

    updateItem->lastSeen = timeSeen;

    int len = btutil_adv_len(data); // ARH maybe a bug here
    if(memcmp(updateItem->data,data,len) == 0)
    {
        updateItem->numSeen += 1;
    }
    else
    {
        updateItem->numSeen = 1;   
    }

    free(updateItem->data);
    updateItem->data = data;
    free(scan_result);

}

In the next article I will add

  1. Sort
  2. Purge

Then I will call it  a day.

AnyCloud Bluetooth Advertising Scanner (Part 8)

Summary

In this series of articles I am building a Bluetooth Low Energy Scanner using the Cypress/Infineon AnyCloud SDK running on a PSoC 6 and CYW43xxx.  In Part 8 I will turn on the ability to filter duplicate advertising packets.

Story

In the previous article I added the ability to record advertising packets.  The problem is, of course, that many devices are blasting out advertising packets, which will quickly overwhelm you.  I suppose more importantly it will overwhelm the packet buffer.  Most of the device are just advertising their presence, so they send the same data over and over.  Some devices alternate between a small number of different advertising packets, e.g. an iBeacon then and Eddystone beacon.

The way that the filter will work is that I will update the “add” function to search through all of the packets that device has launched, then if I have seen the packet before (Ill use a memcmp) then I will just keep a count of how many times I have see that packet.

The other thing that needs to happen is for me to add a “filter” command so that I can turn on packet filtering on a device by device basis.

And I need to fix the printing to use the new filtered packet database.

There are

Article Topic
AnyCloud Bluetooth Advertising Scanner (Part 1) Introduction to AnyCloud Bluetooth Advertising
AnyCloud Bluetooth Advertising Scanner (Part 2) Creating an AnyCloud Bluetooth project
AnyCloud Bluetooth Advertising Scanner (Part 3) Adding Observing functionality to the project
AnyCloud Bluetooth Utilities Library A set of APIs for enhancement of the AnyCloud Library
AnyCloud Bluetooth Advertising Scanner (Part 4) Adding a command line to the scanner
AnyCloud Bluetooth Advertising Scanner (Part 5) Adding a history database to the scanner
AnyCloud Bluetooth Advertising Scanner (Part 6) Decoding advertising packets
AnyCloud Bluetooth Advertising Scanner (Part 7) Adding recording commands to the command line
AnyCloud Bluetooth Advertising Scanner (Part 8) Adding filtering to the scanner
AnyCloud Bluetooth Advertising Scanner (Part 9) Improve the print and add packet age
AnyCloud Bluetooth Advertising Scanner (Part 10) Sort the database

All of the code can be found at git@github.com:iotexpert/AnyCloudBLEScanner.git and https://github.com/iotexpert/AnyCloudBLEScanner.git

There are git tags in place starting at part 5 so that you can look at just that version of the code.  "git tag" to list the tags.  And "git checkout part6" to look at the part 6 version of the code.

You can also create a new project with this is a template if you have the IoT Expert Manifest Files installed

Update the Data Structures

In order to do the filters, and keep track of the data I will add

  1. A “count” field to the packet data structure
  2. A “filter” boolean field to the device data structure.
typedef struct {
    uint8_t *data;
    int count;
    struct adb_adv_data_t *next;
} adb_adv_data_t;

typedef struct {
    wiced_bt_ble_scan_results_t *result;
    bool record;
    bool filter;
    int numSeen;
    int listCount;
    adb_adv_data_t *list;
} adb_adv_t ;

Update the Add Function

In the function “static void adb_db_add(wiced_bt_ble_scan_results_t *scan_result,uint8_t *data)” which is called every time I see a new advertising packet I will need to handle four different cases:

  1. The first time you see a device
  2. A device you have seen AND you are recording AND have the filtering turned on
  3. A device you are recording but not filtering
  4. A device you have seen, but are not recording or filter.

In the first case, a device you haven’t seen before, you need to

  1. Automatically turn on the filtering
  2. Initialize the counts to 1
  3. Do the other initialization (as before)
    // If it is NOT found
    if(entry == -1)
    {
        adb_database[adb_db_count].result = scan_result;
        adb_database[adb_db_count].listCount = 1;
        adb_database[adb_db_count].record = false;
        adb_database[adb_db_count].filter = true;
        adb_database[adb_db_count].numSeen = 1;

        adb_adv_data_t *current = malloc(sizeof(adb_adv_data_t));
        current->next = 0;
        current->data = data;
        current->count = 1;

In the case where you have

  1. See the device before
  2. You have room in the record buffer
  3. And you are in record mode

You will then decide if you are filtering.

Then you will iterate through all of the packets and compare the data to the data you just received.  If there is a match then you update the count, free the duplicate data and return.

    else if(adb_database[entry].record && adb_recording_count<ADB_RECORD_MAX && adb_recording)
    {
        adb_database[entry].numSeen += 1;

        if(adb_database[entry].filter) // if filtering is on.
        {
            int len = btutil_adv_len(data); 
            for(adb_adv_data_t *list = adb_database[entry].list;list;list = (adb_adv_data_t *)list->next)
            {
                if(memcmp(list->data,data,len) == 0) // Found the data
                {
                    list->count += 1;
                    printf("Count = %d\n",list->count);
                    free(data);
                    free(scan_result);
                    return;
                }
            }
        }

If you have not see the data before, then you need to add it to the linked list.

        adb_adv_data_t *current = malloc(sizeof(adb_adv_data_t));
        current->next = (struct adb_adv_data_t *)adb_database[entry].list;
        current->data = data;
        current->count = 1;

If you are not recording and not filtering, just increment counts.

    else
    {
        adb_database[entry].numSeen += 1;
        adb_database[entry].list->count += 1;

Add a “filter” Command

I want the ability for a user to “filter all” or “filter clear” or “filter #” – just like we did with watch.  So, add the #defines and new function to advDatabase.h

#define ADB_FILTER_ALL -1
#define ADB_FILTER_CLEAR -2
void adb_filter(int entry);

Then add the new filter command in advDatabase.c

typedef enum {
    ADB_ADD,
    ADB_PRINT_RAW,
    ADB_PRINT_DECODE,
    ADB_WATCH,
    ADB_ERASE,
    ADB_RECORD,
    ADB_FILTER,
} adb_cmd_t;

I will use the adb_queueCmd function that I created in the last article.

inline void adb_filter(int entry) { adb_queueCmd(ADB_FILTER,(void*)entry,(void *)0); }

The filter command has three cases

  1. All – turn the bool for all on
  2. Clear – turn the bool for all off
  3. Just a specific number – toggle that specific number
static void adb_db_filter(int entry)
{
    if(entry == ADB_FILTER_ALL)
    {
        for(int i=0;i<adb_db_count;i++)
        {
            adb_database[i].filter = true;
        }
        return;
    }

    if(entry == ADB_FILTER_CLEAR)
    {
        for(int i=0;i<adb_db_count;i++)
        {
            adb_database[i].filter = false;
        }
        return;
    }

    if(entry > adb_db_count-1 || entry < ADB_WATCH_CLEAR)
    {
        printf("Record doesnt exist: %d\n",entry);
        return;      
    }
    adb_database[entry].filter = !adb_database[entry].filter; 

}

And you need to fix up the main command processor

                case ADB_FILTER:
                    adb_db_filter((int)msg.data0);
                break;

Finally add the command to the usrcmd.c

static int usrcmd_filter(int argc, char **argv)
{

    if(argc == 2 && !strcmp(argv[1],"all"))
    {
        adb_filter(ADB_FILTER_ALL); // all
        return 0;
    }


    if(argc == 2 && !strcmp(argv[1],"clear"))
    {
        adb_filter(ADB_FILTER_CLEAR);
        return 0;
    }

    if(argc == 2)
    {
        int i;
        sscanf(argv[1],"%d",&i);
        adb_filter(i);
        return 0;
    }

    return 0;
}

Fix the Printing

Now we nee to fix the printing.  I want to add an indicate of the filtering to the output.  Remember from the previous article I indicated “Watch” with a “*”.  When I looked at it, I decided that I should indicate filter with an “F” and watch with a “W”.  So I fix that.

        printf("%c%c%02d %05d %03d MAC: ",adb_database[i].record?'W':' ',
            adb_database[i].filter?'F':' ',
            i,adb_database[i].numSeen,adb_database[i].listCount);
        btutil_printBDaddress(adb_database[i].result->remote_bd_addr);
        switch(method)
        {

Then I test the “filter” command

Fix the Printing Part (2)

As I noodled on how to change the printing I decide that it would be nice to sometimes print out only one packet e.g. no history and sometimes print them all out e.g. history.  So, I add a new parameter to the function called “history”

static void adb_db_print(adb_print_method_t method,bool history,int entry)

As I looked at the printing code, I decided that it would be better to have a new function to print only one entry.  I suppose that I could have left the code inline, but I thought that intent was clearer.

static void adb_db_printEntry(adb_print_method_t method, int entry, adb_adv_data_t *adv_data)
{
    printf("%c%c%02d %05d %03d MAC: ",adb_database[entry].record?'W':' ',
    adb_database[entry].filter?'F':' ',
    entry,adb_database[entry].numSeen,adb_database[entry].listCount);
    btutil_printBDaddress(adb_database[entry].result->remote_bd_addr);

    switch(method)
    {
    
    case ADB_PRINT_METHOD_BYTES:
        printf(" Data: ");
        btutil_adv_printPacketBytes(adv_data->data);
    break;

    case ADB_PRINT_METHOD_DECODE:
        printf("\n");
        btutil_adv_printPacketDecode(adv_data->data);
    break;
    } 
    printf("\n");

}

With the new function in place I now need to update the print function to call the new entry function.  Printing the history is just a matter of iterating through the linked list.

static void adb_db_print(adb_print_method_t method,bool history,int entry)
{
    int start,end;
 
    if(entry < 0)
    {
        start = 0;
        end = adb_db_count;
    }
    else
    {
        start = entry;
        end = entry+1;
    }

    if(end>adb_db_count)
        end = adb_db_count; 

    for(int i=start;i<end;i++)
    {
        if(history) // then iterate through the linked list print all of the packets
        {
            for(adb_adv_data_t *list = adb_database[i].list;list;list = (adb_adv_data_t *)list->next)
            {
                adb_db_printEntry(method,i,list);    
            }
        }
        else // Just print the first packet in the list
            adb_db_printEntry(method,i,adb_database[i].list);
    }
}

Now, I need to update all of the calls to adb_db_print to have the new history parameter.  First, I made the decision that when you “print” from the command line that you are interested in the history.

                case ADB_PRINT_RAW:
                    adb_db_print(ADB_PRINT_METHOD_BYTES,true,(int)msg.data0);
                break;
                case ADB_PRINT_DECODE:
                    adb_db_print(ADB_PRINT_METHOD_DECODE,true,(int)msg.data0);
                break;

But when you are printing out the packet for a new device don’t print out the history

            adb_db_print(ADB_PRINT_METHOD_BYTES,false,adb_db_count-1);

Program and Test

After I program my development kit, I start by typing “watch all”.  Very quickly, at my house, you can see that a bunch of devices are discovered.  You can see that all of these have a “W” (meaning that I am watching them) and an “F” meaning they are filtering out duplicates.  Then I type “record” to turn on recording. After a minute I turn off recording then do the print you can see below.

A couple of things to notice.

  1. Device #4 (which I highlighted) appears to be sending out a pattern of alternating packets.  See that I have heard 3335 packets yet there are only two in the buffer
  2. You can see device 11 seems to be sending out 16 different packets.  Why?  I don’t know.

But we can “decode 11” to try to figure it out.  You can see that it is advertising manufactures specific data with Apple’s UUID which I happen to know is 0x004C.  But why?  I don’t know.

I really want to move onto a new series of articles… but there are two functions which I will add to the program.  Stay tuned for what they do.

AnyCloud Bluetooth Advertising Scanner (Part 7)

Summary

In this series of articles I am building a Bluetooth Low Energy Scanner using the Cypress/Infineon AnyCloud SDK running on a PSoC 6 and CYW43xxx.  In Part 7 I will add the ability to record BLE ADV packets.

Story

If you have been reading along, at this point we have built a BLE scanner that can see Bluetooth devices that are advertising.  My scanner has a command line and you can print out the most recent data.  Even better, we built a decoder that allows you to better understand the data.

Now I want to add the ability to record more than one advertising packet per device.  To that end I will add three commands:

  • watch – Mark a device as one that needs to have the advertising data recorded.  You can type “watch 12” or you can say “watch all” or you can say “watch clear”
  • record – Turn on recording of “watched” devices.  When you type record it will toggle the recording state between On and Off.
  • erase – clear the record buffer of all but the most recent packet.

There are

Article Topic
AnyCloud Bluetooth Advertising Scanner (Part 1) Introduction to AnyCloud Bluetooth Advertising
AnyCloud Bluetooth Advertising Scanner (Part 2) Creating an AnyCloud Bluetooth project
AnyCloud Bluetooth Advertising Scanner (Part 3) Adding Observing functionality to the project
AnyCloud Bluetooth Utilities Library A set of APIs for enhancement of the AnyCloud Library
AnyCloud Bluetooth Advertising Scanner (Part 4) Adding a command line to the scanner
AnyCloud Bluetooth Advertising Scanner (Part 5) Adding a history database to the scanner
AnyCloud Bluetooth Advertising Scanner (Part 6) Decoding advertising packets
AnyCloud Bluetooth Advertising Scanner (Part 7) Adding recording commands to the command line
AnyCloud Bluetooth Advertising Scanner (Part 8) Adding filtering to the scanner
AnyCloud Bluetooth Advertising Scanner (Part 9) Improve the print and add packet age
AnyCloud Bluetooth Advertising Scanner (Part 10) Sort the database

All of the code can be found at git@github.com:iotexpert/AnyCloudBLEScanner.git and https://github.com/iotexpert/AnyCloudBLEScanner.git

There are git tags in place starting at part 5 so that you can look at just that version of the code.  "git tag" to list the tags.  And "git checkout part6" to look at the part 6 version of the code.

You can also create a new project with this is a template if you have the IoT Expert Manifest Files installed

Update the advDatabase Interface

The first thing I realized as I went to add a new command was that I was typing the exact same code over and over for the public interface.  The code looked like this:

void adb_watch(int entry)
{
    adb_cmdMsg_t msg;
    msg.cmd = ADB_WATCH;
    msg.data0 = (void *)entry;
    xQueueSend(adb_cmdQueue,&msg,0); // If the queue is full... oh well

}

So I created this:

static void adb_queueCmd(adb_cmd_t cmd,void *data0, void *data1)
{
    adb_cmdMsg_t msg;
    msg.cmd = cmd;
    msg.data0 = data0;
    msg.data1 = data1;
    xQueueSend(adb_cmdQueue,&msg,0); // If you loose an adv packet it is OK...
}

Then did this to eliminate the duplication.

inline void adb_addAdv(wiced_bt_ble_scan_results_t *scan_result,void *data) { adb_queueCmd(ADB_ADD,(void *)scan_result,(void *)data);}
inline void adb_print(int entry) { adb_queueCmd(ADB_PRINT_RAW,(void *)entry,(void *)0); }
inline void adb_decode(int entry) { adb_queueCmd(ADB_PRINT_DECODE,(void*)entry,(void *)0); }

Redo the Database

If you recall from previous posts, my advertising database was just

  1. An Array of structures
  2. Each structure contained the mac address and…
  3. A pointer to a malloc’d copy of the advertising data
typedef struct {
    wiced_bt_ble_scan_results_t *result;
    uint8_t *data;
} adb_adv_t ;

#define ADB_MAX_SIZE (40)
adb_adv_t adb_database[ADB_MAX_SIZE];

Here is a picture of the datastructure


Now what I want to do is make the “data” pointer to be a pointer to a linked list of data.  Here is the new definition.

typedef struct {
    uint8_t *data;
    struct adb_adv_data_t *next;
} adb_adv_data_t;

typedef struct {
    wiced_bt_ble_scan_results_t *result;
    int listCount;
    bool record;
    int numSeen;
    adb_adv_data_t *list;
} adb_adv_t ;

The new data structure looks like this

I wanted to limit the number advertising packets that can be stored so I don’t run out of memory.  I am not actually sure how many can be stored, but I suppose a bunch as the chip has 1MB of RAM.  But, I pick 100 which seems like enough to start out with.  I create two variables

  1. A counter for the number of advertising packets that are currently saved
  2. A recording state (are you saving or not)
#define ADB_RECORD_MAX (100)
static int adb_recording_count = 0;
static bool adb_recording = false;

Update the Printing

You probably noticed that I declared two new members of the adb_adv_t structure, specifically numSeen and listCount, which I would like to print out.   I also wanted a visual indication that I am “watching” a device.  The columns are now:

  1. A “*” to indicate that a device is being watched
  2. The device #
  3. The number of packets that I have seen in total from that device
  4. The number of recorded packets for that device
  5. The MAC address
  6. The raw bytes

To do implement this a simple change is made to the print function:

    for(int i=start;i<end;i++)
    {
    
        printf("%s%02d %05d %03d MAC: ",adb_database[i].record?"*":" ",i,adb_database[i].numSeen,adb_database[i].listCount);
        btutil_printBDaddress(adb_database[i].result->remote_bd_addr);
        switch(method)
        {
        
        case ADB_PRINT_METHOD_BYTES:
            printf(" Data: ");
            btutil_adv_printPacketBytes(adb_database[i].list->data);
        break;

        case ADB_PRINT_METHOD_DECODE:
            printf("\n");
            btutil_adv_printPacketDecode(adb_database[i].list->data);
        break;
        } 
        printf("\n");
    }

Update the Add

Now that we have all of the infrastructure in place we need to update the function that saves advertising data.  When an advertising packet comes in you have three situations to consider:

  1. You have never seen the device before
  2. You have seen the device before and you are “watching” it
  3. You have see the device but you are not watching it

In the case where you have never seen the device you need to

  1. Save the scan result
  2. Set the listCount to 1 (you only have one datapoint)
  3. Turn off recording (start with the recording off)
  4. Set the total numSeen to 1 as this is the first packet you have seen
  5. Allocate some memory for the advertising linked list structure
  6. Terminate the linked list
  7. Save the advertising data
  8. Increment the database count (up to the max)
  9. Print out the packet you just saw
    if(entry == -1)
    {
        adb_database[adb_db_count].result = scan_result;
        adb_database[adb_db_count].listCount = 1;
        adb_database[adb_db_count].record = false;
        adb_database[adb_db_count].numSeen = 1;

        adb_adv_data_t *current = malloc(sizeof(adb_adv_data_t));
        current->next = 0;
        current->data = data;

        adb_database[adb_db_count].list = current;

        adb_db_count = adb_db_count + 1;
        if(adb_db_count == ADB_MAX_SIZE)
        {
            printf("ADV Table Max Size\n");
            adb_db_count = adb_db_count - 1;
        }
        else
        {    
            adb_db_print(ADB_PRINT_METHOD_BYTES,adb_db_count-1);
        }
    }

In the case where you have

  1. Seen the device before
  2. You are recording that device
  3. There is room left in the recording buffer

Then you will

  1. Increment number seen
  2. Create memory for the new entry in the linked list
  3. Attach the tail of the linked list to your new entry (you will insert at the front of the list)
  4. Save the data
  5. Increment the number of saved entries
  6. Insert your new packet at the head of the list
  7. Printout the packet
  8. Increment the record count (the total number of packets in the recording buffer)
  9. Then potentially stop recording if you have gotten to the max size.
    else if(adb_database[entry].record && adb_recording_count<ADB_RECORD_MAX && adb_recording)
    {
        adb_database[entry].numSeen += 1;

        adb_adv_data_t *current = malloc(sizeof(adb_adv_data_t));
        current->next = (struct adb_adv_data_t *)adb_database[entry].list;
        current->data = data;
        adb_database[entry].listCount += 1;
        adb_database[entry].list = current;

        adb_db_print(ADB_PRINT_METHOD_BYTES,entry);

        adb_recording_count += 1;
        if(adb_recording_count == ADB_RECORD_MAX)
        {
            adb_recording = false;
            printf("Recording buffer full\n");
        }
    }

In the case where you have seen the device before, but you are not recoding then you will

  1. Update the numSeen
  2. Erase the old packet data
  3. Save the new packet
  4. Erase the “result” (you already have it saved)
    else
    {
        adb_database[entry].numSeen += 1;
        free(adb_database[entry].list->data);
        adb_database[entry].list->data = data;
        free(scan_result);
    }

Add a Watch Command

The watch function is pretty simple.  It just needs to either mark the “record” boolean as true or false.  When I decided to implement this function I decided to make positive numbers be the entry in the table.  But, I also wanted to be able to “watch all” and “watch clear”.  So, I used negative numbers for those two special meanings.  I used a #define in advDatabase.h to define those values.

#define ADB_WATCH_ALL -1
#define ADB_WATCH_CLEAR -2

The function is then pretty simple

  1. If it is watch all… then iterate through the database and turn them on
  2. If it is watch clear … then iterate through the database and turn them off
  3. Otherwise make sure that it is a legal number and toggle it.
static void adb_db_watch(int entry)
{
    if(entry == ADB_WATCH_ALL)
    {
        for(int i=0;i<adb_db_count;i++)
        {
            adb_database[i].record = true;
        }
        return;
    }

    if(entry == ADB_WATCH_CLEAR)
    {
        for(int i=0;i<adb_db_count;i++)
        {
            adb_database[i].record = false;
        }
        return;
    }

    if(entry > adb_db_count-1 || entry < ADB_WATCH_CLEAR)
    {
        printf("Record doesnt exist: %d\n",entry);
        return;      
    }
    adb_database[entry].record = !adb_database[entry].record; 

}

Once I have the infrastructure in place, I then add the watch command to usrcmd.c

static int usrcmd_watch(int argc, char **argv)
{

    if(argc == 2 && !strcmp(argv[1],"all"))
    {
        adb_watch(ADB_WATCH_ALL); // all
        return 0;
    }


    if(argc == 2 && !strcmp(argv[1],"clear"))
    {
        adb_watch(ADB_WATCH_CLEAR);
        return 0;
    }

    if(argc == 2)
    {
        int i;
        sscanf(argv[1],"%d",&i);
        adb_watch(i);
        return 0;
    }

    return 0;
}

Add a Record Command

The record command simply turns on the global bool to either true or false and prints out the number of spaces free in the record “buffer”

                case ADB_RECORD:
                    adb_recording = !adb_recording;
                    printf("Record %s Buffer Entries Free=%d\n",adb_recording?"ON":"OFF",
                        ADB_RECORD_MAX-adb_recording_count);
                break;

And the change to usrcmd.c is also simple.

// record = toggles
static int usrcmd_record(int argc, char **argv)
{
    if(argc == 1)
    {
        adb_record(-1);
        return 0;
    }
    return 0;
}

Add an Erase Command

The erase function is like “watch”, as I overload the “entry” to have an ALL which is setup in advDatabase.h

#define ADB_ERASE_ALL -1

The erase is a bit more complicated than the watch.  When you receive a erase command you will either erase them all by iterating over the whole dates, or just erase one.

                case ADB_ERASE:
                    if((int)msg.data0 == ADB_ERASE_ALL)
                    {
                        for(int i=0;i<adb_db_count;i++)
                        {
                            adb_eraseEntry(i);
                        }
                    }
                    else
                        adb_eraseEntry((int)msg.data0);

                    printf("Record Buffer Free %d\n",ADB_RECORD_MAX-adb_recording_count);
                break;

The individual eraseEntry function checks to make sure that you have a legal “entry”.  Then it follows the linked list “freeing” the data structures.

static void adb_eraseEntry(int entry)
{
    if(entry > adb_db_count-1 || entry<0)
    {
        printf("Erase Entry Not Found %d\n",entry);
        return;
    }

    adb_adv_data_t *ptr;
    ptr = (adb_adv_data_t *)adb_database[entry].list->next;
    adb_database[entry].list->next = 0;
    while(ptr)
    {
        adb_adv_data_t *next;
        next = (adb_adv_data_t *)ptr->next;
        free(ptr->data);
        free(ptr);
        adb_database[entry].listCount -= 1;
        adb_recording_count -= 1;
        ptr = next;
    }
}

And, of course, you need to add the command to usrcmd.c

// erase
// erase #
static int usrcmd_erase(int argc, char **argv)
{
    if(argc > 2)
    {
        return 0;
    }

    if(argc == 1)
    {
        adb_erase(ADB_ERASE_ALL);
        return 0;
    }

    int i;
    sscanf(argv[1],"%d",&i);
    adb_erase(i);
    return 0;    

}

Now when you build and program the kit you can turn on/off recording and erase and….

In the next post I will add

  1. Smarter printing
  2. A “filter” to eliminate duplicate advertising packets

AnyCloud Bluetooth Advertising Scanner (Part 6)

Summary

In part 6 of this series I will update the AnyCloud BLE Advertising Scanner to decode advertising packets into a more human readable textual output

Story

We are now 6 (or maybe 7 depending on how you count) articles into this series and we are still looking at raw bytes.  I have gotten to where I am pretty good at understanding those bytes, but that is now way to roll.  You might remember from the article on the IoT Expert Bluetooth Utility library that there were a some interesting functions defined in the header.  Here it is:

wiced_bool_t btutil_isEddystone(uint8_t *data);
wiced_bool_t btutil_is_iBeacon(uint8_t *data);
wiced_bool_t btutil_isCypress(uint8_t *data);

int btutil_adv_len(uint8_t *packet);
void btutil_adv_printPacketDecode(uint8_t *packet);
void btutil_adv_printPacketBytes(uint8_t *packet);

Lets transform our  project from part 6 to use these functions.  In this article I will

  • Redo the print bytes (to be smarter) functionality and to use the built in function
  • Rework the logic for the “print” command implementation
  • Add a new command “decode” which will run the decode function

There are

Article Topic
AnyCloud Bluetooth Advertising Scanner (Part 1) Introduction to AnyCloud Bluetooth Advertising
AnyCloud Bluetooth Advertising Scanner (Part 2) Creating an AnyCloud Bluetooth project
AnyCloud Bluetooth Advertising Scanner (Part 3) Adding Observing functionality to the project
AnyCloud Bluetooth Utilities Library A set of APIs for enhancement of the AnyCloud Library
AnyCloud Bluetooth Advertising Scanner (Part 4) Adding a command line to the scanner
AnyCloud Bluetooth Advertising Scanner (Part 5) Adding a history database to the scanner
AnyCloud Bluetooth Advertising Scanner (Part 6) Decoding advertising packets
AnyCloud Bluetooth Advertising Scanner (Part 7) Adding recording commands to the command line
AnyCloud Bluetooth Advertising Scanner (Part 8) Adding filtering to the scanner
AnyCloud Bluetooth Advertising Scanner (Part 9) Improve the print and add packet age
AnyCloud Bluetooth Advertising Scanner (Part 10) Sort the database

All of the code can be found at git@github.com:iotexpert/AnyCloudBLEScanner.git and https://github.com/iotexpert/AnyCloudBLEScanner.git

There are git tags in place starting at part 5 so that you can look at just that version of the code.  "git tag" to list the tags.  And "git checkout part6" to look at the part 6 version of the code.

You can also create a new project with this is a template if you have the IoT Expert Manifest Files installed

Replace two code blocks with function calls

Do you remember this block of code?  It print’s out the 6-bytes of the Bluetooth Address.

    for(int i=0;i<BD_ADDR_LEN;i++)
    {
        printf("%02X:",adb_database[entry].result->remote_bd_addr[i]);
    }

You might have noticed that this function already exists in the BT Utility Library.  Use it.

    btutil_printBDaddress(adb_database[entry].result->remote_bd_addr);

Then you remember this block of code which iterates through and advertising packet and prints out the raw bytes?

// Print the RAW Data of the ADV Packet
    printf(" Data: ");
    int i=0;
    while(adb_database[entry].data[i])
    {
        for(int j=0;j<adb_database[entry].data[i];j++)
        {
            printf("%02X ",adb_database[entry].data[i+1+j]);
        }
        i = i + adb_database[entry].data[i]+1;
    }

Well, it exists in the library as well.  Use it.

btutil_adv_printPacketBytes(adb_database[entry].data);

Fix the “print” Command

In the previous implementation I had two functions for “print”.  The first one printed one entry and the second one printed the whole table.  I decided that I didnt really like this logic, so I compressed those two functions into one function.  Specifically, it take a number “entry”.  If that number is -1 then it will print the whole table.

static void adb_db_printRawPacket(int entry)
{
    int start,end;
 
    if(entry <= -1)
    {
        start = 0;
        end = adb_db_count;
    }
    else
    {
        start = entry;
        end = entry;
    }

    if(end>adb_db_count)
        end = adb_db_count; 

    for(int i=start;i<=end;i++)
    {
    
        printf("%02d MAC: ",i);
        btutil_printBDaddress(adb_database[i].result->remote_bd_addr);
        printf(" Data: ");
        btutil_adv_printPacketBytes(adb_database[i].data);

        printf("\n");
    }
}

Add a new “decode” Command

The next thing to do is to add a function to print out decoded packets (or the whole table).  So I wrote this:

static void adb_printDecodePacket(int entry)
{
    int start,end;
 
    if(entry == -1)
    {
        start = 0;
        end = adb_db_count;
    }
    else
    {
        start = entry;
        end = entry;
    }

    if(end>adb_db_count)
        end = adb_db_count; 

    for(int i=start;i<=end;i++)
    {

        printf("%02d MAC: ",i);
        btutil_printBDaddress(adb_database[i].result->remote_bd_addr);
        printf("\n");
        btutil_adv_printPacketDecode(adb_database[i].data);
        printf("\n");
    }
}

After finishing that block of code, I realized I had implemented almost exactly the same functionality which two different functions.  So, I decided to redo this by doing this.  Notice that it take in a adb_print_method, in other words raw bytes or decoded packet.

typedef enum {
    ADB_PRINT_METHOD_BYTES,
    ADB_PRINT_METHOD_DECODE,
} adb_print_method_t;

static void adb_db_print(adb_print_method_t method,int entry)
{
    int start,end;
 
    if(entry < 0)
    {
        start = 0;
        end = adb_db_count;
    }
    else
    {
        start = entry;
        end = entry;
    }

    if(end>adb_db_count)
        end = adb_db_count; 

    for(int i=start;i<=end;i++)
    {
    
        printf("%02d MAC: ",i);
        btutil_printBDaddress(adb_database[i].result->remote_bd_addr);
        switch(method)
        {
        
        case ADB_PRINT_METHOD_BYTES:
            printf(" Data: ");
            btutil_adv_printPacketBytes(adb_database[i].data);
        break;

        case ADB_PRINT_METHOD_DECODE:
            printf("\n");
            btutil_adv_printPacketDecode(adb_database[i].data);
        break;
        } 
        printf("\n");
    }
}

I don’t show it here, but after changing this I had to fix up the function calls in several places in the advDatabase.

Add a new command to print decode packets

Now that I have a new method to print packets, I add a command to the database to allow the user to call it:

typedef enum {
    ADB_ADD,
    ADB_PRINT_RAW,
    ADB_PRINT_DECODE,
} adb_cmd_t;

Then in the queue loop:

switch(msg.cmd)
            {
                case ADB_ADD:
                    scan_result = (wiced_bt_ble_scan_results_t *)msg.data0;
                    data = (uint8_t *)msg.data1;
                    adb_db_add(scan_result,data);
                break;
                case ADB_PRINT_RAW:
                    adb_db_print(ADB_PRINT_METHOD_BYTES,(int)msg.data0);
                break;
                case ADB_PRINT_DECODE:
                    adb_db_print(ADB_PRINT_METHOD_DECODE,(int)msg.data0);
                break;
            }

Then the actual function

void adb_printDecode(int entry)
{
    adb_cmdMsg_t msg;
    msg.cmd = ADB_PRINT_DECODE;
    msg.data0 = (void *)entry;
    xQueueSend(adb_cmdQueue,&msg,0); // If the queue is full... oh well
}

Then add it to advDatabase.h

void adb_printDecode(int entry);

Finally to the usercmd.c

static int usrcmd_printDecode(int argc, char **argv)
{
    if(argc == 1)
    {
        adb_printDecode(-1);
    }

    if(argc == 2)
    {
        int val;
        sscanf(argv[1],"%d",&val);
        adb_printDecode(val);
    }
    return 0;
}

Program and Test

When I actually program the scanner you can see that I can print out 1 item.  OR I can decode one item.  Notice that one contains 3 fields

  • flags
  • Tx Power Level
  • Manufacturers data.  Apparently an Apple something or the other

And I can print the whole table

Or decode the whole table.


AnyCloud Bluetooth Advertising Scanner (Part 5)

Summary

In this article I will add a new task to the AnyCloud BLE Advertising Scanning application which will save the advertising data into a database.

Story

There is still a boatload of mostly unintelligible advertising data coming ripping onto our screen.  It is FINALLY time to start fixing that.  In this article I will create a new task called the advertising database task which will hold the history of advertising packets that I have seen.  I will update the Bluetooth Manager task to submit the advertising packets to a queue running in the advertising database task.
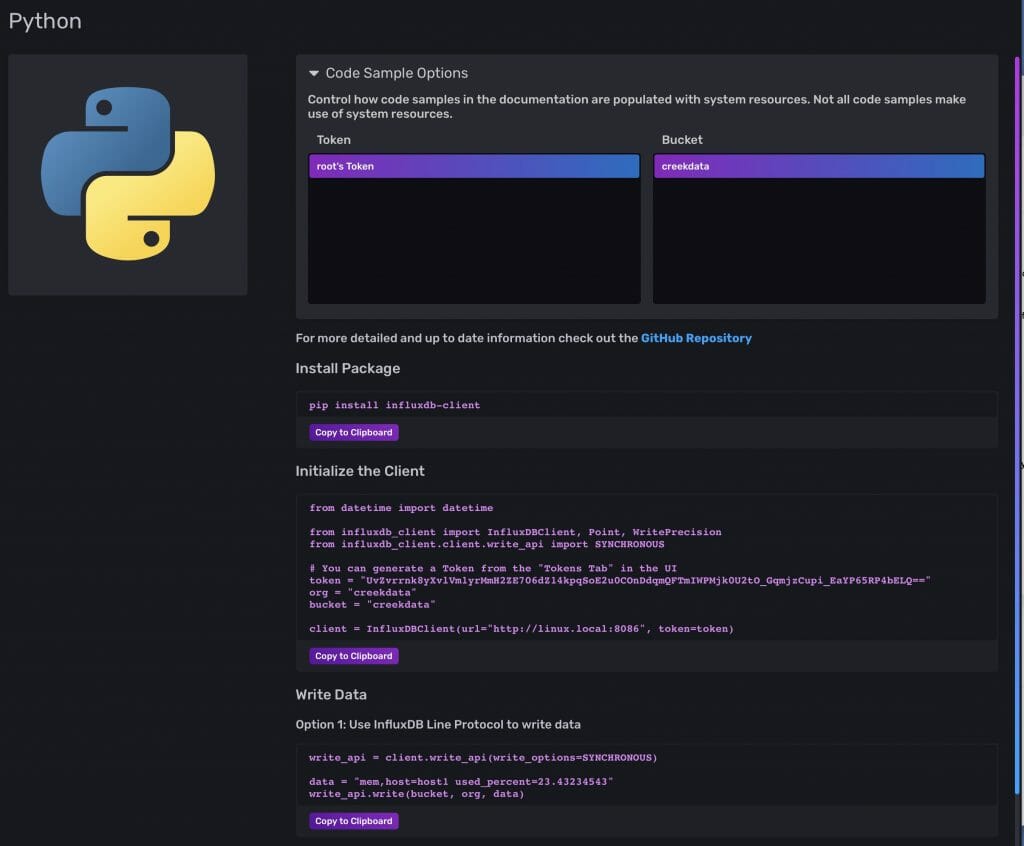
There are

Article Topic
AnyCloud Bluetooth Advertising Scanner (Part 1) Introduction to AnyCloud Bluetooth Advertising
AnyCloud Bluetooth Advertising Scanner (Part 2) Creating an AnyCloud Bluetooth project
AnyCloud Bluetooth Advertising Scanner (Part 3) Adding Observing functionality to the project
AnyCloud Bluetooth Utilities Library A set of APIs for enhancement of the AnyCloud Library
AnyCloud Bluetooth Advertising Scanner (Part 4) Adding a command line to the scanner
AnyCloud Bluetooth Advertising Scanner (Part 5) Adding a history database to the scanner
AnyCloud Bluetooth Advertising Scanner (Part 6) Decoding advertising packets
AnyCloud Bluetooth Advertising Scanner (Part 7) Adding recording commands to the command line
AnyCloud Bluetooth Advertising Scanner (Part 8) Adding filtering to the scanner
AnyCloud Bluetooth Advertising Scanner (Part 9) Improve the print and add packet age
AnyCloud Bluetooth Advertising Scanner (Part 10) Sort the database

All of the code can be found at git@github.com:iotexpert/AnyCloudBLEScanner.git and https://github.com/iotexpert/AnyCloudBLEScanner.git

There are git tags in place starting at part 5 so that you can look at just that version of the code.  "git tag" to list the tags.  And "git checkout part6" to look at the part 6 version of the code.

You can also create a new project with this is a template if you have the IoT Expert Manifest Files installed

Create an Advertising Data Database Task

We need to create the file advertisingDatabase.h which will hold the task prototype (so that main can get going).

#pragma once

void adb_task(void *arg);

Then create the advertisingDatabase.c to hold the actual database code.  It will start with the definition of messages which can be sent to the task.  For now just “ADB_ADD”.  To make things a little bit simpler these command can have two data elements (which I call data0 and data1).  Then the main part of the task just
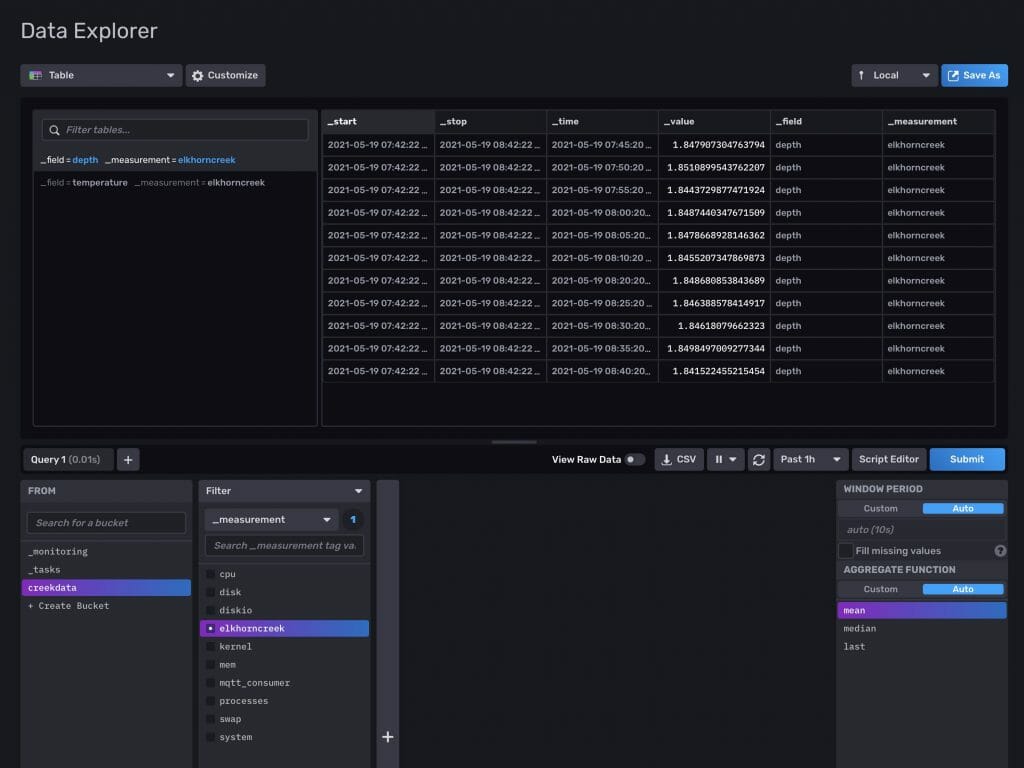
  1. Creates the queue to manage the messages
  2. Process the message until the end of time
#include "FreeRTOS.h"
#include "queue.h"

static QueueHandle_t adb_cmdQueue;
typedef enum {
    ADB_ADD,
} adb_cmd_t;

typedef struct
{
    adb_cmd_t cmd;
    void *data0;
    void *data1;
} adb_cmdMsg_t;

void adb_task(void *arg)
{
    // setup the queue
    adb_cmdMsg_t msg;

    adb_cmdQueue = xQueueCreate(10,sizeof(adb_cmdMsg_t));
    
    while(1)
    {
        BaseType_t status = xQueueReceive(adb_cmdQueue,&msg,portMAX_DELAY);
        if(status == pdTRUE) 
        {
            switch(msg.cmd)
            {
                case ADB_ADD:
                break;
            }

        }
    }
}

To start the task, you need to add it to main.c.

    xTaskCreate(adb_task,"adv database",configMINIMAL_STACK_SIZE*4,0,1,0);

When I build and program this, you can now see the new task.  Good that working.
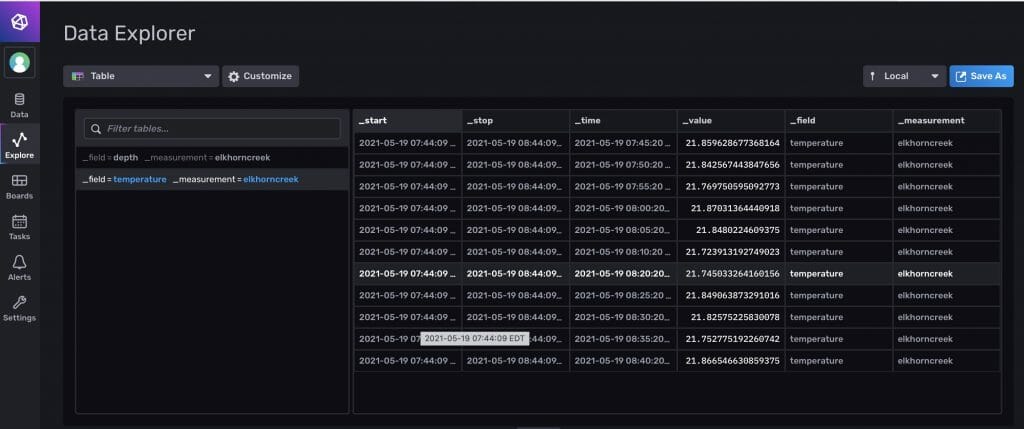
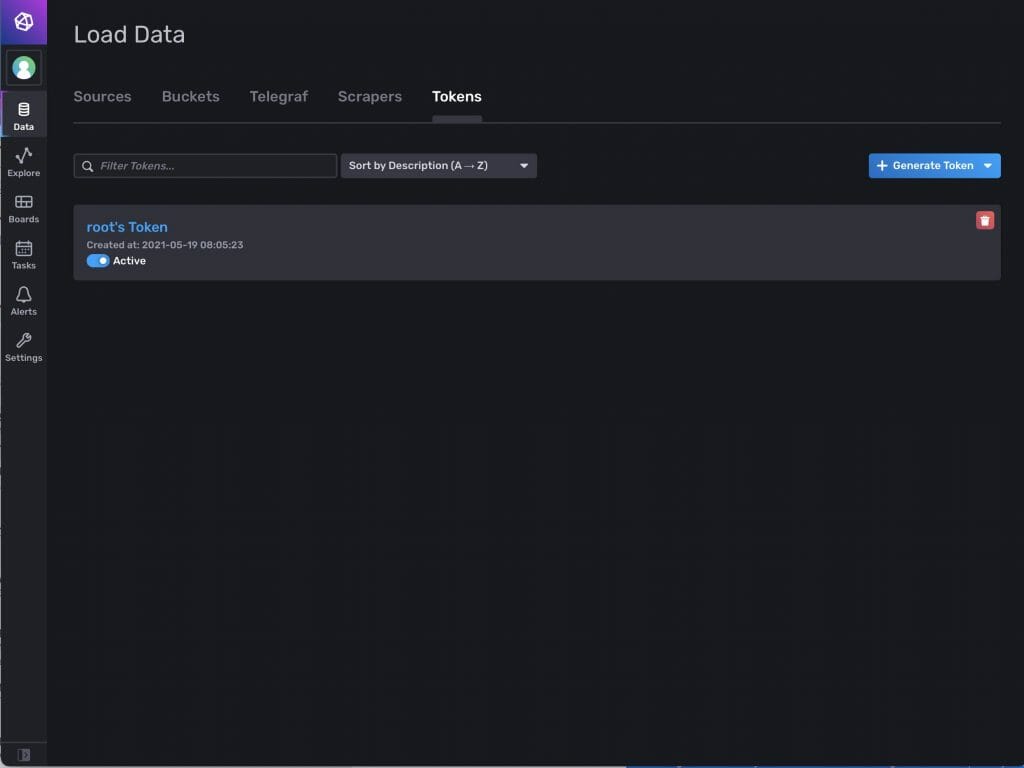
AnyCloud> Unhandled Bluetooth Management Event: BTM_LOCAL_IDENTITY_KEYS_REQUEST_EVT
Started BT Stack Succesfully

AnyCloud> tasks
Name          State Priority   Stack  Num
------------------------------------------
usrcmd_ta       X       0       228     5
IDLE            R       0       115     7
Tmr Svc         B       0       223     8
CYBT_HCI_       B       5       950     3
sleep_tas       B       6       221     1
CYBT_BT_T       B       4       1371    2
blinkTask       B       0       98      4
adv datab       B       1       479     6
‘B’ – Blocked
‘R’ – Ready
‘D’ – Deleted (waiting clean up)
‘S’ – Suspended, or Blocked without a timeout
Stack = bytes free at highwater
AnyCloud>

Update the Advertising Database to Accept Submitted ADV Packets

If you recall our original setup was to take advertising packets in the Bluetooth Manager thread and print out the data.  The first thing that we want to fix up is the ability of the advertising database task to accept advertising packets which are pushed to its command queue.   To prepare for this I create two local variables to hold the data.

void adb_task(void *arg)
{
    // setup the queue
    adb_cmdMsg_t msg;
    wiced_bt_ble_scan_results_t *scan_result;
    uint8_t *data;

Then I update the ADB_ADD command.  My first, and really simple fix, is to grab the printing code from the Bluetooth Manager task.  Obviously this won’t be an improvement from the original program as far as the users goes, but it will verify that the tasks are working properly together.
                case ADB_ADD:
                    // Print the MAC Address
                    scan_result = (wiced_bt_ble_scan_results_t *)msg.data0;
                    data = (uint8_t *)msg.data1;

                    printf("MAC: ");
                    for(int i=0;i<BD_ADDR_LEN;i++)
                    {
                        printf("%02X:",scan_result->remote_bd_addr[i]);
                    }
                    // Print the RAW Data of the ADV Packet
                    printf(" Data: ");
                    int i=0;
                    while(data[i])
                    {
                        for(int j=0;j<data[i];j++)
                        {
                            printf("%02X ",data[i+1+j]);
                        }
                        i = i + data[i]+1;
                    }
                    printf("\n");
    
                    free(msg.data0);
                    free(msg.data1);
                break;

Then I add a command to the advertisingDatabase.h which the Bluetooth Manager task can call to submit advertising packets

void adb_addAdv(wiced_bt_ble_scan_results_t *scan_result,void *data);

The actual command in advertisingDatabase.c just takes the advertising information, puts it in a command message, then submits it to the command queue.

void adb_addAdv(wiced_bt_ble_scan_results_t *scan_result,void *data)
{
    adb_cmdMsg_t msg;
    msg.cmd = ADB_ADD;
    msg.data0 = (void *)scan_result;
    msg.data1 = (void *)data;
    xQueueSend(adb_cmdQueue,&msg,0); // If you loose an adv packet it is OK...
}

Update the Bluetooth Manager to Submit Adv Packets

Now I go and edit the bluetoothManager. c to submit packets rather than print them.  To do this I greatly simplify the callback.  There is one VERY important issue to deal with, which is one of those potential religious war issues.  Memory.

When you get the callback from the stack, it gives you POINTERS to data for the advertising packet that reside inside of buffers inside of the stack.  As soon as this callback returns this memory is purged.  To prevent this data from getting cleaned up by the stack I

  1. Malloc some memory for the wiced_bt_ble_scan_results
  2. Malloc some memory for the advertising data
  3. Make a copy of the data
  4. Submit it to the Advertising Database

I KNOW from the spec that the largest data packet is 31-bytes (actually it is 31-bytes + one more field with length 0).  So I know the maximum length is 32-bytes  This means that in many situations I will be copying GARBAGE into my buffer if the packet is less than 32 bytes long.  I think that this is simpler than calculating the length and then only copying that much data.

void btm_advCallback(wiced_bt_ble_scan_results_t *p_scan_result, uint8_t *p_adv_data)
{
    wiced_bt_ble_scan_results_t *scan_result = malloc(sizeof(wiced_bt_ble_scan_results_t));
    uint8_t *data = malloc(32);
   
    memcpy(data,p_adv_data,32);
    memcpy(scan_result,p_scan_result->remote_bd_addr,BD_ADDR_LEN);
    adb_addAdv(scan_result,data);
}

When I run this updated program I should get the same stream of data coming out on the serial port.  Sure enough the new thread is working.

Create an Advertising Data Database

Now, lets create an actual database.  To simplify things my database is just an array of structures.  One structure per bluetooth device.  The structure will contain a pointer to the information about the device it just saw and the actual raw data.

typedef struct {
    wiced_bt_ble_scan_results_t *result;
    uint8_t *data;
} adb_adv_t ;

#define ADB_MAX_SIZE (40)
adb_adv_t adb_database[ADB_MAX_SIZE];
int adb_db_count=0;

Then I will create several helper functions to work with the database

  1. Find devices in the database given a mac address
  2. Print an entry in the database
  3. Add entries to the database

First, find an entry in the database.  This function will search through the database and compare the mac address against the mac address in the database.  When the memcmp ==0 meaning it found a match, it will return that entry.

static int adb_db_find(wiced_bt_device_address_t *add)
{
    int rval=-1;
    for(int i=0;i<adb_db_count;i++)
    {
        if(memcmp(add,&adb_database[i].result->remote_bd_addr,BD_ADDR_LEN)==0)
        {
            rval = i;
            break;
        }
    }
    return rval;
}

The print function will make sure that you asked for a legal entry (much must be greater than 0… and less than the max).  Then it will print out the mac address and the raw data.  In a future post I will add a smarter print out.

static void adb_db_printEntry(int entry)
{
    if(!(entry>= 0 && entry <= adb_db_count))
    {
        printf("Illegal entry\n");
        return;
    }
    printf("%02d MAC: ",entry);

    for(int i=0;i<BD_ADDR_LEN;i++)
    {
        printf("%02X:",adb_database[entry].result->remote_bd_addr[i]);
    }

    // Print the RAW Data of the ADV Packet
    printf(" Data: ");
    int i=0;
    while(adb_database[entry].data[i])
    {
        for(int j=0;j<adb_database[entry].data[i];j++)
        {
            printf("%02X ",adb_database[entry].data[i+1+j]);
        }
        i = i + adb_database[entry].data[i]+1;
    }
    printf("\n");
}

To add an entry to the database, first make sure that it isn’t already in the database.  Then when you are sure that it isn’t the database, you just add the pointers to your table.  You need to make sure and not go beyond the end of the table, and if you did, you will have effectively blown away the last entry in the table.  Oh well.

static void adb_db_add(wiced_bt_ble_scan_results_t *scan_result,uint8_t *data)
{
 
    int entry = adb_db_find(&scan_result->remote_bd_addr);
    if(entry == -1)
    {
        
        adb_database[adb_db_count].result = scan_result;
        adb_database[adb_db_count].data = data;
        adb_db_printEntry(adb_db_count);
        adb_db_count = adb_db_count + 1;
        if(adb_db_count == ADB_MAX_SIZE)
        {
            printf("ADV Table Max Size\n");
            adb_db_count = adb_db_count - 1;
        }
    }
    else
    {
        free(scan_result);
        free(data);
    }
}

Add a Command to Print the Database

Now we want to add the ability to print from the command line.  So add a new command message to the list of legal commands.

typedef enum {
    ADB_ADD,
    ADB_PRINT,
} adb_cmd_t;

Then create a new function to print.  If you send in a “-1” it will print the whole table.  Otherwise just print the individual entry.

static void adb_printTable(int entry)
{
    if(entry == -1)
    {
        for(int i=0;i<adb_db_count;i++)
        {
            adb_db_printEntry(i);
        }

    }
    else
    {
        adb_db_printEntry(entry);
    }
    

}

Now edit usercmd.c to have the new command line.  Notice that I use “sscanf” which obviously has some issues.  Too bad.

static int usrcmd_print(int argc, char **argv)
{

    if(argc == 1)
    {
        adb_print(-1); // Print whole table
    }

    if(argc == 2)
    {
        int val;
        sscanf(argv[1],"%d",&val);
        adb_print(val);
    }

    return 0;
}

When I program the project it immediately prints out a bunch of devices that are at my house.  Then you can see I run the “print” command which prints the table.  Finally P do a print 0 to just print the first entry.

In the next article I will add smarter diagnostics to the advertising packets.

AnyCloud Bluetooth Advertising Scanner (Part 4)

Summary

In this article I update the AnyCloud BLE advertising scanner to use the btutil library that was created in the previous post.  In addition, I add a command queue to the bluetoothManger and enable a new command to turn on and off scanning.

Story

If you have been following along until now, which I imagine that you have if you are reading this,  you will have gotten a vomit of device data blasting out onto your serial console.  This isn’t very helpful.  So now what?  I am going to divide this problem into two parts

  1. Creating a new user command to turn on and off scanning (this article)
  2. Creating a database to manage the data + a set of commands to dump it (next article)

There are

Article Topic
AnyCloud Bluetooth Advertising Scanner (Part 1) Introduction to AnyCloud Bluetooth Advertising
AnyCloud Bluetooth Advertising Scanner (Part 2) Creating an AnyCloud Bluetooth project
AnyCloud Bluetooth Advertising Scanner (Part 3) Adding Observing functionality to the project
AnyCloud Bluetooth Utilities Library A set of APIs for enhancement of the AnyCloud Library
AnyCloud Bluetooth Advertising Scanner (Part 4) Adding a command line to the scanner
AnyCloud Bluetooth Advertising Scanner (Part 5) Adding a history database to the scanner
AnyCloud Bluetooth Advertising Scanner (Part 6) Decoding advertising packets
AnyCloud Bluetooth Advertising Scanner (Part 7) Adding recording commands to the command line
AnyCloud Bluetooth Advertising Scanner (Part 8) Adding filtering to the scanner
AnyCloud Bluetooth Advertising Scanner (Part 9) Improve the print and add packet age
AnyCloud Bluetooth Advertising Scanner (Part 10) Sort the database

All of the code can be found at git@github.com:iotexpert/AnyCloudBLEScanner.git and https://github.com/iotexpert/AnyCloudBLEScanner.git

There are git tags in place starting at part 5 so that you can look at just that version of the code.  "git tag" to list the tags.  And "git checkout part6" to look at the part 6 version of the code.

You can also create a new project with this is a template if you have the IoT Expert Manifest Files installed

Add the IoT Expert “btutil” Library

Before we actually start all of the command queue stuff, lets move to the btutil library that I talked about in the previous post.  To do this, add the library using the library manager.

Then delete bt_platform_cfg_settings.h and bt_platform_cfg_settings.c from your project.  Finally Rebuild and make sure that everything still works.  That is it.

Multithreading

Id like to explain that there is now some danger.  That danger comes from the fact that we have multiple tasks which are all accessing data plus functions that are talking to each other ASYNCHRONOUSLY.  Specifically we have:

  1. The Bluetooth Stack task – running the Bluetooth stack and management callback
  2. The Bluetooth Stack APIs – e.g. wiced_bt_ble_observe
  3. The usrcmd task – which is interacting with the user on the serial port and talking to the other tasks
  4. A timer_svc task – which runs software timers
  5. The advertising data (which I will start saving in the next article)

When faced with this situation what I typically like to do is provide thread safe public functions for each of the tasks.  Then any other task can call these functions and know that things are not going to get corrupted by a race condition.

To make the design thread safe, I typically like to put an RTOS Queue between the tasks.  These queues are a safe place to send and receive data in a “thread safe” way.  There are two basic design patterns that can be used

  1. Define a message structure (that gets pushed into the queue) and make it global (via a dot-h).  Define a queue handle and make it global (via a dot-h).  Then let any task build messages and push them into the queue to be received in the task that owns the queue.
  2. Define the message structure and queue.  Then define functions which are global (via a dot-h) which know how to interact with the queue.

I typically think that the 2nd method is better, so that is what I am going to do here.

  1. In BluetoothManager.h I will provide a function called “btm_cmdScan”
  2. The usrcmd task will call the btm_cmdScan function which will
  3. Create a btm_cmdMsg_t with the “scan” command and data of true/false
  4. Then push it into the Bluetooth Manager Command Queue
  5. Where a timer callback in the Bluetooth Manager Task will take it out of the queue
  6. Figure out that it is a “scan” command
  7. Then will either turn on or off scanning

Add a Queue to the Bluetooth Manager Thread

So we need two things a message to push into a queue (just a structure) and we need a queue to push it into.  First the message which is just a structure with two elements.  The first element is a command and the second element is some data of type void.  The meaning of the void *data will be different based on the command.

typedef struct {
	btm_cmd_t cmd;
	void *data;
} btm_cmdMsg_t;

But how about the command?  The command is just an enumerate list of commands which will now start with just one command.

typedef enum {
	BTM_SCAN,
} btm_cmd_t;

And know we need to define the queue.

#include "queue.h"
static QueueHandle_t btm_cmdQueue;

Before you can use the queue you need to initialize it.  The best place to initialize this queue is in the management callback right after the stack gets going.  You can see that I tell FreeRTOS that there is a queue which can hold up to 10 commands.  I also tell it that each command is the sizeof the command message.

    switch (event)
    {
        case BTM_ENABLED_EVT:
            printf("Started BT Stack Succesfully\n");
            btm_cmdQueue = xQueueCreate(10,sizeof(btm_cmdMsg_t));

Now we need to create a way for other tasks to create these command messages.  They will do this by calling a function which we will define in the bluetoothManager.h

void btm_cmdScan(bool enable);

This function will live in bluetoothManager.c and it simply

  1. Creates a command
  2. Set the actual command to scan
  3. Sets the void* data to be enable … in other words start or stop scanning.  Remember that a void * can be anything.  See I cast a bool to a void *
  4. Finally push the data into the command queue
void btm_cmdScan(bool enable)
{
    btm_cmdMsg_t msg;
    msg.cmd = BTM_SCAN;
    msg.data = (void *)enable;
  	xQueueSend(btm_cmdQueue, &msg,0);
}

Add a Timer to Process the Queue

So now we have a method to push items into the queue.  How do we get them out of the queue?  To do that I will use a Bluetooth Stack timer that will run every 50ms.

First, define the timer in bluetoothManager.c

#include "wiced_timer.h"
static wiced_timer_ext_t btm_mgmtQueueTimer;

Then define a function which the timer will call.  This function will

  1. Try to get a message out of the queue
  2. IF there is a message it will use a big switch to look at the possible messages
  3. If the message is a scan
  4. Then call the wiced function to either start “observing” or stop “observing”
static void btm_processBluetoothAppQueue()
{
	btm_cmdMsg_t msg;

	 BaseType_t rval;

	 rval = xQueueReceive( btm_cmdQueue,&msg,0);
	 if(rval == pdTRUE)
	 {
		 switch(msg.cmd)
		 {
		 case BTM_SCAN:
            wiced_bt_ble_observe((wiced_bool_t)msg.data,0,btm_advCallback);
			 break;
		 }
	 }
}

The last thing you need to do is start the timer.  The best place to start the timer is in the management callback where you need to

  1. Create the timer
  2. Tell it to start and run every 50ms
    switch (event)
    {
        case BTM_ENABLED_EVT:
            printf("Started BT Stack Succesfully\n");
            btm_cmdQueue = xQueueCreate(10,sizeof(btm_cmdMsg_t));
            wiced_init_timer_ext (&btm_mgmtQueueTimer, btm_processBluetoothAppQueue,0, WICED_TRUE);
            wiced_start_timer_ext (&btm_mgmtQueueTimer, 50);
        break;

A Potential Threading Bug

When I did the implementation originally I created what I thought was a threading bug.  Specifically I used the FreeRTOS timer to process the queue.  In other words instead of using a wiced_timer_ext_t I used a TimerHandle_t.  So what?

The wiced_timer_ext_t is run INSIDE of the BluetoothStack task where the TimerHandle_t is run inside of the Timer_SVC task.
So what?  I was afraid that the call to wiced_bt_ble_obsere was NOT thread safe and needed to be called inside of the same task as the stack.

After some digging I found out that the Bluetooth Stack is threadsafe, so I worried for no reason.  Well, actually, you can never worry enough about making these kinds of threading bugs because they are viscously difficult to debug.

Add a Scan Off & On Command

The last thing that you need to do is add an actual command to the usercmd task to call the bluetooth manager function to turn on and off scanning.

First, add a new prototype for your new command in usercmd.c.  Then add it to the list of legal commands.

static int usrcmd_scan(int argc, char **argv);


static const cmd_table_t cmdlist[] = {

.... deleted stuff

    { "scan","scan [on|off]", usrcmd_scan},

};

Then create the function to process the command line input and call the btm_scan function.

static int usrcmd_scan(int argc, char **argv)
{

    if(argc != 2)
        return 0;

    if(strcmp(argv[1],"on") == 0)
    {
        btm_cmdScan(true);
    }
    else if(strcmp(argv[1],"off") == 0)
    {
        btm_cmdScan(false);

    }
    return 0;

}

Now build it and run it.  You should still get adv packets barfing all over your screen.  But now you can turn on and off the scanning with “scan on” and “scan off”.  In the next article we will create a database to hold the scan packets.

AnyCloud Bluetooth Advertising Scanner (Part 3)

Summary

In this article I discuss BLE “Observing” and add that functionality to my PSoC 6 – CYW43xxx AnyCloud BLE Adverting Scanner project.

Story

In part1 of this series I discussed the pieces parts required to get the AnyCloud Bluetooth Stack operating using the AnyCloud SDK running on a PSoC 6 with a CY43xxx combo.  Then in part 2 I built a project with those parts and started up the Bluetooth Host stack.  The project didn’t really do anything, actually nothing, so it wasn’t very interesting, but it was going.  In this article I will discuss BLE advertising scanning, how to configure it in the AnyCloud project and finally how to add it to the project.

There are

Article Topic
AnyCloud Bluetooth Advertising Scanner (Part 1) Introduction to AnyCloud Bluetooth Advertising
AnyCloud Bluetooth Advertising Scanner (Part 2) Creating an AnyCloud Bluetooth project
AnyCloud Bluetooth Advertising Scanner (Part 3) Adding Observing functionality to the project
AnyCloud Bluetooth Utilities Library A set of APIs for enhancement of the AnyCloud Library
AnyCloud Bluetooth Advertising Scanner (Part 4) Adding a command line to the scanner
AnyCloud Bluetooth Advertising Scanner (Part 5) Adding a history database to the scanner
AnyCloud Bluetooth Advertising Scanner (Part 6) Decoding advertising packets
AnyCloud Bluetooth Advertising Scanner (Part 7) Adding recording commands to the command line
AnyCloud Bluetooth Advertising Scanner (Part 8) Adding filtering to the scanner
AnyCloud Bluetooth Advertising Scanner (Part 9) Improve the print and add packet age
AnyCloud Bluetooth Advertising Scanner (Part 10) Sort the database

All of the code can be found at git@github.com:iotexpert/AnyCloudBLEScanner.git and https://github.com/iotexpert/AnyCloudBLEScanner.git

There are git tags in place starting at part 5 so that you can look at just that version of the code.  "git tag" to list the tags.  And "git checkout part6" to look at the part 6 version of the code.

You can also create a new project with this is a template if you have the IoT Expert Manifest Files installed

Explain BLE Advertising – Scanner/Observer

You might recall that there are four roles that a BLE device can perform

  • Peripheral – low power devices that broadcast advertisements, then accept a single connection
  • Central – devices like cell phones that connect to peripherals.  They may run multiple connections at a time.
  • Broadcaster – a nonconnectable peripheral that sends out advertisements
  • Observer – A central-like device that listens for broadcasters (or advertising peripherals)

And you might remember that advertisements are short, up to 31-byte, packets of data that give information which can be used for one or more of:

  • advertising the availability to connect
  • advertising services
  • advertising the name
  • advertising vendor specific information
  • advertising beacon data (like temperature or …)
  • advertising location

And, if you forgot, BLE operates on 40 channels.  But to save power in peripherals, all of the advertising happens on channel 37, 38 and 39.  Specifically a peripheral or broadcaster will send out the advertising data on channel 37, then 38 then 39, then wait… then do it again.  But why one channel at a time?  Because BLE radio’s can be tuned to transmit and receive on only one channel at a time (a power saving and complexity reducing feature)

Inside of the Central/Observer it will listen on channel 37 for a “window” amount of time.  Then it will do nothing for an interval-window amount of time.  Then it will do that same thing on channel 28 then 39.  But why only one channel at a time?  Same reason as above, it saves power and simplifies the design.  Why not have the window and the interval be the same?  Once again, it saves power.

Here is a picture:

But, what happens if you are not listening when the advertiser advertises?  You missed it.  Tough shit.  It turns out that setting the scan window and interval will greatly impact the probability that you hear advertisements.  And, you are more likely to hear advertisements because they are sent on three channels.  But it seems like it will never work.  Will it? … yes, of course, or they wouldn’t have done it that way 🙂

BLE Advertising – The Advertiser Peripheral or Broadcaster

So what exactly is inside of an advertising packet?  Volume 6 part B Section 2.3 of the bluetooth core spec describes the advertising protocol data unit (PDU)

But what is inside of the header?

This leaves us with what is inside of the “payload”.  The answer is that the ADV_IND Payload Data Unit (PDU) contains an address of 6-bytes plus up to 31 bytes of data.

The AdvA field shall contain the advertiser’s public or random device address as indicated by TxAdd.

The actual AdvData field is further broken up into “AD Structures” like this:

And what is the “AD Type”, well it is a one byte of one of the following:

And then where do you find the assigned numbers for the field types?  In the “Assigned Numbers and GAP“.  Here is a clip from the spec.

And conveniently enough we enumerated them for you inside of the SDK header file wiced_bt_ble.h

/** Advertisement data types */
enum wiced_bt_ble_advert_type_e {
    BTM_BLE_ADVERT_TYPE_FLAG                        = 0x01,                 /**< Advertisement flags */
    BTM_BLE_ADVERT_TYPE_16SRV_PARTIAL               = 0x02,                 /**< List of supported services - 16 bit UUIDs (partial) */
    BTM_BLE_ADVERT_TYPE_16SRV_COMPLETE              = 0x03,                 /**< List of supported services - 16 bit UUIDs (complete) */
    BTM_BLE_ADVERT_TYPE_32SRV_PARTIAL               = 0x04,                 /**< List of supported services - 32 bit UUIDs (partial) */
    BTM_BLE_ADVERT_TYPE_32SRV_COMPLETE              = 0x05,                 /**< List of supported services - 32 bit UUIDs (complete) */
    BTM_BLE_ADVERT_TYPE_128SRV_PARTIAL              = 0x06,                 /**< List of supported services - 128 bit UUIDs (partial) */
    BTM_BLE_ADVERT_TYPE_128SRV_COMPLETE             = 0x07,                 /**< List of supported services - 128 bit UUIDs (complete) */
    BTM_BLE_ADVERT_TYPE_NAME_SHORT                  = 0x08,                 /**< Short name */
    BTM_BLE_ADVERT_TYPE_NAME_COMPLETE               = 0x09,                 /**< Complete name */
    BTM_BLE_ADVERT_TYPE_TX_POWER                    = 0x0A,                 /**< TX Power level  */
    BTM_BLE_ADVERT_TYPE_DEV_CLASS                   = 0x0D,                 /**< Device Class */
    BTM_BLE_ADVERT_TYPE_SIMPLE_PAIRING_HASH_C       = 0x0E,                 /**< Simple Pairing Hash C */
    BTM_BLE_ADVERT_TYPE_SIMPLE_PAIRING_RAND_C       = 0x0F,                 /**< Simple Pairing Randomizer R */
    BTM_BLE_ADVERT_TYPE_SM_TK                       = 0x10,                 /**< Security manager TK value */
    BTM_BLE_ADVERT_TYPE_SM_OOB_FLAG                 = 0x11,                 /**< Security manager Out-of-Band data */
    BTM_BLE_ADVERT_TYPE_INTERVAL_RANGE              = 0x12,                 /**< Slave connection interval range */
    BTM_BLE_ADVERT_TYPE_SOLICITATION_SRV_UUID       = 0x14,                 /**< List of solicitated services - 16 bit UUIDs */
    BTM_BLE_ADVERT_TYPE_128SOLICITATION_SRV_UUID    = 0x15,                 /**< List of solicitated services - 128 bit UUIDs */
    BTM_BLE_ADVERT_TYPE_SERVICE_DATA                = 0x16,                 /**< Service data - 16 bit UUID */
    BTM_BLE_ADVERT_TYPE_PUBLIC_TARGET               = 0x17,                 /**< Public target address */
    BTM_BLE_ADVERT_TYPE_RANDOM_TARGET               = 0x18,                 /**< Random target address */
    BTM_BLE_ADVERT_TYPE_APPEARANCE                  = 0x19,                 /**< Appearance */
    BTM_BLE_ADVERT_TYPE_ADVERT_INTERVAL             = 0x1a,                 /**< Advertising interval */
    BTM_BLE_ADVERT_TYPE_LE_BD_ADDR                  = 0x1b,                 /**< LE device bluetooth address */
    BTM_BLE_ADVERT_TYPE_LE_ROLE                     = 0x1c,                 /**< LE role */
    BTM_BLE_ADVERT_TYPE_256SIMPLE_PAIRING_HASH      = 0x1d,                 /**< Simple Pairing Hash C-256 */
    BTM_BLE_ADVERT_TYPE_256SIMPLE_PAIRING_RAND      = 0x1e,                 /**< Simple Pairing Randomizer R-256 */
    BTM_BLE_ADVERT_TYPE_32SOLICITATION_SRV_UUID     = 0x1f,                 /**< List of solicitated services - 32 bit UUIDs */
    BTM_BLE_ADVERT_TYPE_32SERVICE_DATA              = 0x20,                 /**< Service data - 32 bit UUID */
    BTM_BLE_ADVERT_TYPE_128SERVICE_DATA             = 0x21,                 /**< Service data - 128 bit UUID */
    BTM_BLE_ADVERT_TYPE_CONN_CONFIRM_VAL            = 0x22,                 /**< LE Secure Connections Confirmation Value */
    BTM_BLE_ADVERT_TYPE_CONN_RAND_VAL               = 0x23,                 /**< LE Secure Connections Random Value */
    BTM_BLE_ADVERT_TYPE_URI                         = 0x24,                 /**< URI */
    BTM_BLE_ADVERT_TYPE_INDOOR_POS                  = 0x25,                 /**< Indoor Positioning */
    BTM_BLE_ADVERT_TYPE_TRANS_DISCOVER_DATA         = 0x26,                 /**< Transport Discovery Data */
    BTM_BLE_ADVERT_TYPE_SUPPORTED_FEATURES          = 0x27,                 /**< LE Supported Features */
    BTM_BLE_ADVERT_TYPE_UPDATE_CH_MAP_IND           = 0x28,                 /**< Channel Map Update Indication */
    BTM_BLE_ADVERT_TYPE_PB_ADV                      = 0x29,                 /**< PB-ADV */
    BTM_BLE_ADVERT_TYPE_MESH_MSG                    = 0x2A,                 /**< Mesh Message */
    BTM_BLE_ADVERT_TYPE_MESH_BEACON                 = 0x2B,                 /**< Mesh Beacon */
    BTM_BLE_ADVERT_TYPE_PSRI                        = 0x2E,                 /**< Generic Audio Provate Set Random Identifier */
    BTM_BLE_ADVERT_TYPE_3D_INFO_DATA                = 0x3D,                 /**< 3D Information Data */
    BTM_BLE_ADVERT_TYPE_MANUFACTURER                = 0xFF                  /**< Manufacturer data */
};

How does scanning work in the AnyCloud Bluetooth Stack?

To turn on observing/scanning you need to call the function:

wiced_bt_dev_status_t wiced_bt_ble_observe (wiced_bool_t start, uint8_t duration, wiced_bt_ble_scan_result_cback_t *p_scan_result_cback);

Which will cause the host stack to tell the controller to start scanning for advertising packets.  It will set the scan window and scan interval the low duty scan settings from the bluetooth configuration structure… which we setup with the Bluetooth configurator.

 .low_duty_scan_interval          = CY_BT_LOW_DUTY_SCAN_INTERVAL,                              /**< Low duty scan interval */
        .low_duty_scan_window            = CY_BT_LOW_DUTY_SCAN_WINDOW,                                /**< Low duty scan window */
        .low_duty_scan_duration          = CY_BT_LOW_DUTY_SCAN_DURATION,                              /**< Low duty scan duration in seconds (0 for infinite) */

When the controller hears an advertising packet, it will send the HCI advertising report to the Bluetooth host stack, which with then call you back.  Specifically it will call you back by calling the p_scan_result_cback” function.

You provide the callback function which has the prototype:

typedef void (wiced_bt_ble_scan_result_cback_t) (wiced_bt_ble_scan_results_t *p_scan_result, uint8_t *p_adv_data);

which contains two parameters, p_scan_result which is a structure that has the mac address and some thing data plus the p_adv_data which has the raw bytes of the advertising packet.

Add Observing to our Project

OK.  Lets add this to our project by creating a callback function like this:

Lines 5-9: Just prints out the raw bytes of the MAC address of the remote device, the one advertising

To print out the raw advertising data you need to remember that it is formatted as

  1. A length (of all of the data of the field)
  2. A type
  3. The rest of the data

When you find a field of length of 0 you know that you have reached the end of the data

On Lines 13-20: I print out one field at a time and the raw data

//
void obv_callback(wiced_bt_ble_scan_results_t *p_scan_result, uint8_t *p_adv_data)
{
    // Print the MAC Address
    printf("MAC: ");
    for(int i=0;i<6;i++)
    {
        printf("%02X:",p_scan_result->remote_bd_addr[i]);
    }
    // Print the RAW Data of the ADV Packet
    printf(" Data: ");
    int i=0;
    while(p_adv_data[i])
    {
        for(int j=0;j<p_adv_data[i];j++)
        {
            printf("%02X ",p_adv_data[i+1+j]);
        }
        i = i + p_adv_data[i]+1;
    }
    printf("\n");
    
}

Then update the management callback to start the scanner after the stack is successfully started

    switch (event)
    {
        case BTM_ENABLED_EVT:

            if (WICED_BT_SUCCESS == p_event_data->enabled.status)
            {
                printf("Started BT Stack Succesfully\n");
                wiced_bt_ble_observe(WICED_TRUE,0,obv_callback);

            }

Program and Test

Now when I run the program data comes blasting out of the screen because there are a boatload of ble devices in my house

AnyCloud> Unhandled Bluetooth Management Event: 0x16
Started BT Stack Succesfully
MAC: 76:99:58:E8:8B:1F:Data: 01 1A 0A 0C FF 4C 00 10 06 13 1A 54 F7 5A 7A 
MAC: 9E:7B:EF:0B:74:20:Data: 01 06 16 F7 FD 01 0C C2 81 CE 0C 74 58 77 19 C8 E3 84 A3 42 50 98 00 00 00 00 03 
MAC: 6F:11:7C:FF:02:13:Data: 01 1A 0A 05 FF 4C 00 10 06 03 1E BA 24 58 3D 
MAC: 3F:64:BE:4E:29:0C:Data: 01 04 FF 00 4C 02 15 26 86 F3 9C BA DA 46 58 85 4A A6 2E 7E 5E 8B 8D 00 01 00 00 C9 
MAC: 47:4B:F1:53:2C:84:Data: 01 06 FF 4C 00 10 05 08 18 79 1E C2 
MAC: C8:69:CD:18:BC:E6:Data: 01 1A 0A 0C FF 4C 00 10 05 0C 14 17 BF E9 
MAC: 27:F6:6F:1E:7A:78:Data: 01 1A FF 4C 00 09 06 03 12 C0 A8 20 0D 
MAC: 6F:AE:84:F6:6A:9F:Data: 01 06 FF 4C 00 10 05 08 18 79 1E C2 
MAC: 3F:64:BE:4E:29:0C:Data: 01 04 FF 00 4C 02 15 26 86 F3 9C BA DA 46 58 85 4A A6 2E 7E 5E 8B 8D 00 01 00 00 C9 
MAC: 41:EE:B4:9C:5C:5F:Data: 01 1A 0A 07 FF 4C 00 10 06 33 1A 49 59 46 B4 
MAC: 9E:7B:EF:0B:74:20:Data: 01 06 16 F7 FD 01 0C C2 81 CE 0C 74 58 77 19 C8 E3 84 A3 42 50 98 00 00 00 00 03 
MAC: C8:EB:ED:C8:AC:1C:Data: 01 0A 03 66 66 19 D0 07 FF EE 03 1C AC C8 ED EB C8 
MAC: 76:99:58:E8:8B:1F:Data: 01 1A 0A 0C FF 4C 00 10 06 13 1A 54 F7 5A 7A

In the next article Ill add some more smarts to manage the data to be easier to look at.

For your information here is all of the file bluetoothManager.c

#include <stdio.h>
#include <stdlib.h>

#include "cybsp.h"

#include "FreeRTOS.h"

#include "bluetoothManager.h"
#include "wiced_bt_stack.h"
#include "wiced_bt_dev.h"
#include "wiced_bt_trace.h"

//
void obv_callback(wiced_bt_ble_scan_results_t *p_scan_result, uint8_t *p_adv_data)
{
    // Print the MAC Address
    printf("MAC: ");
    for(int i=0;i<6;i++)
    {
        printf("%02X:",p_scan_result->remote_bd_addr[i]);
    }
    // Print the RAW Data of the ADV Packet
    printf(" Data: ");
    int i=0;
    while(p_adv_data[i])
    {
        for(int j=0;j<p_adv_data[i];j++)
        {
            printf("%02X ",p_adv_data[i+1+j]);
        }
        i = i + p_adv_data[i]+1;
    }
    printf("\n");
    
}

/**************************************************************************************************
* Function Name: app_bt_management_callback()
***************************************************************************************************
* Summary:
*   This is a Bluetooth stack event handler function to receive management events from
*   the BLE stack and process as per the application.
*
* Parameters:
*   wiced_bt_management_evt_t event             : BLE event code of one byte length
*   wiced_bt_management_evt_data_t *p_event_data: Pointer to BLE management event structures
*
* Return:
*  wiced_result_t: Error code from WICED_RESULT_LIST or BT_RESULT_LIST
*
*************************************************************************************************/
wiced_result_t app_bt_management_callback(wiced_bt_management_evt_t event, wiced_bt_management_evt_data_t *p_event_data)
{
    wiced_result_t result = WICED_BT_SUCCESS;

    switch (event)
    {
        case BTM_ENABLED_EVT:

            if (WICED_BT_SUCCESS == p_event_data->enabled.status)
            {
                printf("Started BT Stack Succesfully\n");
                wiced_bt_ble_observe(WICED_TRUE,0,obv_callback);

            }
            else
            {
            	printf("Error enabling BTM_ENABLED_EVENT\n");
            }

            break;

        default:
            printf("Unhandled Bluetooth Management Event: 0x%x\n", event);
            break;
    }

    return result;
}


AnyCloud Bluetooth Advertising Scanner (Part 2)

Summary

The second article in a series discussing the creation of a PSoC 6 + CYW43xxx Advertising Scanner using the AnyCloud SDK.  This article will use the learning from Part 1 to create a template project that starts the BLE stack.

Story

In the previous article I discussed the structure of the Cypress/Infineon Bluetooth Stack and its integration into AnyCloud.  A bunch of “theory”, well I say BS to that.  Let’s build something.

There are

Article Topic
AnyCloud Bluetooth Advertising Scanner (Part 1) Introduction to AnyCloud Bluetooth Advertising
AnyCloud Bluetooth Advertising Scanner (Part 2) Creating an AnyCloud Bluetooth project
AnyCloud Bluetooth Advertising Scanner (Part 3) Adding Observing functionality to the project
AnyCloud Bluetooth Utilities Library A set of APIs for enhancement of the AnyCloud Library
AnyCloud Bluetooth Advertising Scanner (Part 4) Adding a command line to the scanner
AnyCloud Bluetooth Advertising Scanner (Part 5) Adding a history database to the scanner
AnyCloud Bluetooth Advertising Scanner (Part 6) Decoding advertising packets
AnyCloud Bluetooth Advertising Scanner (Part 7) Adding recording commands to the command line
AnyCloud Bluetooth Advertising Scanner (Part 8) Adding filtering to the scanner
AnyCloud Bluetooth Advertising Scanner (Part 9) Improve the print and add packet age
AnyCloud Bluetooth Advertising Scanner (Part 10) Sort the database

All of the code can be found at git@github.com:iotexpert/AnyCloudBLEScanner.git and https://github.com/iotexpert/AnyCloudBLEScanner.git

There are git tags in place starting at part 5 so that you can look at just that version of the code.  "git tag" to list the tags.  And "git checkout part6" to look at the part 6 version of the code.

You can also create a new project with this is a template if you have the IoT Expert Manifest Files installed

Recall from Part 1 that you need three things to startup the Bluetooth Stack

  • The Hardware Configuration Structure that matches : cybt_platform_config_t
  • The Bluetooth Stack Configuration Structure that matches : wiced_bt_cfg_settings_t
  • The Bluetooth Management Callback that matches : typedef wiced_result_t (wiced_bt_management_cback_t) (wiced_bt_management_evt_t event, wiced_bt_management_evt_data_t *p_event_data);

Then you need to call

  • The hardware initialization function : cybt_platform_config_init
  • The stack initialization function : wiced_bt_stack_init

Ok let’s do this!

Basic Project

You can do all of these steps from the Eclipse IDE for ModusToolbox.  Or you can do it from the individual programs and the command line.  I like Visual Studio code, so this article will be done completely from the command line and individual configurators.

Run the new project creator from the start menu.  Start by creating a project for the development kit that you have, in my case the one currently plugged into my computer is the CY8CKIT-062S2-43012, so that is what I pick.  But, this project will work with any of the WiFI/BT combo chips attached to PSoC 6.

In previous articles I discussed the template that I use to get things going with FreeRTOS.  I won’t discuss that here, but I want FreeRTOS and the NTShell, so pick the IoT Expert FreeRTOS NTShell Template.

After about a minute you should have a project.  I always like to build the project to make sure that everything is working before I get too far down the road of modifying anything.  Run “make -j build”

arh (master) AnyCloudBLEScanner $ make -j build
Tools Directory: /Applications/ModusToolbox/tools_2.2
CY8CKIT-062S2-43012.mk: ../mtb_shared/TARGET_CY8CKIT-062S2-43012/latest-v2.X/CY8CKIT-062S2-43012.mk

Prebuild operations complete
Commencing build operations...

Tools Directory: /Applications/ModusToolbox/tools_2.2
CY8CKIT-062S2-43012.mk: ../mtb_shared/TARGET_CY8CKIT-062S2-43012/latest-v2.X/CY8CKIT-062S2-43012.mk

Initializing build: MTBShellTemplate Debug CY8CKIT-062S2-43012 GCC_ARM

Auto-discovery in progress...
-> Found 205 .c file(s)
-> Found 46 .S file(s)
-> Found 23 .s file(s)
-> Found 0 .cpp file(s)
-> Found 0 .o file(s)
-> Found 6 .a file(s)
-> Found 503 .h file(s)
-> Found 0 .hpp file(s)
-> Found 0 resource file(s)
Applying filters...
Auto-discovery complete

Constructing build rules...
Build rules construction complete

==============================================================================
= Building application =
==============================================================================
Generating compilation database file...
-> ./build/compile_commands.json
Compilation database file generation complete
Building 193 file(s)
    Compiling app file lowPower.c
    Compiling app file main.c
    Compiling app file usrcmd.c
    Compiling ext file startup_psoc6_02_cm4.S

..... a bunch of lines deleted

    Compiling ext file psoc6_01_cm0p_sleep.c
    Compiling ext file psoc6_02_cm0p_sleep.c
    Compiling ext file psoc6_03_cm0p_sleep.c
    Compiling ext file psoc6_04_cm0p_sleep.c
    Compiling ext file cy_retarget_io.c
    Linking output file MTBShellTemplate.elf
==============================================================================
= Build complete =
==============================================================================

Calculating memory consumption: CY8C624ABZI-S2D44 GCC_ARM -Og

   ---------------------------------------------------- 
  | Section Name         |  Address      |  Size       | 
   ---------------------------------------------------- 
  | .cy_m0p_image        |  0x10000000   |  6044       | 
  | .text                |  0x10002000   |  54876      | 
  | .ARM.exidx           |  0x1000f65c   |  8          | 
  | .copy.table          |  0x1000f664   |  24         | 
  | .zero.table          |  0x1000f67c   |  8          | 
  | .data                |  0x080022e0   |  1688       | 
  | .cy_sharedmem        |  0x08002978   |  8          | 
  | .noinit              |  0x08002980   |  148        | 
  | .bss                 |  0x08002a14   |  2136       | 
  | .heap                |  0x08003270   |  1029520    | 
   ---------------------------------------------------- 

  Total Internal Flash (Available)          2097152    
  Total Internal Flash (Utilized)           64812      

  Total Internal SRAM (Available)           1046528    
  Total Internal SRAM (Utilized with heap)  1033500    

Then to be sure it is working, program the development kit.

arh (master) AnyCloudBLEScanner $ make program
Tools Directory: /Applications/ModusToolbox/tools_2.2
CY8CKIT-062S2-43012.mk: ../mtb_shared/TARGET_CY8CKIT-062S2-43012/latest-v2.X/CY8CKIT-062S2-43012.mk

Prebuild operations complete
Commencing build operations...

Tools Directory: /Applications/ModusToolbox/tools_2.2
CY8CKIT-062S2-43012.mk: ../mtb_shared/TARGET_CY8CKIT-062S2-43012/latest-v2.X/CY8CKIT-062S2-43012.mk

Initializing build: MTBShellTemplate Debug CY8CKIT-062S2-43012 GCC_ARM

Auto-discovery in progress...
-> Found 205 .c file(s)
-> Found 46 .S file(s)
-> Found 23 .s file(s)
-> Found 0 .cpp file(s)
-> Found 0 .o file(s)
-> Found 6 .a file(s)
-> Found 503 .h file(s)
-> Found 0 .hpp file(s)
-> Found 0 resource file(s)
Applying filters...
Auto-discovery complete

Constructing build rules...
Build rules construction complete

==============================================================================
= Building application =
==============================================================================
Generating compilation database file...
-> ./build/compile_commands.json
Compilation database file generation complete
Building 193 file(s)
==============================================================================
= Build complete =
==============================================================================

Calculating memory consumption: CY8C624ABZI-S2D44 GCC_ARM -Og

   ---------------------------------------------------- 
  | Section Name         |  Address      |  Size       | 
   ---------------------------------------------------- 
  | .cy_m0p_image        |  0x10000000   |  6044       | 
  | .text                |  0x10002000   |  54876      | 
  | .ARM.exidx           |  0x1000f65c   |  8          | 
  | .copy.table          |  0x1000f664   |  24         | 
  | .zero.table          |  0x1000f67c   |  8          | 
  | .data                |  0x080022e0   |  1688       | 
  | .cy_sharedmem        |  0x08002978   |  8          | 
  | .noinit              |  0x08002980   |  148        | 
  | .bss                 |  0x08002a14   |  2136       | 
  | .heap                |  0x08003270   |  1029520    | 
   ---------------------------------------------------- 

  Total Internal Flash (Available)          2097152    
  Total Internal Flash (Utilized)           64812      

  Total Internal SRAM (Available)           1046528    
  Total Internal SRAM (Utilized with heap)  1033500    


Programming target device... 
Open On-Chip Debugger 0.10.0+dev-4.1.0.1058 (2020-08-11-03:45)
Licensed under GNU GPL v2
For bug reports, read
	http://openocd.org/doc/doxygen/bugs.html
Info : auto-selecting first available session transport "swd". To override use 'transport select <transport>'.
adapter speed: 2000 kHz
adapter srst delay: 25
adapter srst pulse_width: 25
** Auto-acquire enabled, use "set ENABLE_ACQUIRE 0" to disable
cortex_m reset_config sysresetreq
Info : Using CMSIS loader 'CY8C6xxA_SMIF' for bank 'psoc6_smif0_cm0' (footprint 14672 bytes)
Warn : SFlash programming allowed for regions: USER, TOC, KEY
Info : CMSIS-DAP: SWD  Supported
Info : CMSIS-DAP: FW Version = 2.0.0
Info : CMSIS-DAP: Interface Initialised (SWD)
Info : SWCLK/TCK = 1 SWDIO/TMS = 1 TDI = 0 TDO = 0 nTRST = 0 nRESET = 1
Info : CMSIS-DAP: Interface ready
Info : KitProg3: FW version: 1.14.514
Info : KitProg3: Pipelined transfers disabled, please update the firmware
Info : VTarget = 3.215 V
Info : kitprog3: acquiring the device...
Info : clock speed 2000 kHz
Info : SWD DPIDR 0x6ba02477
Info : psoc6.cpu.cm0: hardware has 4 breakpoints, 2 watchpoints
***************************************
** Silicon: 0xE453, Family: 0x102, Rev.: 0x12 (A1)
** Detected Device: CY8C624ABZI-S2D44
** Detected Main Flash size, kb: 2048
** Flash Boot version: 3.1.0.378
** Chip Protection: NORMAL
***************************************
Info : psoc6.cpu.cm4: hardware has 6 breakpoints, 4 watchpoints
Info : starting gdb server for psoc6.cpu.cm0 on 3333
Info : Listening on port 3333 for gdb connections
Info : starting gdb server for psoc6.cpu.cm4 on 3334
Info : Listening on port 3334 for gdb connections
Info : SWD DPIDR 0x6ba02477
Info : kitprog3: acquiring the device...
psoc6.cpu.cm0 halted due to debug-request, current mode: Thread 
xPSR: 0x41000000 pc: 0x00000190 msp: 0x080ff800
** Device acquired successfully
** psoc6.cpu.cm4: Ran after reset and before halt...
psoc6.cpu.cm4 halted due to debug-request, current mode: Thread 
xPSR: 0x01000000 pc: 0x0000012a msp: 0x080ff800
** Programming Started **
auto erase enabled
Info : Flash write discontinued at 0x1000179c, next section at 0x10002000
Info : Padding image section 0 at 0x1000179c with 100 bytes (bank write end alignment)
[100%] [################################] [ Erasing     ]
[100%] [################################] [ Programming ]
Info : Padding image section 1 at 0x1000fd24 with 220 bytes (bank write end alignment)
[100%] [################################] [ Erasing     ]
[100%] [################################] [ Programming ]
wrote 62976 bytes from file /Users/arh/mtw/AnyCloudBLEScanner/build/CY8CKIT-062S2-43012/Debug/MTBShellTemplate.hex in 2.069358s (29.719 KiB/s)
** Programming Finished **
** Verify Started **
verified 62656 bytes in 0.122208s (500.683 KiB/s)
** Verified OK **
** Resetting Target **
Info : SWD DPIDR 0x6ba02477
shutdown command invoked
Info : psoc6.dap: powering down debug domain...
  
arh (master) AnyCloudBLEScanner $

When that is done, open up a terminal window and you should have a functioning base project.  Notice that I ran “help” and “tasks” from the command shell.

Now that we have a basic project working, add the Bluetooth libraries.  Run the library manager by typing “make modlibs”.  Then select “bluetooth-freertos” and the library manager will automatically select the other libraries you need.  Press Update then Close.

Next, run the bluetooth configurator by running “make config_bt”  This tool will help you make the bluetooth stack configuration structure.  When the configurator starts, press “New”

Then select our device (the PSoC 6 and the Combo chip)

Click on the “GAP Settings”.  Then press the Plus and add “Observer configuration”

Then setup the scan settings (more detail on these numbers in the next article)

  • Low duty scan window (ms) = 60
  • Low duty scan interval (ms) = 60
  • Low duty scan timeout = deselected (meaning no timeout)

Then save your configuration file.  Notice that I called it “btconfig”

When you are done you will have a directory called “GeneratedSource” inside of your project with the needed files.

The next step is to fix up the Makefile.  I like changing the name of the “App”.

# Name of application (used to derive name of final linked file).
APPNAME=AnyCloudBLEScanner

Then you need the “FREERTOS WICED_BLE” components.

# Enable optional code that is ordinarily disabled by default.
#
# Available components depend on the specific targeted hardware and firmware
# in use. In general, if you have
#
#    COMPONENTS=foo bar
#
# ... then code in directories named COMPONENT_foo and COMPONENT_bar will be
# added to the build
#
COMPONENTS=FREERTOS WICED_BLE

If you run make vscode it will update the workspace with all of the stuff needed for Visual Studio Code to be able to find all of the files.

arh (master) AnyCloudBLEScanner $ make vscode
Tools Directory: /Applications/ModusToolbox/tools_2.2
CY8CKIT-062S2-43012.mk: ../mtb_shared/TARGET_CY8CKIT-062S2-43012/latest-v2.X/CY8CKIT-062S2-43012.mk

Prebuild operations complete
Commencing build operations...

Tools Directory: /Applications/ModusToolbox/tools_2.2
CY8CKIT-062S2-43012.mk: ../mtb_shared/TARGET_CY8CKIT-062S2-43012/latest-v2.X/CY8CKIT-062S2-43012.mk

Initializing build: MTBShellTemplate Debug CY8CKIT-062S2-43012 GCC_ARM

Auto-discovery in progress...
-> Found 230 .c file(s)
-> Found 46 .S file(s)
-> Found 23 .s file(s)
-> Found 0 .cpp file(s)
-> Found 0 .o file(s)
-> Found 22 .a file(s)
-> Found 561 .h file(s)
-> Found 0 .hpp file(s)
-> Found 0 resource file(s)
Applying filters...
Auto-discovery complete

Constructing build rules...
Build rules construction complete

==============================================================================
= Generating IDE files =
==============================================================================

==============================================================================
= Building application =
==============================================================================
Generating compilation database file...
-> ./build/compile_commands.json
Compilation database file generation complete

echo "The existing MTBShellTemplate.code-workspace file has been saved to .vscode/backup";
The existing MTBShellTemplate.code-workspace file has been saved to .vscode/backup
The existing c_cpp_properties.json file has been saved to .vscode/backup
The existing launch.json file has been saved to .vscode/backup
Modifying existing settings.json file. Check against the backup copy in .vscode/backup
The existing tasks.json file has been saved to .vscode/backup

Generated Visual Studio Code files: c_cpp_properties.json launch.json openocd.tcl settings.json tasks.json

J-Link users, please see the comments at the top of the launch.json
   file about setting the location of the gdb-server.

Instructions:
1. Review the modustoolbox.toolsPath property in .vscode/settings.json
2. Open VSCode
3. Install "C/C++" and "Cortex-Debug" extensions
4. File->Open Folder (Welcome page->Start->Open folder)
5. Select the app root directory and open
6. Builds: Terminal->Run Task
7. Debugging: "Bug icon" on the left-hand pane

  
arh (master) AnyCloudBLEScanner $

Inside of Visual Studio Code, create a new file called “bt_platform_cfg_settings.h” and add:

#include "cybt_platform_config.h"
#include "cybsp.h"
#include "wiced_bt_stack.h"

extern const cybt_platform_config_t bt_platform_cfg_settings;

Inside of Visual Studio Code, create a new file called “bt_platform_cfg_settings.c” and add:

#include "cybt_platform_config.h"
#include "cybsp.h"
#include "wiced_bt_stack.h"

const cybt_platform_config_t bt_platform_cfg_settings =
{
    .hci_config =
    {
        .hci_transport = CYBT_HCI_UART,

        .hci =
        {
            .hci_uart =
            {
                .uart_tx_pin = CYBSP_BT_UART_TX,
                .uart_rx_pin = CYBSP_BT_UART_RX,
                .uart_rts_pin = CYBSP_BT_UART_RTS,
                .uart_cts_pin = CYBSP_BT_UART_CTS,

                .baud_rate_for_fw_download = 115200,
                .baud_rate_for_feature     = 115200,

                .data_bits = 8,
                .stop_bits = 1,
                .parity = CYHAL_UART_PARITY_NONE,
                .flow_control = WICED_TRUE
            }
        }
    },

    .controller_config =
    {
        .bt_power_pin      = CYBSP_BT_POWER,
        .sleep_mode =
        {
            #if (bt_0_power_0_ENABLED == 1) /* BT Power control is enabled in the LPA */
            #if (CYCFG_BT_LP_ENABLED == 1) /* Low power is enabled in the LPA, use the LPA configuration */
            .sleep_mode_enabled = true,
            .device_wakeup_pin = CYCFG_BT_DEV_WAKE_GPIO,
            .host_wakeup_pin = CYCFG_BT_HOST_WAKE_GPIO,
            .device_wake_polarity = CYCFG_BT_DEV_WAKE_POLARITY,
            .host_wake_polarity = CYCFG_BT_HOST_WAKE_IRQ_EVENT
            #else /* Low power is disabled in the LPA, disable low power */
            .sleep_mode_enabled = false
            #endif
            #else /* BT Power control is disabled in the LPA – default to BSP low power configuration */
            .sleep_mode_enabled = true,
            .device_wakeup_pin = CYBSP_BT_DEVICE_WAKE,
            .host_wakeup_pin = CYBSP_BT_HOST_WAKE,
            .device_wake_polarity = CYBT_WAKE_ACTIVE_LOW,
            .host_wake_polarity = CYBT_WAKE_ACTIVE_LOW
            #endif
        }
    },

    .task_mem_pool_size    = 2048
};

Inside of Visual Studio Code, create bluetoothManager.h.  Remember this is the Bluetooth Stack Management Callback

#pragma once
#include "wiced_bt_stack.h"
#include "wiced_bt_dev.h"

wiced_result_t app_bt_management_callback(wiced_bt_management_evt_t event, wiced_bt_management_evt_data_t *p_event_data);

Inside of Visual Studio code, create bluetoothManager.c.  This function does a whole lotta nothin… except saying that things got started.

#include <stdio.h>
#include <stdlib.h>

#include "cybsp.h"

#include "FreeRTOS.h"

#include "bluetoothManager.h"
#include "wiced_bt_stack.h"
#include "wiced_bt_dev.h"
#include "wiced_bt_trace.h"


/**************************************************************************************************
* Function Name: app_bt_management_callback()
***************************************************************************************************
* Summary:
*   This is a Bluetooth stack event handler function to receive management events from
*   the BLE stack and process as per the application.
*
* Parameters:
*   wiced_bt_management_evt_t event             : BLE event code of one byte length
*   wiced_bt_management_evt_data_t *p_event_data: Pointer to BLE management event structures
*
* Return:
*  wiced_result_t: Error code from WICED_RESULT_LIST or BT_RESULT_LIST
*
*************************************************************************************************/
wiced_result_t app_bt_management_callback(wiced_bt_management_evt_t event, wiced_bt_management_evt_data_t *p_event_data)
{
    wiced_result_t result = WICED_BT_SUCCESS;

    switch (event)
    {
        case BTM_ENABLED_EVT:

            if (WICED_BT_SUCCESS == p_event_data->enabled.status)
            {
                printf("Started BT Stack Succesfully\n");
            }
            else
            {
            	printf("Error enabling BTM_ENABLED_EVENT\n");
            }

            break;

        default:
            printf("Unhandled Bluetooth Management Event: 0x%x\n", event);
            break;
    }

    return result;
}

Next, update main.c with the required includes.

#include "bluetoothManager.h"
#include "cycfg_bt_settings.h"
#include "bt_platform_cfg_settings.h"

Then update main.c to start the stack

    cybt_platform_config_init(&bt_platform_cfg_settings);
    wiced_bt_stack_init (app_bt_management_callback, &wiced_bt_cfg_settings);

Now build and program it, remember “make -j build” and “make program”.  Look, we have a functioning stack with the two bluetooth thread running.

In the next article Ill finally get around to building the Bluetooth Scanner.