Summary
A tutorial on running MySQL in an instance of Docker on Ubuntu Linux. Then creating a Raspberry Pi Python interface from a sensor to insert data over the network to the new MySQL Server.
Story
As I said in the introduction, this whole process has been a bit chaotic. So here we go. The Raspberry Pi that runs the current creek system has been in my barn since at least 2013 running on the same SD Card and never backed up. I suppose that it wouldn’t have really mattered if I lost the old flood data, but it would have been annoying. Also, that Raspberry Pi is very slow running queries given the 2.2M records that now exist in the database.
To fix this I decided that I want to start by moving the MySQL server to a new computer that runs Docker. Here is the original configuration (from the original article)
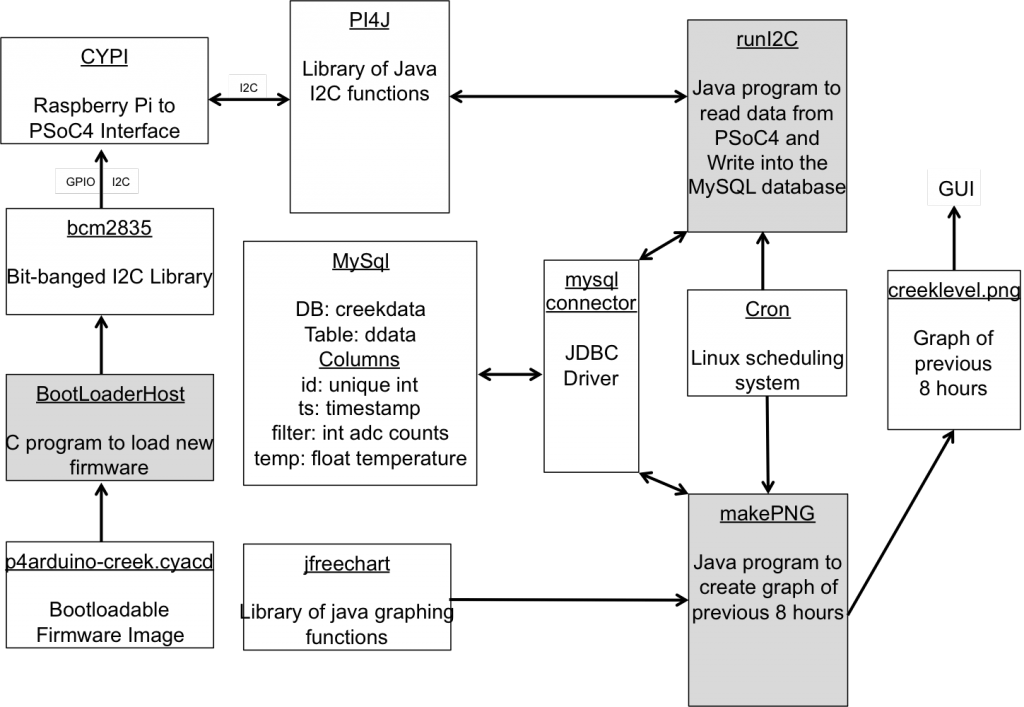
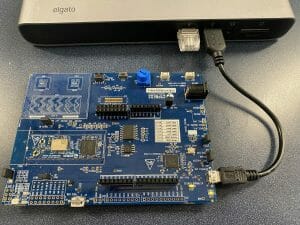
When I set out to do in this article the plan was to move the MySQL Instance from the Raspberry Pi to a new Linux box. Unfortunately while I was doing this, I broke the operating system on the Raspberry Pi and ended up having to rebuild the interface to the PSoC 4. Here is what I ended up building:

This article will walk you through the following steps.
- Build a new Linux machine & Install Ubuntu Server
- Install Docker & MySQL
- Migrate the Data from the original Raspberry Pi MySQL Database
- Build the Python Environment (Part 2.5)
- Python: Get Data SMBUS (Part 2.5)
- Python: Insert MySQL (Part 2.5)
- Shell Script & Crontab (Part 2.5)
- Test using MySQL WorkBench (Part 2.5)
Build a new Linux Box with Ubuntu Server
I wanted to have a local to my lan server running MySQL. My lab assistant suggested that I find something fairly inexpensive on ebay. Here is what I bought:

And… for sure it needed an SSD.

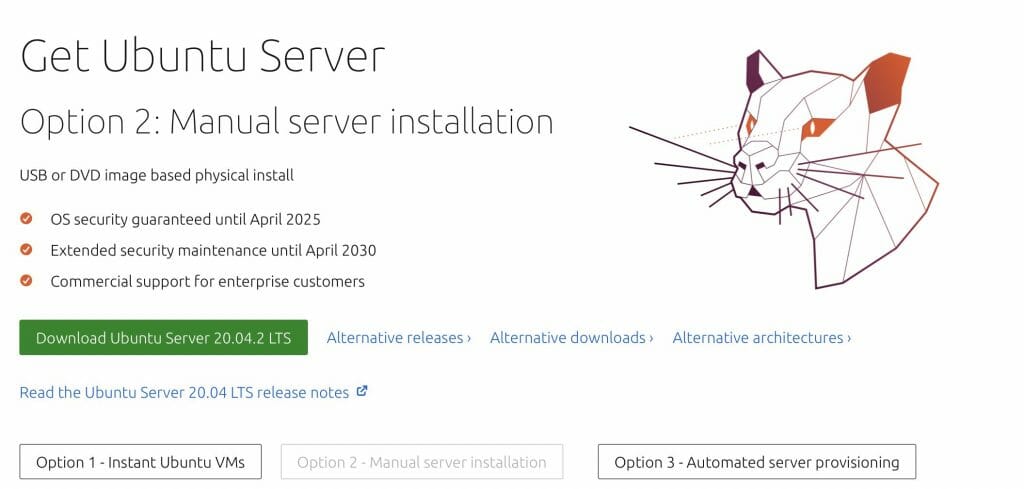
Then I downloaded Ubuntu Server 20.04 from https://ubuntu.com/download/server
After the file was downloaded I created a bootable sdcard by running: dd if=ubuntu-20.04.2-live-server-amd64.iso of=/dev/rdisk4 bs=1m
arh Downloads $ sudo diskutil unmountDisk /dev/disk4 Unmount of all volumes on disk4 was successful arh Downloads $ sudo dd if=ubuntu-20.04.2-live-server-amd64.iso of=/dev/rdisk4 bs=1m 1158+1 records in 1158+1 records out 1215168512 bytes transferred in 32.400378 secs (37504763 bytes/sec) arh Downloads $ diskutil list /dev/disk4 /dev/disk4 (external, physical): #: TYPE NAME SIZE IDENTIFIER 0: Apple_partition_scheme *31.1 GB disk4 1: Apple_partition_map 4.1 KB disk4s1 2: Apple_HFS 4.1 MB disk4s2
After doing the installation (I dont have screen captures of that, but it is easy). I installed the avahi daemon. What is that? Avahi is program that enables mDNS – a part of no configuration networking that helps you manage “names”. Specifically in my case it will create a DNS-like name for this computer without having to actually configure the DNS. That name is “linux.local”.
To install avahi run sudo apt install avahi-daemon
arh@spiff:~$ systemctl status avahi-daemon
● avahi-daemon.service - Avahi mDNS/DNS-SD Stack
     Loaded: loaded (/lib/systemd/system/avahi-daemon.service; enabled; vendor preset: enabled)
     Active: active (running) since Sat 2021-05-01 14:20:40 UTC; 2 weeks 1 days ago
TriggeredBy: ● avahi-daemon.socket
   Main PID: 713 (avahi-daemon)
     Status: "avahi-daemon 0.7 starting up."
      Tasks: 2 (limit: 14105)
     Memory: 2.8M
     CGroup: /system.slice/avahi-daemon.service
             ├─713 avahi-daemon: running [spiff.local]
             └─757 avahi-daemon: chroot helper

May 11 11:26:26 spiff avahi-daemon[713]: Registering new address record for fe80::4409:73ff:fe08:4c75 on veth72ac3b7.*.
May 11 11:26:26 spiff avahi-daemon[713]: Joining mDNS multicast group on interface br-18a7431f8090.IPv6 with address fe80::42:beff:fe8c:e24.
May 11 11:26:26 spiff avahi-daemon[713]: New relevant interface br-18a7431f8090.IPv6 for mDNS.
May 11 11:26:26 spiff avahi-daemon[713]: Registering new address record for fe80::42:beff:fe8c:e24 on br-18a7431f8090.*.
May 11 11:26:43 spiff avahi-daemon[713]: Interface veth72ac3b7.IPv6 no longer relevant for mDNS.
May 11 11:26:43 spiff avahi-daemon[713]: Leaving mDNS multicast group on interface veth72ac3b7.IPv6 with address fe80::4409:73ff:fe08:4c75.
May 11 11:26:43 spiff avahi-daemon[713]: Withdrawing address record for fe80::4409:73ff:fe08:4c75 on veth72ac3b7.
May 11 11:26:48 spiff avahi-daemon[713]: Joining mDNS multicast group on interface veth5c71e0d.IPv6 with address fe80::4499:b0ff:feef:30fe.
May 11 11:26:48 spiff avahi-daemon[713]: New relevant interface veth5c71e0d.IPv6 for mDNS.
May 11 11:26:48 spiff avahi-daemon[713]: Registering new address record for fe80::4499:b0ff:feef:30fe on veth5c71e0d.*.
arh@spiff:~$
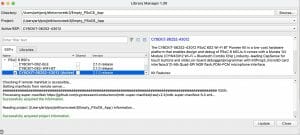
I also will be running MySQL in a Docker instance. To install docker run: sudo apt install docker.io
arh@spiff:~$ systemctl status docker
● docker.service - Docker Application Container Engine
     Loaded: loaded (/lib/systemd/system/docker.service; enabled; vendor preset: enabled)
     Active: active (running) since Sat 2021-05-01 14:20:42 UTC; 2 weeks 1 days ago
TriggeredBy: ● docker.socket
       Docs: https://docs.docker.com
   Main PID: 758 (dockerd)
      Tasks: 26
     Memory: 142.1M
     CGroup: /system.slice/docker.service
             ├─   758 /usr/bin/dockerd -H fd:// --containerd=/run/containerd/containerd.sock
             └─240639 /usr/bin/docker-proxy -proto tcp -host-ip 0.0.0.0 -host-port 3306 -container-ip 172.18.0.2 -container-port 3306

May 02 13:39:42 spiff dockerd[758]: time="2021-05-02T13:39:42.754047181Z" level=info msg="ignoring event" container=4d2e6a3c8c779e01676e4fd8f748aa4581c9469d92398ff274a3800c5d3e98a2 module>
May 02 13:40:42 spiff dockerd[758]: time="2021-05-02T13:40:42.381681852Z" level=error msg="Error setting up exec command in container 4d2e6a3c8c77: Container 4d2e6a3c8c779e01676e4fd8f748a>
May 02 13:40:42 spiff dockerd[758]: time="2021-05-02T13:40:42.760184585Z" level=warning msg="error locating sandbox id 5e4b44ba78eacdb974bfd773ffabf46526177f4ff135ace09b667c3e497b3468: sa>
May 02 13:40:42 spiff dockerd[758]: time="2021-05-02T13:40:42.762228692Z" level=error msg="4d2e6a3c8c779e01676e4fd8f748aa4581c9469d92398ff274a3800c5d3e98a2 cleanup: failed to delete conta>
May 02 13:40:42 spiff dockerd[758]: time="2021-05-02T13:40:42.764274310Z" level=error msg="restartmanger wait error: network c6593d532df7651e3a38572e609d42f69f0daba3ac36263933ca0ae43504cc>
May 11 11:26:24 spiff dockerd[758]: time="2021-05-11T11:26:24.772660650Z" level=info msg="No non-localhost DNS nameservers are left in resolv.conf. Using default external servers: [namese>
May 11 11:26:24 spiff dockerd[758]: time="2021-05-11T11:26:24.772680359Z" level=info msg="IPv6 enabled; Adding default IPv6 external servers: [nameserver 2001:4860:4860::8888 nameserver 2>
May 11 11:26:42 spiff dockerd[758]: time="2021-05-11T11:26:42.994091472Z" level=info msg="ignoring event" container=bfd550cab791b061bbd4e26f3435165de7b3664373de9cbb80d2e78a0aff08e2 module>
May 11 11:26:46 spiff dockerd[758]: time="2021-05-11T11:26:46.212688536Z" level=info msg="No non-localhost DNS nameservers are left in resolv.conf. Using default external servers: [namese>
May 11 11:26:46 spiff dockerd[758]: time="2021-05-11T11:26:46.212708396Z" level=info msg="IPv6 enabled; Adding default IPv6 external servers: [nameserver 2001:4860:4860::8888 nameserver 2>
arh@spiff:~$
Docker Training
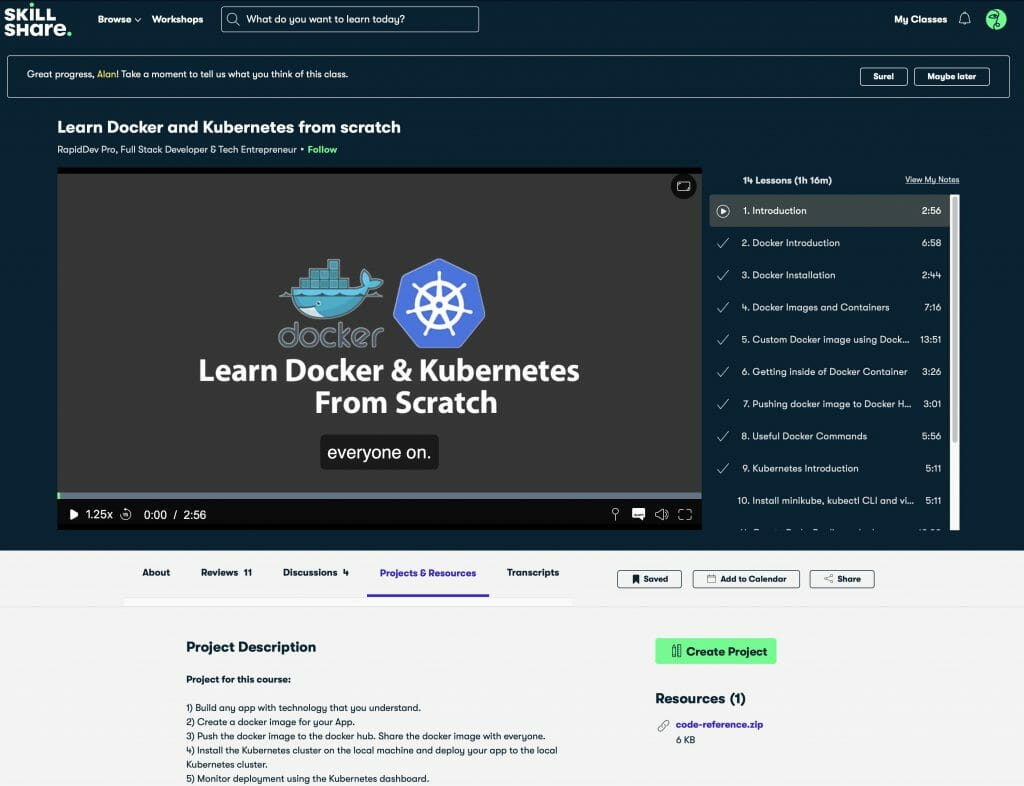
I knew that I wanted to try Docker, no kidding eh, but I didn’t know much of anything about it. I am not really a “video” person for learning, but my son had talked me into trying a skill share class to learn how to edit video. So, I thought that I would give it a try for Docker as well. This class was OK but not great (like 2/5) Here is a screenshot from the class:
I also watched this class, which is excellent…. especially if you watch it at 1.5x speed.
Docker Introduction
There are four basic ideas which you need to understand Docker.
| Concept | Description | Commands |
|---|---|---|
| Image | A runnable binary template that can be instantiated into a container (like a class in object oriented programming) | docker image ls |
| Container | An VM-like instance of an image (like an object i.e. an instance of a class in object oriented programming). This includes network port mapping, volumes,network etc. | docker ps -a |
| Volume | A directory or file map between the host operating system and the docker container. For example a directory X on the host is mapped to the directory Y inside of the container | docker volume ls |
| Network | A synthetic network that is created by the docker daemon to map one or more containers together. This includes a dhcp, dns, routing etc. | docker network ls |
Docker Compose & MySQL
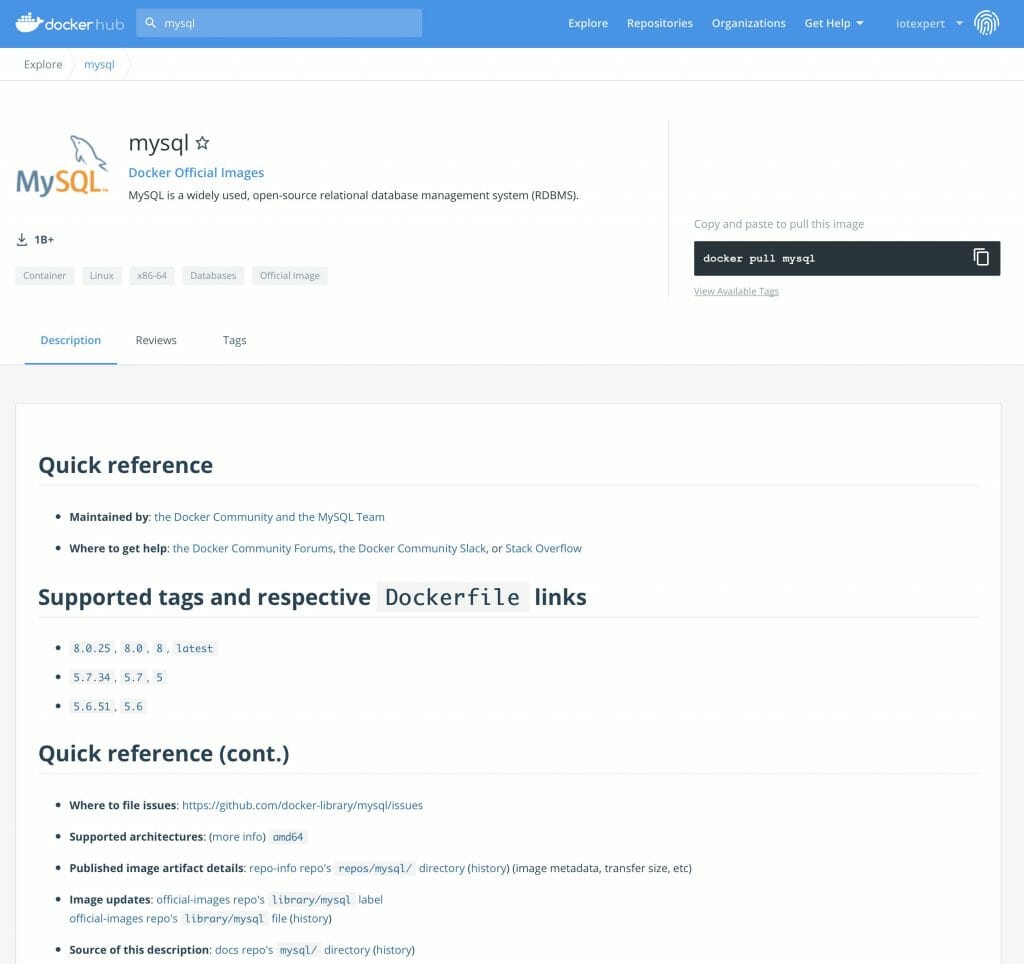
You can find new images at https://hub.docker.com. In fact this is where I get everything that I need for mysql.
If you look a little bit later down on the docker hub you will find the specific instruction for “running” a docker mysql image.
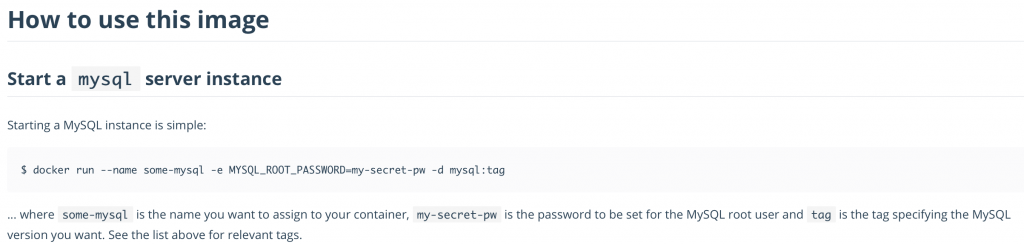
These instructions will work. However, there are two problems.
#1 by running it this way you will not expose the ip port 3306 from inside of the container to the outside work (on your computer or network). This means you won’t be able to talk to the MySQL instance. That is not very helpful
#2 all of the secret sauce you typed will be lost if you need to do that same command again.
The good news is that docker has a specific file format for saving this information called “docker-compose.yaml”.
My docker compose file looks like this.
- The image is “mysql” (use the official docker mysql image)
- Map the MySQL port 3306 from inside the container to the outside
- Make the root password “supersecret”
- Create a database called “creekdata”
- Create a user called “creek” with a password “asillypassword”
- Map the mysql data inside of the container at /var/lib/mysql to an outside volume called “mysql”
arh@spiff:~/mysql$ more docker-compose.yaml
version: '3.1'

services:

  db:
    image: mysql
    restart: always
    ports:
      - 3306:3306
    environment:
      MYSQL_ROOT_PASSWORD: supersecret
      MYSQL_DATABASE: creekdata
      MYSQL_USER: creek
      MYSQL_PASSWORD: asillypassword
    volumes:
      - mysql:/var/lib/mysql

volumes:
  mysql:
With this file I can create the container by running “docker-compose up”
linux$ docker-compose up
Creating network "mysql_default" with the default driver
Creating volume "mysql_mysql" with default driver
Pulling db (mysql:latest)...
latest: Pulling from library/mysql
69692152171a: Pull complete
1651b0be3df3: Pull complete
951da7386bc8: Pull complete
0f86c95aa242: Pull complete
37ba2d8bd4fe: Pull complete
6d278bb05e94: Pull complete
497efbd93a3e: Pull complete
f7fddf10c2c2: Pull complete
16415d159dfb: Pull complete
0e530ffc6b73: Pull complete
b0a4a1a77178: Pull complete
cd90f92aa9ef: Pull complete
Digest: sha256:d50098d7fcb25b1fcb24e2d3247cae3fc55815d64fec640dc395840f8fa80969
Status: Downloaded newer image for mysql:latest
Creating mysql_db_1 ...
Creating mysql_db_1 ... done
Attaching to mysql_db_1
db_1  | 2021-05-17 20:01:20+00:00 [Note] [Entrypoint]: Entrypoint script for MySQL Server 8.0.25-1debian10 started.
db_1  | 2021-05-17 20:01:20+00:00 [Note] [Entrypoint]: Switching to dedicated user 'mysql'
db_1  | 2021-05-17 20:01:20+00:00 [Note] [Entrypoint]: Entrypoint script for MySQL Server 8.0.25-1debian10 started.
db_1  | 2021-05-17 20:01:20+00:00 [Note] [Entrypoint]: Initializing database files
db_1  | 2021-05-17T20:01:20.192621Z 0 [System] [MY-013169] [Server] /usr/sbin/mysqld (mysqld 8.0.25) initializing of server in progress as process 41
db_1  | 2021-05-17T20:01:20.196027Z 1 [System] [MY-013576] [InnoDB] InnoDB initialization has started.
db_1  | 2021-05-17T20:01:20.770999Z 1 [System] [MY-013577] [InnoDB] InnoDB initialization has ended.
db_1  | 2021-05-17T20:01:21.809117Z 6 [Warning] [MY-010453] [Server] root@localhost is created with an empty password ! Please consider switching off the --initialize-insecure option.
db_1  | 2021-05-17 20:01:24+00:00 [Note] [Entrypoint]: Database files initialized
db_1  | 2021-05-17 20:01:24+00:00 [Note] [Entrypoint]: Starting temporary server
db_1  | 2021-05-17T20:01:24.396505Z 0 [System] [MY-010116] [Server] /usr/sbin/mysqld (mysqld 8.0.25) starting as process 86
db_1  | 2021-05-17T20:01:24.415784Z 1 [System] [MY-013576] [InnoDB] InnoDB initialization has started.
db_1  | 2021-05-17T20:01:24.551463Z 1 [System] [MY-013577] [InnoDB] InnoDB initialization has ended.
db_1  | 2021-05-17T20:01:24.618191Z 0 [System] [MY-011323] [Server] X Plugin ready for connections. Socket: /var/run/mysqld/mysqlx.sock
db_1  | 2021-05-17T20:01:24.726805Z 0 [Warning] [MY-010068] [Server] CA certificate ca.pem is self signed.
db_1  | 2021-05-17T20:01:24.726923Z 0 [System] [MY-013602] [Server] Channel mysql_main configured to support TLS. Encrypted connections are now supported for this channel.
db_1  | 2021-05-17T20:01:24.728714Z 0 [Warning] [MY-011810] [Server] Insecure configuration for --pid-file: Location '/var/run/mysqld' in the path is accessible to all OS users. Consider choosing a different directory.
db_1  | 2021-05-17T20:01:24.738807Z 0 [System] [MY-010931] [Server] /usr/sbin/mysqld: ready for connections. Version: '8.0.25'  socket: '/var/run/mysqld/mysqld.sock'  port: 0  MySQL Community Server - GPL.
db_1  | 2021-05-17 20:01:24+00:00 [Note] [Entrypoint]: Temporary server started.
db_1  | Warning: Unable to load '/usr/share/zoneinfo/iso3166.tab' as time zone. Skipping it.
db_1  | Warning: Unable to load '/usr/share/zoneinfo/leap-seconds.list' as time zone. Skipping it.
db_1  | Warning: Unable to load '/usr/share/zoneinfo/zone.tab' as time zone. Skipping it.
db_1  | Warning: Unable to load '/usr/share/zoneinfo/zone1970.tab' as time zone. Skipping it.
db_1  | 2021-05-17 20:01:25+00:00 [Note] [Entrypoint]: Creating database creekdata
db_1  | 2021-05-17 20:01:25+00:00 [Note] [Entrypoint]: Creating user creek
db_1  | 2021-05-17 20:01:25+00:00 [Note] [Entrypoint]: Giving user creek access to schema creekdata
db_1  |
db_1  | 2021-05-17 20:01:25+00:00 [Note] [Entrypoint]: Stopping temporary server
db_1  | 2021-05-17T20:01:25.775184Z 13 [System] [MY-013172] [Server] Received SHUTDOWN from user root. Shutting down mysqld (Version: 8.0.25).
db_1  | 2021-05-17T20:01:27.490685Z 0 [System] [MY-010910] [Server] /usr/sbin/mysqld: Shutdown complete (mysqld 8.0.25)  MySQL Community Server - GPL.
db_1  | 2021-05-17 20:01:27+00:00 [Note] [Entrypoint]: Temporary server stopped
db_1  |
db_1  | 2021-05-17 20:01:27+00:00 [Note] [Entrypoint]: MySQL init process done. Ready for start up.
db_1  |
db_1  | 2021-05-17T20:01:27.988961Z 0 [System] [MY-010116] [Server] /usr/sbin/mysqld (mysqld 8.0.25) starting as process 1
db_1  | 2021-05-17T20:01:27.999715Z 1 [System] [MY-013576] [InnoDB] InnoDB initialization has started.
db_1  | 2021-05-17T20:01:28.135399Z 1 [System] [MY-013577] [InnoDB] InnoDB initialization has ended.
db_1  | 2021-05-17T20:01:28.202245Z 0 [System] [MY-011323] [Server] X Plugin ready for connections. Bind-address: '::' port: 33060, socket: /var/run/mysqld/mysqlx.sock
db_1  | 2021-05-17T20:01:28.287968Z 0 [Warning] [MY-010068] [Server] CA certificate ca.pem is self signed.
db_1  | 2021-05-17T20:01:28.288087Z 0 [System] [MY-013602] [Server] Channel mysql_main configured to support TLS. Encrypted connections are now supported for this channel.
db_1  | 2021-05-17T20:01:28.290206Z 0 [Warning] [MY-011810] [Server] Insecure configuration for --pid-file: Location '/var/run/mysqld' in the path is accessible to all OS users. Consider choosing a different directory.
db_1  | 2021-05-17T20:01:28.300867Z 0 [System] [MY-010931] [Server] /usr/sbin/mysqld: ready for connections. Version: '8.0.25'  socket: '/var/run/mysqld/mysqld.sock'  port: 3306  MySQL Community Server - GPL.
Migrate the Data using MySQLWorkbench
I have a BUNCH of data (2.2M rows or so) on the original Raspberry Pi. I want this data in my newly created instance of MySQL. To get it there I will use the MySQL Workbench migration wizard to move the data from the old to the new instance.
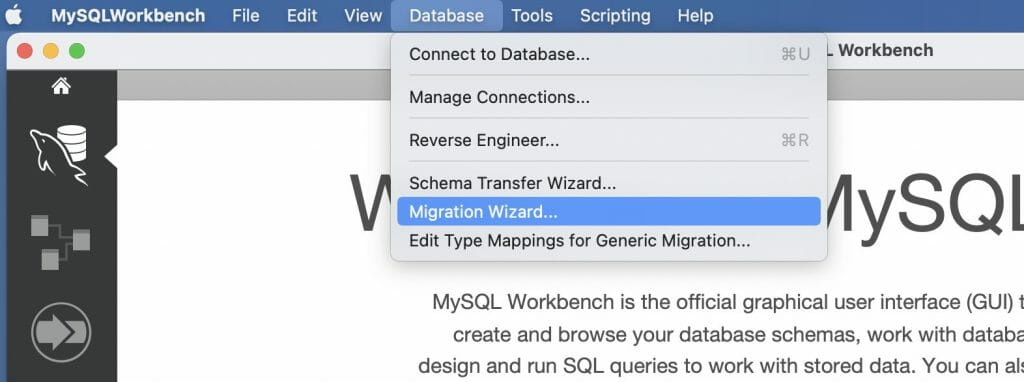
It starts with these nice instructions.

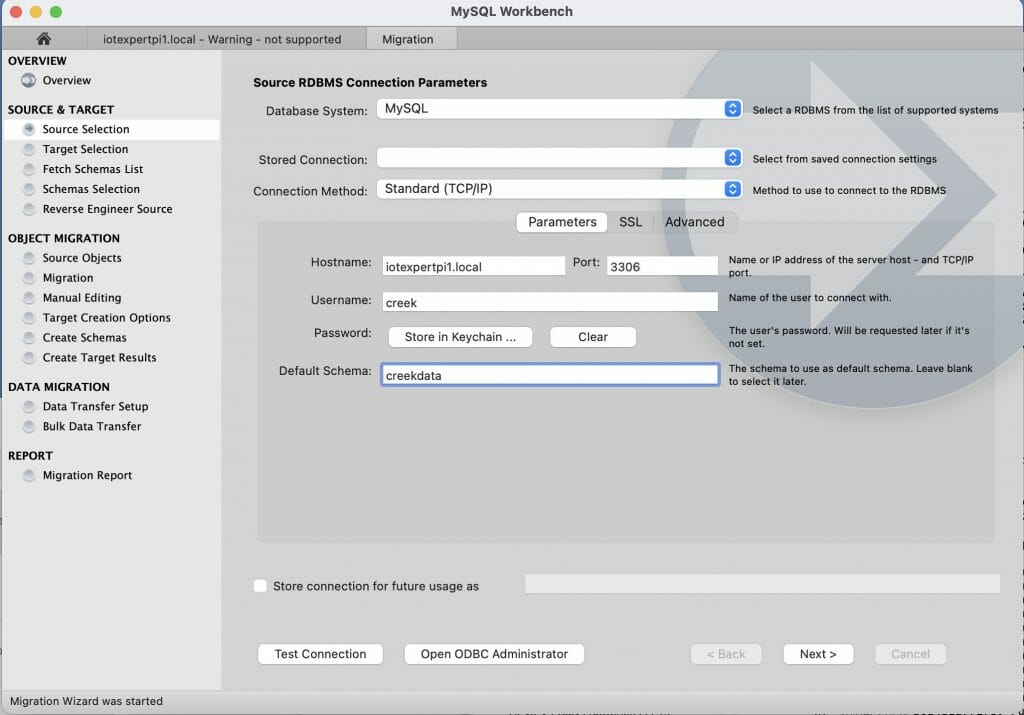
Then I specify the source (the original Raspberry Pi)
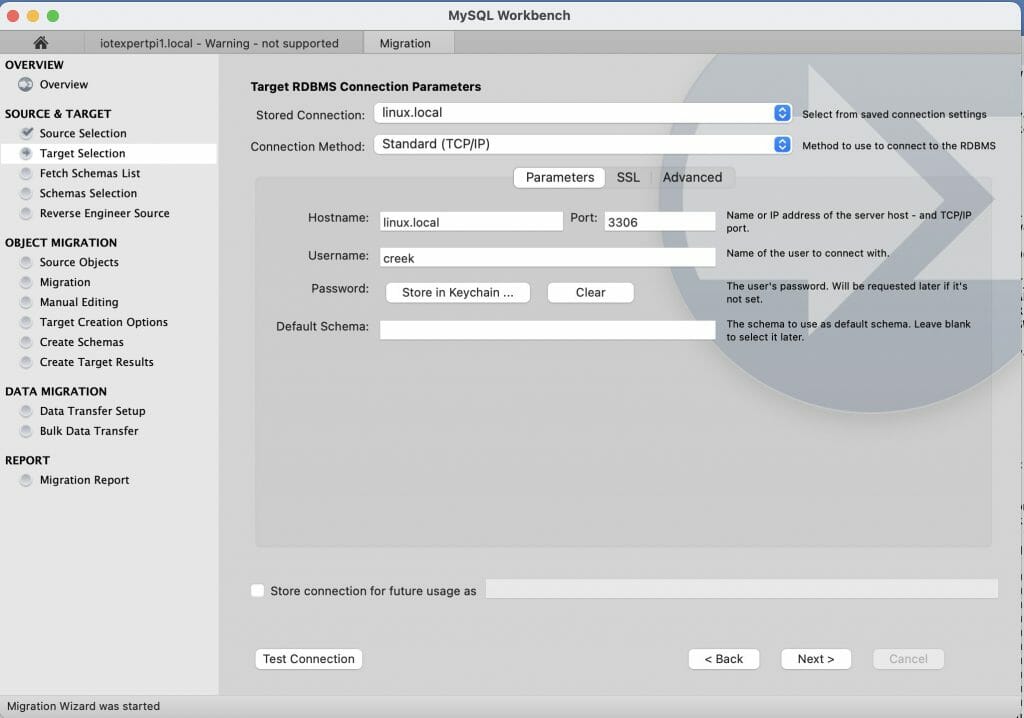
The target is specified next.
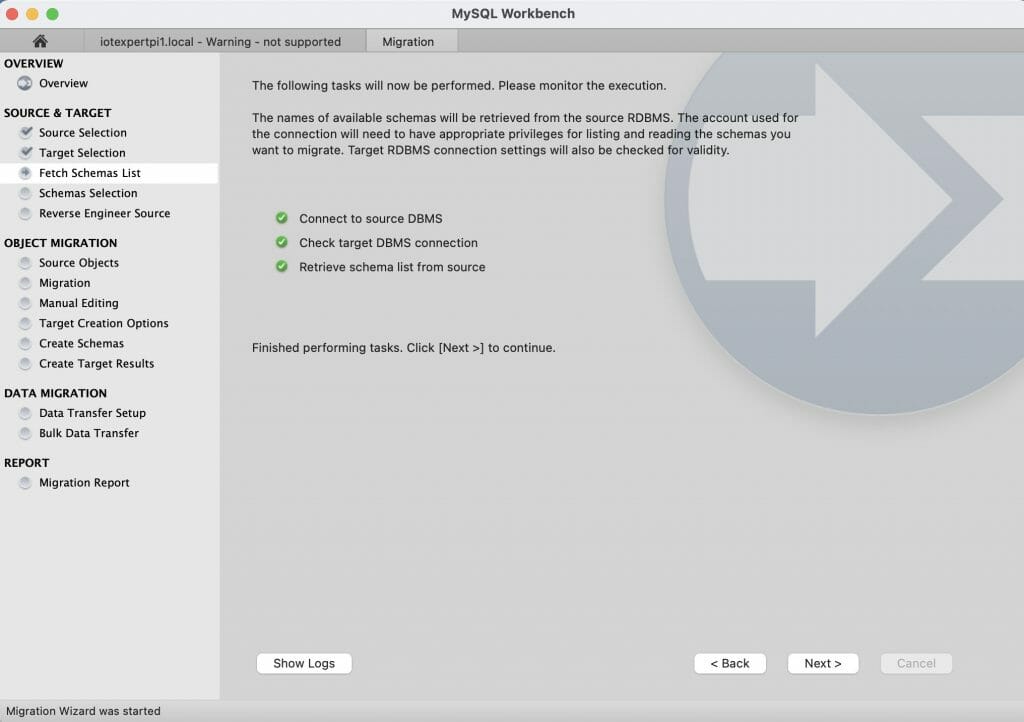
It then reads the database schema from the source and makes sure that it can talk to the target.
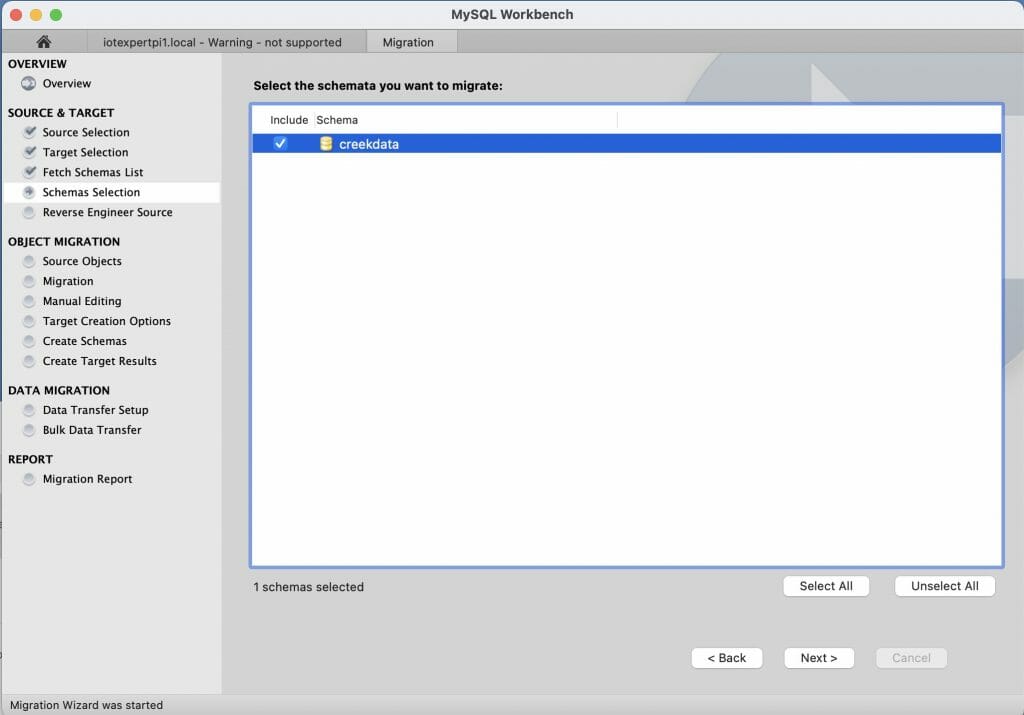
Then it asks me what I want to transfer. There is only one database schema on the source, the “creekdata” database.
Next it reads the source schema and reverse engineers the tables etc.

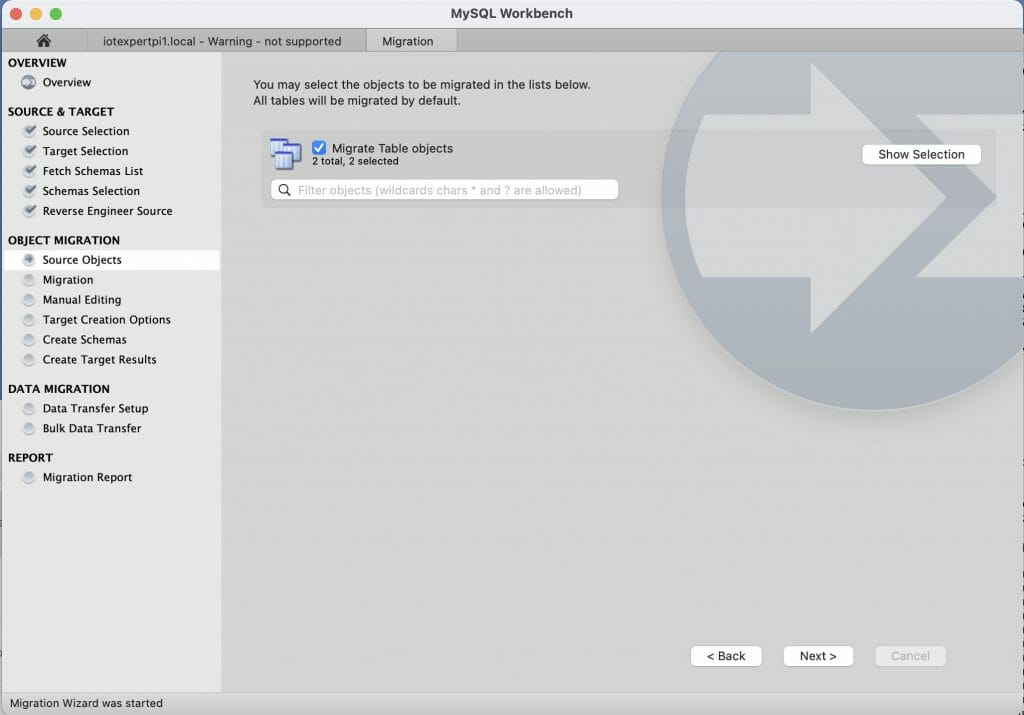
Now it asks specifically what you want to transfer. For my case there are two tables in the creekdata database.
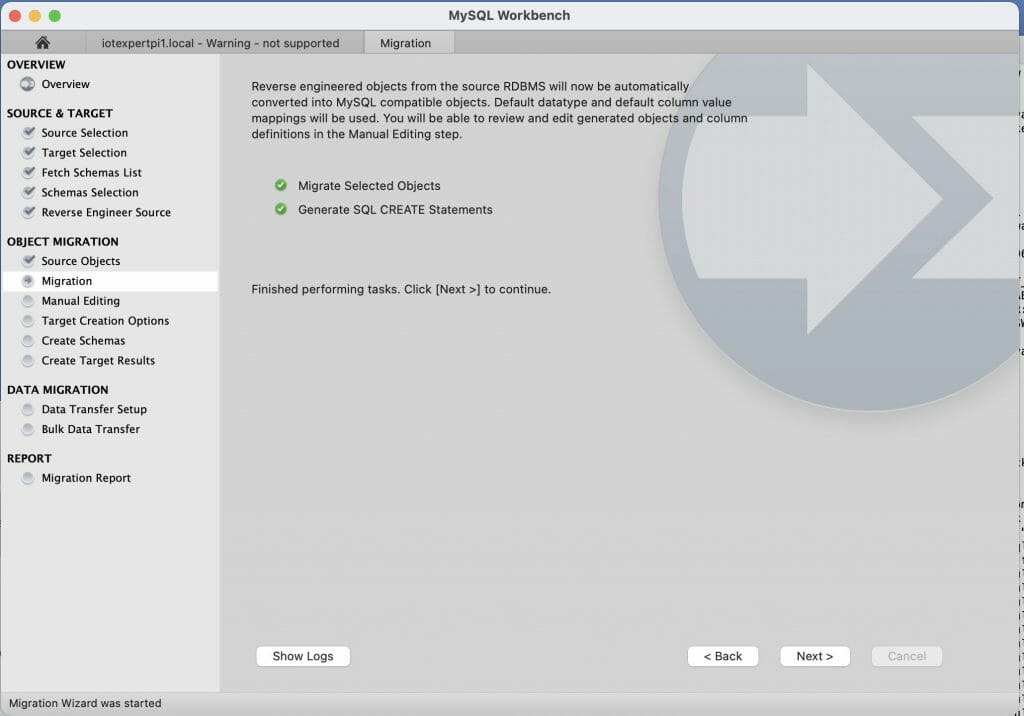
Then it generates the specific mysql commands required to recreate the schema
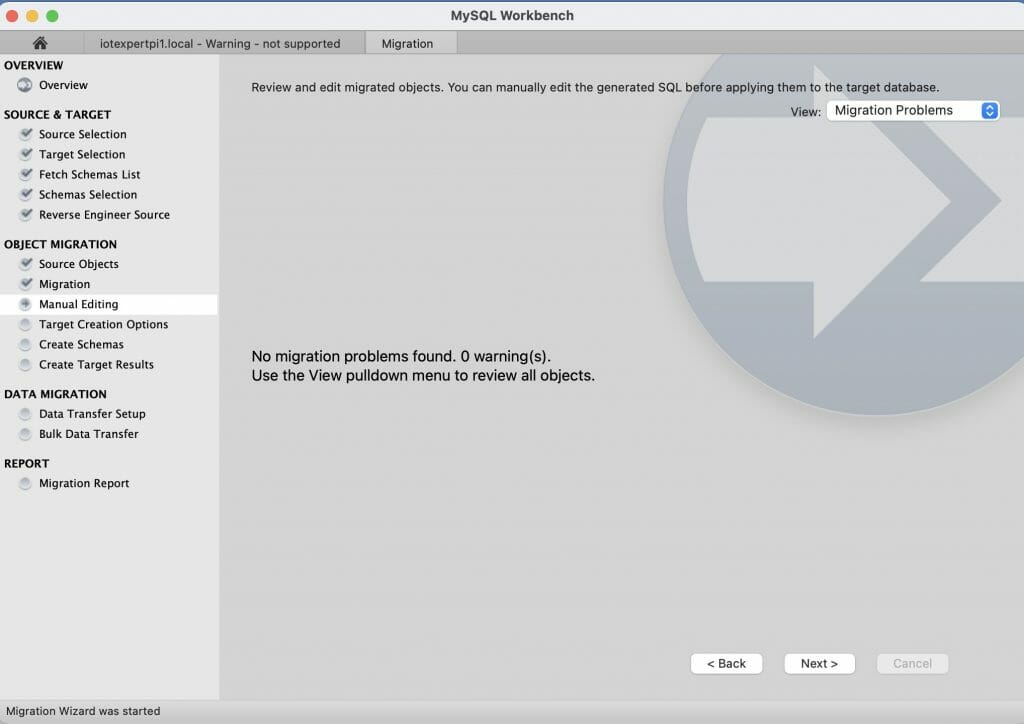
Gives the option of changing it.
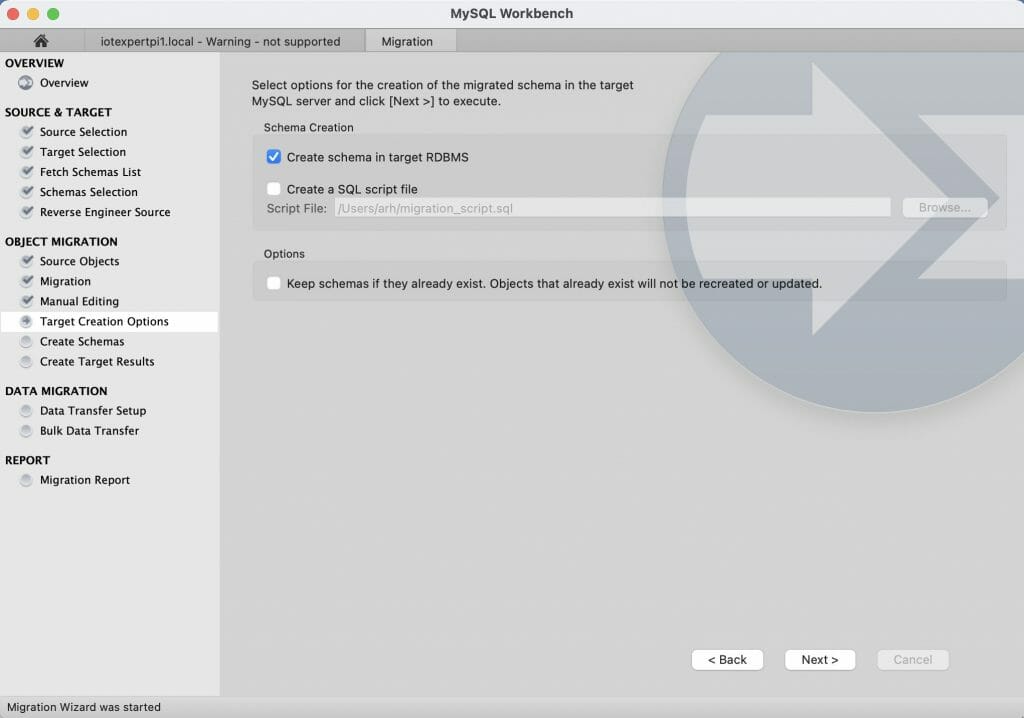
Now it asks you what method you want to use on the target. I choose to have it do all of the work.
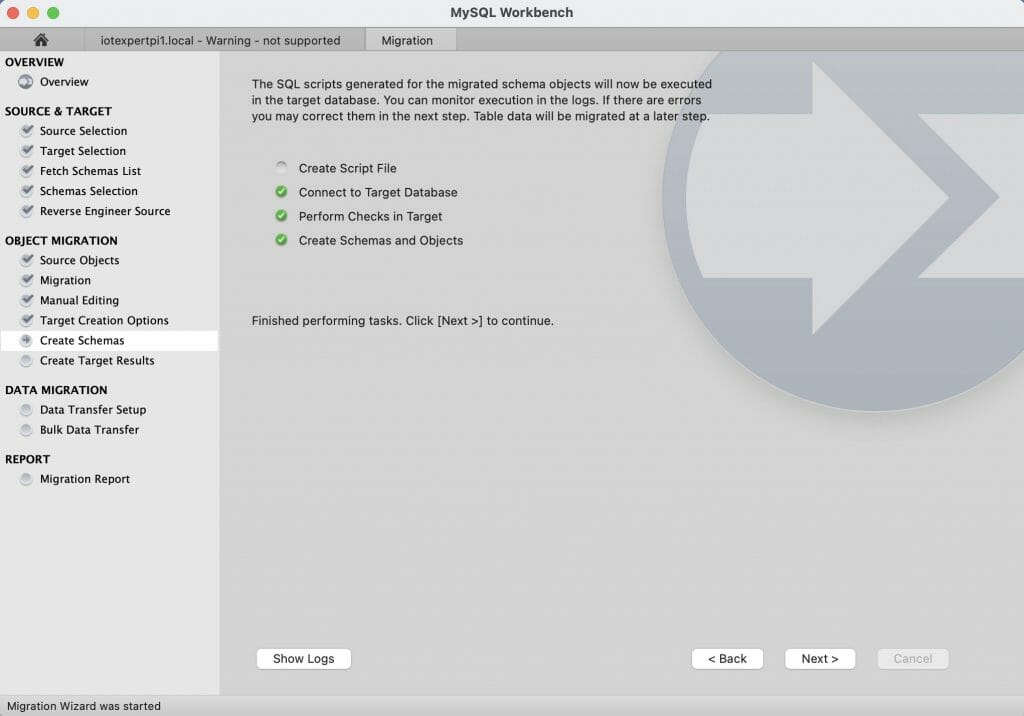
Then it creates the new database and tables.
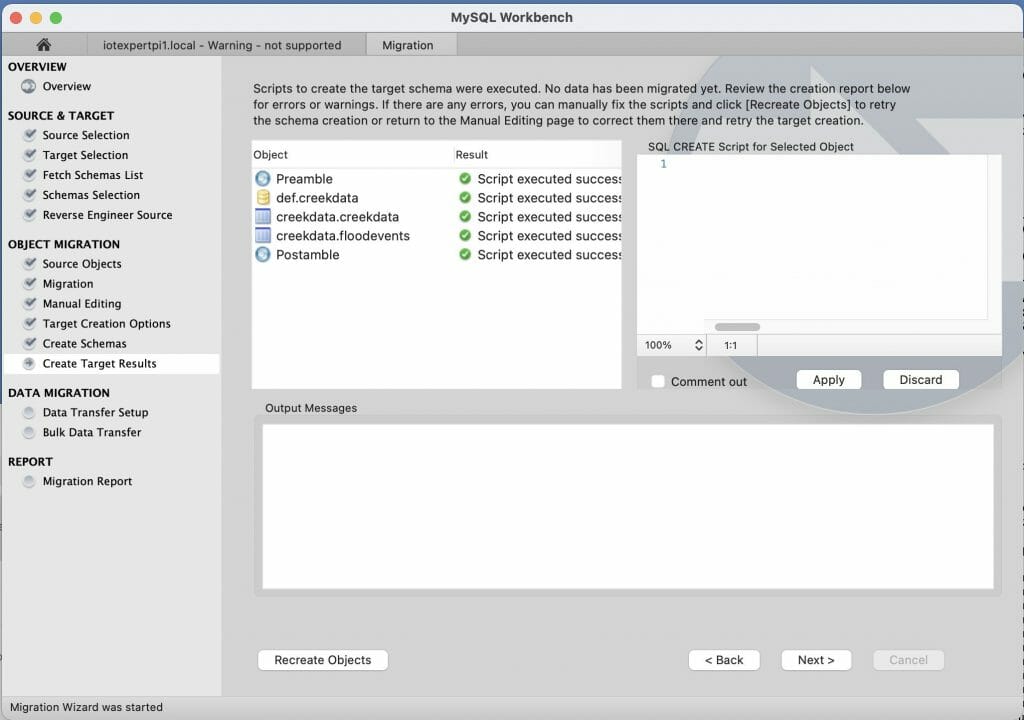
And you can see that it worked.
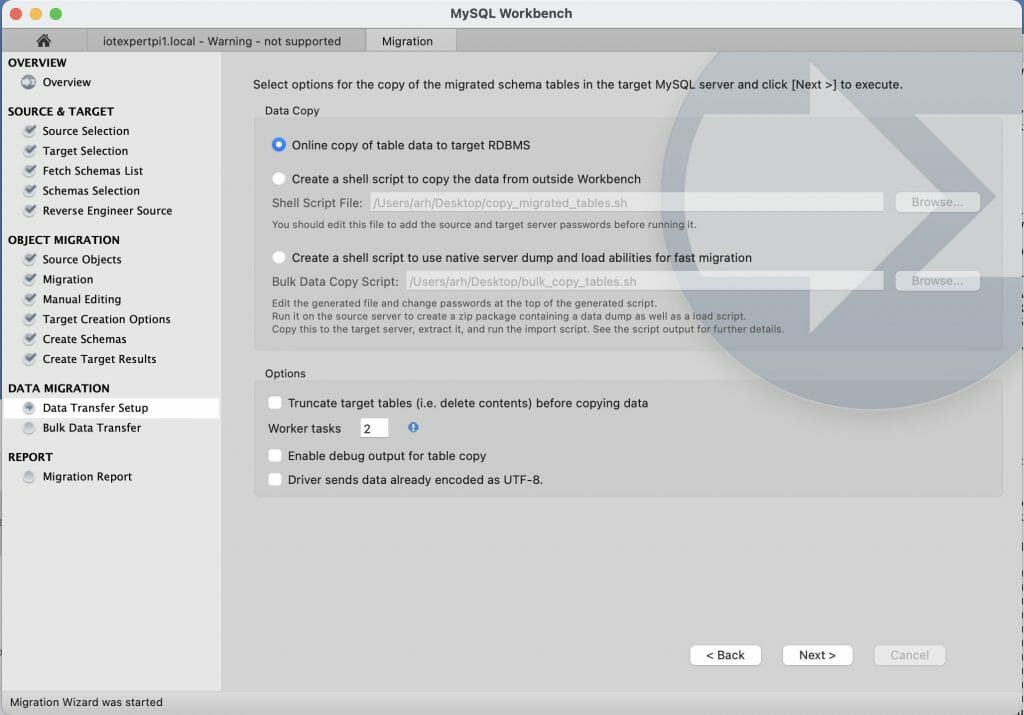
Then it asks how I want to copy the data. I tell it to do all of the work for me.
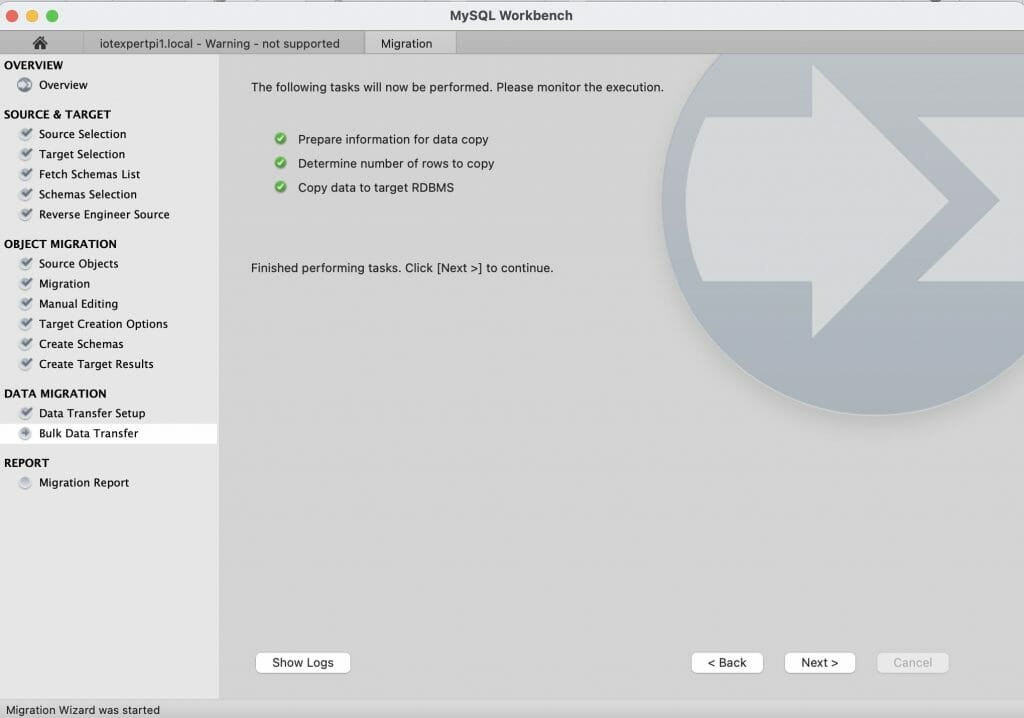
Then it runs a bulk transfer of the data.
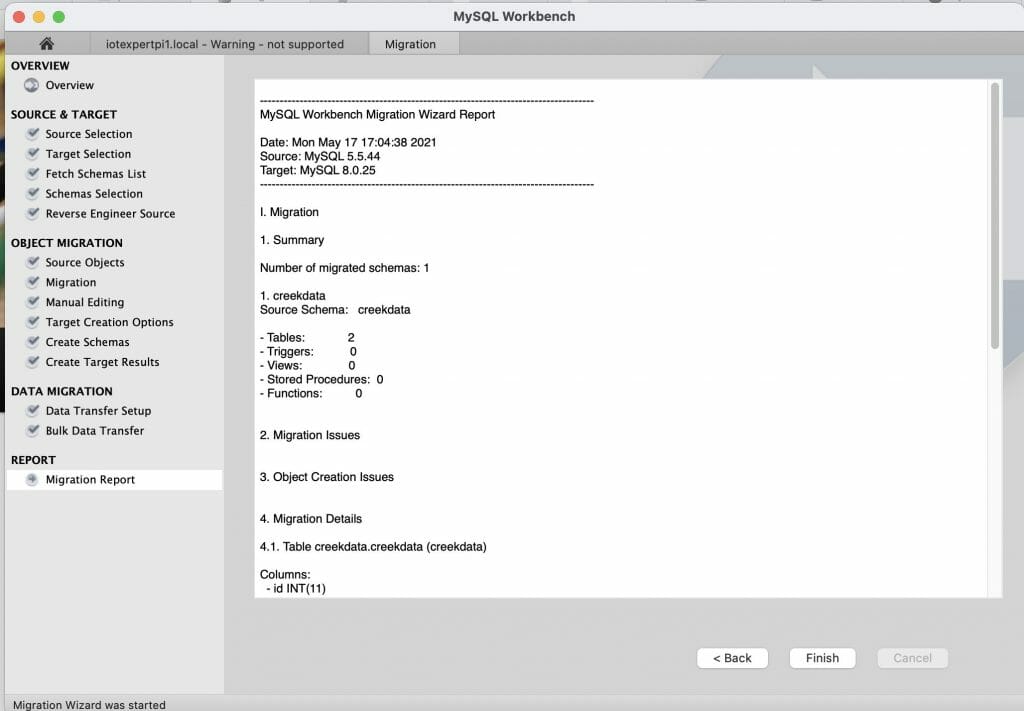
And give me a final report that things worked. Kick ass.
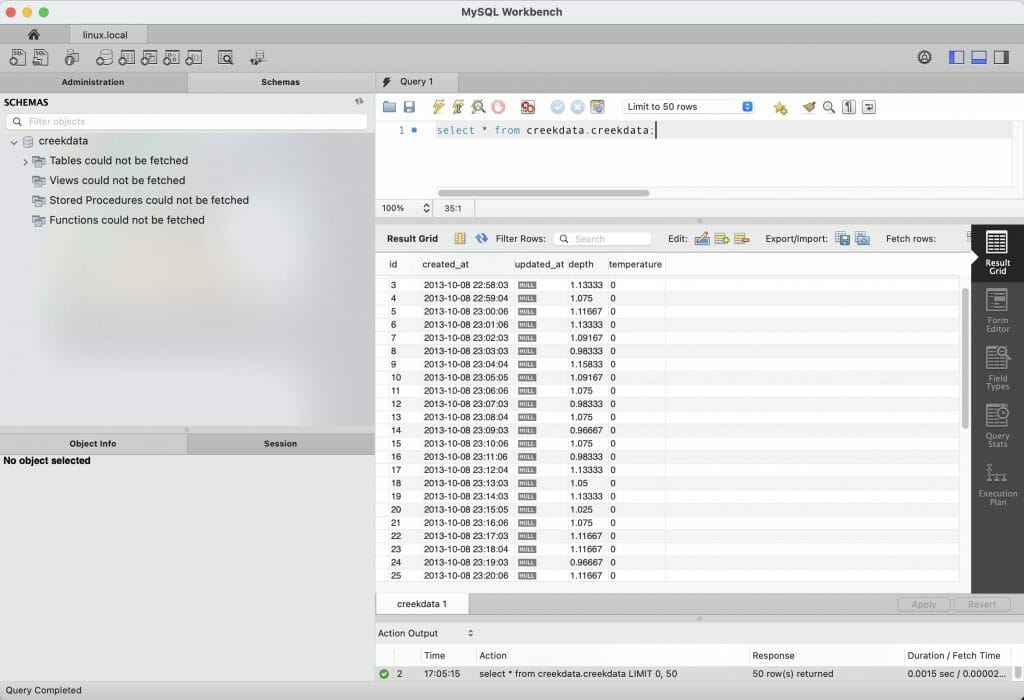
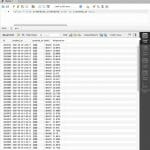
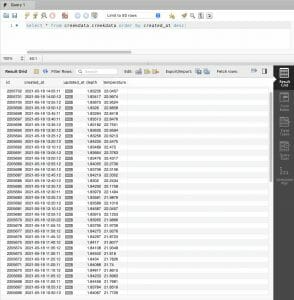
I can now make a connection to the new database. And I see my old data back to 2013.
That is it for this article. In the next article Ill do the Python Shell Script stuff to reconnect my data to the new MySql Server.

No comment yet, add your voice below!