Designing low-power, cloud-connected IoT devices with PSoC® 6 MCU’s and WICED® Wi-Fi/Bluetooth
Summary
Although I a like the video game, it is for sure missing something. That something is IoT. The first IoT thing that we will do to the game is to add a BLE remote control. I wanted a pre-done remote control that could be downloaded from the App store. After looking around a little bit I found GoBle. I published a detailed article about GoBle here, but I’ll explain enough to make it work with the game.
Here is a screen shot of what the remote control looks like. You can see that on the left there is a joystick, and on the right there are some buttons. My son tells me that this is a classic layout for a remote control.
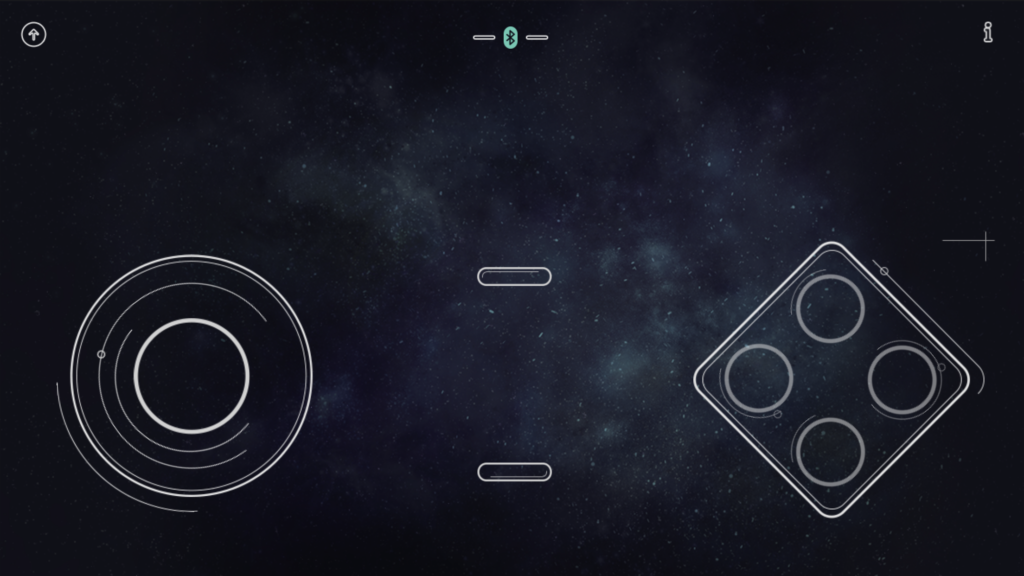
This remote control works as a “Central” meaning it knows how to connect to Peripherals. For this lesson we will turn on the CYW4343W and make it be a Bluetooth Peripheral.
To implement this lesson I will follow these steps:
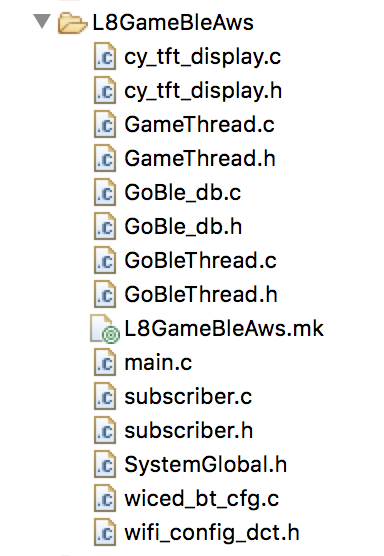
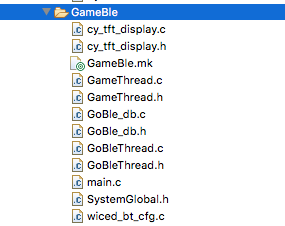
- Create a folder called “L5GoBle”
- Create a makefile called L5GoBle.mk
- Setup a GATT database by creating GoBle_db.h and GoBle_db.c
- Setup wiced_bt_cfg.c
- Create GoBleThread.c
- Create GoBle.c to startup the GoBleThread
- Build, Program and Test
Create a directory called “L5GoBle”
Create a makefile called L5GoBle.mk
NAME := App_WStudio_L5GoBle
$(NAME)_SOURCES := GoBle.c \
GoBleThread.c \
GoBle_db.c \
wiced_bt_cfg.c
$(NAME)_INCLUDES := .
$(NAME)_COMPONENTS += libraries/drivers/bluetooth/low_energy
Setup a GATT database by creating GoBle_db.h and GoBle_db.c
Create a file called “GoBle_db.h”
// GoBle_db.h
#ifndef __GATT_DATABASE_H__
#define __GATT_DATABASE_H__
#include "wiced.h"
#define __UUID_GOBLE 0xfb, 0x34, 0x9b, 0x5f, 0x80, 0x00, 0x00, 0x80, 0x00, 0x10, 0x00, 0x00, 0xb0, 0xdf, 0x00, 0x00
#define __UUID_GOBLE_SERIALPORTID 0xfb, 0x34, 0x9b, 0x5f, 0x80, 0x00, 0x00, 0x80, 0x00, 0x10, 0x00, 0x00, 0xb1, 0xdf, 0x00, 0x00
// ***** Primary Service 'Generic Attribute'
#define HDLS_GENERIC_ATTRIBUTE 0x0001
// ***** Primary Service 'Generic Access'
#define HDLS_GENERIC_ACCESS 0x0014
// ----- Characteristic 'Device Name'
#define HDLC_GENERIC_ACCESS_DEVICE_NAME 0x0015
#define HDLC_GENERIC_ACCESS_DEVICE_NAME_VALUE 0x0016
// ----- Characteristic 'Appearance'
#define HDLC_GENERIC_ACCESS_APPEARANCE 0x0017
#define HDLC_GENERIC_ACCESS_APPEARANCE_VALUE 0x0018
// ***** Primary Service 'GoBle'
#define HDLS_GOBLE 0x0028
// ----- Characteristic 'SerialPortId'
#define HDLC_GOBLE_SERIALPORTID 0x0029
#define HDLC_GOBLE_SERIALPORTID_VALUE 0x002A
// ===== Descriptor 'Client Configuration'
#define HDLD_GOBLE_SERIALPORTID_CLIENT_CONFIGURATION 0x002B
// External definitions
extern const uint8_t gatt_database[];
extern const uint16_t gatt_database_len;
extern uint8_t BT_LOCAL_NAME[];
extern const uint16_t BT_LOCAL_NAME_CAPACITY;
#endif /* __GATT_DATABASE_H__ */
Create a file called “GoBle.c”
/*
* This file has been automatically generated by the WICED 20719-B1 Designer.
* BLE device's GATT database and device configuration.
*
*/
// GoBle_db.c
#include "GoBle_db.h"
#include "wiced.h"
#include "wiced_bt_uuid.h"
#include "wiced_bt_gatt.h"
/*************************************************************************************
** GATT server definitions
*************************************************************************************/
const uint8_t gatt_database[] = // Define GATT database
{
/* Primary Service 'Generic Attribute' */
PRIMARY_SERVICE_UUID16 (HDLS_GENERIC_ATTRIBUTE, UUID_SERVICE_GATT),
/* Primary Service 'Generic Access' */
PRIMARY_SERVICE_UUID16 (HDLS_GENERIC_ACCESS, UUID_SERVICE_GAP),
/* Primary Service 'GoBle' */
PRIMARY_SERVICE_UUID128 (HDLS_GOBLE, __UUID_GOBLE),
/* Characteristic 'SerialPortId' */
CHARACTERISTIC_UUID128_WRITABLE (HDLC_GOBLE_SERIALPORTID, HDLC_GOBLE_SERIALPORTID_VALUE,
__UUID_GOBLE_SERIALPORTID, LEGATTDB_CHAR_PROP_READ | LEGATTDB_CHAR_PROP_WRITE_NO_RESPONSE | LEGATTDB_CHAR_PROP_WRITE | LEGATTDB_CHAR_PROP_NOTIFY,
LEGATTDB_PERM_READABLE | LEGATTDB_PERM_WRITE_CMD | LEGATTDB_PERM_WRITE_REQ),
/* Descriptor 'Client Characteristic Configuration' */
CHAR_DESCRIPTOR_UUID16_WRITABLE (HDLD_GOBLE_SERIALPORTID_CLIENT_CONFIGURATION,
UUID_DESCRIPTOR_CLIENT_CHARACTERISTIC_CONFIGURATION, LEGATTDB_PERM_READABLE | LEGATTDB_PERM_WRITE_REQ | LEGATTDB_PERM_AUTH_WRITABLE),
};
// Length of the GATT database
const uint16_t gatt_database_len = sizeof(gatt_database);
Setup wiced_bt_cfg.c
The WICED Bluetooth Configuration file is called “wiced_bt_config.c”. The only change I made from the default is the timeout value of the advertising. You can copy this directly into your file.
/*
* This file has been automatically generated by the WICED 20719-B1 Designer.
* Device Configuration.
*
*/
/** wiced_bt_cfg.c
*
* Runtime Bluetooth stack configuration parameters
*
*/
#include "wiced_bt_dev.h"
#include "wiced_bt_ble.h"
#include "wiced_bt_uuid.h"
#include "wiced_bt_gatt.h"
#include "wiced_bt_avrc.h"
#include "wiced_bt_cfg.h"
/* Null-Terminated Local Device Name */
uint8_t BT_LOCAL_NAME[] = { 'G','o','B','l','e','T','e','s','t','\0' };
const uint16_t BT_LOCAL_NAME_CAPACITY = sizeof(BT_LOCAL_NAME);
/*******************************************************************
* wiced_bt core stack configuration
******************************************************************/
const wiced_bt_cfg_settings_t wiced_bt_cfg_settings =
{
.device_name = (uint8_t*)BT_LOCAL_NAME, /**< Local device name (NULL terminated) */
.device_class = {0x00, 0x00, 0x00}, /**< Local device class */
.security_requirement_mask = BTM_SEC_NONE, /**< Security requirements mask (BTM_SEC_NONE, or combination of BTM_SEC_IN_AUTHENTICATE, BTM_SEC_OUT_AUTHENTICATE, BTM_SEC_ENCRYPT */
.max_simultaneous_links = 1, /**< Maximum number of simultaneous links to different devices */
/* BR/EDR Scan Configuration */
.br_edr_scan_cfg = {
.inquiry_scan_type = BTM_SCAN_TYPE_STANDARD, /**< Inquiry Scan Type (BTM_SCAN_TYPE_STANDARD or BTM_SCAN_TYPE_INTERLACED) */
.inquiry_scan_interval = 0x0000, /**< Inquiry Scan Interval (0 to use default) */
.inquiry_scan_window = 0x0000, /**< Inquiry Scan Window (0 to use default) */
.page_scan_type = BTM_SCAN_TYPE_STANDARD, /**< Page Scan Type (BTM_SCAN_TYPE_STANDARD or BTM_SCAN_TYPE_INTERLACED) */
.page_scan_interval = 0x0000, /**< Page Scan Interval (0 to use default) */
.page_scan_window = 0x0000, /**< Page Scan Window (0 to use default) */
},
/* BLE Scan Settings */
.ble_scan_cfg = {
.scan_mode = BTM_BLE_SCAN_MODE_PASSIVE, /**< BLE Scan Mode (BTM_BLE_SCAN_MODE_PASSIVE or BTM_BLE_SCAN_MODE_ACTIVE) */
/* Advertisement Scan Configuration */
.high_duty_scan_interval = WICED_BT_CFG_DEFAULT_HIGH_DUTY_SCAN_INTERVAL, /**< High Duty Scan Interval */
.high_duty_scan_window = WICED_BT_CFG_DEFAULT_HIGH_DUTY_SCAN_WINDOW, /**< High Duty Scan Window */
.high_duty_scan_duration = 5, /**< High Duty Scan Duration in seconds (0 for infinite) */
.low_duty_scan_interval = WICED_BT_CFG_DEFAULT_LOW_DUTY_SCAN_INTERVAL, /**< Low Duty Scan Interval */
.low_duty_scan_window = WICED_BT_CFG_DEFAULT_LOW_DUTY_SCAN_WINDOW, /**< Low Duty Scan Window */
.low_duty_scan_duration = 5, /**< Low Duty Scan Duration in seconds (0 for infinite) */
/* Connection Scan Configuration */
.high_duty_conn_scan_interval = WICED_BT_CFG_DEFAULT_HIGH_DUTY_CONN_SCAN_INTERVAL, /**< High Duty Connection Cycle Connection Scan Interval */
.high_duty_conn_scan_window = WICED_BT_CFG_DEFAULT_HIGH_DUTY_CONN_SCAN_WINDOW, /**< High Duty Connection Cycle Connection Scan Window */
.high_duty_conn_duration = 30, /**< High Duty Connection Cycle Connection Duration in seconds (0 for infinite) */
.low_duty_conn_scan_interval = WICED_BT_CFG_DEFAULT_LOW_DUTY_CONN_SCAN_INTERVAL, /**< Low Duty Connection Cycle Connection Scan Interval */
.low_duty_conn_scan_window = WICED_BT_CFG_DEFAULT_LOW_DUTY_CONN_SCAN_WINDOW, /**< Low Duty Connection Cycle Connection Scan Window */
.low_duty_conn_duration = 30, /**< Low Duty Connection Cycle Connection Duration in seconds (0 for infinite) */
/* Connection Configuration */
.conn_min_interval = WICED_BT_CFG_DEFAULT_CONN_MIN_INTERVAL, /**< Minimum Connection Interval */
.conn_max_interval = WICED_BT_CFG_DEFAULT_CONN_MAX_INTERVAL, /**< Maximum Connection Interval */
.conn_latency = WICED_BT_CFG_DEFAULT_CONN_LATENCY, /**< Connection Latency */
.conn_supervision_timeout = WICED_BT_CFG_DEFAULT_CONN_SUPERVISION_TIMEOUT, /**< Connection Link Supervision Timeout */
},
/* BLE Advertisement Settings */
.ble_advert_cfg = {
.channel_map = BTM_BLE_ADVERT_CHNL_37 | /**< Advertising Channel Map (mask of BTM_BLE_ADVERT_CHNL_37, BTM_BLE_ADVERT_CHNL_38, BTM_BLE_ADVERT_CHNL_39) */
BTM_BLE_ADVERT_CHNL_38 |
BTM_BLE_ADVERT_CHNL_39,
.high_duty_min_interval = WICED_BT_CFG_DEFAULT_HIGH_DUTY_ADV_MIN_INTERVAL, /**< High Duty Undirected Connectable Minimum Advertising Interval */
.high_duty_max_interval = WICED_BT_CFG_DEFAULT_HIGH_DUTY_ADV_MAX_INTERVAL, /**< High Duty Undirected Connectable Maximum Advertising Interval */
.high_duty_duration = 0, /**< High Duty Undirected Connectable Advertising Duration in seconds (0 for infinite) */
.low_duty_min_interval = WICED_BT_CFG_DEFAULT_LOW_DUTY_ADV_MIN_INTERVAL, /**< Low Duty Undirected Connectable Minimum Advertising Interval */
.low_duty_max_interval = WICED_BT_CFG_DEFAULT_LOW_DUTY_ADV_MAX_INTERVAL, /**< Low Duty Undirected Connectable Maximum Advertising Interval */
.low_duty_duration = 60, /**< Low Duty Undirected Connectable Advertising Duration in seconds (0 for infinite) */
.high_duty_directed_min_interval = WICED_BT_CFG_DEFAULT_HIGH_DUTY_DIRECTED_ADV_MIN_INTERVAL, /**< High Duty Directed Minimum Advertising Interval */
.high_duty_directed_max_interval = WICED_BT_CFG_DEFAULT_HIGH_DUTY_DIRECTED_ADV_MAX_INTERVAL, /**< High Duty Directed Maximum Advertising Interval */
.low_duty_directed_min_interval = WICED_BT_CFG_DEFAULT_LOW_DUTY_DIRECTED_ADV_MIN_INTERVAL, /**< Low Duty Directed Minimum Advertising Interval */
.low_duty_directed_max_interval = WICED_BT_CFG_DEFAULT_LOW_DUTY_DIRECTED_ADV_MAX_INTERVAL, /**< Low Duty Directed Maximum Advertising Interval */
.low_duty_directed_duration = 30, /**< Low Duty Directed Advertising Duration in seconds (0 for infinite) */
.high_duty_nonconn_min_interval = WICED_BT_CFG_DEFAULT_HIGH_DUTY_NONCONN_ADV_MIN_INTERVAL, /**< High Duty Non-Connectable Minimum Advertising Interval */
.high_duty_nonconn_max_interval = WICED_BT_CFG_DEFAULT_HIGH_DUTY_NONCONN_ADV_MAX_INTERVAL, /**< High Duty Non-Connectable Maximum Advertising Interval */
.high_duty_nonconn_duration = 30, /**< High Duty Non-Connectable Advertising Duration in seconds (0 for infinite) */
.low_duty_nonconn_min_interval = WICED_BT_CFG_DEFAULT_LOW_DUTY_NONCONN_ADV_MIN_INTERVAL, /**< Low Duty Non-Connectable Minimum Advertising Interval */
.low_duty_nonconn_max_interval = WICED_BT_CFG_DEFAULT_LOW_DUTY_NONCONN_ADV_MAX_INTERVAL, /**< Low Duty Non-Connectable Maximum Advertising Interval */
.low_duty_nonconn_duration = 0, /**< Low Duty Non-Connectable Advertising Duration in seconds (0 for infinite) */
},
/* GATT Configuration */
.gatt_cfg = {
.appearance = 0x0000, /**< GATT Appearance */
.client_max_links = 1, /**< Client Config: Maximum number of servers that local client can connect to */
.server_max_links = 1, /**< Server Config: Maximum number of remote client connections allowed by local server */
.max_attr_len = 512, /**< Maximum attribute length; wiced_bt_cfg must have a corresponding buffer pool that can hold this length */
.max_mtu_size = 515, /**< Maximum MTU size for GATT connections, should be between 23 and (max_attr_len + 5) */
},
/* RFCOMM Configuration */
.rfcomm_cfg = {
.max_links = 0, /**< Maximum number of simultaneous connected remote devices */
.max_ports = 0, /**< Maximum Number of simultaneous RFCOMM ports */
},
/* Application-Managed L2CAP Protocol Configuration */
.l2cap_application = {
.max_links = 0, /**< Maximum Number of Application-Managed L2CAP Links (BR/EDR and BLE) */
.max_psm = 0, /**< Maximum Number of Application-Managed BR/EDR PSMs */
.max_channels = 0, /**< Maximum Number of Application-Managed BR/EDR Channels */
.max_le_psm = 0, /**< Maximum Number of Application-Managed LE PSMs */
.max_le_channels = 0, /**< Maximum Number of Application-Managed LE Channels */
.max_le_l2cap_fixed_channels = 0, /**< Maximum Number of Application-Managed LE L2CAP Fixed Channnels supported (in addition to mandatory channels 4, 5, and 6 */
},
/* Audio/Video Distribution Configuration */
.avdt_cfg = {
.max_links = 0, /**< Maximum Number of simultaneous Audio/Video links */
.max_seps = 0, /**< Maximum Number of stream end points */
},
/* AVRC Configuration */
.avrc_cfg = {
.roles = 0, /**< Local Roles supported (AVRC_CONN_INITIATOR or AVRC_CONN_ACCEPTOR) */
.max_links = 0, /**< Maximum simultaneous Remote Control links */
},
/* LE Address Resolution Database Settings */
.addr_resolution_db_size = 10, /**< LE Address Resolution Database Size - Effective only for pre-4.2 controller */
.max_number_of_buffer_pools = 4, /**< Maximum number of buffer pools in p_btm_cfg_buf_pools and by wiced_create_pool */
.rpa_refresh_timeout = 0, /**< Interval of random address refreshing - secs */
};
/*******************************************************************
* wiced_bt_stack buffer pool configuration
*
* Configure buffer pools used by the stack
*
* Pools must be ordered in increasing buf_size.
* If a pools runs out of buffers, the next pool will be used.
******************************************************************/
const wiced_bt_cfg_buf_pool_t wiced_bt_cfg_buf_pools[WICED_BT_CFG_NUM_BUF_POOLS] =
{
/* { buf_size, buf_count, }, */
{ 64, 12, }, /* Small Buffer Pool */
{ 360, 4, }, /* Medium Buffer Pool (used for HCI & RFCOMM control messages, min recommended size is 360) */
{ 512, 4, }, /* Large Buffer Pool (used for HCI ACL messages) */
{ 1024, 2, }, /* Extra Large Buffer Pool (used for AVDT media packets and miscellaneous; if not needed, set buf_count to 0) */
};
Create GoBleThread.c
In order for the GoBleThread to work you need:
- The includes for the GATT Database and the WICED bluetooth stack.
- External References to the GATT Database.
- A few function prototypes.
- A function called “GoBleThread_start” to startup the Bluetooth stack and get things going. This includes providing Bluetooth management and GATT event handler functions.
#include "GoBle_db.h"
#include "wiced.h"
#include "wiced_bt_ble.h"
#include "wiced_bt_gatt.h"
#include "wiced_bt_stack.h"
/*******************************************************************
* Variable Definitions
******************************************************************/
extern const wiced_bt_cfg_settings_t wiced_bt_cfg_settings;
extern const wiced_bt_cfg_buf_pool_t wiced_bt_cfg_buf_pools[WICED_BT_CFG_NUM_BUF_POOLS];
/*******************************************************************
* Function Prototypes
******************************************************************/
static wiced_bt_dev_status_t goble_management_callback ( wiced_bt_management_evt_t event, wiced_bt_management_evt_data_t *p_event_data );
static void goble_set_advertisement_data ( void );
static wiced_bt_gatt_status_t goble_event_handler ( wiced_bt_gatt_evt_t event, wiced_bt_gatt_event_data_t *p_event_data );
/*******************************************************************
* Function Definitions
******************************************************************/
void GoBleThread_start(void)
{
wiced_bt_stack_init(goble_management_callback, &wiced_bt_cfg_settings, wiced_bt_cfg_buf_pools);
}
Create a function to setup the advertising data. The GoBle iOS App looks for Peripherals that are advertising the UUID of the GoBLE Service.
/* Set Advertisement Data */
void goble_set_advertisement_data( void )
{
wiced_bt_ble_advert_elem_t adv_elem[3] = { 0 };
uint8_t adv_flag = BTM_BLE_GENERAL_DISCOVERABLE_FLAG | BTM_BLE_BREDR_NOT_SUPPORTED;
uint8_t num_elem = 0;
/* Advertisement Element for Flags */
adv_elem[num_elem].advert_type = BTM_BLE_ADVERT_TYPE_FLAG;
adv_elem[num_elem].len = sizeof(uint8_t);
adv_elem[num_elem].p_data = &adv_flag;
num_elem++;
uint8_t gobleuuid[] = {__UUID_GOBLE};
/* Advertisement Element for Name */
adv_elem[num_elem].advert_type = BTM_BLE_ADVERT_TYPE_128SRV_COMPLETE;
adv_elem[num_elem].len = 16;
adv_elem[num_elem].p_data = gobleuuid;
num_elem++;
/* Set Raw Advertisement Data */
wiced_bt_ble_set_raw_advertisement_data(num_elem, adv_elem);
}
The Bluetooth Management Event Handler needs to take actions when the stack turns on, or one of the pairing events occur.
/* Bluetooth Management Event Handler */
wiced_bt_dev_status_t goble_management_callback( wiced_bt_management_evt_t event, wiced_bt_management_evt_data_t *p_event_data )
{
wiced_bt_dev_status_t status = WICED_BT_SUCCESS;
switch (event)
{
case BTM_ENABLED_EVT:
goble_set_advertisement_data();
wiced_bt_gatt_register( goble_event_handler );
wiced_bt_gatt_db_init( gatt_database, gatt_database_len );
wiced_bt_start_advertisements(BTM_BLE_ADVERT_UNDIRECTED_HIGH, 0, NULL);
break;
case BTM_SECURITY_REQUEST_EVT:
wiced_bt_ble_security_grant(p_event_data->security_request.bd_addr, WICED_BT_SUCCESS);
break;
case BTM_PAIRING_IO_CAPABILITIES_BLE_REQUEST_EVT:
p_event_data->pairing_io_capabilities_ble_request.local_io_cap = BTM_IO_CAPABILITIES_NONE;
p_event_data->pairing_io_capabilities_ble_request.oob_data = BTM_OOB_NONE;
p_event_data->pairing_io_capabilities_ble_request.auth_req = BTM_LE_AUTH_REQ_NO_BOND;
break;
case BTM_USER_CONFIRMATION_REQUEST_EVT: // Just confirm
wiced_bt_dev_confirm_req_reply( WICED_BT_SUCCESS , p_event_data->user_confirmation_request.bd_addr);
break;
case BTM_PAIRED_DEVICE_LINK_KEYS_REQUEST_EVT:
WPRINT_APP_INFO(("Paired linke keys\n"));
status = WICED_BT_ERROR;
break;
case BTM_LOCAL_IDENTITY_KEYS_REQUEST_EVT:
case BTM_PAIRING_COMPLETE_EVT:
case BTM_ENCRYPTION_STATUS_EVT:
case BTM_BLE_ADVERT_STATE_CHANGED_EVT:
case BTM_LPM_STATE_LOW_POWER:
break;
default:
WPRINT_APP_INFO(("Unhandled Bluetooth Management Event: 0x%x (%d)\n", event, event));
break;
}
return status;
}
The GATT Event Handler is called
- When a connection is made or terminated
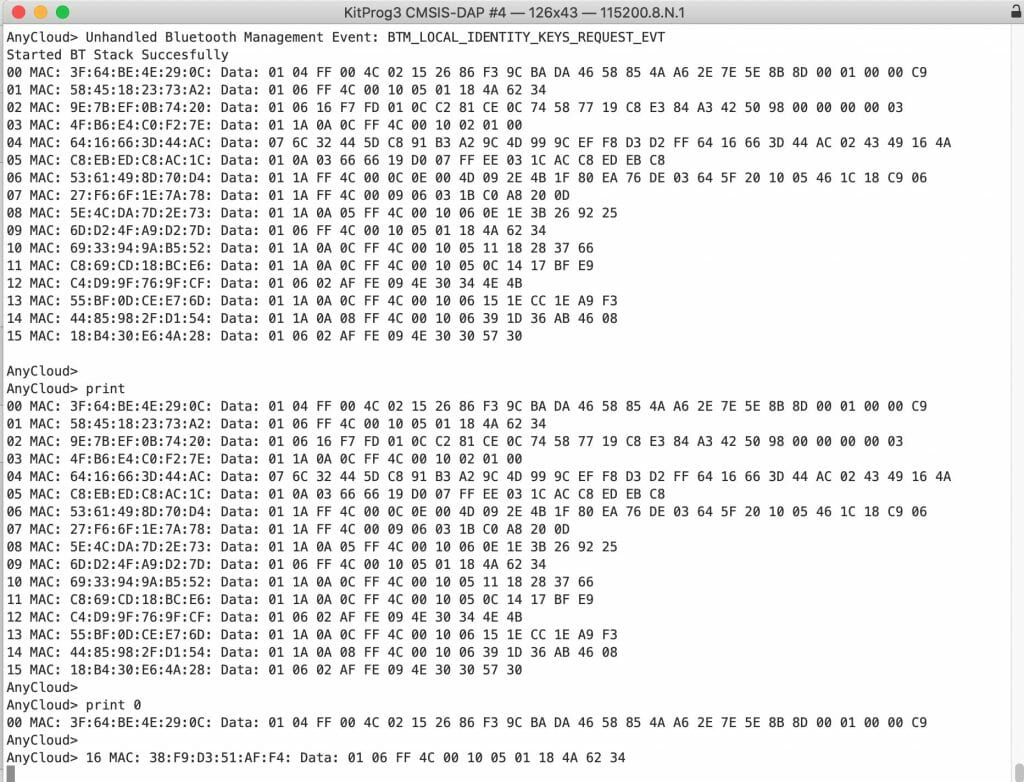
- When the GoBle app writes to your GATT database. When that happens we will just printout the value that was written
/* GATT Event Handler */
wiced_bt_gatt_status_t goble_event_handler( wiced_bt_gatt_evt_t event, wiced_bt_gatt_event_data_t *p_event_data )
{
wiced_bt_gatt_status_t status = WICED_BT_GATT_ERROR;
wiced_bt_gatt_attribute_request_t *p_attr_req = NULL;
switch ( event )
{
case GATT_CONNECTION_STATUS_EVT:
if(!p_event_data->connection_status.connected)
{
WPRINT_APP_INFO(("Disconnected\n"));
wiced_bt_start_advertisements(BTM_BLE_ADVERT_UNDIRECTED_HIGH, 0, NULL);
}
else
WPRINT_APP_INFO(("Connected\n"));
break;
case GATT_ATTRIBUTE_REQUEST_EVT:
p_attr_req = &p_event_data->attribute_request;
if( p_attr_req->request_type == GATTS_REQ_TYPE_WRITE && p_attr_req->data.handle == HDLC_GOBLE_SERIALPORTID_VALUE)
{
uint32_t numButtons = p_attr_req->data.write_req.p_val[3];
uint32_t sliderY = p_attr_req->data.write_req.p_val[5+numButtons];
uint32_t sliderX = p_attr_req->data.write_req.p_val[6+numButtons];
uint32_t buttonMask = 0x00;
for(int i=0;i<numButtons;i++)
{
buttonMask |= (1<<p_attr_req->data.write_req.p_val[5+i]);
}
            WPRINT_APP_INFO(("# Buttons = %d ButtonMask=%02X Slider x=%02X Slider Y=%02X Raw=",(int)numButtons,(unsigned int)buttonMask,(unsigned int)sliderX,(unsigned int)sliderY));

            for(int i=0;i<p_attr_req->data.write_req.val_len;i++)
            {
                WPRINT_APP_INFO(("%02X ",p_attr_req->data.write_req.p_val[i]));
            }
            WPRINT_APP_INFO(("\n"));
status = WICED_BT_GATT_SUCCESS;
}
break;
default:
status = WICED_BT_GATT_SUCCESS;
break;
}
return status;
}
Create GoBleThread.h
#pragma once

extern void GoBleThread_start(void);
Create GoBle.c to startup the GoBleThread
#include "GoBleThread.h"
#include "wiced.h"


/*******************************************************************
 * Function Definitions
 ******************************************************************/
void application_start(void)
{
    wiced_init();
    GoBleThread_start();

}
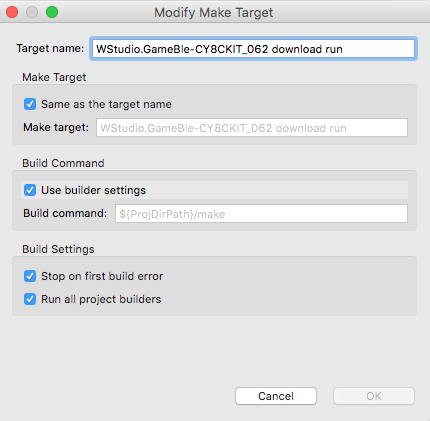
Build, Program and Test