Axeda is one of several (at least a half dozen) companies that sprung up to service the “Cloud” side of the IOT boom. They were successful enough to have been purchased in August by a company called “PTC” (for some reason it isn’t easy from their website to figure out what the letters P.T.C stand for), presumably for a big pile of money. Axeda is focused on the Cloud part of the business, including tools to store, analyze and control IOT machine data.
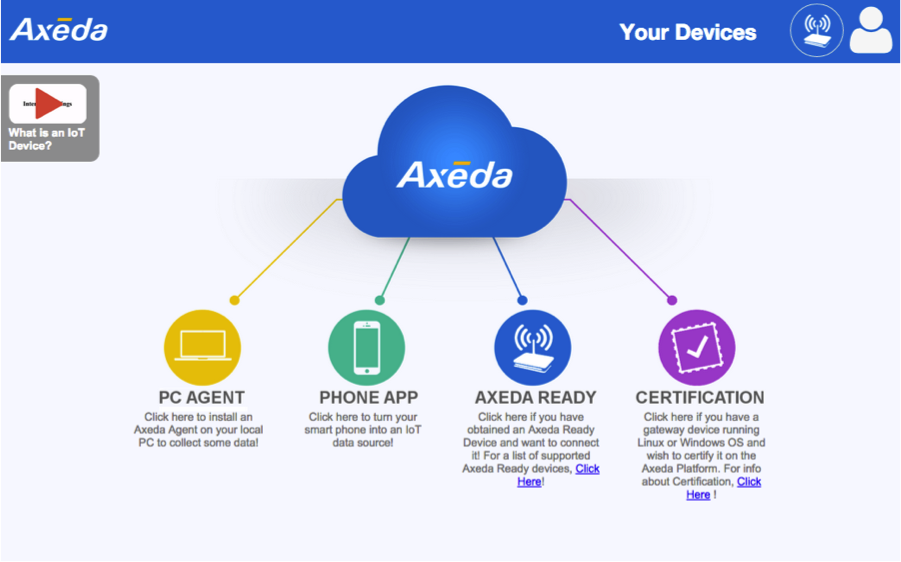
Axeda offers several embedded development kits including ones for ARM MBED, TI, Freescale, Inventek and Raspberry Pi. The kits aren’t so much hardware as they are a set of libraries to allow you to use those platforms to interface with the Axeda Developers Cloud. In order for any of these kits to work you need to have:
- A physical layer (ethernet or wifi)
- A network layer (tcp/ip)
- A protocol layer (http)
- An application layers (json formatted data)
In this article, we will be focusing on the ARM MBED kit.
The architecture of the Axeda + MBED solution is as follows:

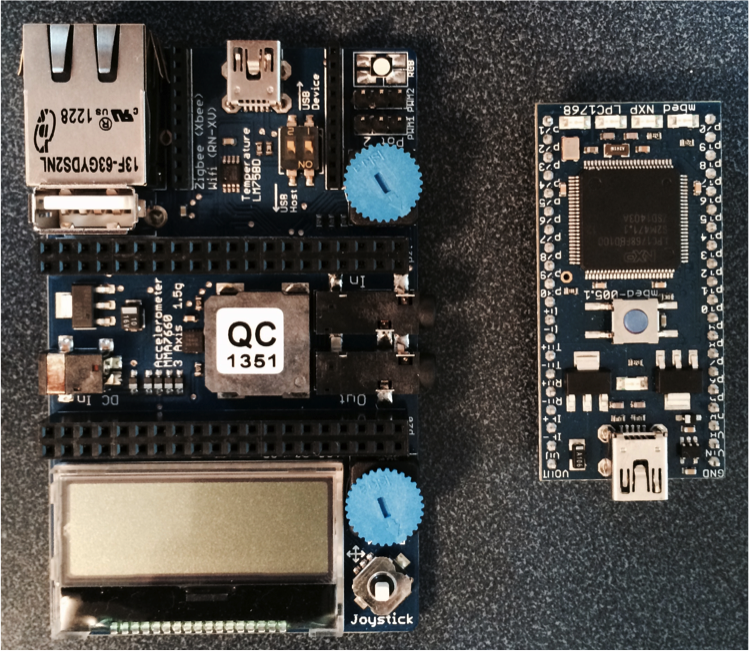
The ARM MBED kit is build with an NXP LPC-1768 ARM based microcontroller. MBED is a cloud based development environment for building embedded firmware for ARM based microcontrollers. The MBED kit is then attached to an expansion board that was designed by ARM that has two potentiometers, an ethernet port, temperature sensors etc.

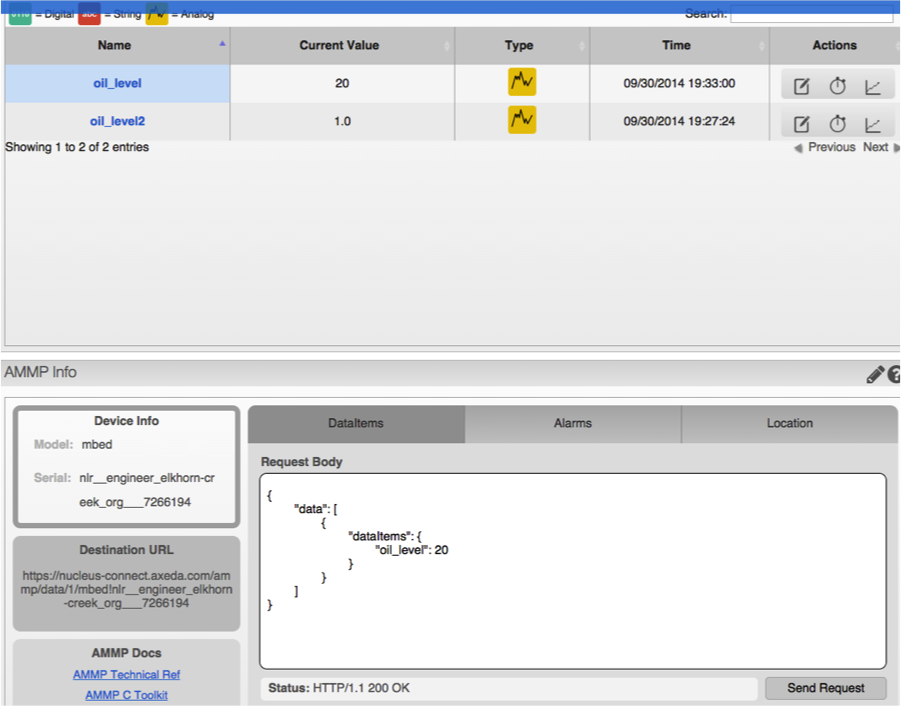
In order to transfer data from the development kit to the Axeda cloud, you need to format your data in a JSON message and transmit it using HTTP to the Axeda server. This seems complicated, but it is really pretty simple. JSON stands for JavaScript Object Notation and is just a text based, human-readable format that is an alternative to XML.
A simple example that encodes two name value pairs (potval and temperature):
{
“data”: [
{
“dataItems”: {
“potvalue”: 10,
“temperature”: 10
}
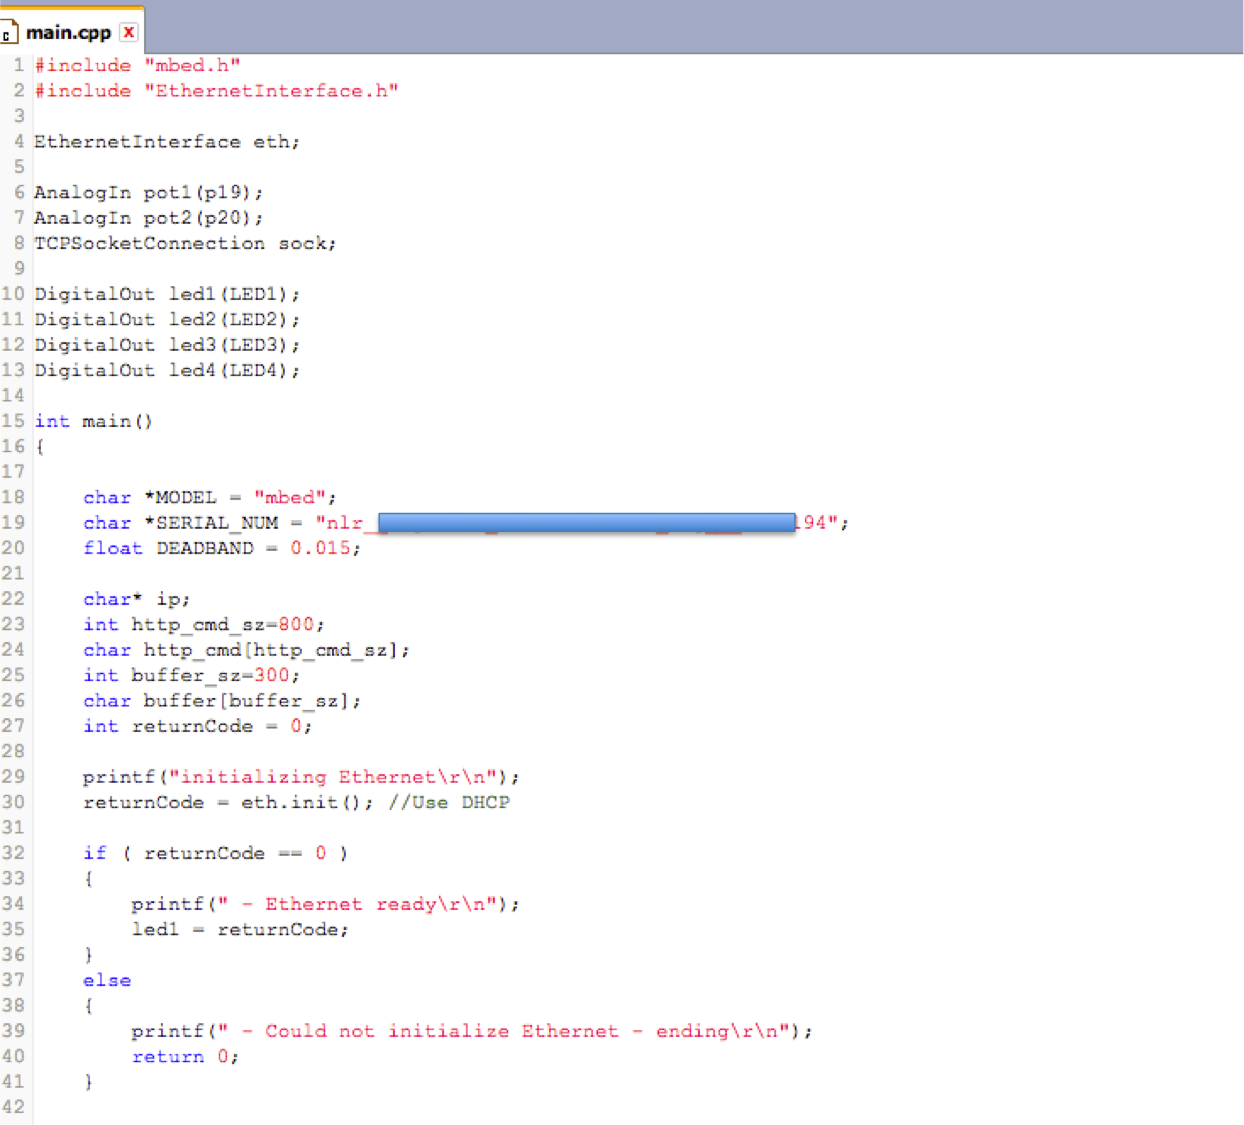
}
]
}
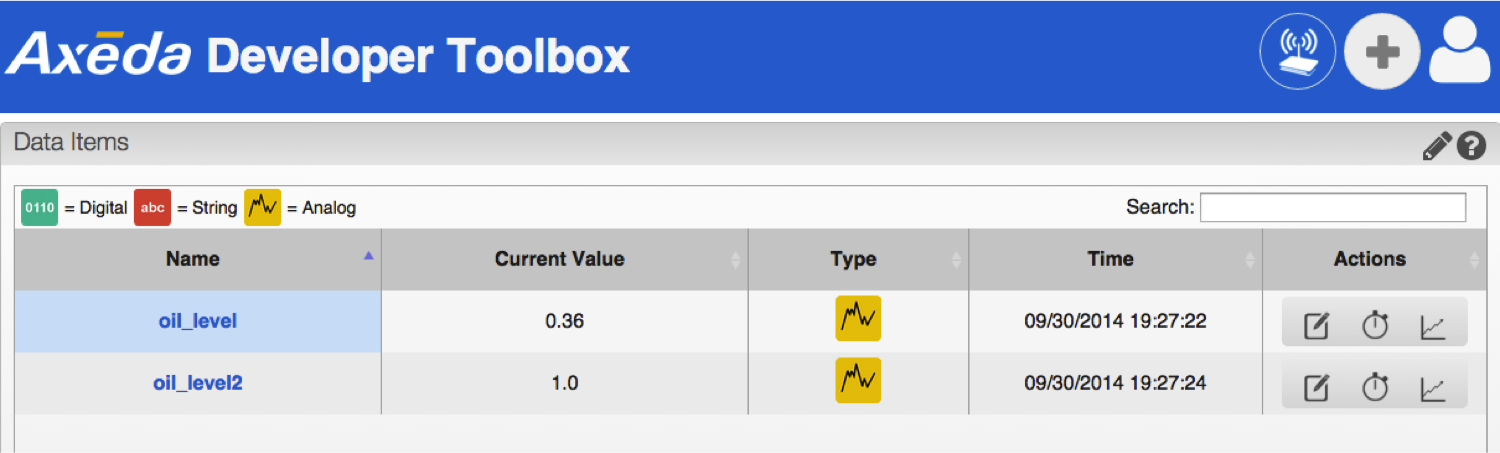
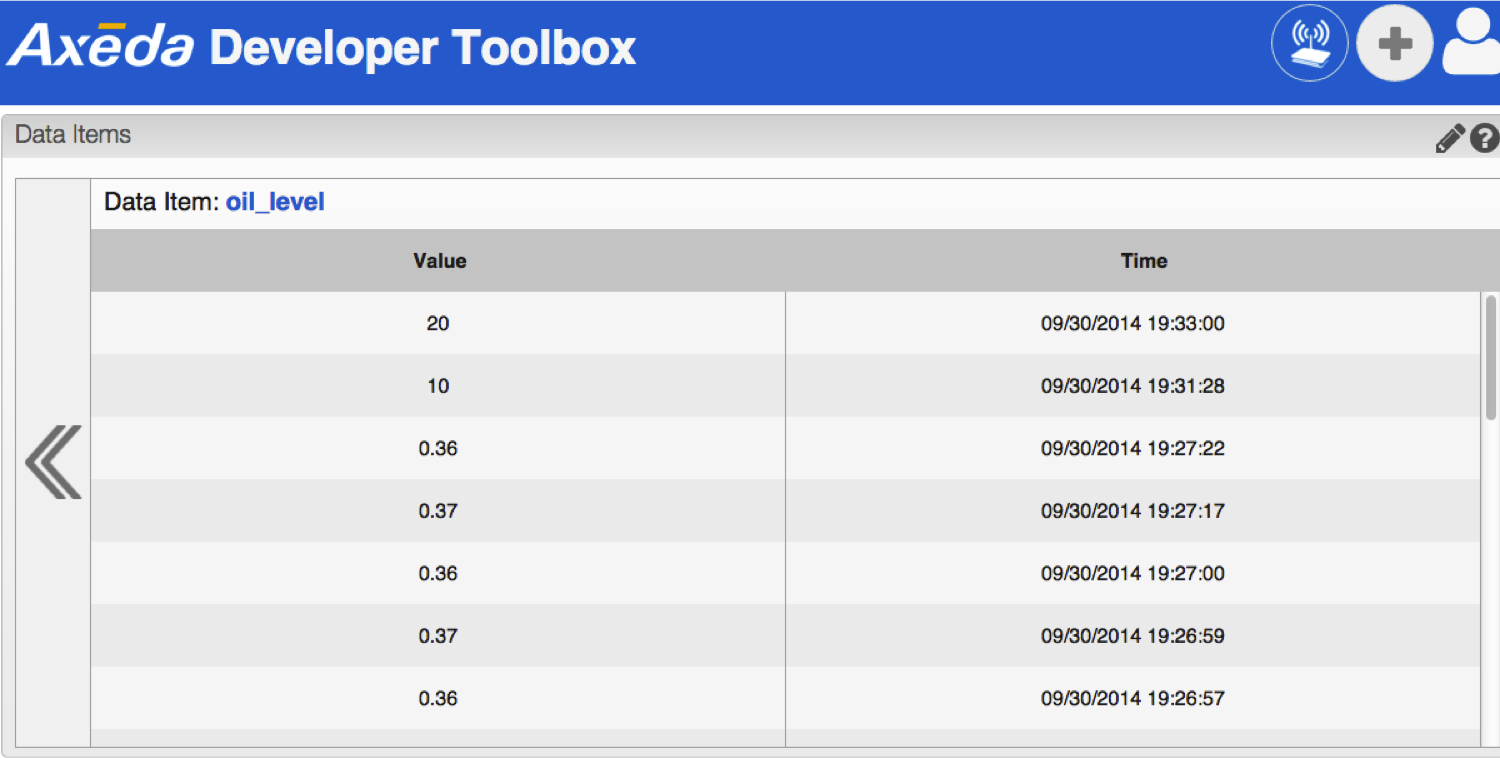
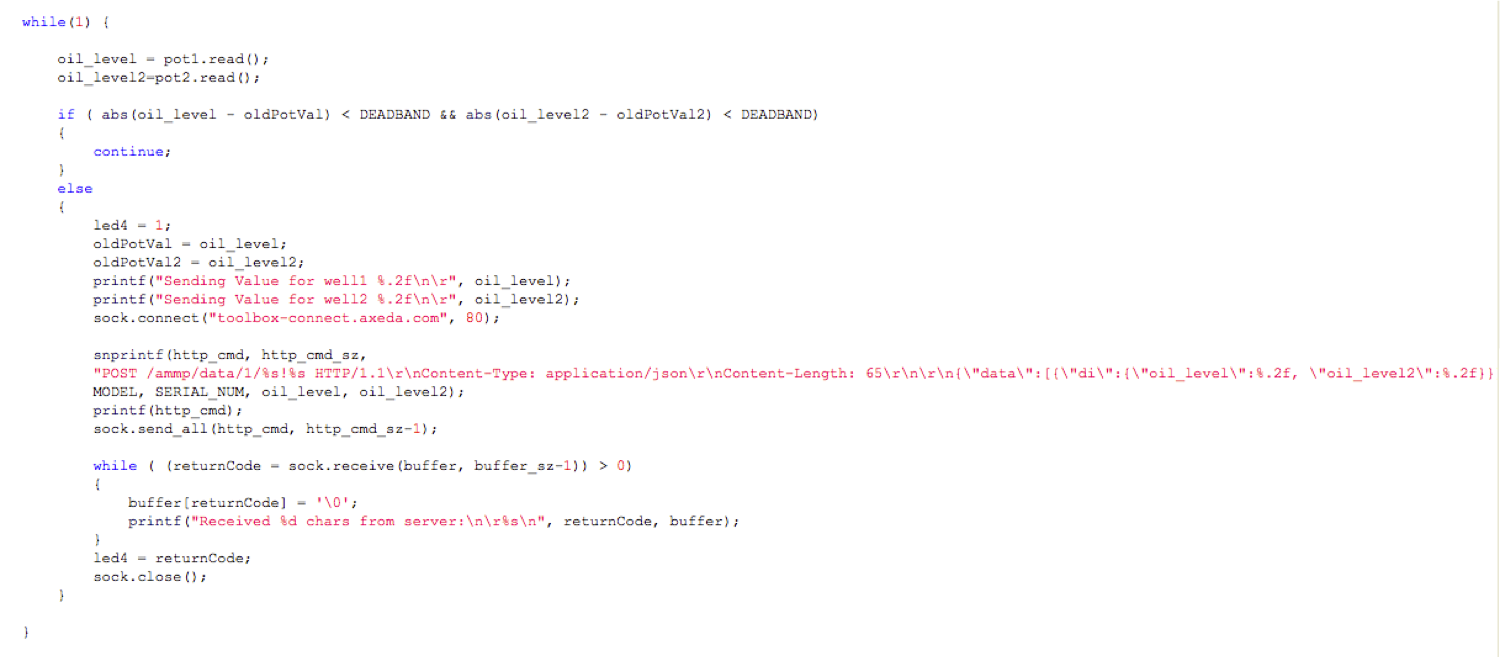
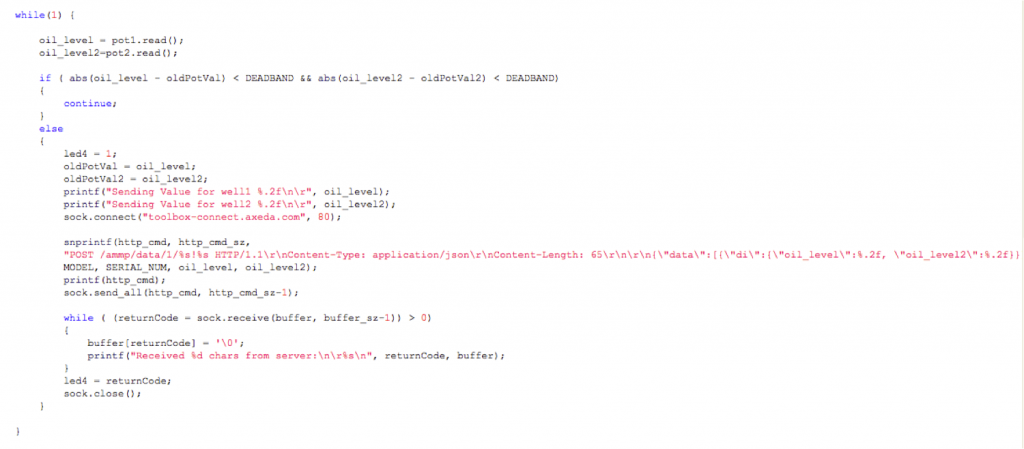
To transmit this to the Axeda cloud, you just embed the JSON into an HTTP POST to the correct web page (which has your Axeda Serial number. Here is the snipped of code from MBED that formats my example message. Notice that there are two data variables, one called oil_level and one called oil_level2:
snprintf(http_cmd, http_cmd_sz,
“POST /ammp/data/1/%s!%s HTTP/1.1\r\nContent-Type: application/json\r\nContent-Length: 65\r\n\r\n{\”data\”:[{\”di\”:{\”oil_level\”:%.2f, \”oil_level2\”:%.2f}}]}\r\n\r\n”,
MODEL, SERIAL_NUM, oil_level, oil_level2);
printf(http_cmd);
Here is the whole program:
The first section initializes the two ports for the potentiometers, sets up the LED output and makes a few buffers. The blued out section of code is my serial number.
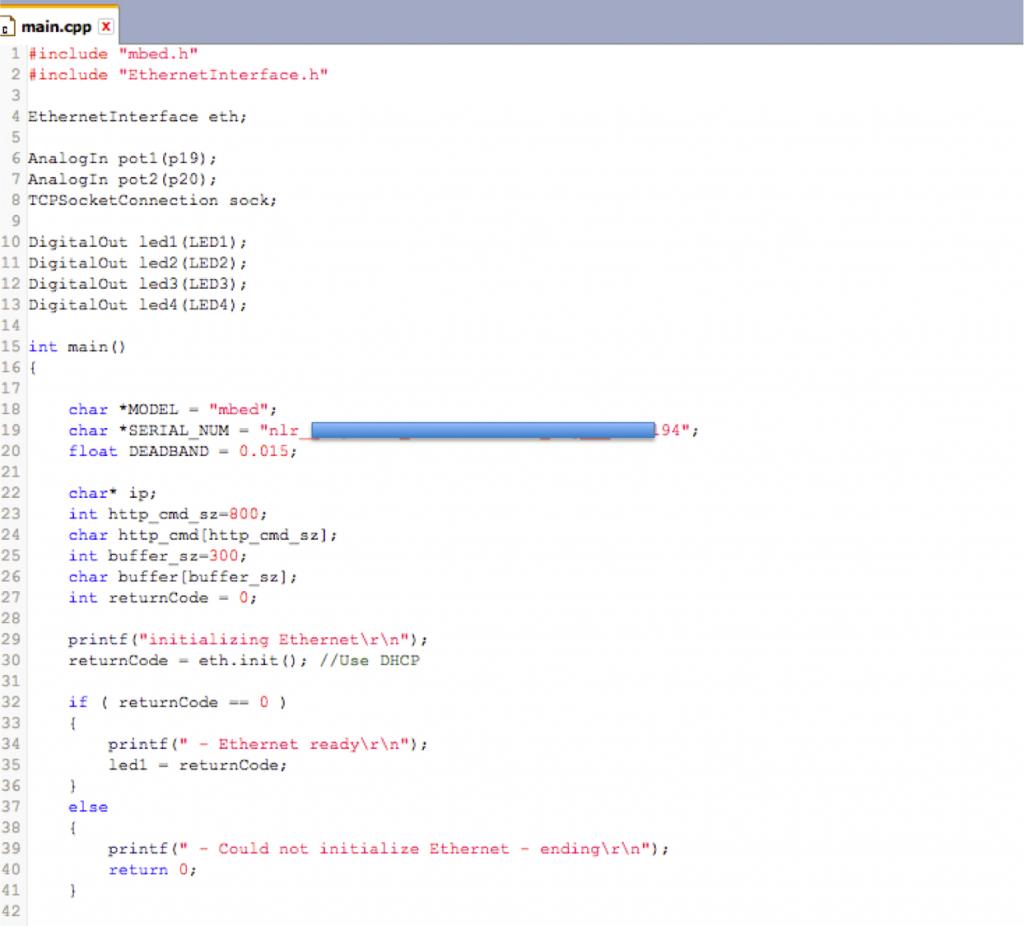
The next section of code starts the ethernet interface and gets an IP address. Notice that these are library routines that are provided by the ARM MBED compiler.

Then the last section of code reads the potentiometers, and then if they have changed enough, transmit the values to the Axeda cloud over a TCP/IP socket.
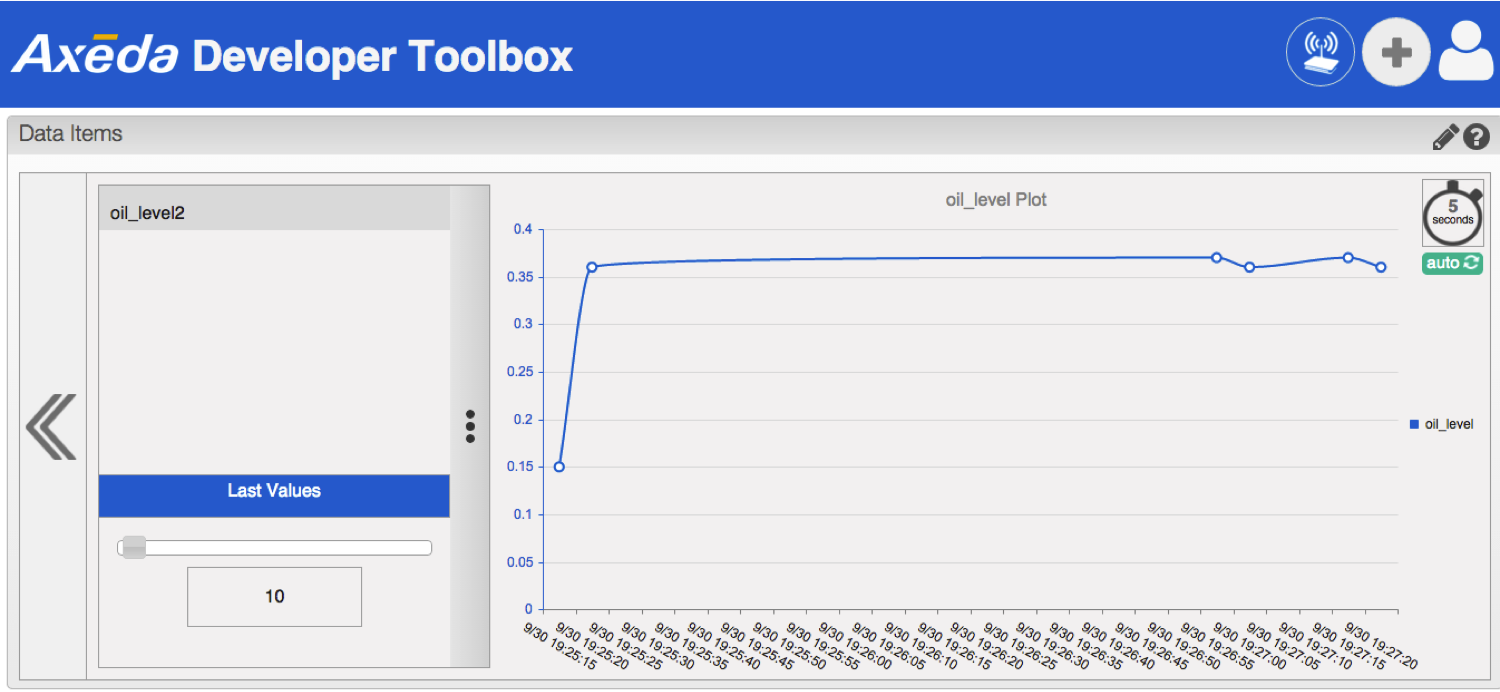
In part 2, I will show how to look at your data in the Axeda cloud.