AnyCloud Bluetooth Advertising Scanner (Part 10)

Summary

We have finally reached the end of the AnyCloud Bluetooth Advertising Scanner.  In this article I will add the ability to sort the database.  In addition I will add the ability to purge a device.  And finally, truly finally, a bit of commentary.

Story

I originally built this program to help me learn about the AnyCloud Bluetooth SDK.  Well, originally I built this functionality to try to find and talk to a specific device (in an upcoming series).  The problem is that there are so many devices at my house that are blasting out so much data it is hard to see what I am looking for.  What I realized would help is add the ability to sort the devices from newest to oldest.  In addition I noticed that occasionally my database would fill up… and it would be nice to purge out old entries.  So that is what we are going to do.

There are

Article Topic
AnyCloud Bluetooth Advertising Scanner (Part 1) Introduction to AnyCloud Bluetooth Advertising
AnyCloud Bluetooth Advertising Scanner (Part 2) Creating an AnyCloud Bluetooth project
AnyCloud Bluetooth Advertising Scanner (Part 3) Adding Observing functionality to the project
AnyCloud Bluetooth Utilities Library A set of APIs for enhancement of the AnyCloud Library
AnyCloud Bluetooth Advertising Scanner (Part 4) Adding a command line to the scanner
AnyCloud Bluetooth Advertising Scanner (Part 5) Adding a history database to the scanner
AnyCloud Bluetooth Advertising Scanner (Part 6) Decoding advertising packets
AnyCloud Bluetooth Advertising Scanner (Part 7) Adding recording commands to the command line
AnyCloud Bluetooth Advertising Scanner (Part 8) Adding filtering to the scanner
AnyCloud Bluetooth Advertising Scanner (Part 9) Improve the print and add packet age
AnyCloud Bluetooth Advertising Scanner (Part 10) Sort the database

All of the code can be found at git@github.com:iotexpert/AnyCloudBLEScanner.git and https://github.com/iotexpert/AnyCloudBLEScanner.git

There are git tags in place starting at part 5 so that you can look at just that version of the code.  "git tag" to list the tags.  And "git checkout part6" to look at the part 6 version of the code.

You can also create a new project with this is a template if you have the IoT Expert Manifest Files installed

Fix the Database Data Structure

You might remember that the database was built as an array of structures.  This mean that any moving around of the data would be a require a replacement of the whole structure.

static adb_adv_t adb_database[ADB_MAX_SIZE];

To fix this problem I moved the database to a an array of pointers.

static adb_adv_t *adb_database[ADB_MAX_SIZE];

To support this, when I see a new device I malloc a block of memory to hold the actual structure.

    // If it is NOT found && you have room
    if(entry == -1)
    {
        adb_database[adb_db_count] = malloc(sizeof(adb_adv_t));

Then I had to fix all of the references to the structure.  And there were a bunch (actually 43 of them).  But the replacement was pretty simple

adb_database[…].xxx is replaced by adb_database[…]-> …. here are the three different cases

case 1: adb_database[adb_db_count].

case 2: adb_database[entry].

case 1: adb_database[i].

That was actually way less painful that I thought it was going to be.  Probably what would actually be best is a library of these data structures with an API that would not have changed when the key changed, but that I suppose, is for another day.

Add Two New Commands

Now I add the sort and purge commands to my command list.

typedef enum {
    ADB_ADD,
    ADB_PRINT_RAW,
    ADB_PRINT_DECODE,
    ADB_WATCH,
    ADB_ERASE,
    ADB_RECORD,
    ADB_FILTER,
    ADB_SORT,
    ADB_PURGE,
} adb_cmd_t;

Create the Sort Functionality

To sort, I will use the c-standard library function qsort.  It requires a function that compares two entries a/b and returns

  1. a negative number of a<b
  2. 0 if a=b
  3. a positive number if a>b

Here is the function.  Hey Hassane you like those pointers?

static int adb_sort_cmpfunc(const void * a, const void * b) 
{
    adb_adv_t *p1 = *((adb_adv_t **)a);
    adb_adv_t *p2 = *((adb_adv_t **)b);
        
    return p2->lastSeen - p1->lastSeen;
}

The sort is actually really simple now.  Just a call to sort (then I decided to print out the table)

                case ADB_SORT:
                    qsort(adb_database, adb_db_count, sizeof(adb_adv_t *), adb_sort_cmpfunc);
                    adb_db_print(ADB_PRINT_METHOD_BYTES,true,-1);
                break;

Now instead of this….

I get this…

Create the Purge Functionality

The purge function needs to do two things

  1. Free all of the memory from an entry
  2. Move the pointers so that the “purged” entry is gone.

First I erase all of the data in the linked list with the adb_eraseEntry function.

Then I free the head of the list

Then I free the actual structure

Then I move all of the pointers to squeeze the able.

static void adb_purgeEntry(int entry)
{

    adb_eraseEntry(entry);
    free(adb_database[entry]->list);
    free(adb_database[entry]->result);
    free(adb_database[entry]);
    adb_db_count -= 1;
    for(int i=entry;i<adb_db_count;i++)
    {
        adb_database[i] = adb_database[i+1];
    }
}

And you need to add the actual command.

                case ADB_PURGE:
                    if((int)msg.data0<0 || (int)msg.data0>=adb_db_count)
                    {
                        printf("Purge error %d\n",(int)msg.data0);
                        break;
                    }   
                    adb_purgeEntry((int)msg.data0);
                break;

The End & Commentary

I would like to add and maybe will one day:

  1. A connect function with a GATT browser
  2. A smarter way to deal with the fact that device change addresses

Finally a couple of comments about this

  1. You might notice that I don’t check very many possible errors.  I do this in the interest of simpler to read code.  This is a tradeoff that I make for “teaching” code.  I hope that you understand that if you want to do something like this in a real product that you need to be much more careful.
  2. I don’t have unit testing.  This falls into the same category as the error checking.  Really this is a bad idea as code without unit testing is obsolete the second it comes out of your fingers.  But, it is easier to read.
  3. I don’t have many comments.  This is something that my colleagues bitch about all of the time with me.  And I know that it must be a personality defect.
  4. I use malloc/free all over the place.  This is a religious war.  You can make a static allocation scheme, but it would be really complicated in this case.  I personally think that the tradeoff of using a battle worn and tested malloc/free is totally worthwhile against the complexity of custom static memory allocation schemes.

AnyCloud Bluetooth Advertising Scanner (Part 9)

Summary

In this series of articles I am building a Bluetooth Low Energy Scanner using the Cypress/Infineon AnyCloud SDK running on a PSoC 6 and CYW43xxx.  In Part 9, I will fix a memory leak, add packet age, and improve the printing.

Story

You might be starting to wonder if this series is ever going to end.  Well, this article and one more.  That is it.

This morning as I was looking at the serial console window I noticed that I had hit the limit of device in the buffer,  OK.  But that it had also crashed, gone, bye bye, so long … the long dark road.  That needs fixing.

I also was curious when I looked at the output, how long ago I had seen the packets/devices.  So I decided that having “age” in the database made sense.

There are

Article Topic
AnyCloud Bluetooth Advertising Scanner (Part 1) Introduction to AnyCloud Bluetooth Advertising
AnyCloud Bluetooth Advertising Scanner (Part 2) Creating an AnyCloud Bluetooth project
AnyCloud Bluetooth Advertising Scanner (Part 3) Adding Observing functionality to the project
AnyCloud Bluetooth Utilities Library A set of APIs for enhancement of the AnyCloud Library
AnyCloud Bluetooth Advertising Scanner (Part 4) Adding a command line to the scanner
AnyCloud Bluetooth Advertising Scanner (Part 5) Adding a history database to the scanner
AnyCloud Bluetooth Advertising Scanner (Part 6) Decoding advertising packets
AnyCloud Bluetooth Advertising Scanner (Part 7) Adding recording commands to the command line
AnyCloud Bluetooth Advertising Scanner (Part 8) Adding filtering to the scanner
AnyCloud Bluetooth Advertising Scanner (Part 9) Improve the print and add packet age
AnyCloud Bluetooth Advertising Scanner (Part 10) Sort the database

All of the code can be found at git@github.com:iotexpert/AnyCloudBLEScanner.git and https://github.com/iotexpert/AnyCloudBLEScanner.git

There are git tags in place starting at part 5 so that you can look at just that version of the code.  "git tag" to list the tags.  And "git checkout part6" to look at the part 6 version of the code.

You can also create a new project with this is a template if you have the IoT Expert Manifest Files installed

Fix the Memory Leak

I noticed that a while after I started getting the message “ADV Table Max Size” that things would crash.  But Why?  The answer is a memory leak – go figure. I originally thought when I get a new device I would just overwrite the last entry in the table.  But, when I overwrote the adb_database[adb_db_count]. record with a new scan_result and a new list, I left memory that was previously allocated, here is the code:

    if(entry == -1)
    {
        adb_database[adb_db_count].result = scan_result;
        adb_database[adb_db_count].listCount = 1;
        adb_database[adb_db_count].record = false;
        adb_database[adb_db_count].filter = true;
        adb_database[adb_db_count].numSeen = 1;

        adb_adv_data_t *current = malloc(sizeof(adb_adv_data_t));
        current->next = 0;
        current->data = data;
        current->count = 1;

        adb_database[adb_db_count].list = current;

        adb_db_count = adb_db_count + 1;
        if(adb_db_count == ADB_MAX_SIZE)
        {
            printf("ADV Table Max Size\n");
            adb_db_count = adb_db_count - 1;
        }
        else
        {    
            adb_db_print(ADB_PRINT_METHOD_BYTES,false,adb_db_count-1);
        }
    }

A cheap fix is to just stop making new entries when the database runs out of room.

    // If there is a new entry and you ran out of space
    if(entry == -1 && adb_db_count >= ADB_MAX_SIZE)
    {
        free(scan_result);
        free(data);
        return;
    }

Add Age

As I mentioned earlier I wanted to keep track of

  1. The last time I had seen a device
  2. When I saw that specific advertising packet

The FreeRTOS has a free running millisecond counter that starts a 0 and counts up to 2^32.  A really cheap way to keep track of time is just to use this counter. To do this the first step is add the time to the database.  Both in the device record and the packet record.

typedef struct {
    uint8_t *data;
    int count;
    TickType_t lastSeen;
    struct adb_adv_data_t *next;
} adb_adv_data_t;

typedef struct {
    wiced_bt_ble_scan_results_t *result;
    bool record;
    bool filter;
    int numSeen;
    int listCount;
    TickType_t lastSeen;
    adb_adv_data_t *list;
} adb_adv_t ;

Update the Printing

I am going to make the output look like this with a new column representing the seconds since I heard the packet.  In the picture below you can see that I heard 00 at 0.0 seconds ago…  Then you can see that I had a recording of device 5 where I have a bunch of packets that I heard back into time.

To do this I just add a time calculation like this:

static void adb_db_printEntry(adb_print_method_t method, int entry, adb_adv_data_t *adv_data)
{
    float time = ((float)xTaskGetTickCount() - (float)(adv_data->lastSeen))/1000;

    printf("%c%c%02d %05d %03d %6.1f ",adb_database[entry].watch?'W':' ',
    adb_database[entry].filter?'F':' ',
    entry,adb_database[entry].numSeen,adb_database[entry].listCount,
    time);

Fix up the Add

The next thing that I need to do is make the “add” function add the time.  The problem is that this function has gotten totally totally out of control.  It turns out that there are x different possibilities

  1. Ignore the packet (because the table is full)
  2. Add a new device & packet
  3. Update the head of the list with a new packet
  4. Insert a new packet at the head of the list
  5. If you are filtering update a duplicated packet count

The code for these branches all looked somewhat similar.  But, which branch to take depended on

  1. If you were “watching” that device
  2. If you were “filtering” that device
  3. If you were “recording”
  4. If you had seen that packet before (aka it was found)

I ended up making a truth table:

Watch Filter Recording Found Action
0 0 0 0 update the head
0 0 0 1 update the head
0 0 1 0 update the head
0 0 1 1 update the head
0 1 0 0 update the head
0 1 0 1 update the head
0 1 1 0 update the head
0 1 1 1 update the head
1 0 0 0 update the head
1 0 0 1 update the head
1 0 1 0 insert at the head
1 0 1 1 insert at the head
1 1 0 0 update the head
1 1 0 1 update the found
1 1 1 0 insert at the head
1 1 1 1 update the found

The case where you

  1. Had no room
  2. Saw a new device

Look like this:

static void adb_db_add(wiced_bt_ble_scan_results_t *scan_result,uint8_t *data)
{

    TickType_t timeSeen = xTaskGetTickCount();

    int entry = adb_db_find(&scan_result->remote_bd_addr);

    // If there is a new entry and you ran out of space
    if(entry == -1 && adb_db_count >= ADB_MAX_SIZE)
    {
        free(scan_result);
        free(data);
        return;
    }
    
    // If it is NOT found && you have room
    if(entry == -1)
    {
        adb_database[adb_db_count] = malloc(sizeof(adb_adv_t));
        adb_database[adb_db_count]->result = scan_result;
        adb_database[adb_db_count]->listCount = 1;
        adb_database[adb_db_count]->watch = false;
        adb_database[adb_db_count]->filter = true;
        adb_database[adb_db_count]->numSeen = 1;
        adb_database[adb_db_count]->lastSeen = timeSeen;

        adb_adv_data_t *current = malloc(sizeof(adb_adv_data_t));
        current->next = 0;
        current->data = data;
        current->numSeen = 1;
        current->lastSeen = timeSeen;

        adb_database[adb_db_count]->list = current;

        adb_db_count = adb_db_count + 1;    
        adb_db_print(ADB_PRINT_METHOD_BYTES,false,adb_db_count-1);

        return; 
    }

At this point in the code you know that you have seen this device before.  If you are filtering you should look in the linked list to see if you can find the specific packet (lines 1-15).

If you look at the truth table above you will see three cases where you should insert at the head of this list.  Those cases are identified with the sprawling if on lines 17-21).  Once you identify that scenario you do the needful.

    adb_adv_data_t *updateItem=0; 

    if(adb_database[entry].filter) // if filtering is on.
    {
        int len = btutil_adv_len(data); // ARH maybe a bug here
        
        for(adb_adv_data_t *list = adb_database[entry].list;list;list = (adb_adv_data_t *)list->next)
        {
            if(memcmp(list->data,data,len) == 0) // Found the data
            {
                updateItem = list;
                break;
            }
        }
    }

    // insert at the head
    if( (adb_database[entry].watch && !adb_database[entry].filter && adb_recording && !updateItem) ||
        (adb_database[entry].watch && !adb_database[entry].filter && adb_recording && updateItem) ||
        (adb_database[entry].watch && adb_database[entry].filter && adb_recording && !updateItem)
    )
    {
        adb_adv_data_t *updateItem = malloc(sizeof(adb_adv_data_t)); // make new data
        updateItem->next = (struct adb_adv_data_t *)adb_database[entry].list;
        updateItem->numSeen = 1;
        updateItem->data = data;
        updateItem->lastSeen = timeSeen;

        adb_database[entry].list = updateItem;
        adb_database[entry].numSeen += 1;
        adb_database[entry].lastSeen = timeSeen;
        adb_database[entry].listCount += 1;
        free(scan_result);
        
        adb_db_print(ADB_PRINT_METHOD_BYTES,false,entry);


        adb_recording_count += 1;
        if(adb_recording_count == ADB_RECORD_MAX)
        {
            adb_recording = false;
            printf("Recording buffer full\n");
        }
        return;
    }

The final case happens when you are just going to update a found packet.

    if(updateItem == 0)
        updateItem = adb_database[entry].list;


    adb_database[entry].numSeen += 1;
    adb_database[entry].lastSeen = timeSeen;

    updateItem->lastSeen = timeSeen;

    int len = btutil_adv_len(data); // ARH maybe a bug here
    if(memcmp(updateItem->data,data,len) == 0)
    {
        updateItem->numSeen += 1;
    }
    else
    {
        updateItem->numSeen = 1;   
    }

    free(updateItem->data);
    updateItem->data = data;
    free(scan_result);

}

In the next article I will add

  1. Sort
  2. Purge

Then I will call it  a day.

AnyCloud Bluetooth Advertising Scanner (Part 8)

Summary

In this series of articles I am building a Bluetooth Low Energy Scanner using the Cypress/Infineon AnyCloud SDK running on a PSoC 6 and CYW43xxx.  In Part 8 I will turn on the ability to filter duplicate advertising packets.

Story

In the previous article I added the ability to record advertising packets.  The problem is, of course, that many devices are blasting out advertising packets, which will quickly overwhelm you.  I suppose more importantly it will overwhelm the packet buffer.  Most of the device are just advertising their presence, so they send the same data over and over.  Some devices alternate between a small number of different advertising packets, e.g. an iBeacon then and Eddystone beacon.

The way that the filter will work is that I will update the “add” function to search through all of the packets that device has launched, then if I have seen the packet before (Ill use a memcmp) then I will just keep a count of how many times I have see that packet.

The other thing that needs to happen is for me to add a “filter” command so that I can turn on packet filtering on a device by device basis.

And I need to fix the printing to use the new filtered packet database.

There are

Article Topic
AnyCloud Bluetooth Advertising Scanner (Part 1) Introduction to AnyCloud Bluetooth Advertising
AnyCloud Bluetooth Advertising Scanner (Part 2) Creating an AnyCloud Bluetooth project
AnyCloud Bluetooth Advertising Scanner (Part 3) Adding Observing functionality to the project
AnyCloud Bluetooth Utilities Library A set of APIs for enhancement of the AnyCloud Library
AnyCloud Bluetooth Advertising Scanner (Part 4) Adding a command line to the scanner
AnyCloud Bluetooth Advertising Scanner (Part 5) Adding a history database to the scanner
AnyCloud Bluetooth Advertising Scanner (Part 6) Decoding advertising packets
AnyCloud Bluetooth Advertising Scanner (Part 7) Adding recording commands to the command line
AnyCloud Bluetooth Advertising Scanner (Part 8) Adding filtering to the scanner
AnyCloud Bluetooth Advertising Scanner (Part 9) Improve the print and add packet age
AnyCloud Bluetooth Advertising Scanner (Part 10) Sort the database

All of the code can be found at git@github.com:iotexpert/AnyCloudBLEScanner.git and https://github.com/iotexpert/AnyCloudBLEScanner.git

There are git tags in place starting at part 5 so that you can look at just that version of the code.  "git tag" to list the tags.  And "git checkout part6" to look at the part 6 version of the code.

You can also create a new project with this is a template if you have the IoT Expert Manifest Files installed

Update the Data Structures

In order to do the filters, and keep track of the data I will add

  1. A “count” field to the packet data structure
  2. A “filter” boolean field to the device data structure.
typedef struct {
    uint8_t *data;
    int count;
    struct adb_adv_data_t *next;
} adb_adv_data_t;

typedef struct {
    wiced_bt_ble_scan_results_t *result;
    bool record;
    bool filter;
    int numSeen;
    int listCount;
    adb_adv_data_t *list;
} adb_adv_t ;

Update the Add Function

In the function “static void adb_db_add(wiced_bt_ble_scan_results_t *scan_result,uint8_t *data)” which is called every time I see a new advertising packet I will need to handle four different cases:

  1. The first time you see a device
  2. A device you have seen AND you are recording AND have the filtering turned on
  3. A device you are recording but not filtering
  4. A device you have seen, but are not recording or filter.

In the first case, a device you haven’t seen before, you need to

  1. Automatically turn on the filtering
  2. Initialize the counts to 1
  3. Do the other initialization (as before)
    // If it is NOT found
    if(entry == -1)
    {
        adb_database[adb_db_count].result = scan_result;
        adb_database[adb_db_count].listCount = 1;
        adb_database[adb_db_count].record = false;
        adb_database[adb_db_count].filter = true;
        adb_database[adb_db_count].numSeen = 1;

        adb_adv_data_t *current = malloc(sizeof(adb_adv_data_t));
        current->next = 0;
        current->data = data;
        current->count = 1;

In the case where you have

  1. See the device before
  2. You have room in the record buffer
  3. And you are in record mode

You will then decide if you are filtering.

Then you will iterate through all of the packets and compare the data to the data you just received.  If there is a match then you update the count, free the duplicate data and return.

    else if(adb_database[entry].record && adb_recording_count<ADB_RECORD_MAX && adb_recording)
    {
        adb_database[entry].numSeen += 1;

        if(adb_database[entry].filter) // if filtering is on.
        {
            int len = btutil_adv_len(data); 
            for(adb_adv_data_t *list = adb_database[entry].list;list;list = (adb_adv_data_t *)list->next)
            {
                if(memcmp(list->data,data,len) == 0) // Found the data
                {
                    list->count += 1;
                    printf("Count = %d\n",list->count);
                    free(data);
                    free(scan_result);
                    return;
                }
            }
        }

If you have not see the data before, then you need to add it to the linked list.

        adb_adv_data_t *current = malloc(sizeof(adb_adv_data_t));
        current->next = (struct adb_adv_data_t *)adb_database[entry].list;
        current->data = data;
        current->count = 1;

If you are not recording and not filtering, just increment counts.

    else
    {
        adb_database[entry].numSeen += 1;
        adb_database[entry].list->count += 1;

Add a “filter” Command

I want the ability for a user to “filter all” or “filter clear” or “filter #” – just like we did with watch.  So, add the #defines and new function to advDatabase.h

#define ADB_FILTER_ALL -1
#define ADB_FILTER_CLEAR -2
void adb_filter(int entry);

Then add the new filter command in advDatabase.c

typedef enum {
    ADB_ADD,
    ADB_PRINT_RAW,
    ADB_PRINT_DECODE,
    ADB_WATCH,
    ADB_ERASE,
    ADB_RECORD,
    ADB_FILTER,
} adb_cmd_t;

I will use the adb_queueCmd function that I created in the last article.

inline void adb_filter(int entry) { adb_queueCmd(ADB_FILTER,(void*)entry,(void *)0); }

The filter command has three cases

  1. All – turn the bool for all on
  2. Clear – turn the bool for all off
  3. Just a specific number – toggle that specific number
static void adb_db_filter(int entry)
{
    if(entry == ADB_FILTER_ALL)
    {
        for(int i=0;i<adb_db_count;i++)
        {
            adb_database[i].filter = true;
        }
        return;
    }

    if(entry == ADB_FILTER_CLEAR)
    {
        for(int i=0;i<adb_db_count;i++)
        {
            adb_database[i].filter = false;
        }
        return;
    }

    if(entry > adb_db_count-1 || entry < ADB_WATCH_CLEAR)
    {
        printf("Record doesnt exist: %d\n",entry);
        return;      
    }
    adb_database[entry].filter = !adb_database[entry].filter; 

}

And you need to fix up the main command processor

                case ADB_FILTER:
                    adb_db_filter((int)msg.data0);
                break;

Finally add the command to the usrcmd.c

static int usrcmd_filter(int argc, char **argv)
{

    if(argc == 2 && !strcmp(argv[1],"all"))
    {
        adb_filter(ADB_FILTER_ALL); // all
        return 0;
    }


    if(argc == 2 && !strcmp(argv[1],"clear"))
    {
        adb_filter(ADB_FILTER_CLEAR);
        return 0;
    }

    if(argc == 2)
    {
        int i;
        sscanf(argv[1],"%d",&i);
        adb_filter(i);
        return 0;
    }

    return 0;
}

Fix the Printing

Now we nee to fix the printing.  I want to add an indicate of the filtering to the output.  Remember from the previous article I indicated “Watch” with a “*”.  When I looked at it, I decided that I should indicate filter with an “F” and watch with a “W”.  So I fix that.

        printf("%c%c%02d %05d %03d MAC: ",adb_database[i].record?'W':' ',
            adb_database[i].filter?'F':' ',
            i,adb_database[i].numSeen,adb_database[i].listCount);
        btutil_printBDaddress(adb_database[i].result->remote_bd_addr);
        switch(method)
        {

Then I test the “filter” command

Fix the Printing Part (2)

As I noodled on how to change the printing I decide that it would be nice to sometimes print out only one packet e.g. no history and sometimes print them all out e.g. history.  So, I add a new parameter to the function called “history”

static void adb_db_print(adb_print_method_t method,bool history,int entry)

As I looked at the printing code, I decided that it would be better to have a new function to print only one entry.  I suppose that I could have left the code inline, but I thought that intent was clearer.

static void adb_db_printEntry(adb_print_method_t method, int entry, adb_adv_data_t *adv_data)
{
    printf("%c%c%02d %05d %03d MAC: ",adb_database[entry].record?'W':' ',
    adb_database[entry].filter?'F':' ',
    entry,adb_database[entry].numSeen,adb_database[entry].listCount);
    btutil_printBDaddress(adb_database[entry].result->remote_bd_addr);

    switch(method)
    {
    
    case ADB_PRINT_METHOD_BYTES:
        printf(" Data: ");
        btutil_adv_printPacketBytes(adv_data->data);
    break;

    case ADB_PRINT_METHOD_DECODE:
        printf("\n");
        btutil_adv_printPacketDecode(adv_data->data);
    break;
    } 
    printf("\n");

}

With the new function in place I now need to update the print function to call the new entry function.  Printing the history is just a matter of iterating through the linked list.

static void adb_db_print(adb_print_method_t method,bool history,int entry)
{
    int start,end;
 
    if(entry < 0)
    {
        start = 0;
        end = adb_db_count;
    }
    else
    {
        start = entry;
        end = entry+1;
    }

    if(end>adb_db_count)
        end = adb_db_count; 

    for(int i=start;i<end;i++)
    {
        if(history) // then iterate through the linked list print all of the packets
        {
            for(adb_adv_data_t *list = adb_database[i].list;list;list = (adb_adv_data_t *)list->next)
            {
                adb_db_printEntry(method,i,list);    
            }
        }
        else // Just print the first packet in the list
            adb_db_printEntry(method,i,adb_database[i].list);
    }
}

Now, I need to update all of the calls to adb_db_print to have the new history parameter.  First, I made the decision that when you “print” from the command line that you are interested in the history.

                case ADB_PRINT_RAW:
                    adb_db_print(ADB_PRINT_METHOD_BYTES,true,(int)msg.data0);
                break;
                case ADB_PRINT_DECODE:
                    adb_db_print(ADB_PRINT_METHOD_DECODE,true,(int)msg.data0);
                break;

But when you are printing out the packet for a new device don’t print out the history

            adb_db_print(ADB_PRINT_METHOD_BYTES,false,adb_db_count-1);

Program and Test

After I program my development kit, I start by typing “watch all”.  Very quickly, at my house, you can see that a bunch of devices are discovered.  You can see that all of these have a “W” (meaning that I am watching them) and an “F” meaning they are filtering out duplicates.  Then I type “record” to turn on recording. After a minute I turn off recording then do the print you can see below.

A couple of things to notice.

  1. Device #4 (which I highlighted) appears to be sending out a pattern of alternating packets.  See that I have heard 3335 packets yet there are only two in the buffer
  2. You can see device 11 seems to be sending out 16 different packets.  Why?  I don’t know.

But we can “decode 11” to try to figure it out.  You can see that it is advertising manufactures specific data with Apple’s UUID which I happen to know is 0x004C.  But why?  I don’t know.

I really want to move onto a new series of articles… but there are two functions which I will add to the program.  Stay tuned for what they do.

AnyCloud Bluetooth Advertising Scanner (Part 6)

Summary

In part 6 of this series I will update the AnyCloud BLE Advertising Scanner to decode advertising packets into a more human readable textual output

Story

We are now 6 (or maybe 7 depending on how you count) articles into this series and we are still looking at raw bytes.  I have gotten to where I am pretty good at understanding those bytes, but that is now way to roll.  You might remember from the article on the IoT Expert Bluetooth Utility library that there were a some interesting functions defined in the header.  Here it is:

wiced_bool_t btutil_isEddystone(uint8_t *data);
wiced_bool_t btutil_is_iBeacon(uint8_t *data);
wiced_bool_t btutil_isCypress(uint8_t *data);

int btutil_adv_len(uint8_t *packet);
void btutil_adv_printPacketDecode(uint8_t *packet);
void btutil_adv_printPacketBytes(uint8_t *packet);

Lets transform our  project from part 6 to use these functions.  In this article I will

  • Redo the print bytes (to be smarter) functionality and to use the built in function
  • Rework the logic for the “print” command implementation
  • Add a new command “decode” which will run the decode function

There are

Article Topic
AnyCloud Bluetooth Advertising Scanner (Part 1) Introduction to AnyCloud Bluetooth Advertising
AnyCloud Bluetooth Advertising Scanner (Part 2) Creating an AnyCloud Bluetooth project
AnyCloud Bluetooth Advertising Scanner (Part 3) Adding Observing functionality to the project
AnyCloud Bluetooth Utilities Library A set of APIs for enhancement of the AnyCloud Library
AnyCloud Bluetooth Advertising Scanner (Part 4) Adding a command line to the scanner
AnyCloud Bluetooth Advertising Scanner (Part 5) Adding a history database to the scanner
AnyCloud Bluetooth Advertising Scanner (Part 6) Decoding advertising packets
AnyCloud Bluetooth Advertising Scanner (Part 7) Adding recording commands to the command line
AnyCloud Bluetooth Advertising Scanner (Part 8) Adding filtering to the scanner
AnyCloud Bluetooth Advertising Scanner (Part 9) Improve the print and add packet age
AnyCloud Bluetooth Advertising Scanner (Part 10) Sort the database

All of the code can be found at git@github.com:iotexpert/AnyCloudBLEScanner.git and https://github.com/iotexpert/AnyCloudBLEScanner.git

There are git tags in place starting at part 5 so that you can look at just that version of the code.  "git tag" to list the tags.  And "git checkout part6" to look at the part 6 version of the code.

You can also create a new project with this is a template if you have the IoT Expert Manifest Files installed

Replace two code blocks with function calls

Do you remember this block of code?  It print’s out the 6-bytes of the Bluetooth Address.

    for(int i=0;i<BD_ADDR_LEN;i++)
    {
        printf("%02X:",adb_database[entry].result->remote_bd_addr[i]);
    }

You might have noticed that this function already exists in the BT Utility Library.  Use it.

    btutil_printBDaddress(adb_database[entry].result->remote_bd_addr);

Then you remember this block of code which iterates through and advertising packet and prints out the raw bytes?

// Print the RAW Data of the ADV Packet
    printf(" Data: ");
    int i=0;
    while(adb_database[entry].data[i])
    {
        for(int j=0;j<adb_database[entry].data[i];j++)
        {
            printf("%02X ",adb_database[entry].data[i+1+j]);
        }
        i = i + adb_database[entry].data[i]+1;
    }

Well, it exists in the library as well.  Use it.

btutil_adv_printPacketBytes(adb_database[entry].data);

Fix the “print” Command

In the previous implementation I had two functions for “print”.  The first one printed one entry and the second one printed the whole table.  I decided that I didnt really like this logic, so I compressed those two functions into one function.  Specifically, it take a number “entry”.  If that number is -1 then it will print the whole table.

static void adb_db_printRawPacket(int entry)
{
    int start,end;
 
    if(entry <= -1)
    {
        start = 0;
        end = adb_db_count;
    }
    else
    {
        start = entry;
        end = entry;
    }

    if(end>adb_db_count)
        end = adb_db_count; 

    for(int i=start;i<=end;i++)
    {
    
        printf("%02d MAC: ",i);
        btutil_printBDaddress(adb_database[i].result->remote_bd_addr);
        printf(" Data: ");
        btutil_adv_printPacketBytes(adb_database[i].data);

        printf("\n");
    }
}

Add a new “decode” Command

The next thing to do is to add a function to print out decoded packets (or the whole table).  So I wrote this:

static void adb_printDecodePacket(int entry)
{
    int start,end;
 
    if(entry == -1)
    {
        start = 0;
        end = adb_db_count;
    }
    else
    {
        start = entry;
        end = entry;
    }

    if(end>adb_db_count)
        end = adb_db_count; 

    for(int i=start;i<=end;i++)
    {

        printf("%02d MAC: ",i);
        btutil_printBDaddress(adb_database[i].result->remote_bd_addr);
        printf("\n");
        btutil_adv_printPacketDecode(adb_database[i].data);
        printf("\n");
    }
}

After finishing that block of code, I realized I had implemented almost exactly the same functionality which two different functions.  So, I decided to redo this by doing this.  Notice that it take in a adb_print_method, in other words raw bytes or decoded packet.

typedef enum {
    ADB_PRINT_METHOD_BYTES,
    ADB_PRINT_METHOD_DECODE,
} adb_print_method_t;

static void adb_db_print(adb_print_method_t method,int entry)
{
    int start,end;
 
    if(entry < 0)
    {
        start = 0;
        end = adb_db_count;
    }
    else
    {
        start = entry;
        end = entry;
    }

    if(end>adb_db_count)
        end = adb_db_count; 

    for(int i=start;i<=end;i++)
    {
    
        printf("%02d MAC: ",i);
        btutil_printBDaddress(adb_database[i].result->remote_bd_addr);
        switch(method)
        {
        
        case ADB_PRINT_METHOD_BYTES:
            printf(" Data: ");
            btutil_adv_printPacketBytes(adb_database[i].data);
        break;

        case ADB_PRINT_METHOD_DECODE:
            printf("\n");
            btutil_adv_printPacketDecode(adb_database[i].data);
        break;
        } 
        printf("\n");
    }
}

I don’t show it here, but after changing this I had to fix up the function calls in several places in the advDatabase.

Add a new command to print decode packets

Now that I have a new method to print packets, I add a command to the database to allow the user to call it:

typedef enum {
    ADB_ADD,
    ADB_PRINT_RAW,
    ADB_PRINT_DECODE,
} adb_cmd_t;

Then in the queue loop:

switch(msg.cmd)
            {
                case ADB_ADD:
                    scan_result = (wiced_bt_ble_scan_results_t *)msg.data0;
                    data = (uint8_t *)msg.data1;
                    adb_db_add(scan_result,data);
                break;
                case ADB_PRINT_RAW:
                    adb_db_print(ADB_PRINT_METHOD_BYTES,(int)msg.data0);
                break;
                case ADB_PRINT_DECODE:
                    adb_db_print(ADB_PRINT_METHOD_DECODE,(int)msg.data0);
                break;
            }

Then the actual function

void adb_printDecode(int entry)
{
    adb_cmdMsg_t msg;
    msg.cmd = ADB_PRINT_DECODE;
    msg.data0 = (void *)entry;
    xQueueSend(adb_cmdQueue,&msg,0); // If the queue is full... oh well
}

Then add it to advDatabase.h

void adb_printDecode(int entry);

Finally to the usercmd.c

static int usrcmd_printDecode(int argc, char **argv)
{
    if(argc == 1)
    {
        adb_printDecode(-1);
    }

    if(argc == 2)
    {
        int val;
        sscanf(argv[1],"%d",&val);
        adb_printDecode(val);
    }
    return 0;
}

Program and Test

When I actually program the scanner you can see that I can print out 1 item.  OR I can decode one item.  Notice that one contains 3 fields

  • flags
  • Tx Power Level
  • Manufacturers data.  Apparently an Apple something or the other

And I can print the whole table

Or decode the whole table.


AnyCloud Bluetooth Advertising Scanner (Part 5)

Summary

In this article I will add a new task to the AnyCloud BLE Advertising Scanning application which will save the advertising data into a database.

Story

There is still a boatload of mostly unintelligible advertising data coming ripping onto our screen.  It is FINALLY time to start fixing that.  In this article I will create a new task called the advertising database task which will hold the history of advertising packets that I have seen.  I will update the Bluetooth Manager task to submit the advertising packets to a queue running in the advertising database task.

There are

Article Topic
AnyCloud Bluetooth Advertising Scanner (Part 1) Introduction to AnyCloud Bluetooth Advertising
AnyCloud Bluetooth Advertising Scanner (Part 2) Creating an AnyCloud Bluetooth project
AnyCloud Bluetooth Advertising Scanner (Part 3) Adding Observing functionality to the project
AnyCloud Bluetooth Utilities Library A set of APIs for enhancement of the AnyCloud Library
AnyCloud Bluetooth Advertising Scanner (Part 4) Adding a command line to the scanner
AnyCloud Bluetooth Advertising Scanner (Part 5) Adding a history database to the scanner
AnyCloud Bluetooth Advertising Scanner (Part 6) Decoding advertising packets
AnyCloud Bluetooth Advertising Scanner (Part 7) Adding recording commands to the command line
AnyCloud Bluetooth Advertising Scanner (Part 8) Adding filtering to the scanner
AnyCloud Bluetooth Advertising Scanner (Part 9) Improve the print and add packet age
AnyCloud Bluetooth Advertising Scanner (Part 10) Sort the database

All of the code can be found at git@github.com:iotexpert/AnyCloudBLEScanner.git and https://github.com/iotexpert/AnyCloudBLEScanner.git

There are git tags in place starting at part 5 so that you can look at just that version of the code.  "git tag" to list the tags.  And "git checkout part6" to look at the part 6 version of the code.

You can also create a new project with this is a template if you have the IoT Expert Manifest Files installed

Create an Advertising Data Database Task

We need to create the file advertisingDatabase.h which will hold the task prototype (so that main can get going).

#pragma once

void adb_task(void *arg);

Then create the advertisingDatabase.c to hold the actual database code.  It will start with the definition of messages which can be sent to the task.  For now just “ADB_ADD”.  To make things a little bit simpler these command can have two data elements (which I call data0 and data1).  Then the main part of the task just

  1. Creates the queue to manage the messages
  2. Process the message until the end of time
#include "FreeRTOS.h"
#include "queue.h"

static QueueHandle_t adb_cmdQueue;
typedef enum {
    ADB_ADD,
} adb_cmd_t;

typedef struct
{
    adb_cmd_t cmd;
    void *data0;
    void *data1;
} adb_cmdMsg_t;

void adb_task(void *arg)
{
    // setup the queue
    adb_cmdMsg_t msg;

    adb_cmdQueue = xQueueCreate(10,sizeof(adb_cmdMsg_t));
    
    while(1)
    {
        BaseType_t status = xQueueReceive(adb_cmdQueue,&msg,portMAX_DELAY);
        if(status == pdTRUE) 
        {
            switch(msg.cmd)
            {
                case ADB_ADD:
                break;
            }

        }
    }
}

To start the task, you need to add it to main.c.

    xTaskCreate(adb_task,"adv database",configMINIMAL_STACK_SIZE*4,0,1,0);

When I build and program this, you can now see the new task.  Good that working.

AnyCloud> Unhandled Bluetooth Management Event: BTM_LOCAL_IDENTITY_KEYS_REQUEST_EVT
Started BT Stack Succesfully

AnyCloud> tasks
Name          State Priority   Stack  Num
------------------------------------------
usrcmd_ta       X       0       228     5
IDLE            R       0       115     7
Tmr Svc         B       0       223     8
CYBT_HCI_       B       5       950     3
sleep_tas       B       6       221     1
CYBT_BT_T       B       4       1371    2
blinkTask       B       0       98      4
adv datab       B       1       479     6
‘B’ – Blocked
‘R’ – Ready
‘D’ – Deleted (waiting clean up)
‘S’ – Suspended, or Blocked without a timeout
Stack = bytes free at highwater
AnyCloud>

Update the Advertising Database to Accept Submitted ADV Packets

If you recall our original setup was to take advertising packets in the Bluetooth Manager thread and print out the data.  The first thing that we want to fix up is the ability of the advertising database task to accept advertising packets which are pushed to its command queue.   To prepare for this I create two local variables to hold the data.

void adb_task(void *arg)
{
    // setup the queue
    adb_cmdMsg_t msg;
    wiced_bt_ble_scan_results_t *scan_result;
    uint8_t *data;

Then I update the ADB_ADD command.  My first, and really simple fix, is to grab the printing code from the Bluetooth Manager task.  Obviously this won’t be an improvement from the original program as far as the users goes, but it will verify that the tasks are working properly together.

                case ADB_ADD:
                    // Print the MAC Address
                    scan_result = (wiced_bt_ble_scan_results_t *)msg.data0;
                    data = (uint8_t *)msg.data1;

                    printf("MAC: ");
                    for(int i=0;i<BD_ADDR_LEN;i++)
                    {
                        printf("%02X:",scan_result->remote_bd_addr[i]);
                    }
                    // Print the RAW Data of the ADV Packet
                    printf(" Data: ");
                    int i=0;
                    while(data[i])
                    {
                        for(int j=0;j<data[i];j++)
                        {
                            printf("%02X ",data[i+1+j]);
                        }
                        i = i + data[i]+1;
                    }
                    printf("\n");
    
                    free(msg.data0);
                    free(msg.data1);
                break;

Then I add a command to the advertisingDatabase.h which the Bluetooth Manager task can call to submit advertising packets

void adb_addAdv(wiced_bt_ble_scan_results_t *scan_result,void *data);

The actual command in advertisingDatabase.c just takes the advertising information, puts it in a command message, then submits it to the command queue.

void adb_addAdv(wiced_bt_ble_scan_results_t *scan_result,void *data)
{
    adb_cmdMsg_t msg;
    msg.cmd = ADB_ADD;
    msg.data0 = (void *)scan_result;
    msg.data1 = (void *)data;
    xQueueSend(adb_cmdQueue,&msg,0); // If you loose an adv packet it is OK...
}

Update the Bluetooth Manager to Submit Adv Packets

Now I go and edit the bluetoothManager. c to submit packets rather than print them.  To do this I greatly simplify the callback.  There is one VERY important issue to deal with, which is one of those potential religious war issues.  Memory.

When you get the callback from the stack, it gives you POINTERS to data for the advertising packet that reside inside of buffers inside of the stack.  As soon as this callback returns this memory is purged.  To prevent this data from getting cleaned up by the stack I

  1. Malloc some memory for the wiced_bt_ble_scan_results
  2. Malloc some memory for the advertising data
  3. Make a copy of the data
  4. Submit it to the Advertising Database

I KNOW from the spec that the largest data packet is 31-bytes (actually it is 31-bytes + one more field with length 0).  So I know the maximum length is 32-bytes  This means that in many situations I will be copying GARBAGE into my buffer if the packet is less than 32 bytes long.  I think that this is simpler than calculating the length and then only copying that much data.

void btm_advCallback(wiced_bt_ble_scan_results_t *p_scan_result, uint8_t *p_adv_data)
{
    wiced_bt_ble_scan_results_t *scan_result = malloc(sizeof(wiced_bt_ble_scan_results_t));
    uint8_t *data = malloc(32);
   
    memcpy(data,p_adv_data,32);
    memcpy(scan_result,p_scan_result->remote_bd_addr,BD_ADDR_LEN);
    adb_addAdv(scan_result,data);
}

When I run this updated program I should get the same stream of data coming out on the serial port.  Sure enough the new thread is working.

Create an Advertising Data Database

Now, lets create an actual database.  To simplify things my database is just an array of structures.  One structure per bluetooth device.  The structure will contain a pointer to the information about the device it just saw and the actual raw data.

typedef struct {
    wiced_bt_ble_scan_results_t *result;
    uint8_t *data;
} adb_adv_t ;

#define ADB_MAX_SIZE (40)
adb_adv_t adb_database[ADB_MAX_SIZE];
int adb_db_count=0;

Then I will create several helper functions to work with the database

  1. Find devices in the database given a mac address
  2. Print an entry in the database
  3. Add entries to the database

First, find an entry in the database.  This function will search through the database and compare the mac address against the mac address in the database.  When the memcmp ==0 meaning it found a match, it will return that entry.

static int adb_db_find(wiced_bt_device_address_t *add)
{
    int rval=-1;
    for(int i=0;i<adb_db_count;i++)
    {
        if(memcmp(add,&adb_database[i].result->remote_bd_addr,BD_ADDR_LEN)==0)
        {
            rval = i;
            break;
        }
    }
    return rval;
}

The print function will make sure that you asked for a legal entry (much must be greater than 0… and less than the max).  Then it will print out the mac address and the raw data.  In a future post I will add a smarter print out.

static void adb_db_printEntry(int entry)
{
    if(!(entry>= 0 && entry <= adb_db_count))
    {
        printf("Illegal entry\n");
        return;
    }
    printf("%02d MAC: ",entry);

    for(int i=0;i<BD_ADDR_LEN;i++)
    {
        printf("%02X:",adb_database[entry].result->remote_bd_addr[i]);
    }

    // Print the RAW Data of the ADV Packet
    printf(" Data: ");
    int i=0;
    while(adb_database[entry].data[i])
    {
        for(int j=0;j<adb_database[entry].data[i];j++)
        {
            printf("%02X ",adb_database[entry].data[i+1+j]);
        }
        i = i + adb_database[entry].data[i]+1;
    }
    printf("\n");
}

To add an entry to the database, first make sure that it isn’t already in the database.  Then when you are sure that it isn’t the database, you just add the pointers to your table.  You need to make sure and not go beyond the end of the table, and if you did, you will have effectively blown away the last entry in the table.  Oh well.

static void adb_db_add(wiced_bt_ble_scan_results_t *scan_result,uint8_t *data)
{
 
    int entry = adb_db_find(&scan_result->remote_bd_addr);
    if(entry == -1)
    {
        
        adb_database[adb_db_count].result = scan_result;
        adb_database[adb_db_count].data = data;
        adb_db_printEntry(adb_db_count);
        adb_db_count = adb_db_count + 1;
        if(adb_db_count == ADB_MAX_SIZE)
        {
            printf("ADV Table Max Size\n");
            adb_db_count = adb_db_count - 1;
        }
    }
    else
    {
        free(scan_result);
        free(data);
    }
}

Add a Command to Print the Database

Now we want to add the ability to print from the command line.  So add a new command message to the list of legal commands.

typedef enum {
    ADB_ADD,
    ADB_PRINT,
} adb_cmd_t;

Then create a new function to print.  If you send in a “-1” it will print the whole table.  Otherwise just print the individual entry.

static void adb_printTable(int entry)
{
    if(entry == -1)
    {
        for(int i=0;i<adb_db_count;i++)
        {
            adb_db_printEntry(i);
        }

    }
    else
    {
        adb_db_printEntry(entry);
    }
    

}

Now edit usercmd.c to have the new command line.  Notice that I use “sscanf” which obviously has some issues.  Too bad.

static int usrcmd_print(int argc, char **argv)
{

    if(argc == 1)
    {
        adb_print(-1); // Print whole table
    }

    if(argc == 2)
    {
        int val;
        sscanf(argv[1],"%d",&val);
        adb_print(val);
    }

    return 0;
}

When I program the project it immediately prints out a bunch of devices that are at my house.  Then you can see I run the “print” command which prints the table.  Finally P do a print 0 to just print the first entry.

In the next article I will add smarter diagnostics to the advertising packets.

AnyCloud Bluetooth Advertising Scanner (Part 4)

Summary

In this article I update the AnyCloud BLE advertising scanner to use the btutil library that was created in the previous post.  In addition, I add a command queue to the bluetoothManger and enable a new command to turn on and off scanning.

Story

If you have been following along until now, which I imagine that you have if you are reading this,  you will have gotten a vomit of device data blasting out onto your serial console.  This isn’t very helpful.  So now what?  I am going to divide this problem into two parts

  1. Creating a new user command to turn on and off scanning (this article)
  2. Creating a database to manage the data + a set of commands to dump it (next article)

There are

Article Topic
AnyCloud Bluetooth Advertising Scanner (Part 1) Introduction to AnyCloud Bluetooth Advertising
AnyCloud Bluetooth Advertising Scanner (Part 2) Creating an AnyCloud Bluetooth project
AnyCloud Bluetooth Advertising Scanner (Part 3) Adding Observing functionality to the project
AnyCloud Bluetooth Utilities Library A set of APIs for enhancement of the AnyCloud Library
AnyCloud Bluetooth Advertising Scanner (Part 4) Adding a command line to the scanner
AnyCloud Bluetooth Advertising Scanner (Part 5) Adding a history database to the scanner
AnyCloud Bluetooth Advertising Scanner (Part 6) Decoding advertising packets
AnyCloud Bluetooth Advertising Scanner (Part 7) Adding recording commands to the command line
AnyCloud Bluetooth Advertising Scanner (Part 8) Adding filtering to the scanner
AnyCloud Bluetooth Advertising Scanner (Part 9) Improve the print and add packet age
AnyCloud Bluetooth Advertising Scanner (Part 10) Sort the database

All of the code can be found at git@github.com:iotexpert/AnyCloudBLEScanner.git and https://github.com/iotexpert/AnyCloudBLEScanner.git

There are git tags in place starting at part 5 so that you can look at just that version of the code.  "git tag" to list the tags.  And "git checkout part6" to look at the part 6 version of the code.

You can also create a new project with this is a template if you have the IoT Expert Manifest Files installed

Add the IoT Expert “btutil” Library

Before we actually start all of the command queue stuff, lets move to the btutil library that I talked about in the previous post.  To do this, add the library using the library manager.

Then delete bt_platform_cfg_settings.h and bt_platform_cfg_settings.c from your project.  Finally Rebuild and make sure that everything still works.  That is it.

Multithreading

Id like to explain that there is now some danger.  That danger comes from the fact that we have multiple tasks which are all accessing data plus functions that are talking to each other ASYNCHRONOUSLY.  Specifically we have:

  1. The Bluetooth Stack task – running the Bluetooth stack and management callback
  2. The Bluetooth Stack APIs – e.g. wiced_bt_ble_observe
  3. The usrcmd task – which is interacting with the user on the serial port and talking to the other tasks
  4. A timer_svc task – which runs software timers
  5. The advertising data (which I will start saving in the next article)

When faced with this situation what I typically like to do is provide thread safe public functions for each of the tasks.  Then any other task can call these functions and know that things are not going to get corrupted by a race condition.

To make the design thread safe, I typically like to put an RTOS Queue between the tasks.  These queues are a safe place to send and receive data in a “thread safe” way.  There are two basic design patterns that can be used

  1. Define a message structure (that gets pushed into the queue) and make it global (via a dot-h).  Define a queue handle and make it global (via a dot-h).  Then let any task build messages and push them into the queue to be received in the task that owns the queue.
  2. Define the message structure and queue.  Then define functions which are global (via a dot-h) which know how to interact with the queue.

I typically think that the 2nd method is better, so that is what I am going to do here.

  1. In BluetoothManager.h I will provide a function called “btm_cmdScan”
  2. The usrcmd task will call the btm_cmdScan function which will
  3. Create a btm_cmdMsg_t with the “scan” command and data of true/false
  4. Then push it into the Bluetooth Manager Command Queue
  5. Where a timer callback in the Bluetooth Manager Task will take it out of the queue
  6. Figure out that it is a “scan” command
  7. Then will either turn on or off scanning

Add a Queue to the Bluetooth Manager Thread

So we need two things a message to push into a queue (just a structure) and we need a queue to push it into.  First the message which is just a structure with two elements.  The first element is a command and the second element is some data of type void.  The meaning of the void *data will be different based on the command.

typedef struct {
	btm_cmd_t cmd;
	void *data;
} btm_cmdMsg_t;

But how about the command?  The command is just an enumerate list of commands which will now start with just one command.

typedef enum {
	BTM_SCAN,
} btm_cmd_t;

And know we need to define the queue.

#include "queue.h"
static QueueHandle_t btm_cmdQueue;

Before you can use the queue you need to initialize it.  The best place to initialize this queue is in the management callback right after the stack gets going.  You can see that I tell FreeRTOS that there is a queue which can hold up to 10 commands.  I also tell it that each command is the sizeof the command message.

    switch (event)
    {
        case BTM_ENABLED_EVT:
            printf("Started BT Stack Succesfully\n");
            btm_cmdQueue = xQueueCreate(10,sizeof(btm_cmdMsg_t));

Now we need to create a way for other tasks to create these command messages.  They will do this by calling a function which we will define in the bluetoothManager.h

void btm_cmdScan(bool enable);

This function will live in bluetoothManager.c and it simply

  1. Creates a command
  2. Set the actual command to scan
  3. Sets the void* data to be enable … in other words start or stop scanning.  Remember that a void * can be anything.  See I cast a bool to a void *
  4. Finally push the data into the command queue
void btm_cmdScan(bool enable)
{
    btm_cmdMsg_t msg;
    msg.cmd = BTM_SCAN;
    msg.data = (void *)enable;
  	xQueueSend(btm_cmdQueue, &msg,0);
}

Add a Timer to Process the Queue

So now we have a method to push items into the queue.  How do we get them out of the queue?  To do that I will use a Bluetooth Stack timer that will run every 50ms.

First, define the timer in bluetoothManager.c

#include "wiced_timer.h"
static wiced_timer_ext_t btm_mgmtQueueTimer;

Then define a function which the timer will call.  This function will

  1. Try to get a message out of the queue
  2. IF there is a message it will use a big switch to look at the possible messages
  3. If the message is a scan
  4. Then call the wiced function to either start “observing” or stop “observing”
static void btm_processBluetoothAppQueue()
{
	btm_cmdMsg_t msg;

	 BaseType_t rval;

	 rval = xQueueReceive( btm_cmdQueue,&msg,0);
	 if(rval == pdTRUE)
	 {
		 switch(msg.cmd)
		 {
		 case BTM_SCAN:
            wiced_bt_ble_observe((wiced_bool_t)msg.data,0,btm_advCallback);
			 break;
		 }
	 }
}

The last thing you need to do is start the timer.  The best place to start the timer is in the management callback where you need to

  1. Create the timer
  2. Tell it to start and run every 50ms
    switch (event)
    {
        case BTM_ENABLED_EVT:
            printf("Started BT Stack Succesfully\n");
            btm_cmdQueue = xQueueCreate(10,sizeof(btm_cmdMsg_t));
            wiced_init_timer_ext (&btm_mgmtQueueTimer, btm_processBluetoothAppQueue,0, WICED_TRUE);
            wiced_start_timer_ext (&btm_mgmtQueueTimer, 50);
        break;

A Potential Threading Bug

When I did the implementation originally I created what I thought was a threading bug.  Specifically I used the FreeRTOS timer to process the queue.  In other words instead of using a wiced_timer_ext_t I used a TimerHandle_t.  So what?

The wiced_timer_ext_t is run INSIDE of the BluetoothStack task where the TimerHandle_t is run inside of the Timer_SVC task.

So what?  I was afraid that the call to wiced_bt_ble_obsere was NOT thread safe and needed to be called inside of the same task as the stack.

After some digging I found out that the Bluetooth Stack is threadsafe, so I worried for no reason.  Well, actually, you can never worry enough about making these kinds of threading bugs because they are viscously difficult to debug.

Add a Scan Off & On Command

The last thing that you need to do is add an actual command to the usercmd task to call the bluetooth manager function to turn on and off scanning.

First, add a new prototype for your new command in usercmd.c.  Then add it to the list of legal commands.

static int usrcmd_scan(int argc, char **argv);


static const cmd_table_t cmdlist[] = {

.... deleted stuff

    { "scan","scan [on|off]", usrcmd_scan},

};

Then create the function to process the command line input and call the btm_scan function.

static int usrcmd_scan(int argc, char **argv)
{

    if(argc != 2)
        return 0;

    if(strcmp(argv[1],"on") == 0)
    {
        btm_cmdScan(true);
    }
    else if(strcmp(argv[1],"off") == 0)
    {
        btm_cmdScan(false);

    }
    return 0;

}

Now build it and run it.  You should still get adv packets barfing all over your screen.  But now you can turn on and off the scanning with “scan on” and “scan off”.  In the next article we will create a database to hold the scan packets.

AnyCloud Bluetooth Utilities Library

Summary

This article is a discussion of a library of utilities functions that support AnyCloud Bluetooth development.  It includes settings to configure the hardware, functions to decode stack events, functions to decode advertising packets etc.

Story

The Cypress, now Infineon, Modus Toolbox team has been working to bring the WICED Bluetooth devices to be closer and more compatible with the PSoC 6 tools.  One of the important enablement things we have done is turn on the WICED Bluetooth Host stack on the PSoC 6 so that it can effectively talk to the CYW43XXX Bluetooth / WiFi combo chips.

As I have been using all of the new stuff I found myself adding my own custom functionality…. and after a while I realized (finally) that I should put all of those little helper things into a library, specifically an IoT Expert library.  For now this library contains:

  • The Bluetooth Platform Configuration Settings
  • Functions to decode stack events
  • Functions to decode advertising packets

but imagine with time I will add more functions and templates.

bt_platform_cfg_settings

As I discussed in the article AnyCloud Bluetooth Advertising Scanner (Part 1), every single AnyCloud BLE Stack project will require a structure of type wiced_bt_cfg_settings_t.  This structure is used to setup the hardware before getting the stack going.  Remember you need to make a call like this to initialize the Bluetooth hardware.

    cybt_platform_config_init(&bt_platform_cfg_settings);

At some point this file will be included automatically for you by the Modus Toolbox team, but for now I have added this to my library.  This file look like this.  Basically a bunch of pin definitions which are set for you automatically by the BSP.  Obviously you can make your own, but this should work on all of the Cypress development kits (I think)

#include "cybt_platform_config.h"
#include "cybsp.h"
#include "wiced_bt_stack.h"

const cybt_platform_config_t bt_platform_cfg_settings =
{
    .hci_config =
    {
        .hci_transport = CYBT_HCI_UART,

        .hci =
        {
            .hci_uart =
            {
                .uart_tx_pin = CYBSP_BT_UART_TX,
                .uart_rx_pin = CYBSP_BT_UART_RX,
                .uart_rts_pin = CYBSP_BT_UART_RTS,
                .uart_cts_pin = CYBSP_BT_UART_CTS,

                .baud_rate_for_fw_download = 115200,
                .baud_rate_for_feature     = 115200,

                .data_bits = 8,
                .stop_bits = 1,
                .parity = CYHAL_UART_PARITY_NONE,
                .flow_control = WICED_TRUE
            }
        }
    },

    .controller_config =
    {
        .bt_power_pin      = CYBSP_BT_POWER,
        .sleep_mode =
        {
            #if (bt_0_power_0_ENABLED == 1) /* BT Power control is enabled in the LPA */
            #if (CYCFG_BT_LP_ENABLED == 1) /* Low power is enabled in the LPA, use the LPA configuration */
            .sleep_mode_enabled = true,
            .device_wakeup_pin = CYCFG_BT_DEV_WAKE_GPIO,
            .host_wakeup_pin = CYCFG_BT_HOST_WAKE_GPIO,
            .device_wake_polarity = CYCFG_BT_DEV_WAKE_POLARITY,
            .host_wake_polarity = CYCFG_BT_HOST_WAKE_IRQ_EVENT
            #else /* Low power is disabled in the LPA, disable low power */
            .sleep_mode_enabled = false
            #endif
            #else /* BT Power control is disabled in the LPA – default to BSP low power configuration */
            .sleep_mode_enabled = true,
            .device_wakeup_pin = CYBSP_BT_DEVICE_WAKE,
            .host_wakeup_pin = CYBSP_BT_HOST_WAKE,
            .device_wake_polarity = CYBT_WAKE_ACTIVE_LOW,
            .host_wake_polarity = CYBT_WAKE_ACTIVE_LOW
            #endif
        }
    },

    .task_mem_pool_size    = 2048
};

btutil_stack

When you startup the Bluetooth Host stack you are responsible for providing a “management callback” which has the function prototype

typedef wiced_result_t (wiced_bt_management_cback_t) (wiced_bt_management_evt_t event, wiced_bt_management_evt_data_t *p_event_data);

The first parameter is an “event” which is  just an enumerated list of possible events by the Bluetooth Host Stack.  Here is the actual list.

enum wiced_bt_management_evt_e {
/* Bluetooth status events */
BTM_ENABLED_EVT,                                /**< Bluetooth controller and host stack enabled. Event data: wiced_bt_dev_enabled_t */
BTM_DISABLED_EVT,                               /**< Bluetooth controller and host stack disabled. Event data: NULL */
BTM_POWER_MANAGEMENT_STATUS_EVT,                /**< Power management status change. Event data: wiced_bt_power_mgmt_notification_t */
BTM_RE_START_EVT,                               /**< Bluetooth controller and host stack re-enabled. Event data: tBTM_ENABLED_EVT */
/* Security events */
BTM_PIN_REQUEST_EVT,                            /**< PIN request (used only with legacy devices). Event data: #wiced_bt_dev_name_and_class_t */
BTM_USER_CONFIRMATION_REQUEST_EVT,              /**< received USER_CONFIRMATION_REQUEST event (respond using #wiced_bt_dev_confirm_req_reply). Event data: #wiced_bt_dev_user_cfm_req_t */
BTM_PASSKEY_NOTIFICATION_EVT,                   /**< received USER_PASSKEY_NOTIFY event. Event data: #wiced_bt_dev_user_key_notif_t */
BTM_PASSKEY_REQUEST_EVT,                        /**< received USER_PASSKEY_REQUEST event @cond DUAL_MODE (respond using #wiced_bt_dev_pass_key_req_reply). Event data: #wiced_bt_dev_user_key_req_t @endcond
@note  BR/EDR Only */
BTM_KEYPRESS_NOTIFICATION_EVT,                  /**< received KEYPRESS_NOTIFY event. Event data: #wiced_bt_dev_user_keypress_t */
BTM_PAIRING_IO_CAPABILITIES_BR_EDR_REQUEST_EVT, /**< Requesting IO capabilities for BR/EDR pairing. Event data: #wiced_bt_dev_bredr_io_caps_req_t 
@note  BR/EDR Only */
BTM_PAIRING_IO_CAPABILITIES_BR_EDR_RESPONSE_EVT,/**< Received IO capabilities response for BR/EDR pairing. Event data: @cond DUAL_MODE #wiced_bt_dev_bredr_io_caps_rsp_t @endcond
@note  BR/EDR Only*/
BTM_PAIRING_IO_CAPABILITIES_BLE_REQUEST_EVT,    /**< Requesting IO capabilities for BLE pairing. Slave can check peer io capabilities in event data before updating with local io capabilities. Event data: #wiced_bt_dev_ble_io_caps_req_t */
BTM_PAIRING_COMPLETE_EVT,                       /**< received SIMPLE_PAIRING_COMPLETE event. Event data: #wiced_bt_dev_pairing_cplt_t */
BTM_ENCRYPTION_STATUS_EVT,                      /**< Encryption status change. Event data: #wiced_bt_dev_encryption_status_t */
BTM_SECURITY_REQUEST_EVT,                       /**< Security request (respond using #wiced_bt_ble_security_grant). Event data: #wiced_bt_dev_security_request_t */
BTM_SECURITY_FAILED_EVT,                        /**< Security procedure/authentication failed. Event data: #wiced_bt_dev_security_failed_t */
BTM_SECURITY_ABORTED_EVT,                       /**< Security procedure aborted locally, or unexpected link drop. Event data: #wiced_bt_dev_name_and_class_t */
BTM_READ_LOCAL_OOB_DATA_COMPLETE_EVT,           /**< Result of reading local OOB data @cond DUAL_MODE (#wiced_bt_dev_read_local_oob_data). Event data: #wiced_bt_dev_local_oob_t @endcond 
@note  BR/EDR Only */
BTM_REMOTE_OOB_DATA_REQUEST_EVT,                /**< OOB data from remote device @cond DUAL_MODE (respond using #wiced_bt_dev_remote_oob_data_reply). Event data: #wiced_bt_dev_remote_oob_t @endcond 
@note  BR/EDR Only */
BTM_PAIRED_DEVICE_LINK_KEYS_UPDATE_EVT,         /**< Updated remote device link keys (store device_link_keys to  NV memory). This is the place to
verify that the correct link key has been generated. Event data: #wiced_bt_device_link_keys_t */
BTM_PAIRED_DEVICE_LINK_KEYS_REQUEST_EVT,        /**< Request for stored remote device link keys (restore device_link_keys from NV memory). If successful, return WICED_BT_SUCCESS. Event data: #wiced_bt_device_link_keys_t */
BTM_LOCAL_IDENTITY_KEYS_UPDATE_EVT,             /**< Update local identity key (stored local_identity_keys NV memory). Event data: #wiced_bt_local_identity_keys_t */
BTM_LOCAL_IDENTITY_KEYS_REQUEST_EVT,            /**< Request local identity key (get local_identity_keys from NV memory). If successful, return WICED_BT_SUCCESS. Event data: #wiced_bt_local_identity_keys_t */
BTM_BLE_SCAN_STATE_CHANGED_EVT,                 /**< BLE scan state change. Event data: #wiced_bt_ble_scan_type_t */
BTM_BLE_ADVERT_STATE_CHANGED_EVT,               /**< BLE advertisement state change. Event data: #wiced_bt_ble_advert_mode_t */
/* BLE Secure Connection events */
BTM_SMP_REMOTE_OOB_DATA_REQUEST_EVT,            /**< SMP remote oob data request. Reply using wiced_bt_smp_oob_data_reply. Event data: #wiced_bt_smp_remote_oob_req_t  */
BTM_SMP_SC_REMOTE_OOB_DATA_REQUEST_EVT,         /**< LE secure connection remote oob data request. Reply using wiced_bt_smp_sc_oob_reply. Event data: #wiced_bt_smp_sc_remote_oob_req_t 
@note  BR/EDR Only */
BTM_SMP_SC_LOCAL_OOB_DATA_NOTIFICATION_EVT,     /**< LE secure connection local OOB data (wiced_bt_smp_create_local_sc_oob_data). Event data: #wiced_bt_smp_sc_local_oob_t */
BTM_SCO_CONNECTED_EVT,                          /**< SCO connected event. Event data: @cond DUAL_MODE #wiced_bt_sco_connected_t @endcond
@note  BR/EDR Only */
BTM_SCO_DISCONNECTED_EVT,                       /**< SCO disconnected event. Event data: @cond #wiced_bt_sco_disconnected_t @endcond
@note  BR/EDR Only */
BTM_SCO_CONNECTION_REQUEST_EVT,                 /**< SCO connection request event. Event data: @cond #wiced_bt_sco_connection_request_t @endcond
@note  BR/EDR Only */
BTM_SCO_CONNECTION_CHANGE_EVT,                  /**< SCO connection change event. Event data: @cond #wiced_bt_sco_connection_change_t @endcond
@note  BR/EDR Only */
BTM_BLE_CONNECTION_PARAM_UPDATE,                /**< BLE connection parameter update. Event data: #wiced_bt_ble_connection_param_update_t */
BTM_BLE_PHY_UPDATE_EVT,                         /**< BLE Physical link update. Event data: wiced_bt_ble_phy_update_t */
BTM_LPM_STATE_LOW_POWER,                        /**< BT device wake has been deasserted. Used for Host Stack Use Case. */
BTM_MULTI_ADVERT_RESP_EVENT,                    /**< Multi adv command status event Used for the status of the command sent */
#if SMP_CATB_CONFORMANCE_TESTER == TRUE
BTM_SMP_SC_PEER_INFO_EVT                        /** The Secure Connections support information of the peer device */
#endif
};

While you are trying to figure out what is going on during the development, it is very useful to be able to print out the name of the events (instead of the numbers).  In other words instead of doing

printf("Event = %02X\n",event);

it is way better to do

printf("Event Name=%s\n",btutil_getBTEventName(event));

While I was looking at an example project I found this function which I thought was awesome.

const char *btutil_getBTEventName(wiced_bt_management_evt_t event)
{
switch ( (int)event )
{
CASE_RETURN_STR(BTM_ENABLED_EVT)
CASE_RETURN_STR(BTM_DISABLED_EVT)
CASE_RETURN_STR(BTM_POWER_MANAGEMENT_STATUS_EVT)
CASE_RETURN_STR(BTM_PIN_REQUEST_EVT)
CASE_RETURN_STR(BTM_USER_CONFIRMATION_REQUEST_EVT)
CASE_RETURN_STR(BTM_PASSKEY_NOTIFICATION_EVT)
CASE_RETURN_STR(BTM_PASSKEY_REQUEST_EVT)
CASE_RETURN_STR(BTM_KEYPRESS_NOTIFICATION_EVT)
CASE_RETURN_STR(BTM_PAIRING_IO_CAPABILITIES_BR_EDR_REQUEST_EVT)
CASE_RETURN_STR(BTM_PAIRING_IO_CAPABILITIES_BR_EDR_RESPONSE_EVT)
CASE_RETURN_STR(BTM_PAIRING_IO_CAPABILITIES_BLE_REQUEST_EVT)
CASE_RETURN_STR(BTM_PAIRING_COMPLETE_EVT)
CASE_RETURN_STR(BTM_ENCRYPTION_STATUS_EVT)
CASE_RETURN_STR(BTM_SECURITY_REQUEST_EVT)
CASE_RETURN_STR(BTM_SECURITY_FAILED_EVT)
CASE_RETURN_STR(BTM_SECURITY_ABORTED_EVT)
CASE_RETURN_STR(BTM_READ_LOCAL_OOB_DATA_COMPLETE_EVT)
CASE_RETURN_STR(BTM_REMOTE_OOB_DATA_REQUEST_EVT)
CASE_RETURN_STR(BTM_PAIRED_DEVICE_LINK_KEYS_UPDATE_EVT)
CASE_RETURN_STR(BTM_PAIRED_DEVICE_LINK_KEYS_REQUEST_EVT)
CASE_RETURN_STR(BTM_LOCAL_IDENTITY_KEYS_UPDATE_EVT)
CASE_RETURN_STR(BTM_LOCAL_IDENTITY_KEYS_REQUEST_EVT)
CASE_RETURN_STR(BTM_BLE_SCAN_STATE_CHANGED_EVT)
CASE_RETURN_STR(BTM_BLE_ADVERT_STATE_CHANGED_EVT)
CASE_RETURN_STR(BTM_SMP_REMOTE_OOB_DATA_REQUEST_EVT)
CASE_RETURN_STR(BTM_SMP_SC_REMOTE_OOB_DATA_REQUEST_EVT)
CASE_RETURN_STR(BTM_SMP_SC_LOCAL_OOB_DATA_NOTIFICATION_EVT)
CASE_RETURN_STR(BTM_SCO_CONNECTED_EVT)
CASE_RETURN_STR(BTM_SCO_DISCONNECTED_EVT)
CASE_RETURN_STR(BTM_SCO_CONNECTION_REQUEST_EVT)
CASE_RETURN_STR(BTM_SCO_CONNECTION_CHANGE_EVT)
CASE_RETURN_STR(BTM_BLE_CONNECTION_PARAM_UPDATE)
#ifdef CYW20819A1
CASE_RETURN_STR(BTM_BLE_PHY_UPDATE_EVT)
#endif
}
return NULL;
}

And then I learned something new when I looked at the “function” CASE_RETURN_STR which used compiler trick to turn an enumerated value into a string.

#define CASE_RETURN_STR(enum_val)          case enum_val: return #enum_val;

This allows you to do this in your management callback (notice line 16 where the string is printed out)

wiced_result_t app_bt_management_callback(wiced_bt_management_evt_t event, wiced_bt_management_evt_data_t *p_event_data)
{
wiced_result_t result = WICED_BT_SUCCESS;
switch (event)
{
case BTM_ENABLED_EVT:
if (WICED_BT_SUCCESS == p_event_data->enabled.status)
{
printf("Started BT Stack Succesfully\n");
wiced_bt_ble_observe(WICED_TRUE,0,obv_callback);
}
break;
default:
printf("Unhandled Bluetooth Management Event: %s\n", btutil_getBTEventName(event));
break;
}
return result;
}

It turns out that there are several other places where the stack gives you an event-ish thing.  So these functions were created as well

#pragma once
const char *btutil_getBTEventName(wiced_bt_management_evt_t event);
const char *btutil_getBLEAdvertModeName(wiced_bt_ble_advert_mode_t mode);
const char *btutil_getBLEGattDisconnReasonName(wiced_bt_gatt_disconn_reason_t reason);
const char *btutil_getBLEGattStatusName(wiced_bt_gatt_status_t status);

btutil_adv_decode

In AnyCloud Bluetooth Advertising Scanner (Part 3) I discussed the format of the advertising packet.  So I created functions which will decode the data in the advertising packets.  More on the future article AnyCloud Bluetooth Advertising Scanner (Part 4 or maybe 5 or maybe 6).  Here are the functions:

#pragma once
wiced_bool_t btutil_isEddystone(uint8_t *data);
wiced_bool_t btutil_is_iBeacon(uint8_t *data);
wiced_bool_t btutil_isCypress(uint8_t *data);
int btutil_adv_len(uint8_t *packet);
void btutil_adv_printPacketDecode(uint8_t *packet);
void btutil_adv_printPacketBytes(uint8_t *packet);

btutil

And because I like to have just one include to get access to all of the function I created “btutil.h” which just includes all of the headers in one place.

#pragma once
#include "btutil_adv_decode.h"
#include "btutil_stack.h"
#include "btutil_general.h"
#include "bt_platform_cfg_settings.h"

Add to the IoT Expert Manifest

In order to set it up for my library to live in the library manager I updated the IoT Expert Manifest file to have a link to the GitHub repository

<middleware>
<name>Bluetooth Utilities</name>
<id>btutil</id>
<uri>https://github.com/iotexpert/btutil</uri>
<desc>A library of Bluetooth Debugging Utilties for Cypress PSoC6 Anycloud</desc>
<category>IoT Expert</category>
<req_capabilities>psoc6</req_capabilities>
<versions>
<version flow_version="1.0,2.0">
<num>master</num>
<commit>master</commit>
<desc>master</desc>
</version>
</versions>
</middleware>

And now the library manager has the IoT Expert Bluetooth Utilities.


AnyCloud – Wireless Connection Manager (Part 2)

Summary

Part 2 of the discussion of using the Infineon (Cypress) PSoC 6 with a CYW4343W and the AnyCloud Connection Manager with Modus Toolbox.  The AnyCloud Connection Manager is an RTOS thread that lets you manage a connection to a WiFi network.  It knows how to scan for networks, attach, detach etc. and was recently released for use with PSoC6 and 43xxx WiFi combos.

The Story

In the last article I walked you through creating a project using the wireless connection manager (WCM) which is one of the libraries that is part of the Infineon/Cypress AnyCloud SDK.  I introduced the wifi-mw-core, wifi-connection-manager and ntshell libraries.  In this article I will update the program to include commands to

  • connect (to an Access Point)
  • disconnect (from an Access Point)
  • print (mac address and ip address)

Add the Connect

I want to add a command that will let me issue a command line like

  • connect SSID (if it doesn’t have a passphrase)
  • connect SSID passphrase

In order to connect to an Access Point you need to call the WCM API, cy_wcm_connect_ap.  Here is the function prototype:

cy_rslt_t cy_wcm_connect_ap(const cy_wcm_connect_params_t *connect_params, cy_wcm_ip_address_t *ip_addr)

This function requires that you give it two arguments

  1. A pointer for a place to store the IP address (that comes from the DHCP server)
  2. A pointer to a structure of connection parameters.  That structure is as follows:
typedef struct
{
cy_wcm_ap_credentials_t  ap_credentials;       /**< Access point credentials */
cy_wcm_mac_t             BSSID;                /**< Specifies the MAC address of Access Point (optional) */
cy_wcm_ip_setting_t      *static_ip_settings;  /**< Specifies the static IP settings of the device (optional) */
cy_wcm_wifi_band_t       band;                 /**< Specifies the Radio band to be connected (optional) */
} cy_wcm_connect_params_t;

Typically you would setup the “ap_credentials” part of the structure (unless you happen to know the MAC address of the AP you want to connect to).  Those credentials include the SSID and password as well as the security (WPA2 PSK etc…)

typedef struct
{
cy_wcm_ssid_t        SSID;                /**< SSID of the Wi-Fi network to join, SSID should be a null terminated string. */
cy_wcm_passphrase_t  password;            /**< Password needed to join the AP, password should be a null terminated string. */
cy_wcm_security_t    security;            /**< Wi-Fi Security. @see cy_wcm_security_t. */
} cy_wcm_ap_credentials_t;

Security is an enumeration of possible security types.

typedef enum
{
WHD_SECURITY_OPEN             = 0,                                                                 /**< Open security                                         */
WHD_SECURITY_WEP_PSK          = WEP_ENABLED,                                                       /**< WEP PSK Security with open authentication             */
WHD_SECURITY_WEP_SHARED       = (WEP_ENABLED | SHARED_ENABLED),                                    /**< WEP PSK Security with shared authentication           */
WHD_SECURITY_WPA_TKIP_PSK     = (WPA_SECURITY | TKIP_ENABLED),                                     /**< WPA PSK Security with TKIP                            */
WHD_SECURITY_WPA_AES_PSK      = (WPA_SECURITY | AES_ENABLED),                                      /**< WPA PSK Security with AES                             */
WHD_SECURITY_WPA_MIXED_PSK    = (WPA_SECURITY | AES_ENABLED | TKIP_ENABLED),                       /**< WPA PSK Security with AES & TKIP                      */
WHD_SECURITY_WPA2_AES_PSK     = (WPA2_SECURITY | AES_ENABLED),                                     /**< WPA2 PSK Security with AES                            */
WHD_SECURITY_WPA2_TKIP_PSK    = (WPA2_SECURITY | TKIP_ENABLED),                                    /**< WPA2 PSK Security with TKIP                           */
WHD_SECURITY_WPA2_MIXED_PSK   = (WPA2_SECURITY | AES_ENABLED | TKIP_ENABLED),                      /**< WPA2 PSK Security with AES & TKIP                     */
WHD_SECURITY_WPA2_FBT_PSK     = (WPA2_SECURITY | AES_ENABLED | FBT_ENABLED),                       /**< WPA2 FBT PSK Security with AES & TKIP */
WHD_SECURITY_WPA3_SAE         = (WPA3_SECURITY | AES_ENABLED),                                     /**< WPA3 Security with AES */
WHD_SECURITY_WPA3_WPA2_PSK    = (WPA3_SECURITY | WPA2_SECURITY | AES_ENABLED),                     /**< WPA3 WPA2 PSK Security with AES */
WHD_SECURITY_WPA_TKIP_ENT     = (ENTERPRISE_ENABLED | WPA_SECURITY | TKIP_ENABLED),                /**< WPA Enterprise Security with TKIP                     */
WHD_SECURITY_WPA_AES_ENT      = (ENTERPRISE_ENABLED | WPA_SECURITY | AES_ENABLED),                 /**< WPA Enterprise Security with AES                      */
WHD_SECURITY_WPA_MIXED_ENT    = (ENTERPRISE_ENABLED | WPA_SECURITY | AES_ENABLED | TKIP_ENABLED),  /**< WPA Enterprise Security with AES & TKIP               */
WHD_SECURITY_WPA2_TKIP_ENT    = (ENTERPRISE_ENABLED | WPA2_SECURITY | TKIP_ENABLED),               /**< WPA2 Enterprise Security with TKIP                    */
WHD_SECURITY_WPA2_AES_ENT     = (ENTERPRISE_ENABLED | WPA2_SECURITY | AES_ENABLED),                /**< WPA2 Enterprise Security with AES                     */
WHD_SECURITY_WPA2_MIXED_ENT   = (ENTERPRISE_ENABLED | WPA2_SECURITY | AES_ENABLED | TKIP_ENABLED), /**< WPA2 Enterprise Security with AES & TKIP              */
WHD_SECURITY_WPA2_FBT_ENT     = (ENTERPRISE_ENABLED | WPA2_SECURITY | AES_ENABLED | FBT_ENABLED),  /**< WPA2 Enterprise Security with AES & FBT               */
WHD_SECURITY_IBSS_OPEN        = (IBSS_ENABLED),                                                    /**< Open security on IBSS ad-hoc network                  */
WHD_SECURITY_WPS_SECURE       = AES_ENABLED,                                                       /**< WPS with AES security                                 */
WHD_SECURITY_UNKNOWN          = -1,                                                                /**< May be returned by scan function if security is unknown. Do not pass this to the join function! */
WHD_SECURITY_FORCE_32_BIT     = 0x7fffffff                                                         /**< Exists only to force whd_security_t type to 32 bits */
} whd_security_t;

Having to know the security of the AP is a total pain in the neck.  Where do you find the security from?  It turns out that when an AP beacons, the security of that SSID is one of the things that is broadcast.  What this means is that my program will need to

  1. When the connect command is called it should scan for the SSID that is part of the connect command & wait
  2. When the scan finds that SSID it will put the security type into the correct datastructure
  3. Then call the connect.

The way that I will do this is to

  1. Build a filter (that looks only for the user specified SSID)
  2. Provides a pointer for a place to store the security type.

I use the cy_wcm_scan function to do this.  Here is the function prototype:

cy_rslt_t cy_wcm_start_scan(cy_wcm_scan_result_callback_t callback, void *user_data, cy_wcm_scan_filter_t *scan_filter)

The scan filter is just a structure that specified

  1. A mode (which type of filter you want)
  2. The specific thing that you are looking for.
typedef struct
{
cy_wcm_scan_filter_type_t      mode;        /**< Scan filter mode */
union
{
cy_wcm_ssid_t              SSID;        /**< Service Set Identification */
cy_wcm_mac_t               BSSID;       /**< MAC address of Access Point */
cy_wcm_wifi_band_t         band;        /**< Radio band */
cy_wcm_scan_rssi_range_t   rssi_range;  /**< RSSI range */
} param;                                    /**< Scan filter mode specific paramter */
} cy_wcm_scan_filter_t;

The mode is simply an enumeration of the types of filters:

typedef enum
{
CY_WCM_SCAN_FILTER_TYPE_SSID = 0,   /**< Denotes SSID based scan filtering */
CY_WCM_SCAN_FILTER_TYPE_MAC,        /**< Denotes MAC  based scan filtering */
CY_WCM_SCAN_FILTER_TYPE_BAND,       /**< Denotes BAND based scan filtering */
CY_WCM_SCAN_FILTER_TYPE_RSSI,       /**< Denotes RSSI based scan filtering */
}cy_wcm_scan_filter_type_t;

What I want to do is start the scan and then wait for a semaphore.  To do this I will create a semaphore variable at the top of the netTask.c

SemaphoreHandle_t scanApSempahore = NULL;

Inside of the switch I will

  1. Create a connection parameters structure (line 226-227)
  2. setup the scan filter (line 231-232)
  3. create the semaphore (line 235)
  4. run the scan (line 236)
  5. wait for the semaphore to be set or timeout (line 239) notice that I hardcoded it to 10 seconds
				cy_wcm_connect_params_t connect_params;
memset(&connect_params, 0, sizeof(cy_wcm_connect_params_t));
// setup scan filter - In order to connect to an SSID you need to know the security type
// To find the security I scan for JUST that SSID which will tell me the security type
scanFilter.mode = CY_WCM_SCAN_FILTER_TYPE_SSID;
strcpy((char *)scanFilter.param.SSID,(char *)msg.val0);
// The scan callback will either 1) unlock the semaphore or 2) timeout (meaning it didnt find it)
scanApSempahore = xSemaphoreCreateBinary();
cy_wcm_start_scan(findApCallback,&connect_params.ap_credentials.security,&scanFilter);
// The semaphore will return pdFALSE if it TIMES out or pdTrue IF it got unlocked by the scan
if(xSemaphoreTake( scanApSempahore, pdMS_TO_TICKS(10000)) == pdTRUE)

In the scan callback I will check to see if I have real data (in other words the scan is not complete).  In the setup above I made the user data be a pointer to the place to store the security.  On line 54 I will store the security type that came back from the scan in the place pointed to by the user data pointer.  Then I will stop the scan and give the semaphore.

// This callback is used to find a specific SSID and then store the security type into the user data
// When I want to connect it will scan with a "filter" and the user data will be a pointer to the
// place to store the security
void findApCallback( cy_wcm_scan_result_t *result_ptr, void *user_data, cy_wcm_scan_status_t status )
{
if(status == CY_WCM_SCAN_INCOMPLETE)
{
whd_security_t *mySecurity = (whd_security_t *)user_data;
*mySecurity = result_ptr->security;
cy_wcm_stop_scan();
xSemaphoreGive(scanApSempahore);
}
}

Now back in the switch statement you can actually connect because you know the security type (line 244)  The else clause on line 253 handles the case where the timeout of the semaphore occurred, meaning that the scan didn’t find the AP.

				// The semaphore will return pdFALSE if it TIMES out or pdTrue IF it got unlocked by the scan
if(xSemaphoreTake( scanApSempahore, pdMS_TO_TICKS(10000)) == pdTRUE)
{
strcpy((char *)connect_params.ap_credentials.SSID,(char *)msg.val0);
strcpy((char *)connect_params.ap_credentials.password,(char *)msg.val1);
result = cy_wcm_connect_ap(&connect_params,&ip_addr);
if(result == CY_RSLT_SUCCESS)
printf("Connect Succeeded SSID=%s\n",(char *)msg.val0);
else
{
printf("Connect to %s failed\n",(char *)msg.val0);
}	
}
else
{
printf("Scan semaphore failed - couldnt find AP\n");
}
free((void *)msg.val0); // Free the SSID and PW that was passed by the caller
free((void *)msg.val1);
}
break;

With all of the connection work done, you can add the scan command to “usrcmd.c”.  It just looks at the number of arguments (either 2 or 3), then sets up the message to send to the network task, the queues the message.

static int usrcmd_connect(int argc, char **argv)
{
networkQueueMsg_t msg;
if(argc == 2)
{
msg.val0 = (uint32_t)malloc(strlen(argv[1])+1);
msg.val1 = (uint32_t)malloc(sizeof(""));
strcpy((char *)msg.val0,argv[1]);
strcpy((char *)msg.val1,"");
msg.cmd = net_connect;
xQueueSend(networkQueue,(const void *)&msg,portMAX_DELAY);
}
if(argc == 3)
{
msg.val0 = (uint32_t)malloc(strlen(argv[1])+1);
msg.val1 = (uint32_t)malloc(strlen(argv[2])+1);
strcpy((char *)msg.val0,argv[1]);
strcpy((char *)msg.val1,argv[2]);
msg.cmd = net_connect;
xQueueSend(networkQueue,(const void *)&msg,portMAX_DELAY);
}
return 0;
}

Add the Disconnect Command

The disconnect command is trivial.  Just call the disconnect api.

			case net_disconnect:
cy_wcm_disconnect_ap();
break;

Which you also need to add to the usercmd.c

static int usrcmd_disconnect(int argc, char **argv)
{
networkQueueMsg_t msg;
msg.cmd = net_disconnect;
xQueueSend(networkQueue,(const void *)&msg,portMAX_DELAY);
return 0;
}

Add the Print Command

The print command will have two optional parameters, IP (to print the current IP address) and MAC (to print our MAC address).  The first command is print ip.

			case net_printip:
result = cy_wcm_get_ip_addr(CY_WCM_INTERFACE_TYPE_STA,&ip_addr,1);
if(result == CY_RSLT_SUCCESS)
{
printf("IP Address=");
printIp(&ip_addr);
printf("\n");
}
else if(result == CY_RSLT_WCM_NETWORK_DOWN)
printf("Network disconnected\n");
else 
printf("IP Address call return unknown %d\n",(int)result);
break;

The MAC address command is also simple:

			case net_printmac:
result = cy_wcm_get_mac_addr(CY_WCM_INTERFACE_TYPE_STA,&mac_addr,1);
if(result == CY_RSLT_SUCCESS)
{
printf("MAC Address =");
printMac(mac_addr);
printf("\n");
}
else
printf("MAC Address = Unknown\n");
break;
}

And you need to add the print command to usrcmd.c

static int usrcmd_print(int argc, char **argv)
{
networkQueueMsg_t msg;
if(argc == 2 && strcmp(argv[1],"ip")==0)
{
msg.cmd = net_printip;
xQueueSend(networkQueue,(const void *)&msg,portMAX_DELAY);
}
if(argc == 2 && strcmp(argv[1],"mac")==0)
{
msg.cmd = net_printmac;
xQueueSend(networkQueue,(const void *)&msg,portMAX_DELAY);
}
return 0;
}

All of this code is available on github at

  • git@github.com:iotexpert/wcm_example
  • https://github.com/iotexpert/wcm_example

AnyCloud – Wireless Connection Manager (Part 1)

Summary

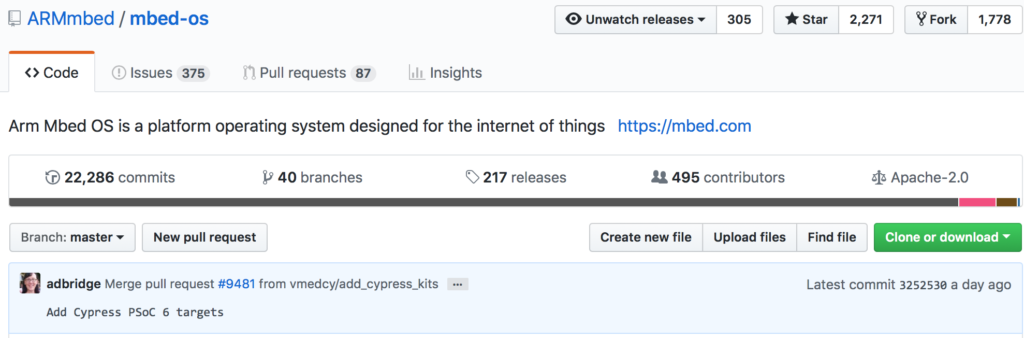
A discussion of using the Infineon (Cypress) PSoC 6 with a CYW4343W and the AnyCloud Connection Manager with Modus Toolbox.  The AnyCloud Connection Manager is an RTOS thread that lets you manage a connection to a WiFi network.  It knows how to scan for networks, attach, detach etc. and was recently released for use with PSoC6 and 43xxx WiFi combos.

The Story

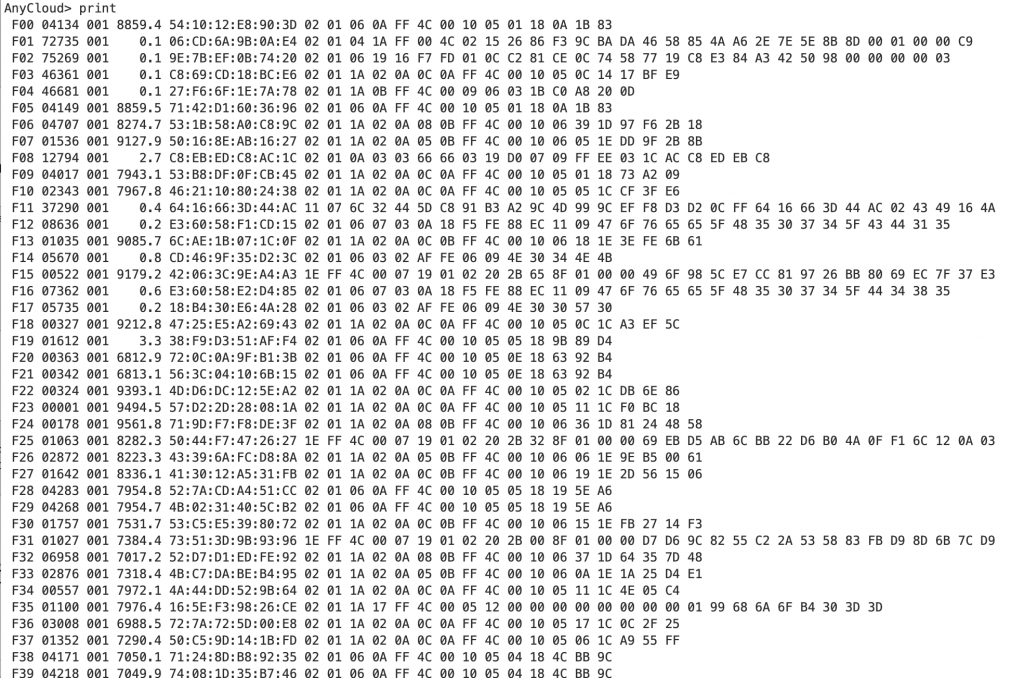
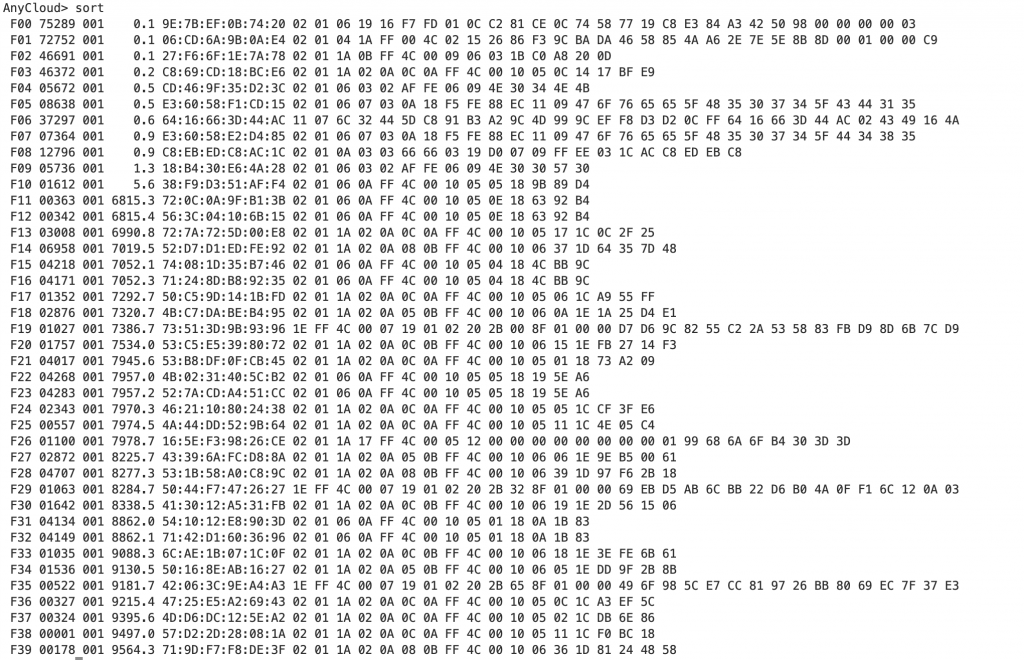
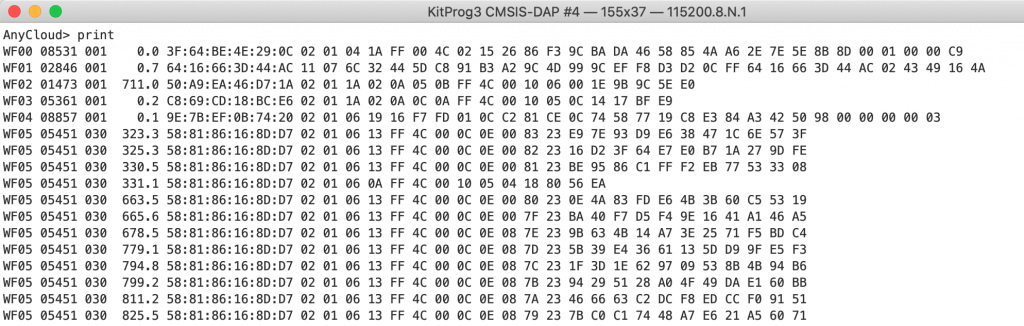
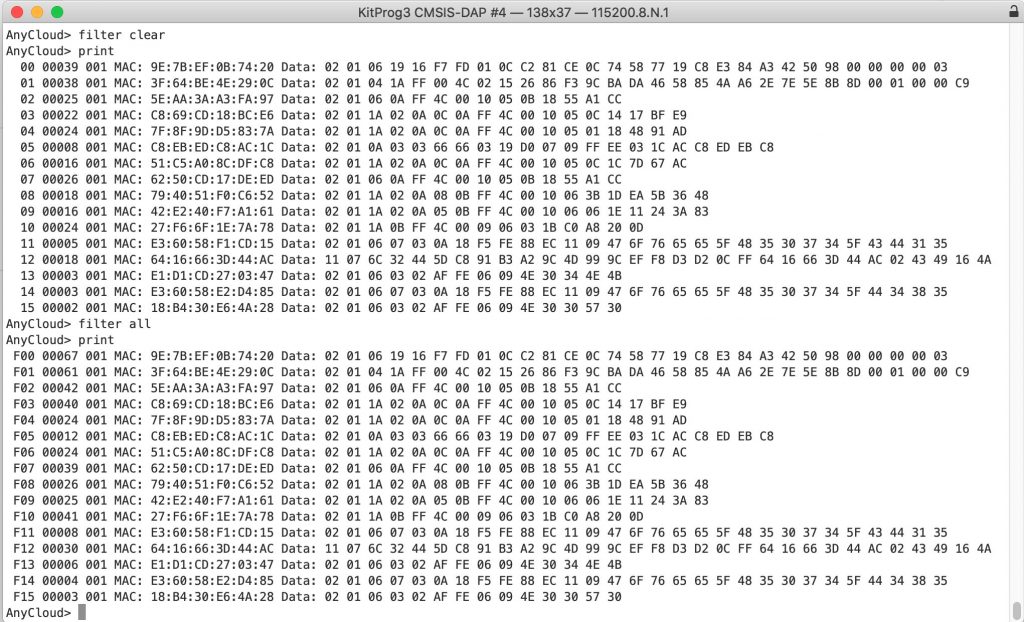
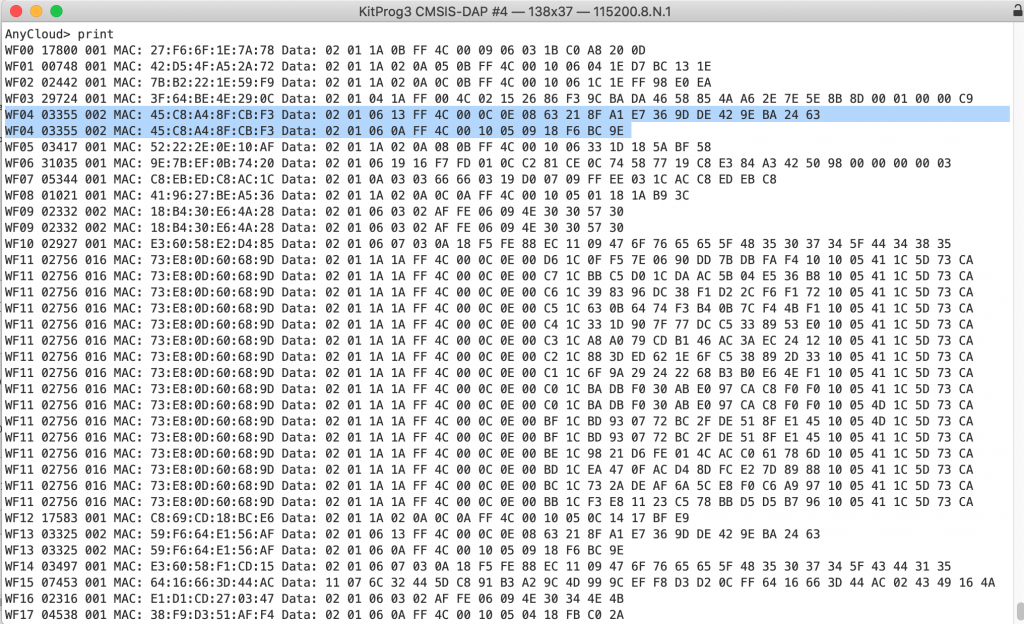
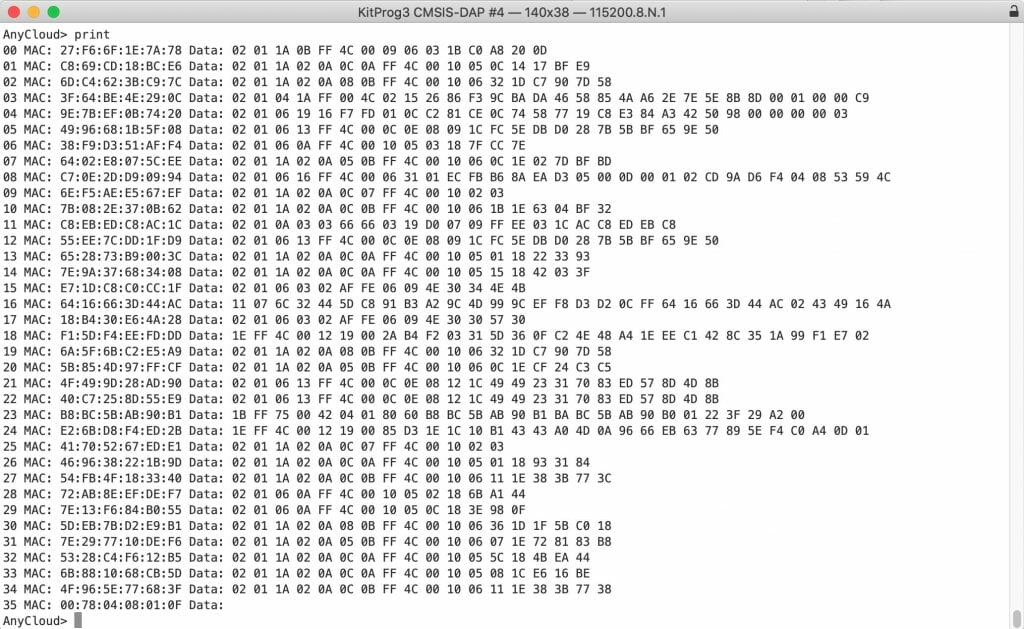
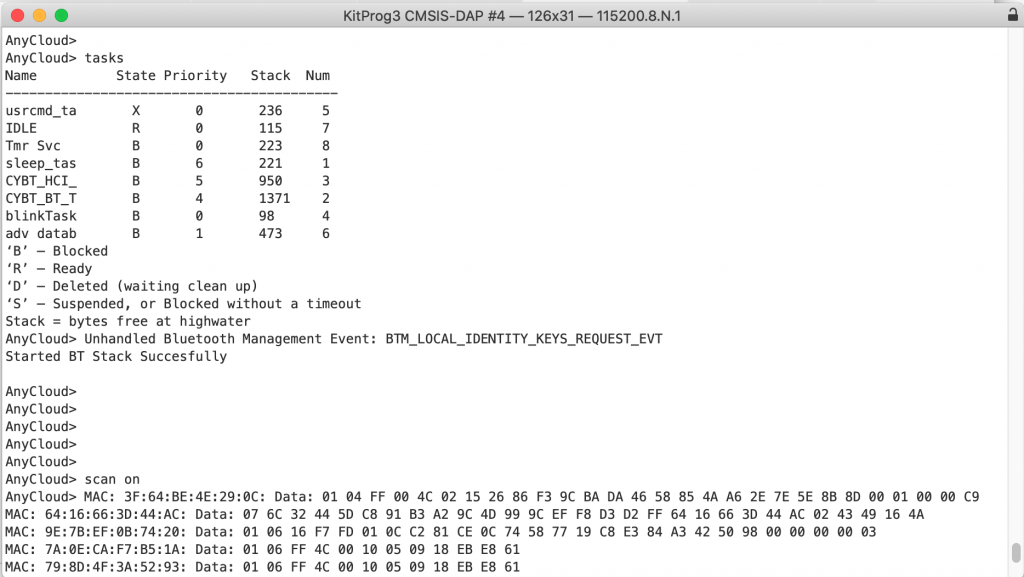
In the WICED WiFI SDK there is an example program called “test.console” which allows you to use a UART command line to do networking “stuff”.  With the release of the new AnyCloud SDK I decided that I should rebuild some of that program using the PSoC and WiFi.  Basically a set of commands like “scan” to interact with the Radio World!  In the picture you below you can see that I use the command “scan” to list out the networks at my house.

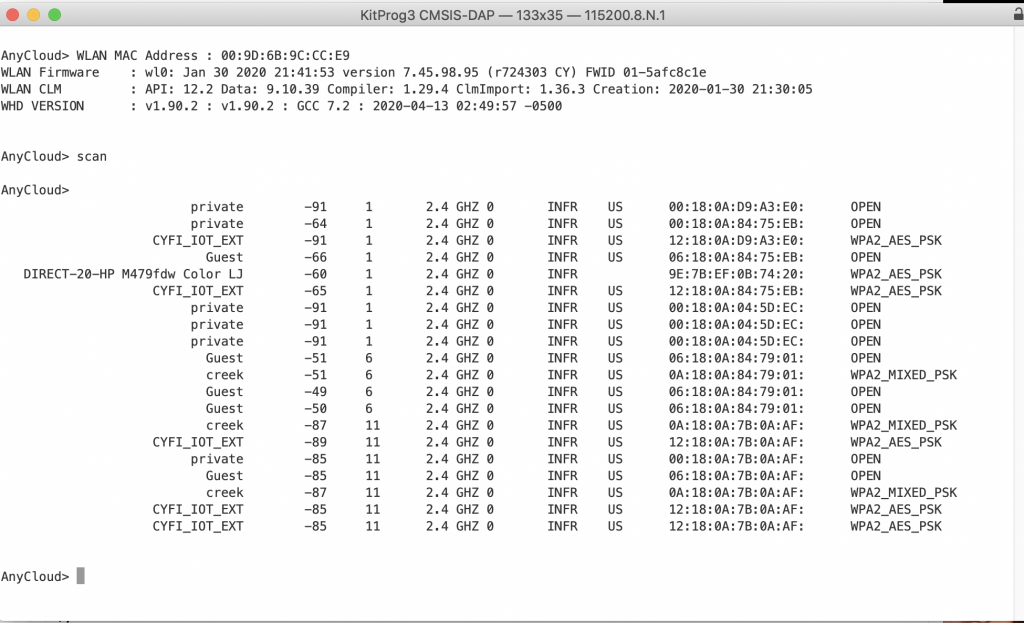
You can also use the command “help” to list out the commands.

Architecture

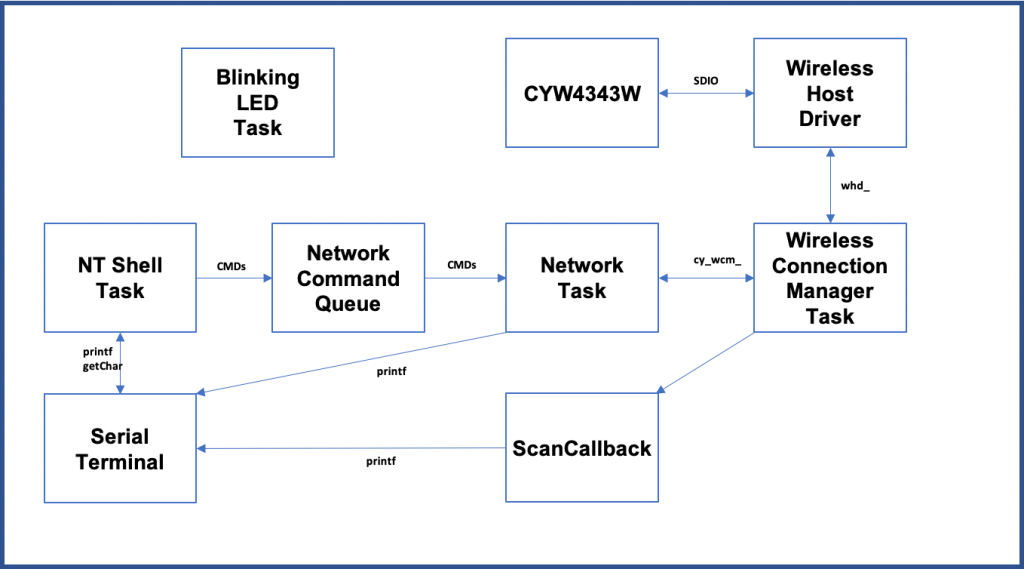
My implementation will have three tasks

  1. A Blinking LED Task (which doesn’t interact with any other tasks)
  2. The NT Shell – which will send commands to the network queue.
  3. The Network Task which will receive commands from the NT Shell task and trigger the Wireless Connection Manager to do something
  4. The Wireless Connection Manager which will interact with the WiFI Radio via the Wireless Host driver.

Make the Basic Project

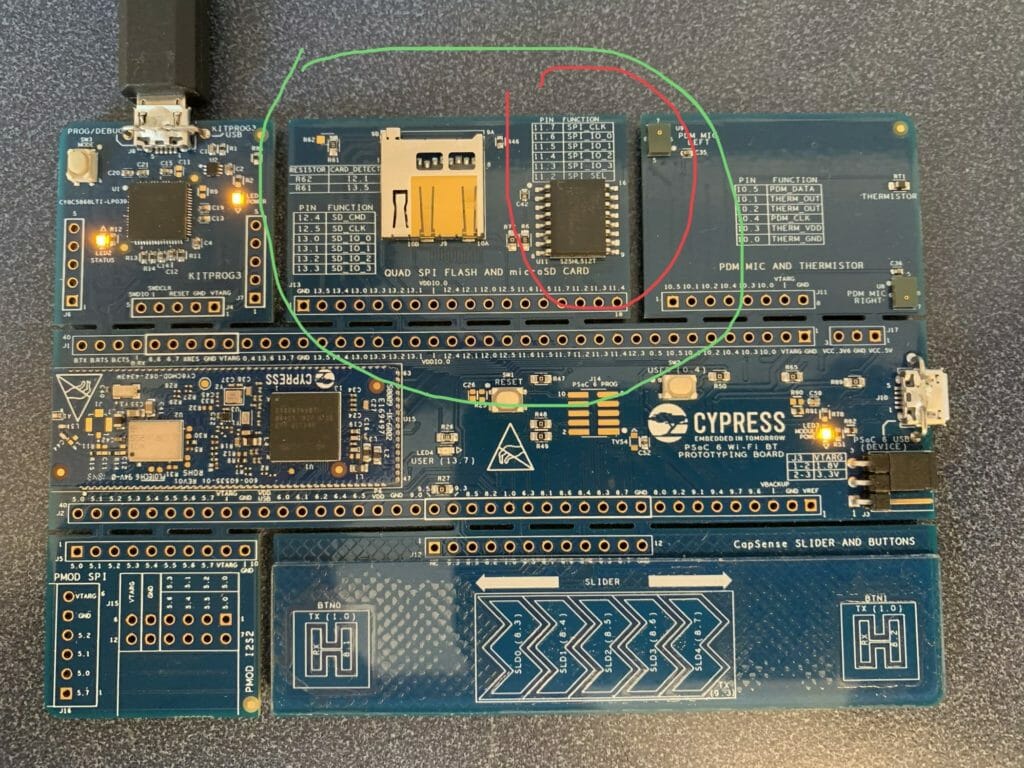
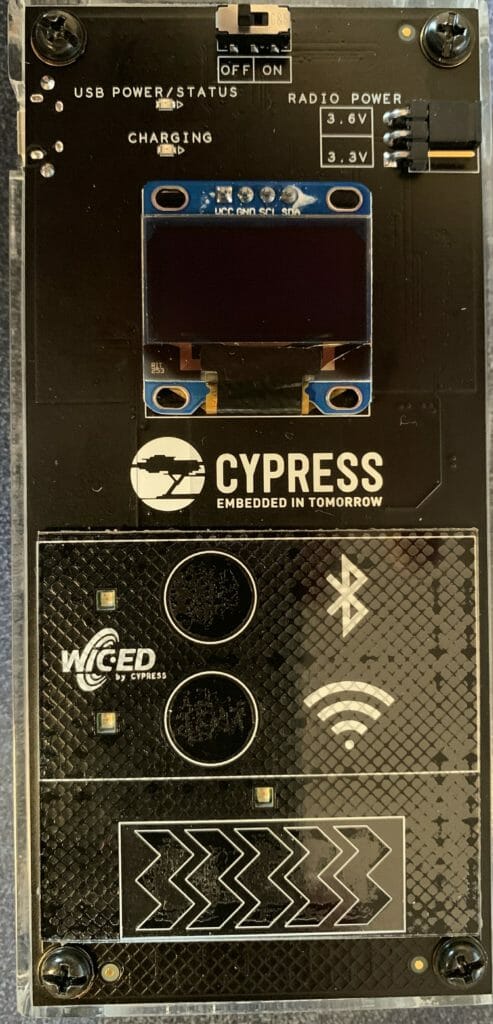
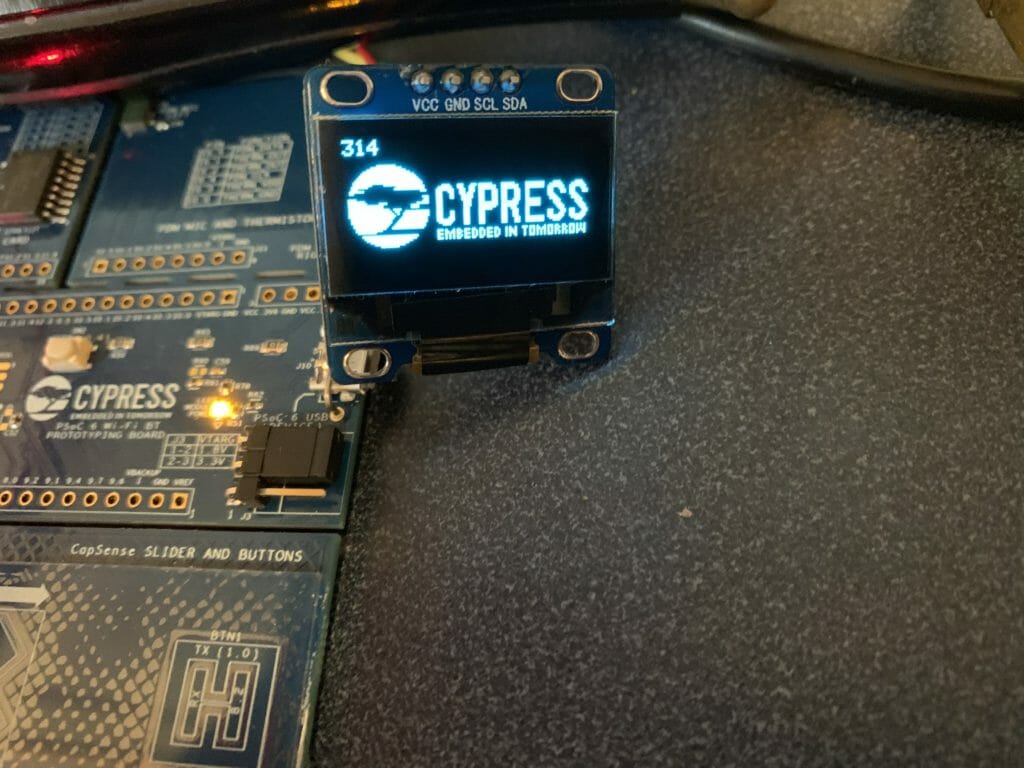
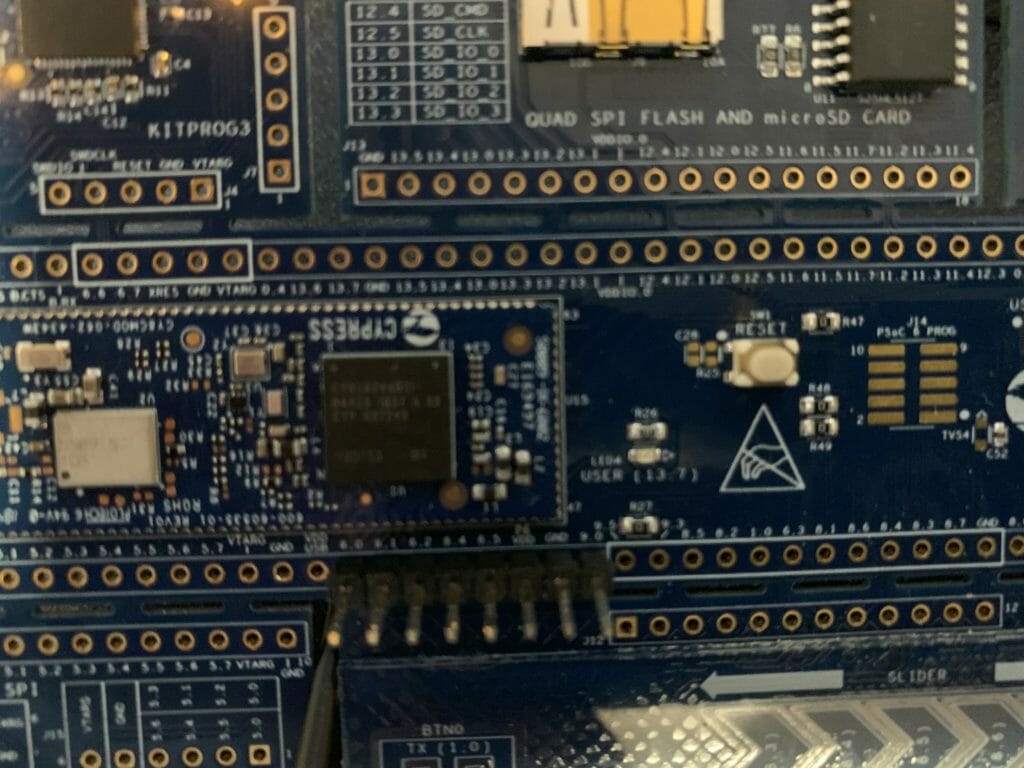
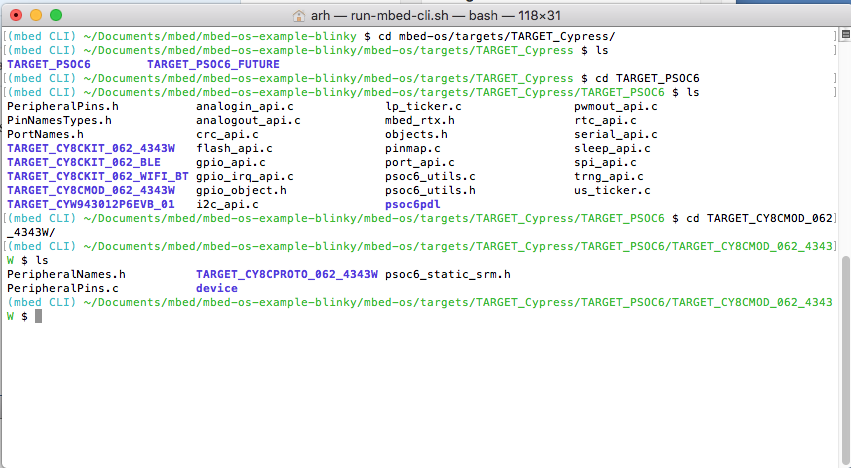
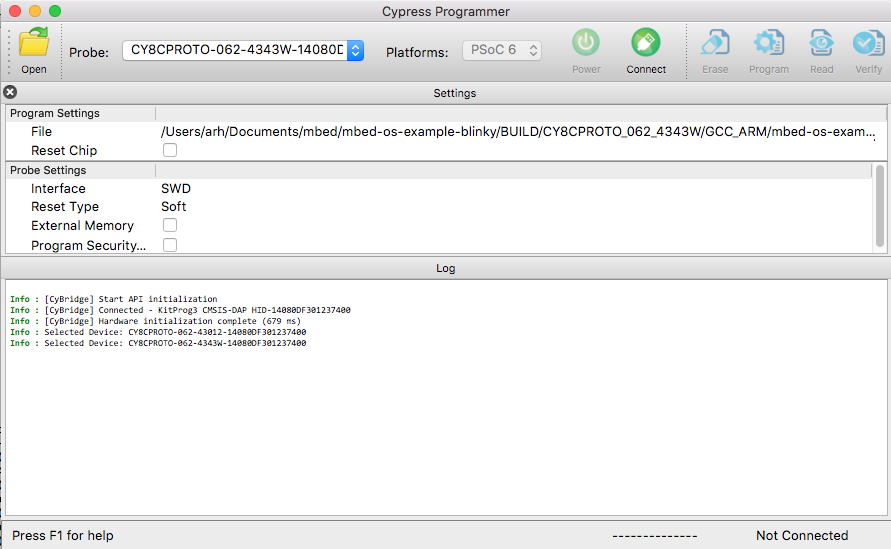
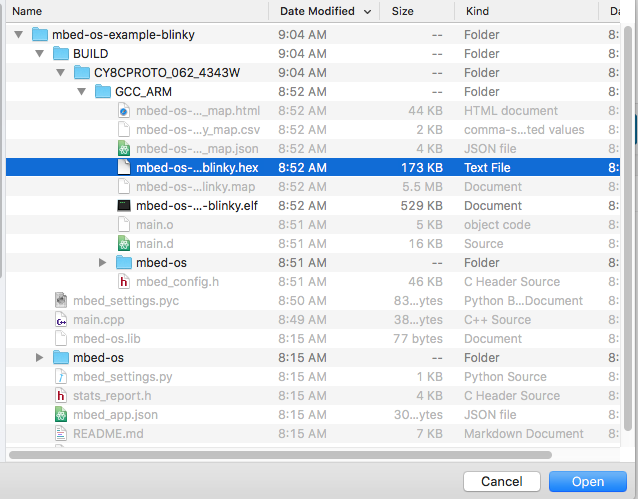
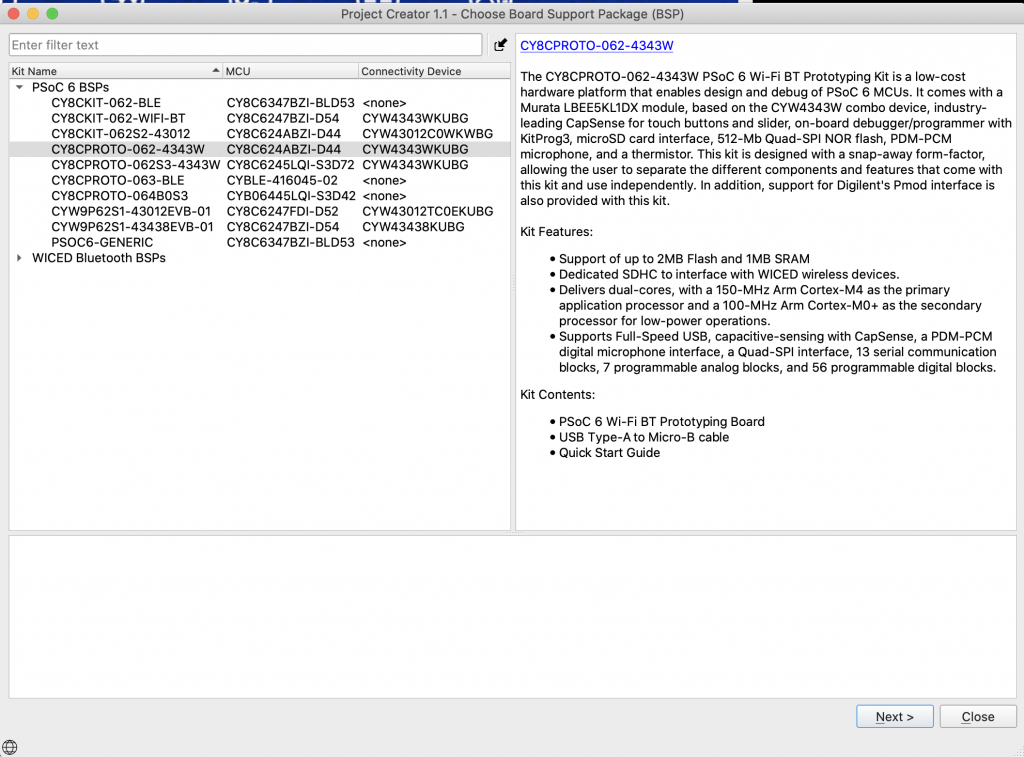
To build this project start by creating a new project.  The development board that I had plugged into my computer when I began this project is a CY8CPROTO-062-4343W so this is the one I will select.

In the new project creator pick the “CY8CPROTO-062-4343W”

I created a FreeRTOS template project that does all of the right stuff.  I wrote an article about how to use the IoT Expert Manifestt here, and until you add the IoT Manifest to your setup you will not get the FreeRTOS Template project.

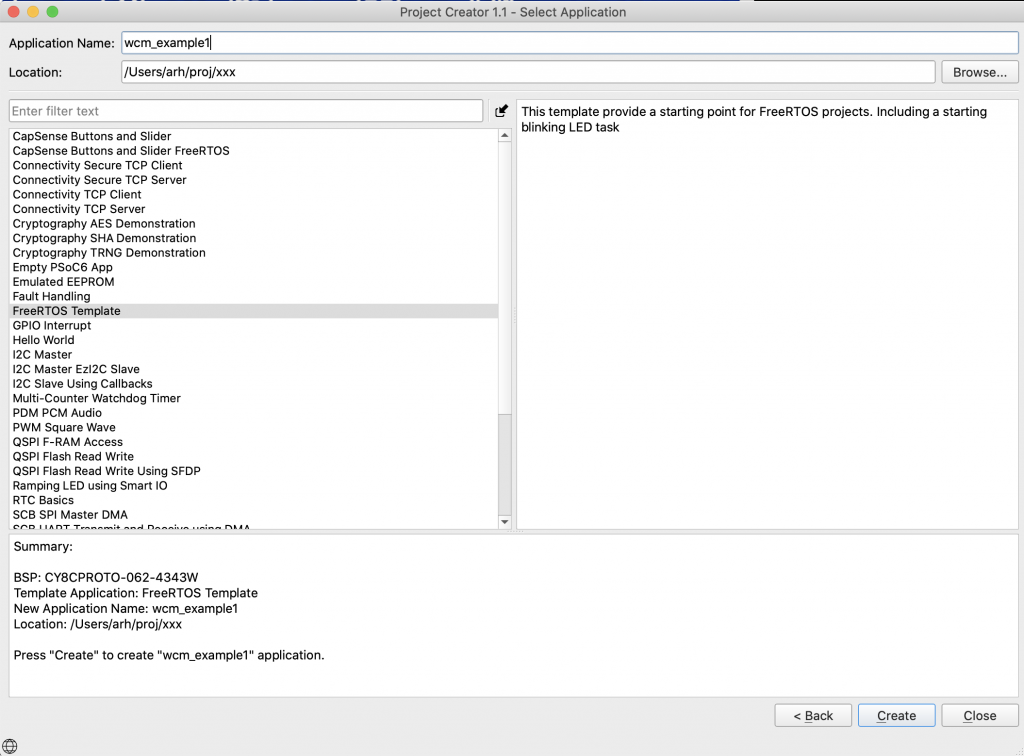
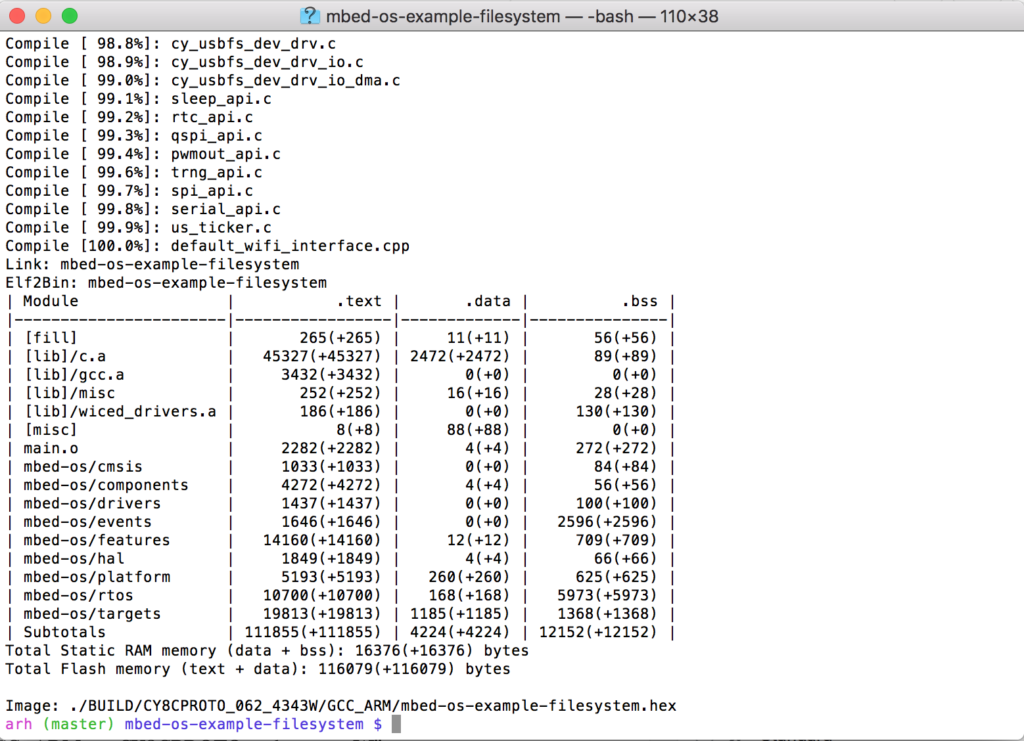
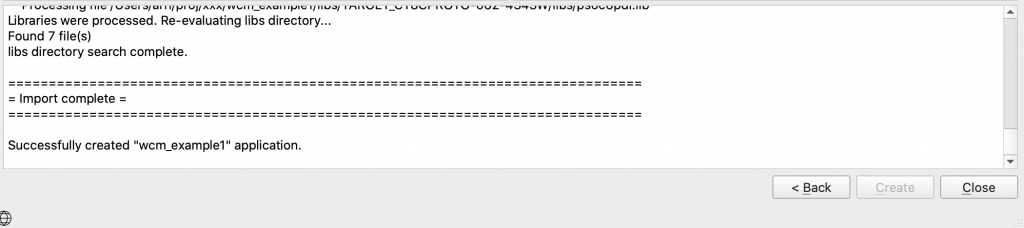
After the new project work is done you should see

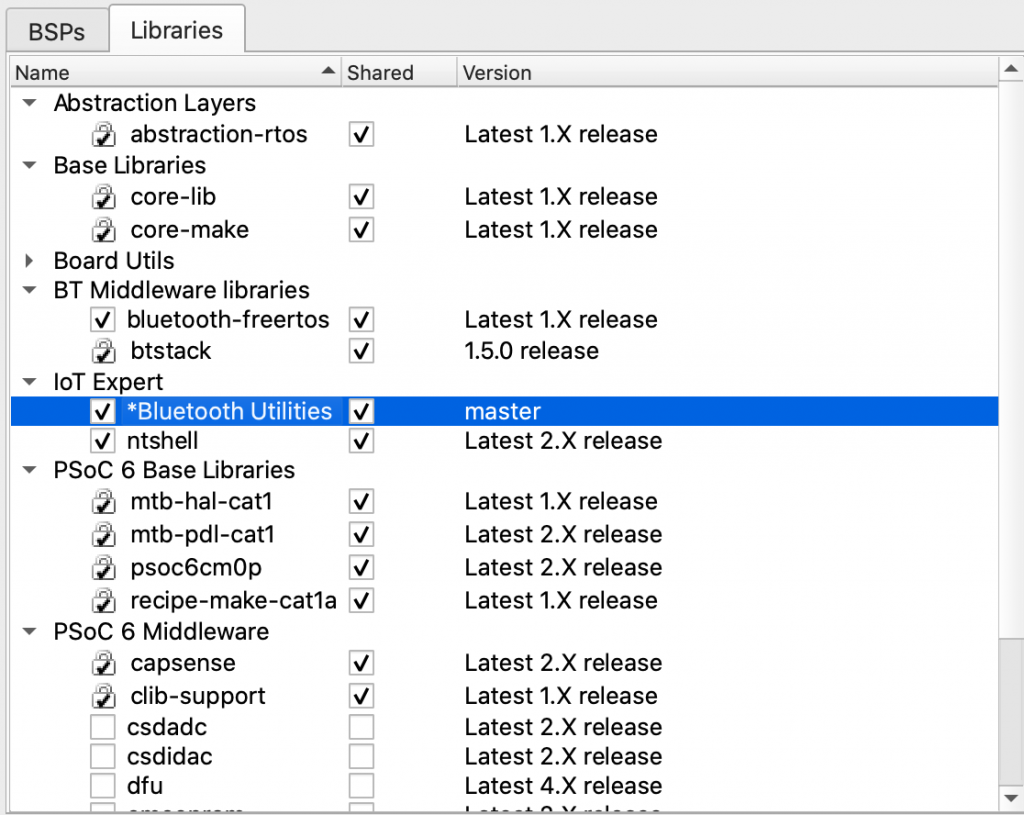
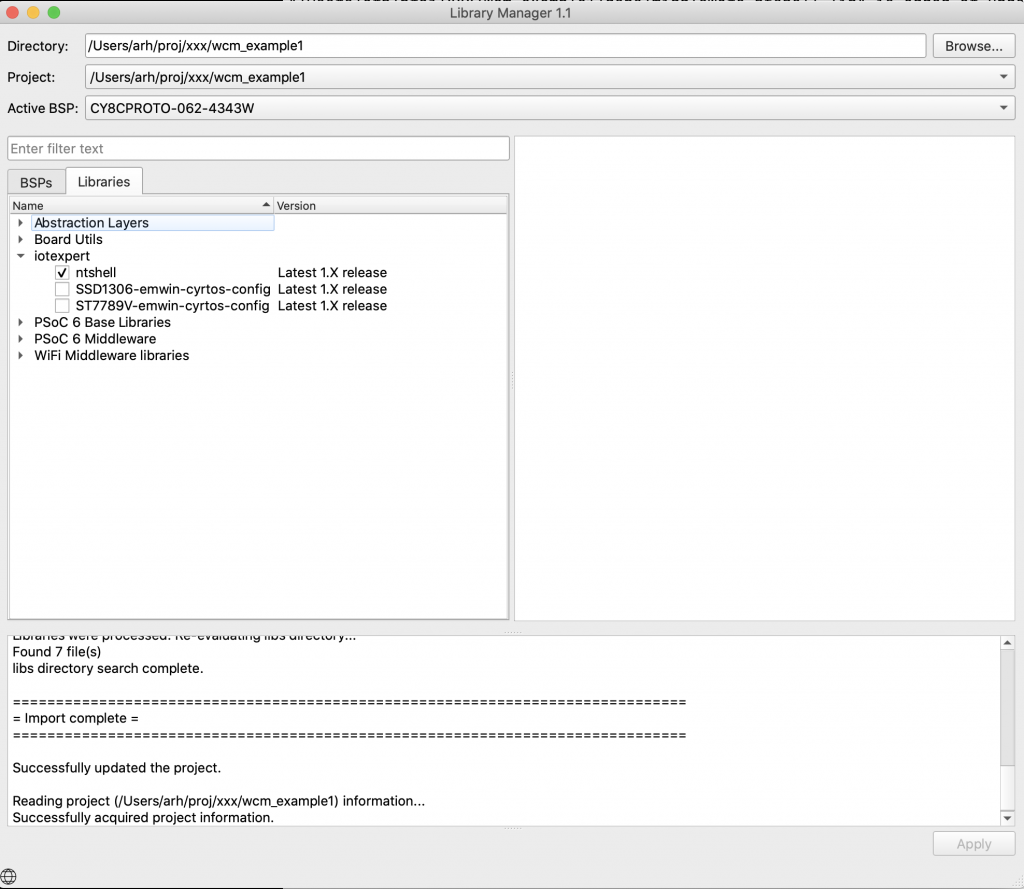
Add the nt-shell, which comes from my IoT Expert library (read about how to add the IoT Expert library here).

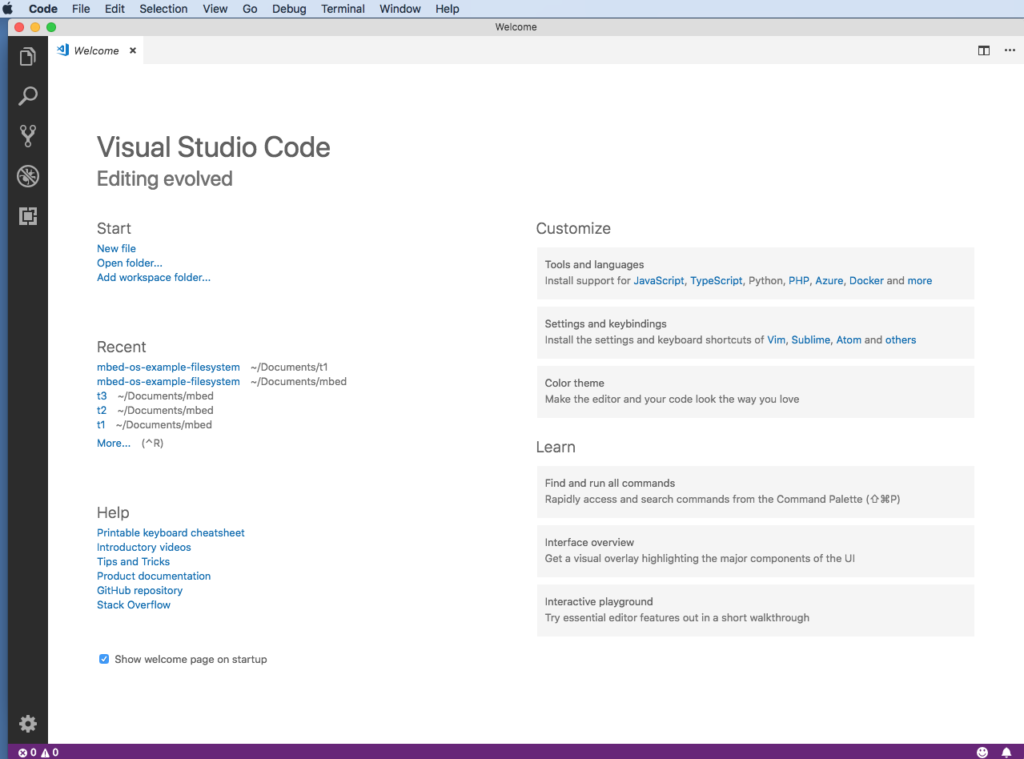
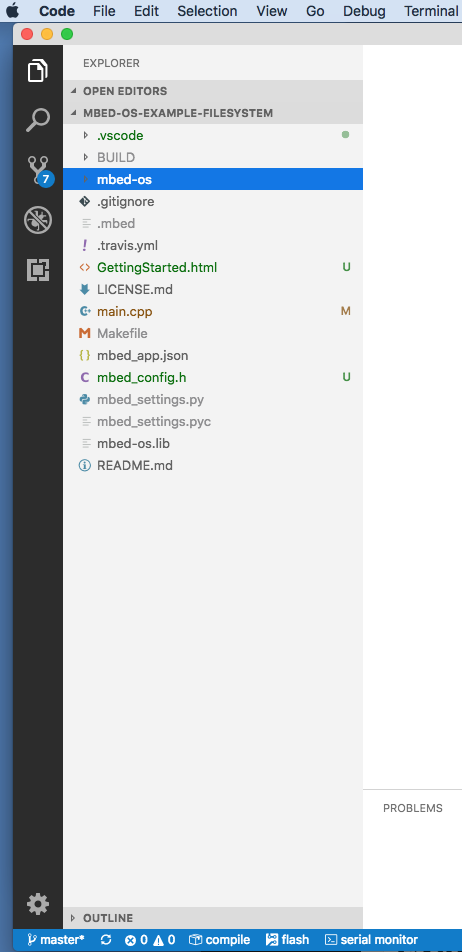
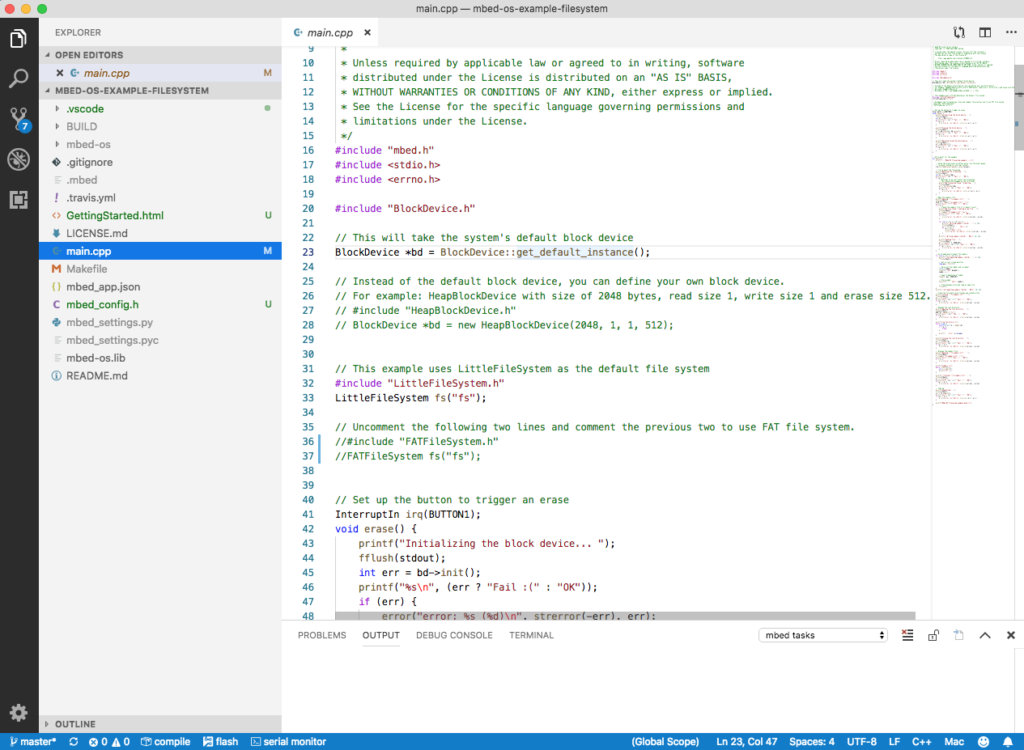
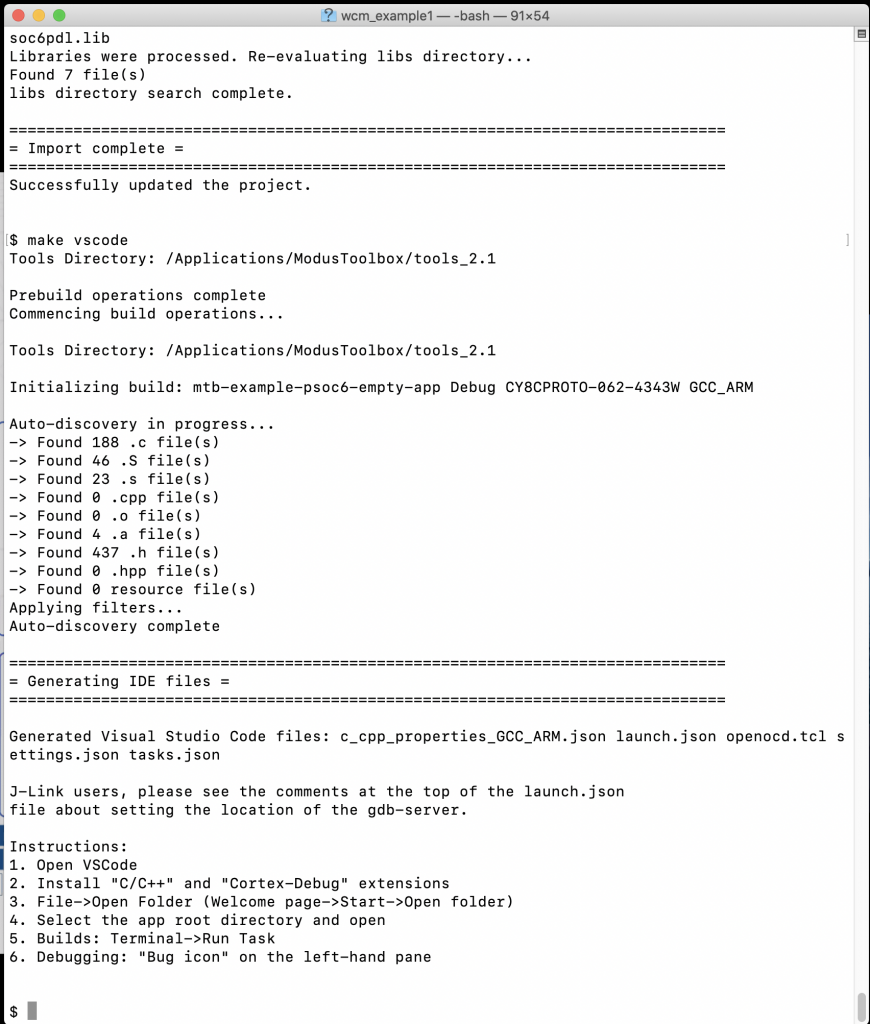
I have been on a kick of using Visual Studio code.  So, run “make vscode” to setup the project for Visual Studio Code.

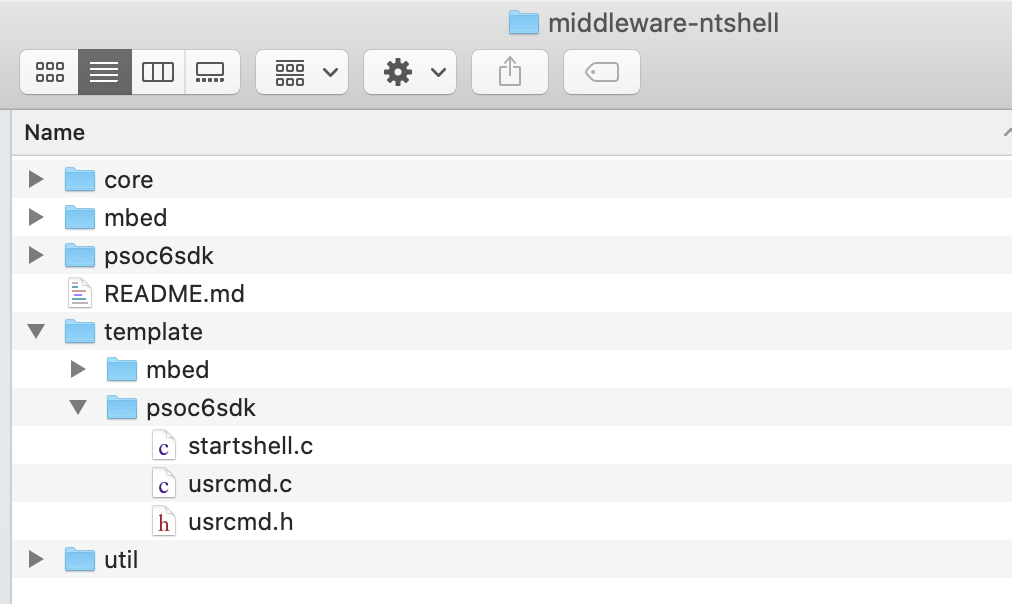
In the finder, copy the template files from nt-shell into your project.

You can also do it with the command line.

Edit main.c to include the configuration.

#include "ntshell.h"
#include "psoc6_ntshell_port.h"

Update the main.c to have the ntShellThread

// Global variable with a handle to the shell
ntshell_t ntshell;
void ntShellTask()
{
printf("Started ntshell\n");
setvbuf(stdin, NULL, _IONBF, 0);
ntshell_init(
&ntshell,
ntshell_read,
ntshell_write,
ntshell_callback,
(void *)&ntshell);
ntshell_set_prompt(&ntshell, "AnyCloud> ");
vtsend_erase_display(&ntshell.vtsend);
ntshell_execute(&ntshell);
}

And start the ntshell task.

    xTaskCreate(ntShellTask, "nt shell task", configMINIMAL_STACK_SIZE*2,0 /* args */ ,4 /* priority */, 0);

When you want to add a command to the shell you need to do three things

  1. Add a function prototype for the command
  2. Add the command to the command list
  3. Write the function
static int usrcmd_help(int argc, char **argv);
static int usrcmd_info(int argc, char **argv);
static int usrcmd_clear(int argc, char **argv);
static int usrcmd_printargs(int argc, char **argv);
static const cmd_table_t cmdlist[] = {
{ "help", "This is a description text string for help command.", usrcmd_help },
{ "info", "This is a description text string for info command.", usrcmd_info },
{ "clear", "Clear the screen", usrcmd_clear },
{ "printargs","print the list of arguments", usrcmd_printargs},
};

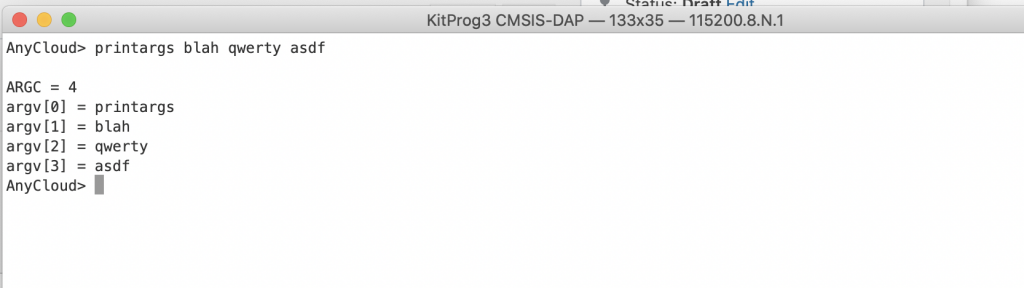
Here is an example of of the printargs command.  The shell will call your function with a ARGC=number of arguments and ARGV[] an array of the pointers to the actual arguments.

static int usrcmd_printargs(int argc, char **argv)
{
printf("ARGC = %d\n",argc);
for(int i =0;i<argc;i++)
{
printf("argv[%d] = %s\n",i,argv[i]);
}
return 0;
}

Build and test your program.

Turn on the Connection Manager and Core Middleware Library

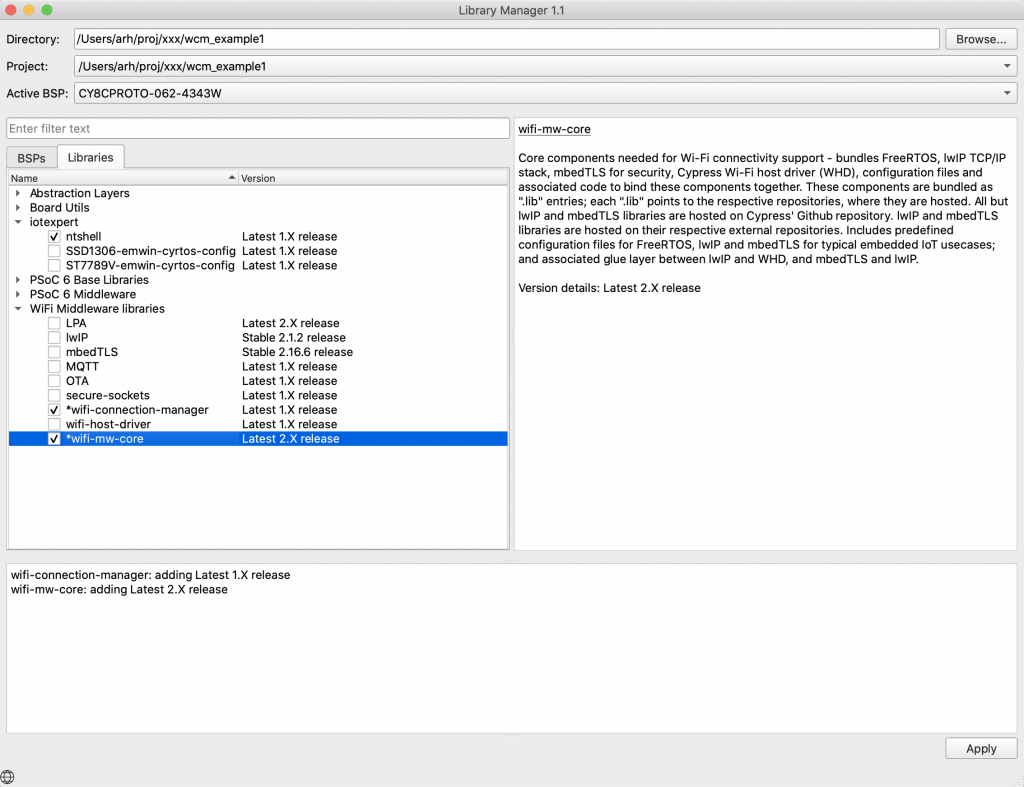
Now, add the wifi-mw-core library & Connection Manager using the library manager.  You can start it with “make modlibs”.  These two libraries are in the “WiFi Middleware” category.

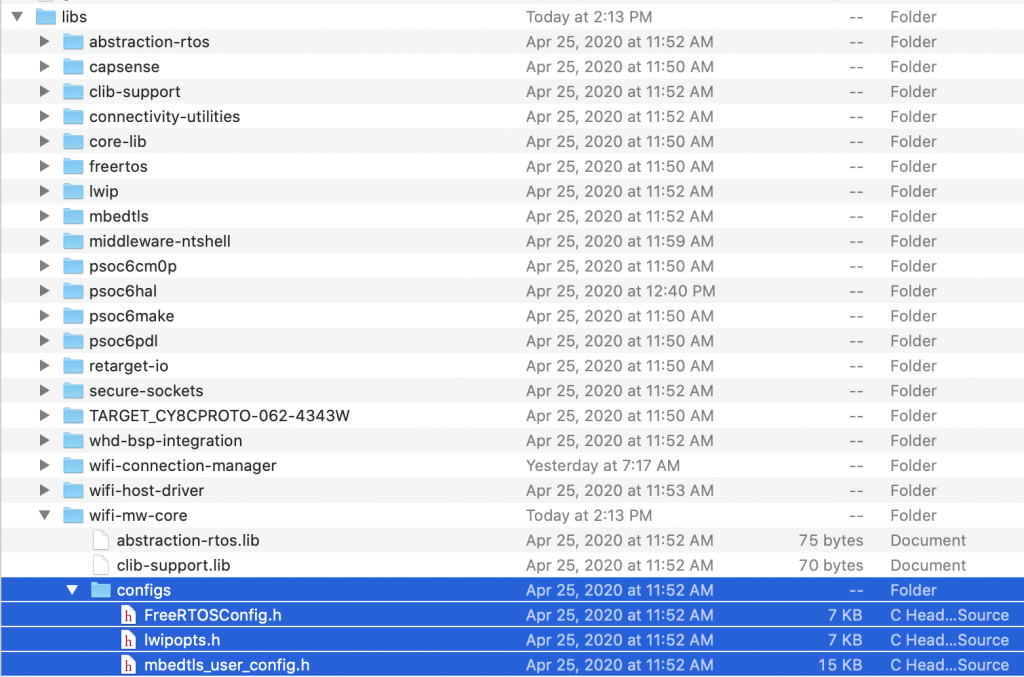
Copy the FreeRTOSConfig.h from the libs/wifi-mw-core/configs directory into your project (so you can modify it)

Update the Makefile to include the WiFi components (line 71) and the MBED TLS configuration (line 86)

COMPONENTS=FREERTOS PSOC6HAL LWIP MBEDTLS 4343W
# Like COMPONENTS, but disable optional code that was enabled by default.
DISABLE_COMPONENTS=
# By default the build system automatically looks in the Makefile's directory
# tree for source code and builds it. The SOURCES variable can be used to
# manually add source code to the build process from a location not searched
# by default, or otherwise not found by the build system.
SOURCES=
# Like SOURCES, but for include directories. Value should be paths to
# directories (without a leading -I).
INCLUDES=
# Add additional defines to the build process (without a leading -D).
DEFINES=MBEDTLS_USER_CONFIG_FILE='"configs/mbedtls_user_config.h"' CYBSP_WIFI_CAPABLE

Create networkTask.h/.c & Start the Task in main.c

Now let’s create the networkTask.  This task will control all of the networking functions in the system.  The first file, networkTask.h, is the public interface.  It declares a Queue where you can push messages (line 5) an enumeration of the messages (lines 7-14), a definition of the message data (lines 17-22) and finally the network task declaration (line 24).

#pragma once
#include "FreeRTOS.h"
#include "queue.h"
extern QueueHandle_t networkQueue;
typedef enum {
net_scan,
net_connect,
net_disconnect,
net_printip,
net_printmac,
} networkCmd_t;
typedef struct {
networkCmd_t cmd;
uint32_t val0;
uint32_t val1;
} networkQueueMsg_t;
void networkTask(void *arg);

Ill go ahead and modify main.c to start the yet to be written network task.  You need to include the header file for the task and define a handle for the task.

#include "networkTask.h"
TaskHandle_t networkTaskHandle;

Finally in main function, start the task.

    xTaskCreate(networkTask, "networkTask", configMINIMAL_STACK_SIZE*8,0 /* args */ ,4/* priority */, &networkTaskHandle);

Create the file networkTask.c.  Make a bunch of includes.

#include <stdio.h>
#include <stdlib.h>
#include "FreeRTOS.h"
#include "task.h"
#include "cy_wcm.h"
#include "cy_wcm_error.h"
#include "whd_types.h"
#include "queue.h"
#include "semphr.h"
#include "networkTask.h"

Now let’s define the actual task function.  This function will

  1. Call the wcm_init function to make a WiFi Station (lines 201-203)
  2. Tell the task that you would like to be called back when things happen (line 205)
  3. Initialize the Queue to receive command messages from other tasks.
  4. Make an infinite loop to receive the commands and process the messages.  Notice that I dont do anything with the message for now.  Ill add the code later.
// The networkTask will:
// - startup the wireless connection manager
// - sit waiting on the rtos queue... getting messages from other tasks
// - and do ( net_scan, net_connect, net_disconnect, net_printip, net_printmac,)
void networkTask(void *arg)
{
cy_rslt_t result;
cy_wcm_config_t config;
cy_wcm_scan_filter_t scanFilter;
memset(&config, 0, sizeof(cy_wcm_config_t));
config.interface = CY_WCM_INTERFACE_TYPE_STA;
cy_wcm_init	(&config);
cy_wcm_register_event_callback(	wcmCallback	);
networkQueue = xQueueCreate( 5, sizeof(networkQueueMsg_t));
while(1)
{
networkQueueMsg_t msg;
xQueueReceive(networkQueue,(void *)&msg,portMAX_DELAY);  // Wait for commands from other tasks
switch(msg.cmd)
{
case net_scan: // 0=stop scan !0=start scan
break;
case net_connect:
break;
case net_disconnect:
break;
case net_printip:
break;
case net_printmac:
break;
}
}
}

Create Utilities for Printing out the IP and MAC Address

It the network task I want to be able to print out IP address (both IPV4 and IPV6).  I also want to be able to print out 6-byte MAC address.  In the Cypress drivers, an IP address is a structure that holds either a IPV4 or and IPV6 address.  It then contains the 4 or 6 bytes of the address.  Here is the type definition.

/**
* IP Address Structure
*/
typedef struct
{
cy_wcm_ip_version_t version;  /**< IP version */
union
{
uint32_t v4;     /**< IPv4 address bytes */
uint32_t v6[4];  /**< IPv6 address bytes */
} ip;                /**< IP address bytes */
} cy_wcm_ip_address_t;

The IP v ersion is just an enumeration.

/**
* IP Version
*/
typedef enum
{
CY_WCM_IP_VER_V4 = 4,      /**< Denotes IPv4 version */
CY_WCM_IP_VER_V6 = 6       /**< Denotes IPv6 version */
} cy_wcm_ip_version_t;

To print an address, figure out which version you are working on.  Then dump the raw bytes.  Notice in the IPV4 case it is encoded into a uint32_t as 4 continuous bytes.

void printIp(cy_wcm_ip_address_t *ipad)
{
if(ip_addr.version == CY_WCM_IP_VER_V4)
{
printf("%d.%d.%d.%d",(int)ipad->ip.v4>>0&0xFF,(int)ipad->ip.v4>>8&0xFF,(int)ipad->ip.v4>>16&0xFF,(int)ipad->ip.v4>>24&0xFF);
}
else if (ip_addr.version == CY_WCM_IP_VER_V6)
{
for(int i=0;i<4;i++)
{
printf("%0X:",(unsigned int)ip_addr.ip.v6[i]);
}
}
else
{
printf("IP ERROR %d",ipad->version);
}			
}

A MAC address is just an array of uint8_t of length CY_WCM_MAC_ADDR_LEN  (which we pound defined to 6)

typedef uint8_t cy_wcm_mac_t[CY_WCM_MAC_ADDR_LEN];                   /**< Unique 6-byte MAC address */

So, the print is just a loop. (probably should have done something slightly better so I dont end up with the trailing : – oh well)

void printMac(cy_wcm_mac_t mac)
{
for(int i=0;i<CY_WCM_MAC_ADDR_LEN;i++)
{
uint8_t val = mac[i];
printf("%02X:",val);
}
}

Add the Scan Command

For the scan I want to print out the:

  1. SSID
  2. RSSI (in dBM)
  3. Channel
  4. Band
  5. Speed
  6. Type of Ap
  7. Country Code
  8. MAC address of the Access Point (AKA BSSID)
  9. Type of Security

In order to have the WCM run a scan you need to call the function cy_wcm_start_scan.  What this will do is tell the 4343W to scan all the channels on the 2.4GHZ band and listen for access point beacons.  This function has three arguments

  1. A function pointer to call back when you find an AP
  2. A user settable data pointer
  3. A filter (which can limit to an SSID, BSSID or RSSI)
cy_rslt_t cy_wcm_start_scan(cy_wcm_scan_result_callback_t callback, void *user_data, cy_wcm_scan_filter_t *scan_filter)

Here is my version of the scanCallback which I put in the networkTask.c file.

// This function is called back when the user asks for an overall scan.
// It just prints out the information about the networks that it hears about
void scanCallback( cy_wcm_scan_result_t *result_ptr, void *user_data, cy_wcm_scan_status_t status )

The result_ptr is a pointer to a structure that contains the data for the found access point.

/**
* Structure for storing scan results
*/
typedef struct
{
cy_wcm_ssid_t                SSID;             /**< Service Set Identification (i.e. Name of Access Point)                    */
cy_wcm_mac_t                 BSSID;            /**< Basic Service Set Identification (i.e. MAC address of Access Point)       */
int16_t                      signal_strength;  /**< Receive Signal Strength Indication in dBm. <-90=Very poor, >-30=Excellent */
uint32_t                     max_data_rate;    /**< Maximum data rate in kilobits/s                                           */
cy_wcm_bss_type_t            bss_type;         /**< Network type                                                              */
cy_wcm_security_t            security;         /**< Security type                                                             */
uint8_t                      channel;          /**< Radio channel that the AP beacon was received on                          */
cy_wcm_wifi_band_t           band;             /**< Radio band                                                                */
uint8_t                      ccode[2];         /**< Two letter ISO country code from AP                                       */
uint8_t                      flags;            /**< flags                                                                     */
uint8_t                      *ie_ptr;          /**< Pointer to received Beacon/Probe Response IE(Information Element)         */
uint32_t                     ie_len;           /**< Length of IE(Information Element)                                         */
} cy_wcm_scan_result_t;

The other parameter to the callback is the status.  The status will either be CY_WCM_SCAN_COMPLETE or CY_WCM_SCAN_INCOMPLETE.  The first thing that to do is see if this callback is the one that tells me that the scan is complete, if so I just return (and don’t print anything)

	if(status == CY_WCM_SCAN_COMPLETE)
return;

Then I print out the raw SSID, Signal Strength and Channel.

	printf("%32s\t%d\t%d\t",result_ptr->SSID,result_ptr->signal_strength,result_ptr->channel);

Next I figure out what channel we are talking about.  The 4343W is single band 2.4GHZ, however, other Cypress chips have dual band.

	switch(result_ptr->band)
{
case CY_WCM_WIFI_BAND_ANY:
printf("ANY");
break;
case CY_WCM_WIFI_BAND_5GHZ:
printf("5.0 GHZ");
break;
case CY_WCM_WIFI_BAND_2_4GHZ:
printf("2.4 GHZ");
break;
}

Then I printout the maximum data rate, which is 0 for all of my test cases.  I have no idea why.

	printf("%d",(int)result_ptr->max_data_rate);

Then I printout what type of AP we are talking about.

	switch(result_ptr->bss_type)
{
case CY_WCM_BSS_TYPE_INFRASTRUCTURE:
printf("INFR");
break; 	
case CY_WCM_BSS_TYPE_ADHOC: 
printf("ADHOC");
break;	
case CY_WCM__BSS_TYPE_ANY: 	
printf("ANY");
break;
case CY_WCM_BSS_TYPE_MESH:
printf("MESG");
break;
case CY_WCM_BSS_TYPE_UNKNOWN: 
printf("UNKWN");
break;
}

Then the country code.

	printf("%c%c",result_ptr->ccode[0],result_ptr->ccode[1]);

Then the Basic Service Set ID of the AP, which is also known as the MAC address of the AP.

	printMac(result_ptr->BSSID);

Then the security type.

	switch(result_ptr->security)
{
case CY_WCM_SECURITY_OPEN:
printf("OPEN");
break;
case CY_WCM_SECURITY_WEP_PSK:
printf("WEP_PSK");
break;
case CY_WCM_SECURITY_WEP_SHARED:
printf("WEP_SHARED");
break;
case CY_WCM_SECURITY_WPA_TKIP_PSK:
printf("WPA_TKIP_PSK");
break;
case CY_WCM_SECURITY_WPA_AES_PSK:
printf("WPA_AES_PSK");
break;
case CY_WCM_SECURITY_WPA_MIXED_PSK:
printf("WPA_MIXED_PSK");
break;
case CY_WCM_SECURITY_WPA2_AES_PSK:
printf("WPA2_AES_PSK");
break;
case CY_WCM_SECURITY_WPA2_TKIP_PSK:
printf("WPA2_TKIP_PSK");
break;
case CY_WCM_SECURITY_WPA2_MIXED_PSK:
printf("WPA2_MIXED_PSK");
break;
case CY_WCM_SECURITY_WPA2_FBT_PSK:
printf("WPA2_FBT_PSK");
break;
case CY_WCM_SECURITY_WPA3_SAE:
printf("WPA3_SAE");
break;
case CY_WCM_SECURITY_WPA3_WPA2_PSK:
printf("WPA3_WPA2_PSK");
break;
case CY_WCM_SECURITY_IBSS_OPEN:
printf("IBSS_OPEN");
break;
case CY_WCM_SECURITY_WPS_SECURE:
printf("WPS_SECURE");
break;
case CY_WCM_SECURITY_UNKNOWN:
printf("UNKNOWN");
break;
case CY_WCM_SECURITY_FORCE_32_BIT:
printf("FORCE_32_BIT");
break;
}

With a complete scanCallback function I can now update the networkTask to deal with the queued commands of net_scan type.  This simply either stops or starts the scan based on the message parameter.

			case net_scan: // 0=stop scan !0=start scan
if(msg.val0 == 0)
cy_wcm_stop_scan();
else
{
printf("\n");
result = cy_wcm_start_scan(scanCallback,0,0);
if(result != CY_RSLT_SUCCESS)
printf("Scan error\n");
}
break;

The last things to do is to add the scan command to the usrcmd.c

static int usrcmd_scan(int argc, char **argv)
{
static int state=0;
if(argc==1)
{
state = (state ==0)?1:0;
}
else if(argc == 2)
{
if(strcmp(argv[1],"on") == 0)
{
state=1;
} 
else if(strcmp(argv[1],"off") == 0)
{
state = 0;
}
else
{
printf("usage: scan [on|off]\n");
return 0;
}
}
else
{
printf("usage scan: [on|off]\n");
return 0;
}
networkQueueMsg_t msg;
msg.cmd = net_scan;
msg.val0 = state;
xQueueSend(networkQueue,(const void *)&msg,portMAX_DELAY);
return 0;
}

OK.  Let it rip.  You should be able to run network scans.  In the next Article I will add a connect and disconnect commands.

You can find all of this example code at https://github.com/iotexpert/wcm_example

Mouser Bluetooth Mesh: L1 Developer Resources

How To Design With Bluetooth Mesh


You can "git" a workspace will all of these files at https://github.com/iotexpert/MouserVTWBluetoothMesh or git@github.com:iotexpert/MouserVTWBluetoothMesh.git

Summary

This lesson has a bunch of links to useful documentation about Bluetooth Mesh.  It includes links to all of the Cypress software and application notes.  It also includes links to the Bluetooth Special Interest Group website for the BLE Mesh Specs.

Cypress Resources

  1. Cypress Bluetooth Mesh Landing Page
  2. AN227069 – Getting Started with Bluetooth Mesh
  3. EZ-BT Mesh Evaluation Kit Landing Page
  4. EZ-BT Mesh Evaluation Kit QuickStart
  5. Modus Toolbox
  6. Cypress Bluetooth Community
  7. Bluetooth SDK 1.2
  8. Modus Toolbox Bluetooth SDK Examples @ github
  9. Cypress WICED Bluetooth 101 – Class
  10. Mesh Client
  11. Mesh Client Documentation

Bluetooth Sig Resources

  1. Bluetooth SIG Mesh Specs
  2. Bluetooth SIG Mesh Profile Spec
  3. Bluetooth SIG Mesh Model Spec
  4. Bluetooth SIG Mesh Device Properties
  5. Introducing Bluetooth Mesh Networking
  6. Intro Bluetooth Mesh Part 1
  7. Intro Bluetooth Mesh Part 2
  8. Bluetooth Mesh Fundamental Concepts of BT Mesh Networking Part1
  9. Bluetooth Mesh Fundamental Concepts of BT Mesh Networking Part2
  10. Bluetooth Mesh Networking: Friendship
  11. Management of Devices in a Bluetooth Mesh Network
  12. In-Market Bluetooth Low Energy Devices and Bluetooth Mesh Networking
  13. Bluetooth Mesh Security Overview
  14. Provisioning a Bluetooth Mesh Network Part 1
  15. Provisioning a Bluetooth Mesh Network Part 2

Other Useful Links

  1. Wikipedia Bluetooth Mesh

Cypress Bluetooth Mesh Landing Page

AN227069 – Getting Started with Bluetooth Mesh

EZ-BT Mesh Evaluation Kit Landing Page

EZ-BT Mesh Evaluation Kit QuickStart

Modus Toolbox

Cypress Bluetooth Community

Bluetooth SDK 1.2

Modus Toolbox Bluetooth SDK Examples @ github

Cypress WICED Bluetooth 101 – Class

Mesh Client

Mesh Client Documentation

Bluetooth SIG Mesh Specs

Bluetooth SIG Mesh Profile Spec

Bluetooth SIG Mesh Model Spec

Bluetooth SIG Mesh Device Properties

Introducing Bluetooth Mesh Networking

Intro Bluetooth Mesh Part 1

Intro Bluetooth Mesh Part 2

Bluetooth Mesh Fundamental Concepts of BT Mesh Networking Part1

Bluetooth Mesh Fundamental Concepts of BT Mesh Networking Part2

Bluetooth Mesh Networking: Friendship

Management of Devices in a Bluetooth Mesh Network

In-Market Bluetooth Low Energy Devices and Bluetooth Mesh Networking

Bluetooth Mesh Security Overview

Provisioning a Bluetooth Mesh Network Part 1

Provisioning a Bluetooth Mesh Network Part 2

MBEDOS Little File System & CY8CPROTO_62_4343W

Summary

This is the first article in a series that will discuss how to use the MBED OS file systems with Cypress SPI Nor Flash chips and PSoC 6.

Title
The Back Story & Making the LittleFS Work with the CY8CKIT_062_4343W
The Architecture of Filesystems in MBEDOS
SPI Nor Flash
SFDP
The MBED OS Quad SPI Driver
LittleFS
FATFS
MBED OS and POSIX Files


The Back Story

On a bunch of our development kits there is a SPI NOR Flash sitting right next to the PSoC 6.  Which exact SPI flash depends on the exact generation of development kit.  I have always wanted to use these chips, but had never had time to sort out how they work.  And quite frankly we never made it very easy to use them because although they were connected, we didn’t provide much in the way of software support.  However, with the advent of MBED OS at Cypress we were suddenly gifted with two file systems to use, LittleFS and FATFS.

This journey starts with an email note to the Applications manager in India (an awesome woman named Jaya)… “Hey, can you get someone to send me an example of the MBED OS flash file system on the CY8CPROTO_062_4343W.”  A day or so later I got an email with an attached project and a “memo” that explained what to do.  This exchange happened right before Embedded World in February and I was really busy.  Finally, a couple of weeks ago I read the email and the instructions which started with “Break off the NOR Flash wing and solder….”  If you look in the picture below you can see that at the top of the kit there is a breakaway wing (circled in green) that has a SPI Flash chip on it (circled in red).

Honestly, I didn’t read any further than “.. break off the wing…”.  So, I sent another note … “Uh… how about no.  Why can’t I use the development kit without soldering?”… And these two emails were my first steps down the Embedded FileSystem & NOR Flash Rabbit Hole which is the subject of this series of articles.

Making the LittleFS Work with the CY8CKIT_062_4343W

I am going to start by giving you the step by step instructions to make the LittleFS work … and these instruction will only include a little bit of commentary on how it works.  I will expand on the “how” in all of the follow on articles.  To make it work you need to follow these steps:

  1. Clone the MBEDOS FileSystem Example
  2. Clone my QSPI driver path
  3. Then patch MBEDOS with the updated QSPI driver.
  4. Test
  5. Examine the Project

The first step in the process of running the example is to clone the MBED OS Example Project for Filesystems.  To do this, run “mbed import mbed-os-example-filesystem”.  As I noted above, the default MBED does not have the required drivers for the Quad SPI interface.  Fortunately another excellent Applications engineer in India named Vaira built me a QSPI driver in advance of the actual official release from Cypress.  I have put these drivers on the iotexpert github repository and you can get them with a “git clone git@github.com:iotexpert/MBED_QSPI_PATCHES.git”.  Once you have them you can apply the patch by

  1. cd mbed-os-example-filesystem
  2. ../MBED_QSPI_PATCHES/patch-qspi-mbed.sh

The shell script is simple program that copies the driver files into the correct locations in your mbed-os directory in your current project.  I will talk in detail about these files in a later article.

#!/bin/sh
cp ../MBED_QSPI_PATCHES/qspi_api.c ../MBED_QSPI_PATCHES/objects.h mbed-os/targets/TARGET_Cypress/TARGET_PSoC6
cp ../MBED_QSPI_PATCHES/targets.json mbed-os/targets
cp ../MBED_QSPI_PATCHES/PinNames.h mbed-os/targets/TARGET_Cypress/TARGET_PSOC6/TARGET_CY8CMOD_062_4343W/TARGET_CY8CPROTO_062_4343W/

Here is what my terminal looks like after I run the import, clone and apply patches.

Next I will build the project “as-is” using “mbed compile -t GCC_ARM -m CY8CPROTO_062_4343W”

OK, the project looks like it builds with no problems (other than a very annoying boatload of warnings – I really wish people weren’t slobs).  Running the compile also has the nice side effect of setting the default target and toolchain.  You can see this by either looking at the “.mbed” file or by running “mbed config target” or “mbed config toolchain”.  Here is what my terminal window looks like

Test

I generally like to test a project before I start making changes to it.  I already compiled, so now, I program it into the board with either the Cypress Programmer or by running “mbed compile -f”.  When you attach a serial program to the development kit you will get something like this:

So, the project seems to work.  When I run the project again (by pressing the reset button on the board), here is what I get:

But what is it doing?  First, lets get the code into an editor where we can see what is happening:

Visual Studio Code

Recently, I have been using Visual Studio Code to view and edit my projects.  To make that experience better, it is a good idea to “export” the project from the MBED CLI.  This doesn’t change anything in your project, but it does create the files to make VSCODE work better.  To do this run “mbed export -i vscode_gcc_arm -m CY8CPROTO_062_4343W –profile mbed-os/tools/profiles/debug.json”

When you start VSCODE it will look something like this:

When I open the directory with my project with the “File -> Open …” menu

It will look like this:

Examine the Project

Now click on main.cpp and your screen should look like this:

To make any of the MBED OS Filesystems work, they need to have a “BlockDevice” to read and write the media, meaning the SPI Flash or SD Card or … The project as it comes from ARM creates the BlockDevice on line 23 where it asks for the “default_instance”.  Those configuration files which we patched MBED with earlier sets up the default instance to be the QSPI flash on the development kit (which I will explain in great detail in a later article).

After you have a BlockDevice, the next thing that you need is a FileSystem object.  In this case on line 31-33 you can see that this project uses a LittleFileSystem.  The argument to the LittleFileSystem object creation is the mount point (think Unix “/fs/”).  The mount point is used by all of the POSIX APIs (open, close, read etc).  I will talk more about POSIX in later article.

// This example uses LittleFileSystem as the default file system
#include "LittleFileSystem.h"
LittleFileSystem fs("fs");

Near the start of main, the first real thing that happens is that you need to “mount” the Filesystem onto the BlockDevice.  This is done on line 80.  The mount will return an non-zero error code if there is nothing on the SPI Flash or the SPI Flash is corrupted.  If the mount fails, the program will try to create a filesystem by calling “reformat” on line 87.  If that fails the “error” will halt the whole thing and blink the red light on the board.

    int err = fs.mount(bd);
printf("%s\n", (err ? "Fail :(" : "OK"));
if (err) {
// Reformat if we can't mount the filesystem
// this should only happen on the first boot
printf("No filesystem found, formatting... ");
fflush(stdout);
err = fs.reformat(bd);
printf("%s\n", (err ? "Fail :(" : "OK"));
if (err) {
error("error: %s (%d)\n", strerror(-err), err);
}
}

Once we have a Filesystem (object) and it is formatted, the project will try to open the file “/fs/numbers.txt” using the POSIX API “open” on line 97.  The open specifics that it is to open the file for “read” and that it will append the “+”.  If that operation fails, it will try to create the file on line 103.

 FILE *f = fopen("/fs/numbers.txt", "r+");
printf("%s\n", (!f ? "Fail :(" : "OK"));
if (!f) {
// Create the numbers file if it doesn't exist
printf("No file found, creating a new file... ");
fflush(stdout);
f = fopen("/fs/numbers.txt", "w+");
printf("%s\n", (!f ? "Fail :(" : "OK"));
if (!f) {
error("error: %s (%d)\n", strerror(errno), -errno);
}

If the file was opened for the first time, it will write the numbers 0-9 into the file using the loop (109) and fprintf (line 112).  The file will have lines with 4 spaces followed by a number then a “\n”.  This format was chosen to make the parsing easier later on in the program.

        for (int i = 0; i < 10; i++) {
printf("\rWriting numbers (%d/%d)... ", i, 10);
fflush(stdout);
err = fprintf(f, "    %d\n", i);
if (err < 0) {
printf("Fail :(\n");
error("error: %s (%d)\n", strerror(errno), -errno);
}
}
printf("\rWriting numbers (%d/%d)... OK\n", 10, 10);

Once the file is initialized, you want the put the file point back to the start which is done with the “fseek” on line 122.

        printf("Seeking file... ");
fflush(stdout);
err = fseek(f, 0, SEEK_SET);
printf("%s\n", (err < 0 ? "Fail :(" : "OK"));
if (err < 0) {
error("error: %s (%d)\n", strerror(errno), -errno);
}

The main part of the program will start at the top,  read the numbers and increment them, and write them back into the file.  I am not really in love with this block of code… but I suppose that it is functional.

    // Go through and increment the numbers
for (int i = 0; i < 10; i++) {
printf("\rIncrementing numbers (%d/%d)... ", i, 10);
fflush(stdout);
// Get current stream position
long pos = ftell(f);
// Parse out the number and increment
int32_t number;
fscanf(f, "%d", &number);
number += 1;
// Seek to beginning of number
fseek(f, pos, SEEK_SET);
// Store number
fprintf(f, "    %d\n", number);
// Flush between write and read on same file
fflush(f);
}
printf("\rIncrementing numbers (%d/%d)... OK\n", 10, 10);

Once all of the numbers are incremented and written back into the file, the last step is closing the file on line 156.

    // Close the file which also flushes any cached writes
printf("Closing \"/fs/numbers.txt\"... ");
fflush(stdout);
err = fclose(f);
printf("%s\n", (err < 0 ? "Fail :(" : "OK"));
if (err < 0) {
error("error: %s (%d)\n", strerror(errno), -errno);
}

The next phase of the program is to do a directory listing using the POSIX directory APIs (opendir, readdir,closedir).  This little block of code will print out all of the files in the “/fs” directory.

  // Display the root directory
printf("Opening the root directory... ");
fflush(stdout);
DIR *d = opendir("/fs/");
printf("%s\n", (!d ? "Fail :(" : "OK"));
if (!d) {
error("error: %s (%d)\n", strerror(errno), -errno);
}
printf("root directory:\n");
while (true) {
struct dirent *e = readdir(d);
if (!e) {
break;
}
printf("    %s\n", e->d_name);
}
printf("Closing the root directory... ");
fflush(stdout);
err = closedir(d);
printf("%s\n", (err < 0 ? "Fail :(" : "OK"));
if (err < 0) {
error("error: %s (%d)\n", strerror(errno), -errno);
}

Then they demonstrate opening the numbers.txt file and printing out the data.

    // Display the numbers file
printf("Opening \"/fs/numbers.txt\"... ");
fflush(stdout);
f = fopen("/fs/numbers.txt", "r");
printf("%s\n", (!f ? "Fail :(" : "OK"));
if (!f) {
error("error: %s (%d)\n", strerror(errno), -errno);
}
printf("numbers:\n");
while (!feof(f)) {
int c = fgetc(f);
printf("%c", c);
}
printf("\rClosing \"/fs/numbers.txt\"... ");
fflush(stdout);
err = fclose(f);
printf("%s\n", (err < 0 ? "Fail :(" : "OK"));
if (err < 0) {
error("error: %s (%d)\n", strerror(errno), -errno);
}

And finally closing things up by unmounting the filesystem.

   // Tidy up
printf("Unmounting... ");
fflush(stdout);
err = fs.unmount();
printf("%s\n", (err < 0 ? "Fail :(" : "OK"));
if (err < 0) {
error("error: %s (%d)\n", strerror(-err), err);
}
printf("Mbed OS filesystem example done!\n");

Super Annoying Hard Code

All through this example program the number “10” is hardcoded.  This is called a MAGIC NUMBER and in this particular case is not at all a good thing.  Moreover, lines of code like this represent absolute insanity.

    printf("\rIncrementing numbers (%d/%d)... OK\n", 10, 10);

Really… just don’t do this.  Friends don’t let friends use magic numbers.

Erasing the FileSystem

Near the top of main you can see that they register an interrupt to create an event when the button on the development kit is pressed.

   irq.fall(mbed_event_queue()->event(erase));

The erase function simply initializes the block device, calls erase and then de-inits the block device.  This will cause the whole thing to begin anew when the kit is reset.

void erase() {
printf("Initializing the block device... ");
fflush(stdout);
int err = bd->init();
printf("%s\n", (err ? "Fail :(" : "OK"));
if (err) {
error("error: %s (%d)\n", strerror(-err), err);
}
printf("Erasing the block device... ");
fflush(stdout);
err = bd->erase(0, bd->size());
printf("%s\n", (err ? "Fail :(" : "OK"));
if (err) {
error("error: %s (%d)\n", strerror(-err), err);
}
printf("Deinitializing the block device... ");
fflush(stdout);
err = bd->deinit();
printf("%s\n", (err ? "Fail :(" : "OK"));
if (err) {
error("error: %s (%d)\n", strerror(-err), err);
}
}

The first time I ran the erase, I thought that there was something wrong… and I ended up going through a big debug loop.  The final step in the debug loop was being patient… which isn’t really in my wheelhouse.  I added this little block of code which timed the erase operation.

    Timer t;
t.start();
err = bd->erase(0,bd->size());
t.stop();
printf("%s\n", (err ? "Fail :(" : "OK"));
if (err) {
error("error: %s (%d)\n", strerror(-err), err);
}
printf("Time in s =%f\n",((double)t.read_ms())/1000.0);

And it turns out the answer is 115.06 seconds.  I am going to have to figure out why it takes so long.

The last thing to notice is that if you press the erase button while it is writing the files, Im pretty sure that something bad happens.

In the next articles I will examine this system in much much more detail.  Again thanks to Jaya and Vaira for their excellent work.


MBED OS & PSoC 6 & SSD1306

Summary

As I wrote about in the last article I have been working to get ready for Embedded World 2019 in a week and a bit.  For my demo, I will be handing out remote controls that have a 128×64 monochrome OLED display that is driven by an I2C SSD1306.  This whole board is controlled by a PSoC 6 & a 4343W WiFi / Bluetooth Combo.

This morning I started to port the U8G2 library to MBEDOS… but ran into some problems, so I i decided to see what ports were already out there.  I immediately found a port of the Adafruit_GFX library.  This article talks about using it on my CY8CPROTO_062_4343W board.  As part of this journey I also wanted to be able to draw the Cypress logo on the screen… so I had to figure out how to create a logo in a format that could be drawn on the screen.

I will follow these steps:

  1. Create a new project & add the Adafruit_GFX_library
  2. Create a main.cpp, configure the library and test
  3. Make a Cypress logo using GIMP
  4. Create a function to draw X11 bitmaps & test

Create a new project & add the Adafruit_GFX_library

The first step to get everything going by running

  1. mbed new .
  2. mbed add http://os.mbed.com/users/nkhorman/code/Adafruit_GFX/

The way to figure out how to add the library is by going to the library webpage on the mbedos website.  Then clicking the arrow on “Import into Compiler” where you will see two options, “Import into Compiler” and “Import with mbed CLI”

When you select that option you will get a window that tells you the exact command to run.

I have been using Atom as an editor (and sort of IDE).  When you open the lcd-example directory using Atom you will see your project including

  1. The mbed-os directory with all of the mbed stuff in it.
  2. The Adafruit_GFX library

Create a main.cpp, configure the library and test

The next step is to create a main.cpp.

  1. Setup the I2C.  In order to use the graphics library you need to setup a communication vehicle.  In my case that is an I2C bus that is connected to P6[0] and P6[1] on my development board.  Lines 6-15 create the communication class of I2CPreInit, configure it to 400kbs and connect the I2C master to P6[0]/P6[1]
  2. Line 16 actually setups up the graphics library and get it going.
  3. The main simply prints out some information about the display on lines 22-23
  4. Line 24 causes the current frame buffer to be displayed (more on this in a second)
  5. The main loop blinks the LED and prints a counter on the top of the screen.
#include "mbed.h"
#include "Adafruit_SSD1306.h"
DigitalOut myled(LED1);
class I2CPreInit : public I2C
{
public:
I2CPreInit(PinName sda, PinName scl) : I2C(sda, scl)
{
frequency(400000);
start();
};
};
I2CPreInit gI2C(P6_1,P6_0);
Adafruit_SSD1306_I2c gOled2(gI2C,P0_2,0x78,64,128);
int main()
{   uint16_t x=0;
printf("Started\n");
printf("%ux%u OLED Display\r\n", gOled2.width(), gOled2.height());
printf("Rotation = %u\n",gOled2.getRotation());
gOled2.display();
while(1)
{
x += 1;
myled = !myled;
gOled2.printf("%u\r",x);
gOled2.display();
wait(1.0);
}
}

In order to build this thing I run “mbed compile -t GCC_ARM -m CY8CPROTO_062_4343w”.  When I run the project it looks like this:

There are several things to notice about this picture.  First, there is an Adafruit logo on the screen.  Where did this come from?  Simple on line 152 of Adafruit_ssd1306.cpp there is a function called “splash” which is called by the constructor.  The spash function just copies a bitmap into the frame buffer of the Adafruit_SSD1306 object.

void Adafruit_SSD1306::splash(void)
{
#ifndef NO_SPLASH_ADAFRUIT
uint8_t adaFruitLogo[64 * 128 / 8] =
{ 
0x00, 0x00, 0x00, 0x00, 0x00, 0x00, 0x00, 0x00, 0x00, 0x00, 0x00, 0x00, 0x00, 0x00, 0x00, 0x00,

The constructor is in Adafruit_ssd1306.h on line 152

	Adafruit_SSD1306_I2c(I2C &i2c, PinName RST, uint8_t i2cAddress = SSD_I2C_ADDRESS, uint8_t rawHeight = 32, uint8_t rawWidth = 128)
: Adafruit_SSD1306(RST, rawHeight, rawWidth)
, mi2c(i2c)
, mi2cAddress(i2cAddress)
{
begin();
splash();
display();
};

And if you don’t want to have this splash screen you can uncomment the #define NO_SPLASH_ADAFRUIT in the file “Adafruit_GFC_Config.h”

#ifndef _ADAFRUIT_GFX_CONFIG_H_
#define _ADAFRUIT_GFX_CONFIG_H_
// Uncomment this to turn off the builtin splash
#define NO_SPLASH_ADAFRUIT
// Uncomment this to enable all functionality
//#define GFX_WANT_ABSTRACTS
// Uncomment this to enable only runtime font scaling, without all the rest of the Abstracts
//#define GFX_SIZEABLE_TEXT
#endif

The next thing to notice in the picture is that I have lead wires attached to the LCD pins… and those wires are attached to a logic analyzer because I typed the I2C incorrectly and I couldn’t figure out why they didn’t talk.  And finally notice my grandfathers magnifying glass which I use every day.

Make a Cypress logo using GIMP

For my project I am less interested in displaying Adafruits Logo and more interested in displaying Cypress’.  To do this I loaded up the Cypress logo in Gimp.

I then converted it to pure black and white using the “Image->Mode->Indexed…”

Then selected “black and white palette”

Then I scaled the image to 128×40 using the “Image->Scale Image”

Unfortunately it made a bit of a mess of the logo during the scaling process… so I put my son to editing it.

Which looks like this after he was done.  Pretty good eh?

In order to use the image you need a “C program” version of it.  It turns out that there is a format called “X11” or “xbm” which is exactly that (a c-file).  You can read about the format on this website.  To get one of these files, just run “File->Export As”

Then give it a name with a “.xbm” on the end

Make sure and “de-select the X10 format bitmap” (and older version of the xbm format)

When all that is said and done you will find the xbm file with goodness in it.  Here is the top of it.

#define cylogo_width 128
#define cylogo_height 40
static unsigned char cylogo_bits[] = {
0x00, 0x00, 0xff, 0x01, 0x00, 0x00, 0x00, 0x00, 0x00, 0x00, 0x00, 0x00,
0x00, 0x00, 0x00, 0x00, 0x00, 0xe0, 0xff, 0x0f, 0x00, 0x00, 0x00, 0x00,
0x00, 0x00, 0x00, 0x00, 0x00, 0x00, 0x00, 0x00, 0x00, 0xf8, 0xff, 0x3f,
0x00, 0x00, 0x00, 0x00, 0x00, 0x00, 0x00, 0x00, 0x00, 0x00, 0x00, 0x00,
0x00, 0xfe, 0xff, 0xff, 0x00, 0x00, 0x00, 0x00, 0x00, 0x00, 0x00, 0x00,

The format of this file is unsigned 8-bit integers… each bit represents the bit of one pixel… in BIG ENDIAN!!!! format.  In other words this table will be 128×40/8 bytes long.

Create a function to draw X11 bitmaps & test

But how do we use this format?  Well, write a new function in the Adafruit library to draw X11 bitmaps.

First add the new function name to the class on line 168 of “Adafruit_GFX.h”

    virtual void drawX11BitMap(const uint8_t bitmap[],uint16_t bitMapWidth,uint16_t bitMapSize,uint16_t posX,uint16_t posY);

Then add the code.

// Write an X11 formatted bitmap to the screen at posX, posY
void Adafruit_GFX::drawX11BitMap(const uint8_t bitmap[],uint16_t bitMapWidth,uint16_t bitMapSize,uint16_t posX,uint16_t posY)
{
int16_t x1 = posX;
int16_t y1 = posY;
for(unsigned int i=0;i<bitMapSize;i++)
{
uint8_t val = bitmap[i];
for(int j=0;j<8;j++)
{
uint16_t pixColor;
if(val>>j & 0x01)
pixColor = 1;
else
pixColor = 0;
drawPixel(x1,y1, pixColor);
x1 = x1 + 1;
if(x1 == posX + bitMapWidth)
{
x1 = posX;
y1 = y1 + 1;
}
}
}

This may not be the most beautiful code in the world… which I suppose makes it fit right in with some of the other stuff in this driver.  Oh well it works.

Once you have added the function to the library, lets test it to see if it can draw the logo.  First, copy the “cylogo.xbm” into the project and call it “cylogo.h”.  Then modify the “main.cpp” to use it.  Add an include of the “cylogo.h”.  Then on line 26, call the function to draw it at 0,(half way down the screen)

#include "mbed.h"
#include "Adafruit_SSD1306.h"
#include "cylogo.h"
DigitalOut myled(LED1);
class I2CPreInit : public I2C
{
public:
I2CPreInit(PinName sda, PinName scl) : I2C(sda, scl)
{
frequency(400000);
start();
};
};
I2CPreInit gI2C(P6_1,P6_0);
Adafruit_SSD1306_I2c gOled2(gI2C,P0_2,0x78,64,128);
int main()
{   uint16_t x=0;
printf("Started\n");
printf("%ux%u OLED Display\r\n", gOled2.width(), gOled2.height());
printf("Rotation = %u\n",gOled2.getRotation());
gOled2.drawX11BitMap(cylogo_bits,cylogo_width,sizeof(cylogo_bits),0,(64-cylogo_height)/2);
gOled2.display();

When you program this… everything seems to be good.

By the way if it isn’t clear by now, I did a solder in a male header onto the board so that I could attach the I2C wires for the display.

MBEDOS & BLE & PSoC 6 & CYW4343W

Summary

At the Embedded World Show in Germany in a couple of weeks I am going to be showing a crazy demo (more on this later) that uses MBED OS and BLE and WiFi and PSoC 6 and the 4343W.  Given how close things are and how new MBED OS is to me I figure that I had better get going sorting out the BLE interface.   This article and probably the next several are going to show my progress through the learning curve.

It turns out that in MBED OS, instead of using the Cypress BLE Host Stack I will be using the ARM Cordio BLE host stack talking via HCI to the Cypress BLE Controller stack running on the 4343W (a Bluetooth, BLE and WiFi combo chip).  At this point all of my experience with BLE has been with Cypress stacks, either the PSoC 4/6 BLE stack or with the Cypress IoT stacks e.g. the CYW20719.  Lot’s of new learning.  Add in that all of the code is in C++ and it makes for an adventure.

For this article I will show the steps to get an ARM BLE example going on the CY8CPROTO_062_4343W development kit.  This will involve.

  1. Importing the ARM MBEDOS BLE Examples
  2. Modifying them to support the Cypress Targets & Test
  3. Updating an example program in a few places to fix things that I don’t like.

Import ARM MBED OS BLE Examples

The first step is to make a clone of the ARM examples by running “mbed import mbed-os-example-ble”.  This will load a bunch of different example projects (as libraries)

Then, when you look at what you have after all of that mess, you can see 14 example programs with promising names.

When you look in the BLE_LED directory you will find a file “readme.md” which is a markdown formatted file.  You can view this file on the GitHub website for this example here.  The top of this one looks promising:

Modify and Test

I decide that the example called “BLE_LED” looks like a good place to start.  This example is a simple peripheral that advertises it name.  When you connect to it there is a Service with UUID “0xA000” (unfortunately a 16-bit UUID… bad demo code) that Service has one characteristic with UUID 0xA001 (another 16-UUID … that isn’t nice … come on people… haven’t you read the spec?).  When you write a “1” to that characteristic the LED2 is supposed to turn on, and when you write a 0 the LED2 is supposed to turn off.

First, until the Cypress stuff is accepted into the main release, I need to update mbed-os to our targets) with “cd mbed-os ; mbed update master”.  To build this project Ill run “mbed compile -t GCC_ARM -m CY8CPROTO_062_4343W”.  When I program the the development kit, the LED starts blinking and I am able to see it using the GATT browser LightBlue Explorer.

But when I try to write a 1 to the 0xA001 characteristic nothing happens.

So, what gives? The answer is that on line 32 you can see that the authors as assuming that you have two LEDs (my development kit only has one.

        _alive_led(LED2, 1),
_actuated_led(LED1, 0),

And on line 124 you can see a function that inverts the LED

void blink() {
_alive_led = !_alive_led;
}

which is triggered on line 47 to be called every 500ms

    void start() {
_ble.gap().setEventHandler(this);
_ble.init(this, &LEDDemo::on_init_complete);
_event_queue.call_every(2000, this, &LEDDemo::blink);
_event_queue.dispatch_forever();
}

OK.  I am not loving this. I think that I should make some updates to this project.

Update

There are several things that I don’t like about this program or need to be fixed.

  1. Make the user LED2 be LED1 and fix the fact that it is active low.
  2. Change the UUIDs of the Service and Characteristic to be legal 128-bit UUIDs
  3. Make the stdio print out the status of the connection (instead of the blinking LED1)
  4. Make the baud rate of standard i/o be 115200 instead of 9600

First, fix the LED2 to be LED1.  Do this by commenting out all of the _alive_led code and switching the _actuated_led to be LED1.  Also set the state of the LED1 to 1 (meaning off because it is active low)

        //_alive_led(LED1, 1),
_actuated_led(LED1, 1),

The author of the example code has a function called blink which is executed by the event queue every 500ms, comment out that function

/*
void blink() {
_alive_led = !_alive_led;
}
*/

And don’t inject events into the queue to run the blink function

        //_event_queue.call_every(500, this, &LEDDemo::blink);

The LED on my board is active low… so instead of writing the value write the opposite of the value.

            _actuated_led = !*(params->data);

It is illegal in Bluetooth to use 16-bit UUIDs without first registering them with the Bluetooth SIG and having them be “Assigned numbers”.  The author of this example program violated the specification by assigning the LED service UUID of 0xA000 and the LED characteristic UUID of 0xA001.  This is super annoying and I am not willing to be a slob.  To fix this modify ledservice.h to declare the UUIDs as UUID type instead of uint16_ts

    //const static uint16_t LED_SERVICE_UUID              = 0xA000;
//const static uint16_t LED_STATE_CHARACTERISTIC_UUID = 0xA001;
const static UUID LED_SERVICE_UUID;
const static UUID LED_STATE_CHARACTERISTIC_UUID;

Then initialize them in the main.cpp as 128-bit UUIDs using the const char * initializer.

const UUID LEDService::LED_SERVICE_UUID("21c04d09-c884-4af1-96a9-52e4e4ba195b");
const UUID LEDService::LED_STATE_CHARACTERISTIC_UUID("1e500043-6b31-4a3d-b91e-025f92ca9763");

The original code has a blinking LED.  Which I dont really like.  Typically, I like to blink the LED when the device is advertising, and make it be solid when there is a connection.  However, as I only have one LED on my board, and I have allocated it to be the “_actuated_led”, I will use the UART to print out status changes.  To do this, I update the “onDisconnectionComplete” and “onConnectionComplete” events to print out that fact to stdio.

    void onDisconnectionComplete(const ble::DisconnectionCompleteEvent&) {
_ble.gap().startAdvertising(ble::LEGACY_ADVERTISING_HANDLE);
printf("DisconnectionCompleteEvent\n");
}
void onConnectionComplete	(	const ble::ConnectionCompleteEvent & 	event	)
{
printf("onConnectionComplete\n");
}

In order to set the stdio to use 115200 instead of 9600 you can change the default rate of the UART in the mbed_app.json.

  "CY8CPROTO_062_4343W": {
"platform.stdio-baud-rate": 115200,
"platform.default-serial-baud-rate": 115200
},

Here is the final version of main.cpp

/* mbed Microcontroller Library
* Copyright (c) 2006-2013 ARM Limited
*
* Licensed under the Apache License, Version 2.0 (the "License");
* you may not use this file except in compliance with the License.
* You may obtain a copy of the License at
*
*     http://www.apache.org/licenses/LICENSE-2.0
*
* Unless required by applicable law or agreed to in writing, software
* distributed under the License is distributed on an "AS IS" BASIS,
* WITHOUT WARRANTIES OR CONDITIONS OF ANY KIND, either express or implied.
* See the License for the specific language governing permissions and
* limitations under the License.
*/
#include <events/mbed_events.h>
#include <mbed.h>
#include "ble/BLE.h"
#include "LEDService.h"
#include "pretty_printer.h"
const static char DEVICE_NAME[] = "LED";
static EventQueue event_queue(/* event count */ 10 * EVENTS_EVENT_SIZE);
//const UUID::LongUUIDBytes_t testbytes = { 0x21, 0xc0, 0x4d, 0x09, 0xc8, 0x84, 0x4a, 0xf1, 0x96, 0xa9, 0x52, 0xe4, 0xe4, 0xba, 0x19, 0x5b } ;
// {0x1e, 0x50, 0x00, 0x43, 0x6b, 0x31, 0x4a, 0x3d, 0xb9, 0x1e, 0x02, 0x5f, 0x92, 0xca, 0x97, 0x63}
//const UUID LEDService::LED_SERVICE_UUID(testbytes,UUID::MSB);
const UUID LEDService::LED_SERVICE_UUID("21c04d09-c884-4af1-96a9-52e4e4ba195b");
const UUID LEDService::LED_STATE_CHARACTERISTIC_UUID("1e500043-6b31-4a3d-b91e-025f92ca9763");
class LEDDemo : ble::Gap::EventHandler {
public:
LEDDemo(BLE &ble, events::EventQueue &event_queue) :
_ble(ble),
_event_queue(event_queue),
//_alive_led(LED1, 1),
_actuated_led(LED1, 1),
_led_uuid(LEDService::LED_SERVICE_UUID),
_led_service(NULL),
_adv_data_builder(_adv_buffer) { }
~LEDDemo() {
delete _led_service;
}
void start() {
_ble.gap().setEventHandler(this);
_ble.init(this, &LEDDemo::on_init_complete);
//_event_queue.call_every(500, this, &LEDDemo::blink);
_event_queue.dispatch_forever();
}
private:
/** Callback triggered when the ble initialization process has finished */
void on_init_complete(BLE::InitializationCompleteCallbackContext *params) {
if (params->error != BLE_ERROR_NONE) {
printf("Ble initialization failed.");
return;
}
_led_service = new LEDService(_ble, false);
_ble.gattServer().onDataWritten(this, &LEDDemo::on_data_written);
print_mac_address();
start_advertising();
}
void start_advertising() {
/* Create advertising parameters and payload */
ble::AdvertisingParameters adv_parameters(
ble::advertising_type_t::CONNECTABLE_UNDIRECTED,
ble::adv_interval_t(ble::millisecond_t(1000))
);
_adv_data_builder.setFlags();
_adv_data_builder.setLocalServiceList(mbed::make_Span(&_led_uuid, 1));
_adv_data_builder.setName(DEVICE_NAME);
/* Setup advertising */
ble_error_t error = _ble.gap().setAdvertisingParameters(
ble::LEGACY_ADVERTISING_HANDLE,
adv_parameters
);
if (error) {
printf("_ble.gap().setAdvertisingParameters() failed\r\n");
return;
}
error = _ble.gap().setAdvertisingPayload(
ble::LEGACY_ADVERTISING_HANDLE,
_adv_data_builder.getAdvertisingData()
);
if (error) {
printf("_ble.gap().setAdvertisingPayload() failed\r\n");
return;
}
/* Start advertising */
error = _ble.gap().startAdvertising(ble::LEGACY_ADVERTISING_HANDLE);
if (error) {
printf("_ble.gap().startAdvertising() failed\r\n");
return;
}
}
/**
* This callback allows the LEDService to receive updates to the ledState Characteristic.
*
* @param[in] params Information about the characterisitc being updated.
*/
void on_data_written(const GattWriteCallbackParams *params) {
if ((params->handle == _led_service->getValueHandle()) && (params->len == 1)) {
_actuated_led = !*(params->data);
}
}
/*
void blink() {
_alive_led = !_alive_led;
}
*/
private:
/* Event handler */
void onDisconnectionComplete(const ble::DisconnectionCompleteEvent&) {
_ble.gap().startAdvertising(ble::LEGACY_ADVERTISING_HANDLE);
printf("DisconnectionCompleteEvent\n");
}
void onConnectionComplete	(	const ble::ConnectionCompleteEvent & 	event	)
{
printf("onConnectionComplete\n");
}
private:
BLE &_ble;
events::EventQueue &_event_queue;
//DigitalOut _alive_led;
DigitalOut _actuated_led;
UUID _led_uuid;
LEDService *_led_service;
uint8_t _adv_buffer[ble::LEGACY_ADVERTISING_MAX_SIZE];
ble::AdvertisingDataBuilder _adv_data_builder;
};
/** Schedule processing of events from the BLE middleware in the event queue. */
void schedule_ble_events(BLE::OnEventsToProcessCallbackContext *context) {
event_queue.call(Callback<void()>(&context->ble, &BLE::processEvents));
}
int main()
{
printf("Example Bluetooth\n");
BLE &ble = BLE::Instance();
ble.onEventsToProcess(schedule_ble_events);
LEDDemo demo(ble, event_queue);
demo.start();
return 0;
}

And LEDService.h

/* mbed Microcontroller Library
* Copyright (c) 2006-2013 ARM Limited
*
* Licensed under the Apache License, Version 2.0 (the "License");
* you may not use this file except in compliance with the License.
* You may obtain a copy of the License at
*
*     http://www.apache.org/licenses/LICENSE-2.0
*
* Unless required by applicable law or agreed to in writing, software
* distributed under the License is distributed on an "AS IS" BASIS,
* WITHOUT WARRANTIES OR CONDITIONS OF ANY KIND, either express or implied.
* See the License for the specific language governing permissions and
* limitations under the License.
*/
#ifndef __BLE_LED_SERVICE_H__
#define __BLE_LED_SERVICE_H__
class LEDService {
public:
//const static uint16_t LED_SERVICE_UUID              = 0xA000;
//const static uint16_t LED_STATE_CHARACTERISTIC_UUID = 0xA001;
const static UUID LED_SERVICE_UUID;
const static UUID LED_STATE_CHARACTERISTIC_UUID;
LEDService(BLEDevice &_ble, bool initialValueForLEDCharacteristic) :
ble(_ble), ledState(LED_STATE_CHARACTERISTIC_UUID, &initialValueForLEDCharacteristic)
{
GattCharacteristic *charTable[] = {&ledState};
GattService         ledService(LED_SERVICE_UUID, charTable, sizeof(charTable) / sizeof(GattCharacteristic *));
ble.gattServer().addService(ledService);
}
GattAttribute::Handle_t getValueHandle() const
{
return ledState.getValueHandle();
}
private:
BLEDevice                         &ble;
ReadWriteGattCharacteristic<bool> ledState;
};
#endif /* #ifndef __BLE_LED_SERVICE_H__ */


Cypress & MBED OS

Summary

This morning I saw something exciting.  When I went to the ARM mbed-os GitHub site I saw the latest accepted merge commit was from vmedcy and it says something interesting.  “Add Cypress PSoC 6 Targets”.  I cannot even begin to describe how gratifying it is to see this commit.

But what does it mean?  Lets look.  I am using a Mac, so I simply install the MBED-CLI using the instructions found on the MBED CLI webpage.

Like all good embedded people, the first thing to do is make sure that the toolchain and everything else works using a simple blinking LED project.  And, the easiest way to do this is to import the ARM example using: “mbed import mbed-os-example-blinky”.

The current release of mbed-os is 5.11.3 which you can see on the Tags page of the mbed-os GitHub site.  Notice in the screenshot above that the commit number for mbed-os is “a8d1d2…”  which means that by default, when you import a project it gives you the “latest” version of mbed-os, which really means the latest official release.

But, I want to use the version that was accepted with the new Cypress stuff (which will become part of the official release starting with mbed-os-5.11.4).  I can do this by running “cd mbed-os” and “mbed update master”.  This will move the git repository to point at the head of the master branch, AKA the latest and greatest.  When I do that I get a version that looks like “32525…”

And when I look at the commit history in GitHub I can see the interesting commit has the same number.

Now to the good stuff.  When I look in the targets directory I see that there is a TARGET_CYPRESS.  Where is see two targets:

  • TARGET_PSOC – the stuff that Cypress created
  • TARGET_PSOC6_FUTURE – a really cool target that Future Electronics created.

When when I look in the Cypress directory I see a bunch of my favorite Cypress PSoC 6 and WICED wireless development Kits.

  • TARGET_CY8CKIT_062_BLE
  • TARGET_CY8CKIT_062_4343W
  • TARGET_CY8CKIT_062_WIFI_BT
  • TARGET_CYW943012P6EVB_01
  • TARGET_CY8CMOD_062_4343W
  • TARGET_CY8CPROTO_062_4343W

I happen to have a CY8CPROTO_062_4343W on my desk at home.  This kit has a bunch of cool stuff on it, but most importantly it a 4343W WiFi Bluetooth Combo chip and a PSoC 6 together.  Finally, A PSoC 6 2M (which is really called CY8C624ABZI-D44) and a WICED 4343W – a Dual Band 802.11n and Bluetooth 5.0 Combo.  Here is a picture from the development kit guide.

Now we have something to program.  Let’s look at the blinking LED example program.  It resides in the file “main.cpp” which is in the root directory of the “mbed-os-example-blinky”

/* mbed Microcontroller Library
* Copyright (c) 2018 ARM Limited
* SPDX-License-Identifier: Apache-2.0
*/
#include "mbed.h"
#include "stats_report.h"
DigitalOut led1(LED1);
#define SLEEP_TIME                  500 // (msec)
#define PRINT_AFTER_N_LOOPS         20
// main() runs in its own thread in the OS
int main()
{
SystemReport sys_state( SLEEP_TIME * PRINT_AFTER_N_LOOPS /* Loop delay time in ms */);
int count = 0;
while (true) {
// Blink LED and wait 0.5 seconds
led1 = !led1;
wait_ms(SLEEP_TIME);
if ((0 == count) || (PRINT_AFTER_N_LOOPS == count)) {
// Following the main thread wait, report on the current system status
sys_state.report_state();
count = 0;
}
++count;
}
}

This looks simple enough, but I am never a fan of “other” stuff in the blinking LED example.  So Ill trim it down to the most basic.

/* mbed Microcontroller Library
* Copyright (c) 2018 ARM Limited
* SPDX-License-Identifier: Apache-2.0
*/
#include "mbed.h"
DigitalOut led1(LED1);
#define SLEEP_TIME                  500 // (msec)
// main() runs in its own thread in the OS
int main()
{
while (true) {
// Blink LED and wait 0.5 seconds
led1 = !led1;
wait_ms(SLEEP_TIME);
}
}

All-right, how do I compile this?  Well, run the mbed command line interface with “mbed compile -m CY8CPROTO_062_4343W -t GCC_ARM“… and after a bit of compiling you should end up with a window like this:


Now I have a “hex file”.  How do I program it?  There are three ways.

#1 You can add the “-f” option to the command line and it will “flash” the device after it gets done compiling using PyOCD.  In order to do this your development kit’s KitProg 3 must be in the DAPLink mode.  To get into this mode hold down the KitProg button for 2 seconds and the LED will turn off. (If the LED turns on that means you put the programmer into CMSIS-DAP mode, so hold down the button for 2 seconds again).  At the time of this writing the -f option doesn’t work in the released version of mbed-cli,  but that will be fixed shortly with an update to the program debug system in mbed (hopefully by the time you read this)

#2 Copy the hex file from the BUILD directory onto the Mass Storage device called “DAP Link” using the finder. (drag and drop).  To use this method your KitProg needs to be in DAPLink mode.  (so follow the steps above)

#3 Use the “Cypress Programmer” to program the flash.  You can download it for Windows, Mac or Linux from this link on cypress.com  When I run Cypress Programmer it looks like this:

Open the hex file by pressing the “Open” button and navigating into the BUILD directory to find the hex file called “mbed-os-example-blinky.hex”

Then press “connect” and “program”

Nothing happens on my development kit?  So I press the reset button and now I get a blinking LED.  But why do I have to press reset?   Do you see the “Reset Chip” checkbox at the top of the “Program Settings” window?  That has to be clicked.  Now when you program, the debugger will reset the chip and you will be off to the races.

So, what was going on with the rest of that program that came by default?  If you attach a serial terminal to the devkit you will see that the blinky example program is putting out information about the RTOS.

It turns out the mbed-os is really an os… an operation system.  Actually it is a real time operating system that traces it genealogy to RTX, a product from the old Keil Corporation which was acquired by ARM…. a lot more on this later.

One final note that may cause confusion (I certainly have been confused).  There are four different modes of KitProg 3 (the programmer that is built into most of the Cypress development kits).

Mode LED Change modes
CMSIS-DAP BULK Solid LED Short button press toggles between BULK and HID
CMSIS-DAP HID Breathing LED Short button press toggles between BULK and HID
DAPLink LED Off Hold KitProg button for >2 seconds (gets in and out of this mode)
B00tloader Fast blinking LED hold reset button and plug in kit

In order to program from the command line using “mbed compile -f” you need to be in “DAPLink” mode.  In order to program with Cypress Programmer you need one of the CMSIS-DAP modes.