After a few days off (Im sorry) I am back to it. Every Pinball machine does lots of beeping, buzzing and music playing as will this one. A very inexpensive way to make sound is to use a piezo-electric buzzer. To make it “buzz”, you just drive a 50% duty cycle square wave into it at the frequency you want. This is a perfect task for the PSoC4 BLE Timer Counter Pulse Width Modulator (TCPWM). There are obviously limitations with this scheme, starting with you can only play one note at a time, and the notes can only be square (real sound has a much more complex waveforms). But all of that is OK because the buzzer work OK and, as I said… they are cheap. On the Pinball printed circuit board I have placed two buzzers, my thought was one would be used for buzzing and one would be used to play a song.
To make things easier for the main firmware I will build a component just like I did for the LEDs and the Switches. Start by creating a new component by:
- Click on the components tab
- Right click on the “Pinball Component” library project and select “Add Component Item…”
- Select “Symbol Wizard”, give the component the name “MusicPlayer” (exactly like I did in the LED and Switches components)
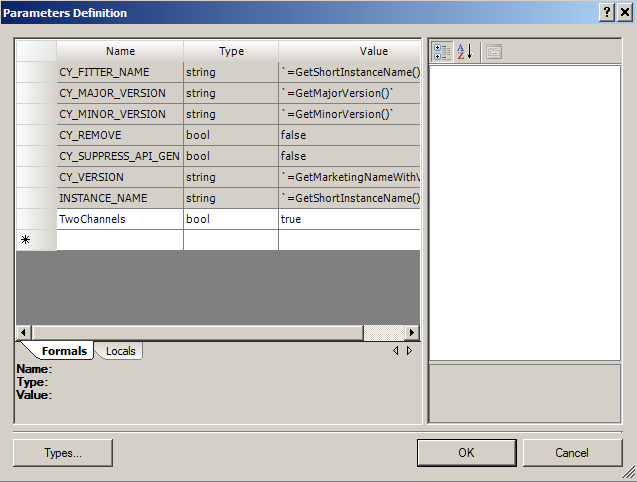
I thought that it would be nice for the MusicPlayer component to be able to select if it is a one or two channel player. So, right click on the blank part of the symbol editor canvas and select “Symbol Parameters”. Next add a bool parameter called “TwoChannels”
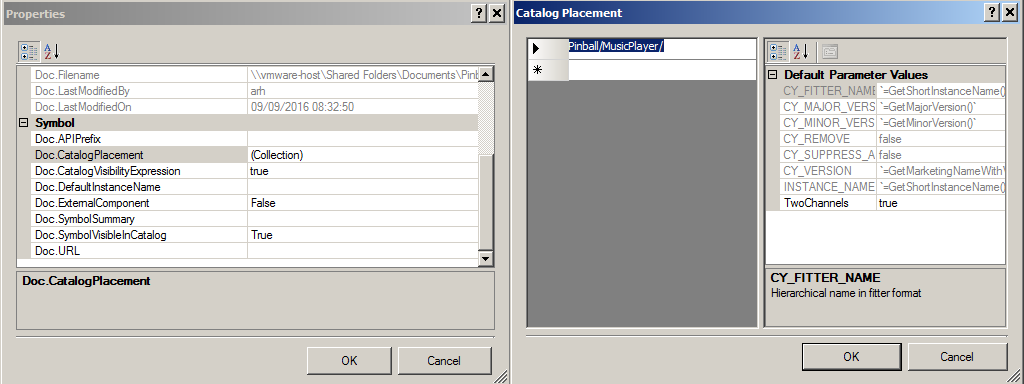
To put the component in the correct place in the Component Browser right click the blank canvas, select “edit properties”, edit the”Doc.CatalogPlacement” and enter the placement of “Pinball/MusicPlayer/”
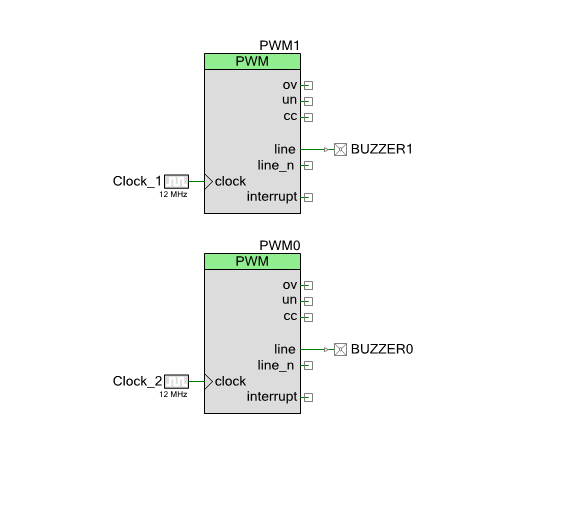
Next, you need to create the schematic for the music player. You do this by right-clicking on the “Pinball Component” project and adding a “Schematic” implementation. Then add the default clocks, the TCPWMs and the pins.
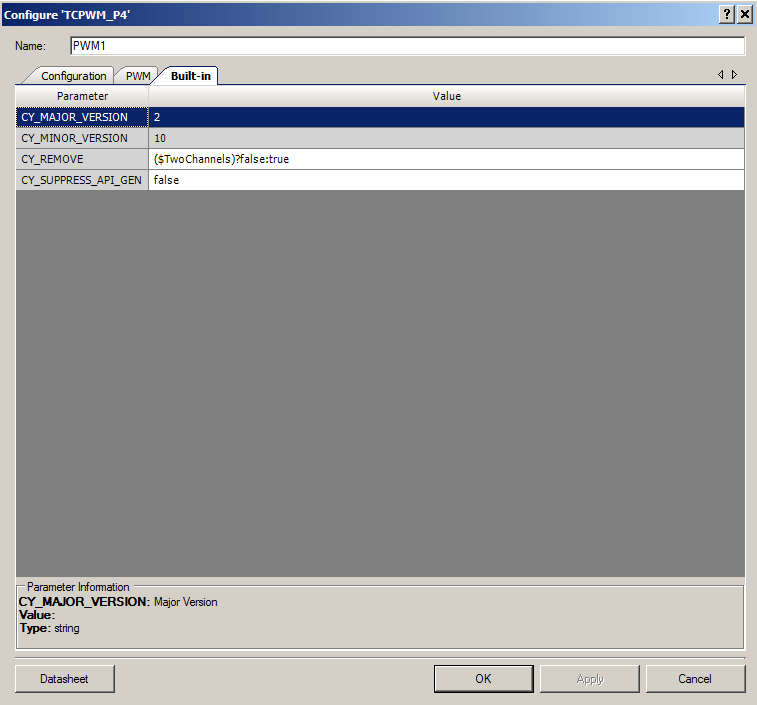
Earlier I added a component parameter called “TwoChannels”. When this parameter is false, I want to remove the extra components. With the help of the Cypress component manager I found out how to do this. And it is simple. Just add an expression to the TCPWM, Pin and Clock “CY_REMOVE” Parameter. This parameter shows up on the “Built-in” tab for these three components (in fact all Cypress components). When the value is “true” the component magically disappears.
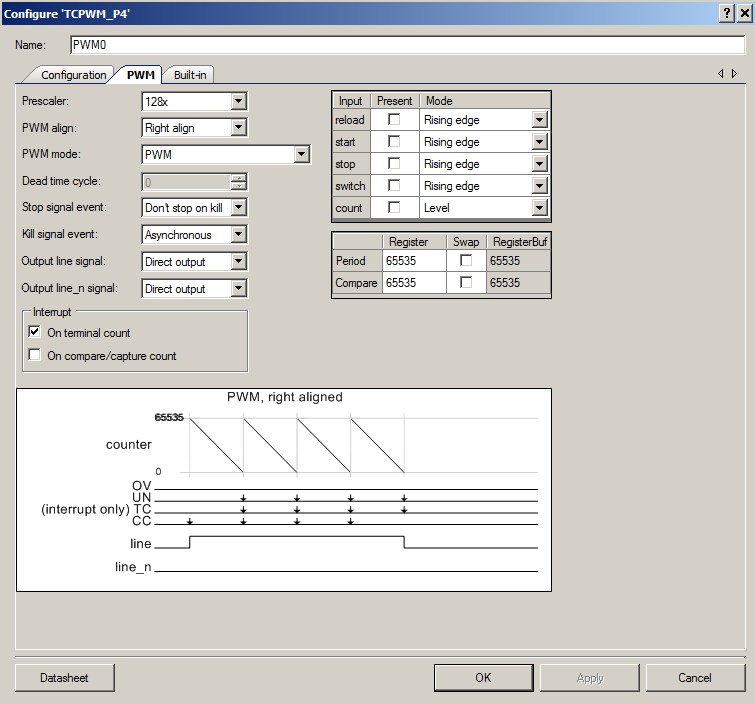
Next, I configure the TCPWM to have the prescaler turned on (which divides the input clock). This is used to reduce the default 12MHz clock down to an easier to control 93.75Khz.
In the next post Ill show you the firmware.
You can find all of the source code and files at the IOTEXPERT site on github.
Index
Description
Pinball: Newton's Attic Pinball
An introduction to the project and the goals
Pinball: Lotsa Blinking LEDs
Everyone needs a bunch of LEDs on their Pinball Machine
Pinball: Matrix LEDs (Part 1)
Saving PSoC pins by using a matrix scheme
Pinball: Matrix LEDs (Part 2)
Solving some problems with the matrix
Pinball: Matrix LEDs Component
How to turn the Matrix LED into a component
Pinball: A Switch Matrix
Implementing a bunch of switches
Pinball: Switch Matrix Component (Part 1)
The switch matrix component implementation
Pinball: Switch Matrix Component (Part 2)
The firmware for matrix component
Pinball: Switch Matrix Component (Part 3)
Test firmware for the matrix component
Pinball: The Music Player (Part 1)
The schematic and symbol for a Music Player component
Pinball: The Music Player (Part 2)
The Public API for the Music Player component
Pinball: The Music Player (Part 3)
The firmware to make the sweet sweet music
Pinball: The Music Player (Part 4)
The test program for the music player
Pinball: The Motors + HBridge
Using an Bridge to control DC Motors
Pinball: The Eagle Schematic
All of the circuits into an Eagle schematic
Pinball: The Printed Circuit Board 1.0
The first Eagle PCB layout of the printed circuit board
Pinball: The PCB Version 1.0 Fail
Problems with the first version of the Eagle PCB layout
Pinball: PCB Layout 1.2 Updates using Eagle
Fixing the errors on the first two versions of the Eagle PCB
Pinball: Assemble and Reflow the 1.2 PCB
Assembling the Eagle PCB
Pinball: Testing the Eagle PCB
Firmware to test the newly built Pinball printed circuit board
Pinball: Debugging the Motor Driver
Fixing the motor driver PSoC project
Pinball: Hot-Air Reworking the Accelerometer Solder
Using a Hot-Air Rework tool to reflow a QFN
Pinball: Debugging the LM317 Power Supply- A Tale of Getting Lucky
Debugging the LM317/LM117 power supply
2 Comments
Nice custom component!, i was searching how to define default values on the custom parameters and accidentally discover how on the second screenshot of this blog 😀
Thanks. I had a little bit of inside help (the manager of the component team) helped me sort that out.
Good luck with your project.
Alan