Summary
In the previous article I showed you how to build PSoC4 BLE Central firmware to talk to a BLE Peripheral. When I did that firmware I built it to program into a CY8CKIT-042-BLE kit. What I should have done was made the firmware work with the CySmart Dongle. An error that I will fix in this article.
In this article I give you an introduction to the CySmart dongle, then I will show you how to:
- Update the firmware on the dongle (both KitProg and the PRoC)
- Use the PC to debug a PSoC4 BLE Peripheral
- Modify the PSoC4 BLE Central Project to work on the CySmart Dongle
CySmart Dongle
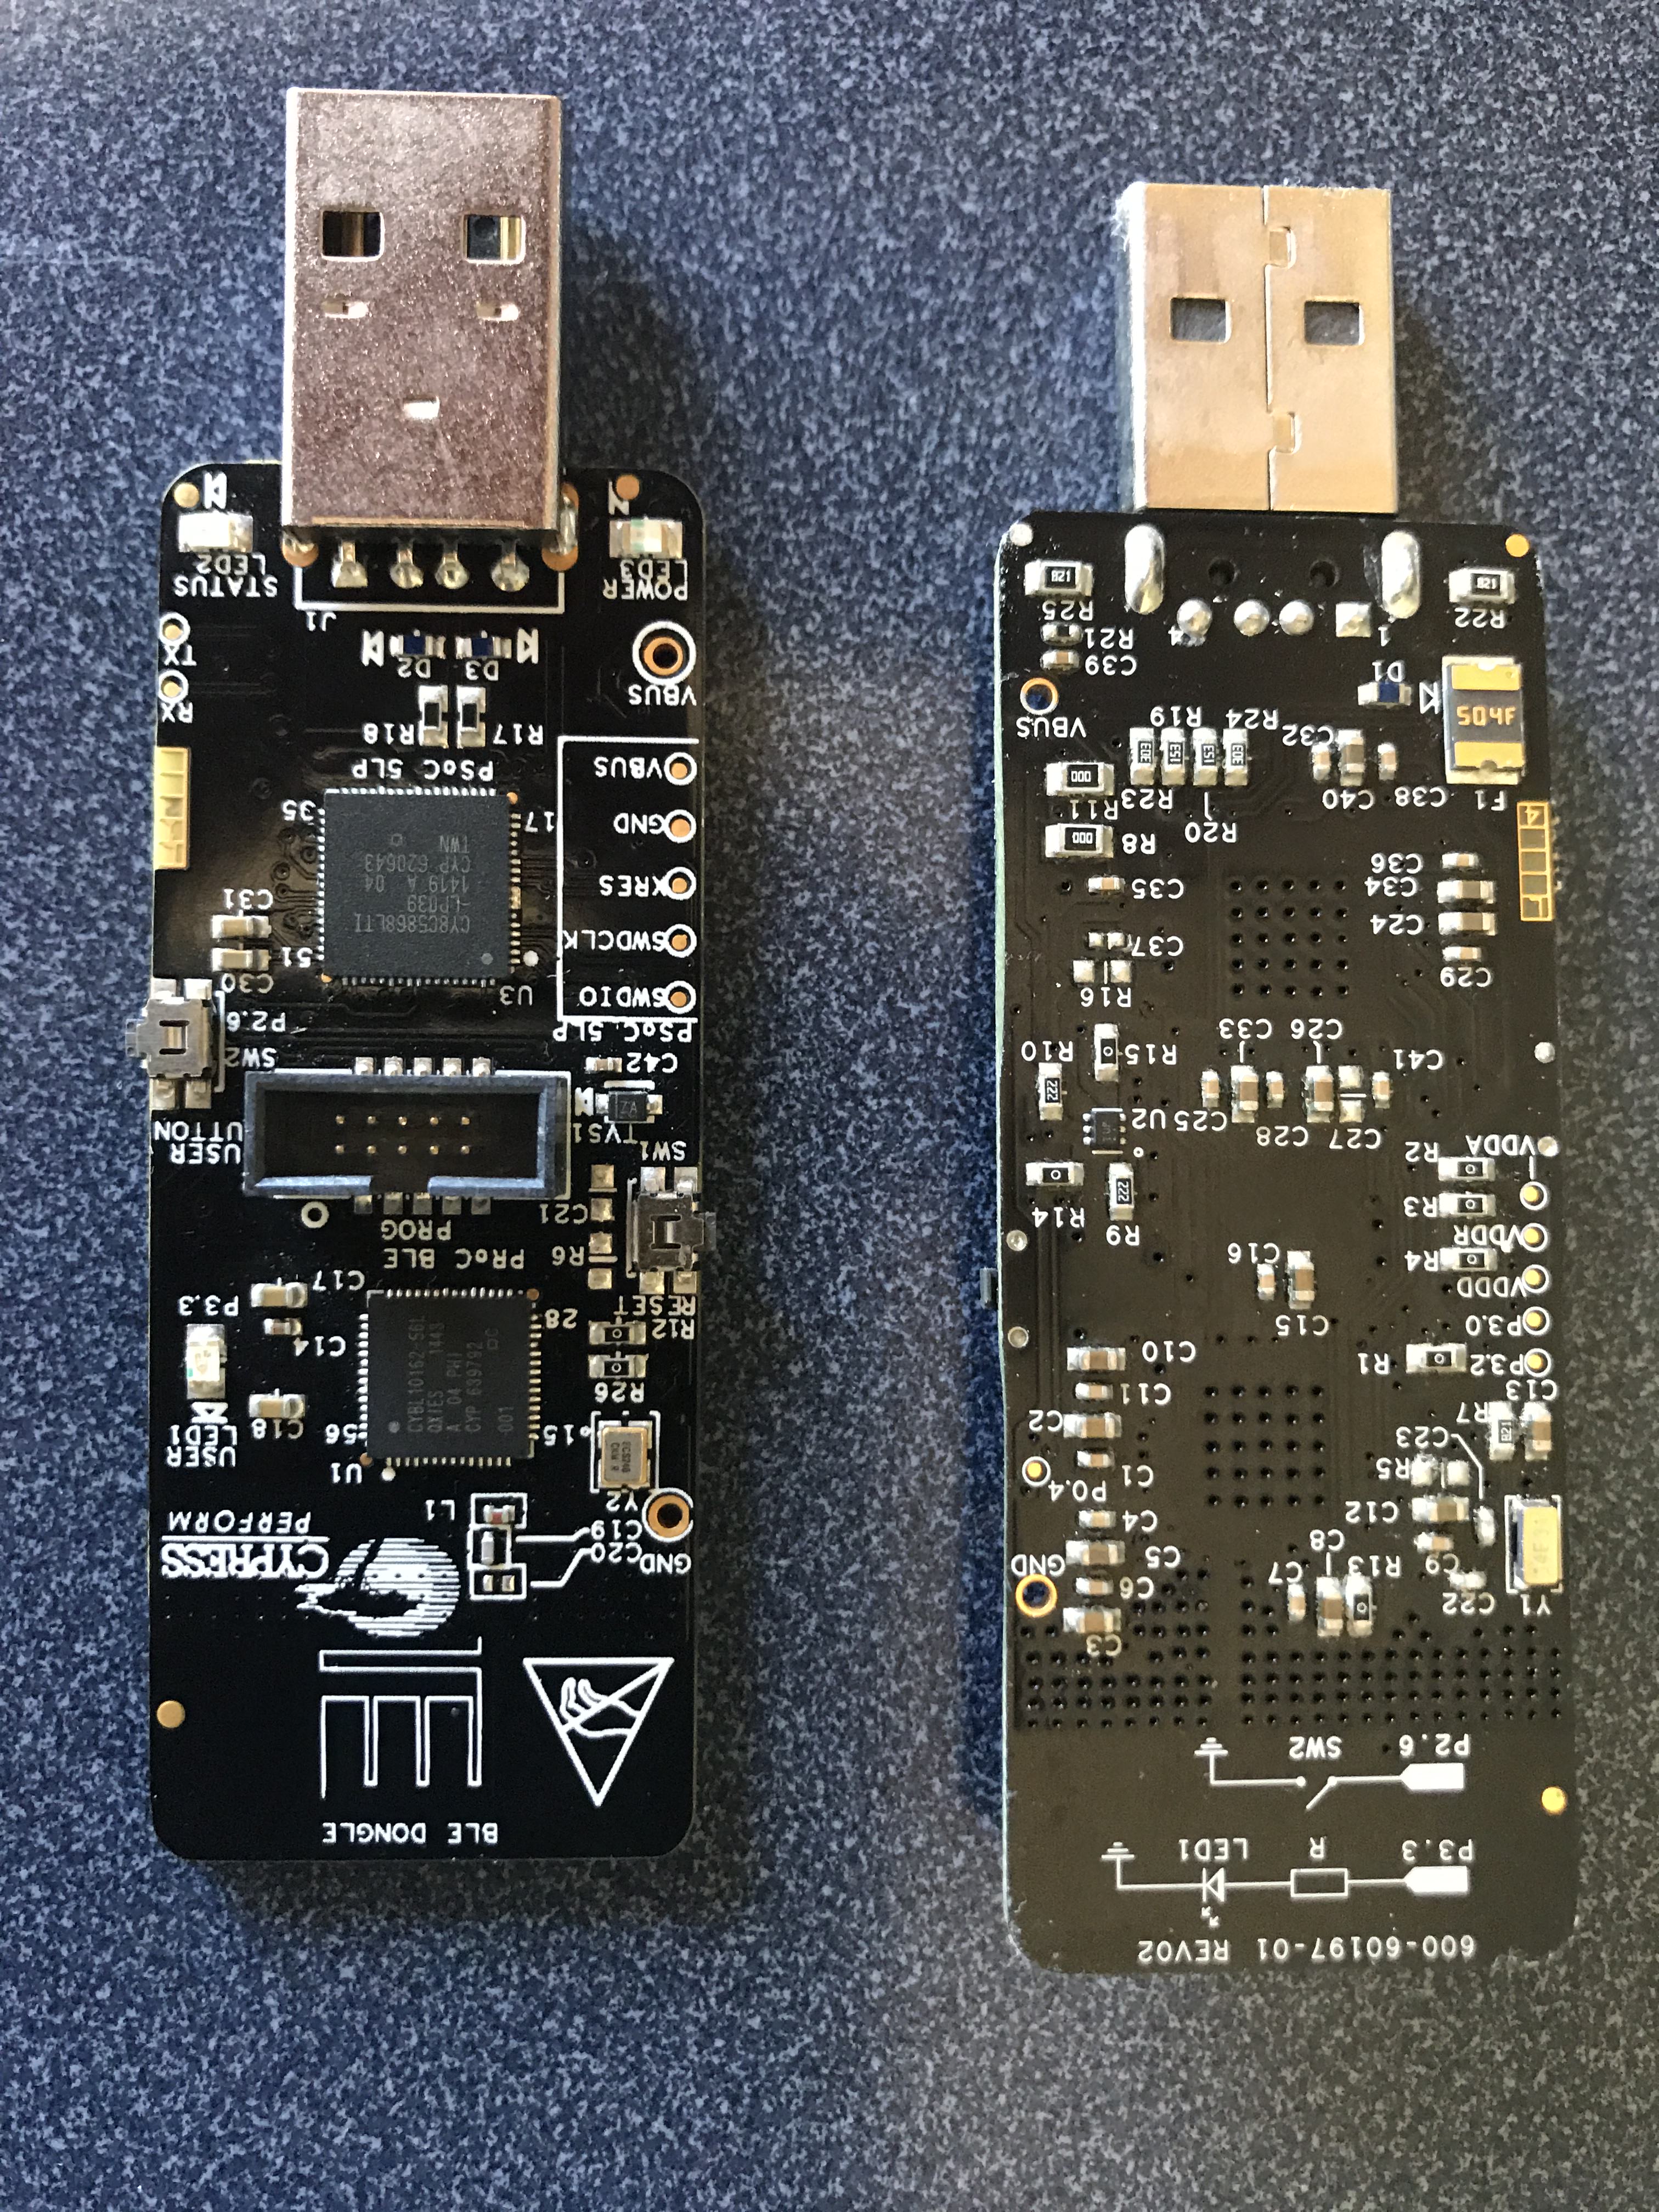
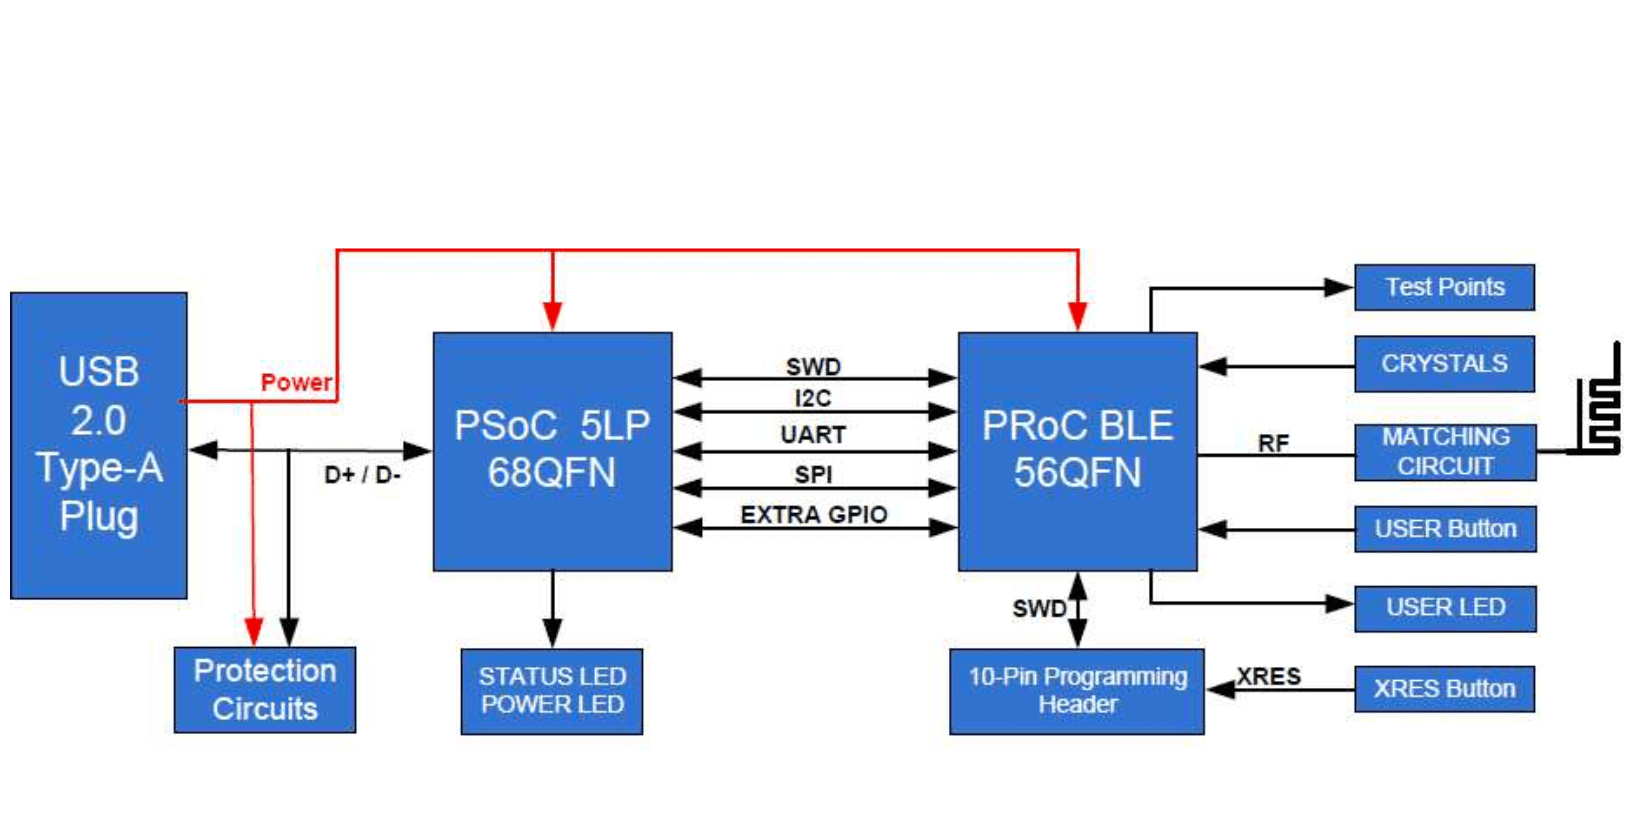
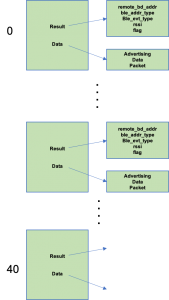
As you can see in the picture above, the CySmart dongle is a USB dongle with a PRoC BLE Radio on it. It uses a PSoC5 programmed with the KitProg firmware to bridge from the PRoC to the PC. In the diagram below you can see that it can bridge SWD, I2C, UART and SPI. In addition the dongle has 1 user button and 1 user LED. This is perfect for the PSoC4 BLE CapSense LED GAP Central Project that I built in the previous article.
You get the CySmart dongle as part of the CY8CKIT-042-BLE Kit. The dongle comes programmed with the CySmart Firmware which enables you to connect to the CySmart PC Program (more later in this article).
There are two version of the dongle
- CY5670 with PRoC & 128K of Flash
- CY5671 with PRoC & 256K of Flash
Update the CySmart Dongle
Literally (well almost) every time I plug in a CySmart dongle, I get this message telling me that it is an “Unsupported Target”. This means that the firmware is out of date and needs to be updated.
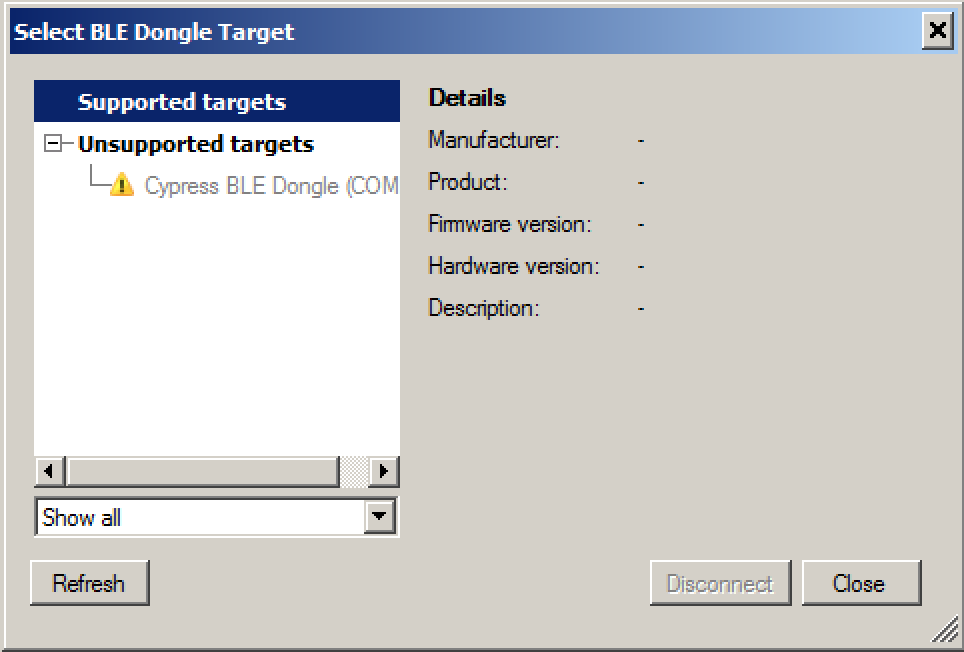
In order to fix the firmware, you need to quit the CySmart program, then start the PSoC Programmer software. And, I also find that every time I start PSoC Programmer that the KitProg firmware is out of date. To fix this press OK.
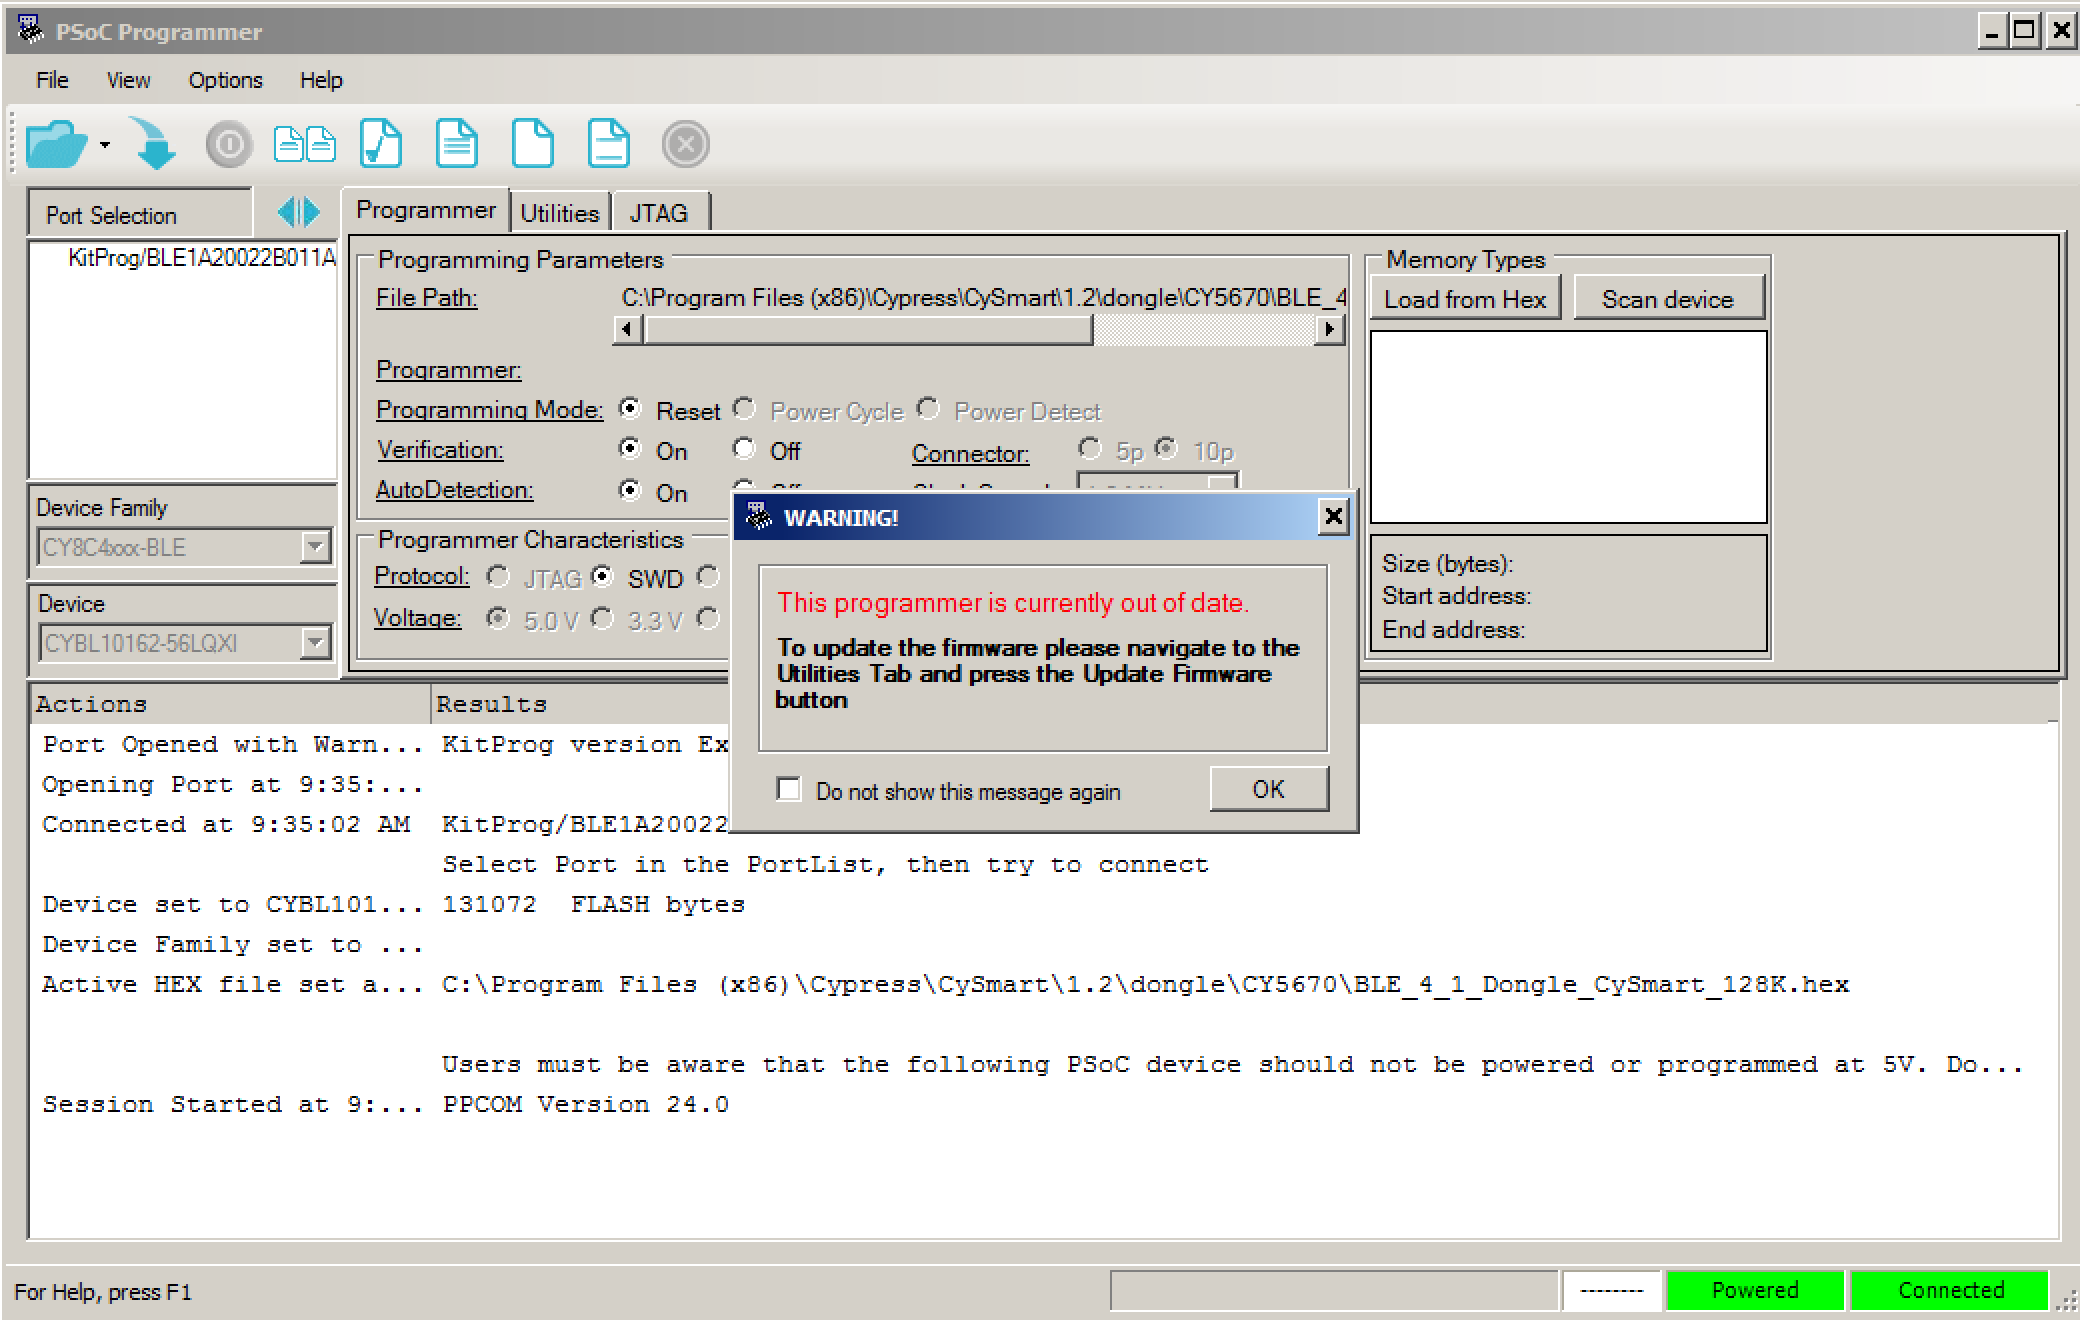
Then click the “Utilities” tab, then “Upgrade Firmware”
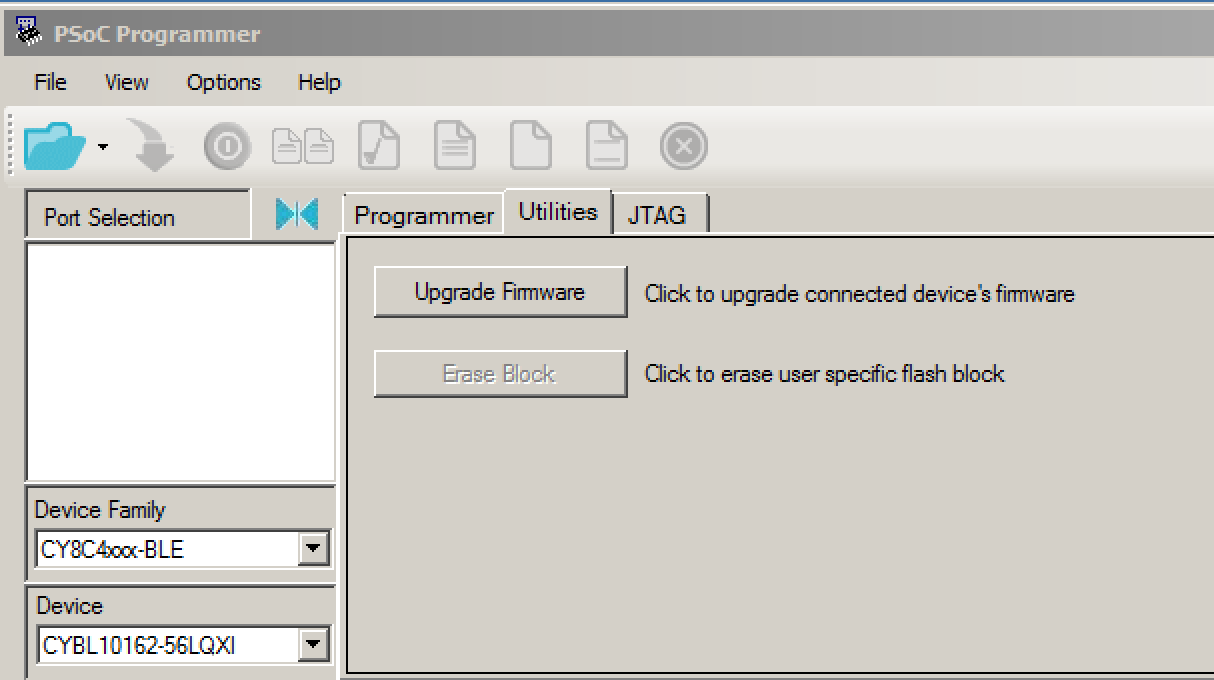
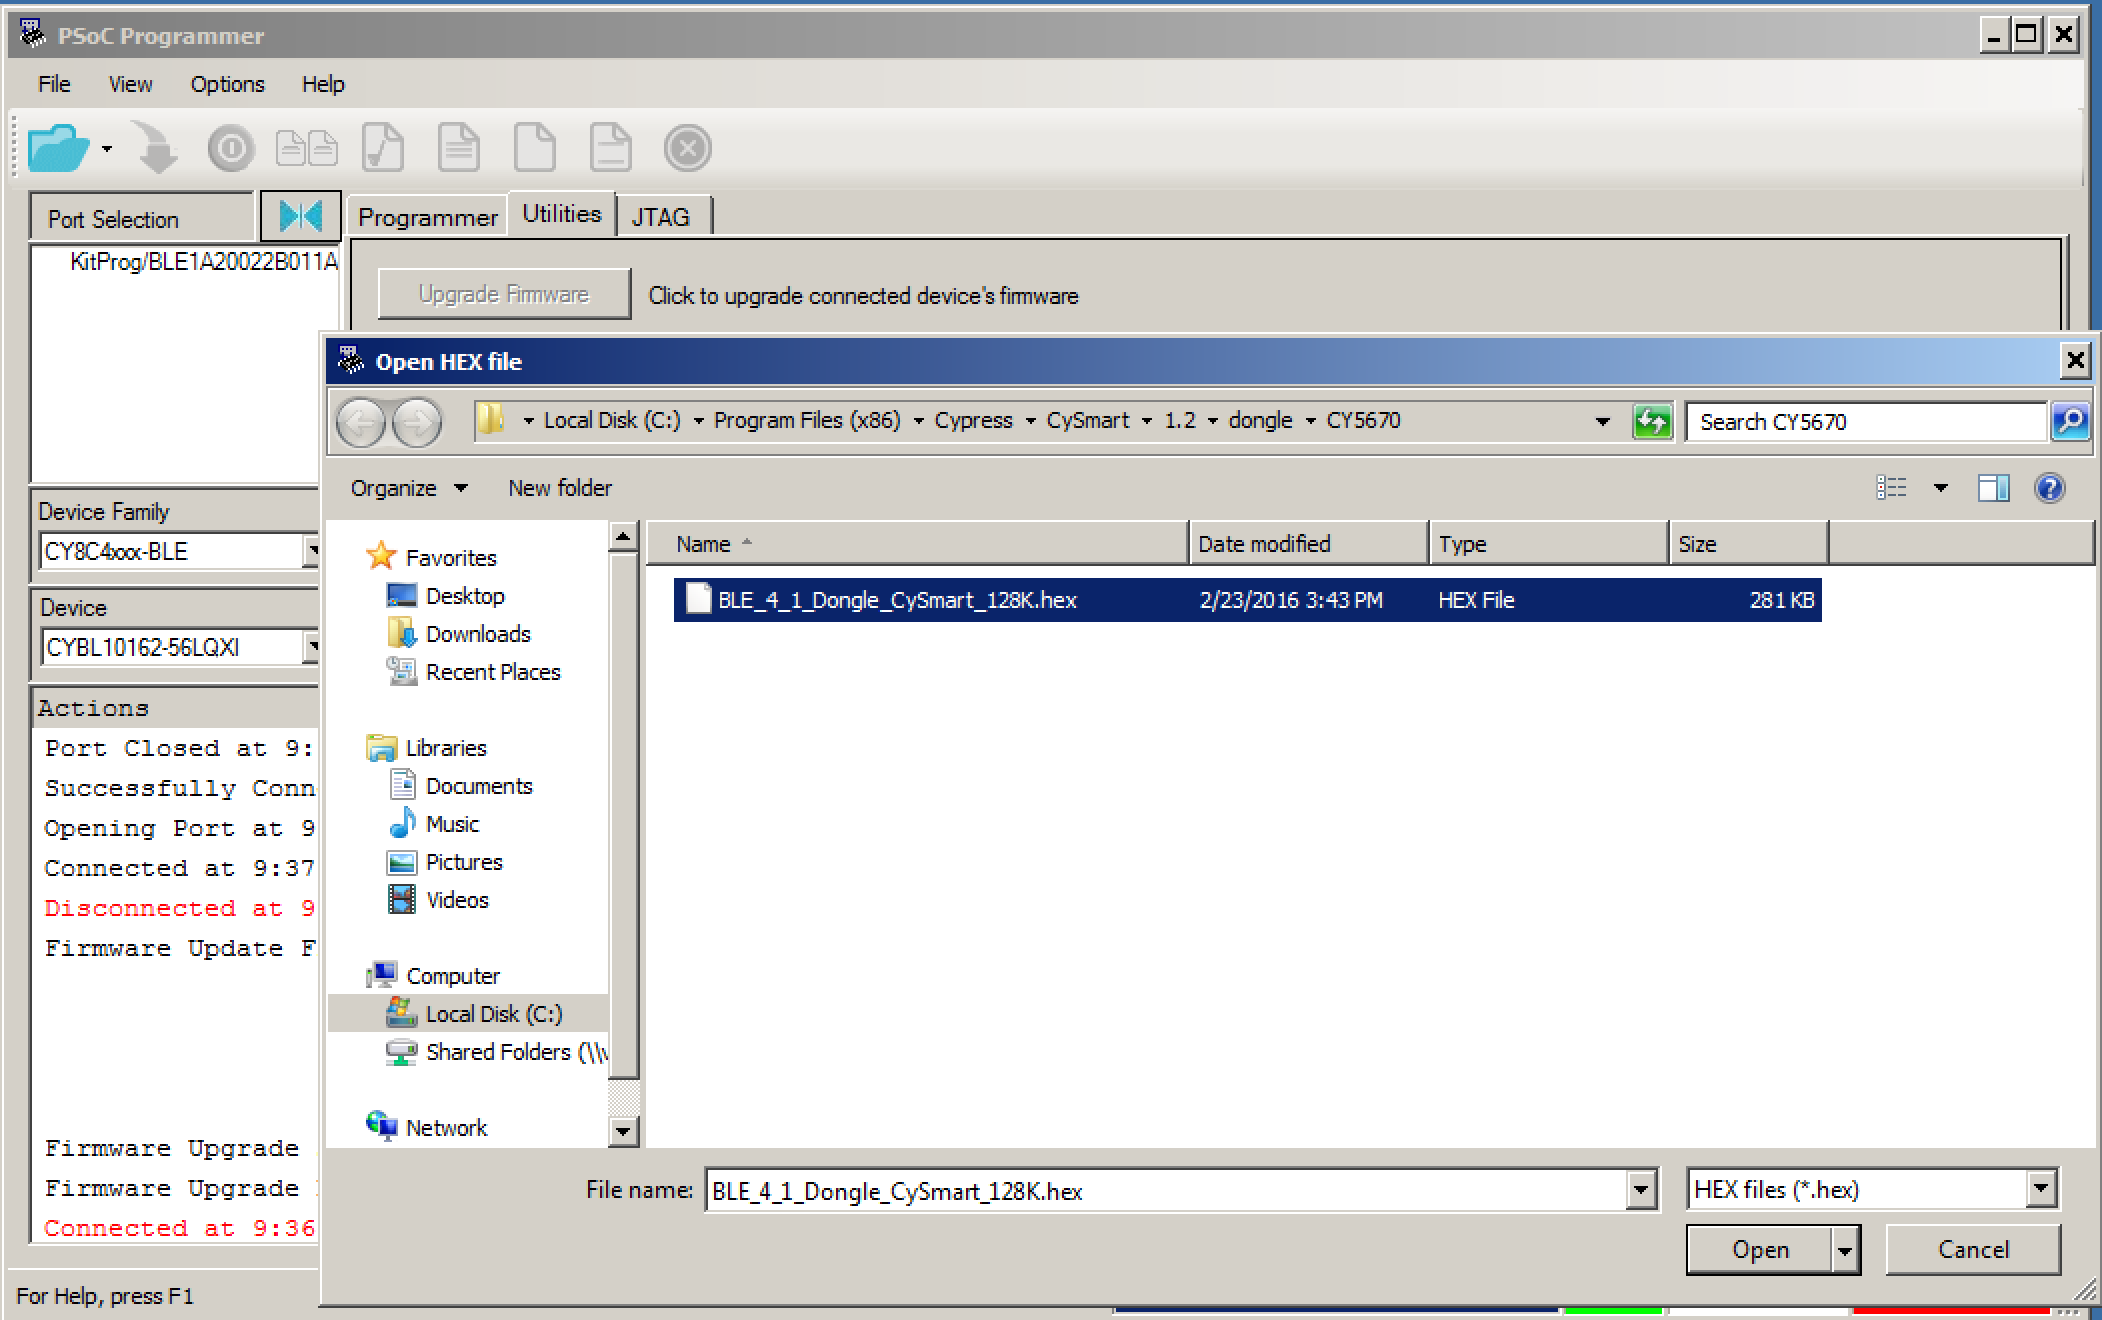
Once the KitProg firmware is up to date, you can then program the CySmart firmware. Press the “folder” button, then navigate to the firmware which lives in Program Files(x86) –> CySmart –> 1.2 –> dongle –> CY5670. Then press the “down arrow” which means “download the firmware”. Once that is done, you are good to go with running CySmart (quit PSoC programmer so that it can talk to the dongle).
Use the PC CySmart to Debug a PSoC4 BLE Peripheral
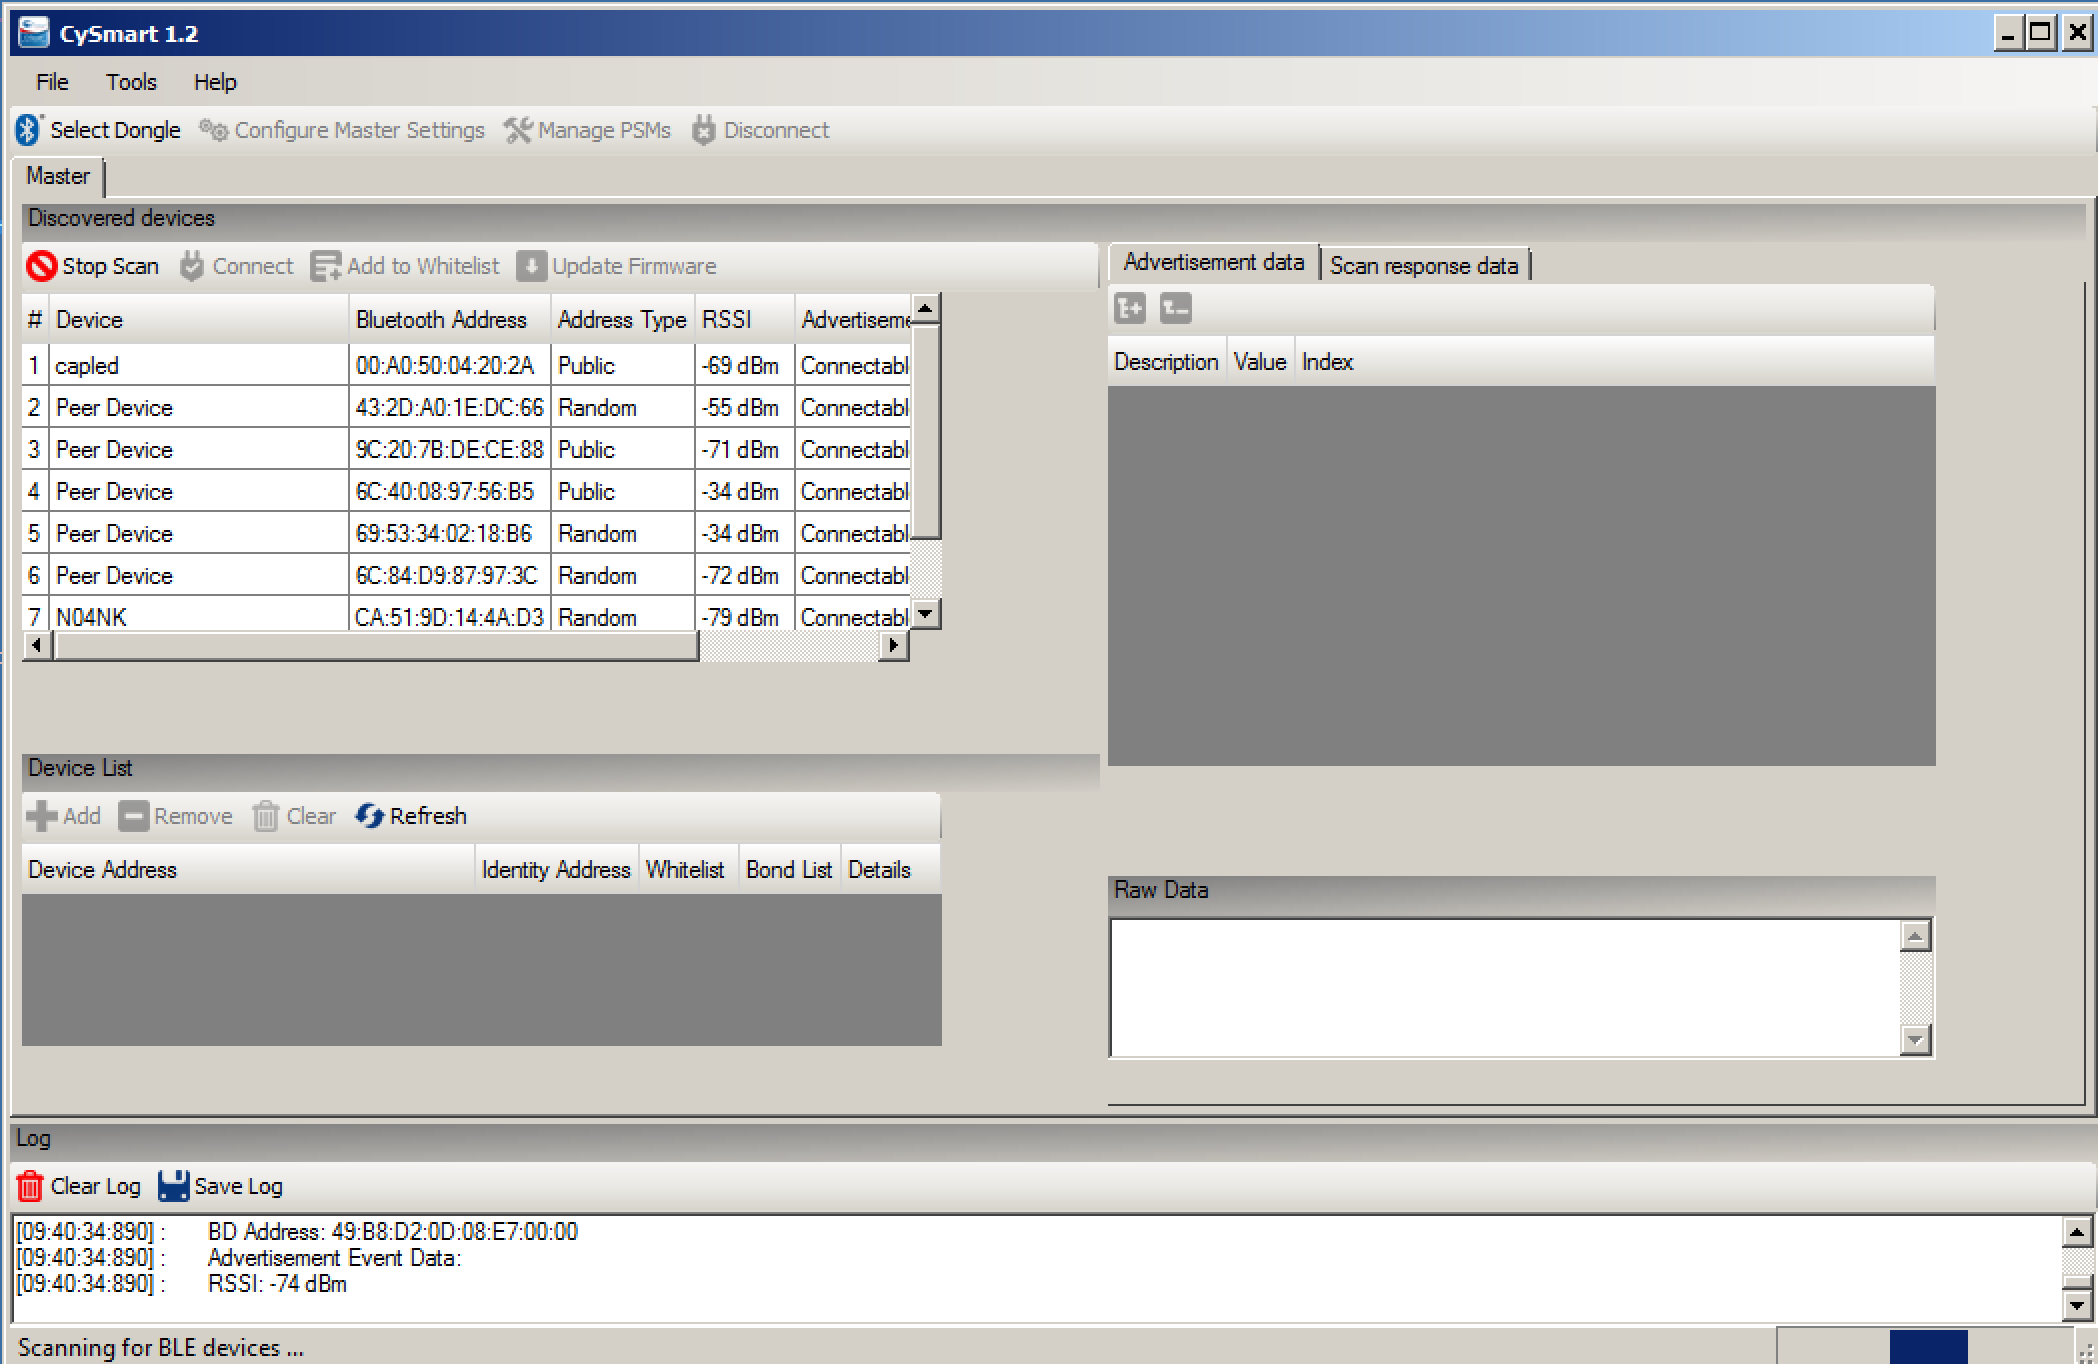
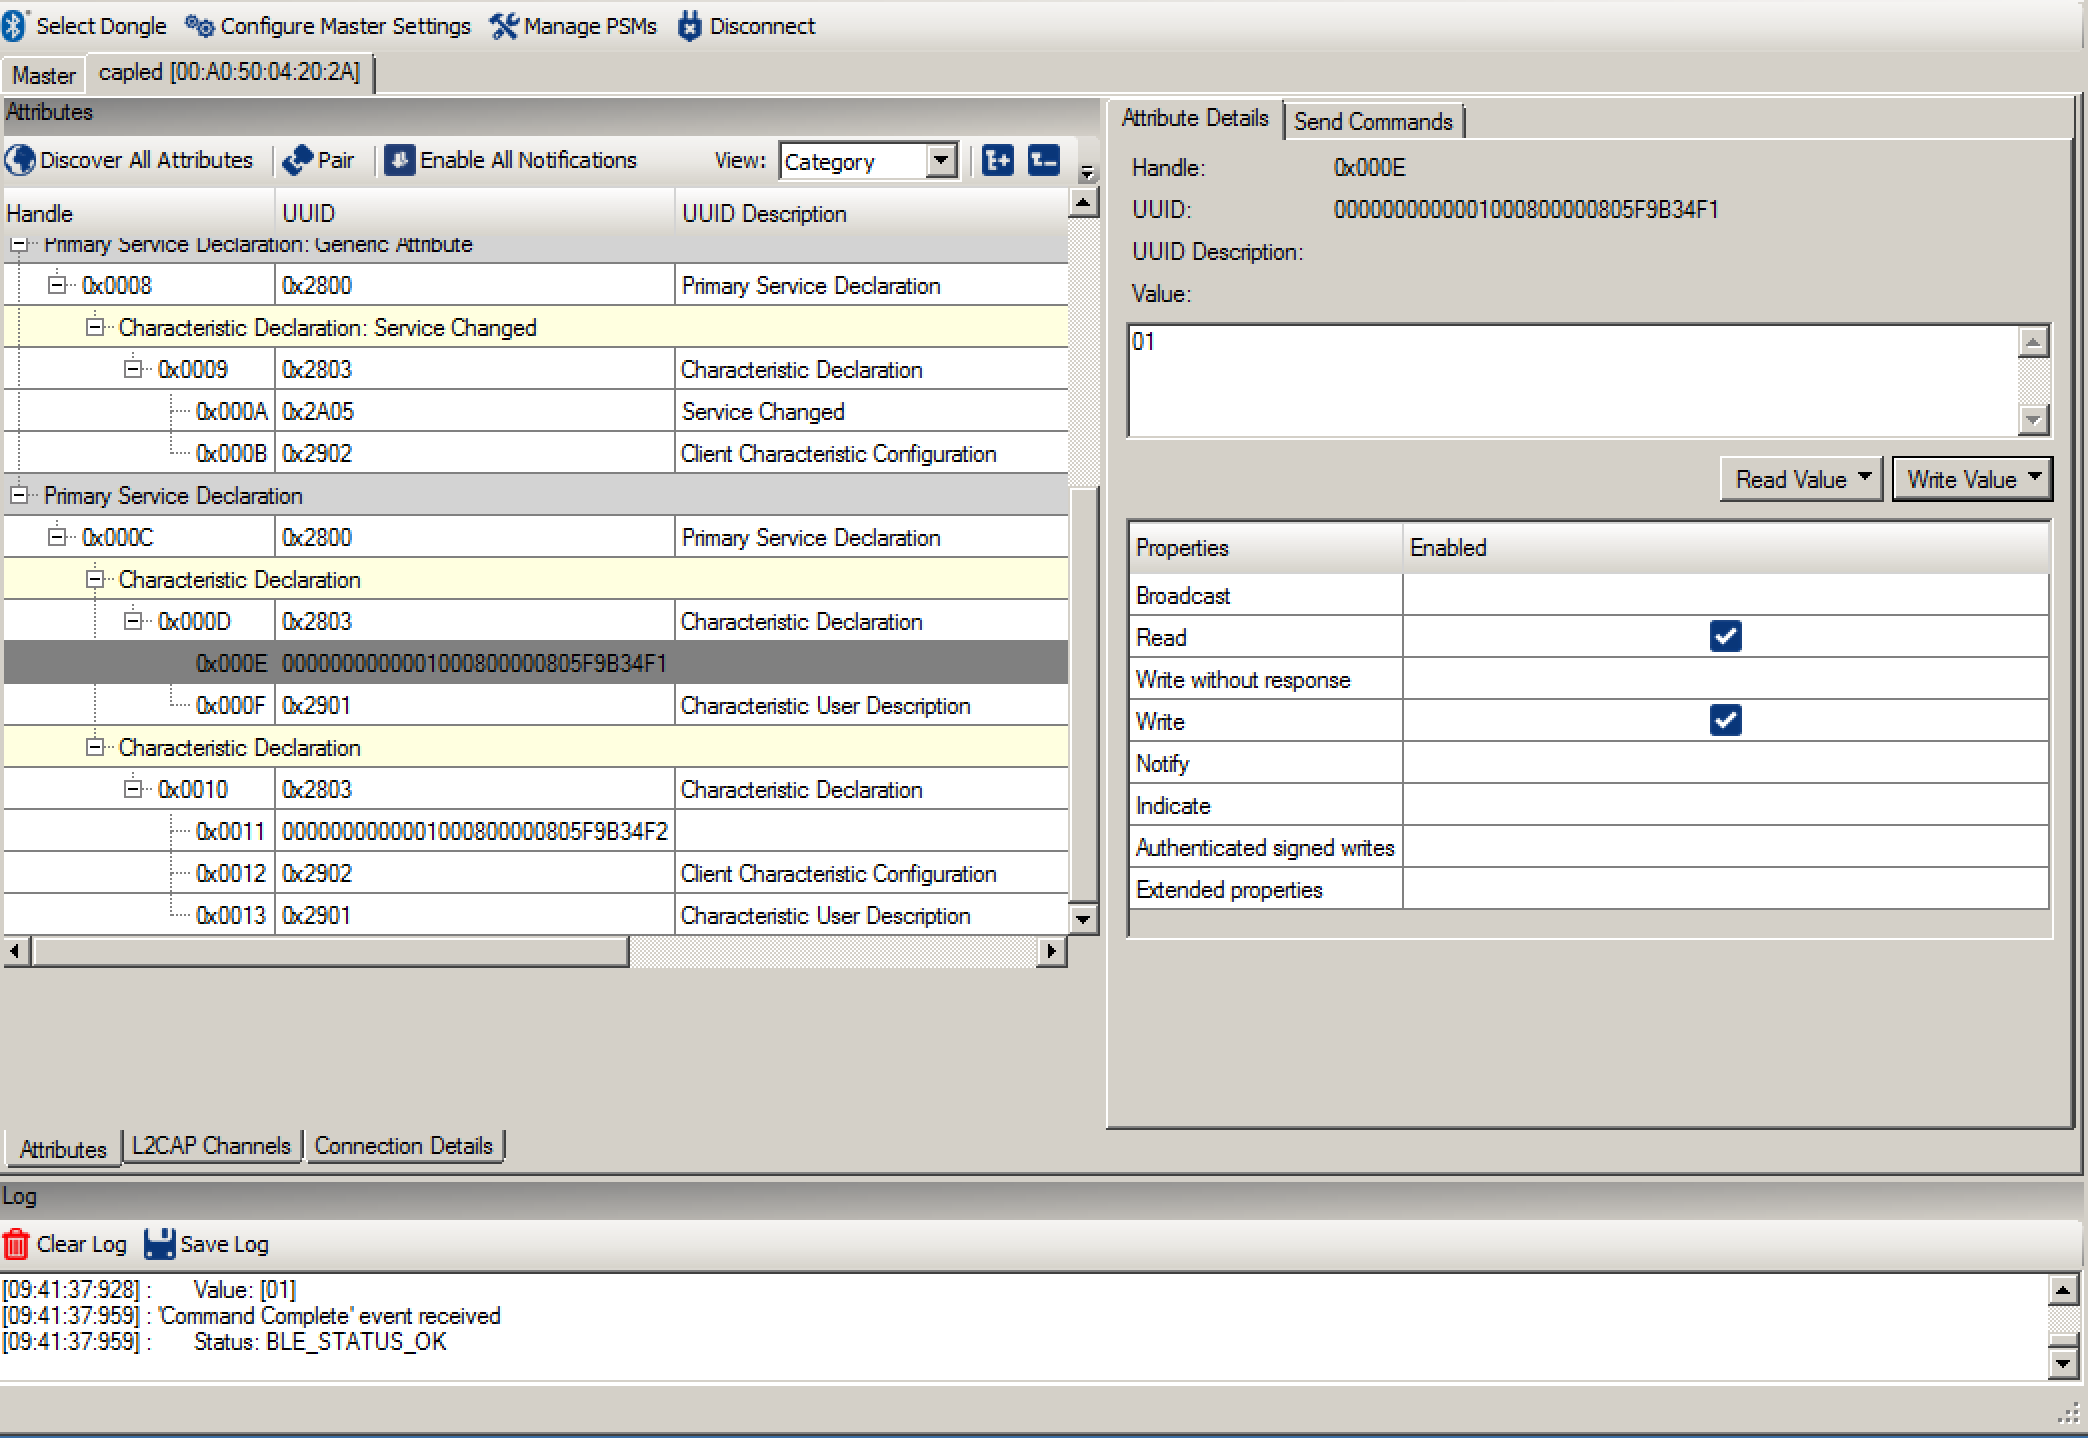
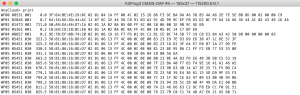
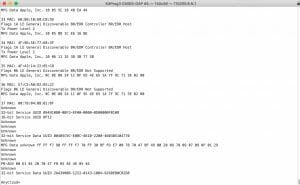
Now that I have a functional CySmart dongle, I can run CySmart. This is a Windows PC Version of a GATT browser (like the CySmart iOS/Android App or the LightBlue app that I used in the previous article). In CySmart press “Start Scan”. In the picture below you can see all of the BLE peripherals that CySmart can see, including the “capled” project.
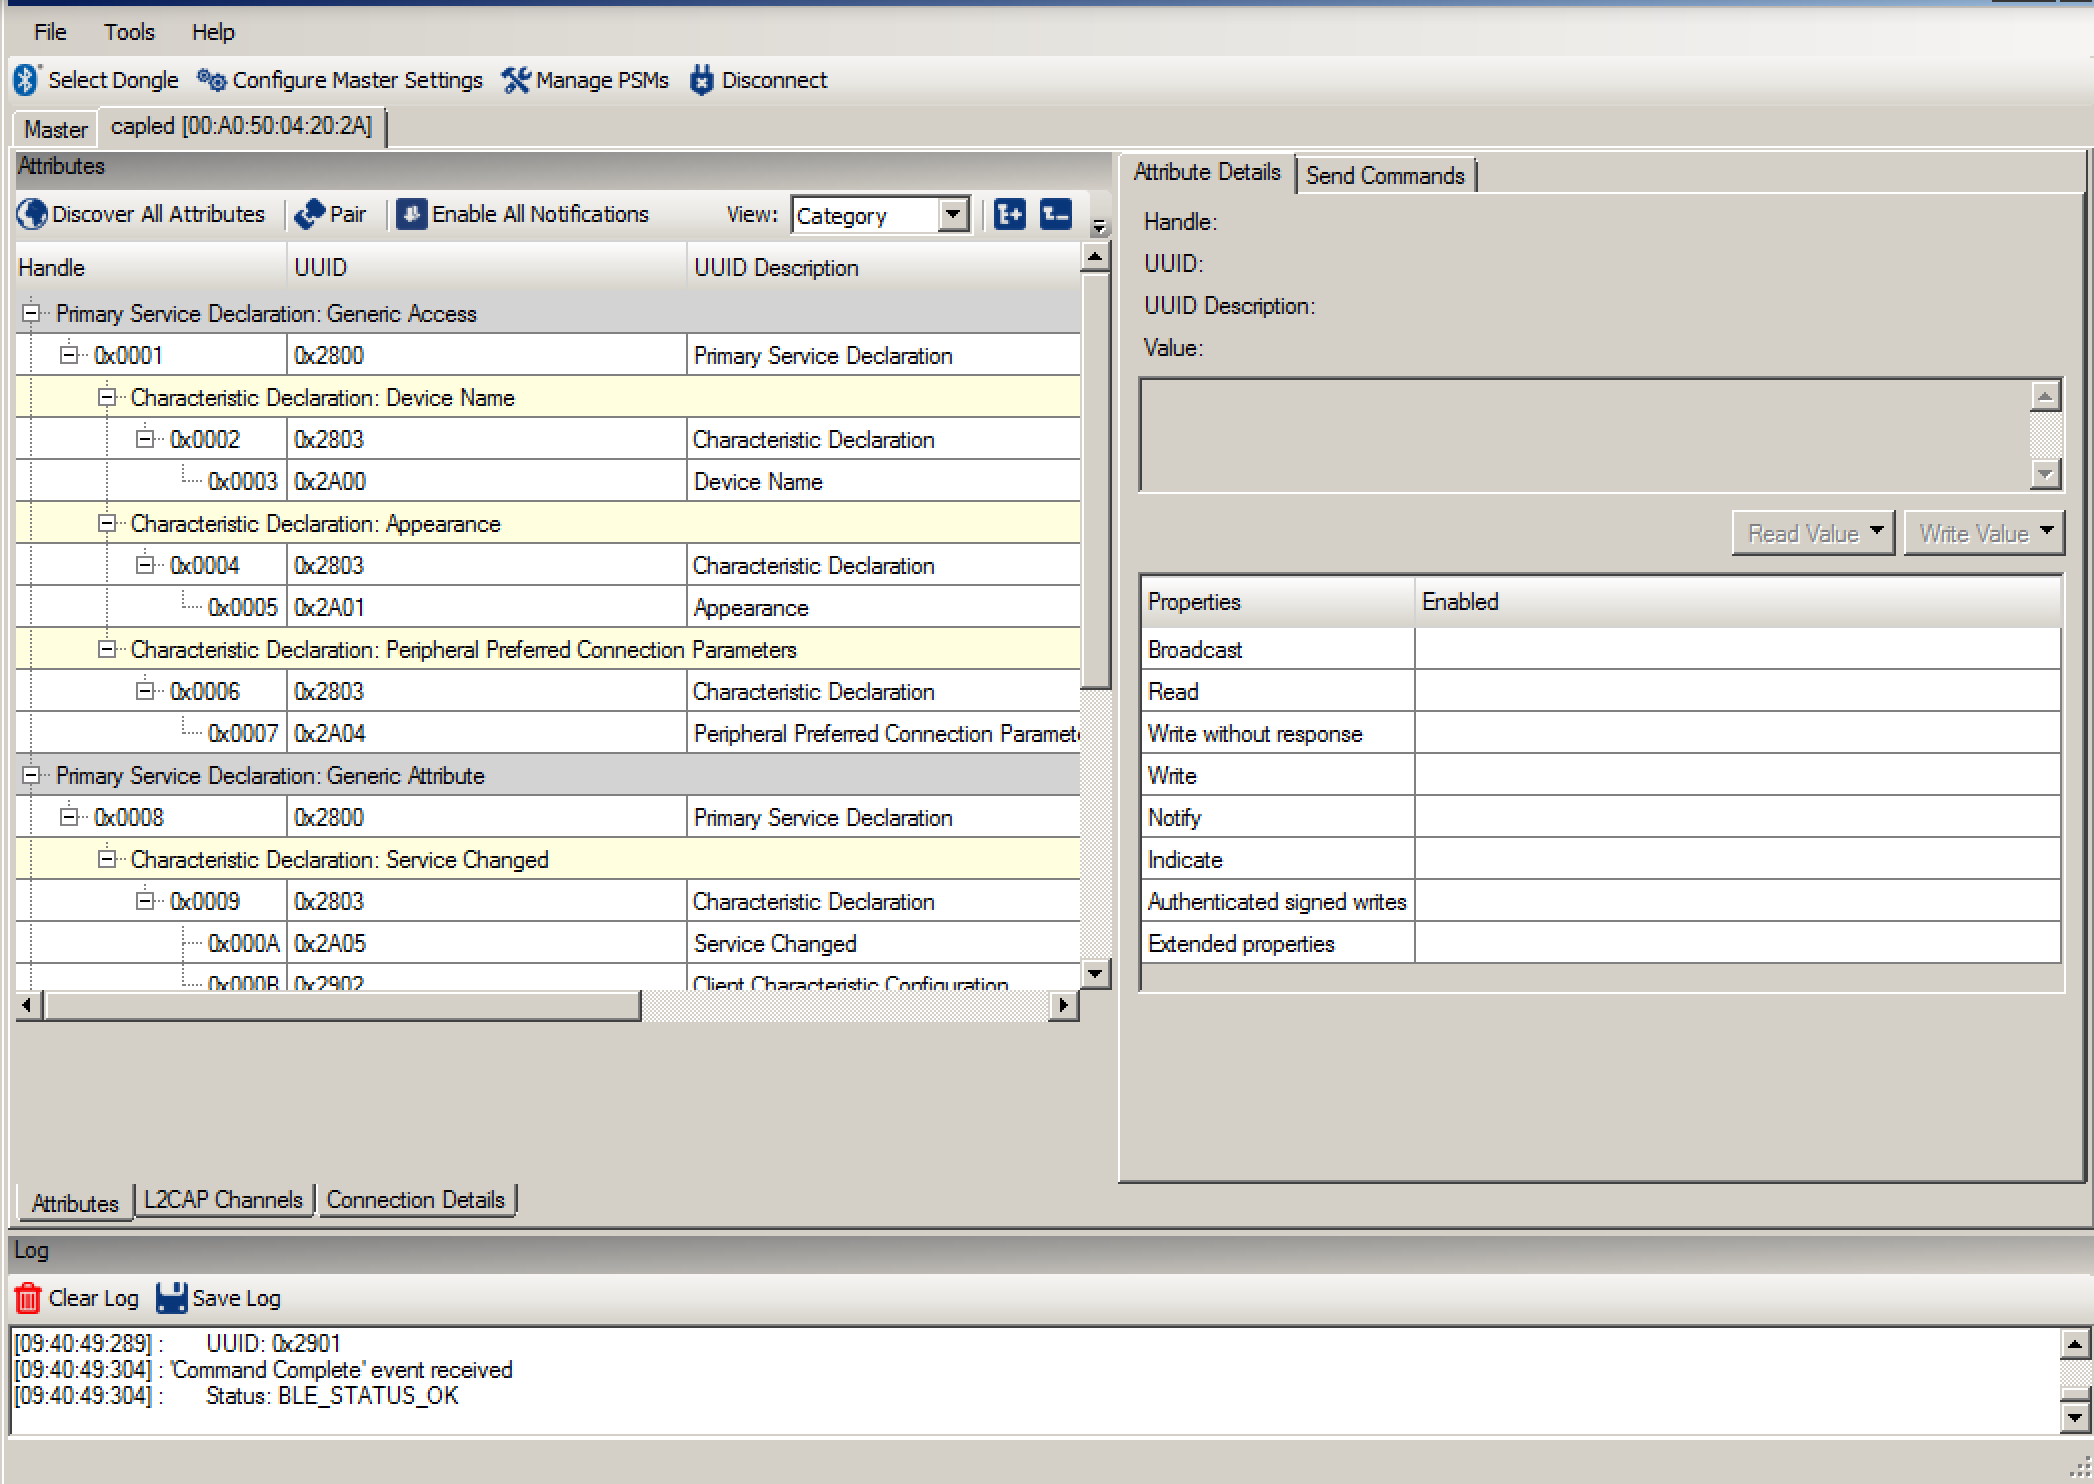
Once I click on “capled” and then “connect” and finally “discover all attributes” I will get a window that looks like this. You can see all of the GATT Database.
 After that I can Read and Write attributes (like the LED Attribute) by typing the value I want to write into the box on the upper right, and pressing “Write Value”. For example you can turn on the LED by writing a “1” into the LED characteristic.
Modify the PSoC4 BLE Central Project to work on the CySmart Dongle
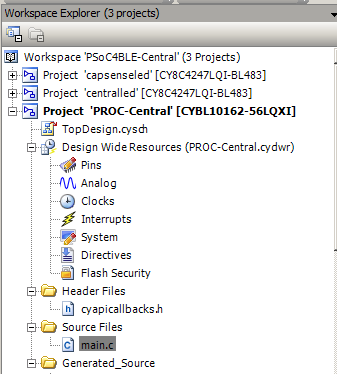
Next, lets modify the original project so that it can work on the dongle. I will start this whole process by doing a copy/paste of the “centralled” project. Then renaming it to “PROC-Central”
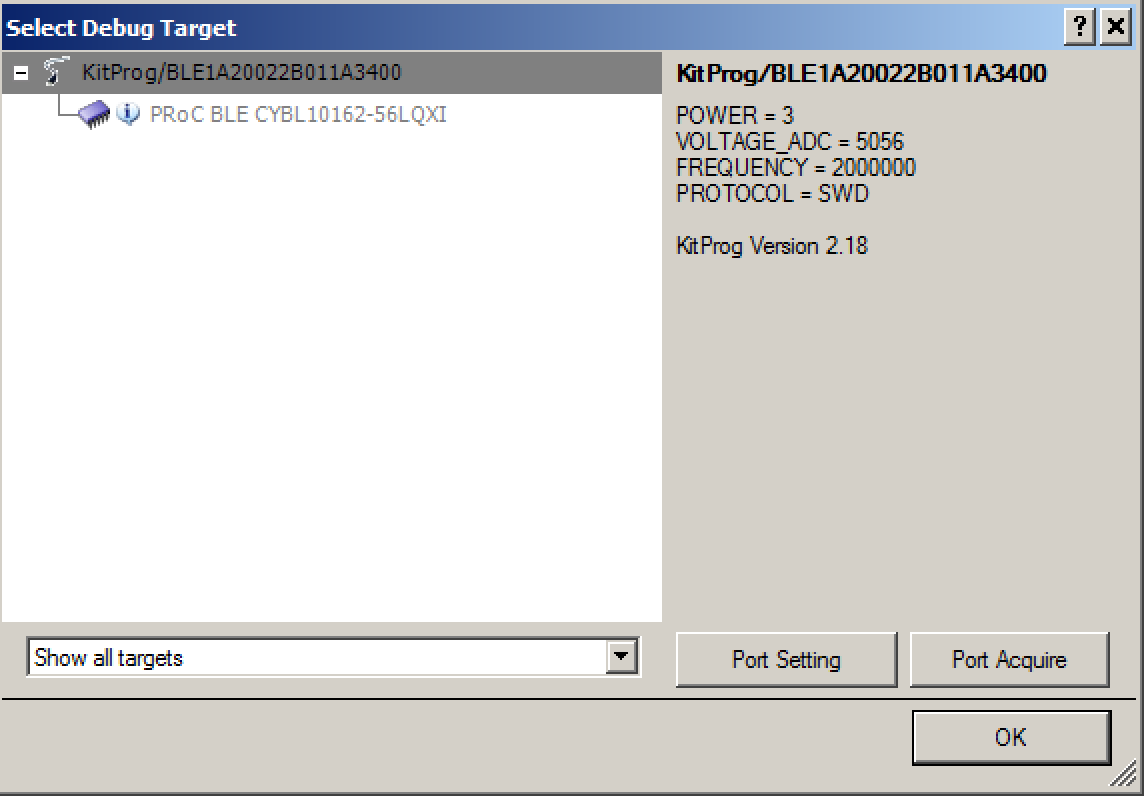
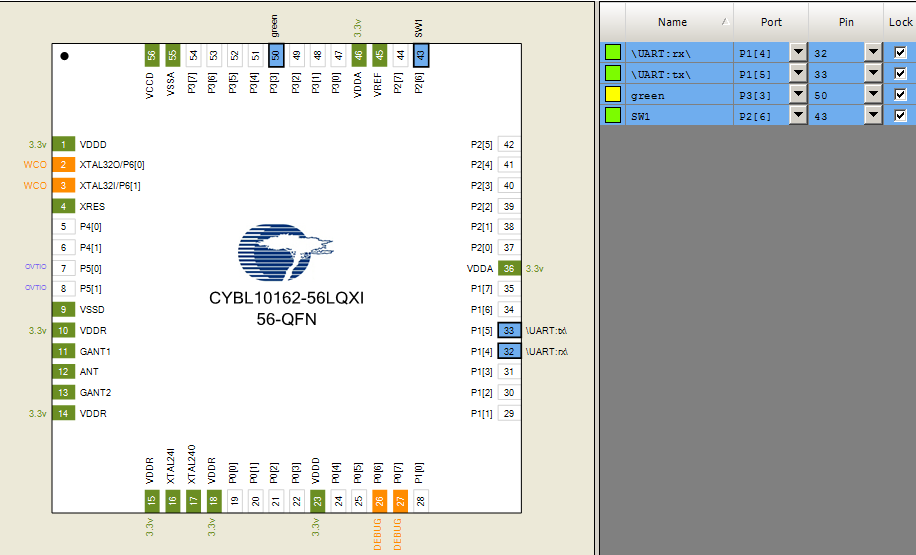
The dongle has a PRoC instead of a PSoC4 BLE. This means you need to run the device selector and change the target device. I can never remember which version of PROC is on the dongle. So, to figure it out I click the program button, which brings up this screen that says my project isn’t compatible with the target. It also tells me that this dongle has “CYBL10162-56LQXI”
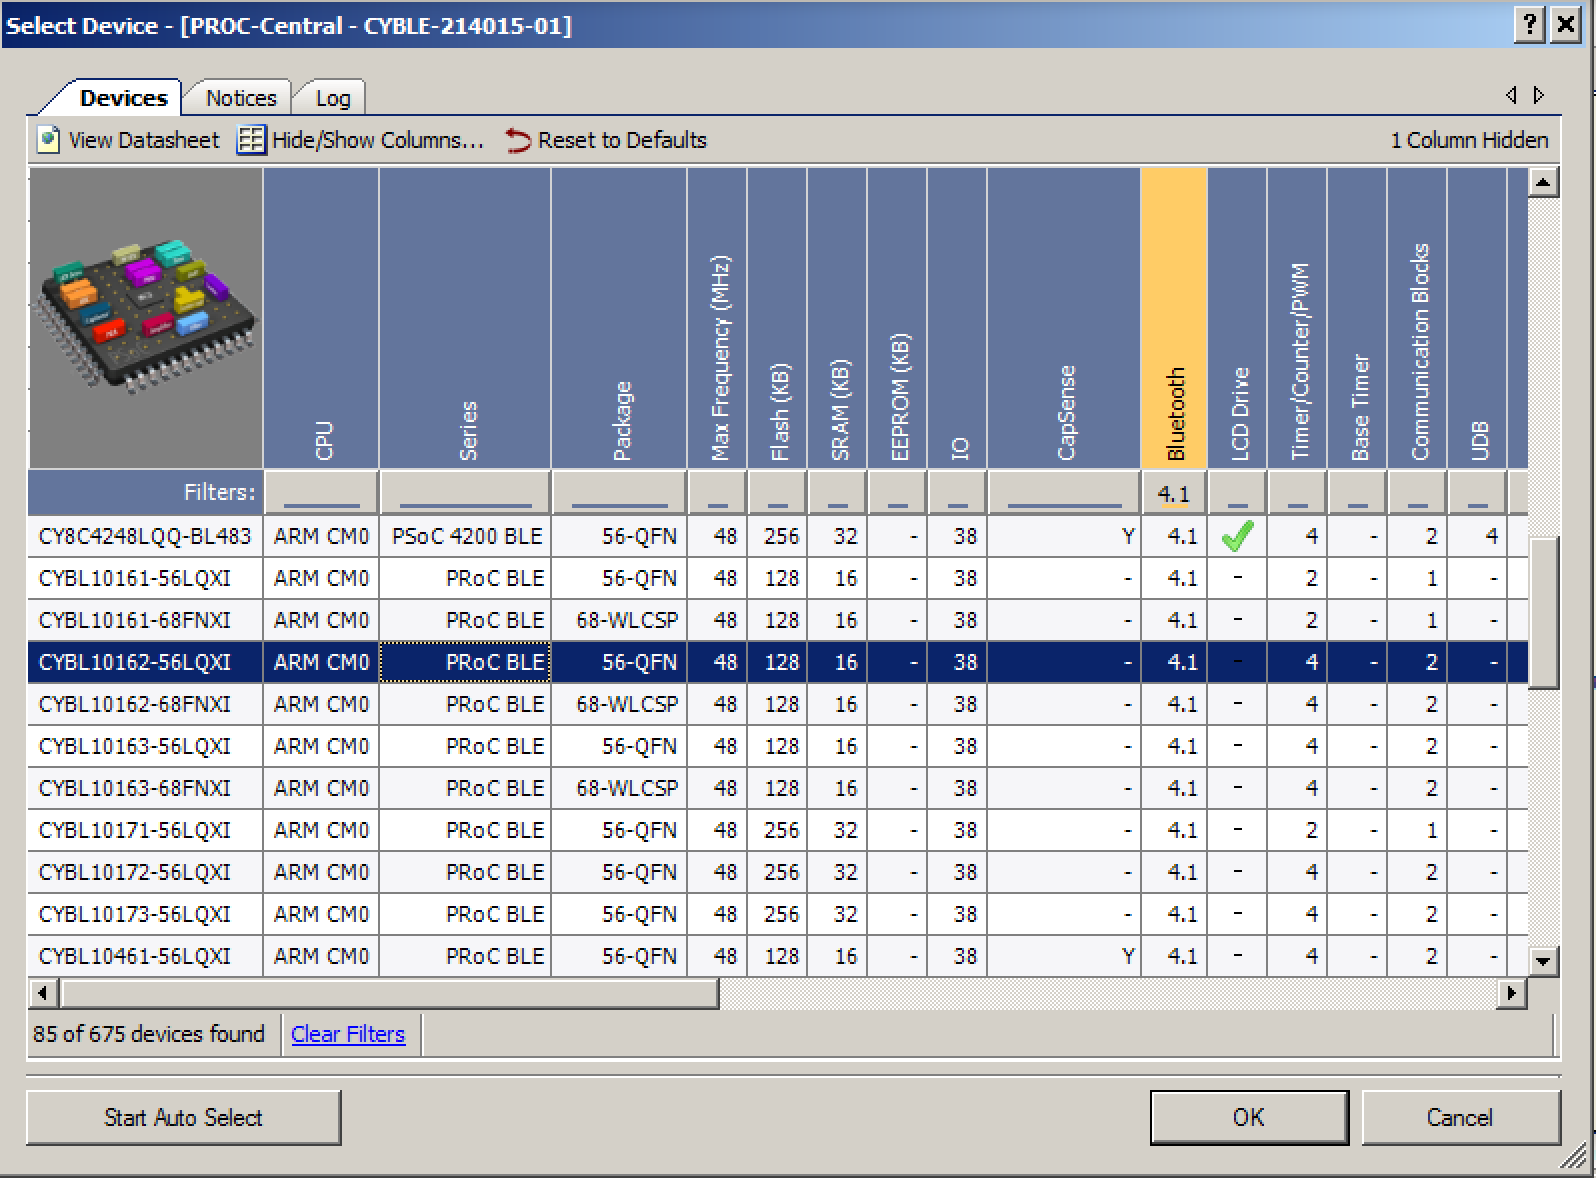
Now go to “Project –> Device Selector” and change to the “CYBLE10162-56LQXI”
The pin assignments are a little bit different. On the back of the board you can see that we put a handy-dandy picture showing the arrangement for the LED and the button.
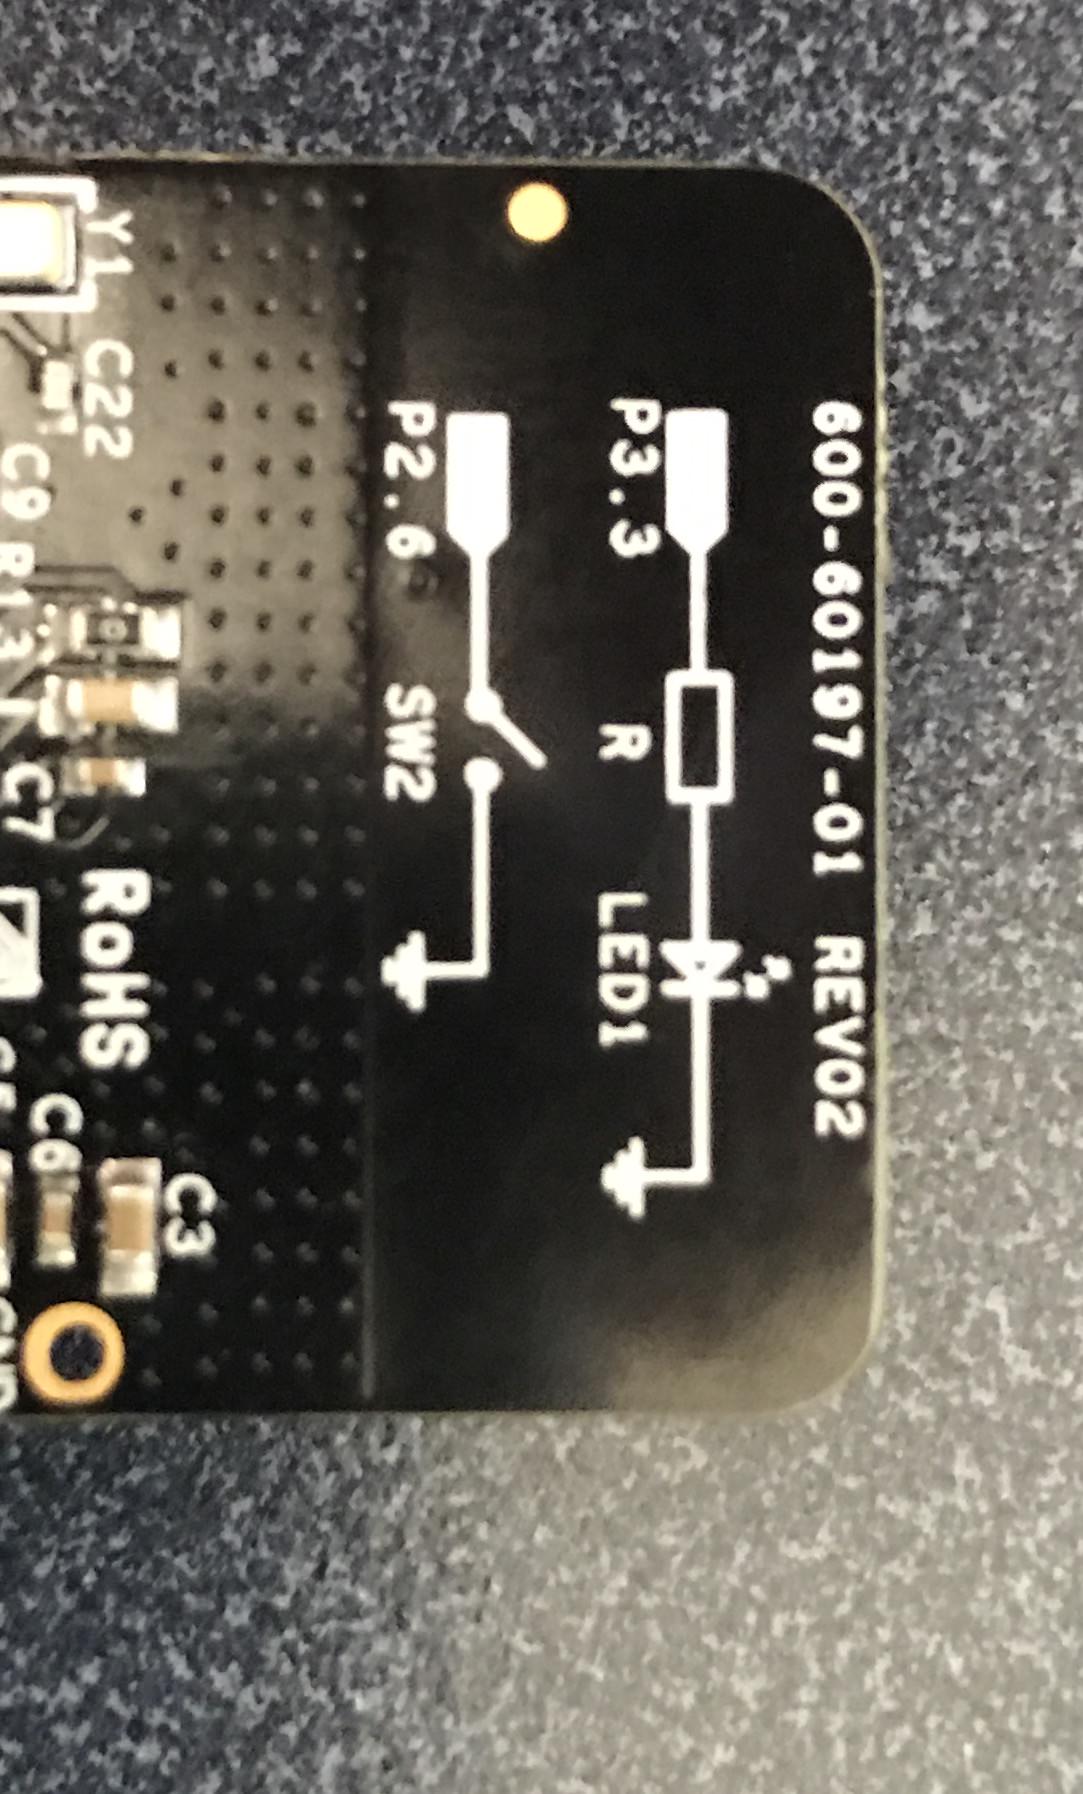
But unfortunately we didn’t show you the pins for the UART on the silkscreen. But you can find those in the schematic (which can be downloaded from the website)

Now you can assign the correct pins (noticed that I deleted the red/blue LED pins because they don’t exist on the dongle)
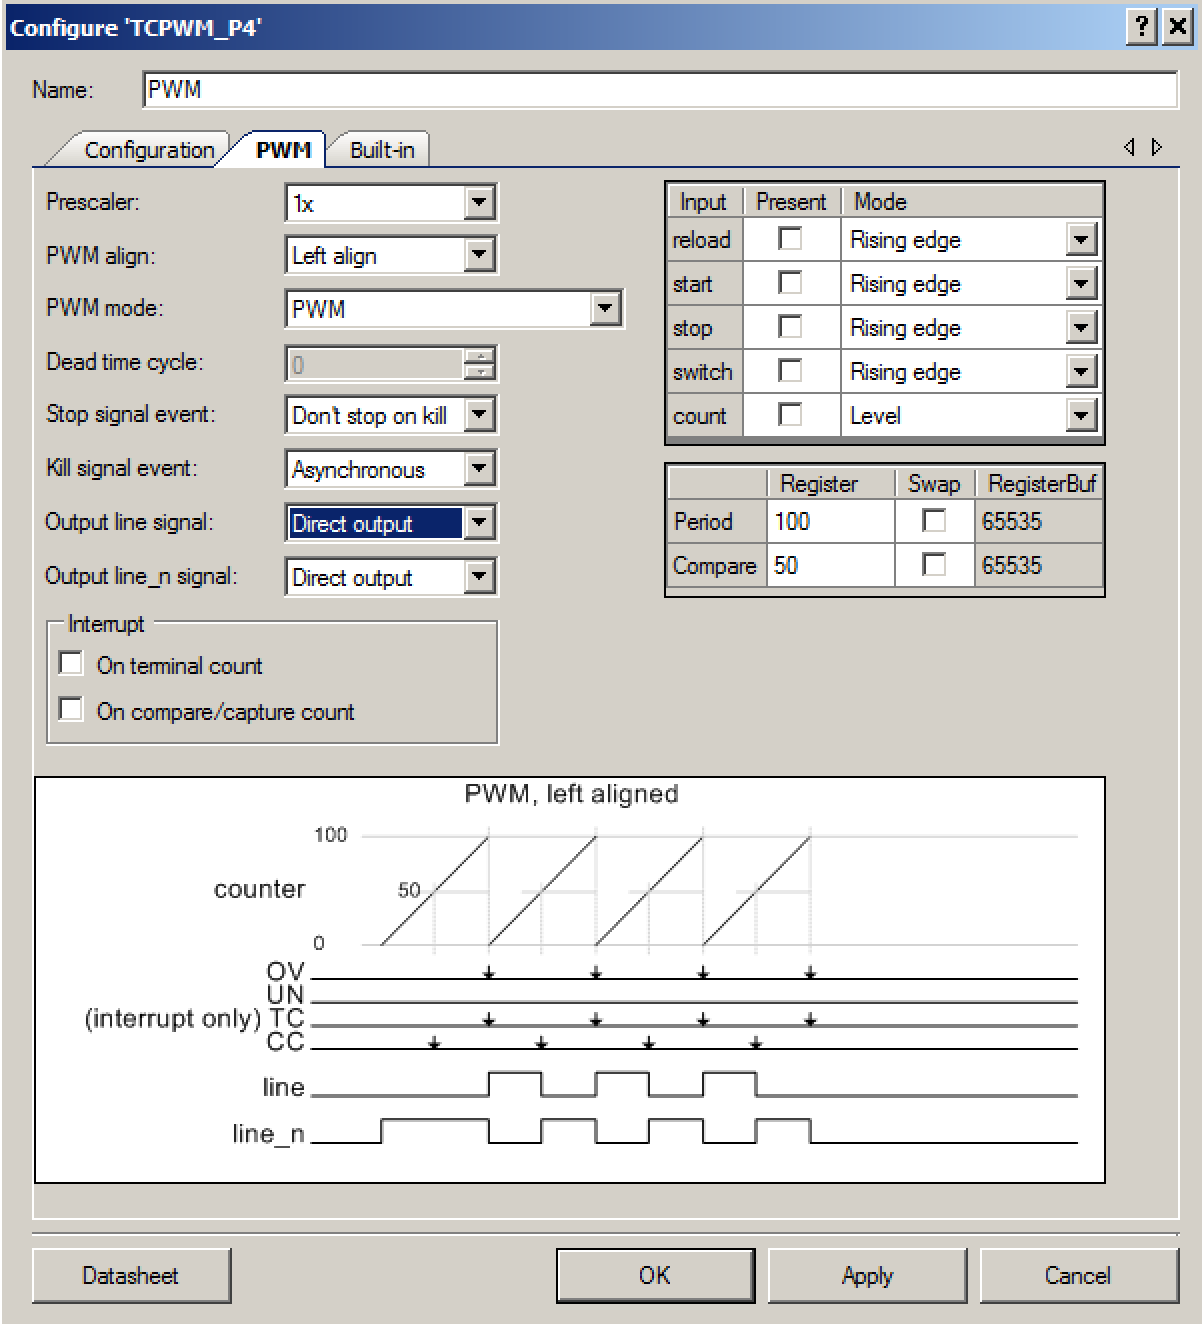
Finally you need to change the PWM to be active high instead of active low.
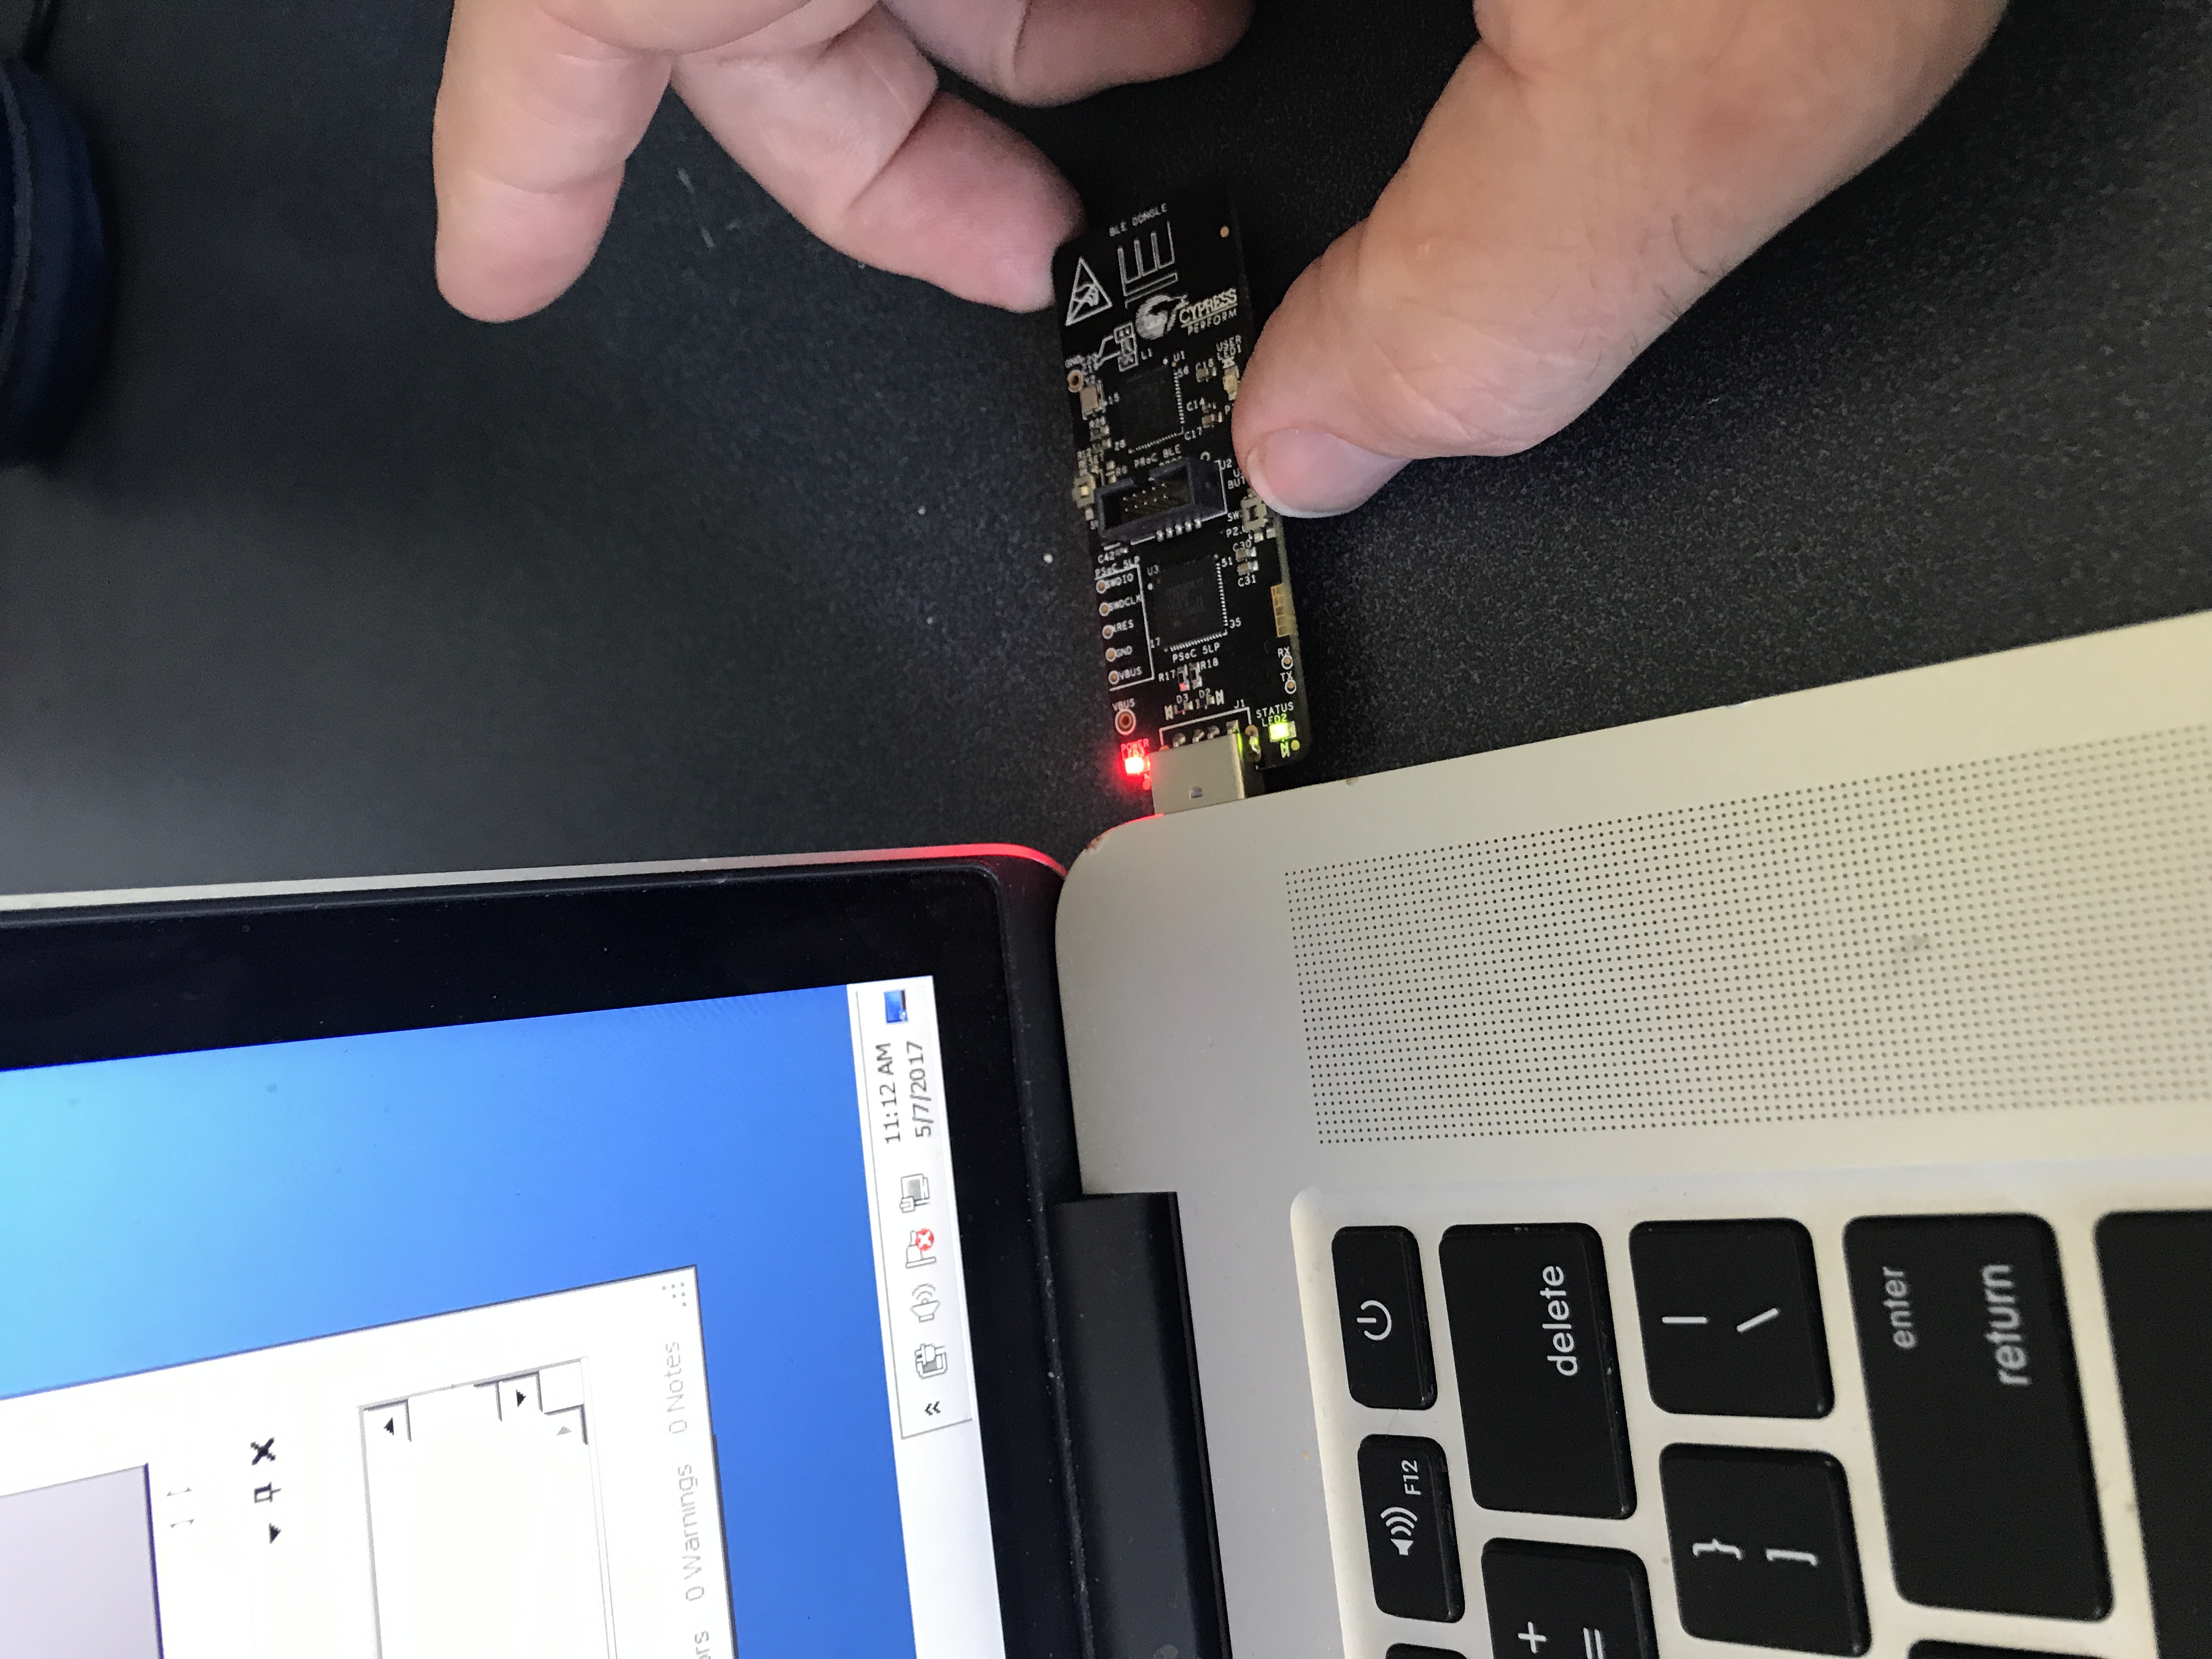
Now program and test it. The user switch is the tiny little button under my thumb.
As with the previous article you can find all of this source code on the IoT Expert Github site or git@github.com:iotexpert/PSoC4BLE-Central.git. In the next article I will start the process of building a GATT Browser inside of a PSoC4 BLE.


2 Comments
I have the CY8CKIT-042-BLE-A. In the quick start guide that was shipped with the kit it says that the chip installed on the supplied dongle is CYBL11573-56LQXI. This matches the silkscreen chip ID on the dongle itself. I cannot find a device with this ID in the “Device Selector” window even with search filters cleared. Is there a way to update the device list in the device selector?
The “Select Debug Target” window shows “KitProg/BLE0D170FB3031D6400” and under this “Cortex-M0”. When I select “Cortex-M0” the side note says “This device was recognized, but PSoC Creator does not support using it at this time.”
Yes that chip is called PROC and I believe that we have stopped shipping it. We only use it for that application because it was already designed in. You can do all of the same functionality with the PSoC4 BLE Chips.
Alan