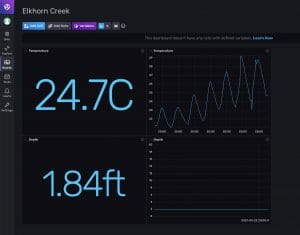
Apache Tomcat is a web server that allows you to create dynamic web pages using “Java Server Pages” (JSP). Basically, you can embed Java into your HTML to create dynamic web pages. Instead of writing Java that spits out HTML (CGI style) you write HTML with the Java embedded into it to create the dynamic part of your web page. I use this to read the creek depth and temperature and put it into an HTML table, this will be the subject of a future post.
It is straight forward to install Tomcat onto your Raspberry Pi. You use your old friend “apt-get install” to load Tomcat from somewhere out in the cloud.
- sudo apt-get update
- sudo apt-get install tomcat7 –fix-missing [wordpress turns double dash into endash… so use double -]
- sudo apt-get install tomcat7-docs tomcat7-admin tomcat7-examples
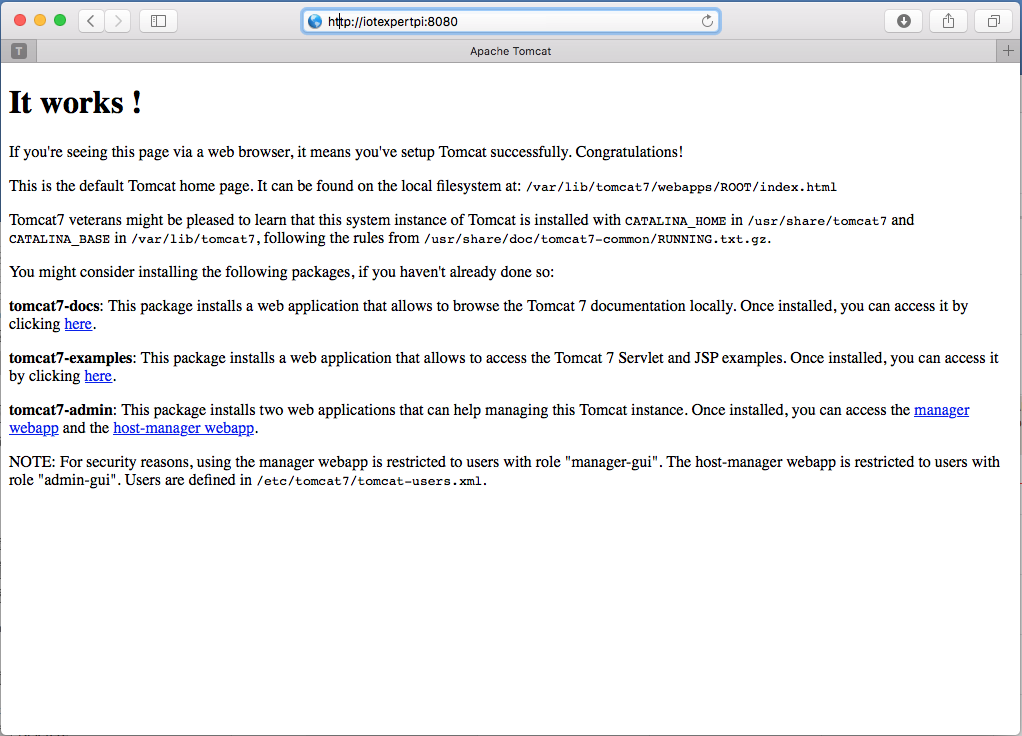
Once you have started Tomcat you will be able to load up the default web page into your browser. In my case it is “http://iotexpert:8080”. The “8080” refers to the default port that Tomcat runs on. If your install went OK, you should see the welcome screen:
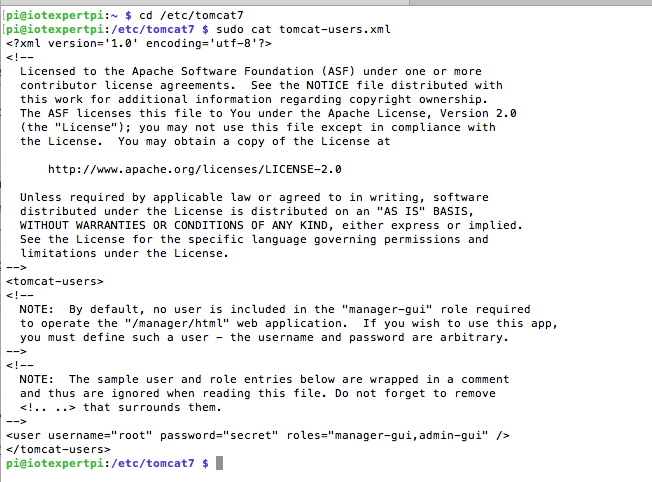
After you have it working, you will need to configure the Administration and Manager users. To do this edit the “/etc/tomcat7/tomcat-users.xml” file and add a user. I call my administration user “root” and gave it the excellent password “secret”.
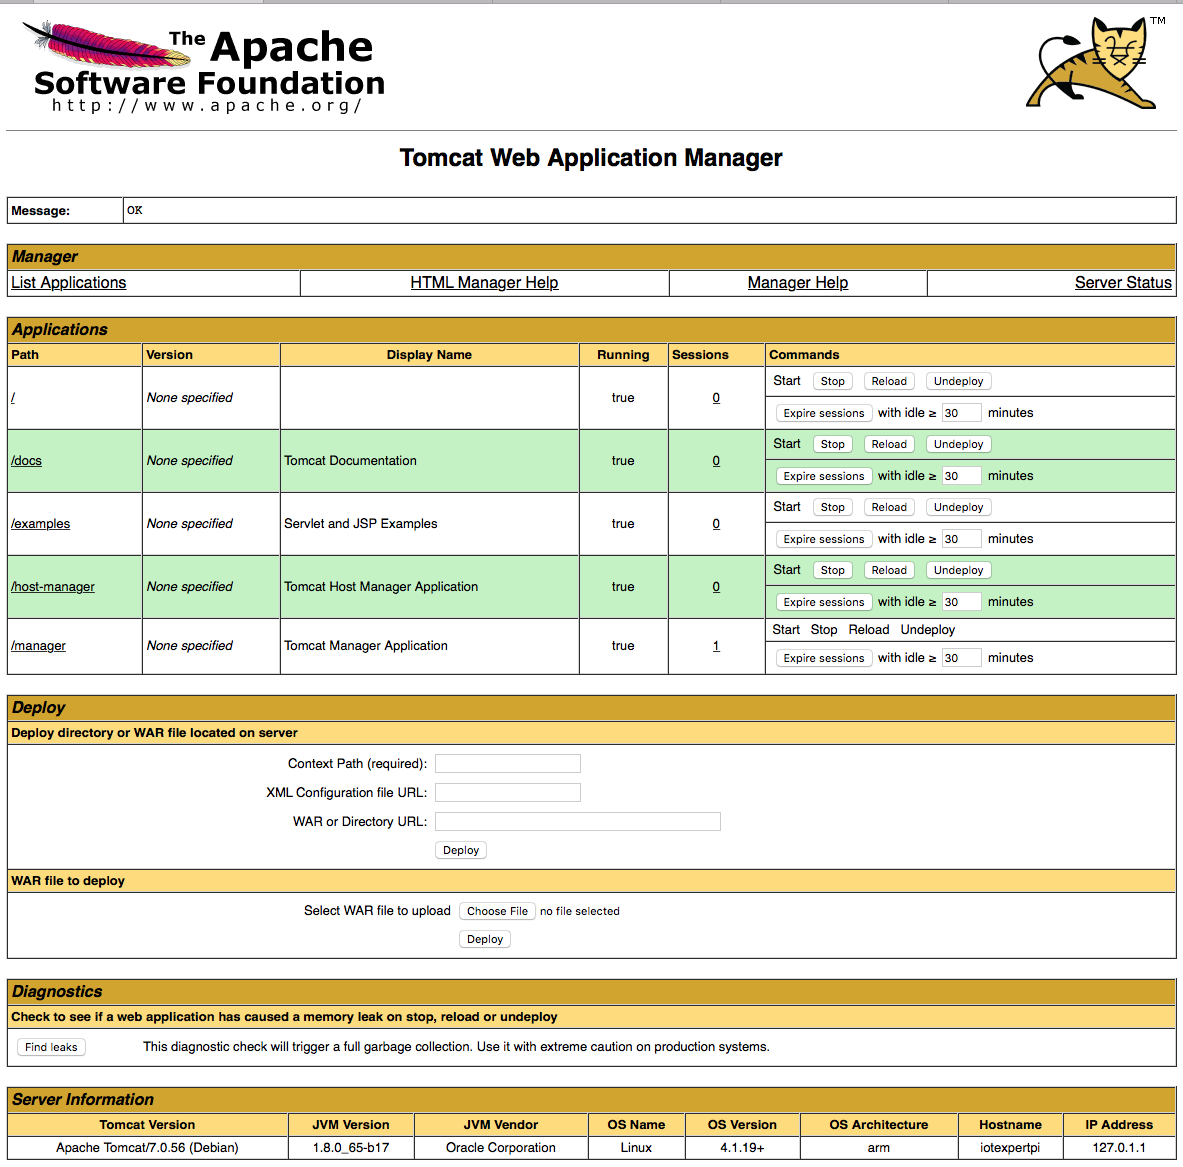
After you have made the changes you should restart Tomcat using “sudo service tomcat7 restart”. Then when you click on the “manager web app” you will see this screen:
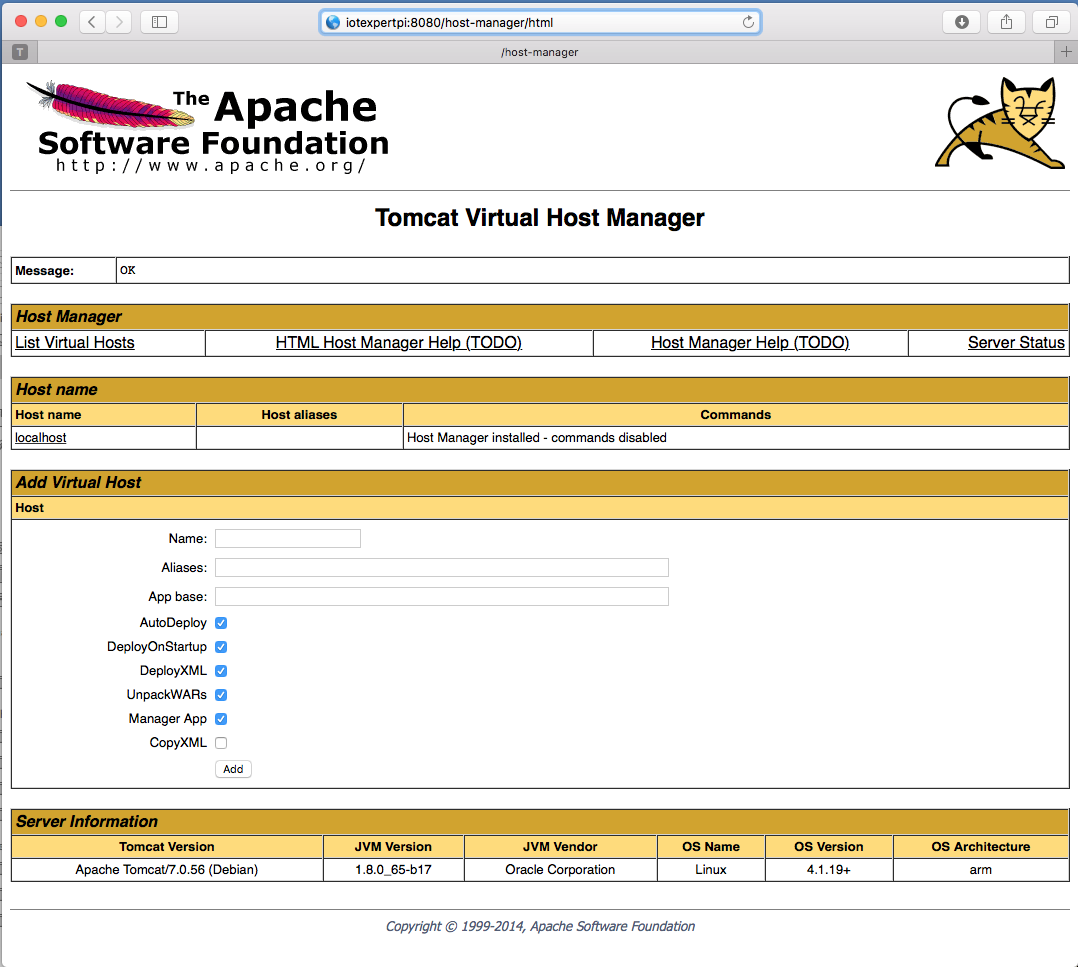
And the Virtual Host Manager.
At this point the Raspberry Pi has all of the required tools to make the Creek Server work. In the next few posts Ill talk about the different programs that read the data, store it into the database and create the web pages.
Index
Description
The Creek: IOT for the Elkhorn Creek
Introduction
The Creek: Solution Architecture 1.0
Overall architecture
The Creek: Creek Board 1.1
Eagle layout of the board
The Creek: Creek Board 1.0 – RCCA
A discussion of the errors in the 1.0 board
The Creek: CYPI, a Raspberry Pi to Arduino Bridge
PSoC4 <--> Raspberry Pi Bridge Board
The Creek: PSoC4 Creator Schematic and Firmware
Firmware to interface with the temperature and pressure sensors
The Creek: Testing the Firmware
Using tools to verify that the PSoC 4 Firmware is working correctly
The Creek: Testing the Bootloader
Make sure that you can load new firmware into the PSoC
The Creek: Software Architecture
All of the Raspberry Pi software connections
The Creek: Install MySql
Instruction to configure MySql
The Creek: Install Tomcat
Instruction to configure Tomcat JSP Server
The Creek: Data Collection Java (Part 1)
The Java program that reads the I2C and saves it in the database
The Creek: Data Collection Java (Part 2)
The Java program that reads the I2C and saves it in the database
The Creek: Create the Chart with JFreeChart
Using open source Java charting software to create plots of the Creek Depth
The Creek: Flood Event Data Processor
A batch program to create analyze the database and create a table of flood events
The Creek: Flood Event Web Page
A batch program to create the flood event web page
The Creek: Creek Server 1.1
Updates to all of the back off server programs to integrate charts
The Creek: JSP Web Page for www.elkhorn-creek.org
The JSP program to make the table and display the website
The Creek: Raspberry Pi Clock Stretching
Sorting out a bug in the system having to do with the Broadcomm Raspberry Pi Master not functioning well with clock stretching
The Creek: Creek Server 1.2
Caching the web pages to make them faster
No comment yet, add your voice below!