In The Creek: Server Architecture I described a program called “runI2C” which is a shell script that is run once per minute by the crontab on the Raspberry PI (RPi). This shell script does a “sudo” and runs the java program “i2cdb”.
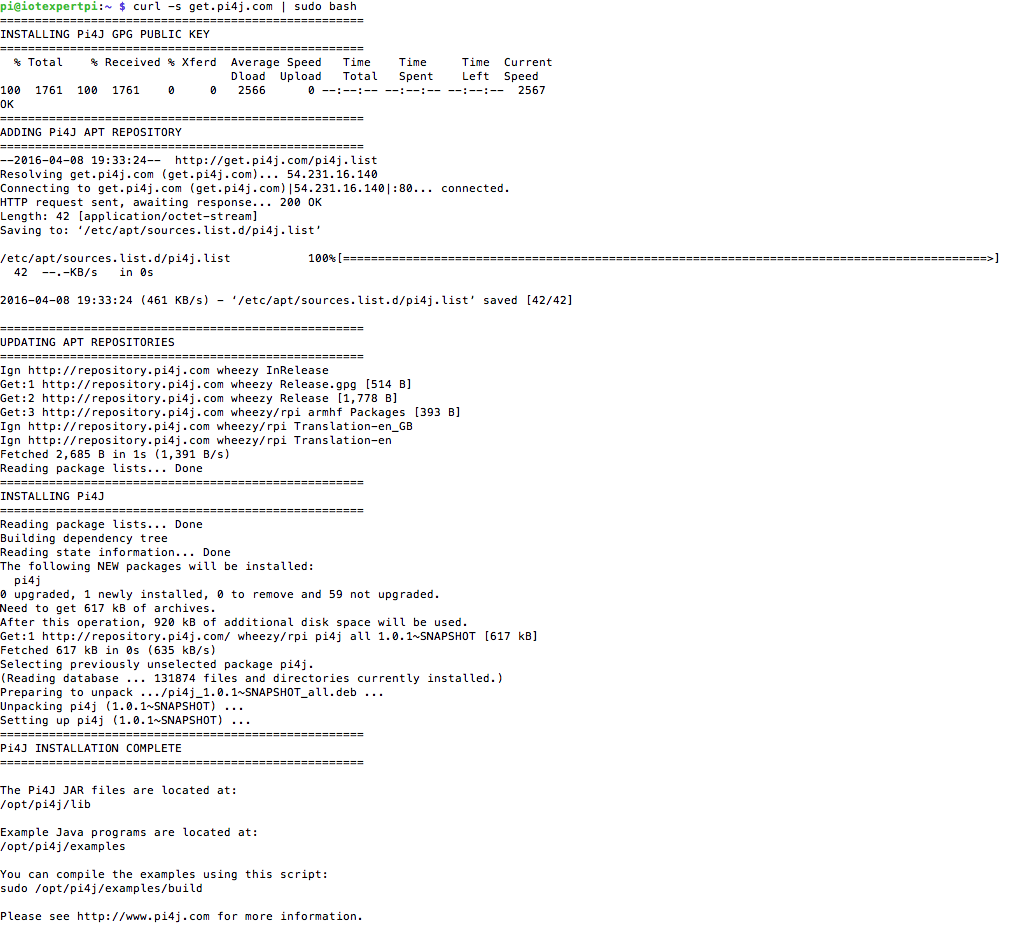
“i2cdb” is a Java program that uses the open source pi4j library to access the RPi I2C bus, reads the data out of the PSoC4 and then inserts it into the “creek data” database. In order for all of this to work you first need to get the pi4j jar files. To do that, on the Raspberry Pi, run “curl -s get.pi4j.com | sudo bash” which will install everything you need:
Pi4J is a Java library that will give you complete access to the GPIOs on the Raspberry Pi, you can read and write the GPIOs as well as use the UART, SPI and I2C communication devices. Once you install the libraries you will have 4 jar files in “/opt/pi4j/lib” as well as a bunch of examples in “/opt/pi4j/examples”.
Because I wanted to edit the files on my Mac, I copied the libraries into my “lib” directory in the project so that Netbeans would know about them.
The next library that you need is the mysql-connector which is a jar supplied by the MySql team. You can get it from their website. I put this jar file in my “lib” folder as well.
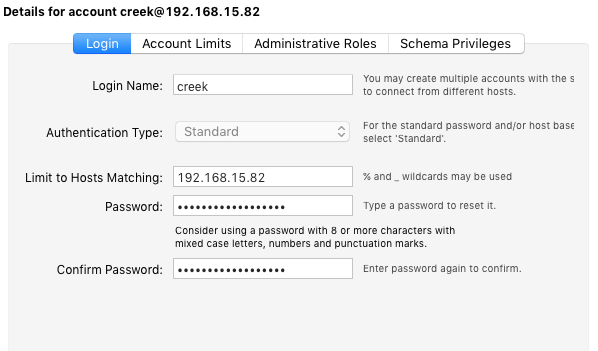
In order to access the database, there needs to be a user in the MySql database. To do this, log in as root in the MySqlWorkbench tool and add a new user. I call this user “creek” and give it a password of “creek”, then restrict it to only being able to connect from the RPi IP address.
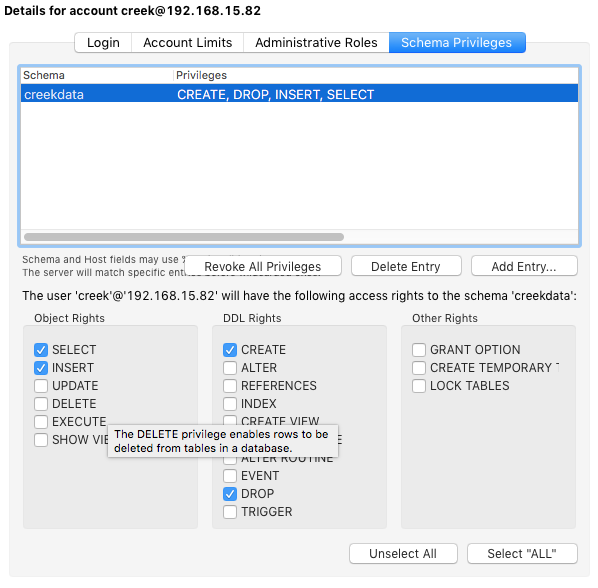
Then assign “creek”s privileges
The next step is to create a MySql script to create the database. Originally, I stored the ADC raw counts in the database because I wasn’t sure about calibration and I was interested in the raw data. The problem with this method is that I had to encode the conversion from raw counts to depth on the server side. I have come to believe that is a bad idea and that the acquisition hardware should be responsible for that conversion.
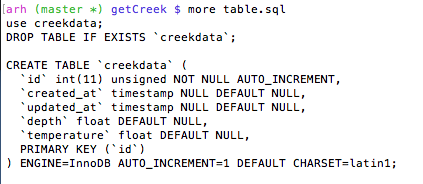
The easiest thing to do is to make a script to make the table. I called it “table.sql” and I run it by doing “mysql -u creek -p < table.sql”
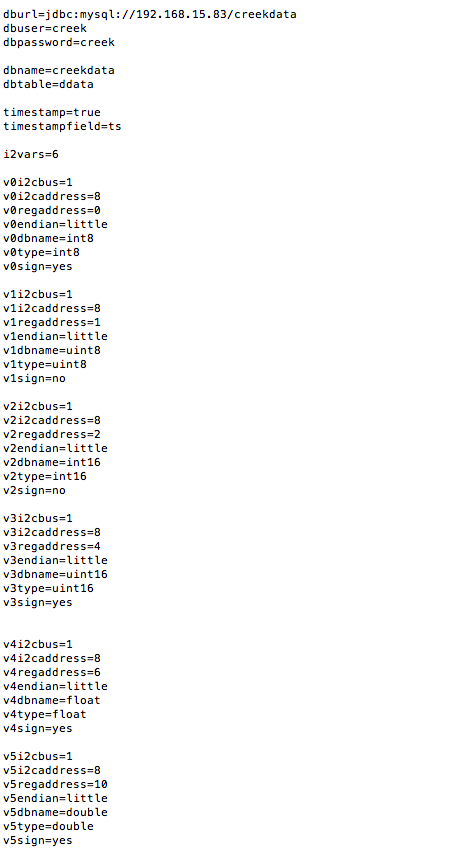
This program has been written and re-written about a dozen times (including as I prepared this post) as I searched around for what was the “best” solution. Originally it started as a hard coded program. After some iteration I decided to create a configuration file. That file, called “config.properties” is read in when the program starts. It specifies:
- The mysql url, user and password
- Which database and table to store the data into
- If it should store timestamps, and the name of the timestamp column
- The number of “variables” to read
- For each variable
- The BUS # (0 or 1) on RPi (on my model only bus 1 works)
- The I2C slave address
- little or big endian
- The name of the column to store the data in
- What type of data (uint8, int8, uint16, int16, float, double)
Here is the file “config.properties.test”:
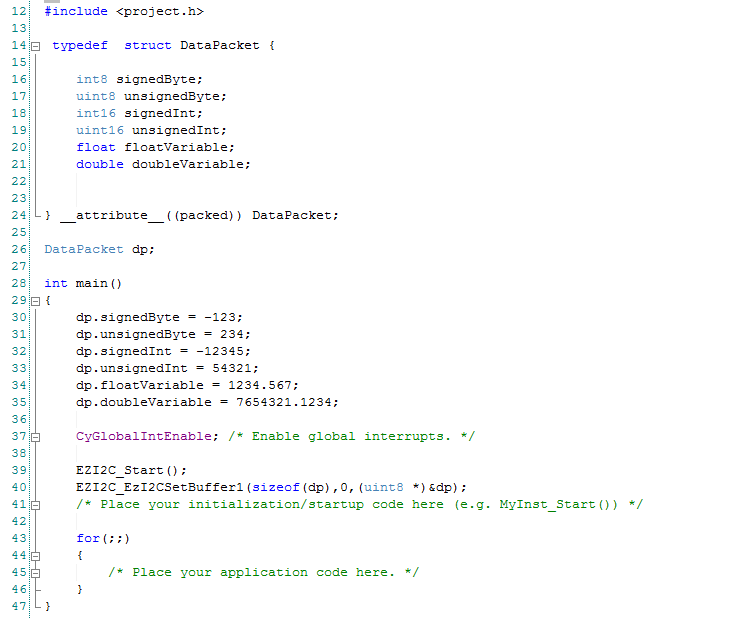
I was going crazy trying to get all of the pieces to fit together (the endian-ness, the sign) and trying to sort out the fact that Java doesnt like unsigned. So I created firmware for the PSoC that just had one of each test case. The project is called “debugJavaPi” and is available on the iotexpert github site. This program just creates an I2C buffer with one of each type of data, then initializes them with known data, then services I2C requests.
In the next post I will explain in detail the I2CDB Java Program.
Index
Description
The Creek: IOT for the Elkhorn Creek
Introduction
The Creek: Solution Architecture 1.0
Overall architecture
The Creek: Creek Board 1.1
Eagle layout of the board
The Creek: Creek Board 1.0 – RCCA
A discussion of the errors in the 1.0 board
The Creek: CYPI, a Raspberry Pi to Arduino Bridge
PSoC4 <--> Raspberry Pi Bridge Board
The Creek: PSoC4 Creator Schematic and Firmware
Firmware to interface with the temperature and pressure sensors
The Creek: Testing the Firmware
Using tools to verify that the PSoC 4 Firmware is working correctly
The Creek: Testing the Bootloader
Make sure that you can load new firmware into the PSoC
The Creek: Software Architecture
All of the Raspberry Pi software connections
The Creek: Install MySql
Instruction to configure MySql
The Creek: Install Tomcat
Instruction to configure Tomcat JSP Server
The Creek: Data Collection Java (Part 1)
The Java program that reads the I2C and saves it in the database
The Creek: Data Collection Java (Part 2)
The Java program that reads the I2C and saves it in the database
The Creek: Create the Chart with JFreeChart
Using open source Java charting software to create plots of the Creek Depth
The Creek: Flood Event Data Processor
A batch program to create analyze the database and create a table of flood events
The Creek: Flood Event Web Page
A batch program to create the flood event web page
The Creek: Creek Server 1.1
Updates to all of the back off server programs to integrate charts
The Creek: JSP Web Page for www.elkhorn-creek.org
The JSP program to make the table and display the website
The Creek: Raspberry Pi Clock Stretching
Sorting out a bug in the system having to do with the Broadcomm Raspberry Pi Master not functioning well with clock stretching
The Creek: Creek Server 1.2
Caching the web pages to make them faster
No comment yet, add your voice below!