Summary
If you have to use a hot air solder tool, you are probably having a bad day. But when you need a hot air solder rework tool, you are very, very glad to have one. I am sure that there are people who can get a QFN off a printed circuit board without one, but I am not one of them. It is even more fun to put a QFN back on a board without one. But, once again, I am not one of those people.
Hot Air Solder
I have a Metcal HCT-900-11 Hand Held Convection Rework tool aka Hot Air Solder tool. This machine can blow out hot air … really, really hot air, up to about 950 degrees Fahrenheit. I’m pretty sure you could cut your arm off with it. The tool has a bunch of nozzles of different shapes and sizes. Using one of these things is an art form because you need to get the temperature right, the airflow right, the distance from the board right or you will find yourself blowing components off the board and making things worse.

Pinball machine PCB Solder Problem
In the post where I discussed the first test of the Pinball board I told you that the power supply was not working. It turns out that the cause of the problem was a big blob of solder under the accelerometer. To fix that problem I had to remove the tiny little 3x3mm QFN accelerometer using the hot air solder tool. Once I did, there was a big mess of solder under the package which I cleaned up with a braided copper wick and a soldering iron. I suspect that I put too much solder onto the pads with the metal stencil when I built the board.
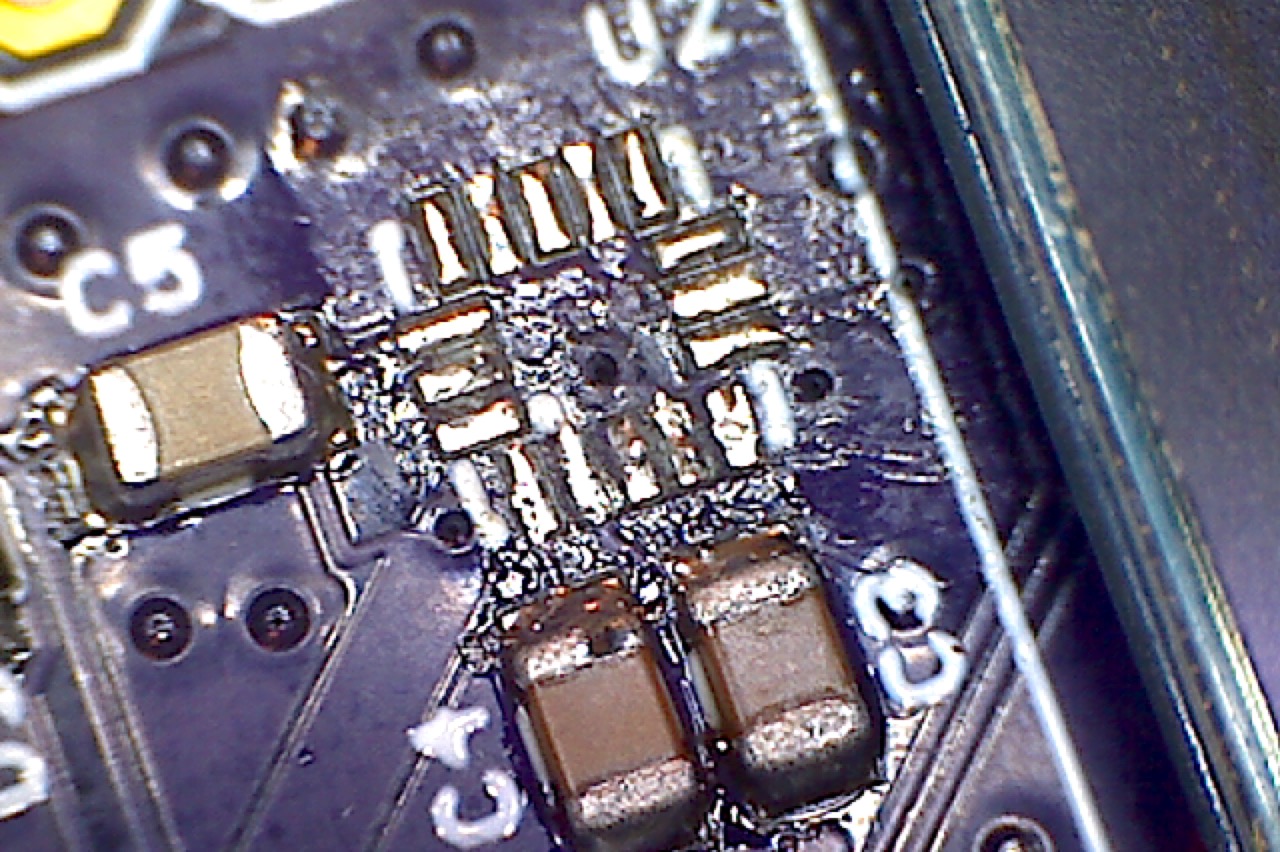
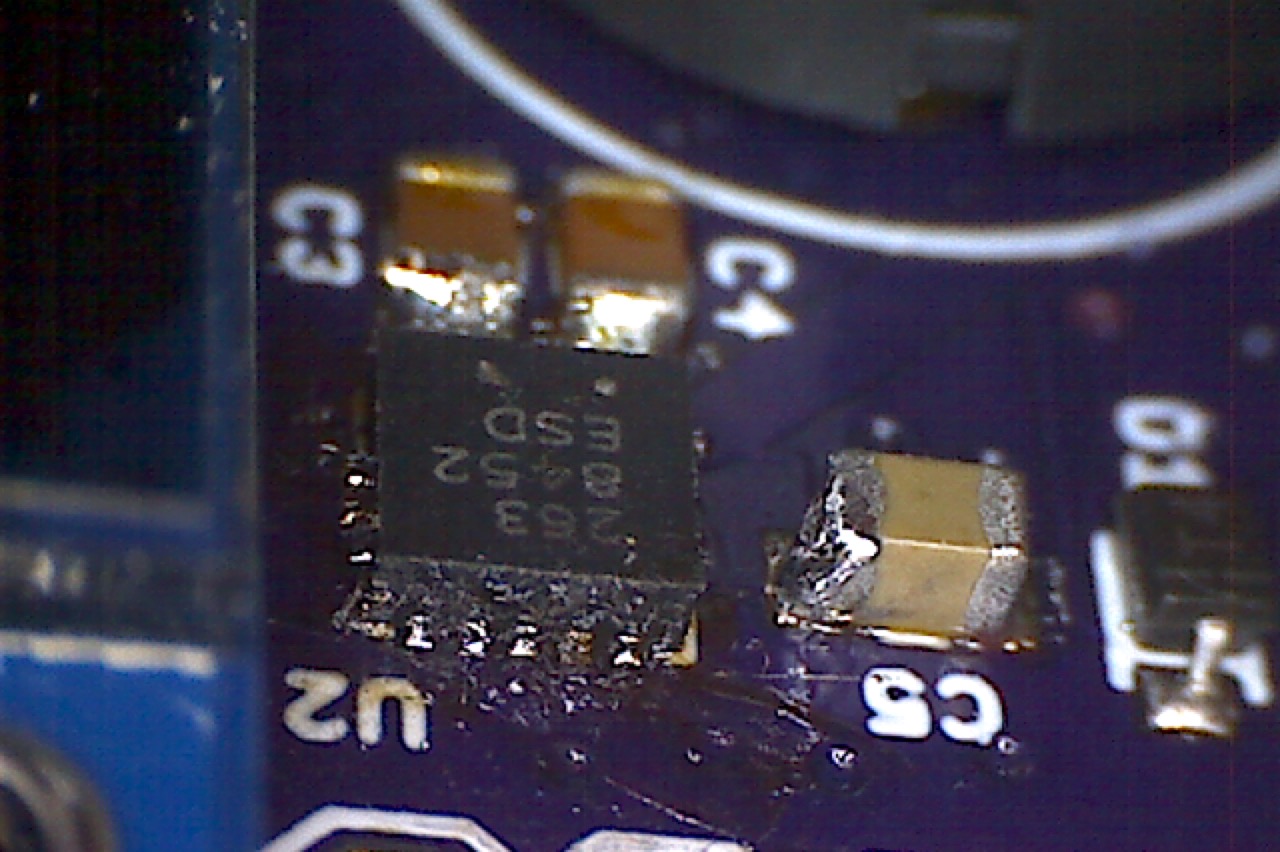
Here is what the board looked like after I cleaned it up:
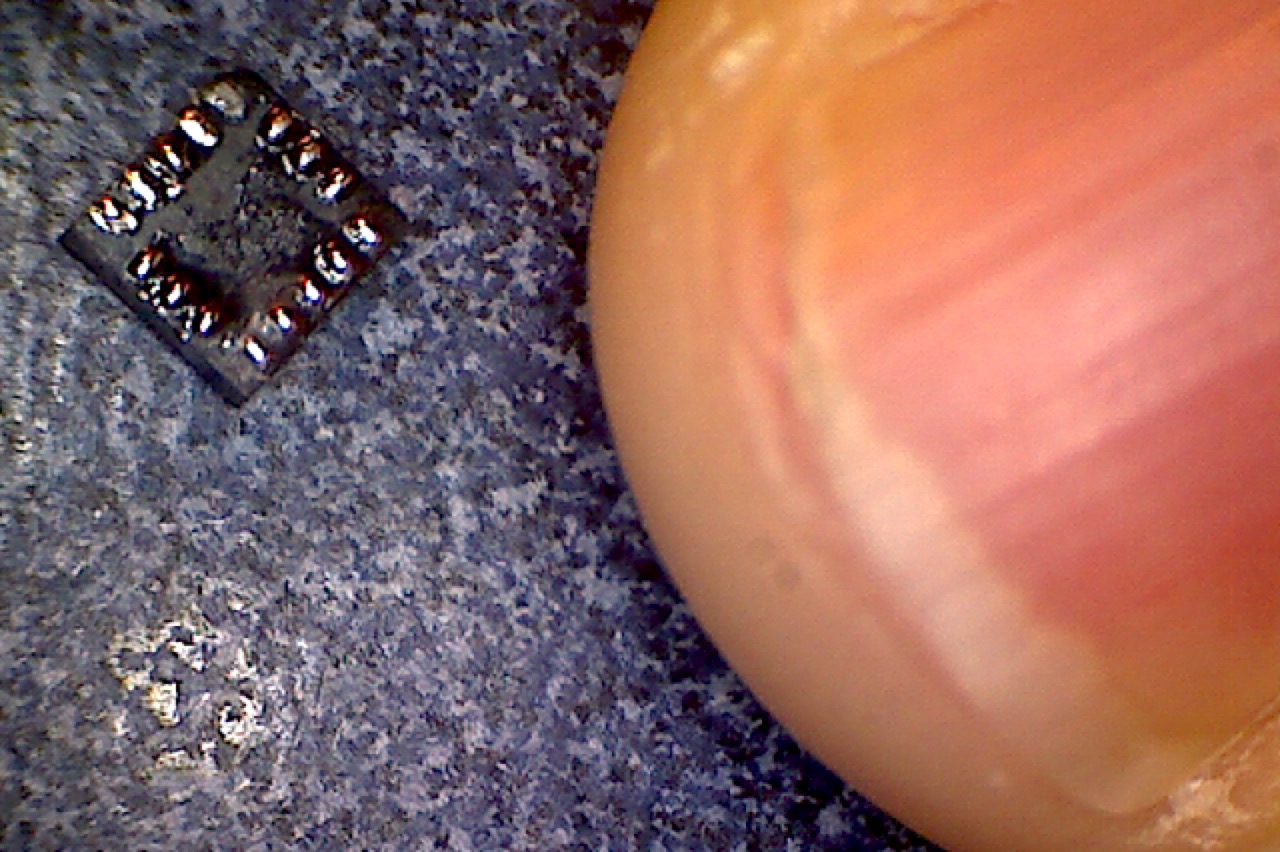
And here is a picture of the damn tiny chip. The problem with all of these chips is they are meant to be used in cell phones, so they are as small and thin as possible. And to make matters worse, the pads are on 0.5mm pitch or smaller.
Hot Air Solder Rework
When I first started fighting with these QFN problems, I talked to the guys in the Cypress Development Kit team in India. The manager of the group recorded this video of Jesudasan Moses, who is a wizard with hot air solder tools and a soldering irons. This video was a huge help and I am grateful to them for recording it.
To fix my problem I followed the same process. Here is the video:
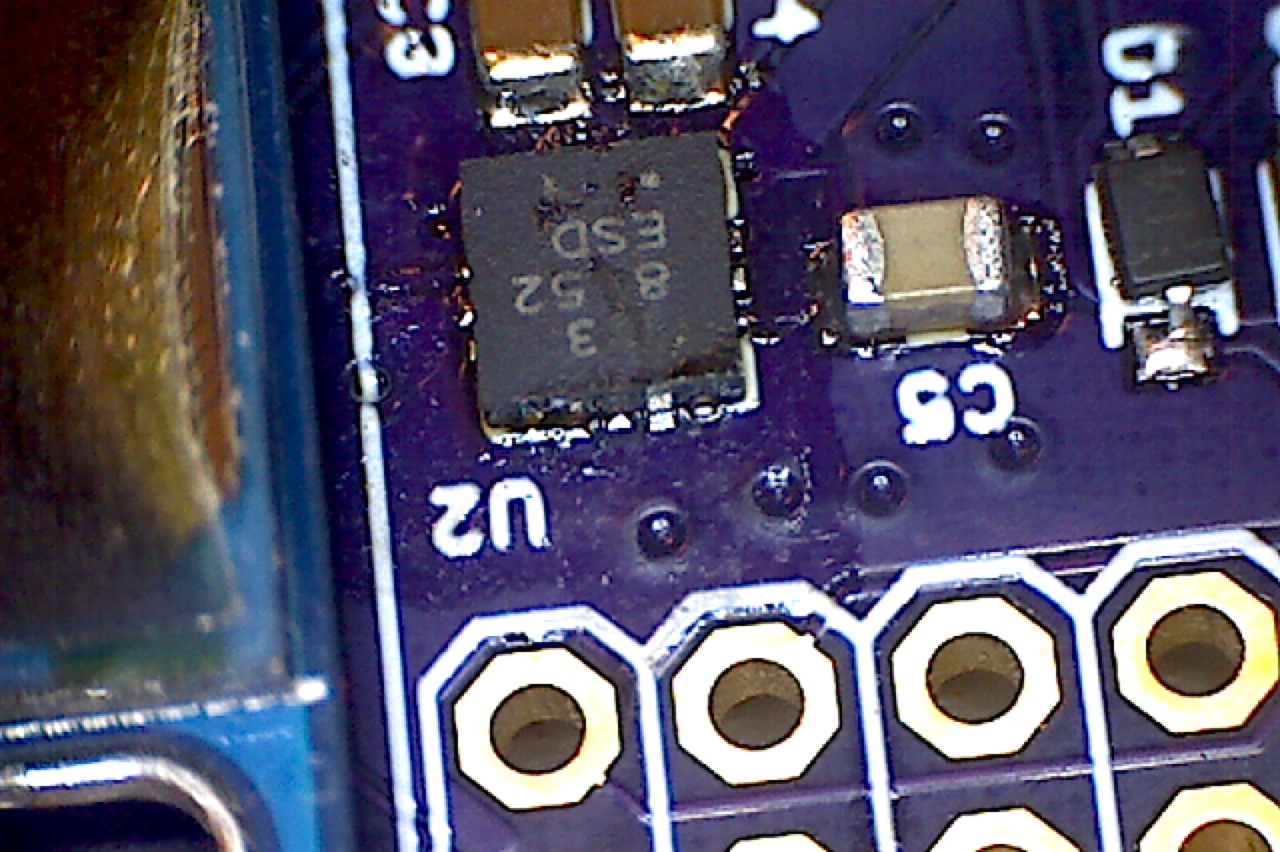
After three attempts, I got the chip mostly on. As you can see in the picture below, I was missing a connection to one of the pins. The other problem was that I melted the screen with the hot air. Suck.
After I touched up that pin with a soldering iron I still couldn’t talk to it with the PSoC, and I didn’t have easy access to the I2C bus to figure out what was going on. In the future I need to make sure that there is a place to plug into the I2C bus to debug network traffic. I will add this to my PCB design guidelines.
Back to the soldering iron to fix it. I started by putting some flux on the pins of the QFN package. Then, I draged a very fine tipped iron with a little bit of solder on it across the pins. After a couple of rounds of this, I got the chip working. I still need to cleanup the flux, but here is a picture of one side:
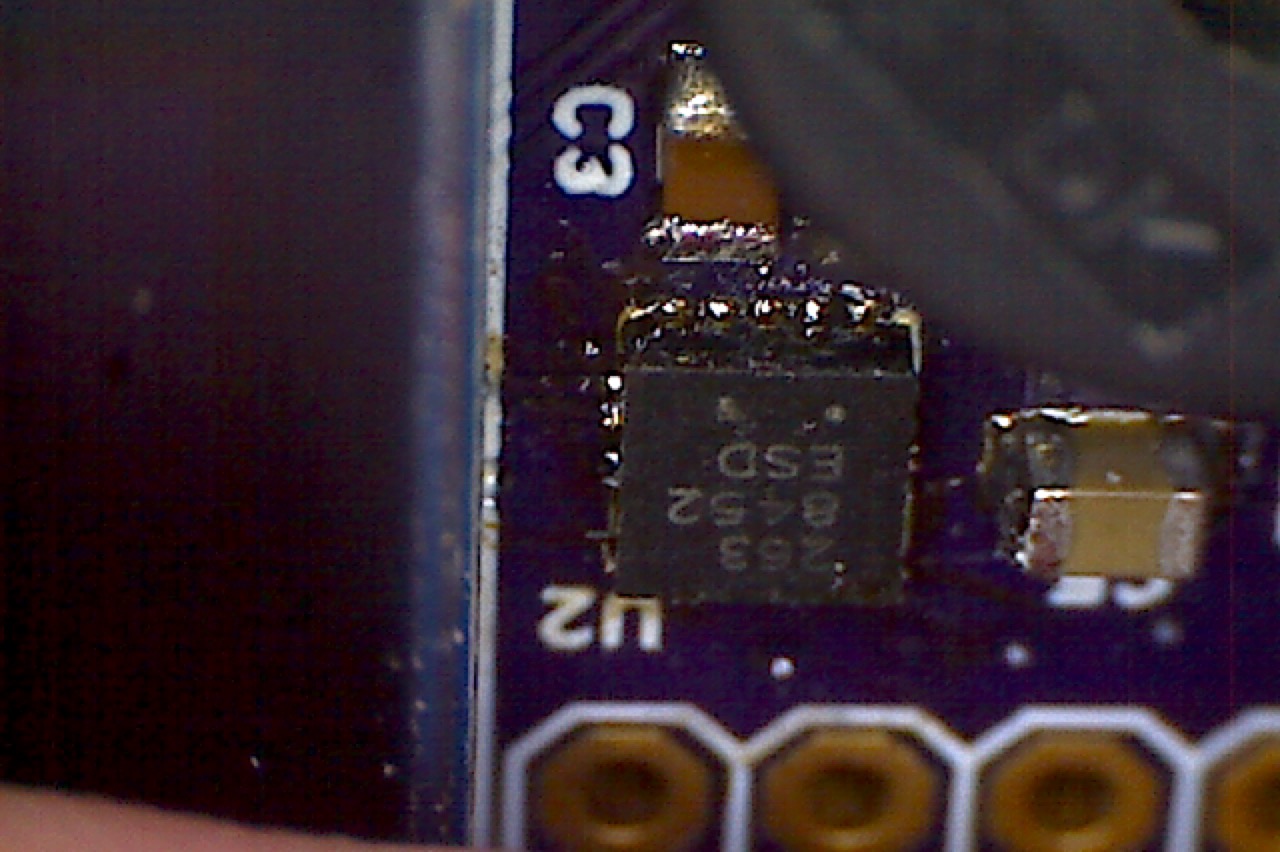
And here is a picture of the other side. You can see that I mangled the capacitor to the right during the rework process.
I think that a significant source of problems was not having the entire underside of the QFN with Solder Mask. That would have helped repel the solder and kept the blob from forming. I think that I will add that to the checklist as well.
Unfortunately when I was looking at the layout trying to figure out what was going on, I realized that the accelerometer interrupt pin was not connected to the PSoC. This happened because I had the pins connected by “name” in the schematic. This is something else that I will add to the checklist.
Using a hot air solder tool is definitely an art form. One that I will need to practice quite a bit before I get to anywhere near Jesusdan level of skill.
You can find all of the source code and files at the IOTEXPERT site on github.
Index
Description
Pinball: Newton's Attic Pinball
An introduction to the project and the goals
Pinball: Lotsa Blinking LEDs
Everyone needs a bunch of LEDs on their Pinball Machine
Pinball: Matrix LEDs (Part 1)
Saving PSoC pins by using a matrix scheme
Pinball: Matrix LEDs (Part 2)
Solving some problems with the matrix
Pinball: Matrix LEDs Component
How to turn the Matrix LED into a component
Pinball: A Switch Matrix
Implementing a bunch of switches
Pinball: Switch Matrix Component (Part 1)
The switch matrix component implementation
Pinball: Switch Matrix Component (Part 2)
The firmware for matrix component
Pinball: Switch Matrix Component (Part 3)
Test firmware for the matrix component
Pinball: The Music Player (Part 1)
The schematic and symbol for a Music Player component
Pinball: The Music Player (Part 2)
The Public API for the Music Player component
Pinball: The Music Player (Part 3)
The firmware to make the sweet sweet music
Pinball: The Music Player (Part 4)
The test program for the music player
Pinball: The Motors + HBridge
Using an Bridge to control DC Motors
Pinball: The Eagle Schematic
All of the circuits into an Eagle schematic
Pinball: The Printed Circuit Board 1.0
The first Eagle PCB layout of the printed circuit board
Pinball: The PCB Version 1.0 Fail
Problems with the first version of the Eagle PCB layout
Pinball: PCB Layout 1.2 Updates using Eagle
Fixing the errors on the first two versions of the Eagle PCB
Pinball: Assemble and Reflow the 1.2 PCB
Assembling the Eagle PCB
Pinball: Testing the Eagle PCB
Firmware to test the newly built Pinball printed circuit board
Pinball: Debugging the Motor Driver
Fixing the motor driver PSoC project
Pinball: Hot-Air Reworking the Accelerometer Solder
Using a Hot-Air Rework tool to reflow a QFN
Pinball: Debugging the LM317 Power Supply- A Tale of Getting Lucky
Debugging the LM317/LM117 power supply
No comment yet, add your voice below!