In the summer of 2013, I decided that I needed to design a printed circuit board. I had worked on sections of chips but no PCBs. I didnt really know which tool to use, but after looking around a bit it seemed like Eagle was a good simple choice as it had wide adoption in the Maker community. At that point in time the Elkhorn Creek Measuring System was being run off a Raspberry PI and a PSoC5LP but Cypress had just released a new family of chips called the PSoC4200. I thought that it would be a cool idea to have a PSoC to Raspberry PI bridge board. So this is what I did.
On the bottom of the board I wanted female pins that matched the Raspberry PI, and on the top I wanted an Arduino pins. Bottom line, I decided to build a board that was very similar to the CY8CKIT-042 except for having Raspberry PI GPIOs on the bottom of the board.
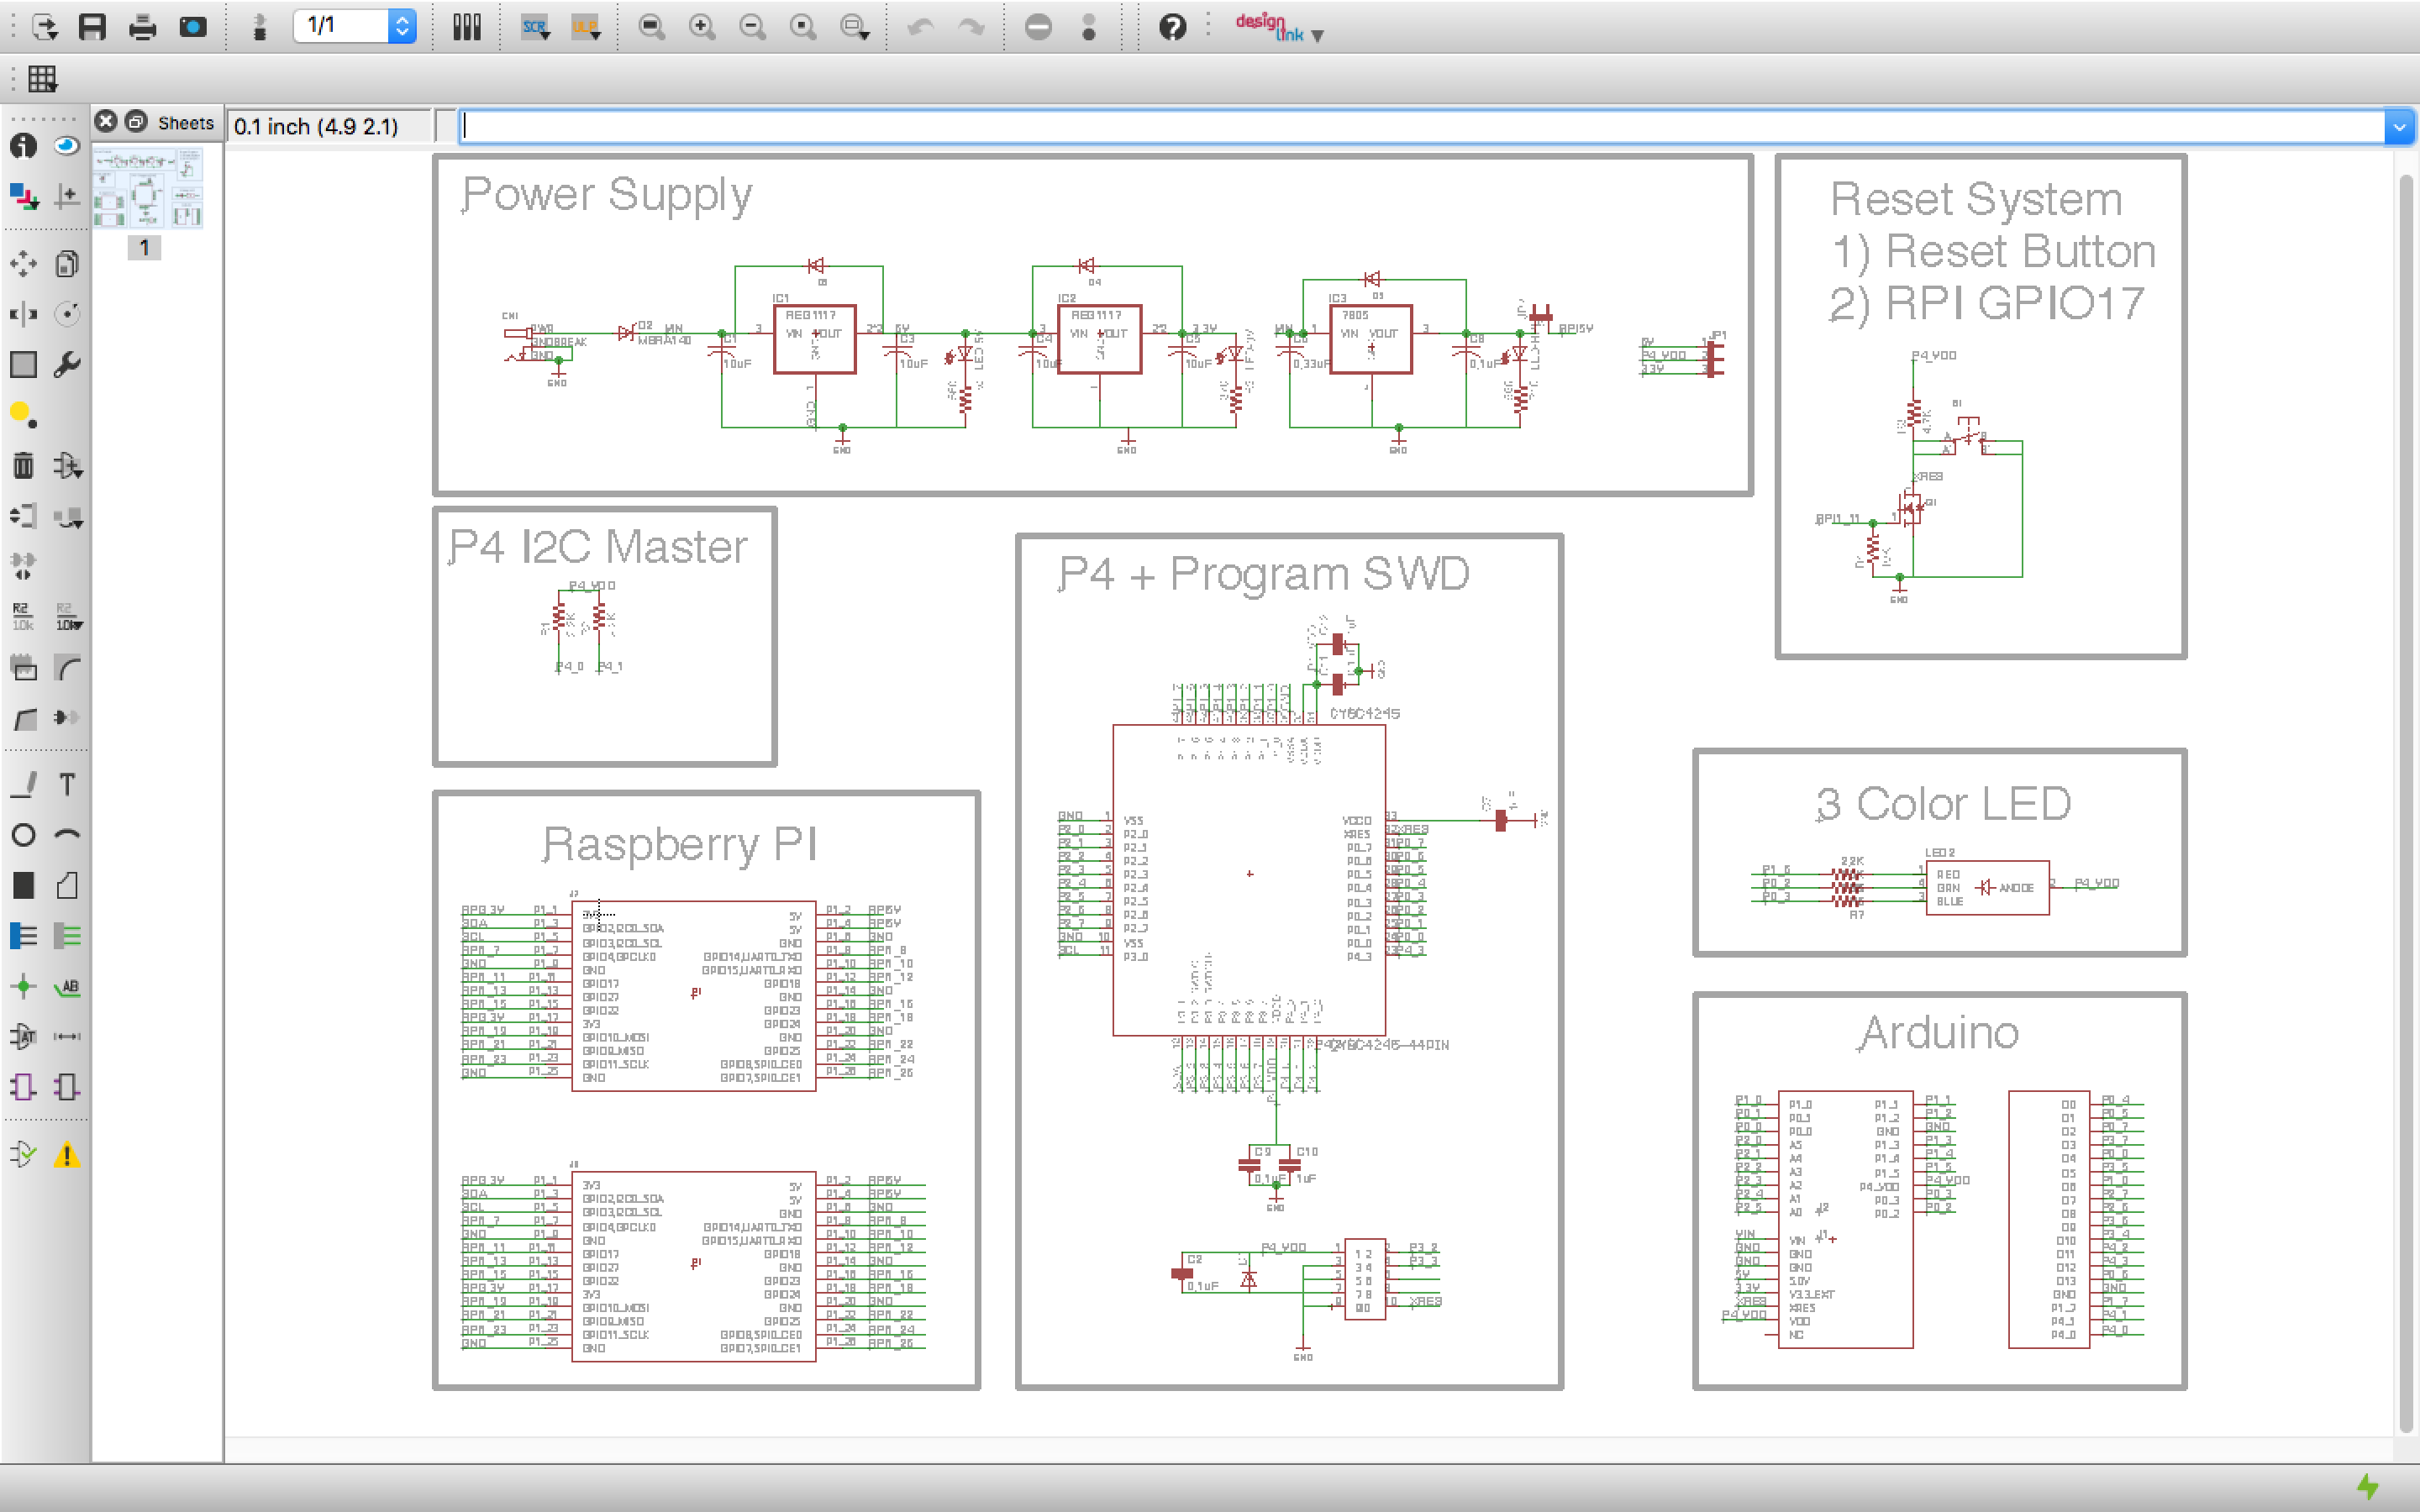
My board has:
- Power System: Both 3.3v and 5.0v for the PSoC as well as 5.0v@1.0A for the Raspberry PI.
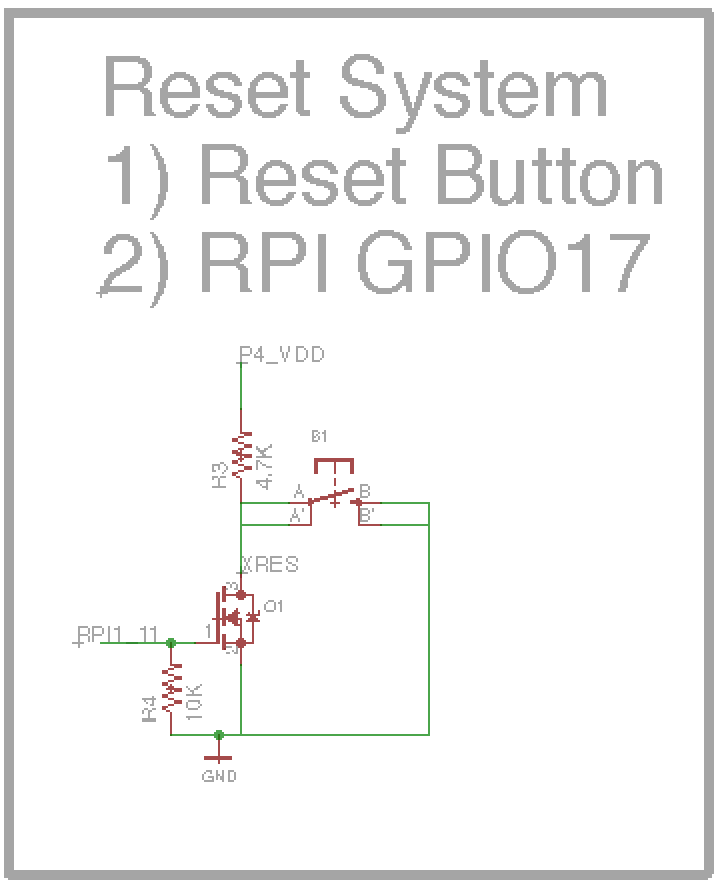
- Reset System: A RPi connection to the PSoC and Arduino XRES.
- An I2C connection between the RPi and the PSoC including the pullup resistors
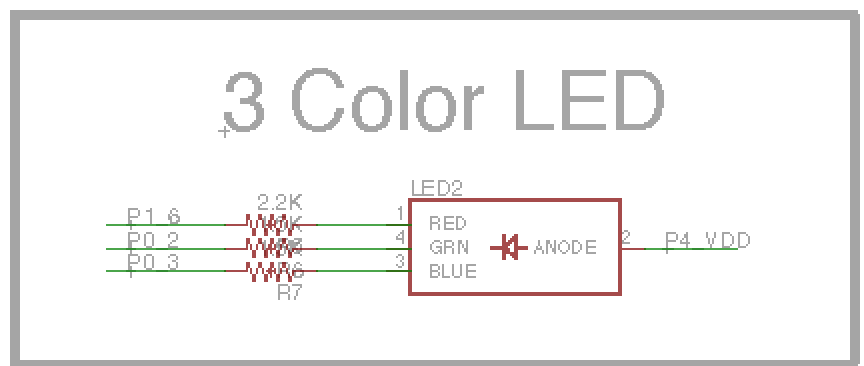
- A 3-Color LED
- Arduino pins that match the pinout of the CY8CKIT-042
The overall schematic
I used the same RGB 3 Color LED (CLV1A-FKB- CJ1M1F1BB7R4S3) as exists on the CY8CKIT-042.
I wanted to be able to reset PSoC and Arduino from the Raspberry Pi so I attached the RPi GPIO 1_11 to a pulldown transistor that is connected to the XRES of the Arduino and PSoC. I also attached a small pushbutton to enable a user reset.
I copied the Arduino pin out of the CY8CKIT-042. This would allow me to easily use all of the projects that I had already developed that that development kit.

This section of the schematic has the required power supply decoupling capacitors. It also has the ARM standard 10 Pin programming header which allows me to program the PSoC using a MiniProg-3.
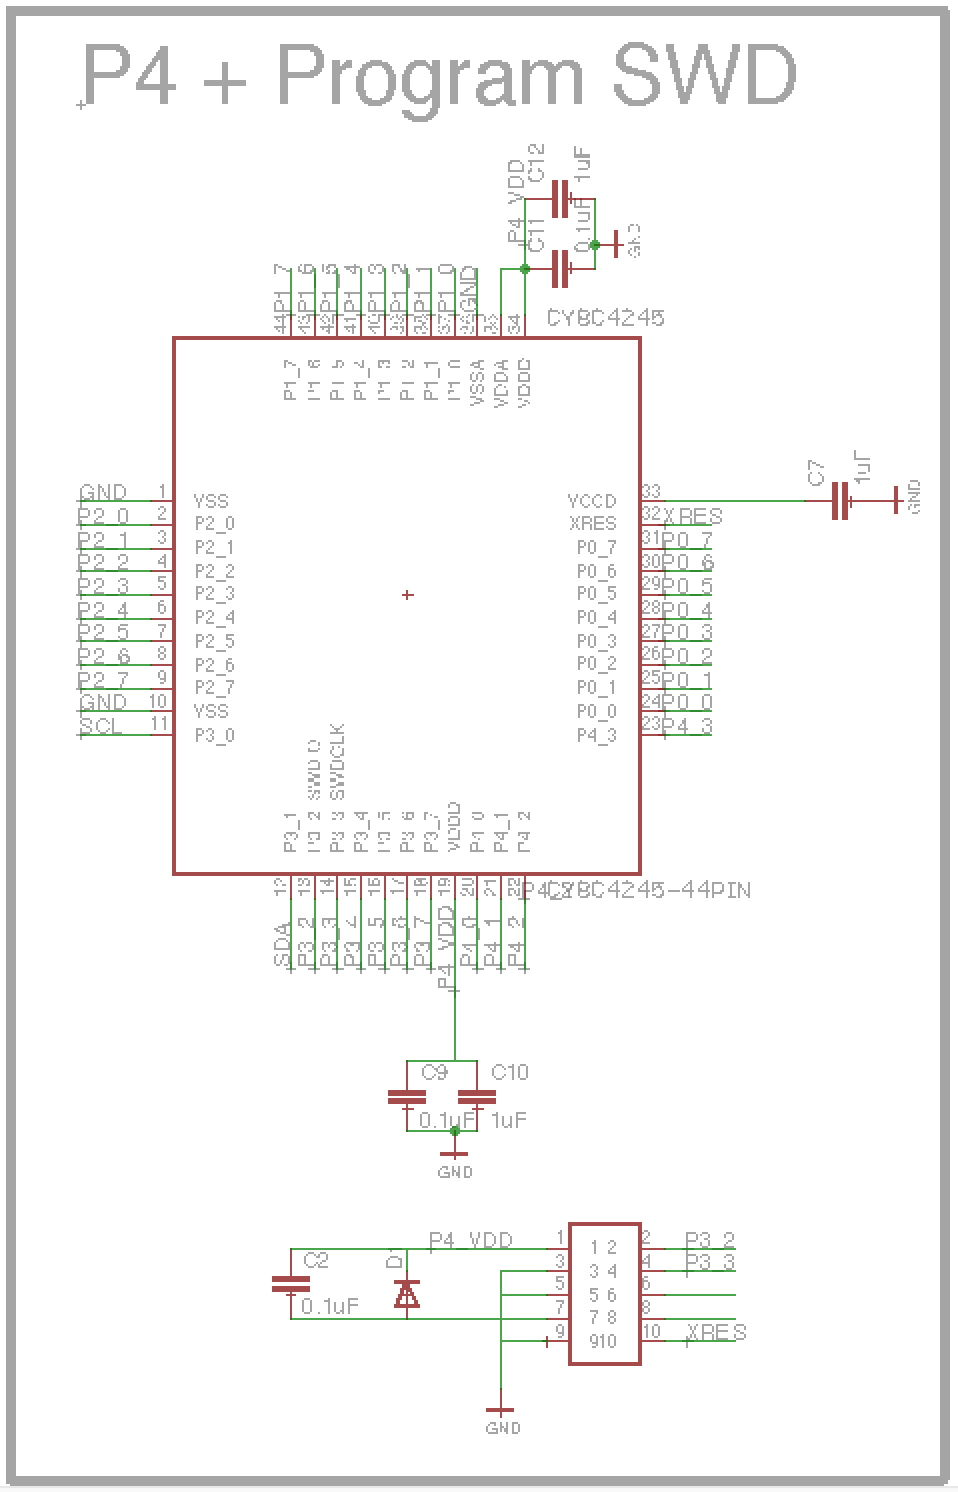
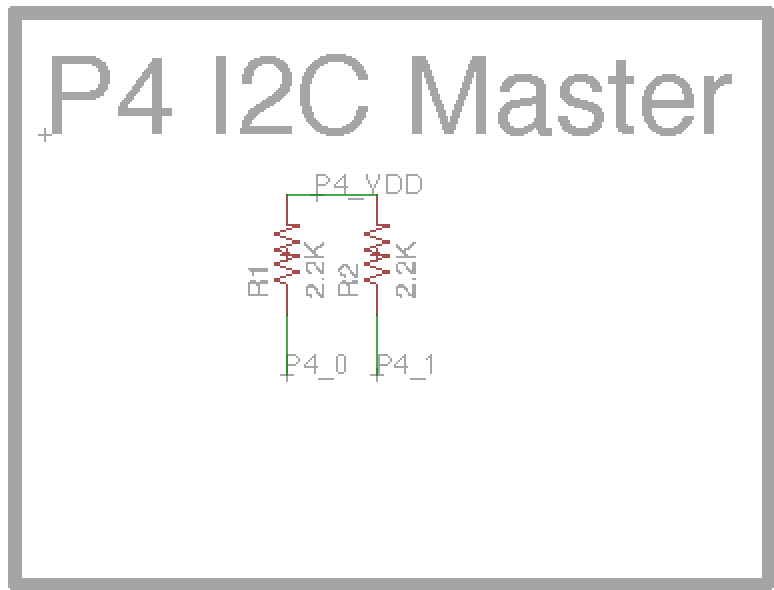
I provided pull up resistors on the PSoC P4[0] and P4[1] to easily enable the PSoC to serve as an I2C Master for the Arduino shield.
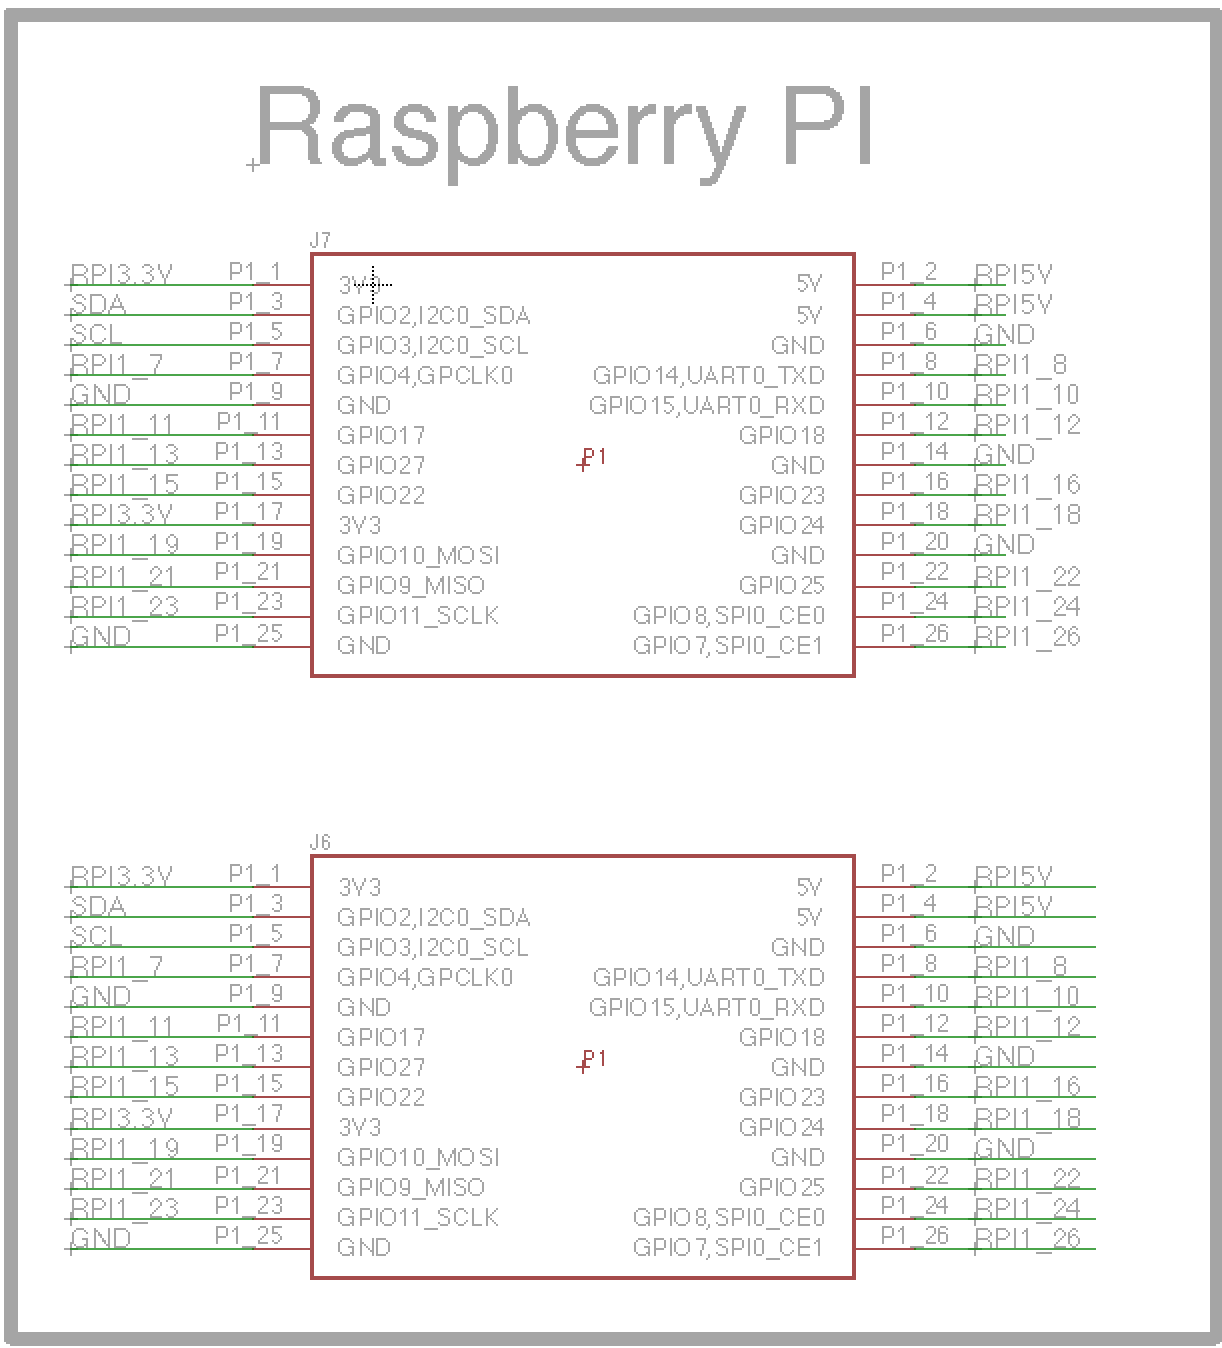
The connection to get data between the RPi and the PSoC is I2C. The PSoC is setup as an I2C slave and the RPi is the master. The connection on the RPi uses the RPI1_3 and RPI1_4 GPIOs. On the PSoC it is connected to P3[0] and P3[1].
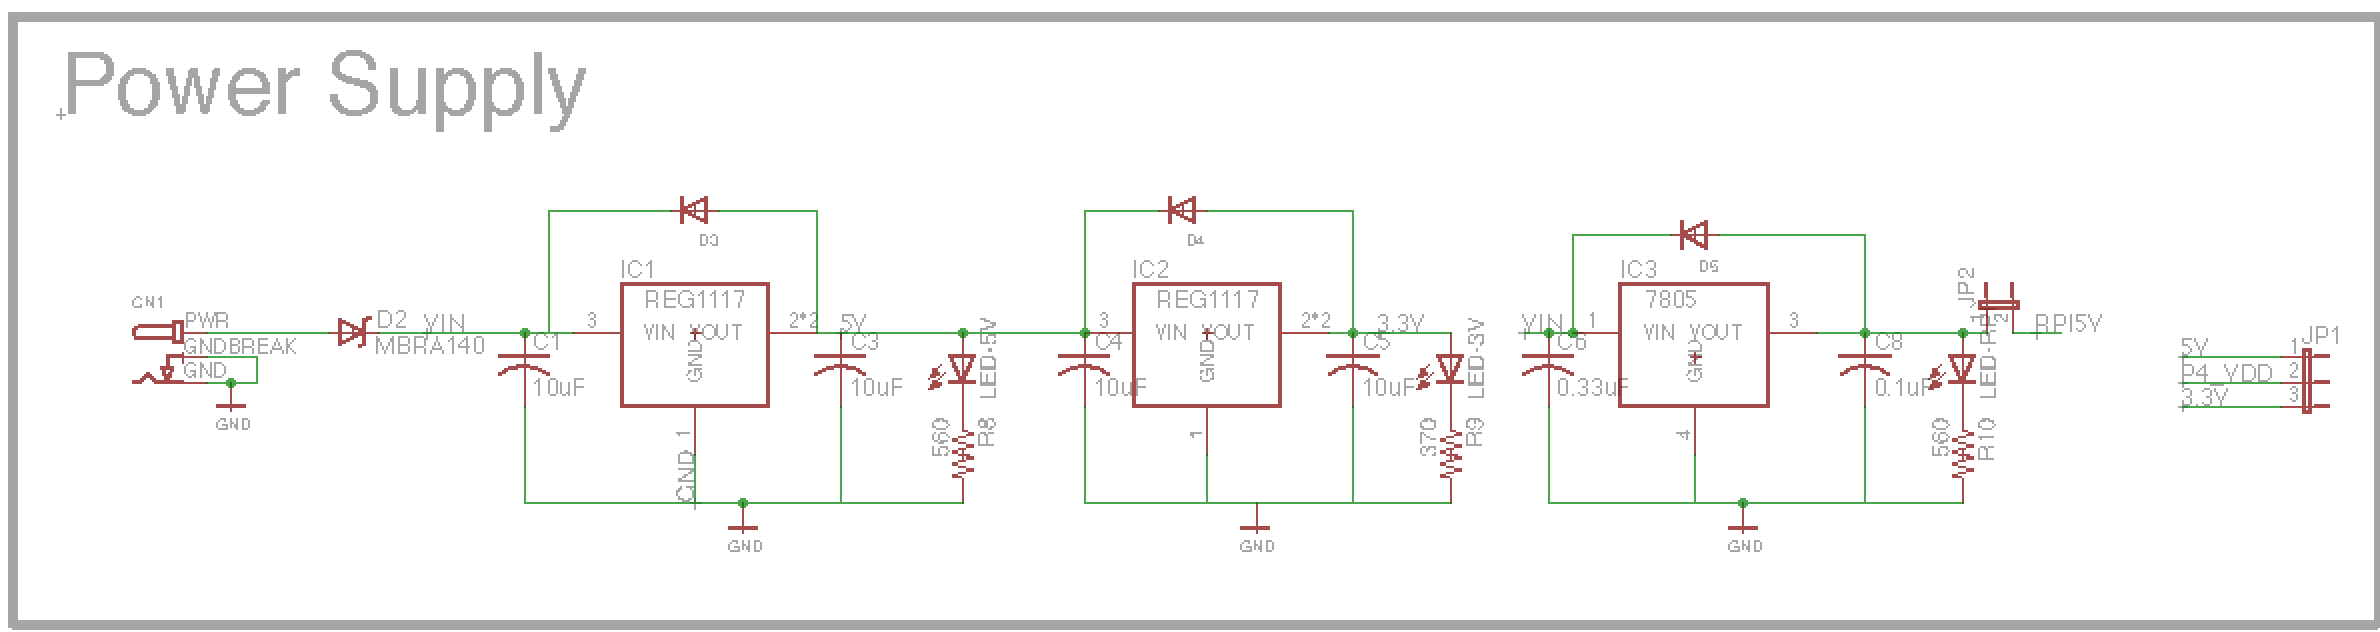
The power supply turned out to be by far the most difficult part of the project. In the first version of the board I chose a regulator that was to small to supply the Raspberry PI. When the RPi was plugged in, the regulator immediately went into thermal shutdown. In general this sucked as the PSoC Applications Manager warned me to pick a big enough regulator. Oh well. In the final version of the board I used a 7805 to supply the RPi, this regulator has a giant tab which allows you to sink heat into the ground plane of the board. On the board I also provide a 5.0V supply and a 3.3V supply for the PSoC using a 1117 regulator.
Here is a picture of the final layout

And here is a picture of the first version of the board.
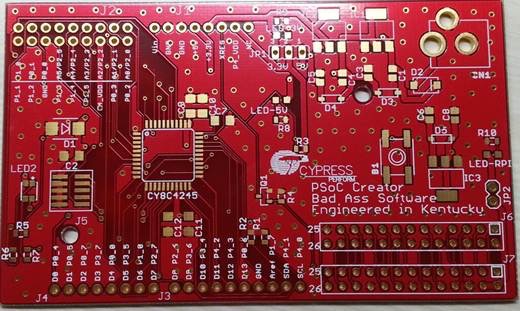
On thing that you might notice on this board is that the vias are exposed. What I didnt know is that you need to tell Eagle to “tent” the vias so that they are covered with solder mask.
There is a lot going on in the layout and it is probably easiest to review the layout using eagle. You can get the design from github at https://github.com/iotexpert/cypi
Index
Description
The Creek: IOT for the Elkhorn Creek
Introduction
The Creek: Solution Architecture 1.0
Overall architecture
The Creek: Creek Board 1.1
Eagle layout of the board
The Creek: Creek Board 1.0 – RCCA
A discussion of the errors in the 1.0 board
The Creek: CYPI, a Raspberry Pi to Arduino Bridge
PSoC4 <--> Raspberry Pi Bridge Board
The Creek: PSoC4 Creator Schematic and Firmware
Firmware to interface with the temperature and pressure sensors
The Creek: Testing the Firmware
Using tools to verify that the PSoC 4 Firmware is working correctly
The Creek: Testing the Bootloader
Make sure that you can load new firmware into the PSoC
The Creek: Software Architecture
All of the Raspberry Pi software connections
The Creek: Install MySql
Instruction to configure MySql
The Creek: Install Tomcat
Instruction to configure Tomcat JSP Server
The Creek: Data Collection Java (Part 1)
The Java program that reads the I2C and saves it in the database
The Creek: Data Collection Java (Part 2)
The Java program that reads the I2C and saves it in the database
The Creek: Create the Chart with JFreeChart
Using open source Java charting software to create plots of the Creek Depth
The Creek: Flood Event Data Processor
A batch program to create analyze the database and create a table of flood events
The Creek: Flood Event Web Page
A batch program to create the flood event web page
The Creek: Creek Server 1.1
Updates to all of the back off server programs to integrate charts
The Creek: JSP Web Page for www.elkhorn-creek.org
The JSP program to make the table and display the website
The Creek: Raspberry Pi Clock Stretching
Sorting out a bug in the system having to do with the Broadcomm Raspberry Pi Master not functioning well with clock stretching
The Creek: Creek Server 1.2
Caching the web pages to make them faster
3 Comments
hi my name is jaka, i am an electronic engineer , i am working on redesign raspiboard to project i doing, i find it hard to get the eagale library for this board , i just get the lib for making shield , can you help me please , please sent me email
ah sorry i missread and i skip the link of the pcb lib, thanks bro great help , love u
Good luck.
Alan