Lesson 9 – WICED Bluetooth: Classic Serial Port

WICED Bluetooth Using the CYW20719

# Title Comment
0 A Two Hour WICED Bluetooth Class WICED Bluetooth Using the CYW20719 in all its glory
1 Resources Links to all of the Cypress WICED information including videos, application notes etc.
2 Your First Project Making Hello World & the Blinky LED
3 The Super Mux Tool Learning about platforms and the Super Mux Tool
4 Snips Using the example projects to learn Bluetooth
5 Bluetooth Designer Using the tool to customize a project and get going fast
6 The CCCD & Notification Writing back to the Central
7 Advertising  Beacon Building a beacon project to advertise your custom information 
8 Scanner Viewing the world around you
9 Bluetooth Classic SPP Using the Serial Port Profile to Transmit Lots of Data

Source code: 

  • git@github.com:iotexpert/wiced_bt_intro.git
  • https://github.com/iotexpert/wiced_bt_intro


Summary

In all of the previous examples I have been using Bluetooth Low Energy.  One of the great benefits of the Cypress CYW20719 is that it is a Combo Radio.  Combo means that it can use both Bluetooth Low Energy as well as Bluetooth Classic.  I am late to the Bluetooth game but as best I can tell Bluetooth Classic and Bluetooth Low Energy are exactly the same … except everything is different.  When Bluetooth was originally conceived, one of the principal functions was to act as “serial port wire cutter”.  Everywhere you looked there were devices that used a serial port wire, e.g. mice, printers, keyboards etc.

For this lesson we are going to dip back into the snip directory to get a Bluetooth Classic program to start with.  The program snip.bt.spp implements the Serial Port Profile (SPP).  The SPP is emulates a classic serial port.  It has all of the uart wires that we know and love including rx,tx,cts etc.  What this allows you to do is open up a high speed (much faster than BLE) connection.

To implement this lesson I will perform the following steps

  1. Make a new folder in the wiced_bt_class folder
  2. Copy the files from apps/snip/bt/spp into my new folder
  3. Create a make target and program it
  4. Make a connection using a Bluetooth serial port on my Mac
  5. Look at where the pin is set
  6. Examine the spp setup code
  7. Modify it to print out all the data sent to the SPP

Implement the SPP


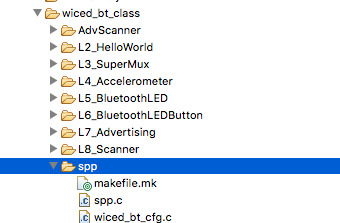
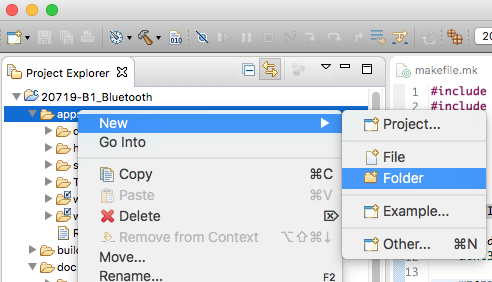
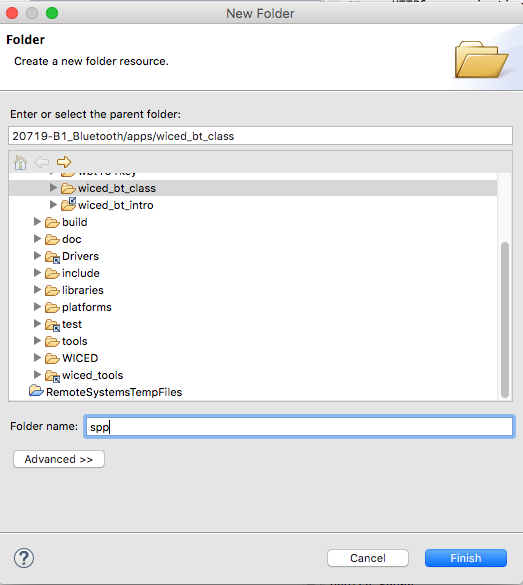
Set the folder name to “spp”

Copy and past the files from the folder apps.snip.bt.spp


And paste them into your new spp folder

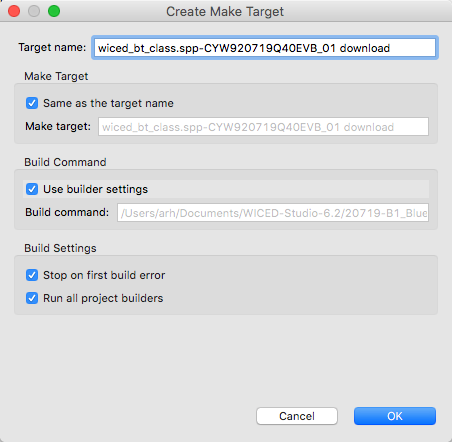
Create a make target for your spp project

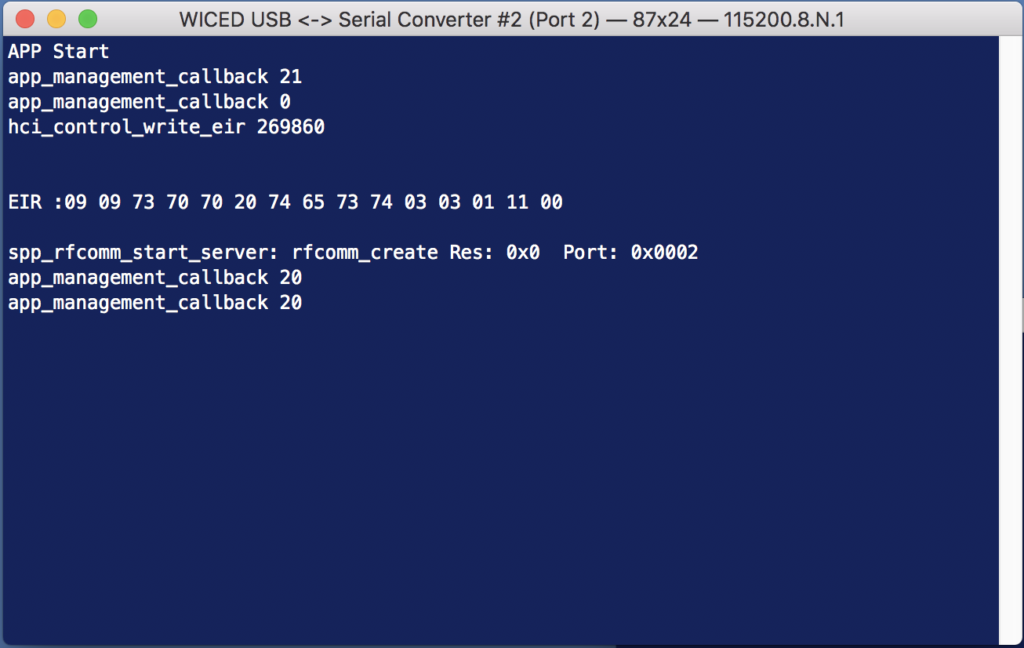
Program the board with your project

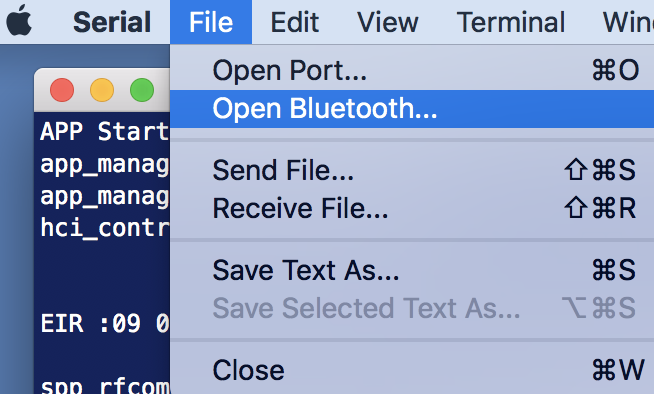
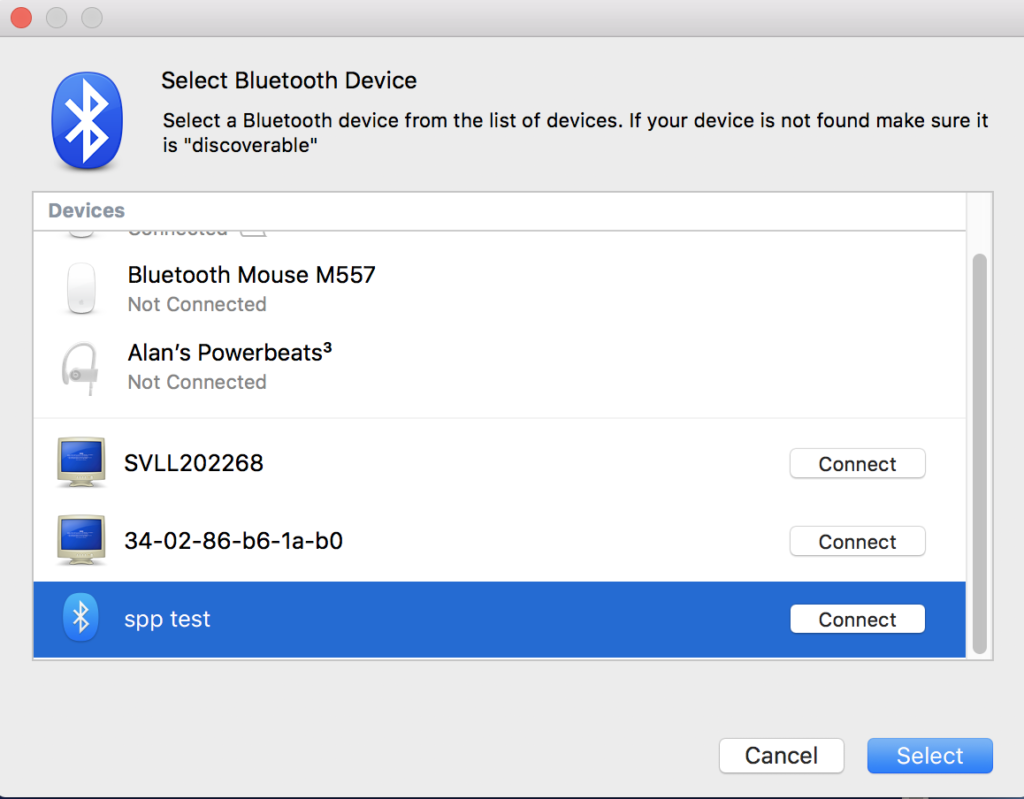
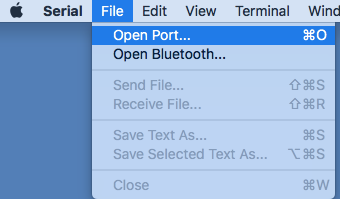
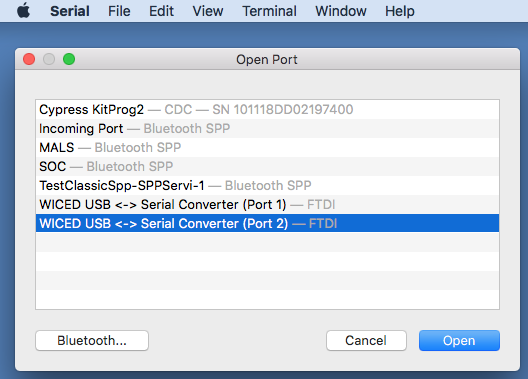
Now tell the computer to open a classic connection by running file->open bluetooth

Select the “spp test”

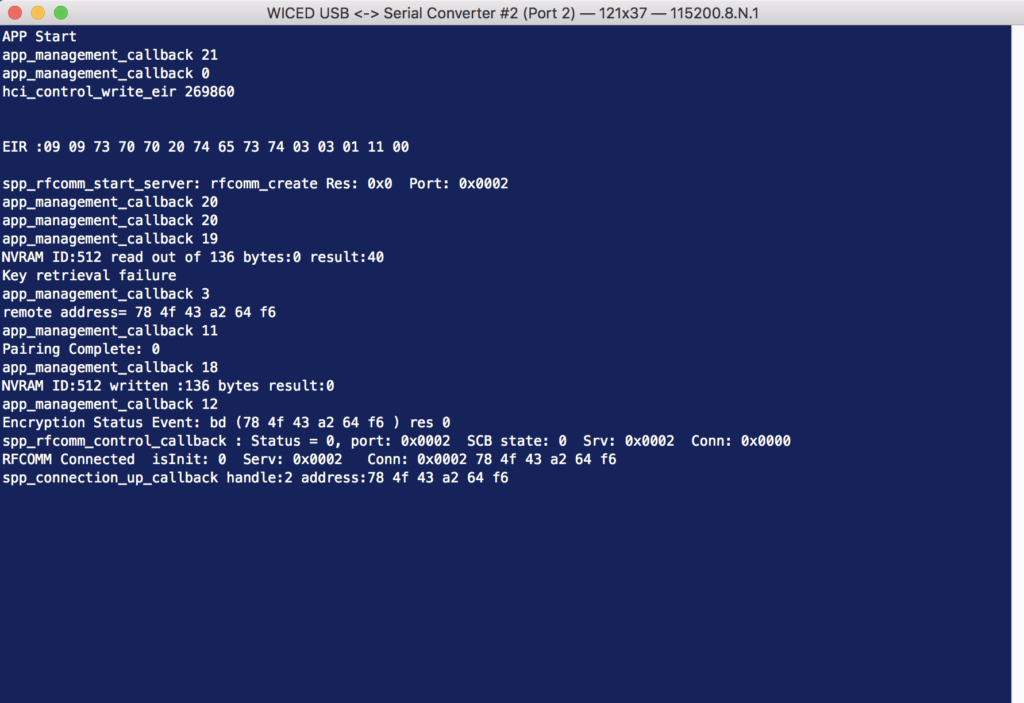
Now press some keys on the new terminal window… and look at the output window of the “spp test”

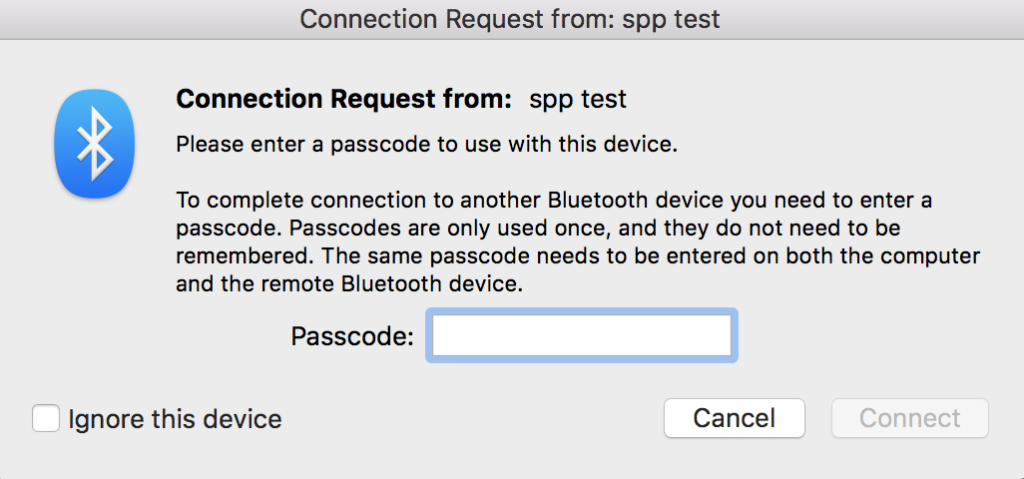
Type in the pin code which is 0000.

But, how did I know the pin code?  Look at the source code.

uint8_t pincode[4] = { 0x30, 0x30, 0x30, 0x30 };

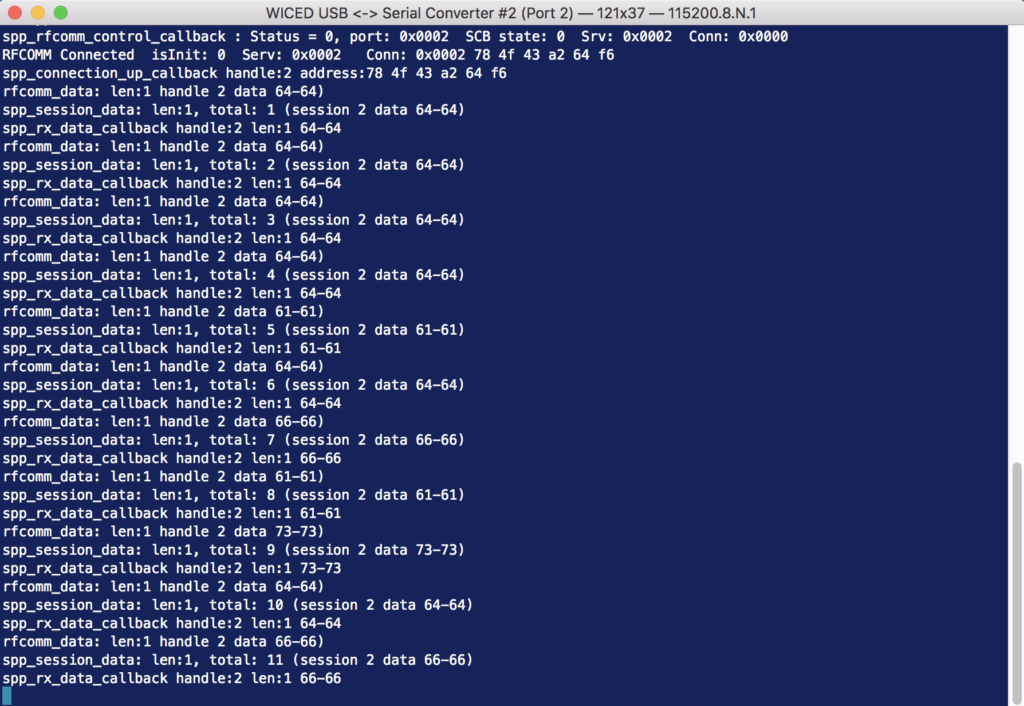
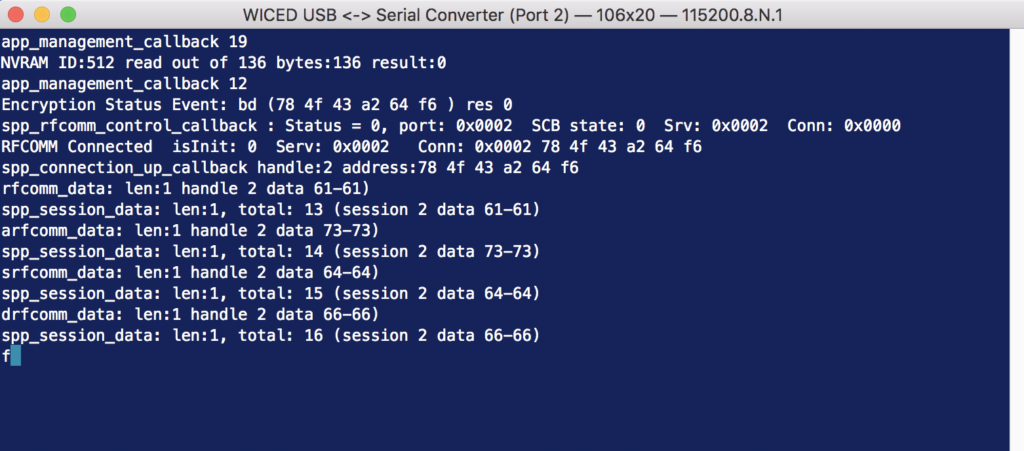
Now, when you press keys on the “Bluetooth serial terminal” you will see a not very helpful message on the CYW920719Q40EVB-01 terminal window.

I think that it would be better to print out the characters that the person types.  So lets figure out how this works.  In the application init function on line 251 there is a call to wiced_bt_spp_startup

void application_init(void)
{
    wiced_bt_gatt_status_t gatt_status;
    wiced_result_t         result;


#if SEND_DATA_ON_INTERRUPT
    /* Configure the button available on the platform */
    wiced_platform_register_button_callback( WICED_PLATFORM_BUTTON_1, app_interrupt_handler, NULL, WICED_PLATFORM_BUTTON_RISING_EDGE);

    // init timer that we will use for the rx data flow control.
    wiced_init_timer(&app_tx_timer, app_tx_ack_timeout, 0, WICED_MILLI_SECONDS_TIMER);
#endif

    app_write_eir();


    // Initialize SPP library
    wiced_bt_spp_startup(&spp_reg);

That function takes a pointer to a structure with a bunch of interesting things in it.  Notice that there is a function called “spp_rx_data_callback” that is called every time that data come in from the SPP.

wiced_bt_spp_reg_t spp_reg =
{
    SPP_RFCOMM_SCN,                     /* RFCOMM service channel number for SPP connection */
    MAX_TX_BUFFER,                      /* RFCOMM MTU for SPP connection */
    spp_connection_up_callback,         /* SPP connection established */
    NULL,                               /* SPP connection establishment failed, not used because this app never initiates connection */
    NULL,                               /* SPP service not found, not used because this app never initiates connection */
    spp_connection_down_callback,       /* SPP connection disconnected */
    spp_rx_data_callback,               /* Data packet received */
};

Now look at the function spp_rx_data_callback.  All it does is print out a message saying how much data and the hex value of the data.

wiced_bool_t spp_rx_data_callback(uint16_t handle, uint8_t* p_data, uint32_t data_len)
{
    int i;
//    wiced_bt_buffer_statistics_t buffer_stats[4];

//    wiced_bt_get_buffer_usage (buffer_stats, sizeof(buffer_stats));

//    WICED_BT_TRACE("0:%d/%d 1:%d/%d 2:%d/%d 3:%d/%d\n", buffer_stats[0].current_allocated_count, buffer_stats[0].max_allocated_count,
//                   buffer_stats[1].current_allocated_count, buffer_stats[1].max_allocated_count,
//                   buffer_stats[2].current_allocated_count, buffer_stats[2].max_allocated_count,
//                   buffer_stats[3].current_allocated_count, buffer_stats[3].max_allocated_count);

//    wiced_result_t wiced_bt_get_buffer_usage (&buffer_stats, sizeof(buffer_stats));

    WICED_BT_TRACE("%s handle:%d len:%d %02x-%02x\n", __FUNCTION__, handle, data_len, p_data[0], p_data[data_len - 1]);

#if LOOPBACK_DATA
    wiced_bt_spp_send_session_data(handle, p_data, data_len);
#endif
    return WICED_TRUE;
}

So,  How about instead of that message we just print out the data.

    //WICED_BT_TRACE("%s handle:%d len:%d %02x-%02x\n", __FUNCTION__, handle, data_len, p_data[0], p_data[data_len - 1]);

    for(int i=0;i<data_len;i++)
        WICED_BT_TRACE("%c",p_data[i]);

Now when I run the project and type I see the characters that I type coming out on the serial port.

Lesson 8 – WICED Bluetooth: The Advertising Scanner

WICED Bluetooth Using the CYW20719

# Title Comment
0 A Two Hour WICED Bluetooth Class WICED Bluetooth Using the CYW20719 in all its glory
1 Resources Links to all of the Cypress WICED information including videos, application notes etc.
2 Your First Project Making Hello World & the Blinky LED
3 The Super Mux Tool Learning about platforms and the Super Mux Tool
4 Snips Using the example projects to learn Bluetooth
5 Bluetooth Designer Using the tool to customize a project and get going fast
6 The CCCD & Notification Writing back to the Central
7 Advertising  Beacon Building a beacon project to advertise your custom information 
8 Scanner Viewing the world around you
9 Bluetooth Classic SPP Using the Serial Port Profile to Transmit Lots of Data

Source code: 

  • git@github.com:iotexpert/wiced_bt_intro.git
  • https://github.com/iotexpert/wiced_bt_intro


Summary

In the last lesson I showed you how to build a BLE Advertising Beacon.  In that lesson I used a program called the “AdvScanner” which ran on a CYW920719Q40EVB-01 and acted like a Bluetooth Sniffer.  In this lesson I’ll show you how to build a simpler version of that program to look for the L7_Advertiser we built in the last lesson.

The important concepts in this lesson are:

  1. BLE Scanning
  2. Parsing Advertising Packets

I am going to build a project that Scans for BLE Advertisers.  Then, I’ll add the ability to print out the advertising packet.  And finally, I will add filtering capability to only look for advertisers who are using the Cypress Manufacturers code.

The steps that we will follow are:

  1. Make a new project with WICED Bluetooth Designer called L8_Scanner
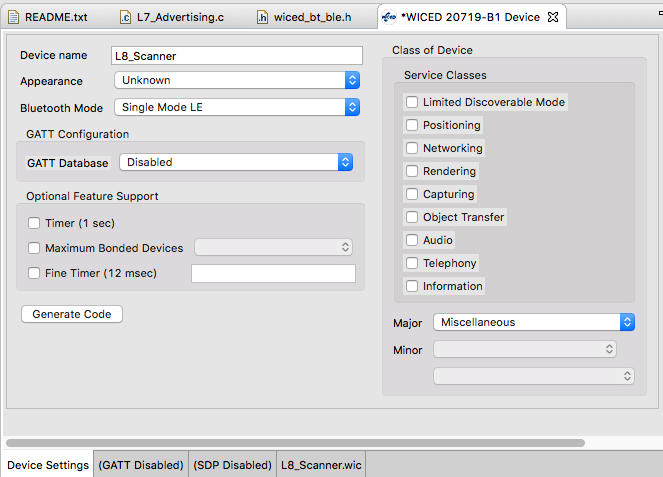
  2. Turn off the GATT Database
  3. Move it into your project folder
  4. Fix the WICED_BT_TRACE to use the PUART
  5. Create a make target and build it
  6. Add a new function that prints out Advertising Packets
  7. Update the l8_scanner_app_init function to remove Advertising
  8. Update the wiced_bt_config to never stop scanning
  9. Program the development kit and see what happens
  10. Update the newAdv function to print out the raw data in the advertising packet
  11. Program again and see all of the chaos
  12. Put a filter for the Advertisers using the Cypress MFG Code
  13. Program

Implement the Project

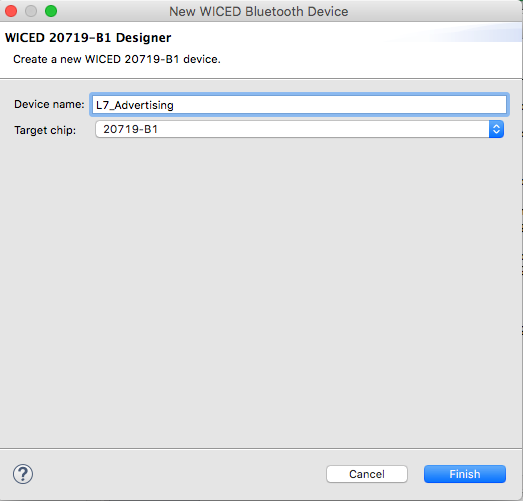
Create a new project called L8_Scanner using the Bluetooth Designer

Turn off the GATT Database and then press Generate Code

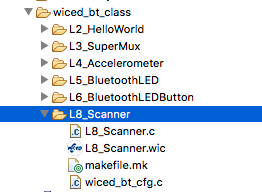
Move the project into the wiced_bt_class folder

Update the WICED_BT_TRACE to send output to the PUART

#if ((defined WICED_BT_TRACE_ENABLE) || (defined HCI_TRACE_OVER_TRANSPORT))
    /* Set the Debug UART as WICED_ROUTE_DEBUG_NONE to get rid of prints */
    //  wiced_set_debug_uart( WICED_ROUTE_DEBUG_NONE );

    /* Set Debug UART as WICED_ROUTE_DEBUG_TO_PUART to see debug traces on Peripheral UART (PUART) */
      wiced_set_debug_uart( WICED_ROUTE_DEBUG_TO_PUART );

    /* Set the Debug UART as WICED_ROUTE_DEBUG_TO_WICED_UART to send debug strings over the WICED debug interface */
    //wiced_set_debug_uart( WICED_ROUTE_DEBUG_TO_WICED_UART );
#endif

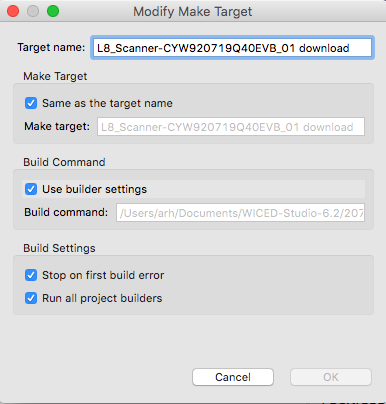
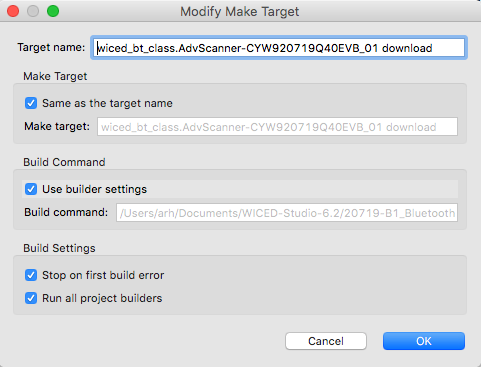
Modify the make target & program that was created by the BT Designer

Make a new function that will be called when WICED finds a new advertising packet.

void newAdv(wiced_bt_ble_scan_results_t *p_scan_result, uint8_t *p_adv_data)
{
    WICED_BT_TRACE("Found device %B\n",p_scan_result->remote_bd_addr);

}

Remove the start advertising from l8_scanner_app_init

/*
 * This function is executed in the BTM_ENABLED_EVT management callback.
 */
void l8_scanner_app_init(void)
{
    /* Initialize Application */
    wiced_bt_app_init();

    /* Allow peer to pair */
    wiced_bt_set_pairable_mode(WICED_TRUE, 0);

    /* Set Advertisement Data */
    //l8_scanner_set_advertisement_data();

    /* Start Undirected LE Advertisements on device startup.
     * The corresponding parameters are contained in 'wiced_bt_cfg.c' */
    /* TODO: Make sure that this is the desired behavior. */
    //wiced_bt_start_advertisements(BTM_BLE_ADVERT_UNDIRECTED_HIGH, 0, NULL);
    wiced_bt_ble_scan(BTM_BLE_SCAN_TYPE_HIGH_DUTY,FALSE,newAdv);
}

Update wiced_bt_config.c to never stop scanning.

        .high_duty_scan_duration =          0,                                                          /**< High Duty Scan Duration in seconds (0 for infinite) */

Program your development kit and see what happens.

Now lets update the program to print the advertising packets.

void newAdv(wiced_bt_ble_scan_results_t *p_scan_result, uint8_t *p_adv_data)
{

    uint8_t mfgLen;
    uint8_t* mfgData = wiced_bt_ble_check_advertising_data( p_adv_data,0xFF,&mfgLen);


    WICED_BT_TRACE("Found device %B ",p_scan_result->remote_bd_addr);

    uint8_t index=0;
    int fieldLength=p_adv_data[index];
    do {
        for(int i=0;i<=fieldLength;i++)
            WICED_BT_TRACE("%02X ",p_adv_data[index+i]);

        index = index + fieldLength + 1;
        fieldLength = p_adv_data[index];

    } while(fieldLength);

    WICED_BT_TRACE("\n");
}

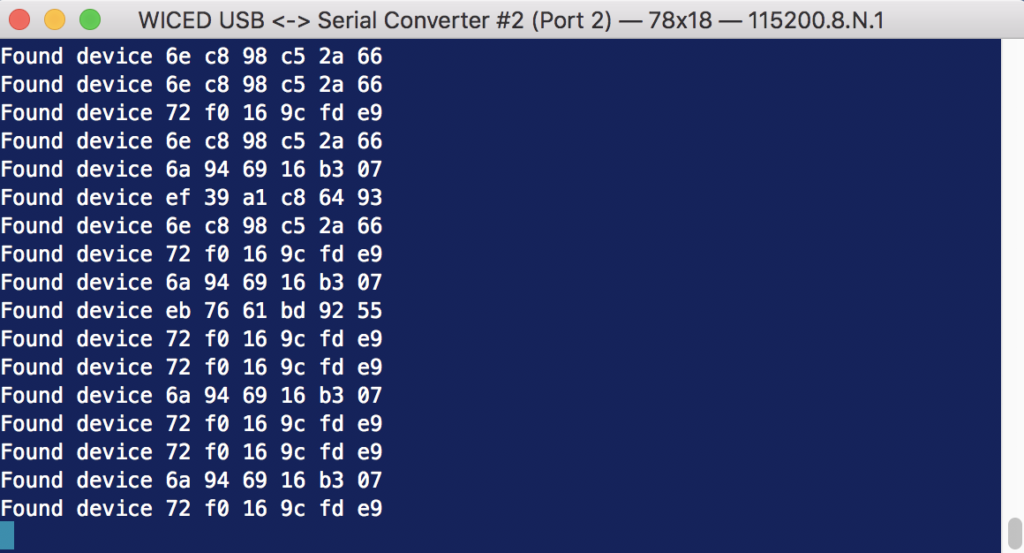
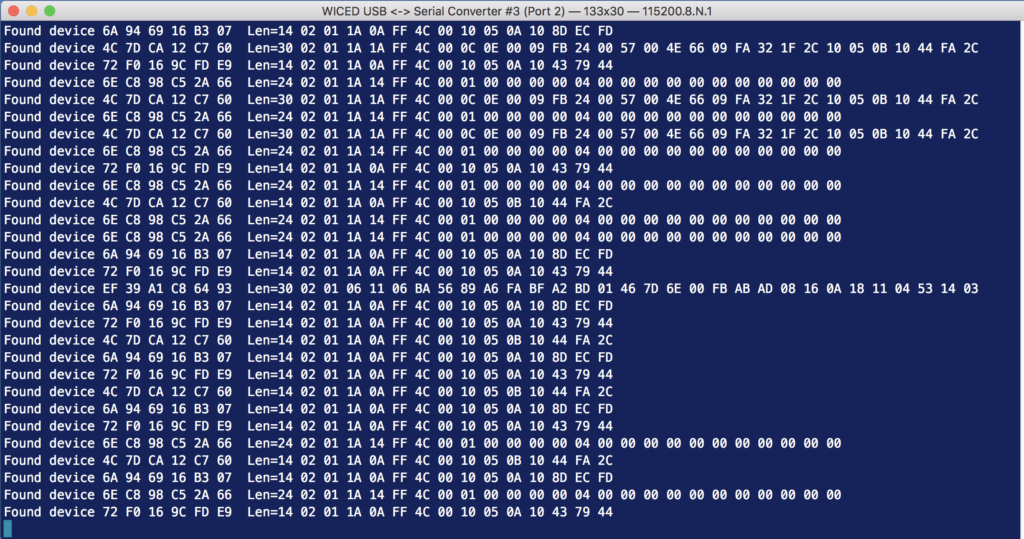
Now program the development kit and see what happens.  Where I am sitting this is not very helpful because there are boatloads of advertisers.

Now let’s make one more change.  Instead of printing all of the packets let’s only look only at the ones that have Manufacturer data, the right length and the Cypress manufacturer id.

    uint8_t mfgLen;
    uint8_t* mfgData = wiced_bt_ble_check_advertising_data( p_adv_data,0xFF,&mfgLen);

    if(!(mfgData && mfgLen == 3 && mfgData[0] == 0x31 && mfgData[1]  == 0x01 ))
        return;

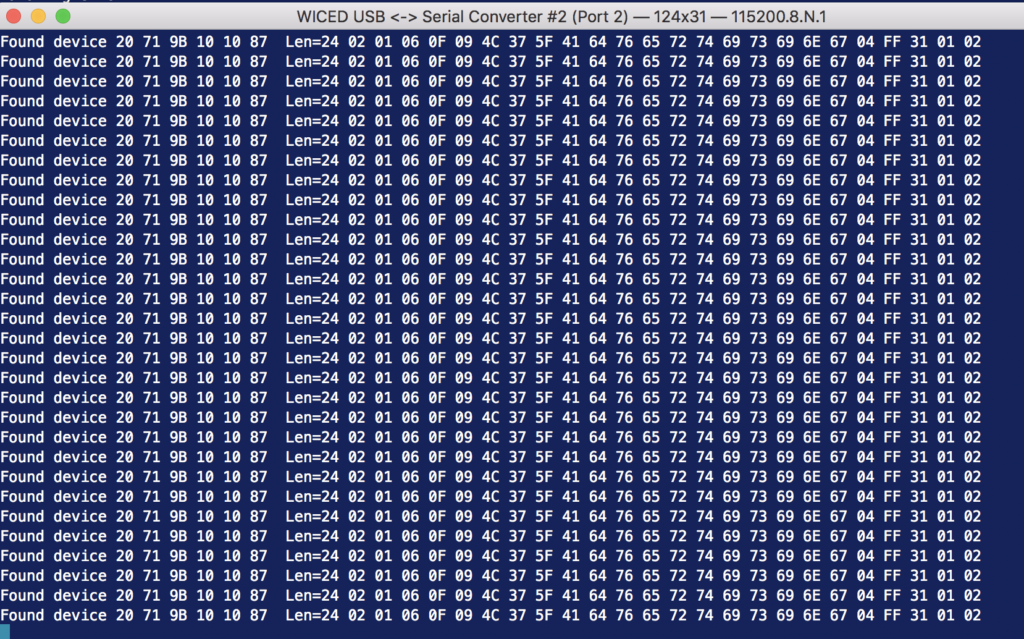
Now I only see my L7_Advertising project

Lesson 7 – WICED Bluetooth: Bluetooth Advertising

WICED Bluetooth Using the CYW20719

# Title Comment
0 A Two Hour WICED Bluetooth Class WICED Bluetooth Using the CYW20719 in all its glory
1 Resources Links to all of the Cypress WICED information including videos, application notes etc.
2 Your First Project Making Hello World & the Blinky LED
3 The Super Mux Tool Learning about platforms and the Super Mux Tool
4 Snips Using the example projects to learn Bluetooth
5 Bluetooth Designer Using the tool to customize a project and get going fast
6 The CCCD & Notification Writing back to the Central
7 Advertising  Beacon Building a beacon project to advertise your custom information 
8 Scanner Viewing the world around you
9 Bluetooth Classic SPP Using the Serial Port Profile to Transmit Lots of Data

Source code: 

  • git@github.com:iotexpert/wiced_bt_intro.git
  • https://github.com/iotexpert/wiced_bt_intro


Summary

Everywhere you go there are bunches of Bluetooth devices that are acting as beacons.  Apple has a standard called iBeacon.  Google has a standard called Eddystone.  Some companies use those standards, and some companies make proprietary beacons.  In this lesson we will build a beacon.

The important concepts in this lesson are:

  1. Advertising packet formats
  2. wiced_bt_cfg.c

The steps I will follow are:

  1. Run BT Designer
  2. Setup the device as “no gatt database”
  3. Move the project into the wiced_bt_class folder
  4. Edit the make target
  5. Fix the WICED_BT_TRACE to go to the PUART
  6. Run it
  7. Edit the wiced_bt_cfg.c to never timeout
  8. Setup no random address changing
  9. Add the manufacturing data uint8_t array and include the Cypress company code
  10. Change the start advertising call to BTM_BLE_ADVERT_NONCONN_HIGH, BLE_ADDR_PUBLIC
  11. Update the length of the advertising packet
  12. Update the set advertising packet to have the manufacturing data
  13. Add a button interrupt function
  14. Register the button interrupt

BLE Concepts

The Advertising Packet is a string of 3-31 bytes that is broadcast at a configurable interval. The packet is broken up into variable length fields. Each field has the form:

  • Length in bytes (not including the Length byte)
  • Type
  • Optional Data

The minimum packet requires the <<Flags>> field which is a set of flags that defines how the device behaves (e.g. is it connectable?). Here is a list of the other field Types that you can add:

/** Advertisement data types */
enum wiced_bt_ble_advert_type_e {
    BTM_BLE_ADVERT_TYPE_FLAG                        = 0x01,                 /**< Advertisement flags */
    BTM_BLE_ADVERT_TYPE_16SRV_PARTIAL               = 0x02,                 /**< List of supported services - 16 bit UUIDs (partial) */
    BTM_BLE_ADVERT_TYPE_16SRV_COMPLETE              = 0x03,                 /**< List of supported services - 16 bit UUIDs (complete) */
    BTM_BLE_ADVERT_TYPE_32SRV_PARTIAL               = 0x04,                 /**< List of supported services - 32 bit UUIDs (partial) */
    BTM_BLE_ADVERT_TYPE_32SRV_COMPLETE              = 0x05,                 /**< List of supported services - 32 bit UUIDs (complete) */
    BTM_BLE_ADVERT_TYPE_128SRV_PARTIAL              = 0x06,                 /**< List of supported services - 128 bit UUIDs (partial) */
    BTM_BLE_ADVERT_TYPE_128SRV_COMPLETE             = 0x07,                 /**< List of supported services - 128 bit UUIDs (complete) */
    BTM_BLE_ADVERT_TYPE_NAME_SHORT                  = 0x08,                 /**< Short name */
    BTM_BLE_ADVERT_TYPE_NAME_COMPLETE               = 0x09,                 /**< Complete name */
    BTM_BLE_ADVERT_TYPE_TX_POWER                    = 0x0A,                 /**< TX Power level  */
    BTM_BLE_ADVERT_TYPE_DEV_CLASS                   = 0x0D,                 /**< Device Class */
    BTM_BLE_ADVERT_TYPE_SIMPLE_PAIRING_HASH_C       = 0x0E,                 /**< Simple Pairing Hash C */
    BTM_BLE_ADVERT_TYPE_SIMPLE_PAIRING_RAND_C       = 0x0F,                 /**< Simple Pairing Randomizer R */
    BTM_BLE_ADVERT_TYPE_SM_TK                       = 0x10,                 /**< Security manager TK value */
    BTM_BLE_ADVERT_TYPE_SM_OOB_FLAG                 = 0x11,                 /**< Security manager Out-of-Band data */
    BTM_BLE_ADVERT_TYPE_INTERVAL_RANGE              = 0x12,                 /**< Slave connection interval range */
    BTM_BLE_ADVERT_TYPE_SOLICITATION_SRV_UUID       = 0x14,                 /**< List of solicitated services - 16 bit UUIDs */
    BTM_BLE_ADVERT_TYPE_128SOLICITATION_SRV_UUID    = 0x15,                 /**< List of solicitated services - 128 bit UUIDs */
    BTM_BLE_ADVERT_TYPE_SERVICE_DATA                = 0x16,                 /**< Service data - 16 bit UUID */
    BTM_BLE_ADVERT_TYPE_PUBLIC_TARGET               = 0x17,                 /**< Public target address */
    BTM_BLE_ADVERT_TYPE_RANDOM_TARGET               = 0x18,                 /**< Random target address */
    BTM_BLE_ADVERT_TYPE_APPEARANCE                  = 0x19,                 /**< Appearance */
    BTM_BLE_ADVERT_TYPE_ADVERT_INTERVAL             = 0x1a,                 /**< Advertising interval */
    BTM_BLE_ADVERT_TYPE_LE_BD_ADDR                  = 0x1b,                 /**< LE device bluetooth address */
    BTM_BLE_ADVERT_TYPE_LE_ROLE                     = 0x1c,                 /**< LE role */
    BTM_BLE_ADVERT_TYPE_256SIMPLE_PAIRING_HASH      = 0x1d,                 /**< Simple Pairing Hash C-256 */
    BTM_BLE_ADVERT_TYPE_256SIMPLE_PAIRING_RAND      = 0x1e,                 /**< Simple Pairing Randomizer R-256 */
    BTM_BLE_ADVERT_TYPE_32SOLICITATION_SRV_UUID     = 0x1f,                 /**< List of solicitated services - 32 bit UUIDs */
    BTM_BLE_ADVERT_TYPE_32SERVICE_DATA              = 0x20,                 /**< Service data - 32 bit UUID */
    BTM_BLE_ADVERT_TYPE_128SERVICE_DATA             = 0x21,                 /**< Service data - 128 bit UUID */
    BTM_BLE_ADVERT_TYPE_CONN_CONFIRM_VAL            = 0x22,                 /**< LE Secure Connections Confirmation Value */
    BTM_BLE_ADVERT_TYPE_CONN_RAND_VAL               = 0x23,                 /**< LE Secure Connections Random Value */
    BTM_BLE_ADVERT_TYPE_URI                         = 0x24,                 /**< URI */
    BTM_BLE_ADVERT_TYPE_INDOOR_POS                  = 0x25,                 /**< Indoor Positioning */
    BTM_BLE_ADVERT_TYPE_TRANS_DISCOVER_DATA         = 0x26,                 /**< Transport Discovery Data */
    BTM_BLE_ADVERT_TYPE_SUPPORTED_FEATURES          = 0x27,                 /**< LE Supported Features */
    BTM_BLE_ADVERT_TYPE_UPDATE_CH_MAP_IND           = 0x28,                 /**< Channel Map Update Indication */
    BTM_BLE_ADVERT_TYPE_PB_ADV                      = 0x29,                 /**< PB-ADV */
    BTM_BLE_ADVERT_TYPE_MESH_MSG                    = 0x2A,                 /**< Mesh Message */
    BTM_BLE_ADVERT_TYPE_MESH_BEACON                 = 0x2B,                 /**< Mesh Beacon */
    BTM_BLE_ADVERT_TYPE_3D_INFO_DATA                = 0x3D,                 /**< 3D Information Data */
    BTM_BLE_ADVERT_TYPE_MANUFACTURER                = 0xFF                  /**< Manufacturer data */
};

Here is an example of the advertising packet that we are going to generate

Implement the Project

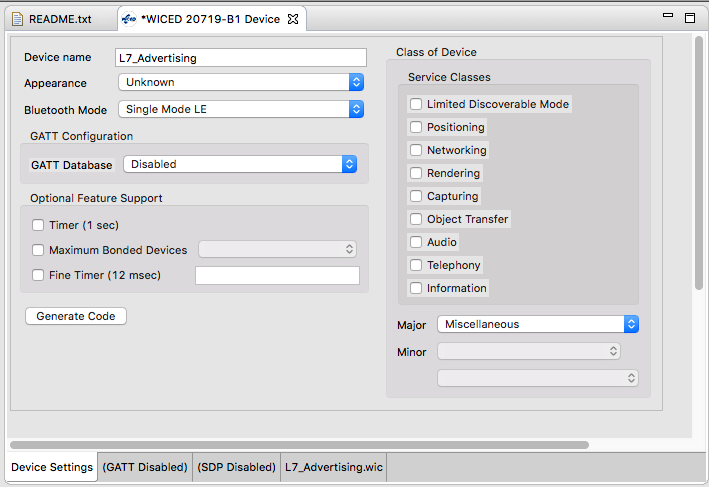
Run BT Designer and create a new project called “L7_Advertising”

Turn off the GATT Database

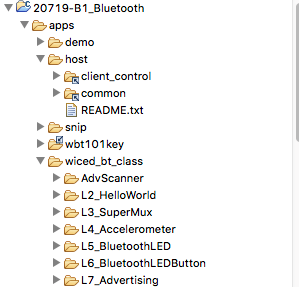
Move the project into the wiced_bt_class folder

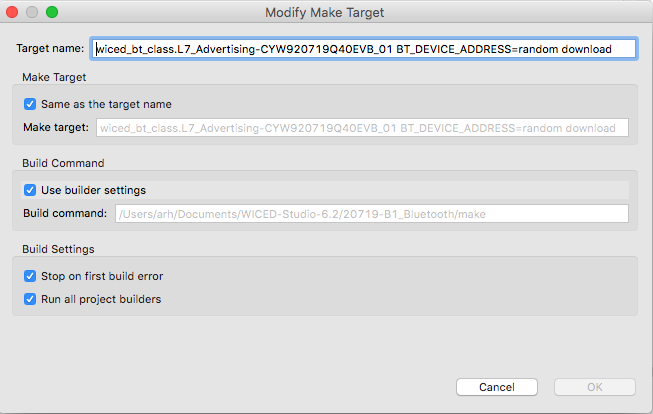
Edit the make target

Setup the the WICED_BT_TRACE to use the PUART

#if ((defined WICED_BT_TRACE_ENABLE) || (defined HCI_TRACE_OVER_TRANSPORT))
    /* Set the Debug UART as WICED_ROUTE_DEBUG_NONE to get rid of prints */
    //  wiced_set_debug_uart( WICED_ROUTE_DEBUG_NONE );

    /* Set Debug UART as WICED_ROUTE_DEBUG_TO_PUART to see debug traces on Peripheral UART (PUART) */
      wiced_set_debug_uart( WICED_ROUTE_DEBUG_TO_PUART );

    /* Set the Debug UART as WICED_ROUTE_DEBUG_TO_WICED_UART to send debug strings over the WICED debug interface */
    //wiced_set_debug_uart( WICED_ROUTE_DEBUG_TO_WICED_UART );
#endif

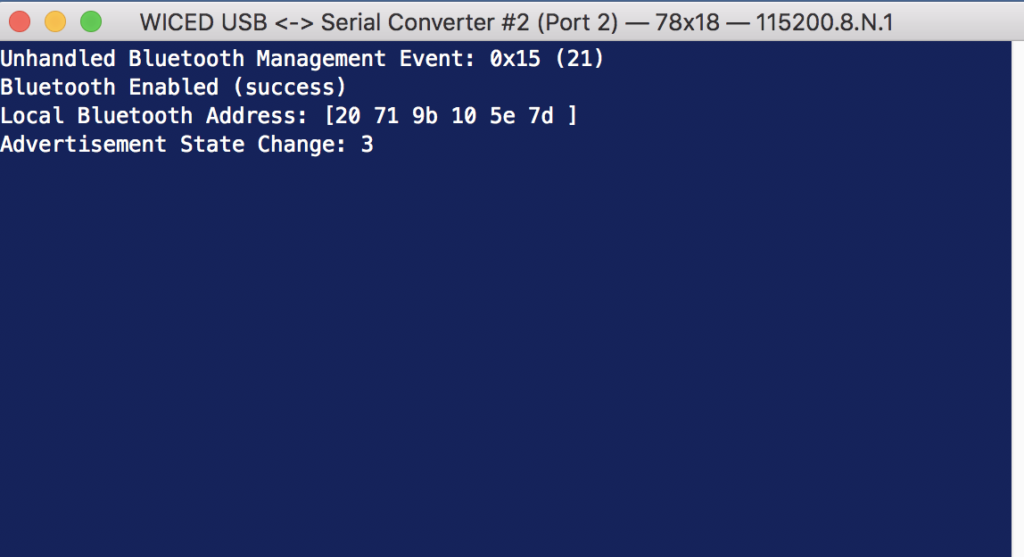
Run it

Now that we know it is working, Ill edit the wiced_bt_cfg.c to never timeout

        .high_duty_nonconn_duration =       0,                                                         /**< High Duty Non-Connectable Advertising Duration in seconds (0 for infinite) */

Setup no random address changing

    .rpa_refresh_timeout =                  WICED_BT_CFG_DEFAULT_RANDOM_ADDRESS_NEVER_CHANGE,         /**< Interval of random address refreshing - secs */

Now edit the L7_Advertising.c to add the manufacturing data uint8_t array

uint8_t manuf_data[] = {0x31,0x01,0x00};

Switch to non-connectable advertising

    wiced_bt_start_advertisements(BTM_BLE_ADVERT_NONCONN_HIGH, BLE_ADDR_PUBLIC, NULL);

Update the l7_advertising_set_advertisement_data function to have three elements in the advertising packet

    wiced_bt_ble_advert_elem_t adv_elem[3] = { 0 };

Add the Manufacturer information to the advertising packet

    /* Advertisement Element for Manufacturer Data */
    adv_elem[num_elem].advert_type = BTM_BLE_ADVERT_TYPE_MANUFACTURER;
    adv_elem[num_elem].len = sizeof(manuf_data);
    adv_elem[num_elem].p_data = manuf_data;
    num_elem++;

Add a button interrupt function

void buttonISR(void *data, uint8_t port_pin )
{

    manuf_data[2] += 1;
    l7_advertising_set_advertisement_data();
    WICED_BT_TRACE("Manufacturer Data = %d\n",manuf_data[2]);
}

Register the button interrupt

 wiced_hal_gpio_register_pin_for_interrupt( WICED_GPIO_PIN_BUTTON_1, buttonISR, NULL );
    wiced_hal_gpio_configure_pin( WICED_GPIO_PIN_BUTTON_1, ( GPIO_INPUT_ENABLE | GPIO_PULL_UP | GPIO_EN_INT_FALLING_EDGE ), GPIO_PIN_OUTPUT_HIGH );

Test using the AdvScanner

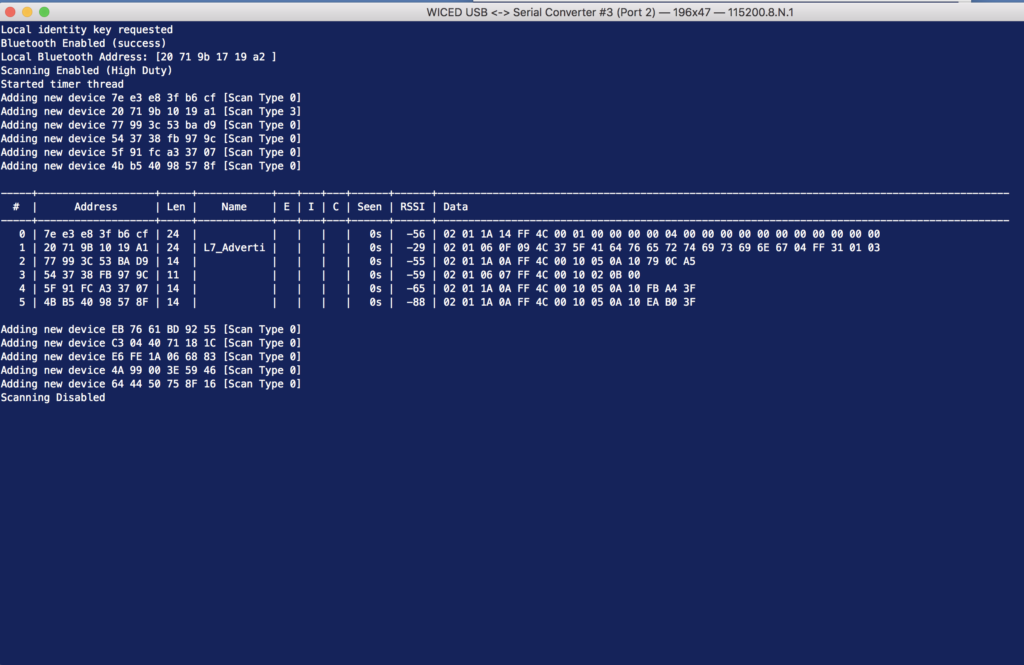
I have given you a project called the “AdvScanner”.  You can run it by creating a make target.

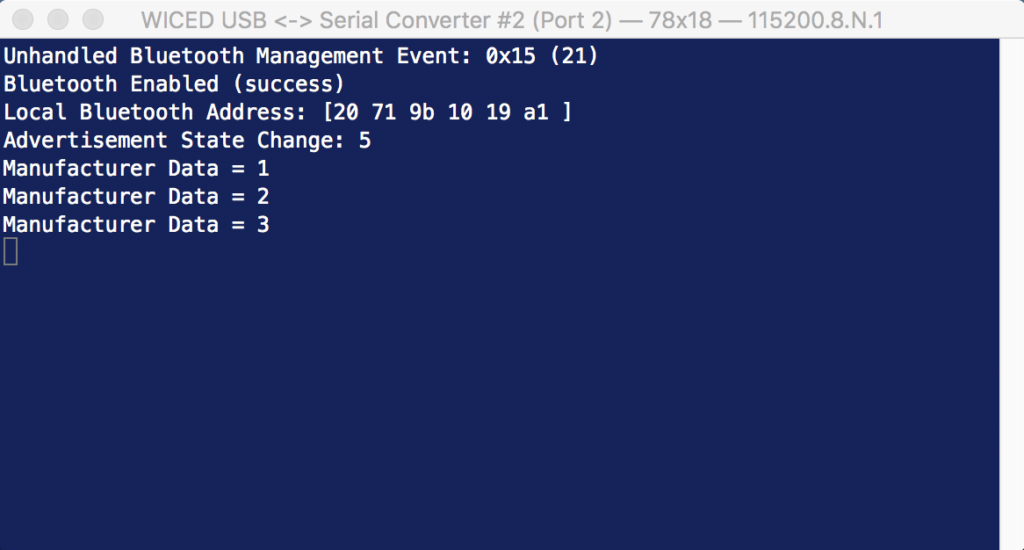
When I run the L7_Advertising project and press the buttons a few times my terminal will look like this

And when I look at the output of the scanner program you can see the advertising packet for the this project.  Notice that the last three bytes are 31 01 03.  The 03 is the count of button presses.

Lesson 5 – WICED Bluetooth: Bluetooth Designer – Turn up the Radio!

WICED Bluetooth Using the CYW20719

# Title Comment
0 A Two Hour WICED Bluetooth Class WICED Bluetooth Using the CYW20719 in all its glory
1 Resources Links to all of the Cypress WICED information including videos, application notes etc.
2 Your First Project Making Hello World & the Blinky LED
3 The Super Mux Tool Learning about platforms and the Super Mux Tool
4 Snips Using the example projects to learn Bluetooth
5 Bluetooth Designer Using the tool to customize a project and get going fast
6 The CCCD & Notification Writing back to the Central
7 Advertising  Beacon Building a beacon project to advertise your custom information 
8 Scanner Viewing the world around you
9 Bluetooth Classic SPP Using the Serial Port Profile to Transmit Lots of Data

Source code: 

  • git@github.com:iotexpert/wiced_bt_intro.git
  • https://github.com/iotexpert/wiced_bt_intro


Summary

In this lesson we are going to build the simplest project that I could think of… turning an LED on/off with Bluetooth Low Energy.

The important BLE concepts are

  1. What is a Central / Peripheral
  2. What is Advertising
  3. What is a GATT Database

The important WICED Bluetooth Concepts are:

  1. How do you run WICED Bluetooth Designer
  2. What is the structure of a WICED Bluetooth Project
  3. What is a Callback
  4. How is the GATT Database Implemented
  5. How to run CySmart

The steps that we will follow are:

  1. Run BT Designer
  2. Create a project called L5_BluetoothLED
  3. Go to the characteristics page
  4. Add a vendor specific service
  5. Name the Service L5Service
  6. Add an optional characteristic that is vendor specific
  7. Name it RED
  8. Make it 1 byte with an initial value of 01
  9. Set it up for host write
  10. Add a user description to the characteristic
  11. Generate the code
  12. Move the folder to the wiced_bt_class folder
  13. Fix the three include problems
  14. Reset the debug UART to PUART
  15. When there is a write, change the value of the WICED_LED_1 GPIO
  16. Test

BLE Concepts

In the world of BLE there are two sides of every connection

  • The Central – typically a cellphone
  • The Peripheral – your WICED device

Centrals listen for Peripherals that are Advertising.  Advertising is a periodic packet of up to 31 bytes of information that a Peripheral will send out to make it presence known.  When a Central hears the Advertising packets of a Peripheral that is “interesting” it can initiate a connection.

Once a connection is made, how do you exchange information?  The answer is that a Peripheral has a database running inside of it.  The database is called a “GATT database”.   A Central can perform “Service Discovery” to find all of the legal stuff in the database.  The GATT database is organized into one or more “Services” that have one or more “Characteristics”.  For instance a Heart Rate Monitor might have a “Heart Rate Service” with two characteristics, one for heart rate and one for battery level.

There are two types of Services.  Ones that are specified by the Bluetooth SIG, like heartrate.  And vendor specific custom services.

Run Bluetooth Designer

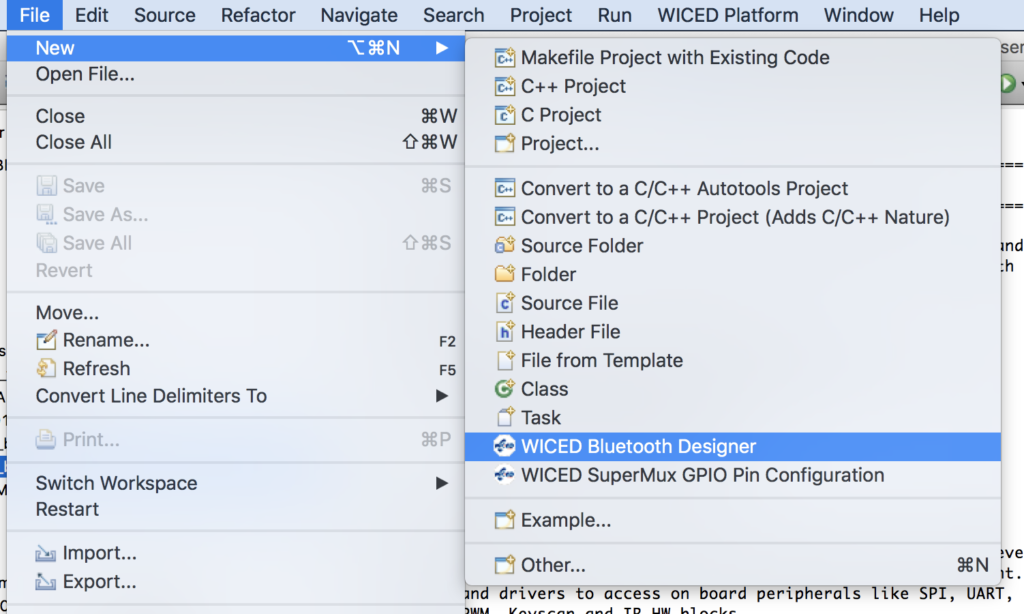
The Bluetooth Designer is a GUI tool that we built into Eclipse.  It allows you to configure some of the fundamental Bluetooth feature (like the GATT Database) and then automatically generate the code.  Start Bluetooth Designer by running File->New->WICED Bluetooth Designer.

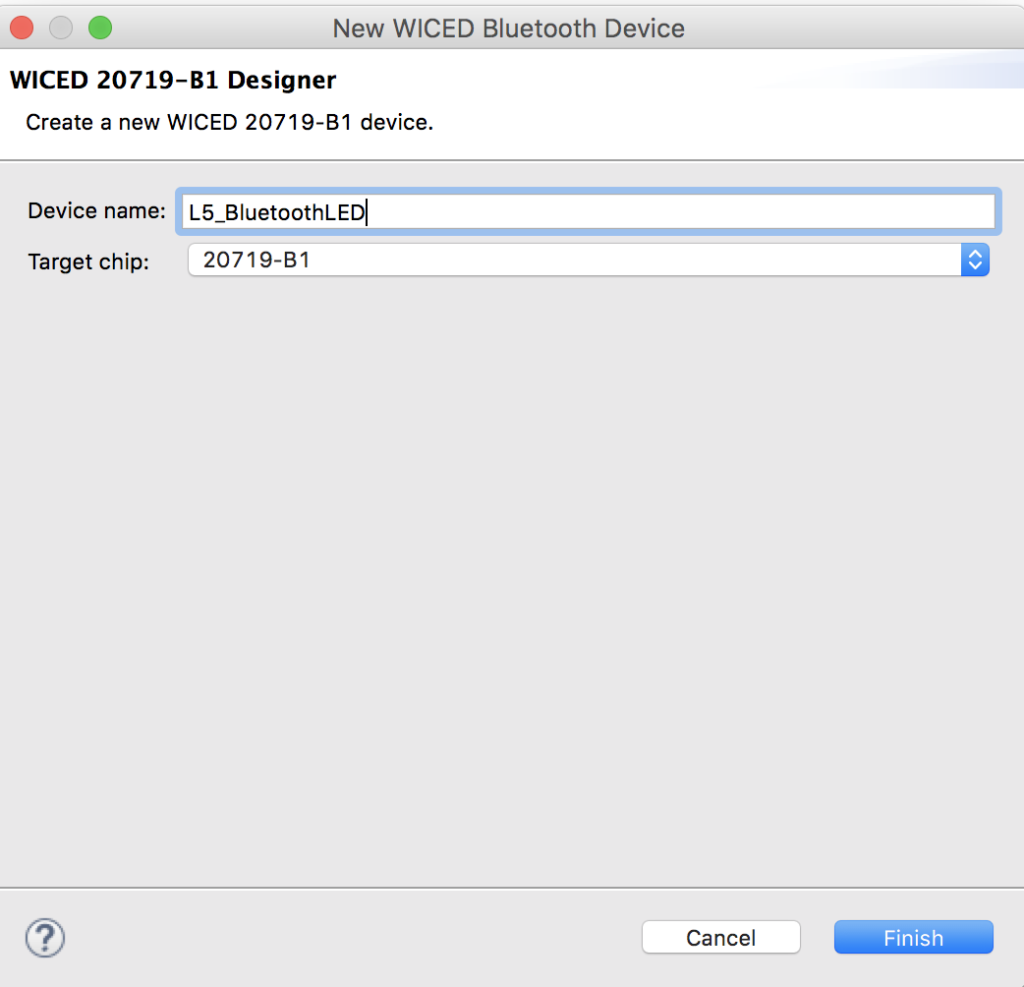
Since this is Lesson 5 and we are going to write and LED… call the project “L5_BluetoothLED”

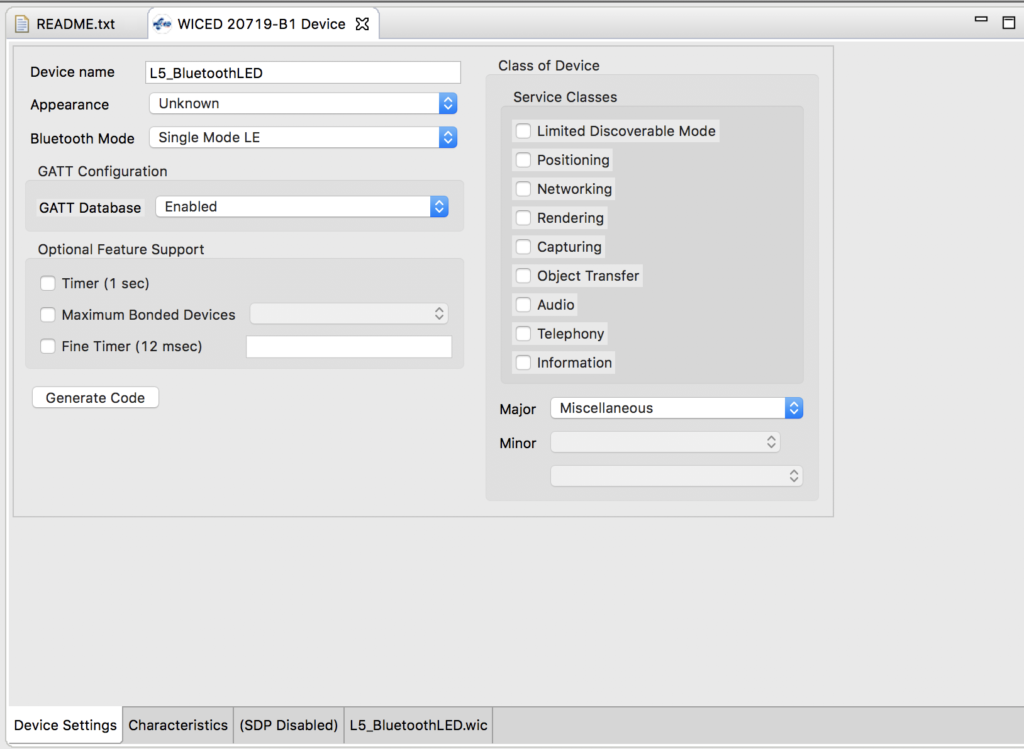
Once you start BT Designer, you screen should look like this.  The project is going to be a BLE only project.

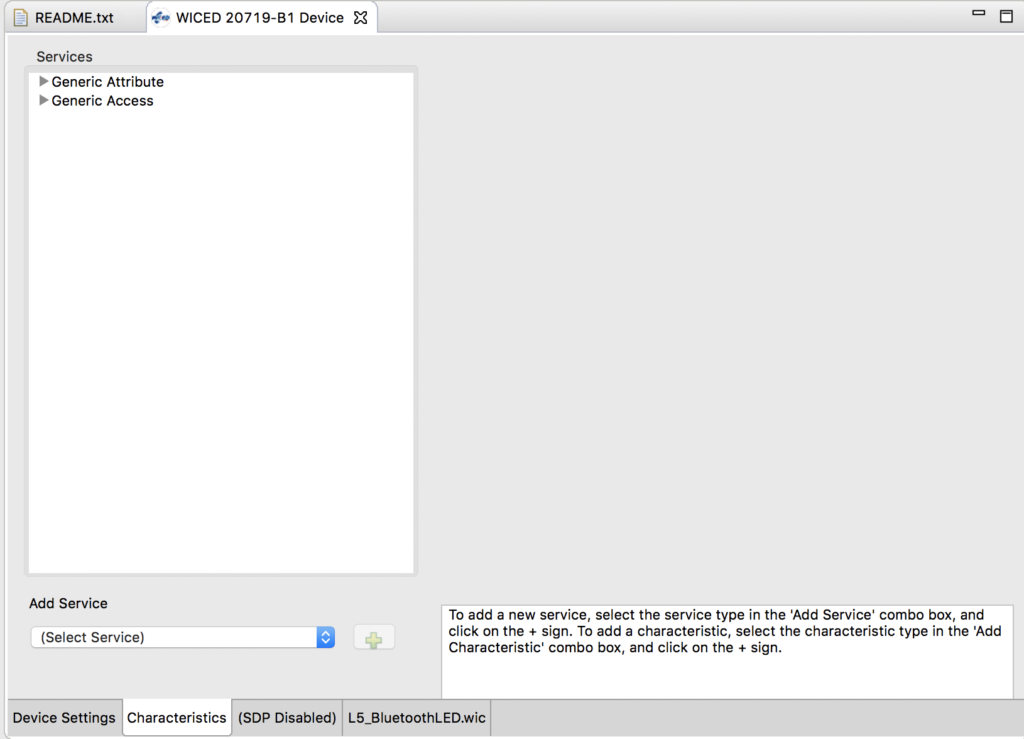
The Characteristics button lets you setup the GATT database.

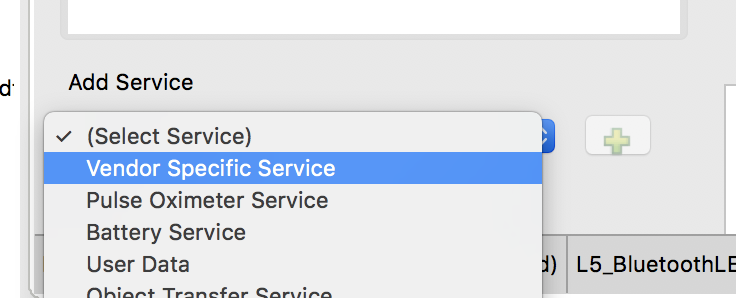
Add a service by selecting vendor specific service and then hitting the “+”

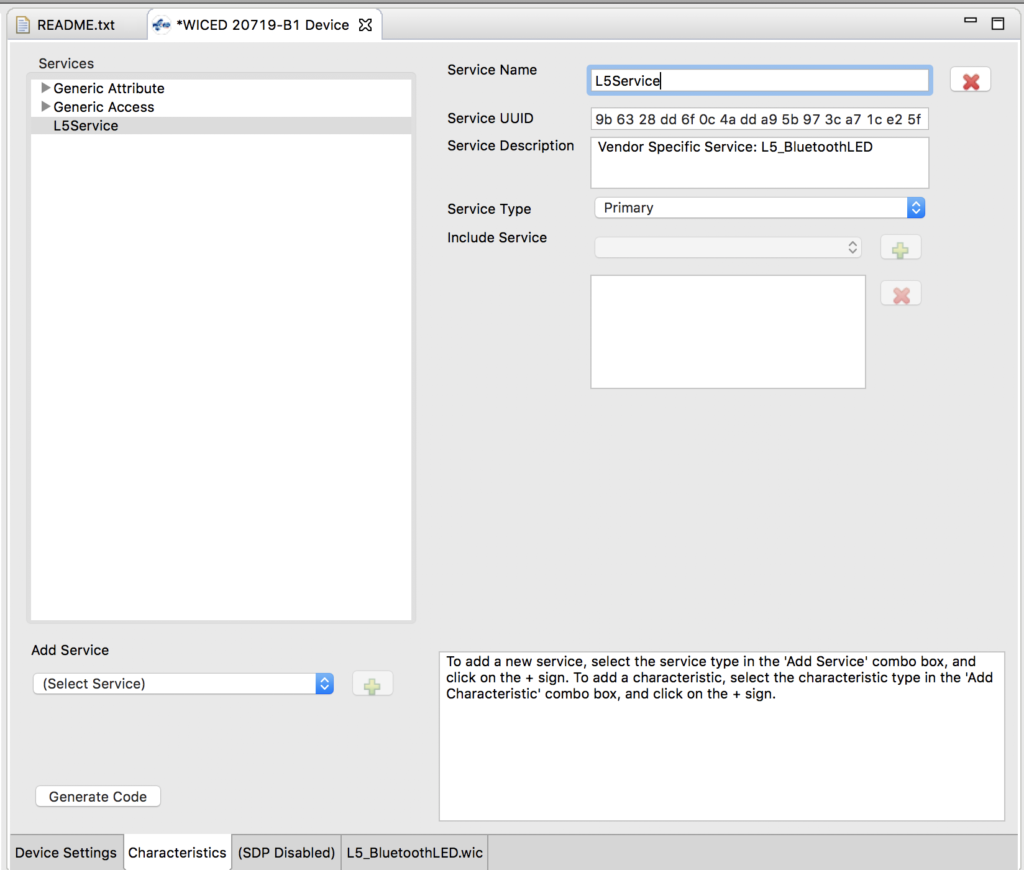
I’ll call the service “L5Service”

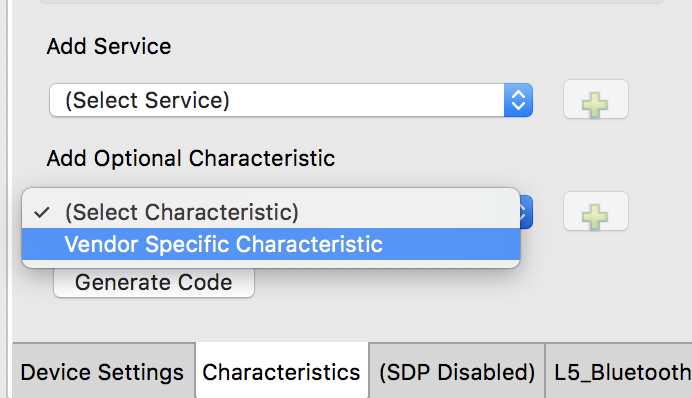
Next add a characteristic by selecting “vendor specific characteristic” and pressing “+”

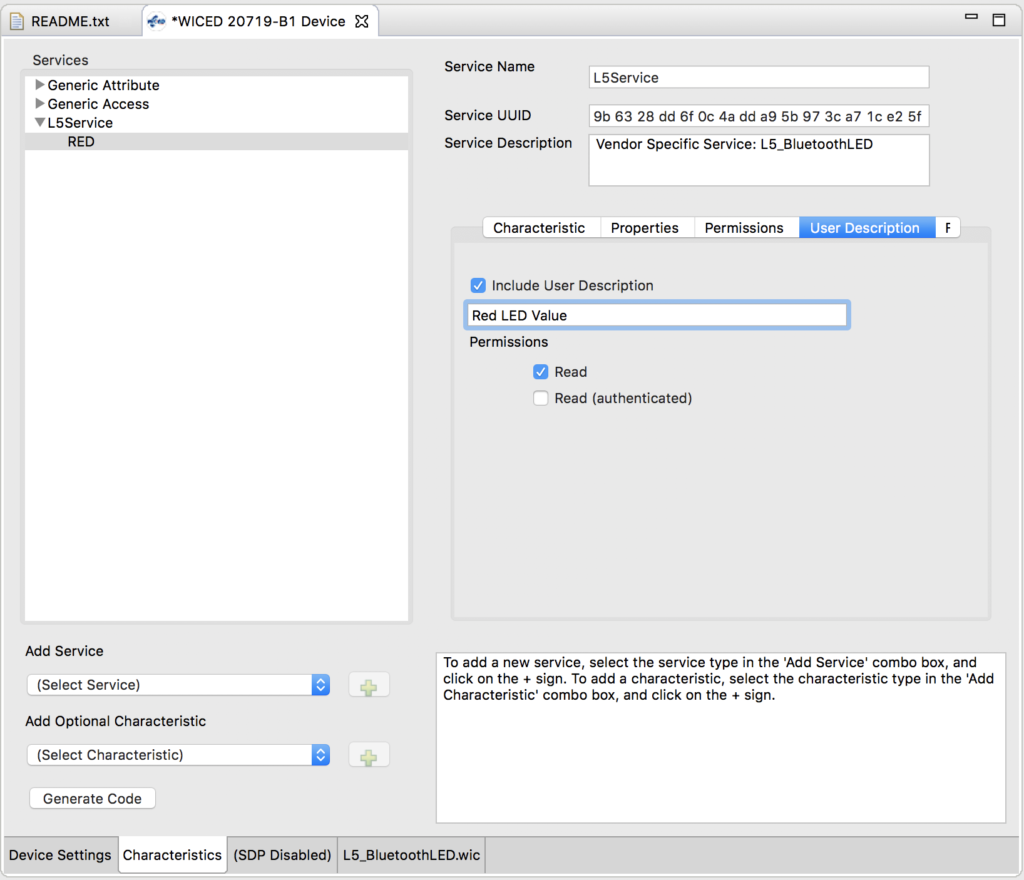
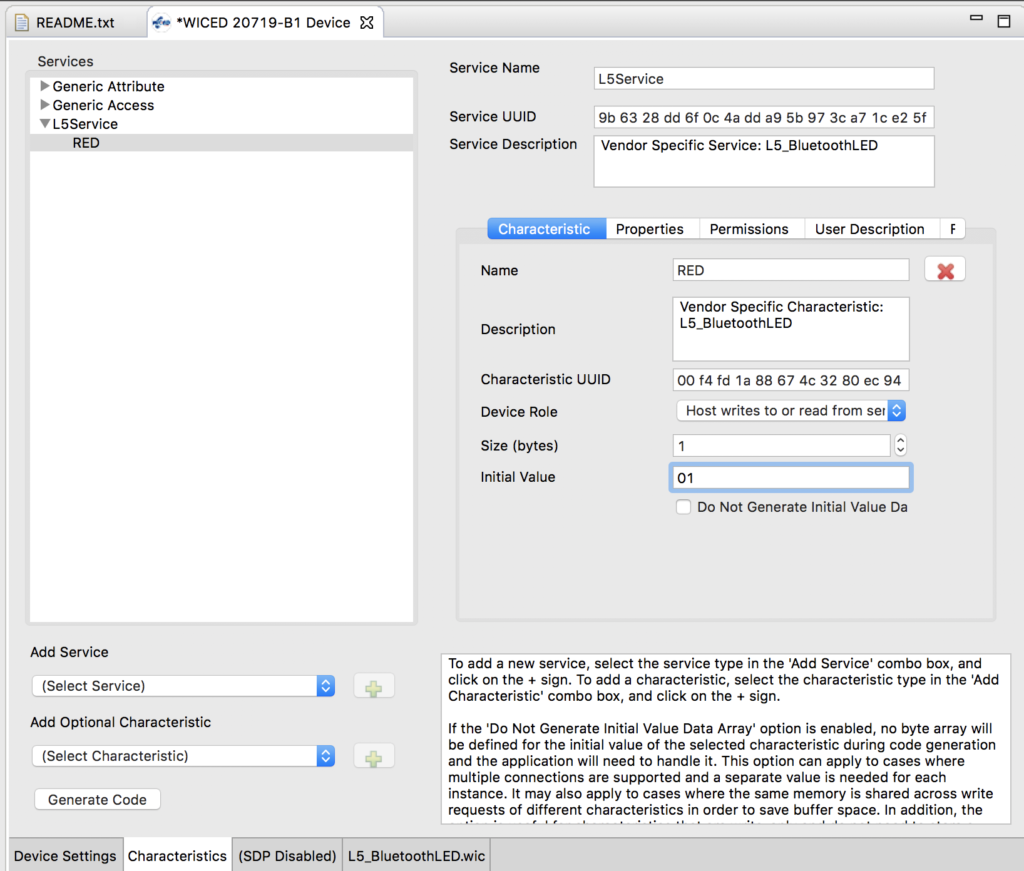
Change the name to “RED”, Make the device role “Host write to or reads from service”.  Make the size 1 byte and set the initial value to 01 (it must be 01 not 1 or 001)

When we are looking at this remotely you would like to be able to see the user description.  So click that tab and give it a description.

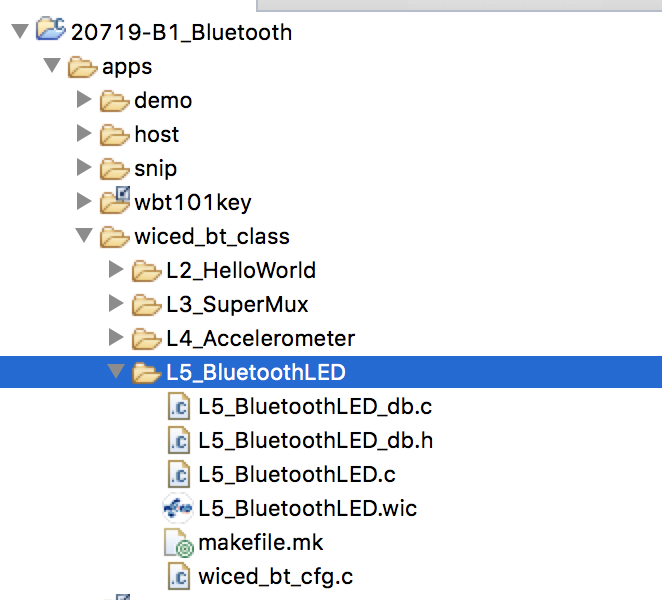
Press Generate Code button.  You will end up with a folder in the top level apps directory.  I don’t like this, so lets move it into our class projects folder.  You can do this by dragging the folder to the wiced_bt_class folder.  Now it should look like this:

Unfortunately, there are three little issues that this creates which need to be fixed.  First, you need to fix L5_BluetoothLED.c as this include is wrong.

#include "../wiced_bt_class/L5_BluetoothLED/L5_BluetoothLED_db.h"

And change it to:

#include "L5_BluetoothLED_db.h"

Next edit L5_BluetoothLED_db.h and add the #include “wiced.h”

#include "wiced.h"

Finally edit the L5_BluetoothLED_db.c to fix the same include problem.

#include "../wiced_bt_class/L5_BluetoothLED/L5_BluetoothLED_db.h"

It should be like this.

#include "L5_BluetoothLED_db.h"

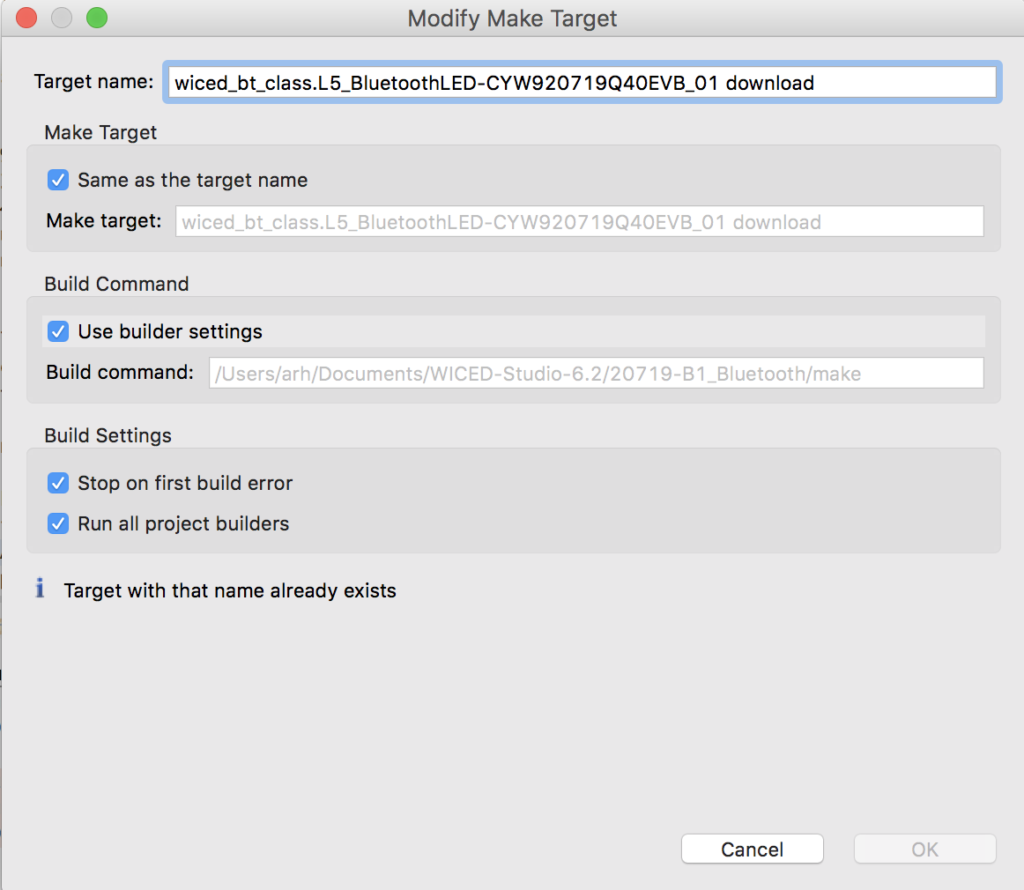
Now edit the make target that was created by the BT Designer and change it to:

Remember in the earlier lesson I showed you about the WICED HCI UART and the WICED PUART.  Well by default the WICED_BT_TRACE is setup to go to the HCI UART.  So, lets fix the output of BT_TRACE to go to the PUART by changing the file “L5_BluetoothLED.c”

#if ((defined WICED_BT_TRACE_ENABLE) || (defined HCI_TRACE_OVER_TRANSPORT))
    /* Set the Debug UART as WICED_ROUTE_DEBUG_NONE to get rid of prints */
    //  wiced_set_debug_uart( WICED_ROUTE_DEBUG_NONE );

    /* Set Debug UART as WICED_ROUTE_DEBUG_TO_PUART to see debug traces on Peripheral UART (PUART) */
      wiced_set_debug_uart( WICED_ROUTE_DEBUG_TO_PUART );

    /* Set the Debug UART as WICED_ROUTE_DEBUG_TO_WICED_UART to send debug strings over the WICED debug interface */
    //wiced_set_debug_uart( WICED_ROUTE_DEBUG_TO_WICED_UART );
#endif

The last thing that we want to do is fix it so that when the Central writes a new value into the RED LED characteristic we should write the GPIO to the new value.  In L5_BluetoothLED.c make this change.

     case HDLC_L5SERVICE_RED_VALUE:
                       WICED_BT_TRACE("LED = %d\n",l5_bluetoothled_l5service_red[0]);
                       wiced_hal_gpio_set_pin_output(WICED_GPIO_PIN_LED_2,l5_bluetoothled_l5service_red[0]);
                       break;

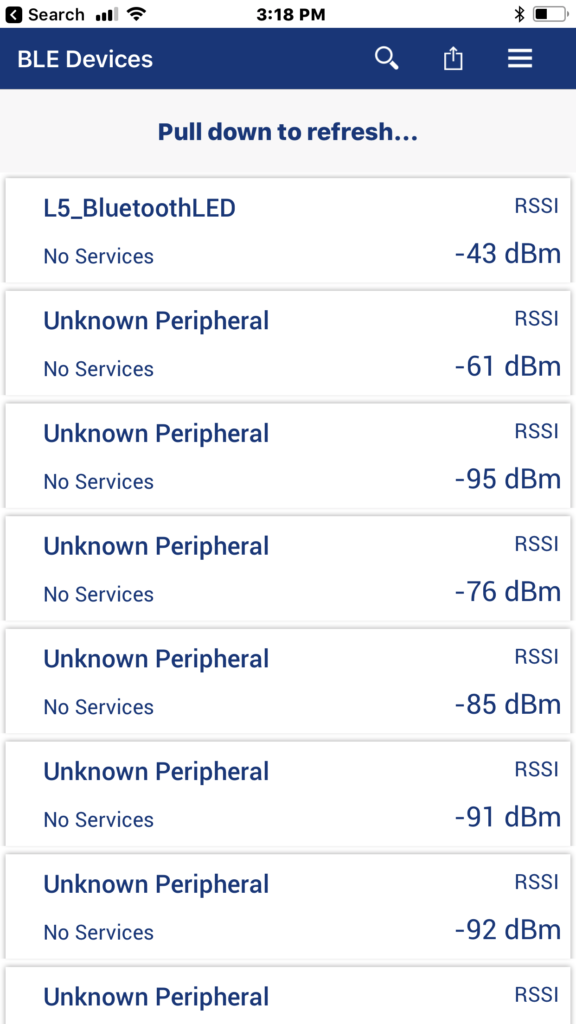
Now build the project and see what happens.  The first testing step will be to open CySmart.  You can see that a device called “L5_BluetoothLED” is advertising.

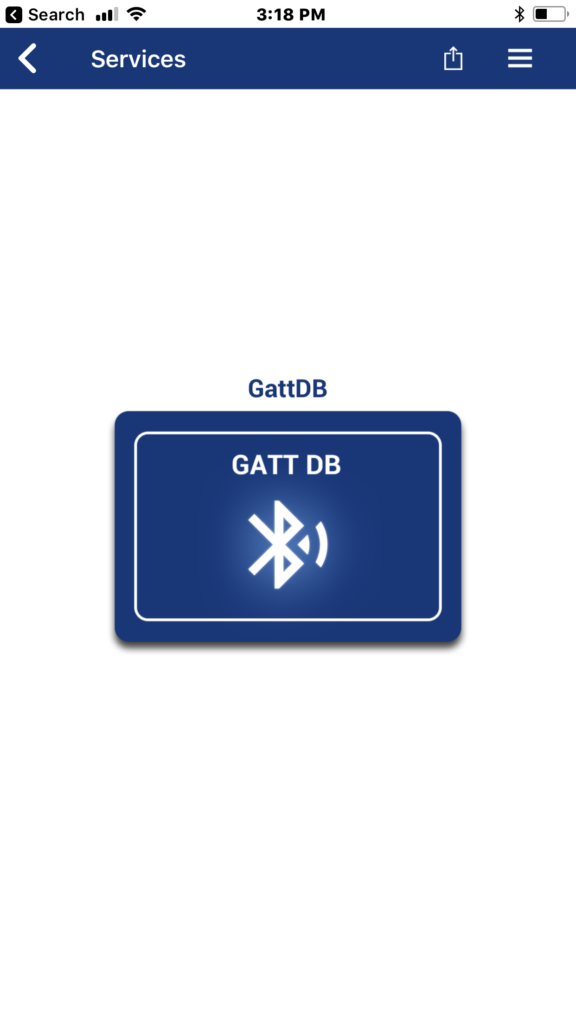
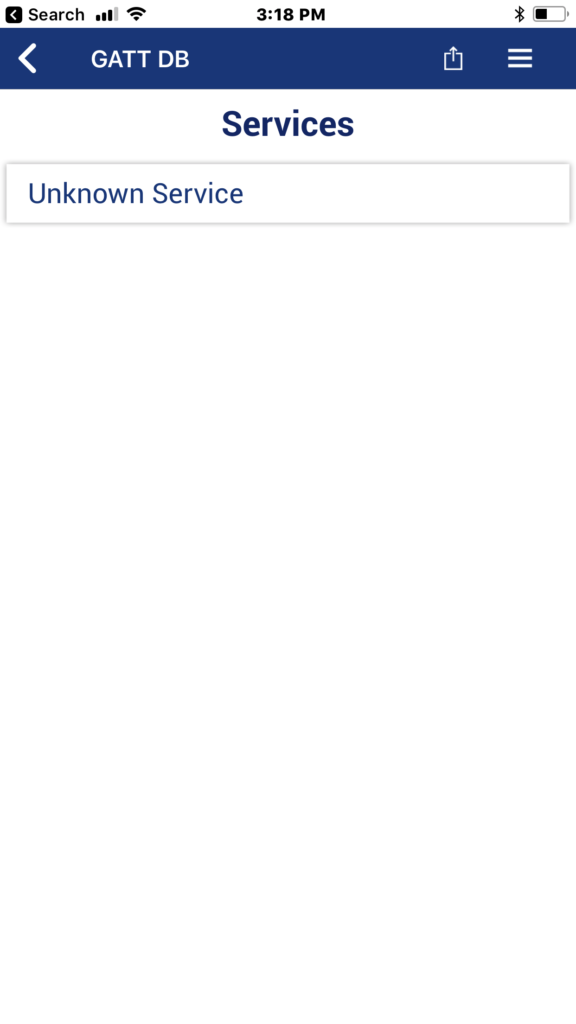
When I click it, you can see that there is a GattDB.

When I click on the database, I can see that there is only one service (which makes sense as we setup only one)

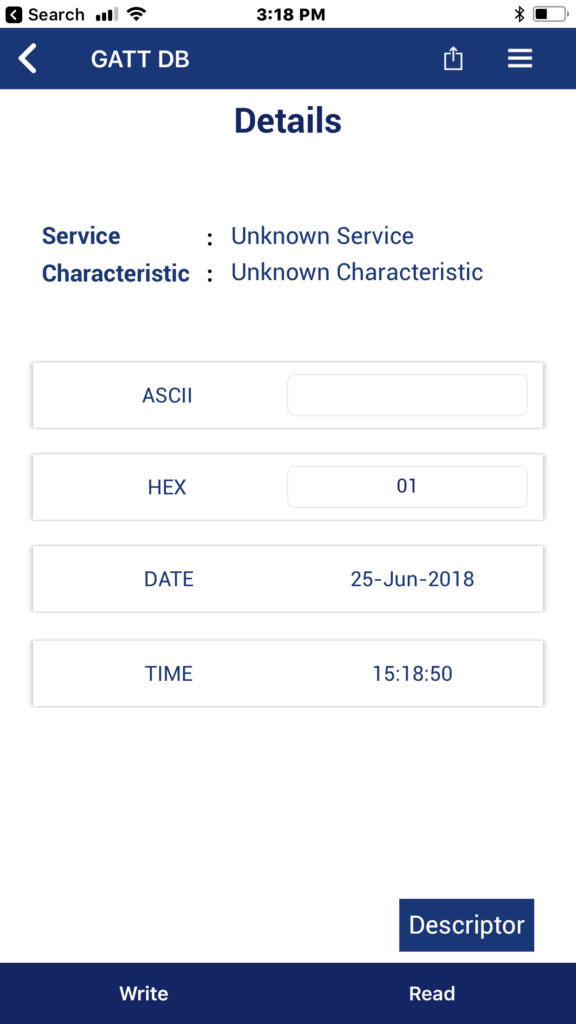
Click on the Service and you can see that there is only one characteristic in the service… and its value is 01.

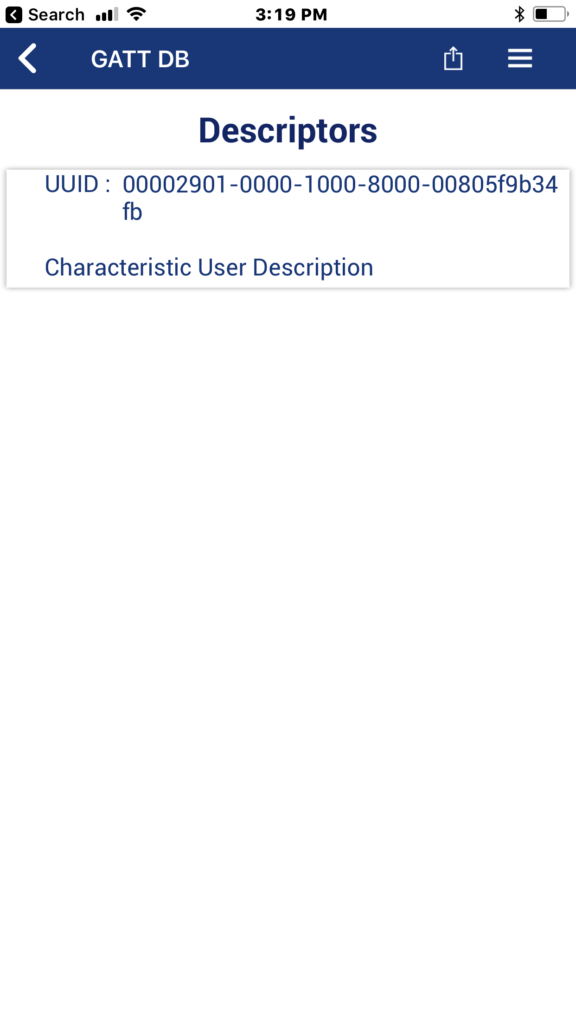
When you click the descriptor button you can see that there is a Characteristic User Description


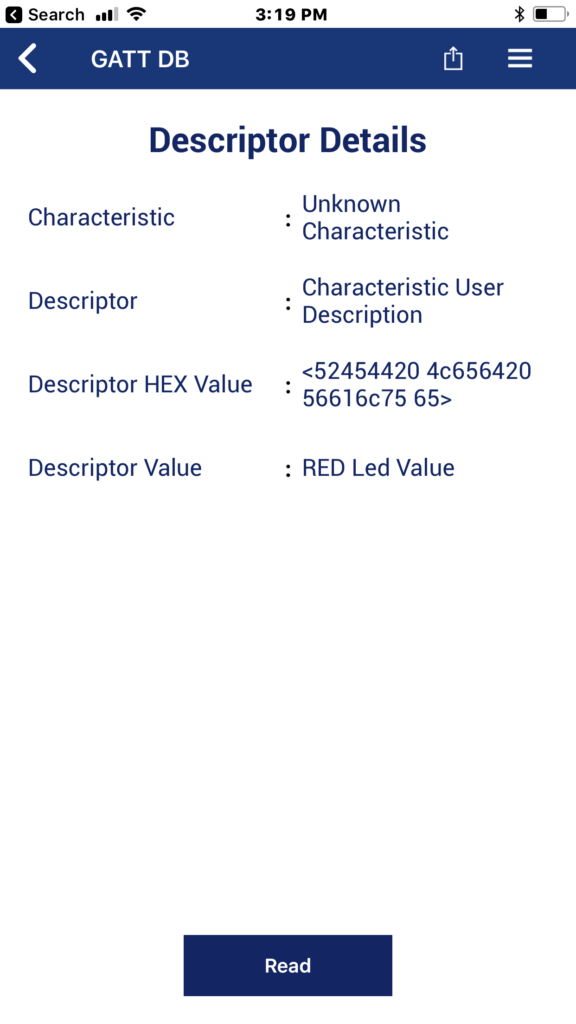
And finally the value is “Red LED Value”.  That is what we setup.

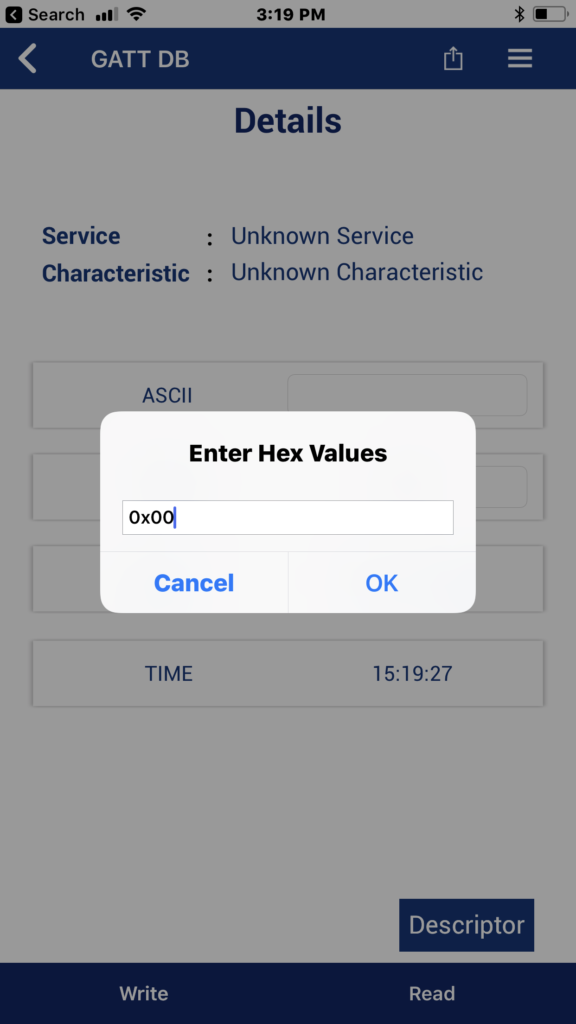
When you click back … then click on the write it will bring up this window where I can send a new value.

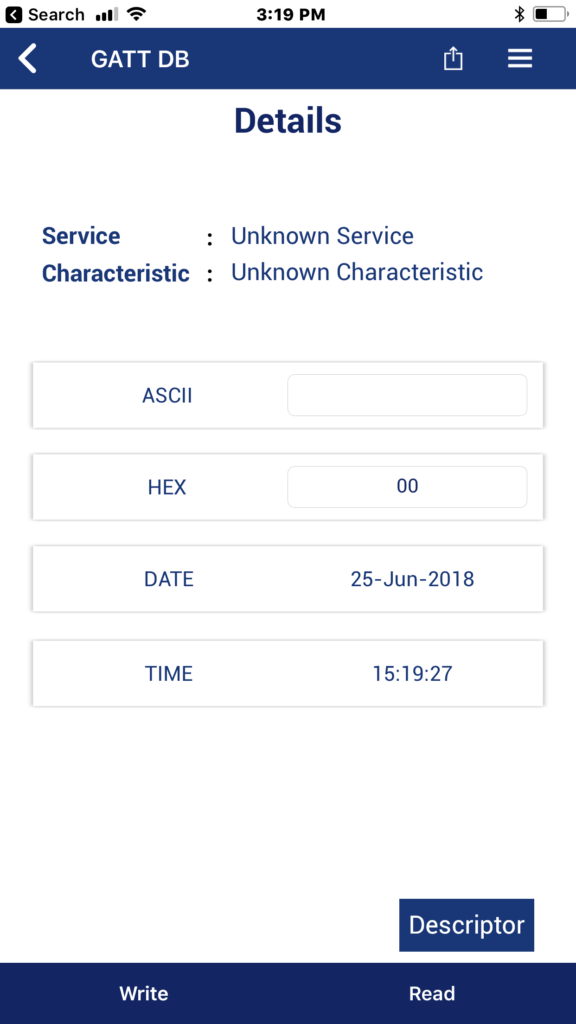
Now the value is 0x00 and the RED LED is on (remember from earlier that it is active low so that makes sense)


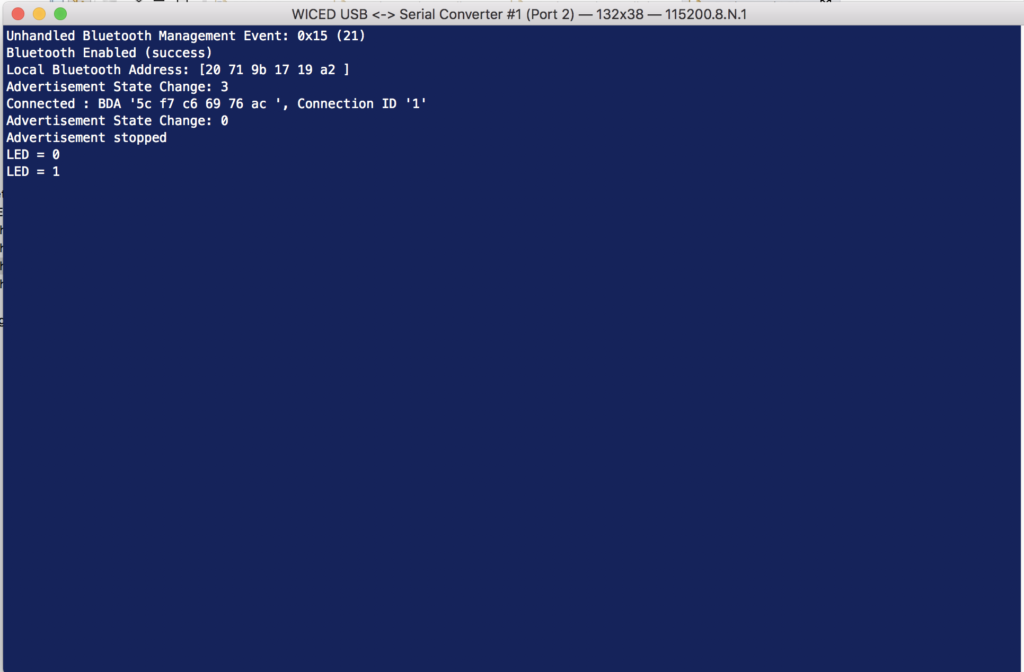
And when I look at the terminal I can see two writes (I wrote again before I took this screen shot)

A Tour of the Source Code

The GATT Database is in the file L5_BluetoothLED_db.c

const uint8_t gatt_database[] = // Define GATT database
{
    /* Primary Service 'Generic Attribute' */
    PRIMARY_SERVICE_UUID16 (HDLS_GENERIC_ATTRIBUTE, UUID_SERVICE_GATT),

    /* Primary Service 'Generic Access' */
    PRIMARY_SERVICE_UUID16 (HDLS_GENERIC_ACCESS, UUID_SERVICE_GAP),

        /* Characteristic 'Device Name' */
        CHARACTERISTIC_UUID16 (HDLC_GENERIC_ACCESS_DEVICE_NAME, HDLC_GENERIC_ACCESS_DEVICE_NAME_VALUE,
            UUID_CHARACTERISTIC_DEVICE_NAME, LEGATTDB_CHAR_PROP_READ,
            LEGATTDB_PERM_READABLE),

        /* Characteristic 'Appearance' */
        CHARACTERISTIC_UUID16 (HDLC_GENERIC_ACCESS_APPEARANCE, HDLC_GENERIC_ACCESS_APPEARANCE_VALUE,
            UUID_CHARACTERISTIC_APPEARANCE, LEGATTDB_CHAR_PROP_READ,
            LEGATTDB_PERM_READABLE),

    /* Primary Service 'L5Service' */
    PRIMARY_SERVICE_UUID128 (HDLS_L5SERVICE, __UUID_L5SERVICE),

        /* Characteristic 'RED' */
        CHARACTERISTIC_UUID128_WRITABLE (HDLC_L5SERVICE_RED, HDLC_L5SERVICE_RED_VALUE,
            __UUID_L5SERVICE_RED, LEGATTDB_CHAR_PROP_READ | LEGATTDB_CHAR_PROP_WRITE,
            LEGATTDB_PERM_READABLE | LEGATTDB_PERM_WRITE_REQ),

            /* Descriptor 'Characteristic User Description' */
            CHAR_DESCRIPTOR_UUID16 (HDLD_L5SERVICE_RED_USER_DESCRIPTION,
                UUID_DESCRIPTOR_CHARACTERISTIC_USER_DESCRIPTION, LEGATTDB_PERM_READABLE),

};

Each row in the Database table has a unique “Handle” that is defined in the L5_BluetoothLED_db.h

#define __UUID_L5SERVICE                      0x30, 0x9d, 0x7f, 0x29, 0x73, 0xca, 0x4f, 0xfd, 0xa5, 0x68, 0x17, 0xd8, 0x90, 0x67, 0x7f, 0x35
#define __UUID_L5SERVICE_RED                  0x29, 0xbf, 0x86, 0xa6, 0xc8, 0x6c, 0x4e, 0xa5, 0xaa, 0x56, 0xbd, 0xac, 0x72, 0x80, 0x93, 0xa9

// ***** Primary Service 'Generic Attribute'
#define HDLS_GENERIC_ATTRIBUTE                0x0001

// ***** Primary Service 'Generic Access'
#define HDLS_GENERIC_ACCESS                   0x0014
// ----- Characteristic 'Device Name'
#define HDLC_GENERIC_ACCESS_DEVICE_NAME       0x0015
#define HDLC_GENERIC_ACCESS_DEVICE_NAME_VALUE 0x0016
// ----- Characteristic 'Appearance'
#define HDLC_GENERIC_ACCESS_APPEARANCE        0x0017
#define HDLC_GENERIC_ACCESS_APPEARANCE_VALUE  0x0018

// ***** Primary Service 'L5Service'
#define HDLS_L5SERVICE                        0x0028
// ----- Characteristic 'RED'
#define HDLC_L5SERVICE_RED                    0x0029
#define HDLC_L5SERVICE_RED_VALUE              0x002A
// ===== Descriptor 'User Description'
#define HDLD_L5SERVICE_RED_USER_DESCRIPTION   0x002B

Each characteristic value is held in one of the uint8_t arrays found in “L5_BluetoothLED.c”

/*******************************************************************
 * GATT Initial Value Arrays
 ******************************************************************/
uint8_t l5_bluetoothled_generic_access_device_name[]     = {'L','5','_','B','l','u','e','t','o','o','t','h','L','E','D'};
uint8_t l5_bluetoothled_generic_access_appearance[]      = {0x00,0x00};
uint8_t l5_bluetoothled_l5service_red[]                  = {0x01};
uint8_t l5_bluetoothled_l5service_red_user_description[] = {'R','E','D',' ','L','e','d',' ','V','a','l','u','e'};

/*******************************************************************
 * GATT Lookup Table
 ******************************************************************/

/* GATT attribute lookup table                                */
/* (attributes externally referenced by GATT server database) */
gatt_db_lookup_table l5_bluetoothled_gatt_db_ext_attr_tbl[] =
{
    /* { attribute handle,                  maxlen,                                                 curlen,                                                 attribute data } */
    {HDLC_GENERIC_ACCESS_DEVICE_NAME_VALUE, 15,                                                     15,                                                     l5_bluetoothled_generic_access_device_name},
    {HDLC_GENERIC_ACCESS_APPEARANCE_VALUE,  2,                                                      2,                                                      l5_bluetoothled_generic_access_appearance},
    {HDLC_L5SERVICE_RED_VALUE,              1,                                                      1,                                                      l5_bluetoothled_l5service_red},
    {HDLD_L5SERVICE_RED_USER_DESCRIPTION,   sizeof(l5_bluetoothled_l5service_red_user_description), sizeof(l5_bluetoothled_l5service_red_user_description), l5_bluetoothled_l5service_red_user_description},
};


Lesson 4 – WICED Bluetooth: Using Snips

WICED Bluetooth Using the CYW20719

# Title Comment
0 A Two Hour WICED Bluetooth Class WICED Bluetooth Using the CYW20719 in all its glory
1 Resources Links to all of the Cypress WICED information including videos, application notes etc.
2 Your First Project Making Hello World & the Blinky LED
3 The Super Mux Tool Learning about platforms and the Super Mux Tool
4 Snips Using the example projects to learn Bluetooth
5 Bluetooth Designer Using the tool to customize a project and get going fast
6 The CCCD & Notification Writing back to the Central
7 Advertising  Beacon Building a beacon project to advertise your custom information 
8 Scanner Viewing the world around you
9 Bluetooth Classic SPP Using the Serial Port Profile to Transmit Lots of Data

Source code: 

  • git@github.com:iotexpert/wiced_bt_intro.git
  • https://github.com/iotexpert/wiced_bt_intro


Summary

In this lesson I am going to show you how to NOT write all of your own code and still get the job done.  In this lesson we are going to do three things.

  1. Examine & Run the hal_gpio snip
  2. Examine & Run the hal_i2c_master snip
  3. Copy the hal_i2c_master snip and make it “more better”

To modify the hal_i2c_master snip I will

  1. Make a new folder called L4_Accelerometer
  2. Copy the makefile.mk and hal_i2c_master.c into the L4_Accelerometer folder
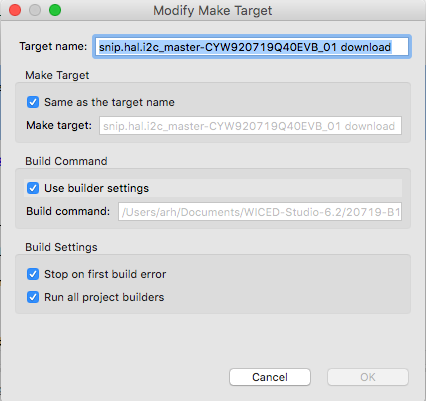
  3. Create a new make target and make sure that things still work
  4. Look at the LSM9DS1 datasheet
  5. Update the function initialize_app to startup the Accelerometer and speed up the polling
  6. Update the function comboread_cb to read the Acceleration registers and print out the values

Run hal_gpio

If you dont already have a make target for snip.hal.hal_gpio create one and then program the board.

Notice that the light blinking will change speeds if you press the button.  Let’s look at the code that does this:

At the beginning it sets up a timer

        // Initialize timer to control the pin toggle frequency
        if (wiced_init_timer(&hal_gpio_app_timer, &hal_gpio_app_timer_cb, 0, WICED_SECONDS_PERIODIC_TIMER) == WICED_SUCCESS)
        {
            if (wiced_start_timer(&hal_gpio_app_timer, LED_BLINK_FREQ_A_IN_SECONDS) != WICED_SUCCESS)
            {
                WICED_BT_TRACE("Seconds Timer Error\n");
            }
        }

The timer calls this function each time the timer expires.

/*
 * The function invoked on timeout of app. seconds timer.
 */
void hal_gpio_app_timer_cb(uint32_t arg)
{
    static uint32_t wiced_seconds = 0; /* number of seconds elapsed */
    uint8_t index = 0;

    wiced_seconds++;

    if (wiced_seconds & 1)
    {
        for (index = 0; index < sizeof(output_pin_list); index++)
        {
            wiced_hal_gpio_set_pin_output(output_pin_list[index], GPIO_PIN_OUTPUT_LOW);
        }
    }
    else
    {
        for (index = 0; index < sizeof(output_pin_list); index++)
        {
            wiced_hal_gpio_set_pin_output(output_pin_list[index], GPIO_PIN_OUTPUT_HIGH);
        }
    }
}

And when the button is pressed all it does is switch back and forth between two different intervals for the timer.  And after the switch it restarts the timer.

/*
 * Handle interrupt generated due to change in the GPIO state
 */
void hal_gpio_app_interrrupt_handler(void *data, uint8_t pin)
{
    static uint32_t blink_freq = LED_BLINK_FREQ_A_IN_SECONDS;

    // toggle LED blink rate upon each button press
    if (blink_freq == LED_BLINK_FREQ_A_IN_SECONDS)
    {
        blink_freq = LED_BLINK_FREQ_B_IN_SECONDS;
    }
    else
    {
        blink_freq = LED_BLINK_FREQ_A_IN_SECONDS;
    }

    if (wiced_stop_timer(&hal_gpio_app_timer) == WICED_SUCCESS)
    {
        wiced_start_timer(&hal_gpio_app_timer, blink_freq);
    }

    // clear the interrupt status
    wiced_hal_gpio_clear_pin_interrupt_status(pin);
}

Run hal_i2c_master

This CYW920719Q40EVB_01 development kit has an I2C LSM9DS1 accelerometer on it.  And I noticed that when looking around in the snips that the Snip called “hal_i2c_master.c” appears to talk to the chip.  Here is a little section of the comments from the top of the snip

 *
 * WICED sample application for I2C Master usage
 *
 * This application demonstrates how to use I2C driver interface
 * to send and receive bytes or a stream of bytes over the I2C hardware as a master.
 * The on-board LSM9DS1 motion sensor acts as the I2C slave

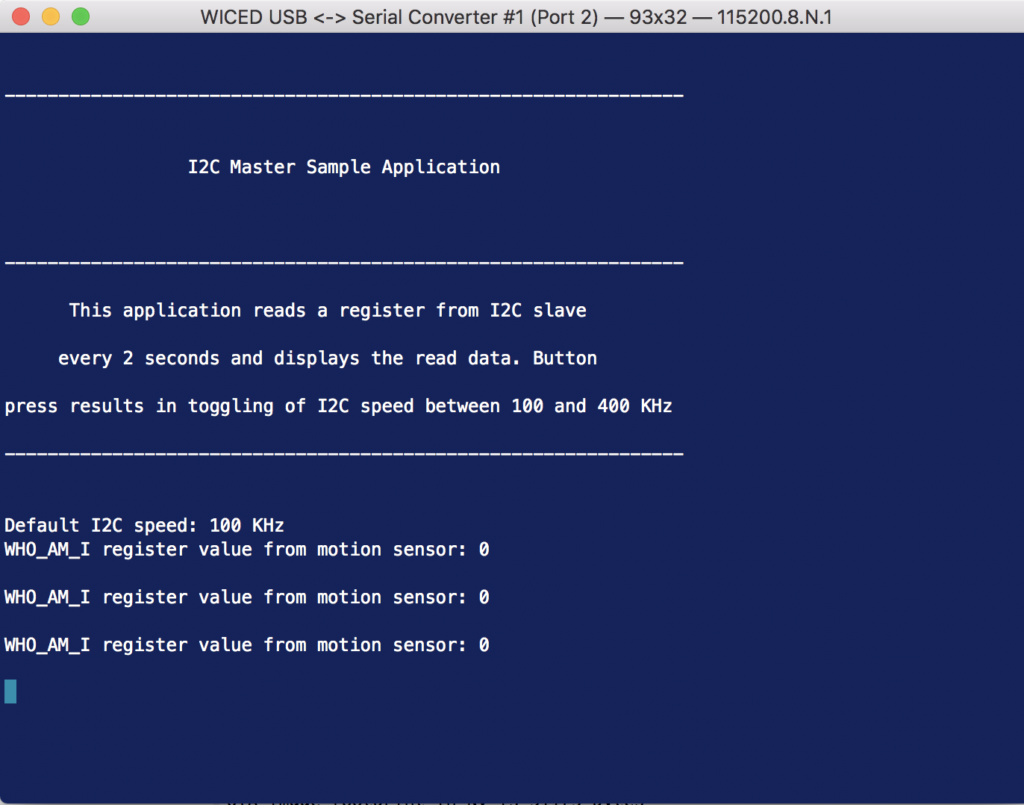
So, lets run the snip and see what happens.  If you don’t have a make target… well then make one.

Then make the make target.

It turns out that “0” is a bug in the example project.  And printing out the WHO_AM_I register isnt really very interesting.

Modify the hal_i2c_master.c Create a Better Project

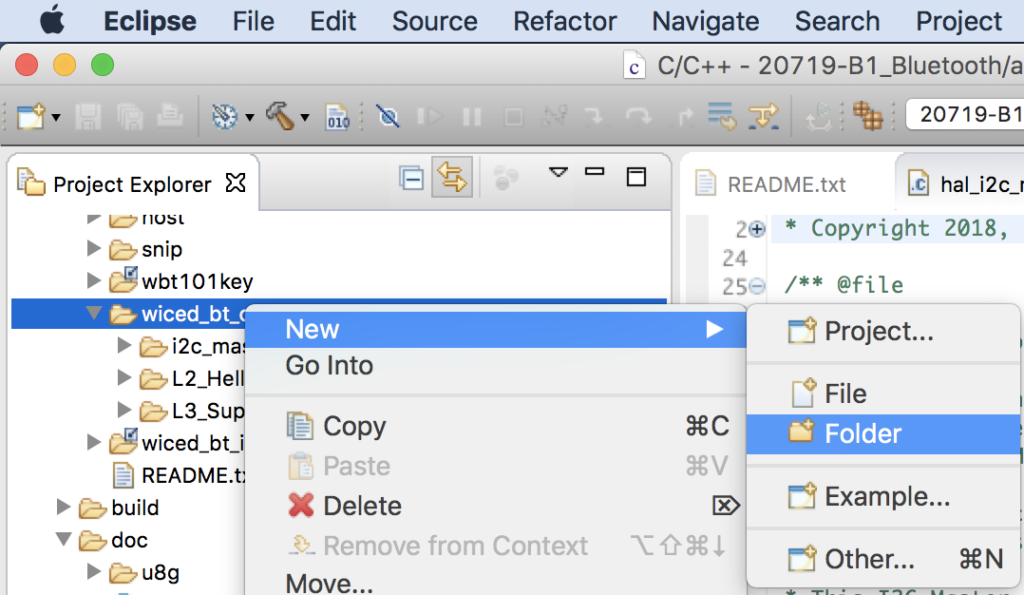
I don’t like making changes inside of the WICED SDK files.  But, I want to fix the bug and printout something more interesting.  So start by creating a new folder in the wiced_bt_class folder

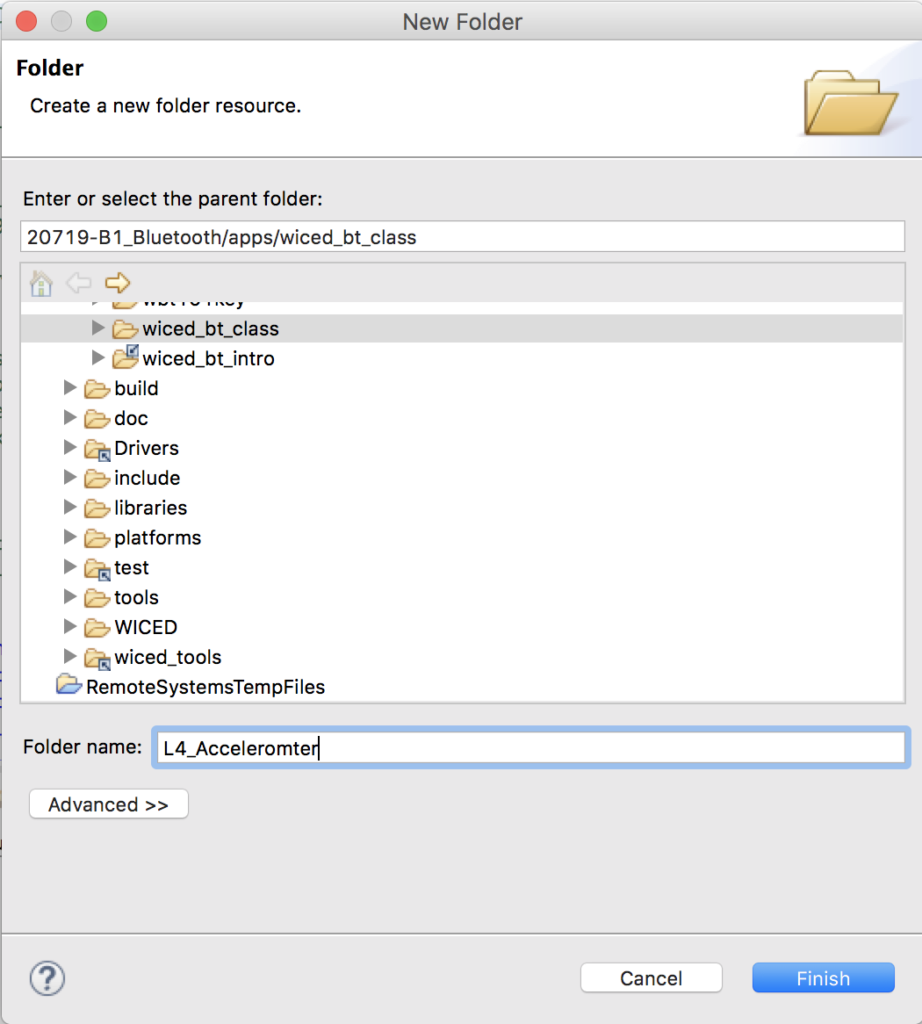
Type in the directory name L4_Accelerometer (notice in the screenshot below I mistyped it)

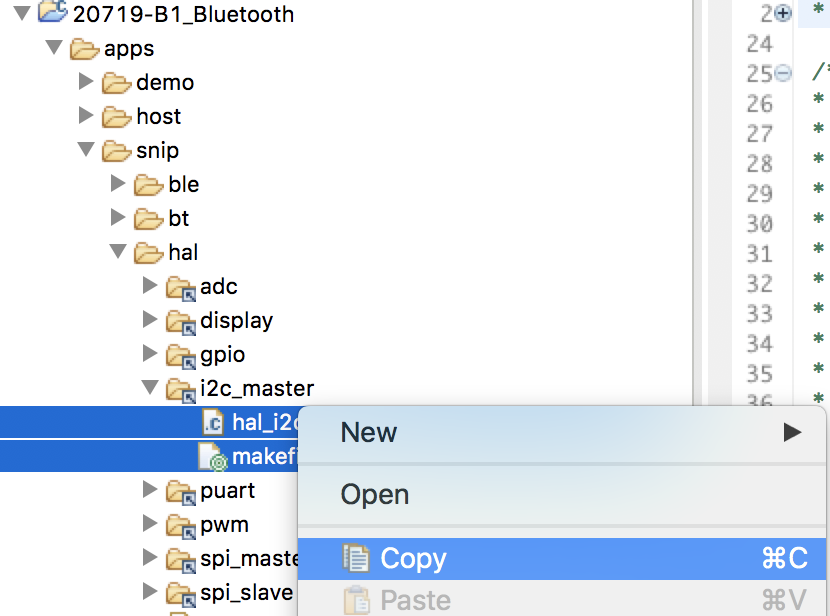
Select the makefile.mk and the hal_i2c_master.c then right click copy the files.

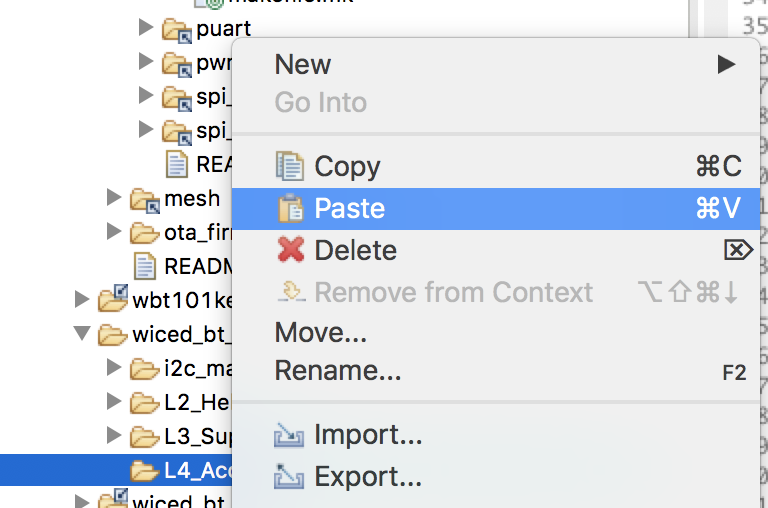
Then select the L4_Accelerometer folder and pick paste.

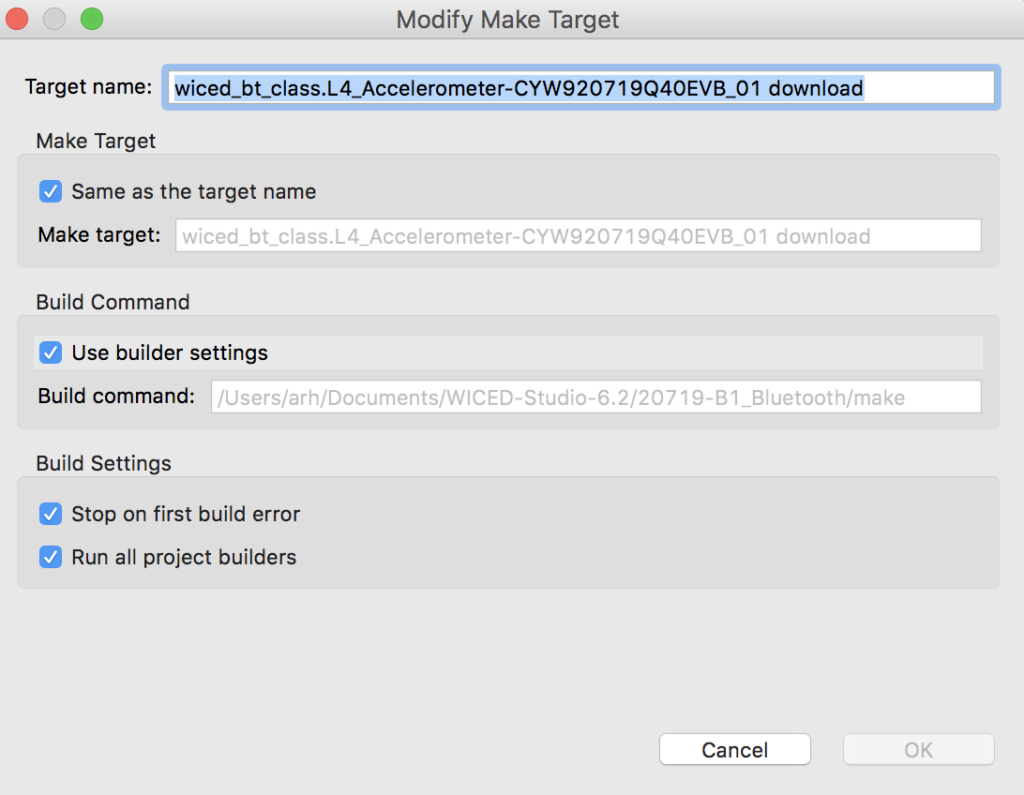
Create a make target for the L4_Accelerometer

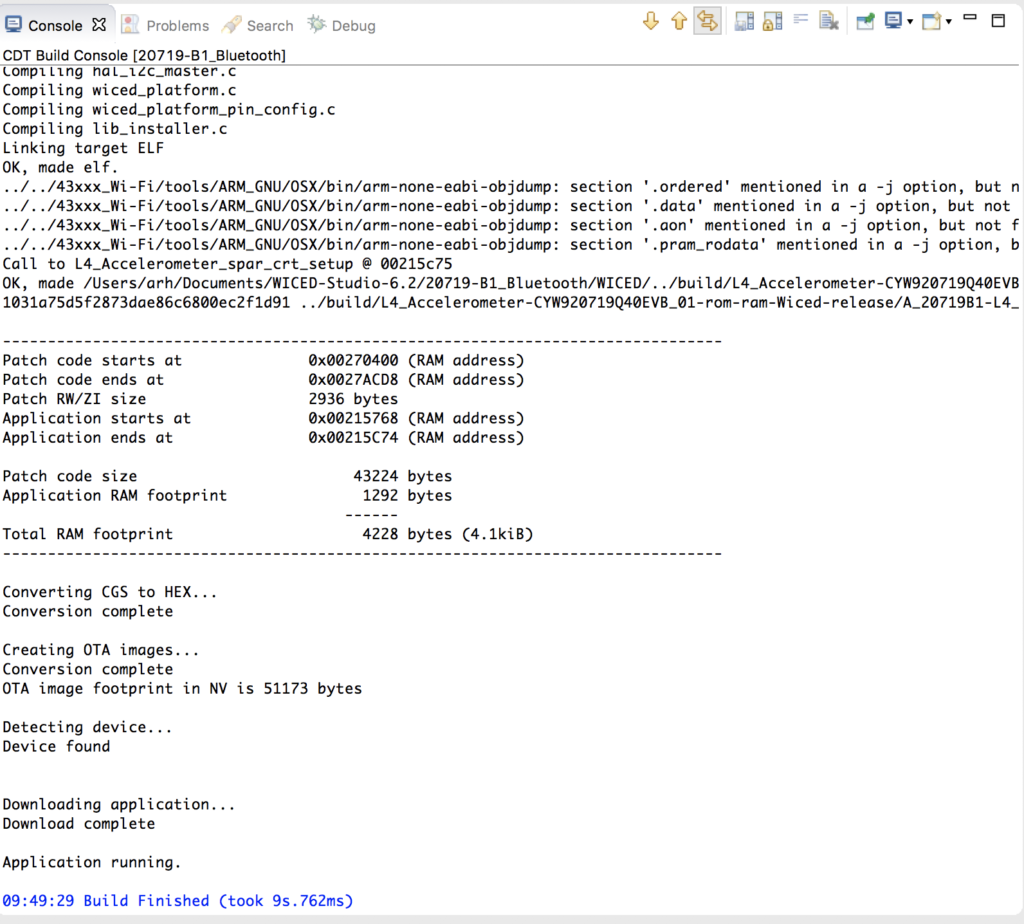
Build it to make sure it still works.

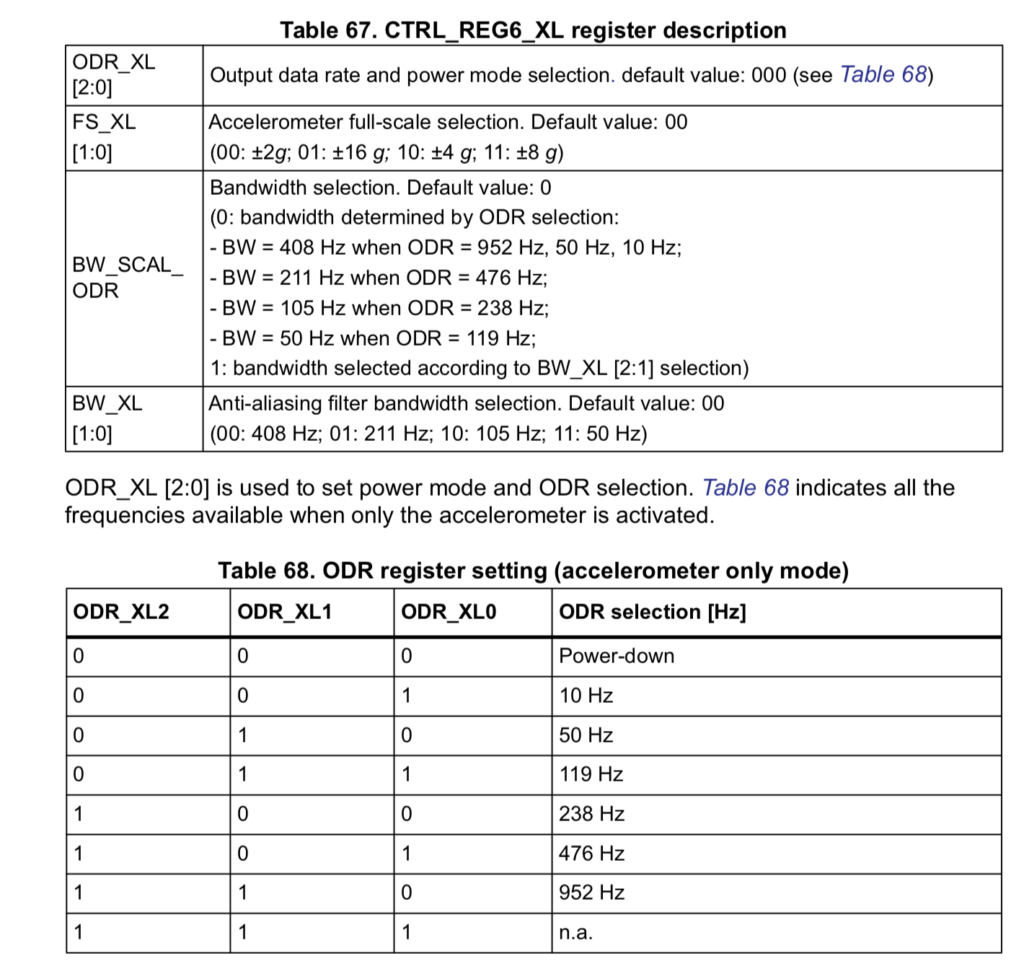
Now that we have a base to stand-on.  Let’s have a look at the data sheet.  I have used these before and I know that you need to turn on the Accelerometer to give you anything interesting.  Turns out CTRL_REG_6_XL is the control register we need.

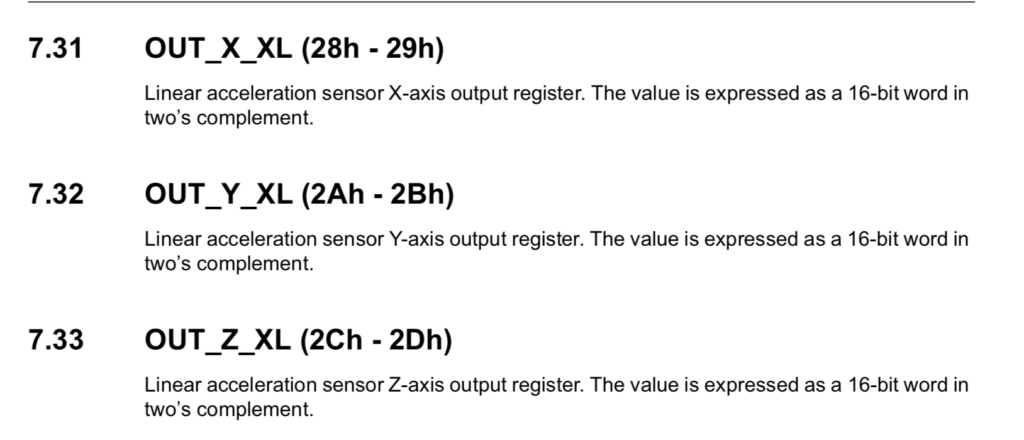
The other interesting registers are the actual output of the accelerometer.  That is 0x28 –> 0x2D

Start by modifying the function initialize_app to turn on the accelerometer by writing 0x40 to register 0x20

uint8_t status;
    // Turn on Accelerometer - Register 0x20... 2g accelerometer on @ 50hz
    uint8_t data[] = {0x20, 0x40};
    status = wiced_hal_i2c_write(data,sizeof(data),LSM9DS1_ACC_GYRO_I2C_ADDRESS);

I dont really like printing the values every two seconds so I will modify the timer:

  • Make it a milisecond timer
  • Set it to print every 500ms
if ( WICED_SUCCESS == wiced_init_timer( &seconds_timer, &comboread_cb, 0, WICED_MILLI_SECONDS_PERIODIC_TIMER )) {
        if ( WICED_SUCCESS != wiced_start_timer( &seconds_timer, 500 )) {
            WICED_BT_TRACE( "Seconds Timer Error\n\r" );
        }
    }

Here is the whole function initialize_app together

void initialize_app( void )
{
    wiced_hal_i2c_init();
    uint8_t status;

    // Turn on Accelerometer - Register 0x20... 2g accelerometer on @ 50hz
    uint8_t data[] = {0x20, 0x40};
    status = wiced_hal_i2c_write(data,sizeof(data),LSM9DS1_ACC_GYRO_I2C_ADDRESS);


    /* register callback for button available on the platform */
    wiced_platform_register_button_callback( WICED_PLATFORM_BUTTON_1, button_cb, NULL, WICED_PLATFORM_BUTTON_RISING_EDGE);

    current_speed = wiced_hal_i2c_get_speed();

    WICED_BT_TRACE("Default I2C speed: %d KHz\n", (CLK_FREQ/current_speed));

    /*Start a timer for POLL_TIMER seconds*/

    if ( WICED_SUCCESS == wiced_init_timer( &seconds_timer, &comboread_cb, 0, WICED_MILLI_SECONDS_PERIODIC_TIMER )) {
        if ( WICED_SUCCESS != wiced_start_timer( &seconds_timer, 500 )) {
            WICED_BT_TRACE( "Seconds Timer Error\n\r" );
        }
    }

}

Next I need to modify the comboread_cb callback.  It will

  • Setup a structure to hold the three acceleration values (Line 145)
  • Then it will read from the LSM9DS1 (Line 152)
  • Then print them (Line 156)
/******************************************************************************
 * This function reads the value from I2C slave and prints it
 *****************************************************************************/

void comboread_cb (uint32_t arg)
{
    UINT8  status = 0xFF;
    UINT8 reg_add = 0x28; // Acceleromter register

    typedef struct {
        int16_t ax;
        int16_t ay;
        int16_t az;
    } __attribute__((packed)) accel_val_t;

    accel_val_t data;
    status = wiced_hal_i2c_combined_read((UINT8 *)&reg_add, sizeof(UINT8), (uint8_t *)&data, sizeof(data), LSM9DS1_ACC_GYRO_I2C_ADDRESS);

    if(I2CM_SUCCESS == status) {

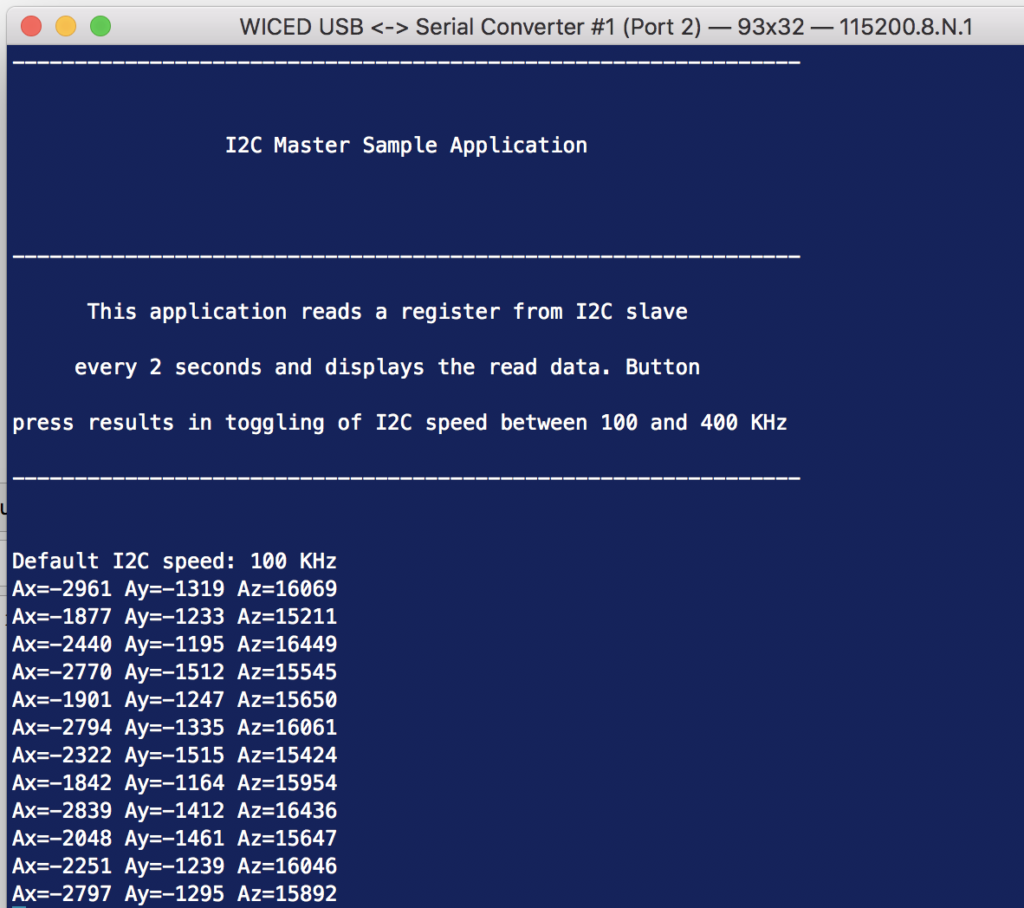
        WICED_BT_TRACE("Ax=%d Ay=%d Az=%d\n",data.ax,data.ay,data.az);
    }else if(I2CM_OP_FAILED == status) {
        WICED_BT_TRACE("I2C comboread operation failed\r\n");
    }else if(I2CM_BUSY == status) {
        WICED_BT_TRACE("I2C busy\r\n");
    }else{
        WICED_BT_TRACE("Unknown status from I2C\r\n");
    }

}

Now double click the make target and make sure that everything is working.

Lesson 3 – WICED Bluetooth: The Super Mux Tool

WICED Bluetooth Using the CYW20719

# Title Comment
0 A Two Hour WICED Bluetooth Class WICED Bluetooth Using the CYW20719 in all its glory
1 Resources Links to all of the Cypress WICED information including videos, application notes etc.
2 Your First Project Making Hello World & the Blinky LED
3 The Super Mux Tool Learning about platforms and the Super Mux Tool
4 Snips Using the example projects to learn Bluetooth
5 Bluetooth Designer Using the tool to customize a project and get going fast
6 The CCCD & Notification Writing back to the Central
7 Advertising  Beacon Building a beacon project to advertise your custom information 
8 Scanner Viewing the world around you
9 Bluetooth Classic SPP Using the Serial Port Profile to Transmit Lots of Data

Source code: 

  • git@github.com:iotexpert/wiced_bt_intro.git
  • https://github.com/iotexpert/wiced_bt_intro


Summary

You probably noticed and wondered “Why did he use WICED_LED_2 instead of WICED_LED_1”?  The answer to that question is that by default the CYW920719Q40EVB_01 is setup with WICED_LED_2 enabled as a GPIO and WICED_LED_1 used for another purpose.  But to what purpose?  In this lesson we will answer the questions:

  1. What are the default pins?
  2. How do you use the SuperMux tool?
  3. How do you use a PWM?

To do this we are going to copy the L2_HelloWorld project and add a PWM to drive the Green LED also known as WICED_LED_1.

The steps we are going to follow are

  1. Copy the L2_HelloWorld to start a new project called L3_SuperMux
  2. Rename L2_HelloWorld.c
  3. Fix the makefile.mk for the updated source file
  4. Create a new make target
  5. Program to make sure everything is still working
  6. Look at the platform files for CYW920719Q40EVB_01
  7. Run  the SuperMux Tool
  8. Delete the SPI Slave_1 From the SuperMux
  9. Add an LED to the SuperMux
  10. Configure the LED to P28
  11. Apply the SuperMux configuration
  12. Look at the new files added to the project
  13. Look a the makefile.mk
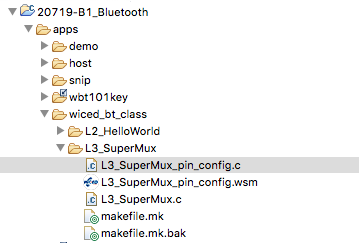
  14. Look L3_SuperMux_pin_config.c
  15. Update L3_SuperMux.c to have correct includes
  16. Update L3_SuperMux.c to start the clock, pin and PWM
  17. Program the project
  18. Look at the Hardware Abstraction Layer Documentation

Copy L2_HelloWorld –> L3_SuperMux

Instead of starting from a blank project.  Lets make a copy of the L2_HelloWorld project.  If you right click on the L2_HelloWorld folder and select copy

Then click on the “wiced_bt_class” folder and select paste.

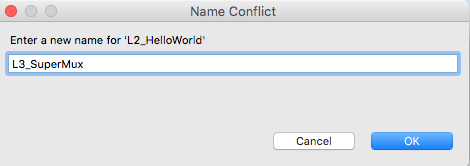
WICED Studio will then complain that you already have a directory called “L2_HelloWord” and give you the opportunity to rename it.  Call the new project “L3_SuperMux”

Now you need to rename the L2_HelloWorld.c to be L3_SuperMux.c.  Right click on the L2_HelloWorld.c and select rename

Then give it a new file name… like L3_SuperMux.c

Double click makefile.mk and edit it.  You need to change the comment, and the name of the APP_SRC source file.

#
# Lesson 3 - SuperMux
#
APP_SRC +=  L3_SuperMux.c

C_FLAGS += -DWICED_BT_TRACE_ENABLE

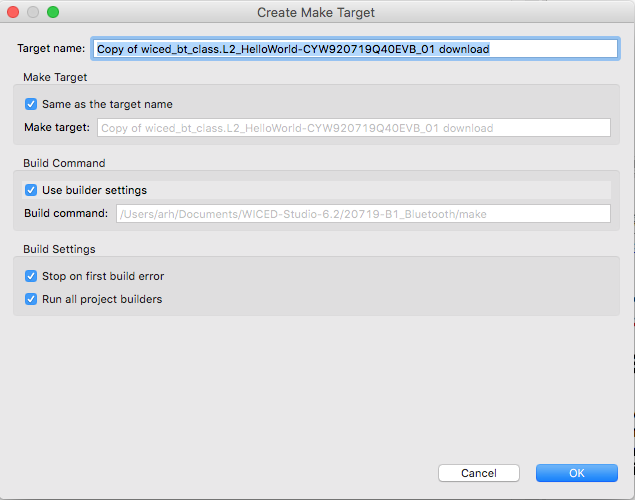
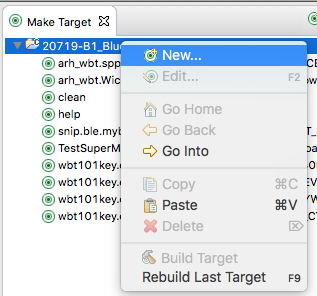
Create a make target for this project by right clicking the L2_HelloWorld Make Target, then selecting “New”

That will make a new target… and it will bring up this dialog box.  Notice that it named the target “Copy of …”

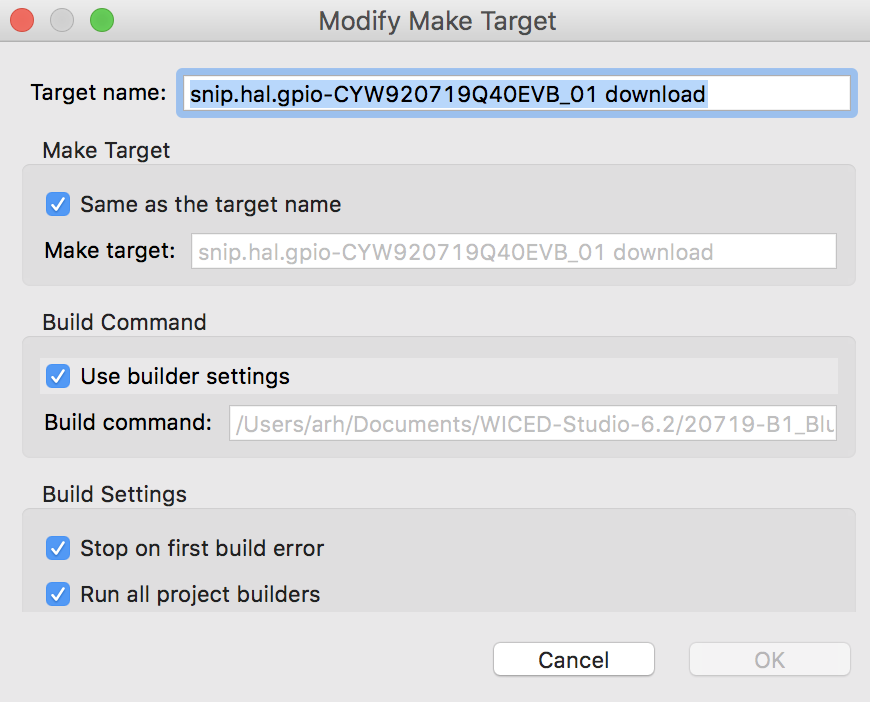
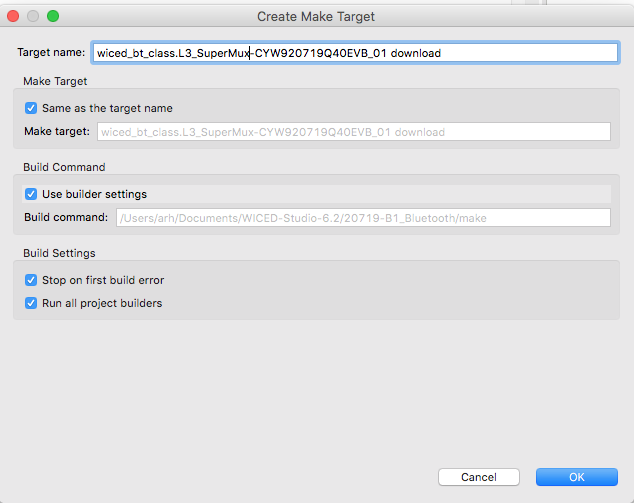
Fix it to be “L3_SuperMux” like this:

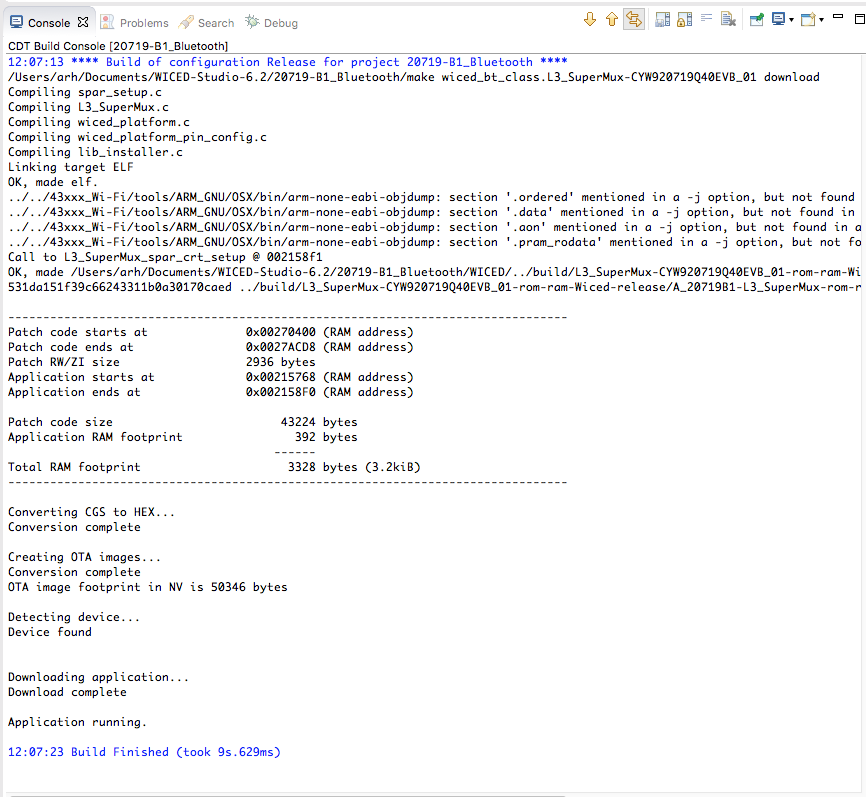
You should now have an exact copy of L2_HelloWorld, in the project L3_SuperMux.  Double click the make target and make sure that things are still working.  When you build you should get this.  Don’t forget to “Start the Bootloader” if the programming doesn’t work.

Platform Files

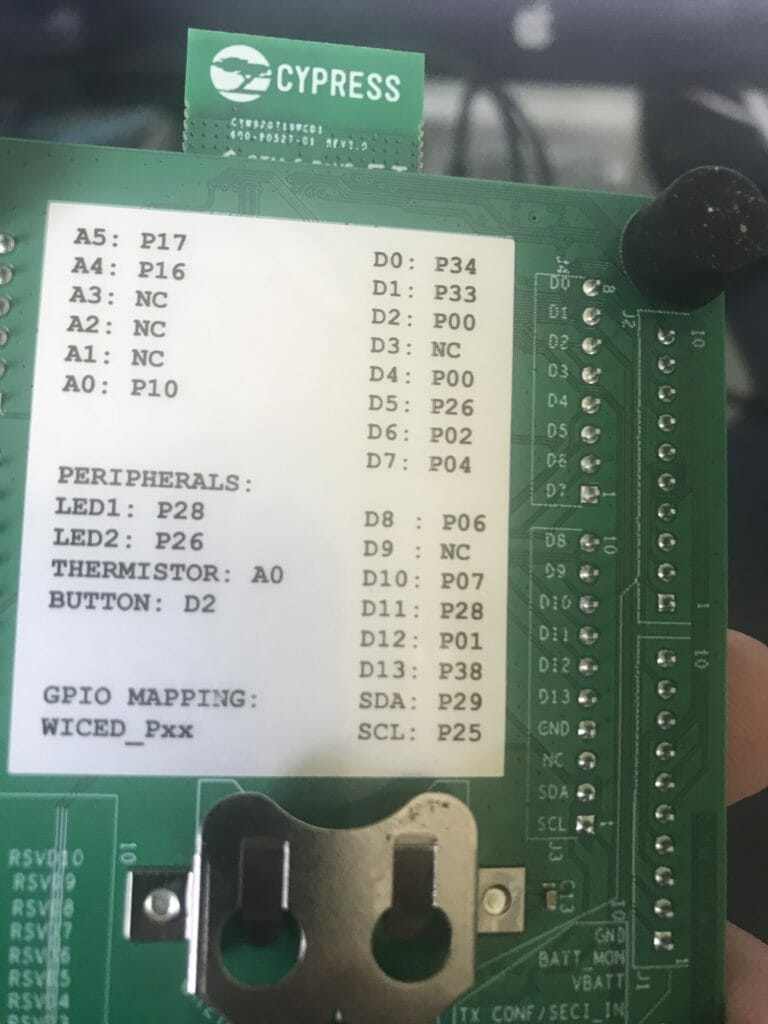
If you look on the back of your CYW920719Q40EVB-01 development kit you will find the exact pin map of this board.  On this picture you can see that LED1 is connected to P28

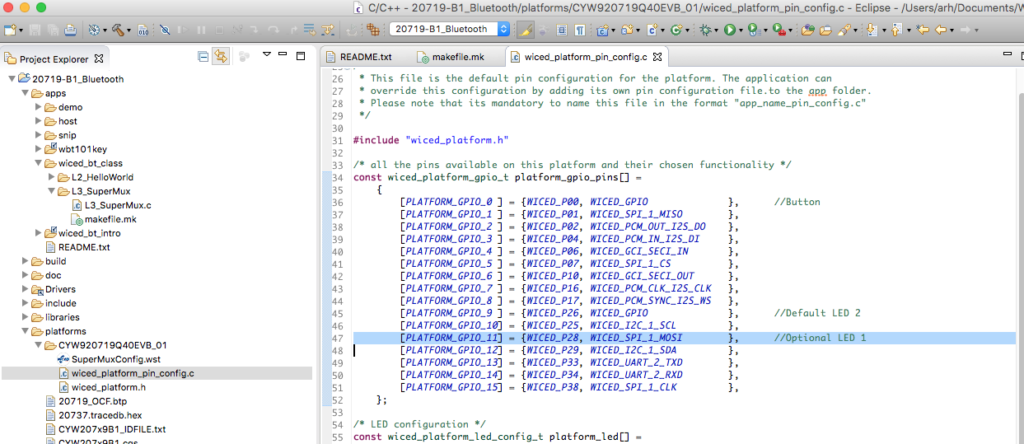
In WICED Studio, the world “Platform” is just another word for Board Support Package.  Basically all of the configuration required to build the firmware for a specific board.  If you click on platforms you will find a directory for the CYW920719Q40EVB.  All of the default configuration for the pins are located in the file “wiced_platform_pin_config.c”

If you look at this file closely, you will see on line 47 that pin P28 is setup as the MOSI of WICED_SPI_1.  That isnt a GPIO!!!.  And you will see a whole block of code on line 74 that is commented out that COULD   configure P28 as a GPIO.  But that would require modifying our default platform files, which I dont want to do.  Now what?  Simple use the SuperMux tool.

/* all the pins available on this platform and their chosen functionality */
const wiced_platform_gpio_t platform_gpio_pins[] =
    {
        [PLATFORM_GPIO_0 ] = {WICED_P00, WICED_GPIO              },      //Button
        [PLATFORM_GPIO_1 ] = {WICED_P01, WICED_SPI_1_MISO        },
        [PLATFORM_GPIO_2 ] = {WICED_P02, WICED_PCM_OUT_I2S_DO    },
        [PLATFORM_GPIO_3 ] = {WICED_P04, WICED_PCM_IN_I2S_DI     },
        [PLATFORM_GPIO_4 ] = {WICED_P06, WICED_GCI_SECI_IN       },
        [PLATFORM_GPIO_5 ] = {WICED_P07, WICED_SPI_1_CS          },
        [PLATFORM_GPIO_6 ] = {WICED_P10, WICED_GCI_SECI_OUT      },
        [PLATFORM_GPIO_7 ] = {WICED_P16, WICED_PCM_CLK_I2S_CLK   },
        [PLATFORM_GPIO_8 ] = {WICED_P17, WICED_PCM_SYNC_I2S_WS   },
        [PLATFORM_GPIO_9 ] = {WICED_P26, WICED_GPIO              },      //Default LED 2
        [PLATFORM_GPIO_10] = {WICED_P25, WICED_I2C_1_SCL         },
        [PLATFORM_GPIO_11] = {WICED_P28, WICED_SPI_1_MOSI        },      //Optional LED 1
        [PLATFORM_GPIO_12] = {WICED_P29, WICED_I2C_1_SDA         },
        [PLATFORM_GPIO_13] = {WICED_P33, WICED_UART_2_TXD        },
        [PLATFORM_GPIO_14] = {WICED_P34, WICED_UART_2_RXD        },
        [PLATFORM_GPIO_15] = {WICED_P38, WICED_SPI_1_CLK         },
    };

/* LED configuration */
const wiced_platform_led_config_t platform_led[] =
    {
        [WICED_PLATFORM_LED_2] =
            {
                .gpio          = (wiced_bt_gpio_numbers_t*)&platform_gpio_pins[PLATFORM_GPIO_9].gpio_pin,
                .config        = ( GPIO_OUTPUT_ENABLE | GPIO_PULL_UP ),
                .default_state = GPIO_PIN_OUTPUT_HIGH,
            },

// We can use either LED1 or SPI1 MOSI, by default we are using WICED_P28 for SPI1 MOSI,
// uncomment the following initialization if WICED_P28 is to be used as an LED and set PIN
// functionality in platform_gpio_pins as WICED_GPIO

//        [WICED_PLATFORM_LED_1] =
//            {
//                .gpio          = (wiced_bt_gpio_numbers_t*)&platform_gpio_pins[PLATFORM_GPIO_11].gpio_pin,
//                .config        = ( GPIO_OUTPUT_ENABLE | GPIO_PULL_UP ),
//                .default_state = GPIO_PIN_OUTPUT_HIGH,
//            }
    };

SuperMux Tool

The SuperMux tool is a GUI for setting the default configurations of the Pins on the chip.  Like all capable MCUs, this chip has PWMs, SPIs, UARTs, GPIOs, I2C, ADCs etc.  Each pin on the chip can do a bunch of different functions, but only one at a time.  Each pin has a multiplexor in front of it that selects the function of that pin.  The SuperMux tool helps you setup the multiplexors for each pin on the chip.

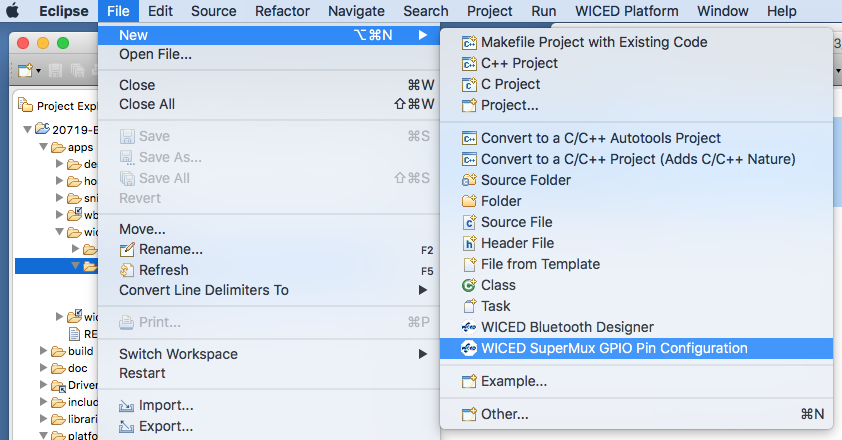
To run the SuperMux tool, first click on your project directory (remember L3_SuperMux).  The select File–>New–>WICED SuperMux GPIO Pin Configuration

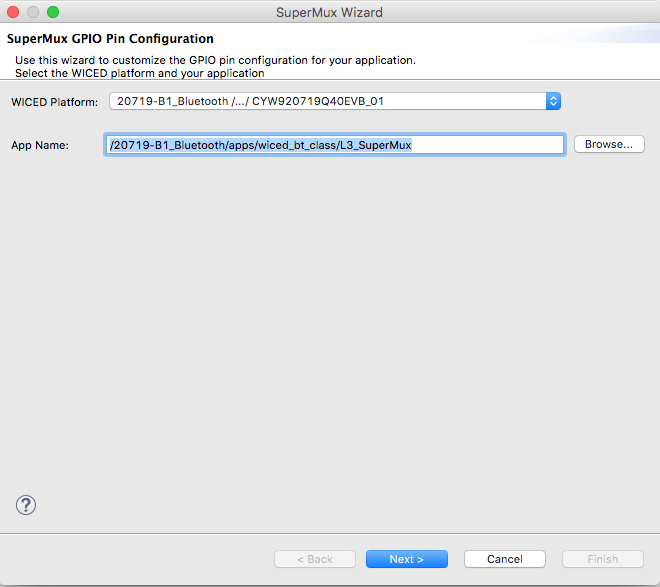
It will ask you which “App Name” you want it to work on.  Since we clicked on the L3_SuperMux app, it uses that name by default.  Press Next

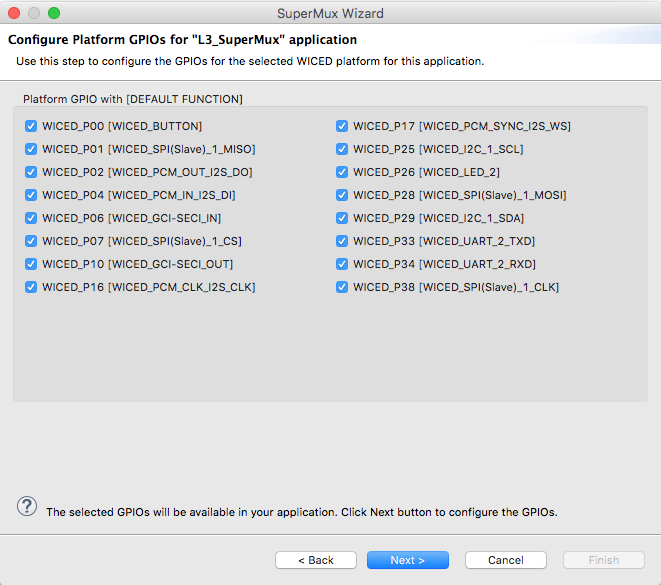
The SuperMux Wizard will give you the opportunity to select which pins you want to configure.  It also shows you the default configuration of each of the pins.  In this case just press “Next” because we want to configure them all.

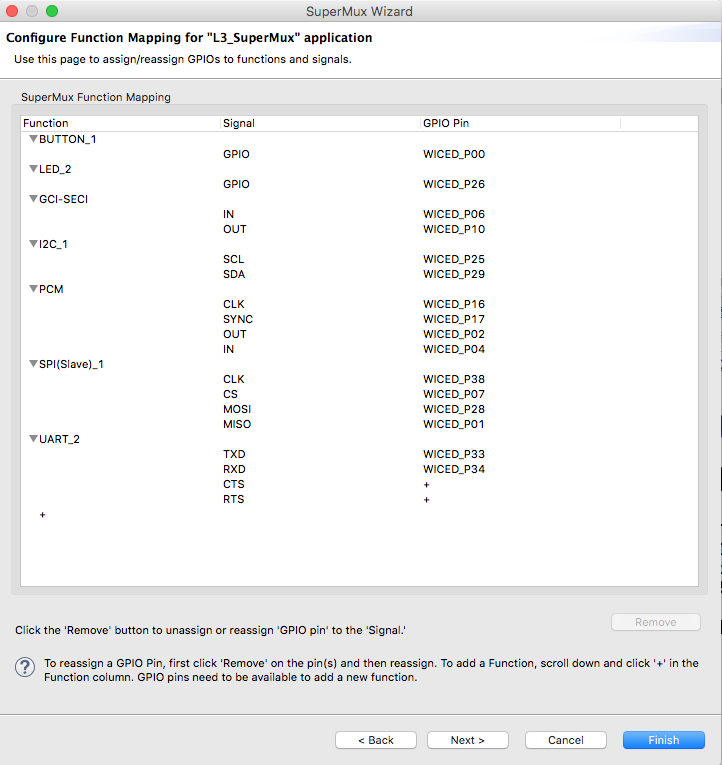
Now you will see the functions of the chip and which pins they are assigned to.  Notice that WICED_P28 is assigned as the MOSI of SPI(Slave)_1.  We don’t want that.

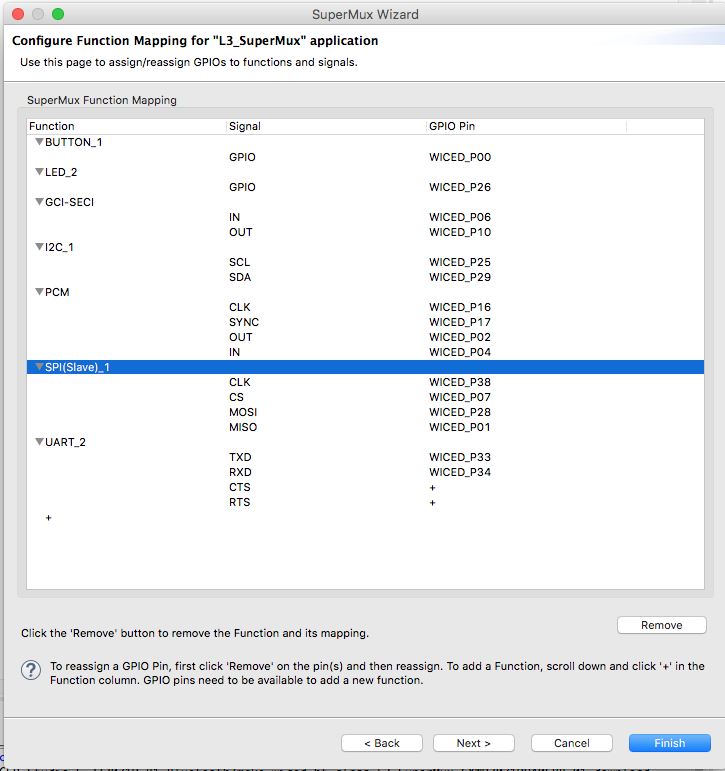
Remove the SPI(Slave)_1 by selecting it and then pressing the “Remove” button

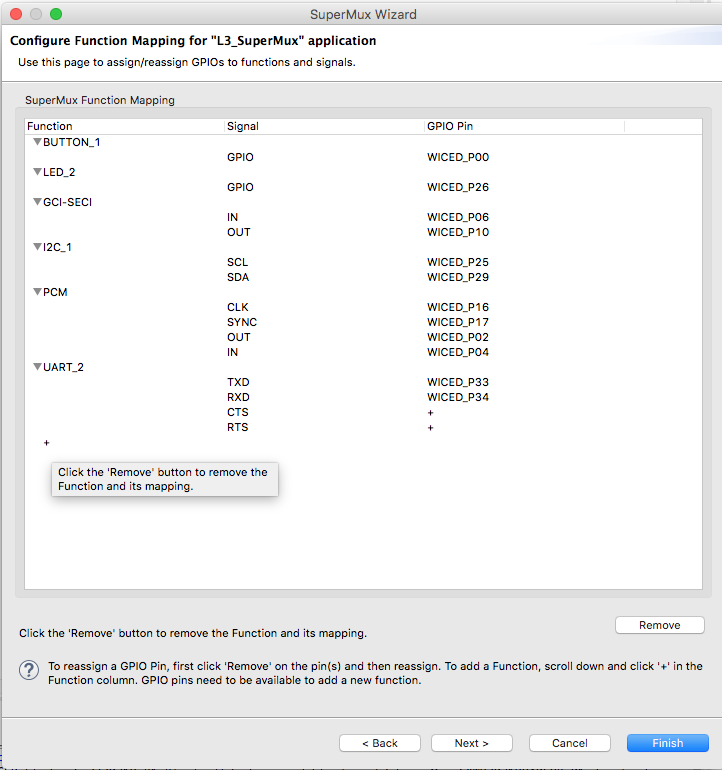
Now your screen will look like this.  In order to add a new pin configuration you can press the little “+” at the bottom of the function column.

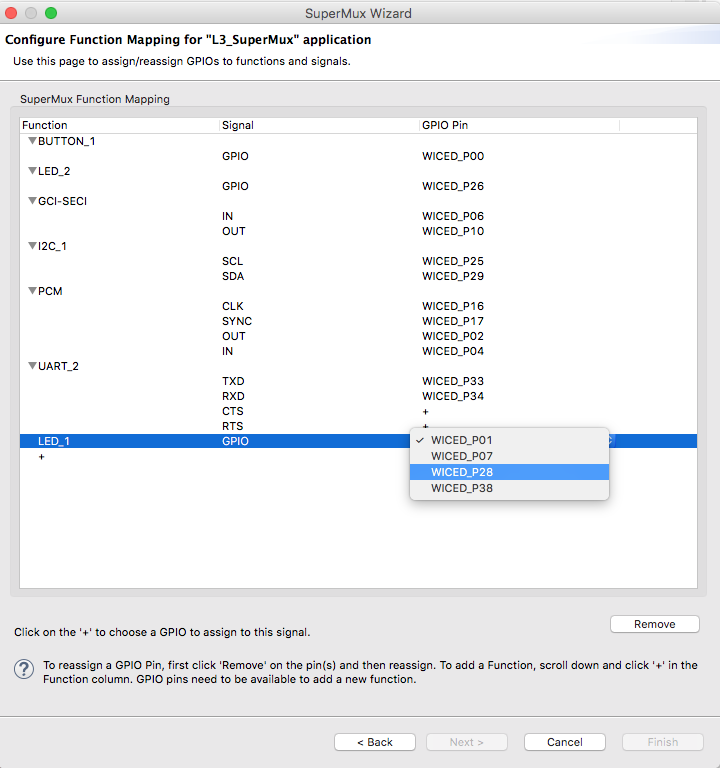
Next press the little “+” button and select LED.

The select which Pin you want assigned to the LED.  In this case we want WICED_P28

After you press finish you will notice that it adds a several files to your project.  And you notice that it creates a file called “makefile.mk.bak” (which is the backup of the original makefile)

First look at the makefile and notice that it added the “L3_SuperMux_pin_config.c” to the sources and added a CFLAG

#
# Lesson 3 - SuperMux
#
APP_SRC +=  L3_SuperMux.c

C_FLAGS += -DWICED_BT_TRACE_ENABLE
C_FLAGS += -DSMUX_CHIP=$(CHIP)
APP_SRC += L3_SuperMux_pin_config.c

So, what is up with the  L3_SuperMux_pin_config.c.  OH!!! I See, this is just a replacement for the default platform configuration.  Notice that P28 is now a WICED_GPIO and that it is now defined in the LED list.

wiced_platform_gpio_t platform_gpio_pins[]=
	{
		[PLATFORM_GPIO_0]	= {WICED_P00, WICED_GPIO},
		[PLATFORM_GPIO_1]	= {WICED_P02, WICED_PCM_OUT_I2S_DO},
		[PLATFORM_GPIO_2]	= {WICED_P04, WICED_PCM_IN_I2S_DI},
		[PLATFORM_GPIO_3]	= {WICED_P06, WICED_GCI_SECI_IN},
		[PLATFORM_GPIO_4]	= {WICED_P10, WICED_GCI_SECI_OUT},
		[PLATFORM_GPIO_5]	= {WICED_P16, WICED_PCM_CLK_I2S_CLK},
		[PLATFORM_GPIO_6]	= {WICED_P17, WICED_PCM_SYNC_I2S_WS},
		[PLATFORM_GPIO_7]	= {WICED_P25, WICED_I2C_1_SCL},
		[PLATFORM_GPIO_8]	= {WICED_P26, WICED_GPIO},
		[PLATFORM_GPIO_9]	= {WICED_P28, WICED_GPIO},
		[PLATFORM_GPIO_10]	= {WICED_P29, WICED_I2C_1_SDA},
		[PLATFORM_GPIO_11]	= {WICED_P33, WICED_UART_2_TXD},
		[PLATFORM_GPIO_12]	= {WICED_P34, WICED_UART_2_RXD},
	};

const wiced_platform_button_config_t platform_button[WICED_PLATFORM_BUTTON_MAX]=
	{
		[WICED_PLATFORM_BUTTON_1] =
			{
				.gpio			= &platform_gpio_pins[PLATFORM_GPIO_0].gpio_pin,
				.config			= (GPIO_INPUT_ENABLE | GPIO_PULL_UP),
				.default_state	= GPIO_PIN_OUTPUT_LOW,
				.button_pressed_value	= GPIO_PIN_OUTPUT_LOW,
			},
	};

const size_t button_count =  (sizeof(platform_button) / sizeof(wiced_platform_button_config_t));


const wiced_platform_led_config_t platform_led[WICED_PLATFORM_LED_MAX]=
	{
		[WICED_PLATFORM_LED_1] =
			{
				.gpio			= &platform_gpio_pins[PLATFORM_GPIO_9].gpio_pin,
				.config			= (GPIO_OUTPUT_ENABLE | GPIO_PULL_UP),
				.default_state	= GPIO_PIN_OUTPUT_HIGH,
			},
		[WICED_PLATFORM_LED_2] =
			{
				.gpio			= &platform_gpio_pins[PLATFORM_GPIO_8].gpio_pin,
				.config			= (GPIO_OUTPUT_ENABLE | GPIO_PULL_UP),
				.default_state	= GPIO_PIN_OUTPUT_HIGH,
			},
	};

Now that the pins are configured.  We need to setup the PWM.

Configure the Clock and the PWM

Now I will add a little bit of code to the top of  our L3_SuperMux.c to configure the PWM, Clock and Pin.

First add includes for the ACLK and PWM driver.

#include "wiced_hal_aclk.h"
#include "wiced_hal_pwm.h"

Then startup the Clock, Pin and PWM.

    wiced_hal_aclk_enable(2000, ACLK1, ACLK_FREQ_1_MHZ );
    wiced_hal_pwm_configure_pin (WICED_GPIO_PIN_LED_1, PWM1 );
    wiced_hal_pwm_start(PWM1, PMU_CLK, 0xFFFF-500, 0xFFFF-999,0);

If you want to turn on the PWM you need to do three things

  1. Turn on a clock to drive it (line 17) sets the clock frequency to 2000hz
  2. Attach the PWM to a Pin (line 18) attaches PWM 1 to the pin
  3. Turn on the PWM which is a 16-bit up-counting PWM.  When the PWM is reset it will go to 0xFFFF-999 (the period)… then it will switch at 0xFFFF-500 (the compare value)

When you program this your Green LED aka WICED_LED_1 is being driven by the PWM.  And your RED LED is being driven by your firmware.

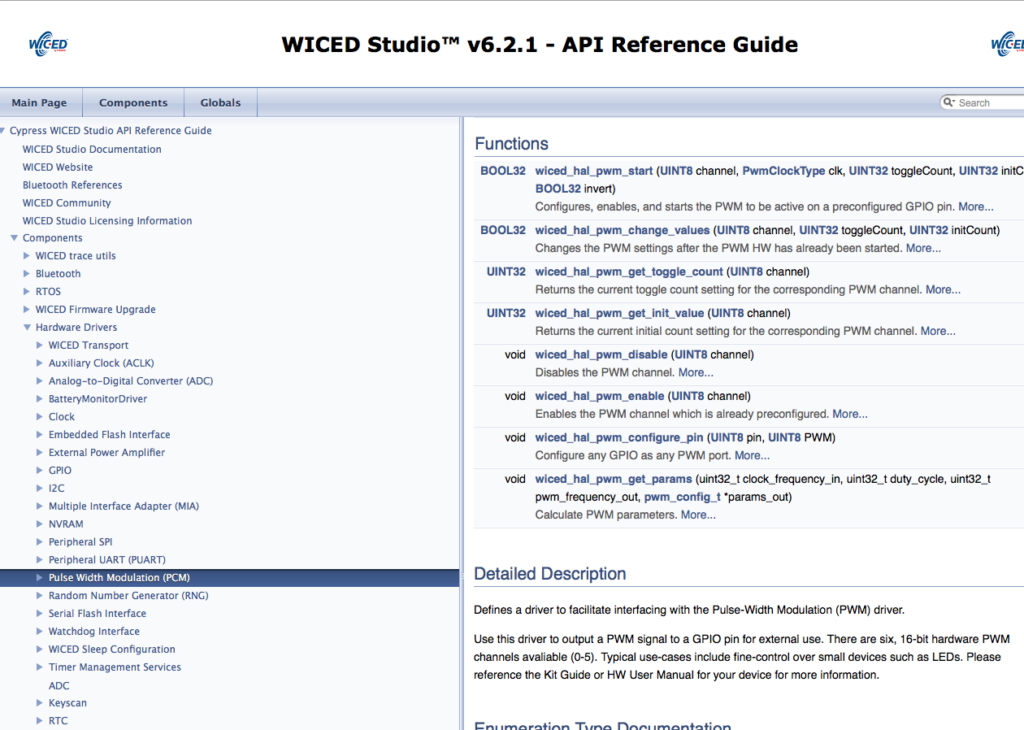
Documentation

All of the hardware blocks on the chip have a set of API functions to help you interface with them.  You can find all of that in the Documentation

Lesson 2 – WICED Bluetooth: Your First Project(s)

WICED Bluetooth Using the CYW20719

# Title Comment
0 A Two Hour WICED Bluetooth Class WICED Bluetooth Using the CYW20719 in all its glory
1 Resources Links to all of the Cypress WICED information including videos, application notes etc.
2 Your First Project Making Hello World & the Blinky LED
3 The Super Mux Tool Learning about platforms and the Super Mux Tool
4 Snips Using the example projects to learn Bluetooth
5 Bluetooth Designer Using the tool to customize a project and get going fast
6 The CCCD & Notification Writing back to the Central
7 Advertising  Beacon Building a beacon project to advertise your custom information 
8 Scanner Viewing the world around you
9 Bluetooth Classic SPP Using the Serial Port Profile to Transmit Lots of Data

Source code: 

  • git@github.com:iotexpert/wiced_bt_intro.git
  • https://github.com/iotexpert/wiced_bt_intro


Summary

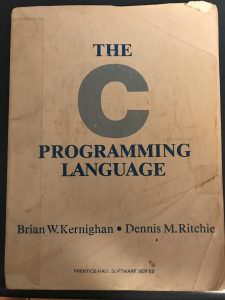
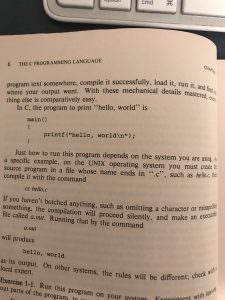
For our first project, I am going to stand on the shoulder of giants.  In 1978, Brian Kernighan and Dennis Ritchie published “The C Programming Language”.  Here are pictures of my copy.

Kernighan & Ritchie

The reason you do “Hello, World” is that you want to make sure that your compiler chain, programmer etc are all working correctly with something that is super simple.  The only change that I will make to their classic program is to add the “Blinking LED” which is the embedded developers version of “Hello, World”.

The concepts that I want to show in this lesson are.

  1. How to make a new project – makefile.mk, <appname>.c
  2. How NOT to make a new project
  3. How to create a “Make Target”
  4. CYW920719Q40EVB01 Development Kit
  5. WICED PUART and WICED HCI UART
  6. How to start the bootloader
  7. Where the documentation resides for the WICED 20719 hardware abstraction layer
  8. WICED uses ThreadX RTOS

To make this first project the steps are:

  1. Make a new folder called wiced_bt_class  in the Apps Folder
  2. Make a new folder called L2_HelloWorld in the wiced_bt_intro Folder
  3. Create a new file called L2_HelloWorld.c
  4. Create a new file called makefile.mk
  5. Add the code to print HelloWorld & blink the LED to L2_HelloWorld.c
  6. Add the secret incantation to makefile.mk to build the project
  7. Create a “Make Target”
  8. Connect the development kit to your computer
  9. Attach a serial terminal to the PUART
  10. Run the Make Target to Build and Program

Lets do this!

DO NOT DO File->New Project

I always hate to start with a negative statement… but DO NOT make a file project by doing File->New Project.  This is used for creating a new Eclipse project, not a new WICED Studio project.  In WICED Studio we use the make external build system.  If you do File->New Project all hell is going to break loose.  So don’t do any of the things on this menu:

Hello World & Blinking LED

Now lets get on with making a WICED Studio Project.  First create a new folder to hold the projects for the Class in the “Apps” folder by right-clicking and selecting New->Folder

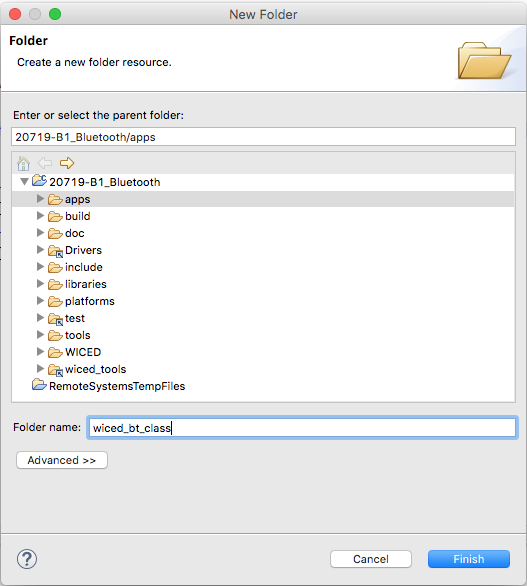
Give it the name “wiced_bt_class”

Create a folder to hold the first project called L2_HelloWorld

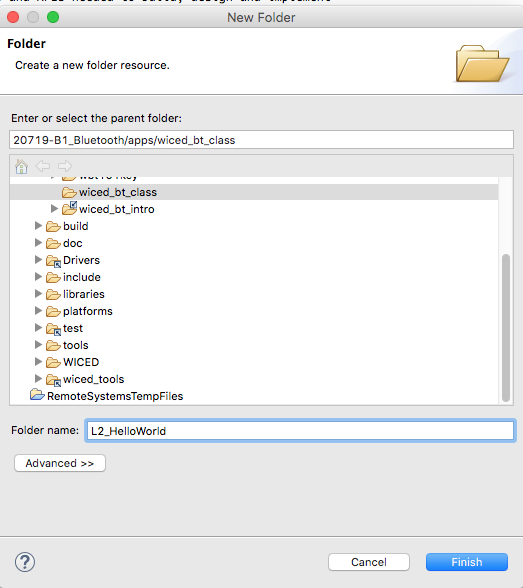
Call the folder L2_HelloWorld

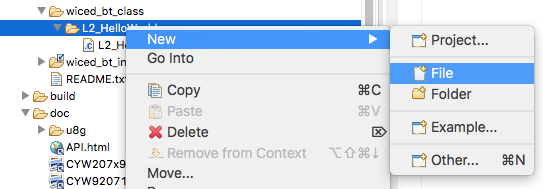
Make a new file called L2_HelloWorld.c by right clicking on the L2_HelloWorld folder and selecting New–>File

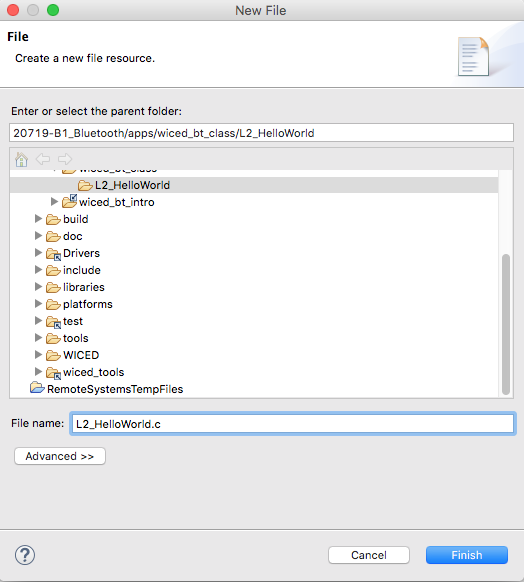
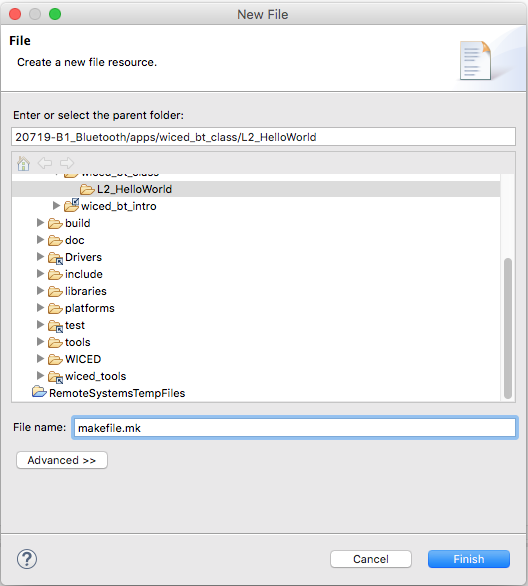
Give it the name L2_HelloWorld.c

Make a new file called makefile.mk by right clicking on the L2_HelloWorld directory and selecting New->File

and giving it the name makefile.mk

Add some code to the L2_HelloWorld.c

#include "wiced.h"
#include "sparcommon.h"
#include "wiced_platform.h"
#include "wiced_rtos.h"
#include "wiced_hal_gpio.h"
#include "wiced_bt_trace.h"

APPLICATION_START()
{
    wiced_set_debug_uart(WICED_ROUTE_DEBUG_TO_PUART);

    WICED_BT_TRACE("Hello, World\n");
    while(1)
    {

        WICED_BT_TRACE("Setting 0\n");
        wiced_hal_gpio_set_pin_output(WICED_GPIO_PIN_LED_2,0);
        wiced_rtos_delay_milliseconds(500,KEEP_THREAD_ACTIVE );
        WICED_BT_TRACE("Setting 1\n");
        wiced_hal_gpio_set_pin_output(WICED_GPIO_PIN_LED_2,1);
        wiced_rtos_delay_milliseconds(500,KEEP_THREAD_ACTIVE );
    }
}

Add the secret incantation to the makefile.mk

#
# Lesson 2 - Hello, World
#
APP_SRC +=  L2_HelloWorld.c

C_FLAGS += -DWICED_BT_TRACE_ENABLE

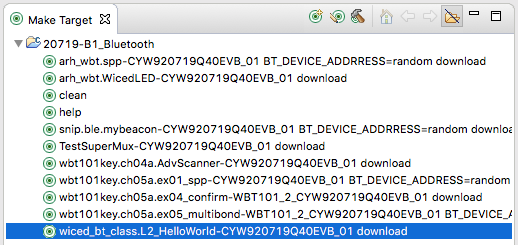
Create a make target

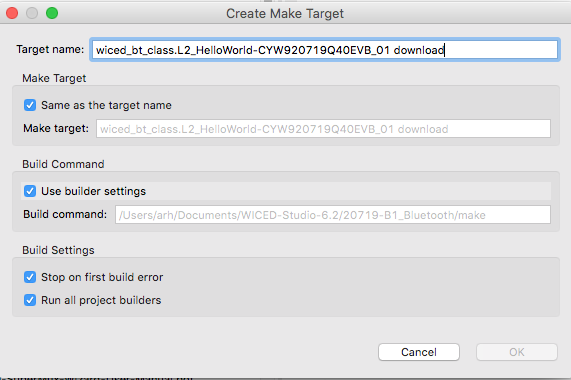
The make target has a VERY specific format.  It is:

directory.directory.appname-platform download

In our case we have all of our projects in a directory called “wiced_bt_class”.  Then we have a directory called “L2_HelloWorld” which holds the exact project.  And our platform name is “CYW920719Q40EVB_01”

Connect the Development Kit To Your Computer

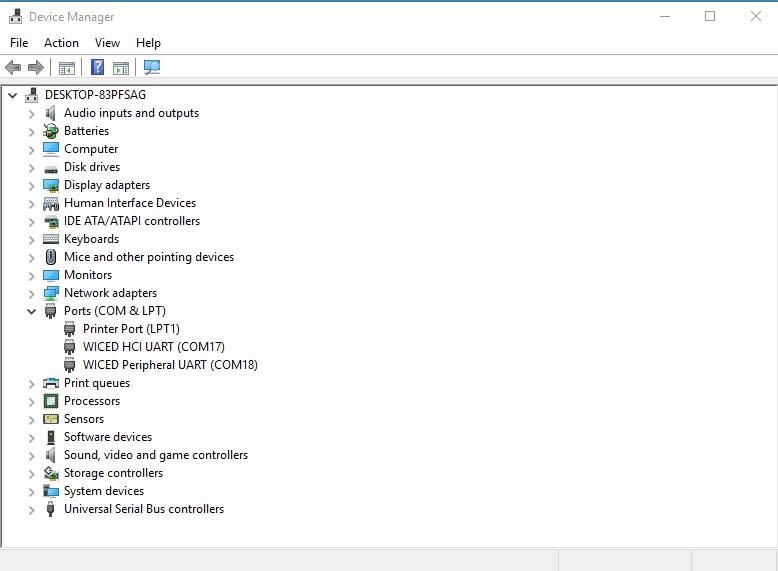
When you plug in your development kit, it will USB enumerate a TWO serial ports.  One of the serial ports (the first one) is called the “WICED HCI UART”.  The second serial port is called the “WICED Peripheral UART” (this is often abbreviated “PUART”)

One of the key things that the WICED HCI UART is used as is a UART to download new code to the bootloader.

The PUART is used as a general purpose serial port.  When we call this function it causes all of our “WICED_BT_TRACE” outputs to go to the the PUART.
    wiced_set_debug_uart(WICED_ROUTE_DEBUG_TO_PUART);

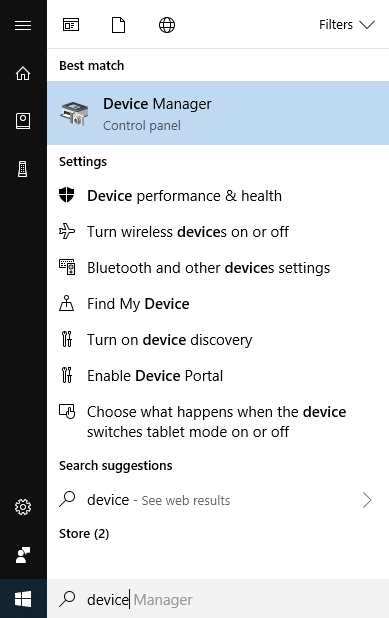
You can see these two UARTs on a PC by running the device manager.

You can see COM17 is the “WICED HCI UART” and COM18 is the “WICED Peripheral UART”

On my Mac I use the program “Serial” which I downloaded from the App Store.

When I run Serial and then to open a Port

You can see the two UARTs.

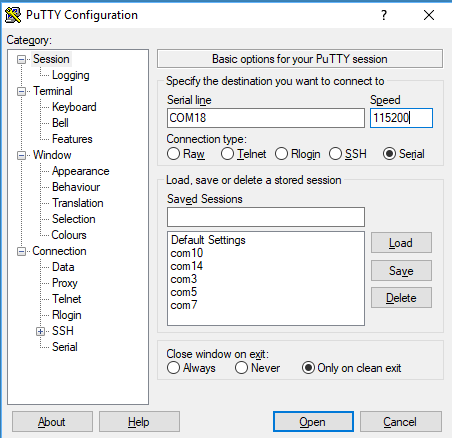
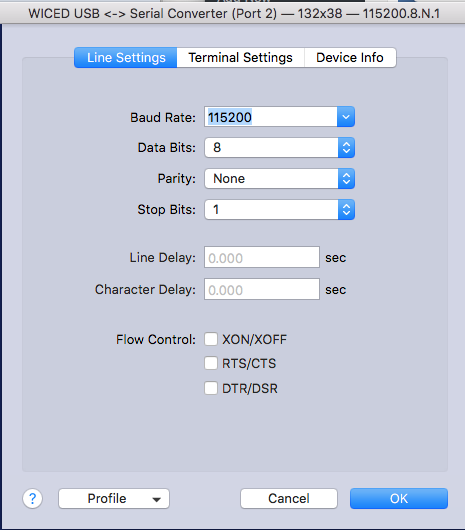
In order to see the output I will connect to the port with the settings

  • 115200 Baud
  • 8-n-1 (Data bits, Parity, Stop Bits)

With my PC I typically use Putty (remember it was COM18 from the screen above)

On the Mac program serial you can configure it with Terminal->Settings

Program your Development Kit

In the Make Target window you should see a bunch of “targets”.  You probably have a bunch more targets, which came in your installation of WICED Studio by default, but I deleted a bunch of them so I could just see the ones that I created.

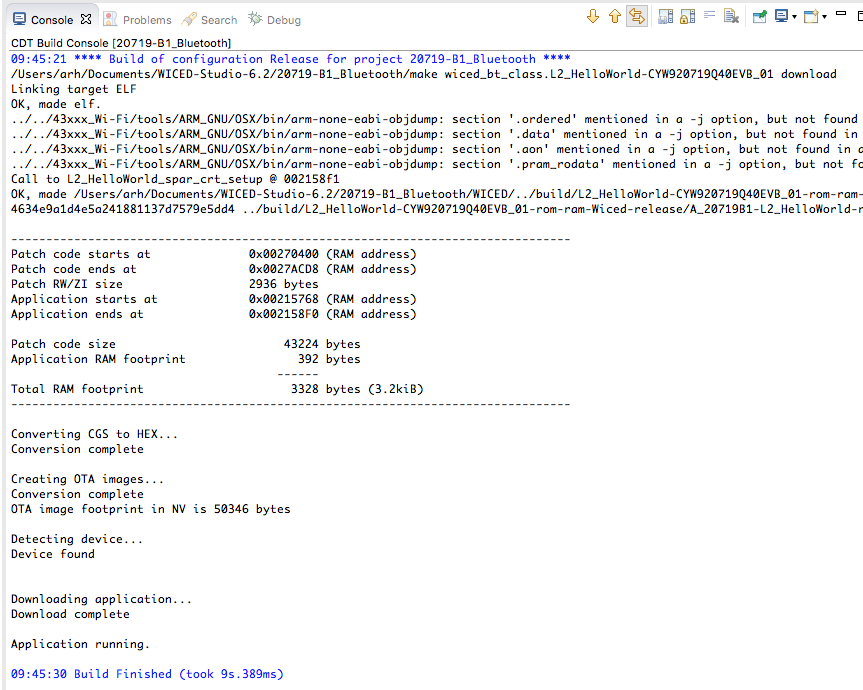
To build and program your project, double click the make target we made before.

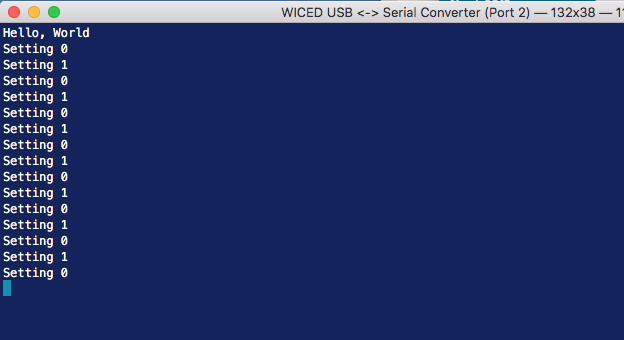
When you look in the console you should see something like this:

And when you look at your serial terminal you will see this:

And you should also see the blinking LED!!!

Start the Bootloader

If you get this message there are three posibilites

  1. The kit isn’t plugged in
  2. The driver didn’t install properly
  3. The bootloader wont start

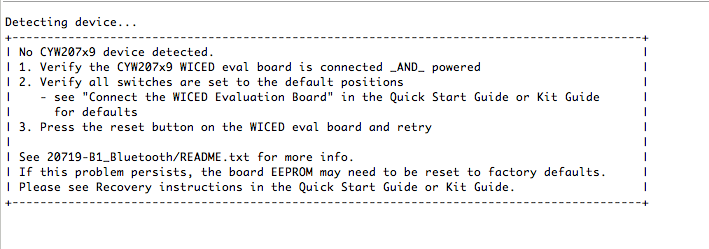
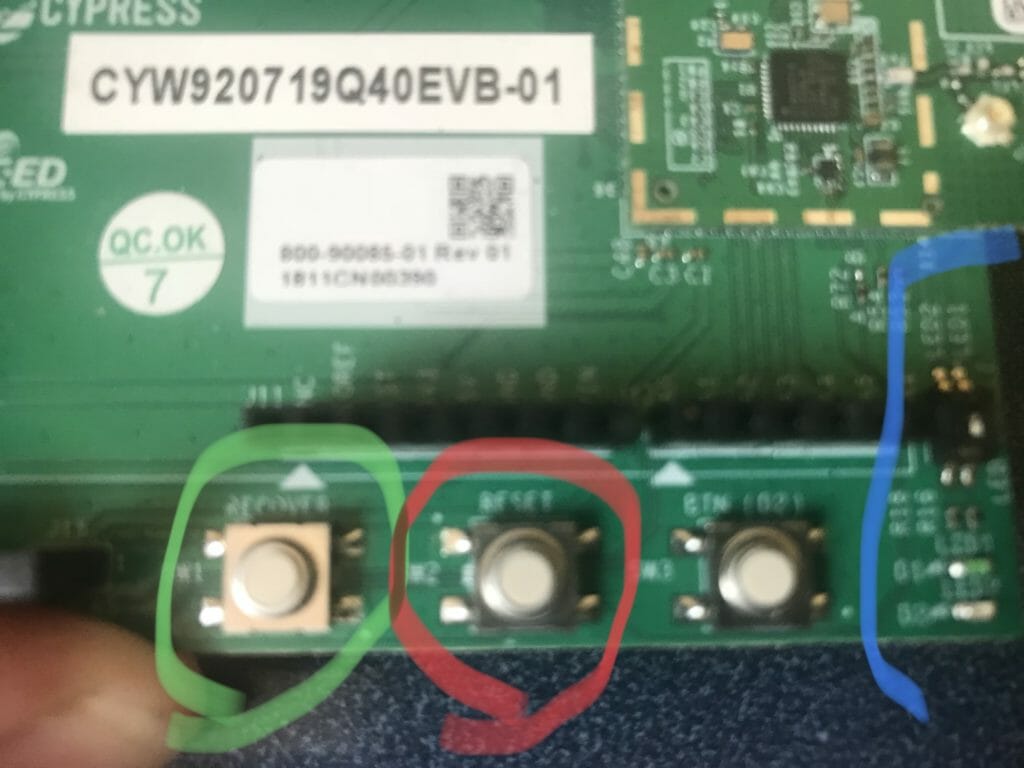
Check the first two… and if that doesnt work then what this means is that the bootloader is not listening on the WICED HCI UART.  In order to fix this you need to press reset and hold down the button called “Recover”.  Then release the reset, then release the recover button.  What does this do?  Simple, when the chip comes out of reset, if the recover button is pressed, the chip starts the bootloader instead of the main application.

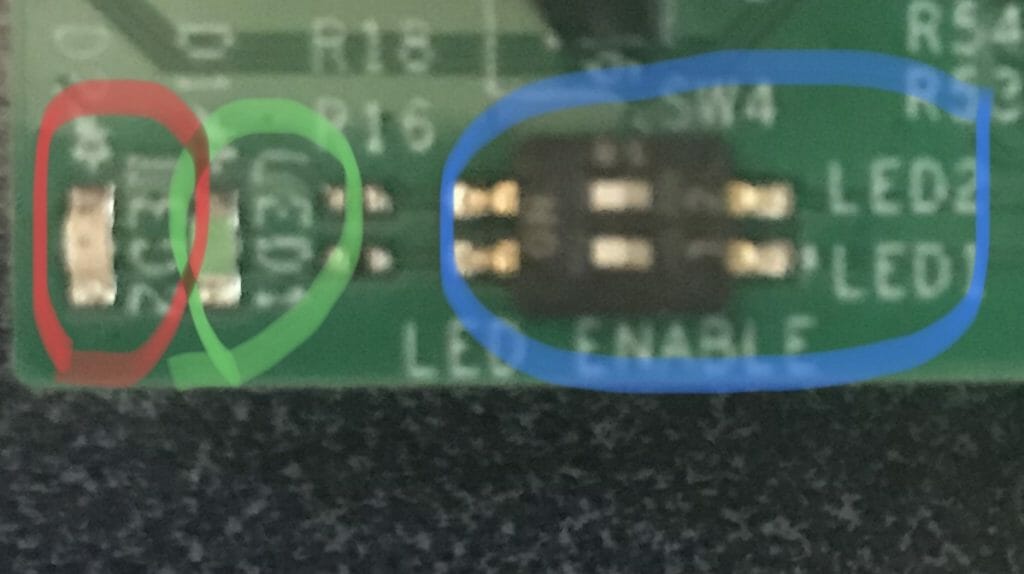
Here is a picture of the bottom corner of the board.  The button circled in Green is the “Recover”.  The button in Red is “Reset” and the Blue surrounds the LED circuit.

The two LEDs are labeled LED1 and LED2.  LED2 is the Red one, LED1 is the Green one.  The dip switches circled in Blue connect or disconnect the LEDs from the CYW20719.  In my case you can see (barely) that the switch is set to On.  Both of these LEDs are active LOW (0 turns them on)

Lesson 1 – WICED Bluetooth: A Tour of the Resources

WICED Bluetooth Using the CYW20719

# Title Comment
0 A Two Hour WICED Bluetooth Class WICED Bluetooth Using the CYW20719 in all its glory
1 Resources Links to all of the Cypress WICED information including videos, application notes etc.
2 Your First Project Making Hello World & the Blinky LED
3 The Super Mux Tool Learning about platforms and the Super Mux Tool
4 Snips Using the example projects to learn Bluetooth
5 Bluetooth Designer Using the tool to customize a project and get going fast
6 The CCCD & Notification Writing back to the Central
7 Advertising  Beacon Building a beacon project to advertise your custom information 
8 Scanner Viewing the world around you
9 Bluetooth Classic SPP Using the Serial Port Profile to Transmit Lots of Data

Source code: 

  • git@github.com:iotexpert/wiced_bt_intro.git
  • https://github.com/iotexpert/wiced_bt_intro


A Tour of the Resources

Cypress is committed to the “Whole Product”.  What that means is that we believe that you should have great software, hardware, dev kits, community etc. experience while using our chip.  So, before we get started Id like to show you all of the learning and development resources available to you.

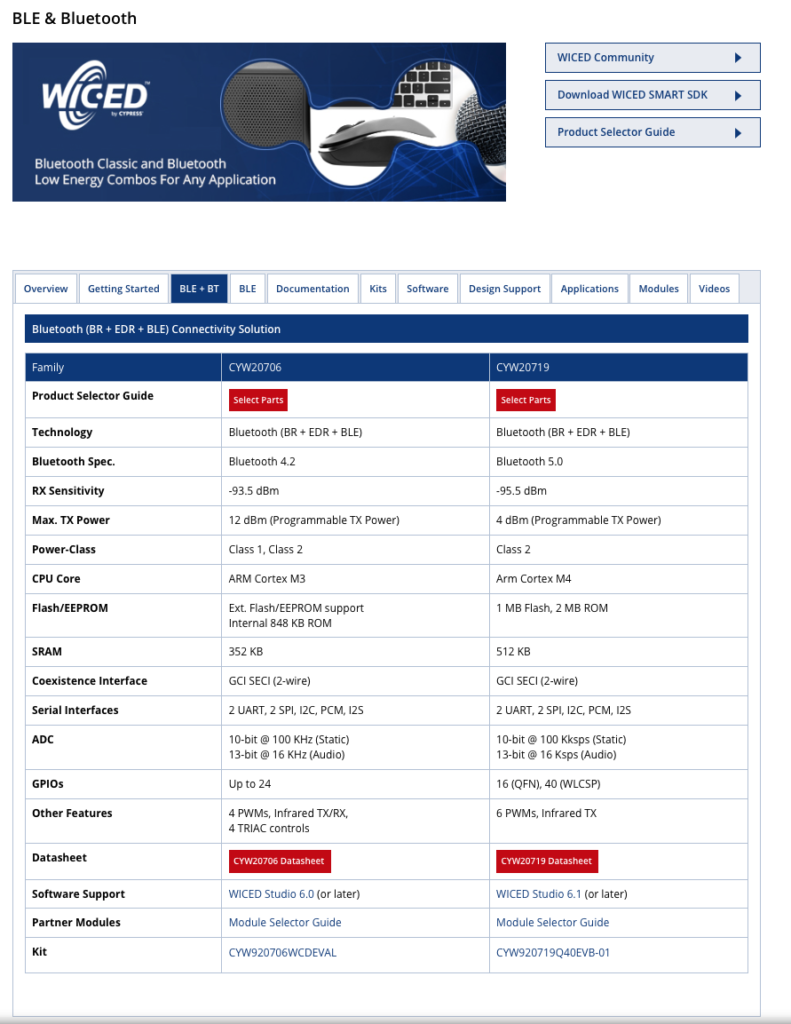
  1. BLE & Bluetooth Connectivity Solutions
  2. WICED CYW20719 Product Page
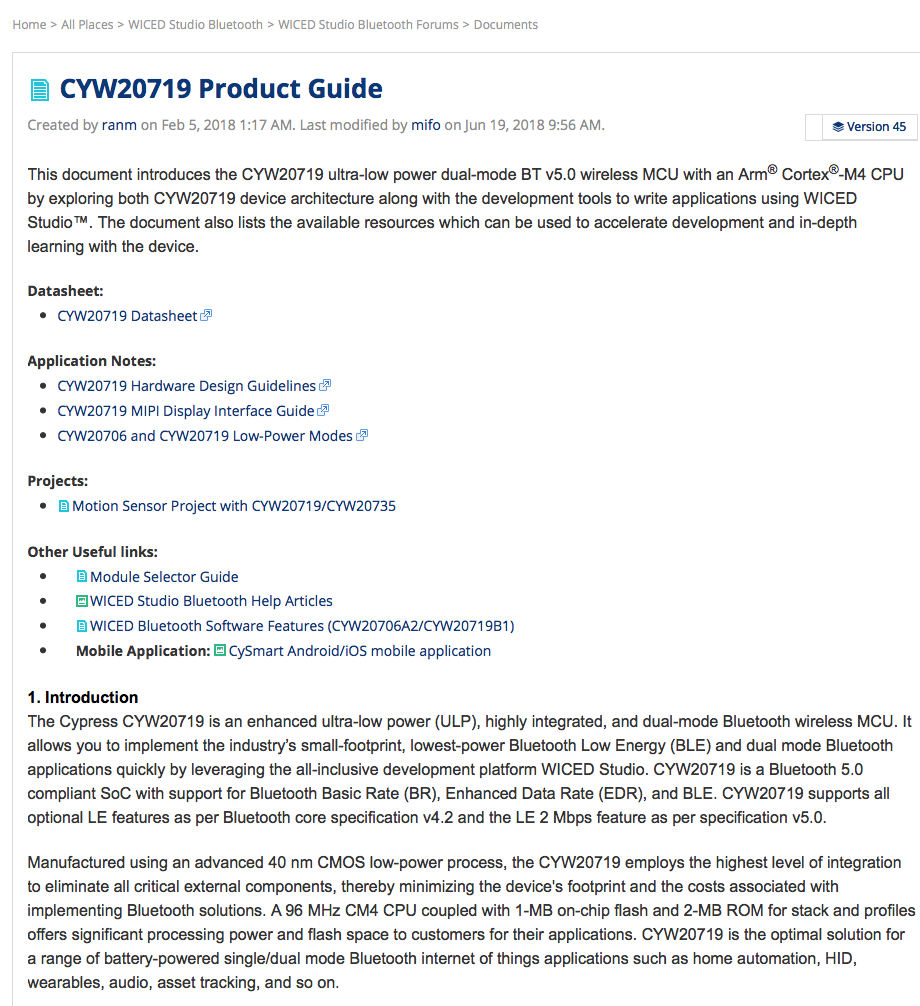
  3. CYW20719 Product Guide
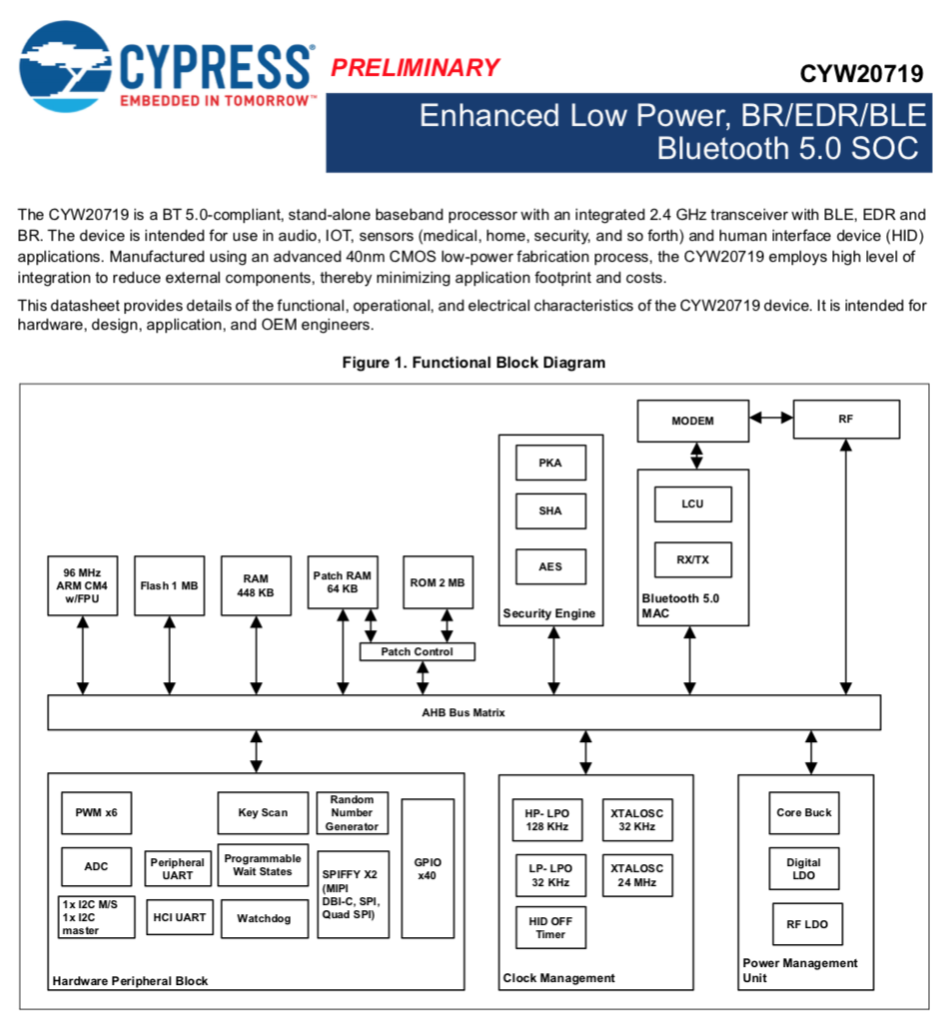
  4. CYW20719 Datasheet
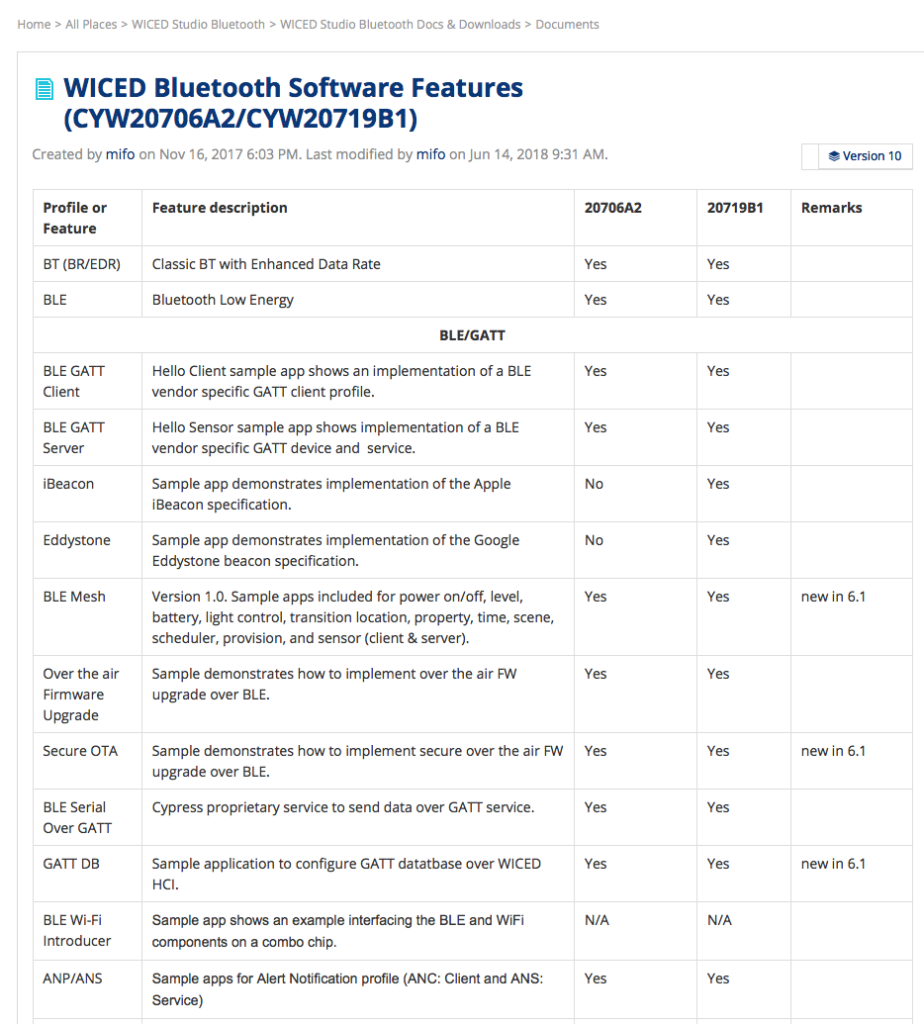
  5. CYW20719 Software Features
  6. WICED Module Selection Guide
  7. CYW920719Q40EVB-01 Development Kit
  8. CYW920719Q40EVB-01 Product Page
  9. CYW920719 Quick Start
  10. CYW920719Q40EVB-01 Evaluation Board User Guide
  11. Cypress Community
  12. WICED Studio Bluetooth Community
  13. WICED Studio Bluetooth Forums
  14. WICED Studio
  15. WICED Studio Bluetooth Example Projects
  16. WICED Studio Documentation
  17. WICED Bluetooth API Guide
  18. WICED README.txt
  19. WICED Studio Release Notes
  20. WICED Studio Technical Brief
  21. WICED Bluetooth 101

Bluetooth BR+EDR Connectivity Solutions Page

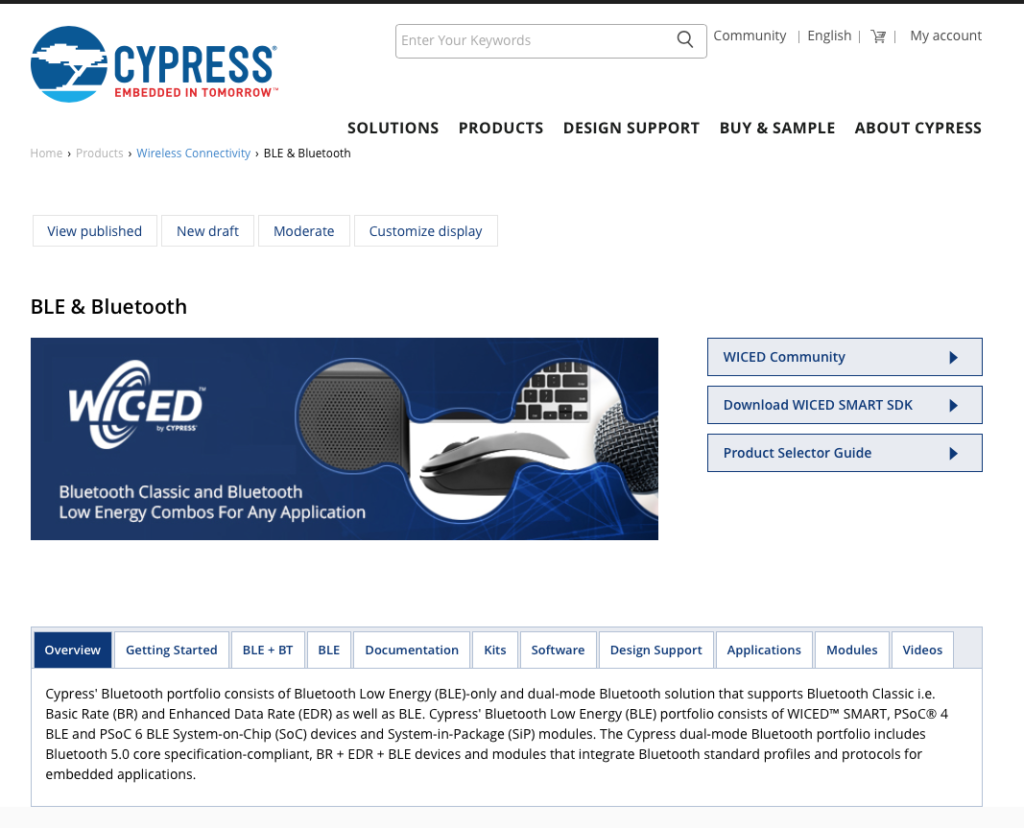
This pages gets to you all of the Cypress WICED BR+EDR+Bluetooth products

WICED CYW20719 Product Page

When you get the the BLE+Bluetooth products page, then click “BLE+BT” to see just the chips Im talking about here (CYW20719)

CYW20719 Product Guide

The Product Guide is a website that has all (most?) of the links you might need to learn about the CYW20719

CYW20719 Datasheet

The Datasheet always anchors you to the reality of what the chip can and cannot do

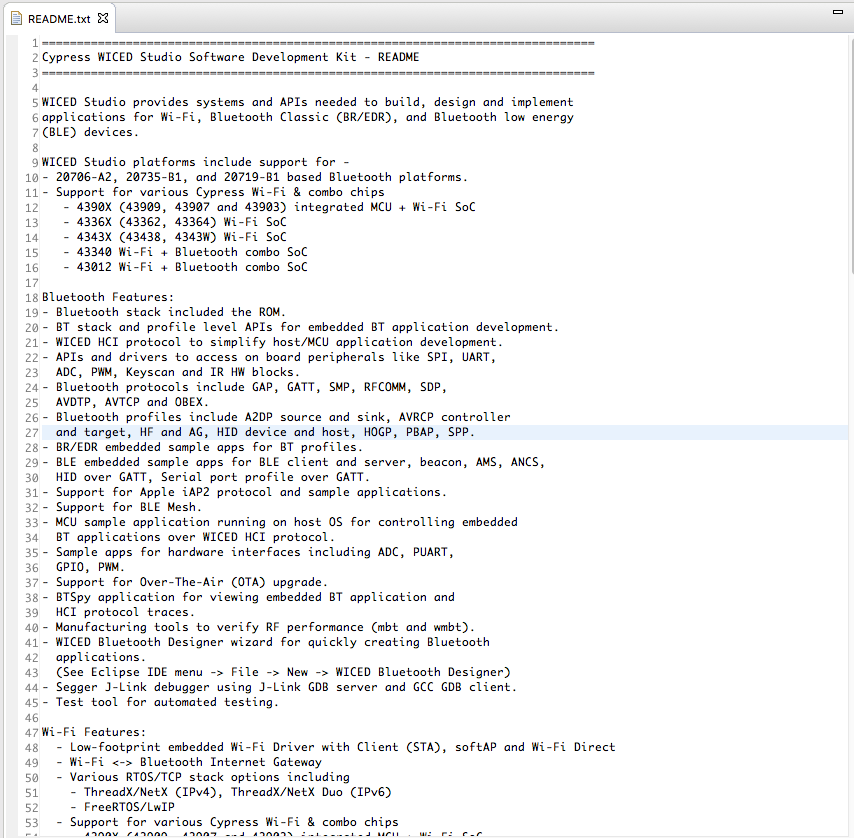
CYW20719 Software Features

This webpage has a list of all of the stuff that you have access to inside of the WICED Bluetooth SDK.

And it goes on and on and on from here.

WICED Module Selection Guide

If you feel like building a Bluetooth Product, you are almost certainly going to want to use a FCC certified module.  This guide is a discussion of all of the module vendors.

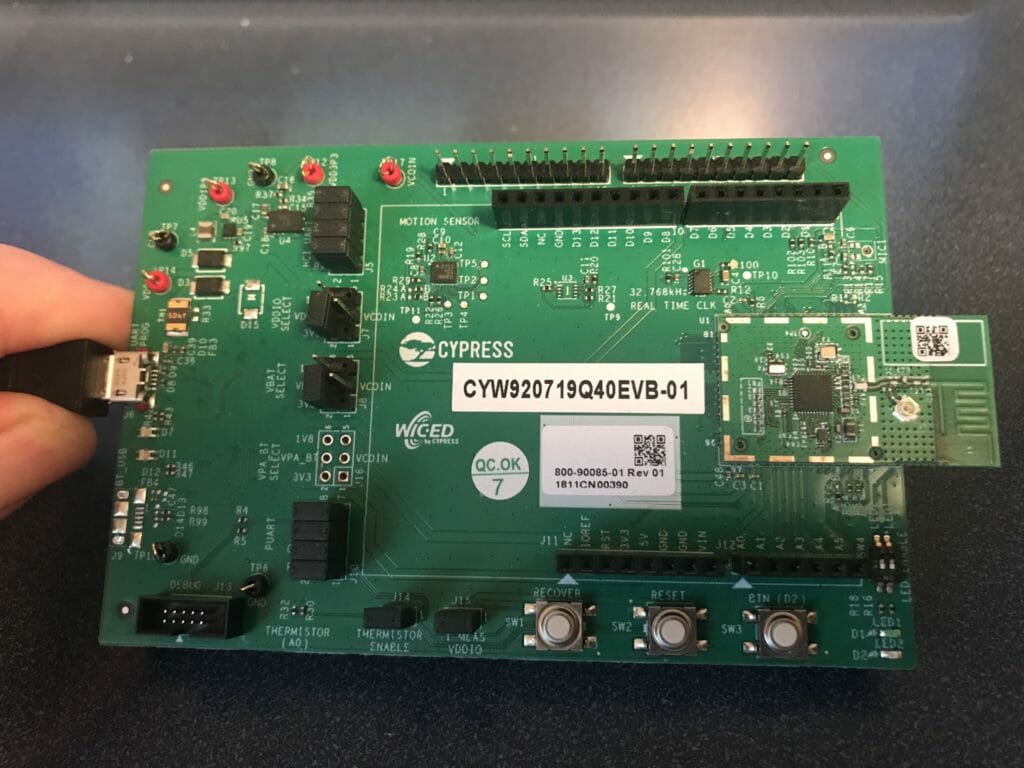
CYW920719Q40EVB-01 Development Kit

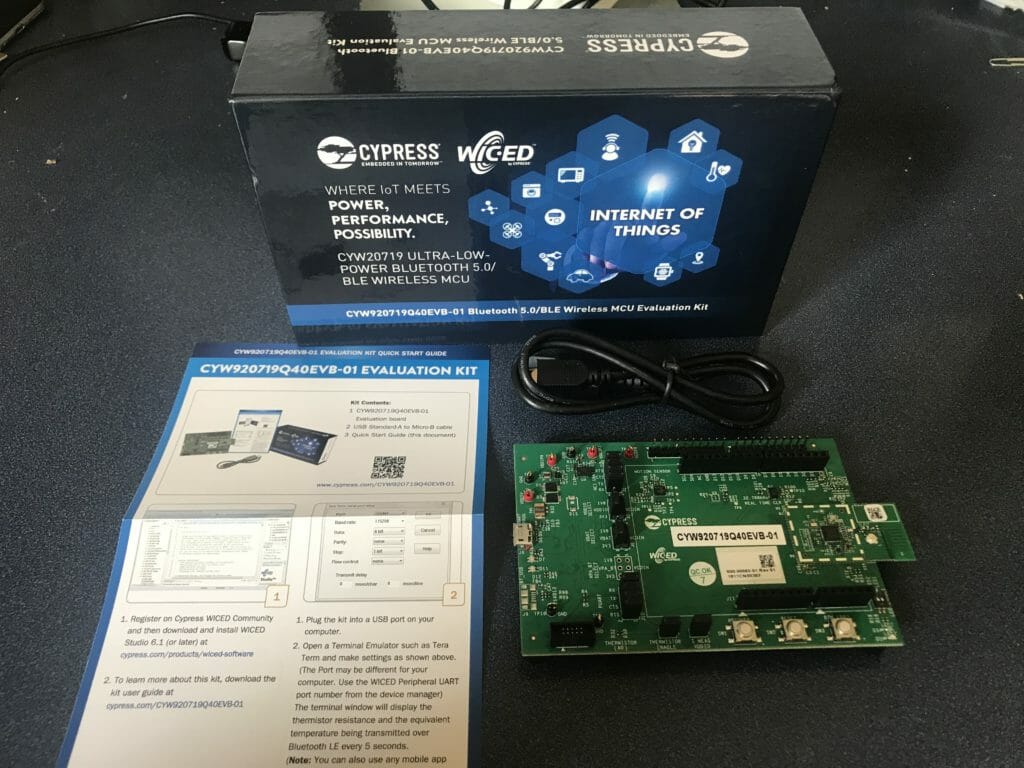
Here is the development kit.  You can see in the picture that this is an Arduino form factor board.  It has a button and and LED plus programmer and UART bridge.  Most importantly it has a daughter card with the 20719 and and antenna.

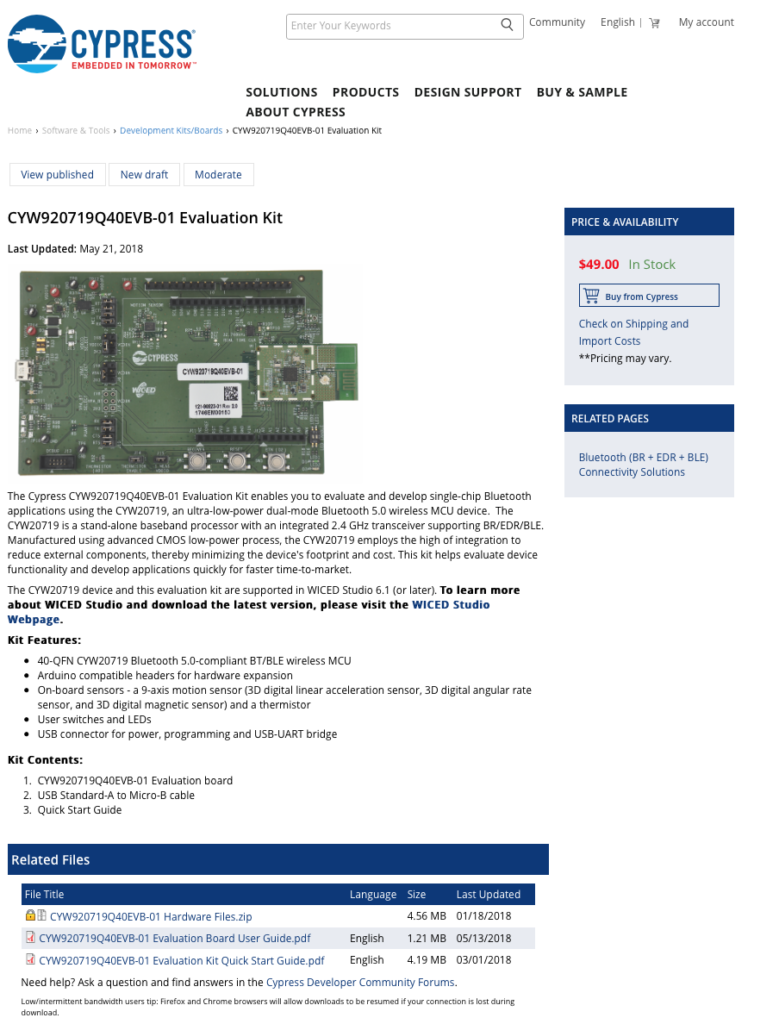
CYW920719Q40EVB-01 Product Page

The product landing pages for the development kit has lots of resources specific to this kit including the manual and quick start guide.

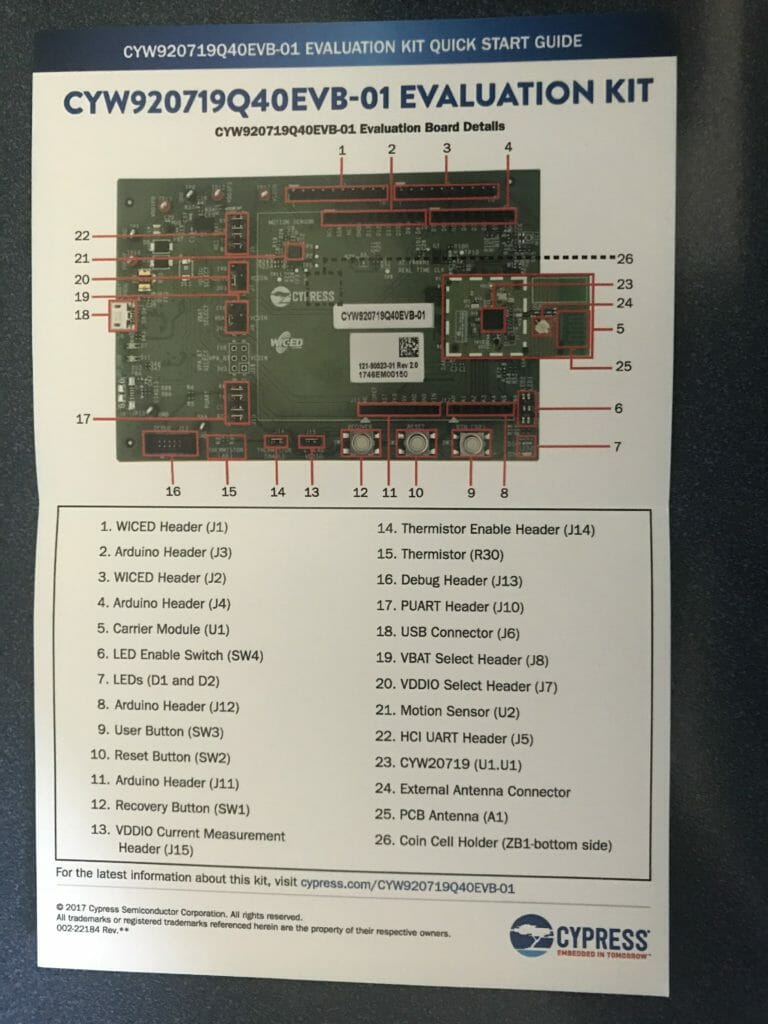
CYW920719 Quick Start

The Quickstart guide is included in the kit.  Just a single sheet of paper that points out all of the features of the development kit.

CYW920719Q40EVB-01 Evaluation Board User Guide

The Users Guide is the manual for the development kit.  It shows you how to use all of the resouces on the board and how to get going with WICED Studio.

Cypress Community

The community is your anchor for support.  It has all of the documentation etc… and most importantly a vibrant user forum.
WICED Studio Bluetooth Community

The Bluetooth Community website brings together all of the people and product collateral for WICED Bluetooth.

WICED Studio Bluetooth Forums

The actual forum is accessible to everyone to ask questions about the Cypress products.  It is staffed by our technical support team and you will get good answers.

WICED Studio

WICED Studio is the development tool which you can use to build projects.  This will be the central tool used for the rest of this class.

WICED Studio Bluetooth Example Projects

Cypress delivers a bunch of “apps” which range from small examples we call SNIPs to more fully featured projects (in the Demo) folder.  Ill be showing you how to use the in the next set of tutorials.

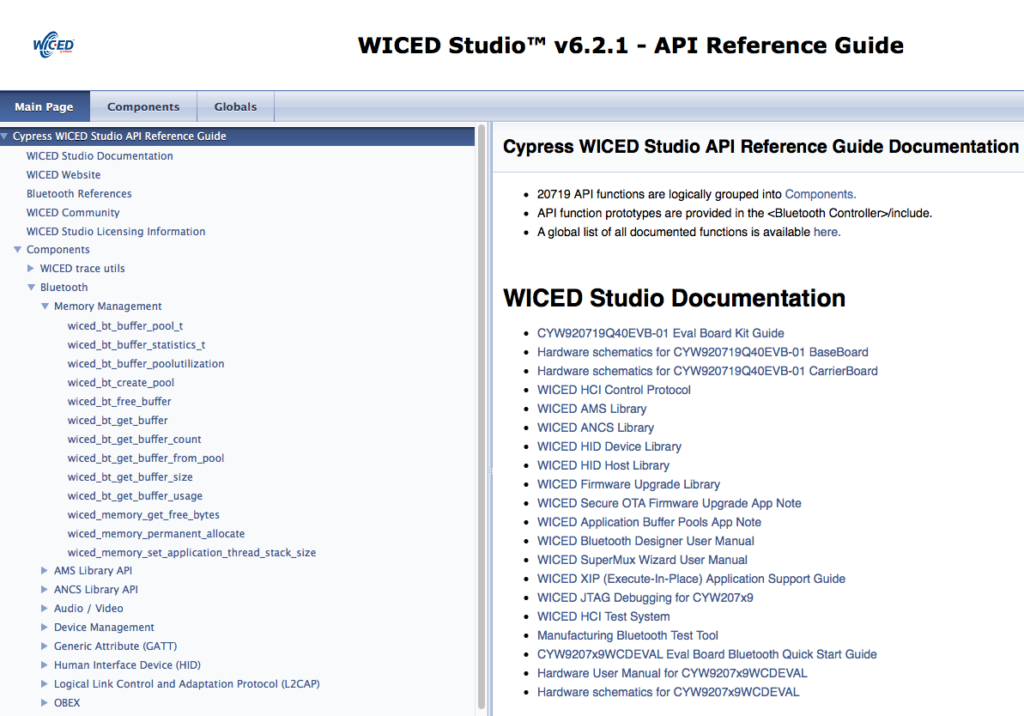
WICED Studio Documentation

In the “doc” folder resides all of the documentation for WICED bluetooth.

WICED Bluetooth API Guide

The API guide is doxygen generated API documentation for the WICED Bluetooth SDK.

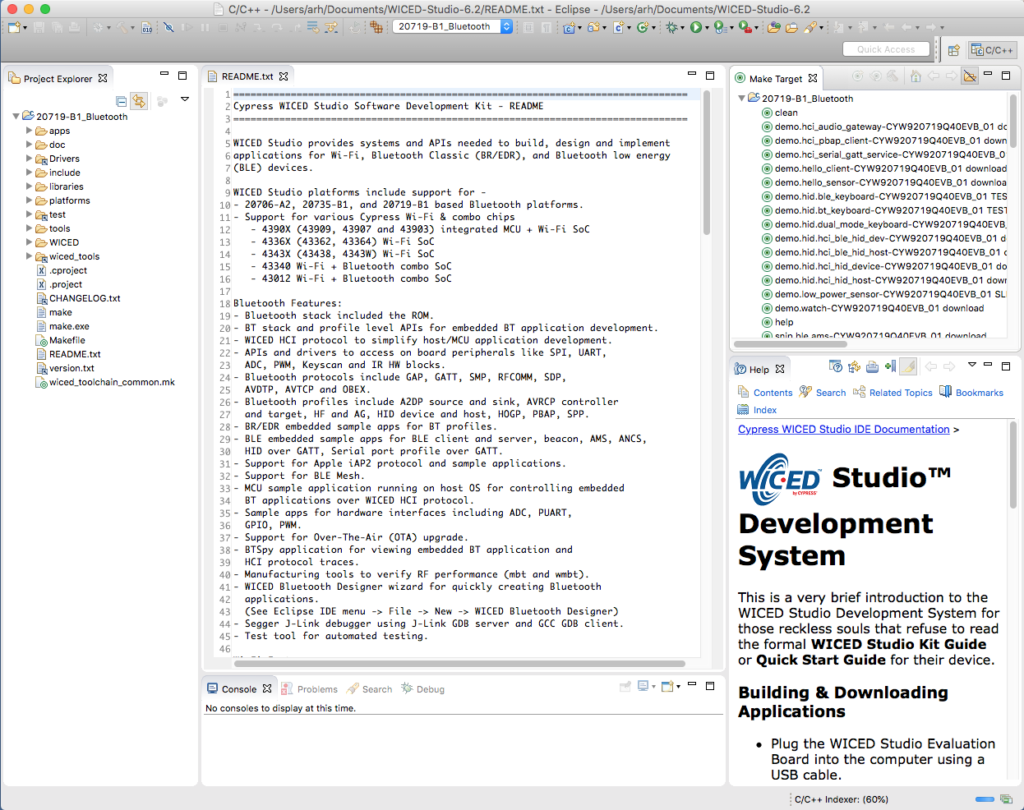
WICED Studio README.txt

WICED Studio Release Notes


WICED Studio Technical Brief

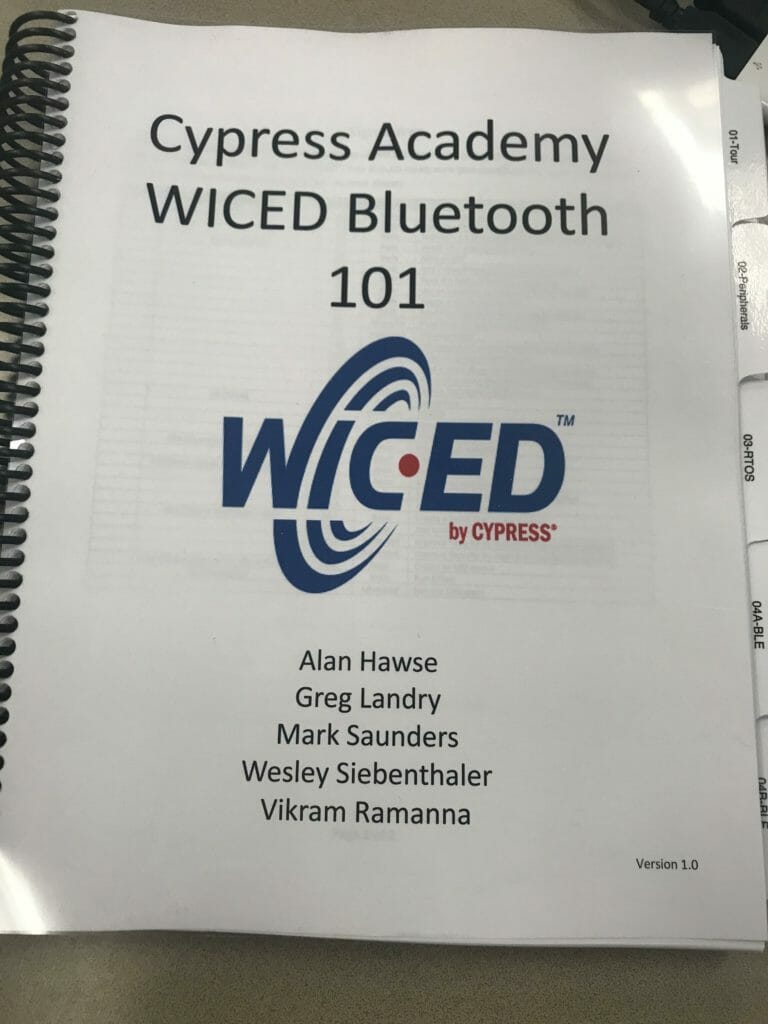
WICED Bluetooth 101

I have been working with  some amazing people to build a class for learning WICED Bluetooth.  You can find all of the material at https://github.com/cypresssemiconductorco/CypressAcademy_WBT101_Files

Lesson 0 – A Two Hour WICED Bluetooth Class

Summary

This is the top level web page for a two hour class about getting you started building products with WICED Bluetooth using the CYW20719.  My friend Victor told me that I am totally insane and that I have enough material for a semester long class, but I have faith in you.  The whole point of WICED Bluetooth is to make it possible for you to build your own Bluetooth application using the best Bluetooth radios in the world.  Life is too short for flaky Bluetooth!

When I started working on this class the marketing guys asked if they could show a “few” powerpoint slides at the begining.  But I knew that is just a euphemism for power point carpet bombing you to sleep.  That sucks, so we aren’t doing that.
AFH, TDD, ∏/4 DQPSK, ISM, 8DPSK, Symbol Rate, binary FM modulation, dBi, LMP, AMP, Gaussian Frequency Shift Keying,  Modulation Index, ppm, eye diagram, FCC, Frequency Offset, Slot Length, Frequency Drift, Differential Phase Encoding, Pulse Shaping, Modulation Accuracy, Differential Error Vector Magnitude, BER, Sensitivity, Co-Chanel interference, Intermodulation Characteristics, Symbol rate, Timeslot, piconet clock, piconet channel timing,  blah blah blah blah….
Whew… now that is out of the way.  Forget that.  Rather than start at the bottom with the radio and Maxwells equations I going to start at the top.  Cypress has a huge team of radio designers to deal with all of that so you don’t have to.  To be clear, this stuff matter A LOT to how well your product works but it is only the second best reason to use Cypress WICED Bluetooth.  The best reason to use Cypress is that our software team lets you have access to the most robust Bluetooth stack and radio infrastructure without having to figure all that crap out.  You may, in time, dig into all of that.  But none of it matters for building your applications.
This workshop is hands on, as that is the only real way to learn.  This series of web pages have the exact steps that I am going to use, so you can follow along with me.

You will need a few things for the class:

  • WICED Studio 6.2.1 which you can download from the Cypress Community
  • Copies of the example projects which you can get from GitHub.
  • A CYW920719Q40EVB-01 which you can get from Mouser
  • A Terminal Program like Putty
  • CySmart, a Bluetooth GATT DB Browser for Android (Google Play Store) or iPhone (Apple App Store)
  • The courage to be WICED!

Todays virtual workshop is going to go like this:

WICED Bluetooth Using the CYW20719

# Title Comment
0 A Two Hour WICED Bluetooth Class WICED Bluetooth Using the CYW20719 in all its glory
1 Resources Links to all of the Cypress WICED information including videos, application notes etc.
2 Your First Project Making Hello World & the Blinky LED
3 The Super Mux Tool Learning about platforms and the Super Mux Tool
4 Snips Using the example projects to learn Bluetooth
5 Bluetooth Designer Using the tool to customize a project and get going fast
6 The CCCD & Notification Writing back to the Central
7 Advertising  Beacon Building a beacon project to advertise your custom information 
8 Scanner Viewing the world around you
9 Bluetooth Classic SPP Using the Serial Port Profile to Transmit Lots of Data

Source code: 

  • git@github.com:iotexpert/wiced_bt_intro.git
  • https://github.com/iotexpert/wiced_bt_intro


WICED Studio 6.2.1

This class is build around WICED Studio 6.2, the Cypress IDE built on top of Eclipse.  WICED Studio has all of the tools, examples and SDKs to build projects for the Cypress WICED Bluetooth and WiFi products.  We support Windows, Mac and Linux and you can download it from our community website: https://community.cypress.com/community/wireless (which I hope you have done by now)

CYW920719Q40EVB-01

I am going to build and program all of the projects in this class into our development kit, the CY920719Q40EVB-01.  This development kit (which you should buy from Mouser) uses the Cypress CYW20719 Bluetooth chip.  This is the worlds best Dual-mode Bluetooth 5.0 chip.  Dual mode means that it does Bluetooth Classic BR/EDR as well as Bluetooth Low Energy.  Even better it can do both standards at the same time.