Now that we have a component built up, I will build up a test to demonstrate its functionality. The test will do the following
On the PSoC side it will:
- Read the Capsense Button0. If it is pressed it will send a “boatload” command to the PRoC
- Read the Capsense Button1. Each time it is pressed it will toggle the PRoC blue LED by sending alternating On/Off
- Read the remote LED0 update and turn on/off the LED0 based on the remote command
On the PRoC side it will:
- Alternate sending a 1/0 every 500ms to the “led0” on the PSoC side
- If the Capsense Button 0 is changed from the PSoC side it will turn the Blue LED On/Off
- If it get a Bootload it will enter the bootloader
These projects are available as Example9 in the CY8CKIT-021 workspace that is in the firmware directory on github at github.com/iotexpert/CY8CKIT-021
PSoC
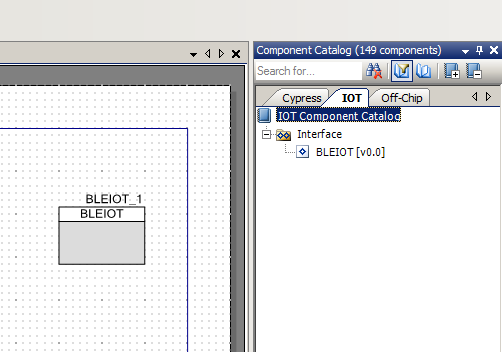
After creating a new schematic for PSoC 4200m, the next thing that I do is make a dependency to the components in the BLEInterface project. This gives me access to the BLEIOT component.

When I go to the component catalog I see the “IOT” and in that tab I find the IOT Tab with the BLEIOT component.
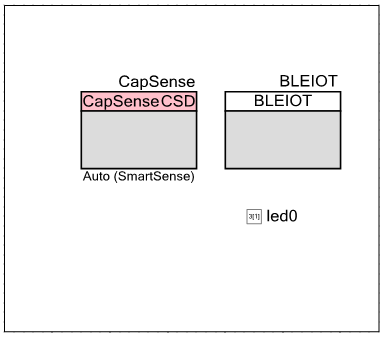
Now I add components for CapSense and the LED to get the final schematic.
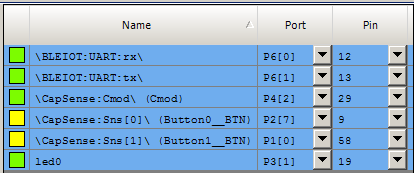
Now assign the Pins in the cydwr.
And finally the code:
// Project: Example9b-PSoC-BLEIOT-Test // Kit: CY8CKIT-021 Sheild // Baseboard: CY8CKit-44 PSoC4M // // This project demonstrates using the BLEIOT component // If the other side writes the LED then update it // If the user presses button 0 then send an bootload command // If the user presses button 1 then send an update to the button #include <project.h> int main() { CyGlobalIntEnable; CapSense_Start(); CapSense_InitializeEnabledBaselines(); CapSense_ScanEnabledWidgets(); BLEIOT_Start(); for(;;) { if(!CapSense_IsBusy()) { uint8 b0 = CapSense_CheckIsWidgetActive(CapSense_BUTTON0__BTN); uint8 b1 = CapSense_CheckIsWidgetActive(CapSense_BUTTON1__BTN); if(b0) BLEIOT_updateBootload(1); // send the bootload command if(b1 != BLEIOT_local.button1) // if the button state has changed send it BLEIOT_updateButton1(b1); CapSense_UpdateEnabledBaselines(); CapSense_ScanEnabledWidgets(); } if(BLEIOT_getDirtyFlags() & BLEIOT_FLAG_LED0) // other side wrote LED0, update state { BLEIOT_updateLed0(BLEIOT_local.led0); // update local state led0_Write(!BLEIOT_remote.led0); // the LED is active low } } } </project.h>
PRoC
Unfortunately it is prohibited to create custom components for PRoC BLE devices. So, the first thing that I do after creating the project is to copy over BLEIOT_BLEIOT.c and BLEIOT_BLEIOT.h from the generated source directory of the PSoC project. Yes I understand that this is a bit of a lame thing to do, but there it is:
cd Example9a-ProC-BLEIOT-Test.cydsn/
cp ../Example9b-PSoC-BLEIOT-Test.cydsn/Generated_Source/PSoC4/BLEIOT_BLEIOT.* .
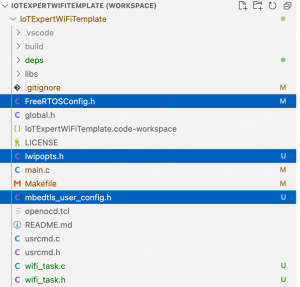
One you have the files in the correct directory you need to add them to the project by right clicking on the “header files” in the workspace explorer and “add existing” then adding the BLEIOT_BLEIOT.h. You also should do the same with “source files” and BLEIOT_BLEIOT.c
Finally you need to add #include “BLEIOT_BLEIOT.h” to the top of BLEIOT_BLEIOT.c
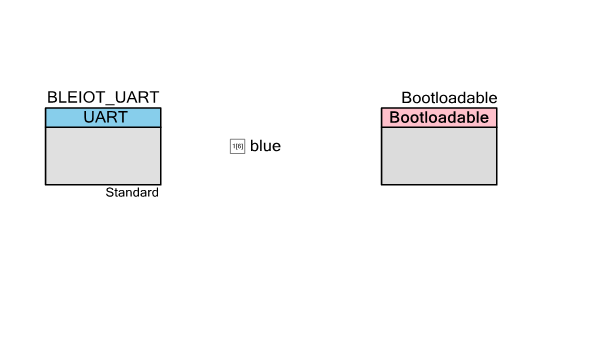
After that I finish the schematic. First, add a UART Component to the schematic and call it BLEIOT_UART (so that it will match the code that was generated in the other project). Then add the bootloadable and the blue LED pin. Don’t forget to configure the Bootloadable to link to the bootloader just like Example 8. Also you need to configure the UART to have a 32 byte software buffer.
Then assign the pins:
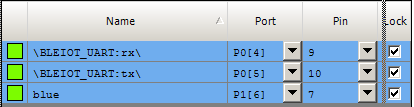
Finally the main.c
// Project: Example9b-PRoC-BLEIOT-Test // Kit: CY8CKIT-021 Sheild // Baseboard: CY8CKit-44 PSoC4M // // This project should be bootloaded into the PRoC. It demonstrates using the BLEIOT // component. // // Using the systick, send an update to led0 every 500ms // If the other side writes to Bootload... then start the bootloader // If the other side writes to the button1... then display that on the blue led #include <project.h> #include "BLEIOT_BLEIOT.h" int countMs =0; // This is the ISR for the systick void sendLedUpdate() { if(countMs++<500) // count 500ms return; countMs = 0; BLEIOT_updateLed0(!BLEIOT_local.led0); } int main() { CyGlobalIntEnable; CyDelay(100); BLEIOT_Start(); CySysTickStart(); // start the systick and register our call back CySysTickSetCallback(0,sendLedUpdate); for(;;) { if(BLEIOT_getDirtyFlags() & BLEIOT_FLAG_BOOTLOAD) Bootloadable_Load(); if(BLEIOT_getDirtyFlags() & BLEIOT_FLAG_BUTTON1) { BLEIOT_updateButton1(BLEIOT_remote.button1); blue_Write(!BLEIOT_local.button1); } } } </project.h>
As always these projects are available in the firmware directory at http://github.com/iotexpert/CY8CKIT-021
In the next post Ill show you the BLE Firmware.
index
description
CY8CKIT-021: A Simple FM/PSoC + BLE Demonstration Board
Introduction to CY8CKIT021
CY8CKIT-021: The first four example projects
Use the LEDs
Buzzer
7-Segment display and the Potentiometer
CY8CKIT-021: The next three example projects
Use theThermistor and two Capsense Examples
CY8CKIT-021: Bootloading the PRoC
How to put firmware into the PRoC
CY8CKIT-021: The BLEIOT Component
A custom component to communicate with the PRoC/PSoC
CY8CKIT-021: Using the BLEIOT Component
A full example of the tho MCUs talking
CY8CKIT-021: The PRoC BLE Firmware
How to make PRoC Firmware and use it with the BLEIOT Component
CY8CKIT-021: Example 10 - the new IOS App
How to build and IOS App to talk to the development kit

No comment yet, add your voice below!