In the previous post I introduced 4 basic example projects. In this post Ill finish up the examples with the Thermistor and two Capsense projects.
- Example 5: A Thermistor
- Example 6: 2 Capsense Buttons (using the V2.x component)
- Example 7: 2 Capsense Buttons (using the new V3.x component + tuner)
Example 5: The Thermistor
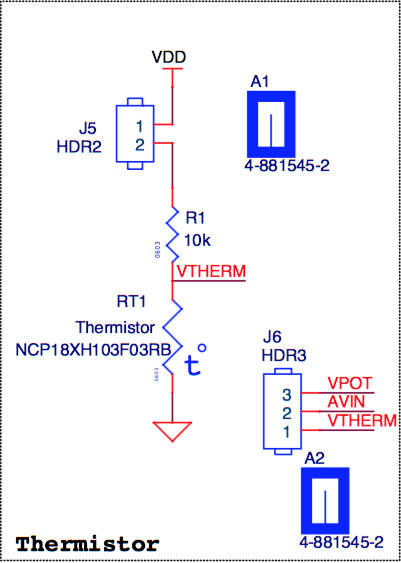
A thermistor is a resistor that changes resistance with temperature in a known way. You can use it in combination with a precision reference resistor to calculate temperature. PSoC Creator provides a component for making this easy as the actual formula is crazy. Here is the schematic. R1 is the known reference resistor. RT1 is the thermistor. J6 is a selector that lets you select the analog input from the shield to either be the POT or the Thermistor.
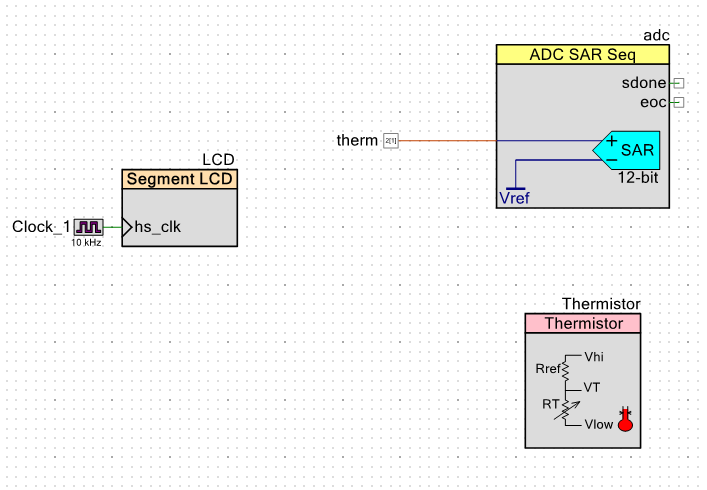
The schematic is simple. Just an Analog to Digital Convertor and the LCD from the previous design plus the Thermistor. Notice that the Thermistor symbol shows the configuration that you need on the schematic to make this work.
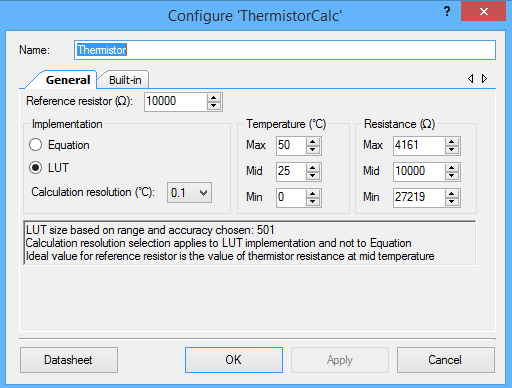
In the Thermistor configuration window you get to select the size of the reference resistor (in this case it is 10K) and if you want to use a LUT or use an Equation. If you choose LUT then PSoC Creator will pre-calculate a temperature versus resistance table and embed that into your program. This will enable very fast calculation of temperature but will take more flash.
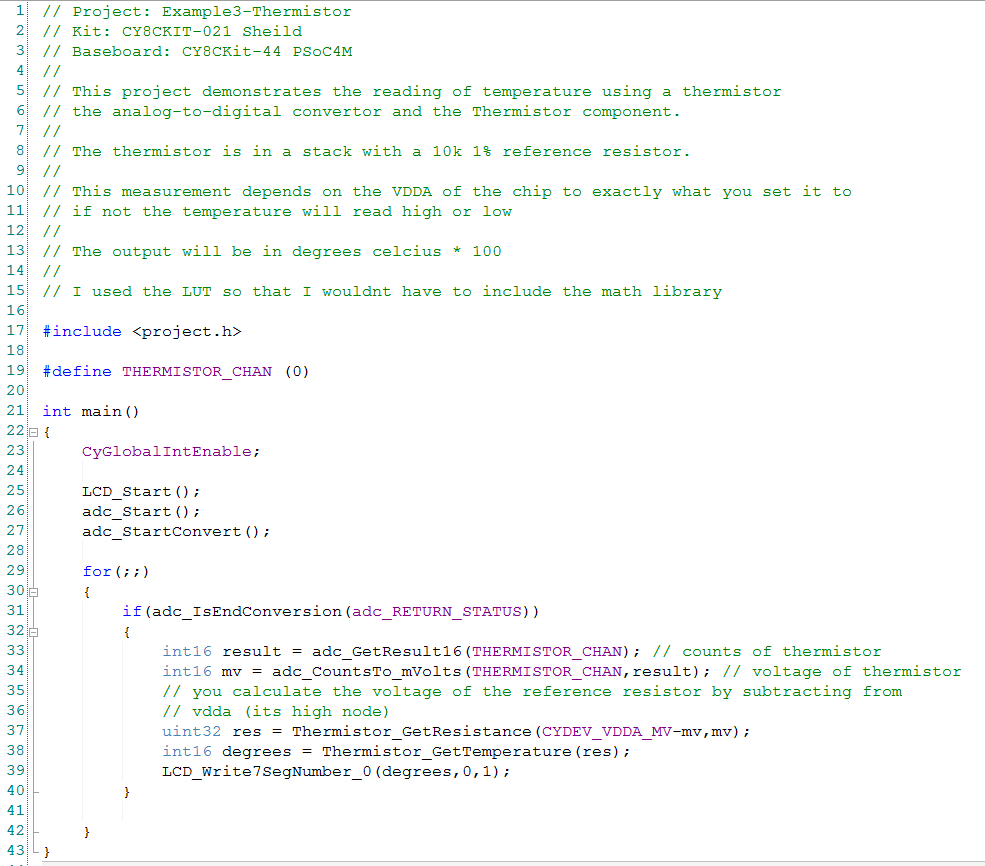
The main.c just reads the voltage, calculates the resistance (using the API), calculates the temperature (using the API) and then displays it on the LCD. The only problem with this whole setup is that it depends on knowing the exact VDDA voltage because you need to know the voltage across the reference resistor. I use the handy PSoC Creator #define CYDEV_VDDA_MV to find out what the configured voltage. The problem with this circuit is that the VDDA will vary and this will throw off the temperature calculation. This could have been solved if we had used two differential measurements, but we were out of pins.
Example 6: The CapSense Buttons using the 2.x Component
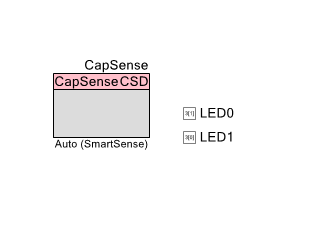
There are two CapSense buttons on this Development Kit. I started with the old CapSense component because I know the APIs without looking at the examples. We have now upgraded the component to support features in the new CapSense block (which I will show in the next example). The V2.x schematic is simple with just the CapSense component plus the two LED pins.
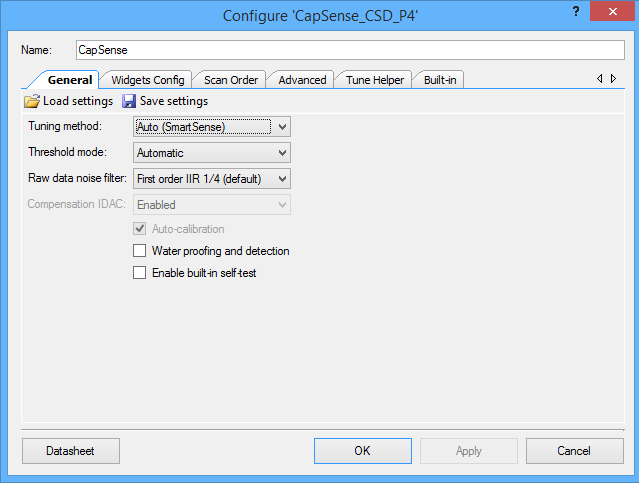
The CapSense component uses the default settings including SmartSense tuning.
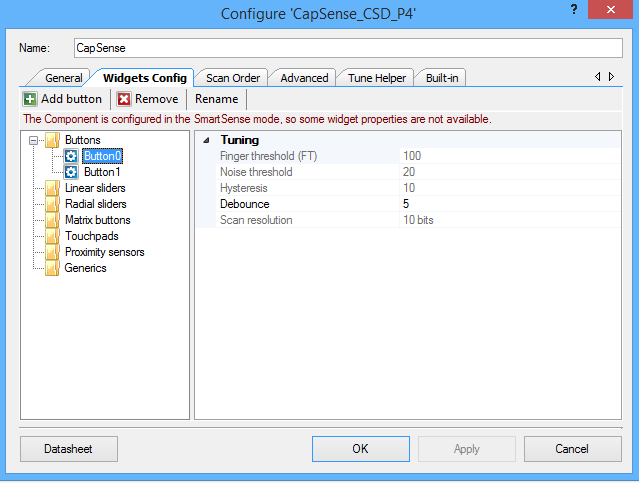
I add two buttons and use the default values.
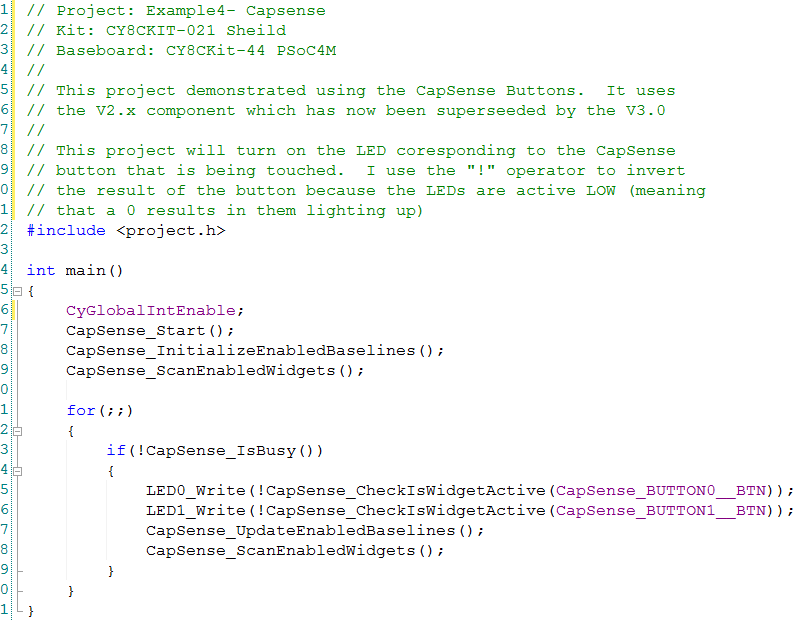
The code is also very simple.
Example 7: CapSense 3.0
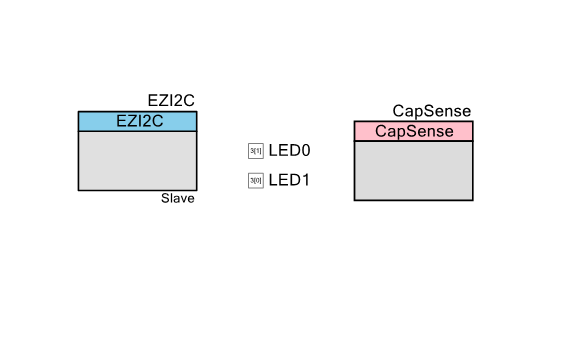
In PSoC Creator 3.3 we released a new component to support features in the new CapSense block that was put into the new PSoC 4000S/4100S family. Like the previous example, this project will light up the LEDs when the corresponding button is pressed. The addition in this example is the EZi2C to support the tuner (which is also new).
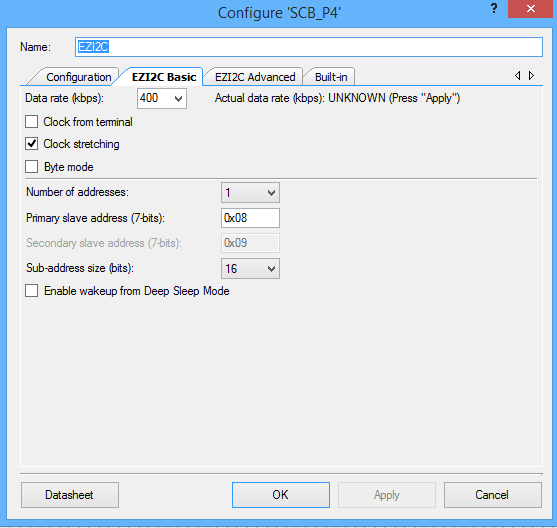
In the EZI2C you need to change the defaults from 100kbps to 400 kbs and 8-bit subaddress to 16-bit subaddress.
The first time I put this design together I noticed that the CapSense buttons were very sensitive. Very means that you get a touch when your finger is 1mm or more from the surface of the button. I thought that as long as I was going to manually tune some of the buttons that I will show the new tuner-which is really cool-in this example.
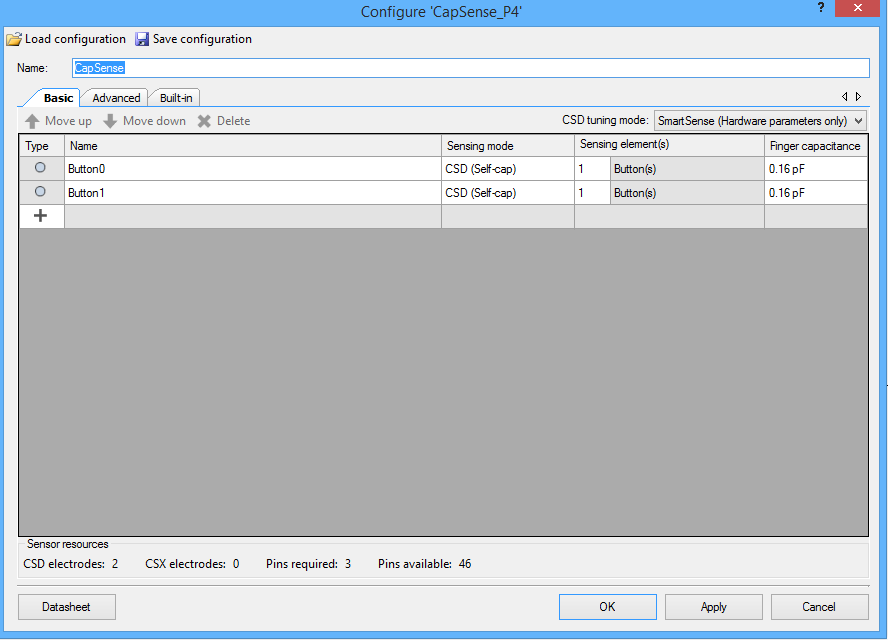
First configure two buttons and set the tuning to SmartSense (Hardware parameters only).
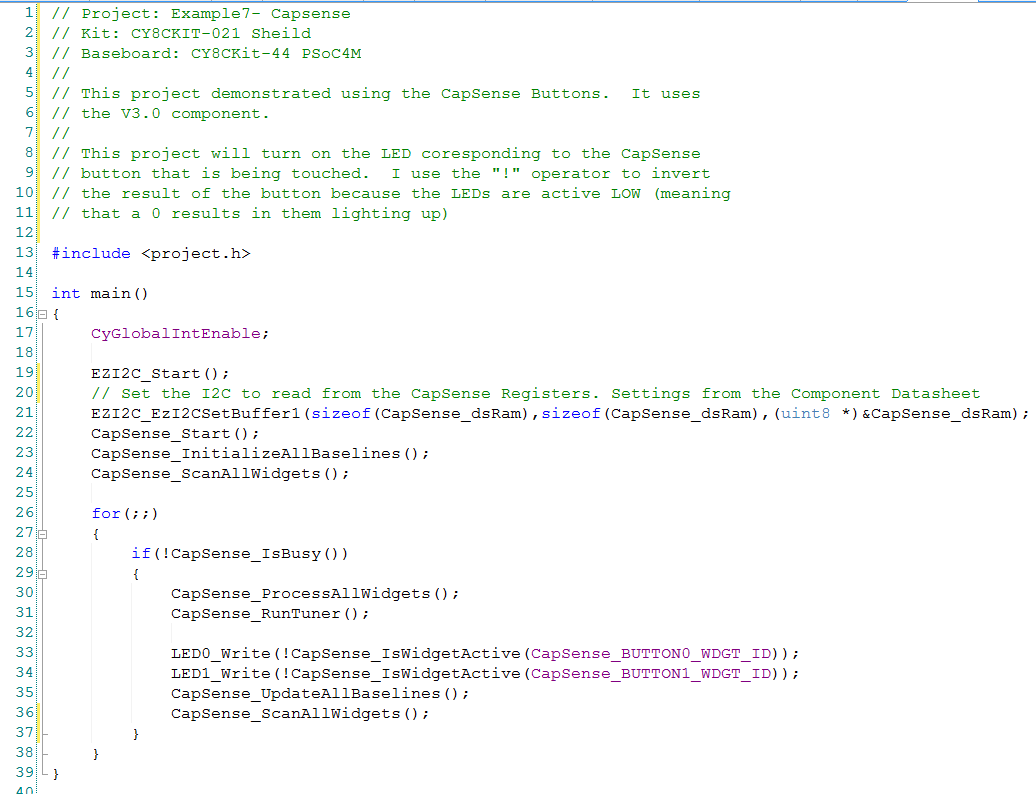
The main.c is also very simple.
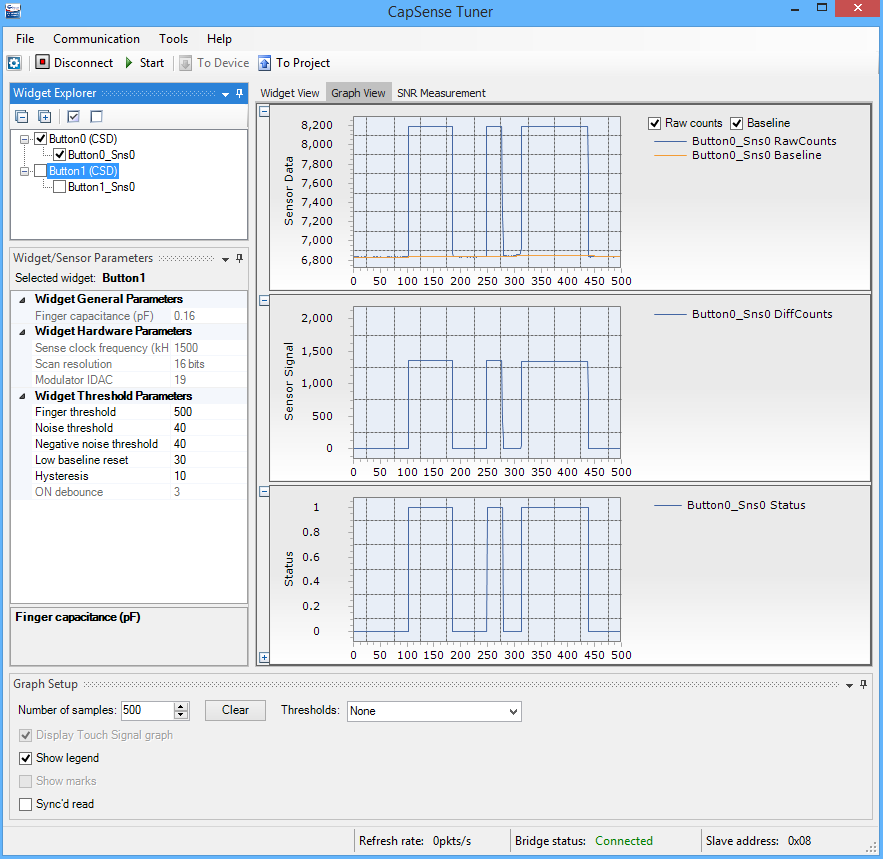
The last step is to run the tuner. The default finger threshold is 100. To make the button less sensitive I increase the button touch to 500. You can see in the picture below that Button 0 has about 1300 counts of signal when I am touching the button so 500 gives us plenty of room to not miss a touch. You can see that just sitting there untouched that the signal is about 6850 counts and when there is a touch it is about 8150.
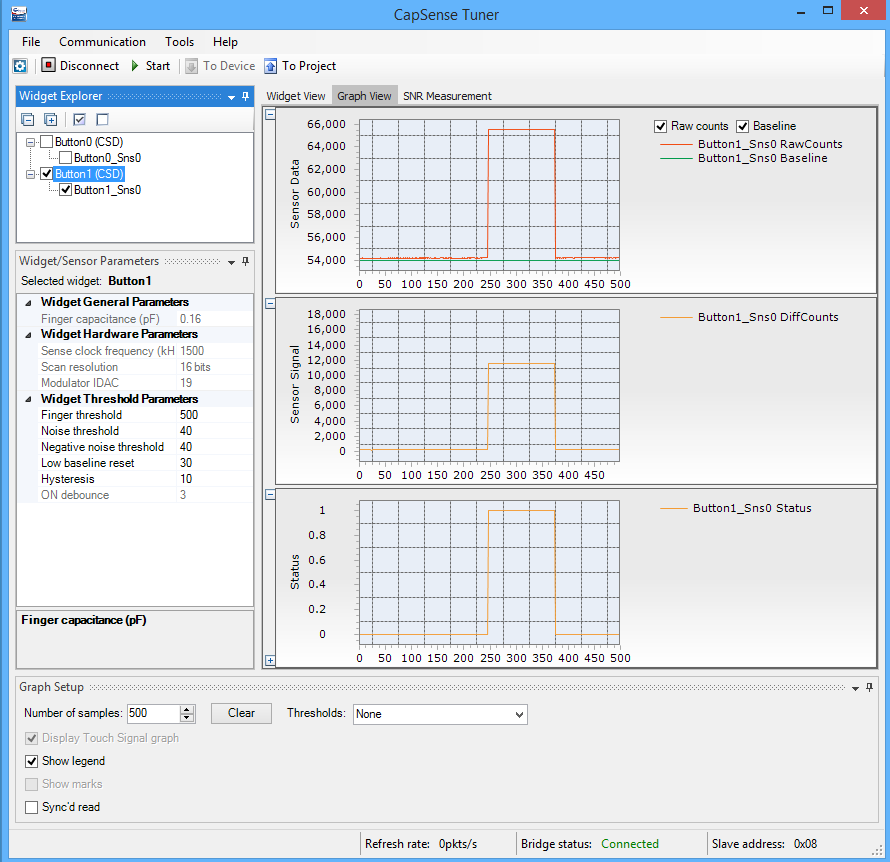
Button 1 is more interesting. I decided to run a signal-to-noise measurement on the button. Here is the “acquire noise” graph. You can see that just sitting there untouched, the signal is about 54170 and there is about 54 counts of noise. That is quite a bit different than Button 0 which has a baseline of about 6850. I don’t know why they are so different.

When I run the signal acquisition I get this graph. You can see that a “touch” is about 65500 which means that there is about 10000 counts of difference, so a threshold of 500 will also be stable, in fact it could be 5000 and work just fine.

Here is the touch graph:
In the next post I will talk about the BlueTooth Firmware.
Alan
index
description
CY8CKIT-021: A Simple FM/PSoC + BLE Demonstration Board
Introduction to CY8CKIT021
CY8CKIT-021: The first four example projects
Use the LEDs
Buzzer
7-Segment display and the Potentiometer
CY8CKIT-021: The next three example projects
Use theThermistor and two Capsense Examples
CY8CKIT-021: Bootloading the PRoC
How to put firmware into the PRoC
CY8CKIT-021: The BLEIOT Component
A custom component to communicate with the PRoC/PSoC
CY8CKIT-021: Using the BLEIOT Component
A full example of the tho MCUs talking
CY8CKIT-021: The PRoC BLE Firmware
How to make PRoC Firmware and use it with the BLEIOT Component
CY8CKIT-021: Example 10 - the new IOS App
How to build and IOS App to talk to the development kit

No comment yet, add your voice below!