IoT Design with Cypress PSoC® 6 MCUs and Wi-Fi/Bluetooth using Arm® Mbed™
#
Lesson
GitHub Project
0
Introduction
1
Developer Resources
2
Your First Project & The Blinking Thread
https://github.com/iotexpert/mouser-mbed-02.git
3
Display Thread
https://github.com/iotexpert/mouser-mbed-03.git
4
Temperature Thread
https://github.com/iotexpert/mouser-mbed-04.git
5
CapSense Thread
https://github.com/iotexpert/mouser-mbed-05.git
6
WiFi & NTP Thread
https://github.com/iotexpert/mouser-mbed-06.git
7
The CY8CKIT-062-WiFi-BT
https://github.com/iotexpert/mouser-mbed-07.git
8
Amazon AWS MQTT Thread - Part1
https://github.com/iotexpert/mouser-mbed-08.git
9
Amazon AWS MQTT Thread - Part2
https://github.com/iotexpert/mouser-mbed-09.git
You can “mbed import https://github.com/iotexpert/mouser-mbed-09.git“ to make a copy of the project in your workspace.
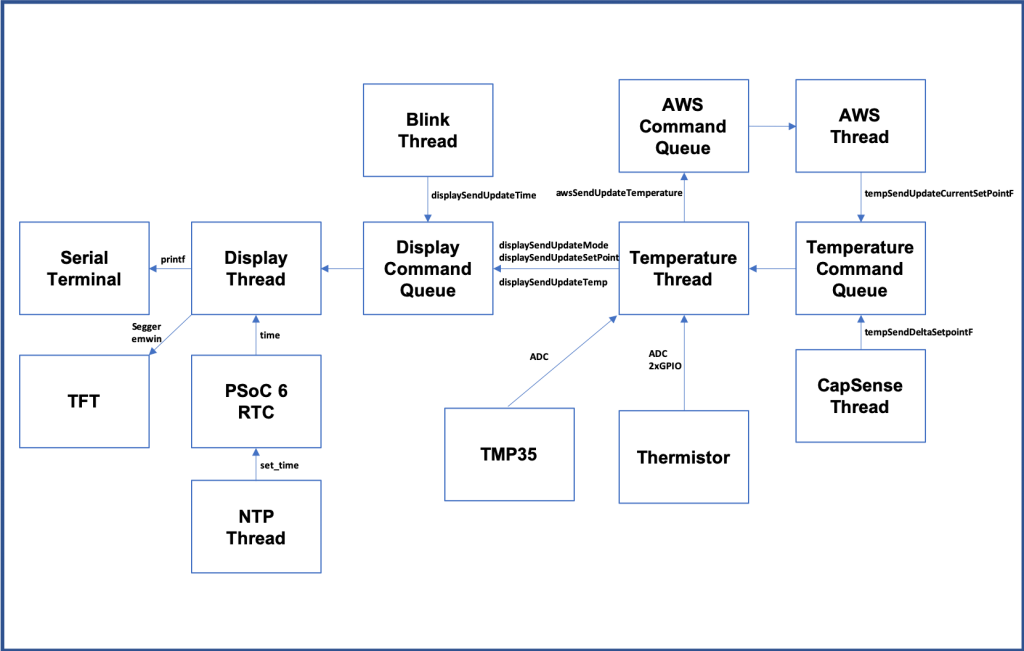
The final architecture of the thermostat looks like this.
Summary
In Lesson 05 we will add a CapSense GUI to enable the user to change the setPoint of the thermostat.
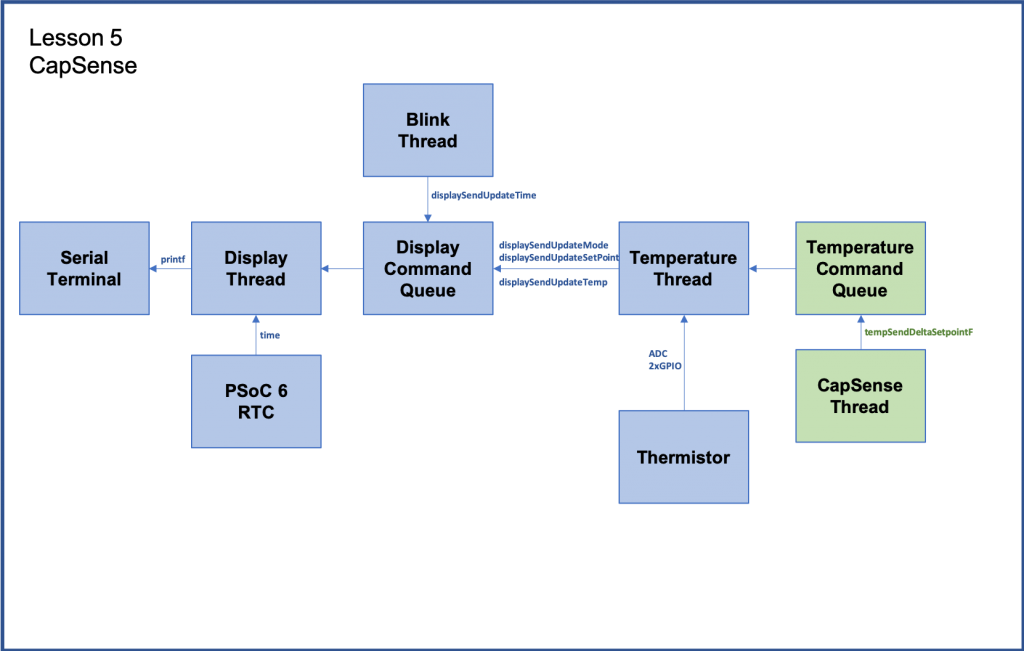
Specifically I will create a new Thread called “CapSense Thread” which will read the state of the CapSense Buttons and send messages to the temperatureThread.
To implement this I will:
- Import Lesson 04
- Add the Cypress CapSense library
- Run the CapsSense configurator
- Create and code capsenseThread.h
- Create and code capsenseThread.cpp
- Update main.cpp
- Build, Program and Test
Import Lesson 04
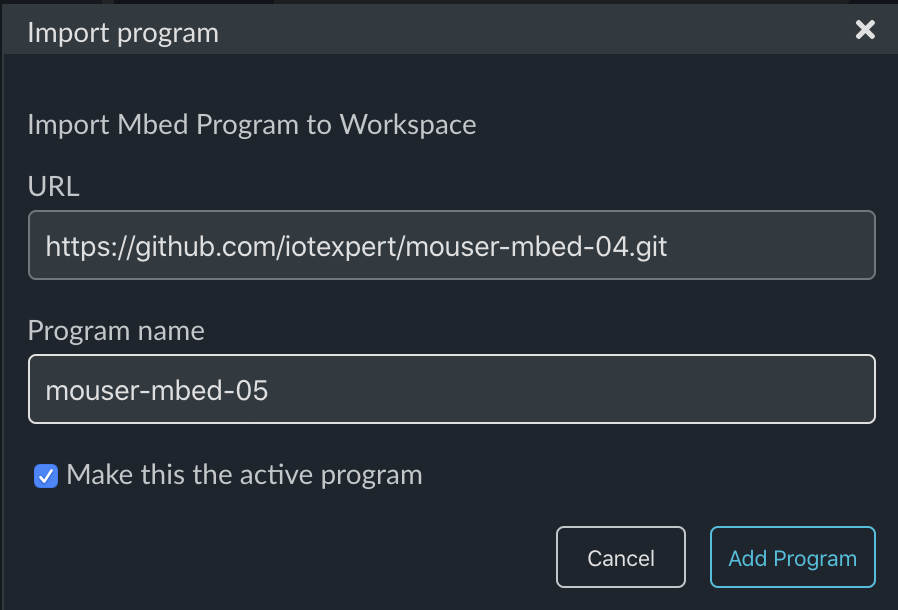
First import Lesson 04 and call your new project “mouser-mbed-05”
https://github.com/iotexpert/mouser-mbed-04.git
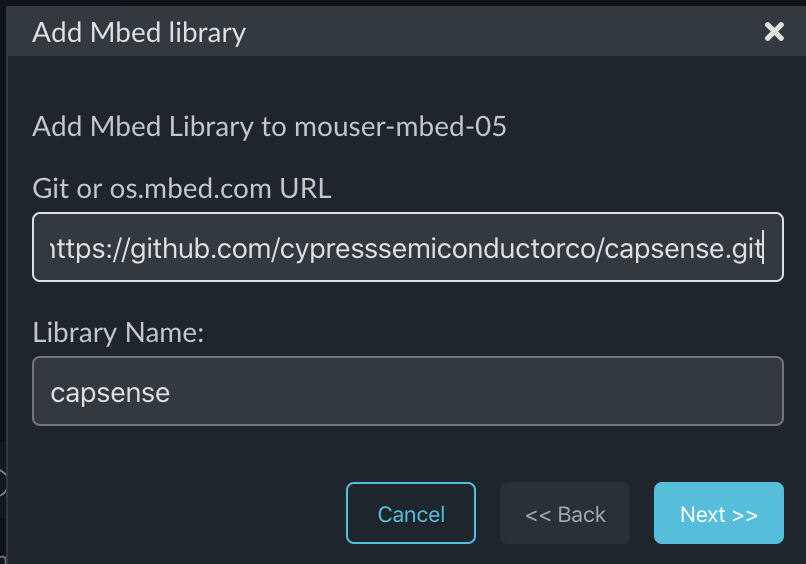
Add the Cypress CapSense library
In order to use the CapSense library you will need to import it from the Cypress GitHub site. To do this we will use the Mbed Studio Library manager. Click on the “Libraries” tab. Then press the “+” button to add a new library.

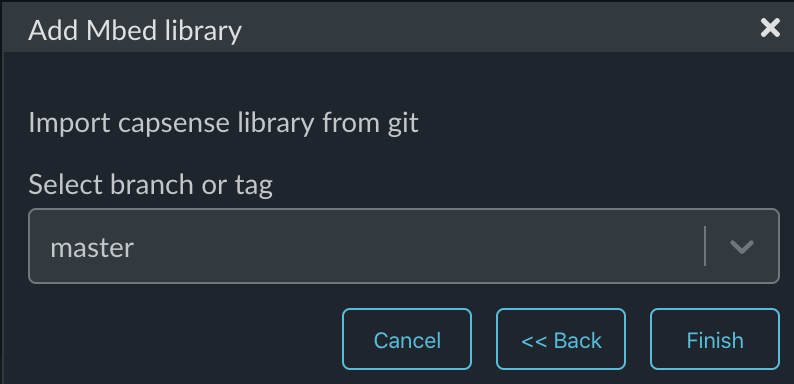
Give the Library manager the URL to the Cypress CapSense library:
https://github.com/cypresssemiconductorco/capsense.git
Specify that you want your library to point to the master branch.
Once that is done your library screen should look something like this. When I took this screen shot I noticed that I was on the old version of mbed-os so I pressed the update button.
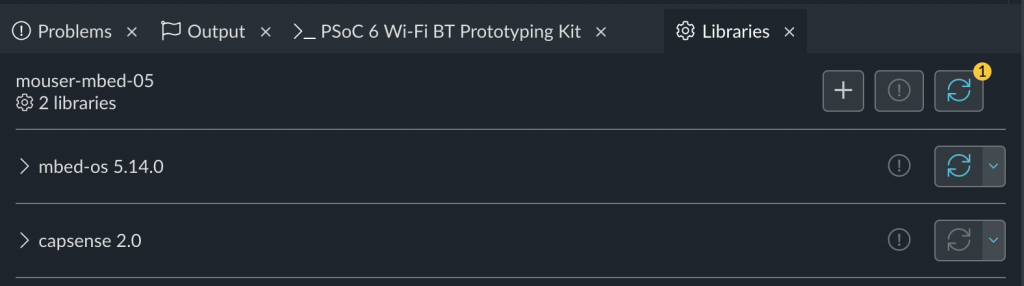
Now both libraries are at the latest version.

Run the CapSense Configurator
First, lets run the CapSense configurator to look at the CapSense configuration. You can find it in ModusToolbox/tools_2.0/capsense_configurator. Then use file>open to open the Target’s CapSense configuration file from targets/TARGET_Cypress/TARGET_PSOC6/TARGET_CY8PROTO_062_4343w/COMPONENT_BSP_DESIGN_MODUS/design.cycapsense.

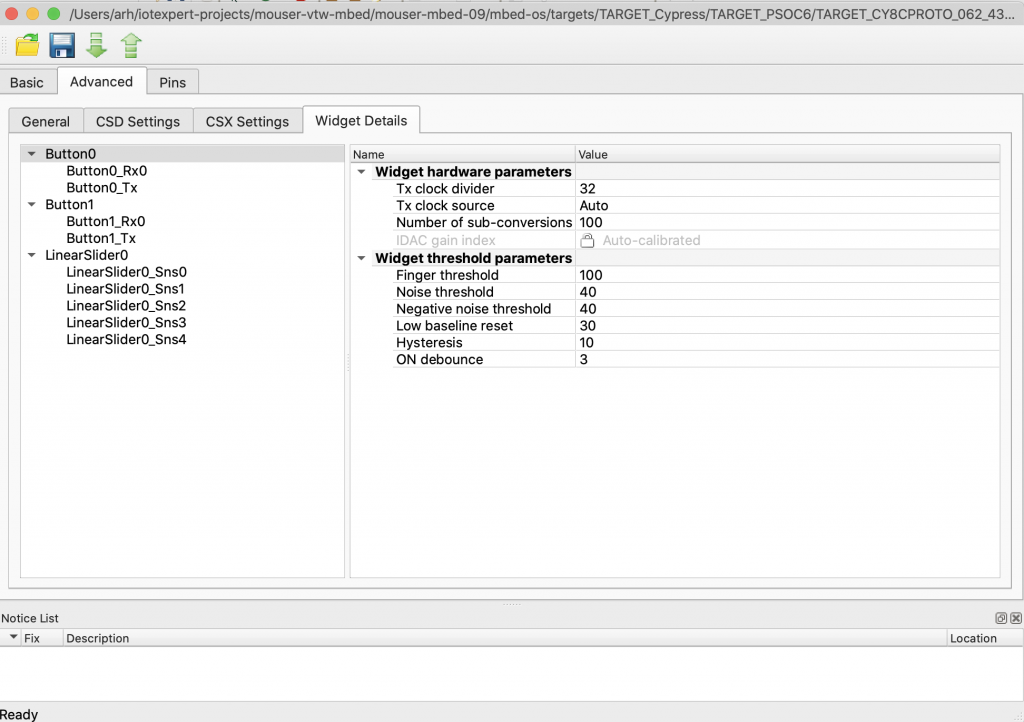
Here is the advanced tab:
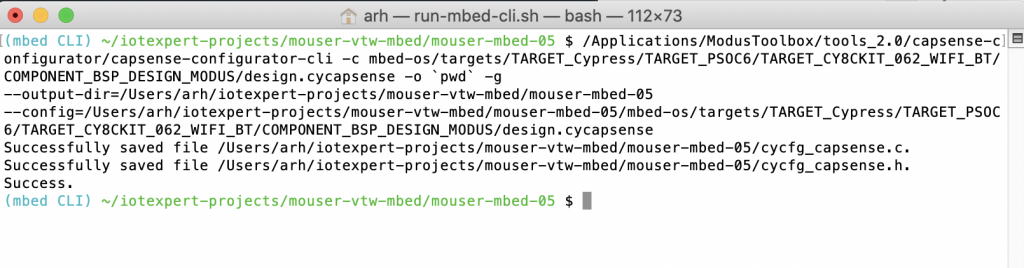
The BSP/Target as delivered inside of Mbed OS does not have the generated source code required to run CapSense. I could press save in the CapSense configurator GUI, but this would modify my version of Mbed OS. I would rather add these files to the make project. In order to get this code into my project I run the CapSense Configurator from the command line and tell to save the files locally.
- /Applications/ModusToolbox/tools_2.0/capsense-configurator/capsense-configurator-cli -c mbed-os/targets/TARGET_Cypress/TARGET_PSOC6/TARGET_CY8CKIT_062_WIFI_BT/COMPONENT_BSP_DESIGN_MODUS/design.cycapsense -o `pwd` -g
Here is what the output looks like:
 Create and Code capsenseThread.h
As with all of the other lessons, I want a new thread called “capsenseThread” Start by making the “dot h”
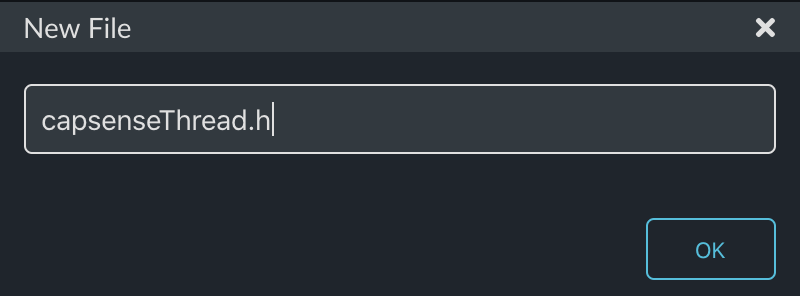
This will only have the capsenseThread function.
#ifndef CAPSENSE_THREAD_H
#define CAPSENSE_THREAD_H

void capsenseThread(void);

#endif
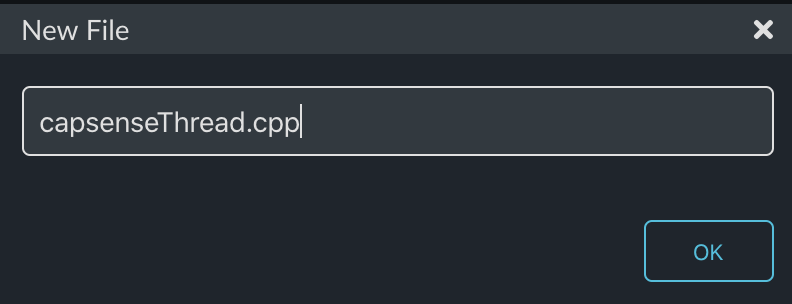
Create and code capsenseThread.cpp
Now make the cpp file.
The Cypress CapSense system is a combination of hardware and firmware. It works by:
- Initializing the Hardware
- Initializing the Interrupt
- Initializing the callback
- Starting a scan (run the hardware block)
- Processing the raw data when the scan is done and send a message
- Starting another Scan
I got the basis for this code by using the CapSense example project that Cypress has posted on GitHub. You can find that code example at:
github.com/cypresssemiconductorco/mtb-example-psoc6-capsense-buttons-slider
Initializing the Hardware
    /* Configure AMUX bus for CapSense */
    init_cycfg_routing();
    /* Configure PERI clocks for CapSense */
    Cy_SysClk_PeriphAssignDivider(PCLK_CSD_CLOCK, CYBSP_CSD_CLK_DIV_HW, CYBSP_CSD_CLK_DIV_NUM);
    Cy_SysClk_PeriphDisableDivider(CYBSP_CSD_CLK_DIV_HW, CYBSP_CSD_CLK_DIV_NUM);
    Cy_SysClk_PeriphSetDivider(CYBSP_CSD_CLK_DIV_HW, CYBSP_CSD_CLK_DIV_NUM, 0u);
    Cy_SysClk_PeriphEnableDivider(CYBSP_CSD_CLK_DIV_HW, CYBSP_CSD_CLK_DIV_NUM);


    /* Initialize the CSD HW block to the default state. */
    Cy_CapSense_Init(&cy_capsense_context);
Initializing the Interrupt
This sets up the CapSense interrupt to work with the hardware block
    const cy_stc_sysint_t CapSense_ISR_cfg =
    {
        .intrSrc = CYBSP_CSD_IRQ,
        .intrPriority = 4u
    };
    /* Initialize CapSense interrupt */
    Cy_SysInt_Init(&CapSense_ISR_cfg, &CapSense_InterruptHandler);
    NVIC_ClearPendingIRQ(CapSense_ISR_cfg.intrSrc);
    NVIC_EnableIRQ(CapSense_ISR_cfg.intrSrc);
Initializing the callback
The callback is used to set the semaphore when the scan is done.
    /* Initialize the CapSense firmware modules. */
    Cy_CapSense_Enable(&cy_capsense_context);
    Cy_CapSense_RegisterCallback(CY_CAPSENSE_END_OF_SCAN_E, CapSenseEndOfScanCallback, &cy_capsense_context);
Starting a scan (run the hardware block)
Cy_CapSense_ScanAllWidgets(&cy_capsense_context); // Launch the initial scan
Processing Raw Data when the scan completes, and Send Message
        if (CY_CAPSENSE_NOT_BUSY == Cy_CapSense_IsBusy(&cy_capsense_context))
        {
            Cy_CapSense_ProcessAllWidgets(&cy_capsense_context);
            uint32_t currBtn0Status = Cy_CapSense_IsSensorActive(CY_CAPSENSE_BUTTON0_WDGT_ID, CY_CAPSENSE_BUTTON0_SNS0_ID, &cy_capsense_context);
            uint32_t currBtn1Status = Cy_CapSense_IsSensorActive(CY_CAPSENSE_BUTTON1_WDGT_ID, CY_CAPSENSE_BUTTON1_SNS0_ID, &cy_capsense_context);

            if(currBtn0Status != prevBtn0Status && currBtn0Status==1 )
            {
                tempSendDeltaSetpointF(-0.1);
            }
            prevBtn0Status = currBtn0Status;

            if(currBtn1Status != prevBtn1Status && currBtn1Status == 1)
            {
                tempSendDeltaSetpointF(0.1);
            }
            prevBtn1Status = currBtn1Status;


        }
Starting another Scan
Cy_CapSense_ScanAllWidgets(&cy_capsense_context);
Here is the whole file:
#include "mbed.h"
#include "cy_pdl.h"
#include "cycfg_capsense.h"
#include "cycfg.h"
#include "temperatureThread.h"

static Semaphore capsense_sem;


/*****************************************************************************
* Function Name: CapSense_InterruptHandler()
******************************************************************************
* Summary:
*  Wrapper function for handling interrupts from CSD block.
*
*****************************************************************************/
static void CapSense_InterruptHandler(void)
{
    Cy_CapSense_InterruptHandler(CYBSP_CSD_HW, &cy_capsense_context);
}


/*****************************************************************************
* Function Name: CapSenseEndOfScanCallback()
******************************************************************************
* Summary:
*  This function releases a semaphore to indicate end of a CapSense scan.
*
* Parameters:
*  cy_stc_active_scan_sns_t* : pointer to active sensor details.
*
*****************************************************************************/
static void CapSenseEndOfScanCallback(cy_stc_active_scan_sns_t * ptrActiveScan)
{
    capsense_sem.release();
}


void capsenseThread(void)
{

    /* Configure AMUX bus for CapSense */
    init_cycfg_routing();
    /* Configure PERI clocks for CapSense */
    Cy_SysClk_PeriphAssignDivider(PCLK_CSD_CLOCK, CYBSP_CSD_CLK_DIV_HW, CYBSP_CSD_CLK_DIV_NUM);
    Cy_SysClk_PeriphDisableDivider(CYBSP_CSD_CLK_DIV_HW, CYBSP_CSD_CLK_DIV_NUM);
    Cy_SysClk_PeriphSetDivider(CYBSP_CSD_CLK_DIV_HW, CYBSP_CSD_CLK_DIV_NUM, 0u);
    Cy_SysClk_PeriphEnableDivider(CYBSP_CSD_CLK_DIV_HW, CYBSP_CSD_CLK_DIV_NUM);


    /* Initialize the CSD HW block to the default state. */
    Cy_CapSense_Init(&cy_capsense_context);

    const cy_stc_sysint_t CapSense_ISR_cfg =
    {
        .intrSrc = CYBSP_CSD_IRQ,
        .intrPriority = 4u
    };
    /* Initialize CapSense interrupt */
    Cy_SysInt_Init(&CapSense_ISR_cfg, &CapSense_InterruptHandler);
    NVIC_ClearPendingIRQ(CapSense_ISR_cfg.intrSrc);
    NVIC_EnableIRQ(CapSense_ISR_cfg.intrSrc);

    /* Initialize the CapSense firmware modules. */
    Cy_CapSense_Enable(&cy_capsense_context);
    Cy_CapSense_RegisterCallback(CY_CAPSENSE_END_OF_SCAN_E, CapSenseEndOfScanCallback, &cy_capsense_context);

    Cy_CapSense_ScanAllWidgets(&cy_capsense_context);  // Launch the initial scan

    uint32_t prevBtn0Status = 0u;
    uint32_t prevBtn1Status = 0u;

    while(1)
    {

        capsense_sem.acquire();
        if (CY_CAPSENSE_NOT_BUSY == Cy_CapSense_IsBusy(&cy_capsense_context))
        {
            Cy_CapSense_ProcessAllWidgets(&cy_capsense_context);
            uint32_t currBtn0Status = Cy_CapSense_IsSensorActive(CY_CAPSENSE_BUTTON0_WDGT_ID, CY_CAPSENSE_BUTTON0_SNS0_ID, &cy_capsense_context);
            uint32_t currBtn1Status = Cy_CapSense_IsSensorActive(CY_CAPSENSE_BUTTON1_WDGT_ID, CY_CAPSENSE_BUTTON1_SNS0_ID, &cy_capsense_context);

            if(currBtn0Status != prevBtn0Status && currBtn0Status==1 )
            {
                tempSendDeltaSetpointF(-0.1);
            }
            prevBtn0Status = currBtn0Status;

            if(currBtn1Status != prevBtn1Status && currBtn1Status == 1)
            {
                tempSendDeltaSetpointF(0.1);
            }
            prevBtn1Status = currBtn1Status;

            Cy_CapSense_ScanAllWidgets(&cy_capsense_context);
        }

    }
}
Update main.cpp
Inside of the main.cpp I will make the usual changes to turn on the CapSense thread.
#include "mbed.h"
#include "blinkThread.h"
#include "displayThread.h"
#include "temperatureThread.h"
#include "capsenseThread.h"

Thread blinkThreadHandle;
Thread displayThreadHandle;
Thread temperatureThreadHandle;
Thread capsenseThreadHandle;

int main()
{

    printf("Started System\n");

    blinkThreadHandle.start(blinkThread);
    displayThreadHandle.start(displayThread);
    temperatureThreadHandle.start(temperatureThread);
    capsenseThreadHandle.start(capsenseThread);

}
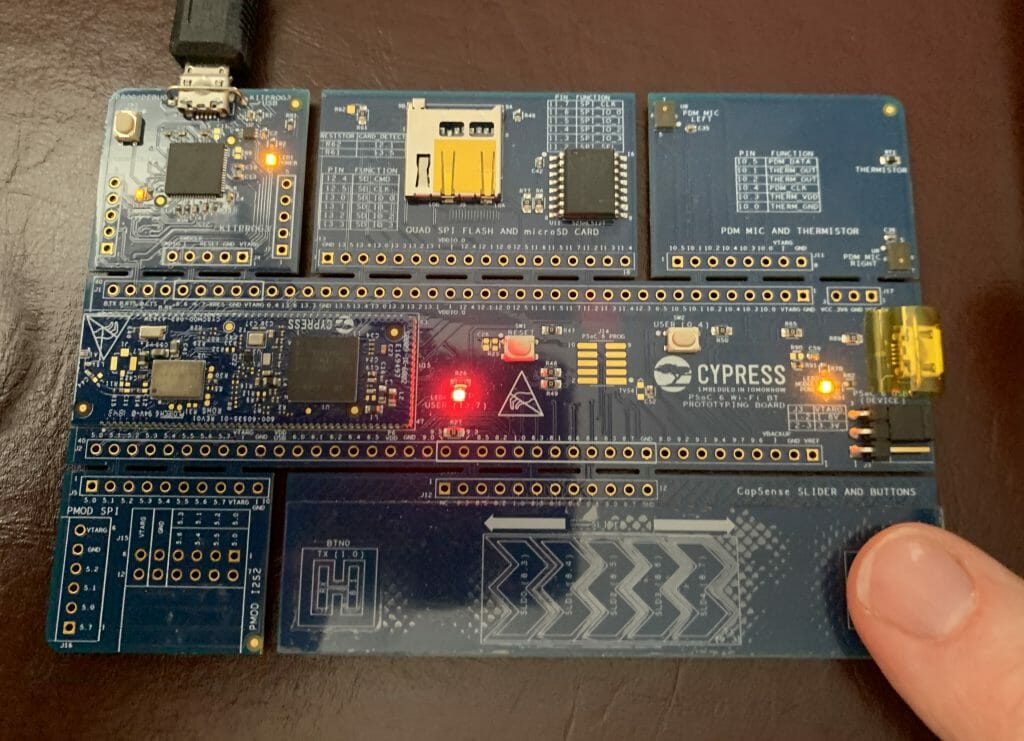
Build, Program and Test
When I build, program and test I can see that by pressing the two CapSense Buttons I can raise and lower the setPoint.
8 Comments
When Mbed Studio is installed, it creates the directory for Mbed programs with a space. The Windows CMD prompt will have a problem with spaces in a directory name, so the path needs to be quoted to work properly.
Example:
xxxx = your user directory
C:\Users\xxxx\Mbed Programs\mouser-mbed-05>C:\Users\xxxx\ModusToolbox\tools_2.0\capsense-configurator\capsense-configurator-cli -c .\mbed-os\targets\TARGET_Cypress\TARGET_PSOC \TARGET_CY8CKIT_062_WIFI_BT\COMPONENT_BSP_DESIGN_MODUS\design.cycapsense -o .\mbed-os\targets\TARGET_Cypress\TARGET_PSOC6\TARGET_CY8CKIT_062_WIFI_BT\COMPONENT_BSP_DESIGN_MODUS\ -g –output-dir=”C:\Users\xxxx\Mbed Programs\mouser-mbed-05″ –config=.\mbed-os\targets\TARGET_Cypress\TARGET_PSOC6\TARGET_CY8CKIT_062_WIFI_BT\COMPONENT_BSP_DESIGN_MODUS\design.cycapsense
–output-dir=C:\Users\xxxx\Mbed Programs\mouser-mbed-05
–config=C:/Users/xxxx/Mbed Programs/mouser-mbed-05/./mbed-os/targets/TARGET_Cypress/TARGET_PSOC6/TARGET_CY8CKIT_062_WIFI_BT/COMPONENT_BSP_DESIGN_MODUS/design.cycapsense
Target File Path=C:/Users/kerx/Mbed Programs/mouser-mbed-05/mbed-os/targets/TARGET_Cypress/TARGET_PSOC6/TARGET_CY8CKIT_062_WIFI_BT/COMPONENT_BSP_DESIGN_MODUS/design.cycapsense
Successfully saved file C:\Users\kerx\Mbed Programs\mouser-mbed-05/cycfg_capsense.c.
Successfully saved file C:\Users\kerx\Mbed Programs\mouser-mbed-05/cycfg_capsense.h.
Success.
Hi Alan
Thanks for the great VTW and guide -really useful
on the capsense-configurator part, can you share the command used to add those files for a Windows (& Linux i guess) machine as well, as getting the syntax right is proving a little difficult
thanks
Graham
Yes it should work… I ran Mac…
Ill try it on a PC.
This is what worked for me on Windows- As Scott said we should avoid spaces in project folder name (i named it MbedPrograms)
C:\Users\xxxx\MbedPrograms\mouser-mbed-05>C:\Users\mlms\ModusToolbox\tools_2.0\capsense-configurator/capsense-configurator-cli -c mbed-os/targets/TARGET_Cypress/TARGET_PSOC6/TARGET_CY8CKIT_062_WIFI_BT/COMPONENT_BSP_DESIGN_MODUS/design.cycapsense -o \Users\xxxx\MbedPrograms\mouser-mbed-05 -g
Yup… spaces=bad
Alan
I’ve tried on Windows. I used the same command and it works.
Hi Alan et all,
I’m reproducing the whole series of these lessons/exercises now with Mbed OS 6.2.0. There are a few tweaks here and there, but in general it all works as intended. In regards to the capsense part in this lesson, the good news is that “cycfg_capsense.h” and “cycfg_capsense.c” are now part of the BSP generated code. They are located at the same location of the “design.capsense” file.
I found out that after doing the generation by hand (enclosing paths with double quotes) and including those files in the project I have errors of double definition of a couple of variables.
Attention Cypress: cycfg_capsense.h header file #include is marked as deprecated, so, it works for now, but will break future releases of Mbed OS.
I’ll summarize all the changes needed to port to OS 6.2.0 when I’m done with the exercises.
Really good work on this…
I have the general problem with how to do matintence on my Articles when new versions of things are released. In fact there is a new version of Modus Toolbox that will be released shortly which mean that some of my content needs to be updated…
Alan