A couple of weeks ago I told you about teaching the first Cypress Academy WICED WiFi class. In that class, one of the things that I taught people is how to connect a WICED WiFi devkit to the Amazon AWS IOT Cloud using MQTT (which I am going to will publish here). At the time I was writing the material I wanted to create a “cloud” server that ran on the LAN for the classroom, but there were too many moving parts for me to attack that. However, the last couple of days I have had some free time so I have gone through all of the steps to create the first part of the Cypress Academy Cloud. The cloud will have:
Each of these four protocols are in common use by IoT devices to transfer data to the cloud as they are all lightweight.
In order to simply things, I wanted to run MQTT and AMQP in Docker containers. And to make matters a bit more fun, on my laptop I only run test stuff inside of a virtual machine (VirtualBox in this case), never on the bare metal. In order to facilitate the provisioning of the virtual machine I use a tool called Vagrant which can create and configure a virtual machine from a single configuration file called “Vagrantfile”.
Nicholas, my son, always comes in my office and asks “what are you doing”. I decided years ago to always do my best to answer this question. On Tuesday, when he asked the question I started talking and quickly realized that this whole thing was a little bit complicated…. well, actually a lot complicated. So, I did what I always do, drew a picture:

The get all of this going I:
- Install VirtualBox 5.1 on the Mac (Use the simple Mac installer)
- Install Vagrant 1.8.7 on the Mac (Use the simple Mac installer)
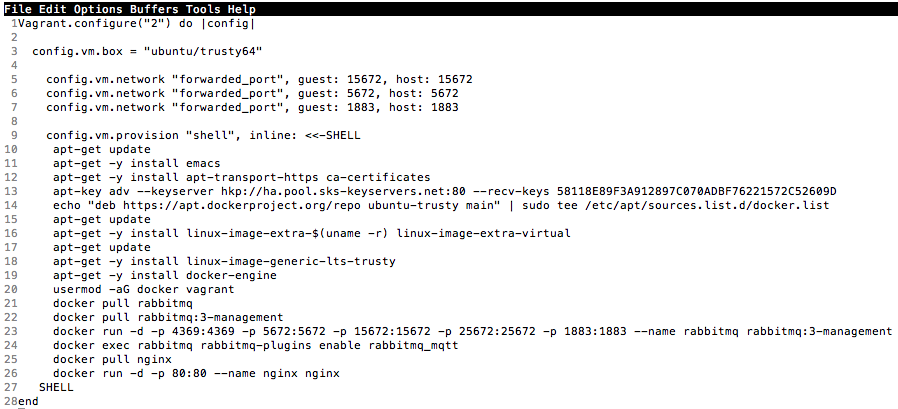
- Create a “Vagrantfile” (by running “vagrant init”) that:
- (line 3) Creates a Ubuntu trusty installation in VirtualBox
- (lines 5-7) Forwards ports TCP ports 15672, 1883 and 5672
- (line 11) Install emacs (which is the best editor)
- (lines 12-20) Installs Docker into the Ubuntu 14.04 (Trusty) virtual machine using instructions from the docker website. There is a vagrant Ubuntu box based on Precise Pangolin 12.04 but the built in kernel does not seem to work with Docker and it wasn’t worth figuring out why/how to fix it.
- (line 21-22) Configures Docker to get the RabbitMQ and Management docker images using instructions from the docker rabbitmq website
- (line 23) Creates a Docker container called “rabbitmq” and forwards ports 15672, 1883, and 5672
- (line 24) Enables the MQTT Plugin
- (line 25)Configures Docker to get the NGINX HTTP container
- (line 26) Create and run a docker container with NGINX and forward Port 80
- (line 21-22) Configures Docker to get the RabbitMQ and Management docker images using instructions from the docker rabbitmq website
The networking aspect of this was a bit tricky to understand when I first went through the process. Docker and VirtualBox both create private networks for the virtual machines/containers to run in. In order to get from the native Mac –> Ubuntu VirtualBox –> Docker RabbitMQ container you need to setup port forwarding tables.
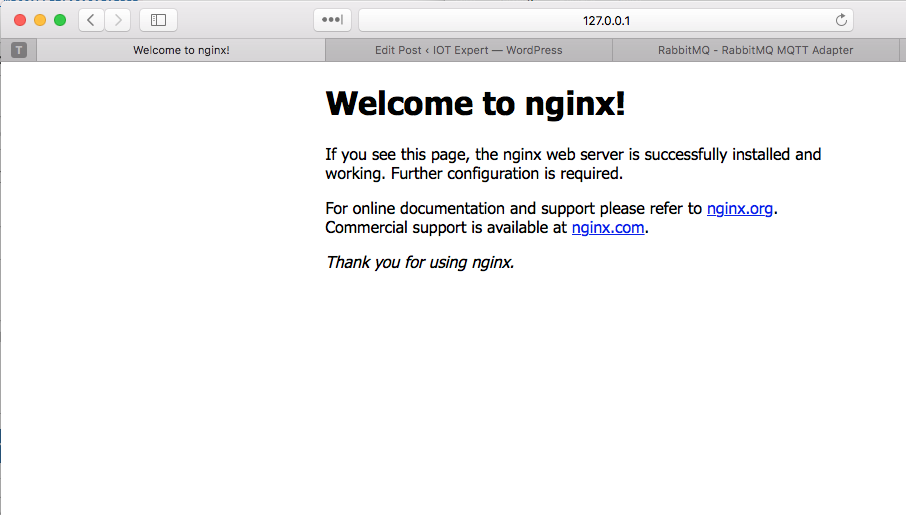
To test all of this first prove that the NGIX server is working go to http://127.0.0.1:8000
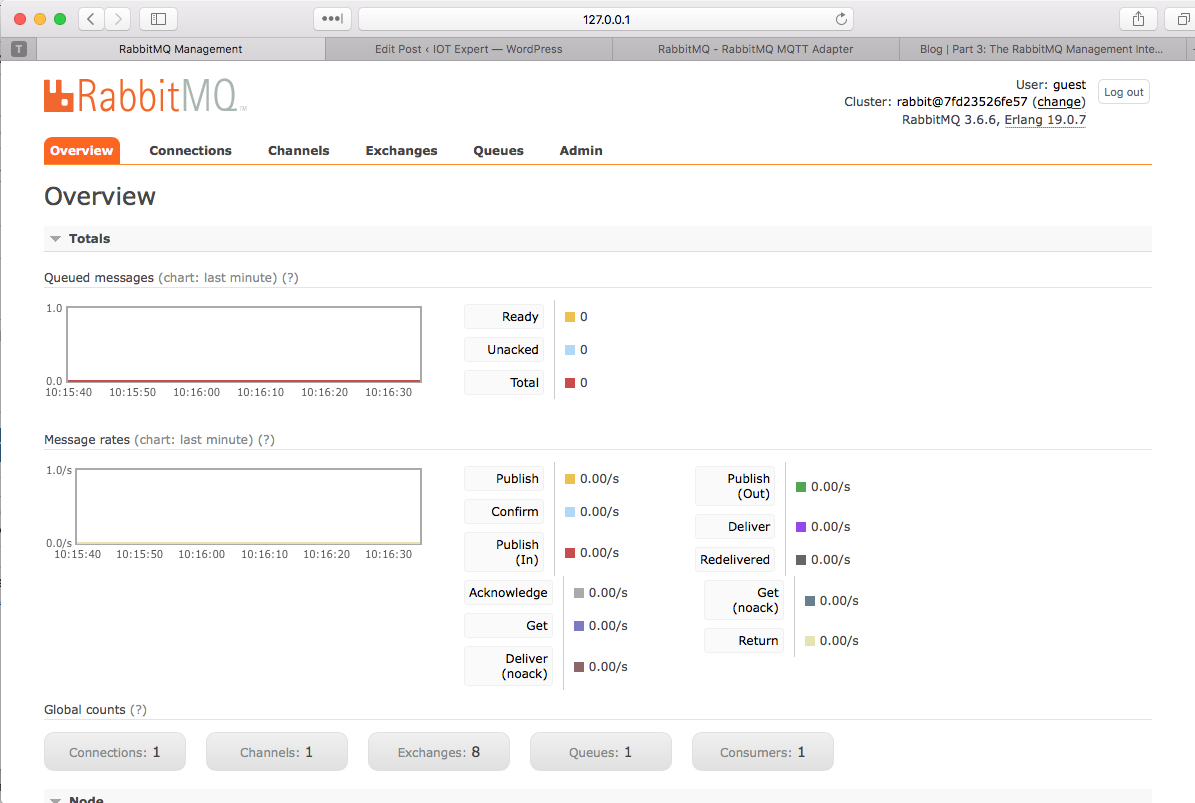
And the RabbitMQ Management Console at http://127.0.0.1:15672
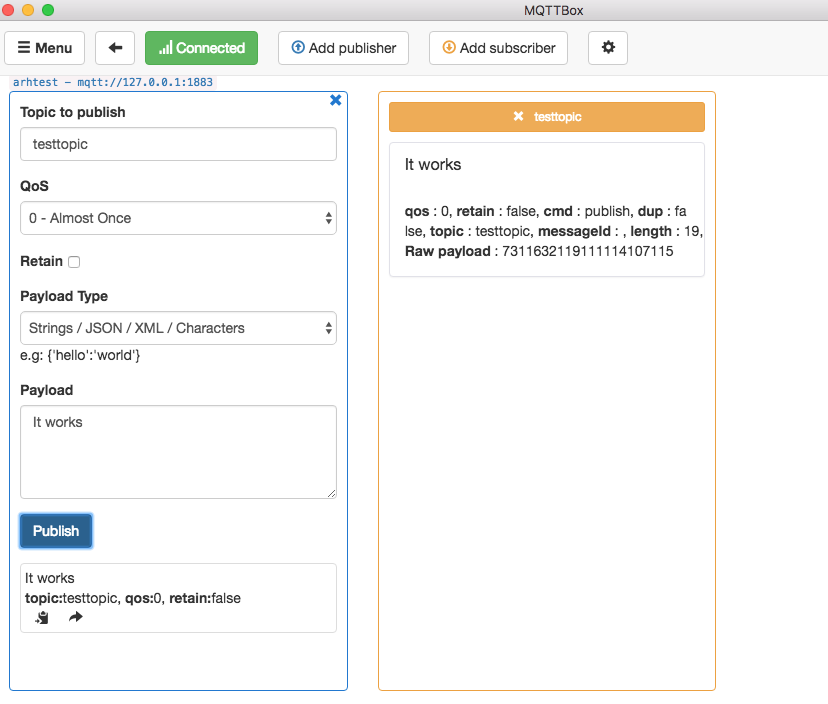
And test the MQTT server on port 1883 using MQTTBox
2 Comments
This is great man thanks. Can you convert the script to text if you have it handy
Sorry about that.. Here is the text
Vagrant.configure(“2”) do |config|
config.vm.box = “ubuntu/trusty64”
config.vm.network “forwarded_port”, guest: 15672, host: 15672
config.vm.network “forwarded_port”, guest: 5672, host: 5672
config.vm.network “forwarded_port”, guest: 1883, host: 1883
config.vm.provision “shell”, inline: <<-SHELL apt-get update apt-get -y install emacs apt-get -y install apt-transport-https ca-certificates apt-key adv --keyserver hkp://ha.pool.sks-keyservers.net:80 --recv-keys 58118E89F3A912897C070ADBF76221572C52609D echo "deb https://apt.dockerproject.org/repo ubuntu-trusty main” | sudo tee /etc/apt/sources.list.d/docker.list
apt-get update
apt-get -y install linux-image-extra-$(uname -r) linux-image-extra-virtual
apt-get update
apt-get -y install linux-image-generic-lts-trusty
apt-get -y install docker-engine
usermod -aG docker vagrant
docker pull rabbitmq
docker pull rabbitmq:3-management
docker run -d -p 4369:4369 -p 5672:5672 -p 15672:15672 -p 25672:25672 -p 1883:1883 –name rabbitmq rabbitmq:3-management
docker exec rabbitmq rabbitmq-plugins enable rabbitmq_mqtt
docker pull nginx
docker run -d -p 80:80 –name nginx nginx
SHELL
end