Summary
As I explained in yesterday’s article I was unhappy about not connecting to Amazon AWS IoT cloud for my presentation at Electronica 2016. In this article I will start this process of repairing the my brain damage by taking you through the steps I am following to create an MQTT connection to Amazons cloud using WICED WiFi. I will post 3 articles on this topic:
- Amazon IoT & MQTT (Part 1)
- Modify & Test the WICED Publisher App (Part 1)
- Modify & Test the WICED Subscriber App (Part 2)
- Modify the Application to talk I2C to the PSoCs (Part 3)
Amazon IoT & MQTT
The Amazon IoT Cloud can do an amazing, frightening, crazy overwhelming amount of different things. Here is a picture of their architecture.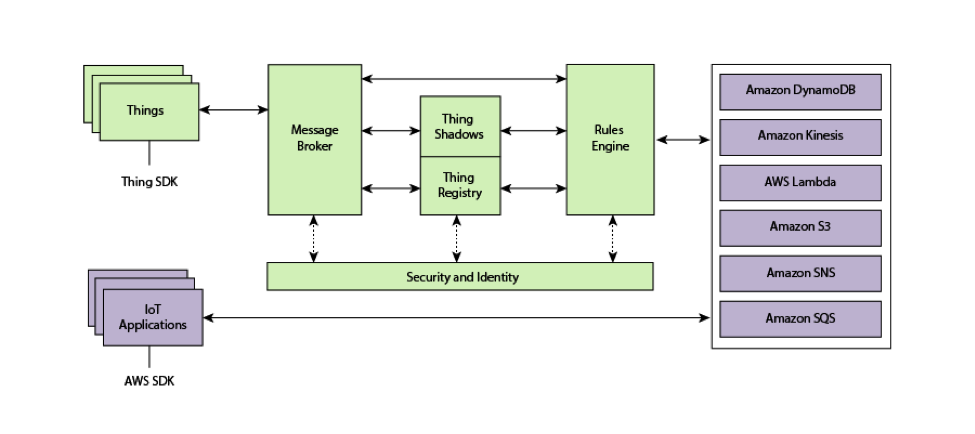
Above, you can see that Amazon has decided to follow on the language of IoT by actually calling the devices that attach to their cloud “Thing”. This makes for some rather awkward English sentences, but I suppose they are not going to change it, so I will go with their language. For the purposes of this demonstration I am going to create two “things”. One will be “Publisher” and one will be the “Subscriber”. The “Things” will attach and communicate to each other via the Message Broker in the Amazon Cloud. The connection will be built in the WICED SDK using MQTT and run on the Cypress CYW943907AEVAL1F development kit.
MQTT stands for Message Queuing Telemetry Transport, which, in simplest terms is a lightweight TCP/IP based protocol that can run over secure sockets. The good news is the Cypress WICED SDK has MQTT built in and provides a clean interface for you to develop firmware to create and use MQTT connections. MQTT is pretty simple and has only four important concepts.
- Message Broker – A server that supports MQTT connections and hosts Topics
- Topic – The name for a queue of Messages (the Topic name can essentially be anything that you want in your system)
- Message – A string of bytes in any format you desire for your system
- Publisher – A device that sends a Message to a specific Topic on a specific MQTT Message Broker
- Subscriber – A device that has asked to receive Messages sent to a specific Topic
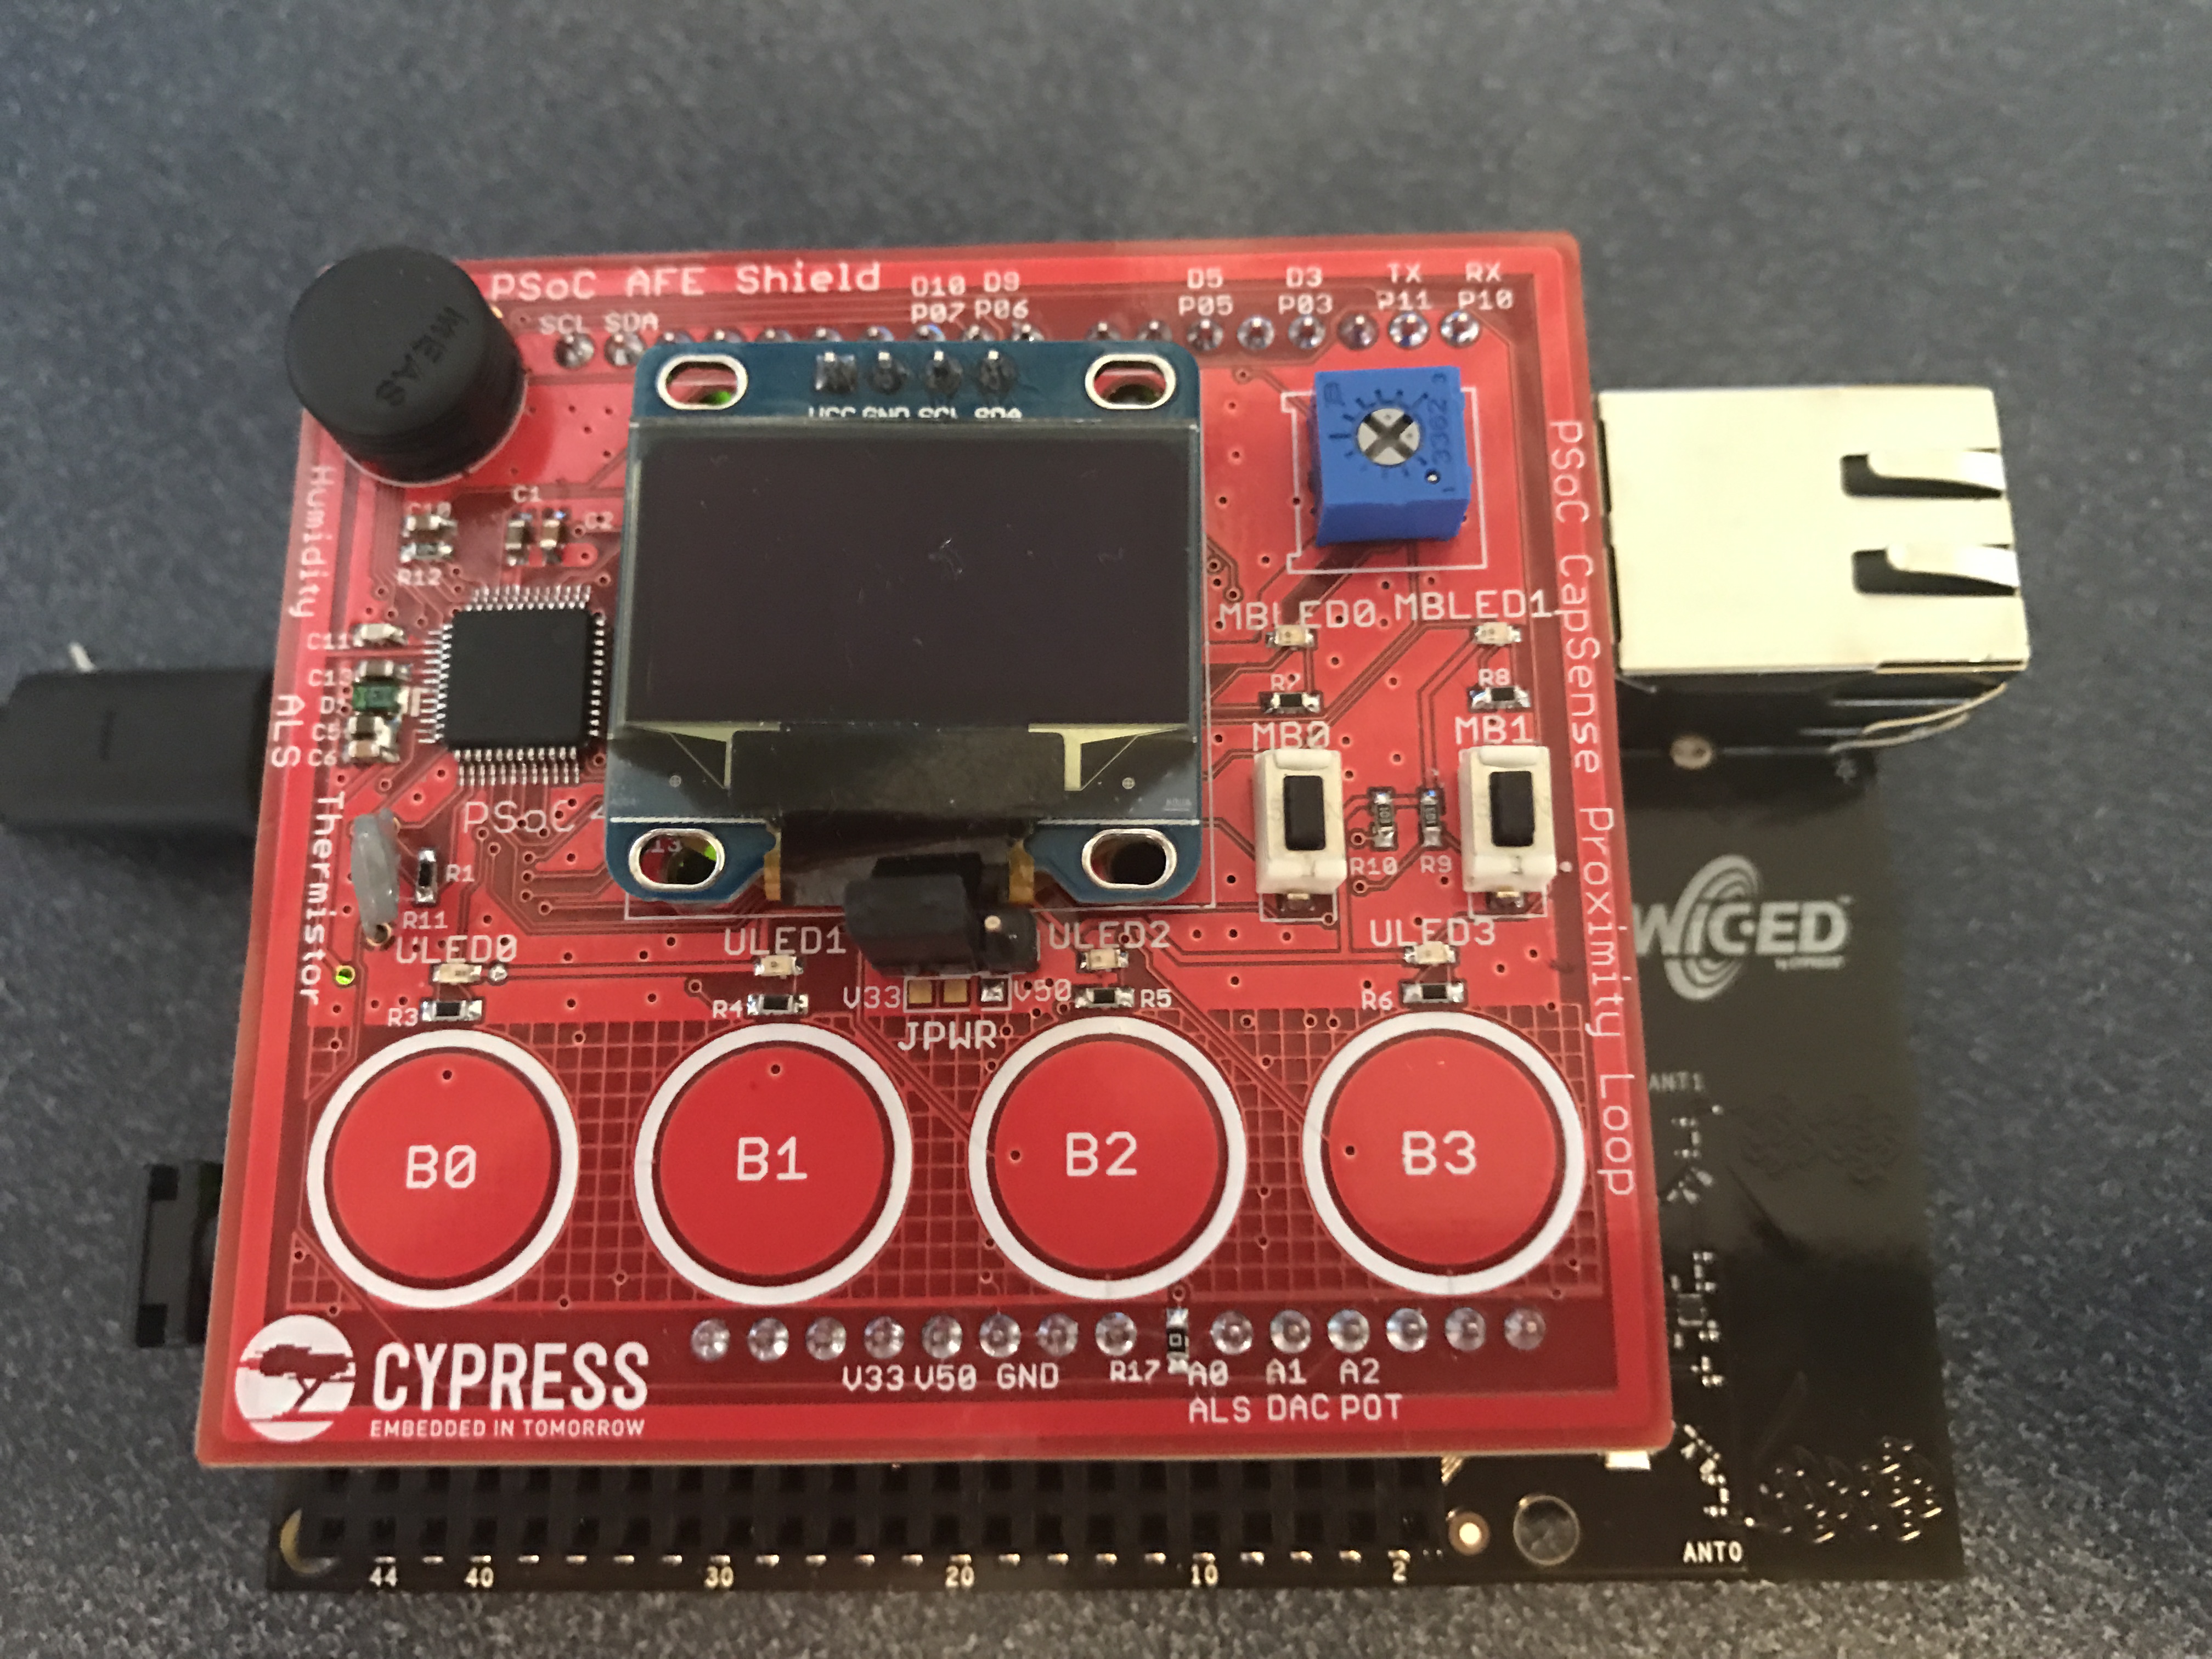
For the purposes of this demonstration I will create a Publisher (running on the 943907AEVAL1F board) that will publish a message with the desired position of the servo motors on the robot ARM to a Topic (named ROBOT_POSITION) on the Amazon Message Broker. The Subscriber (running on a different 943907AEVAL) will subscribe to the Topic and will then send an I2C command to the PSoC controlling the Robot ARM. For example if the 4 CapSense buttons B0-B3 represent 10%, 30%, 50%, 70%, 90% then when the users presses B0, WICED will publish a message of “10” to the Topic “ROBOT_POSITION”. Then, that message will go to the Subscriber, who will send that message to the PSoC Servo Motor controller.
In order to make the connection to the Amazon IoT Cloud you need to use Transport Layer Security which is also built into the WICED SDK. Good security is one of the best reasons to use Cypress WICED as we are taking that very seriously.
The AWS IoT Cloud supports a bunch of other functionality including:
- Connections to the Dynamo DB
- Simple Notifications (Text message, Email)
- Running Lambda Functions
- Plus a bunch more
However, all of that is outside of the scope of what I have time to show live.
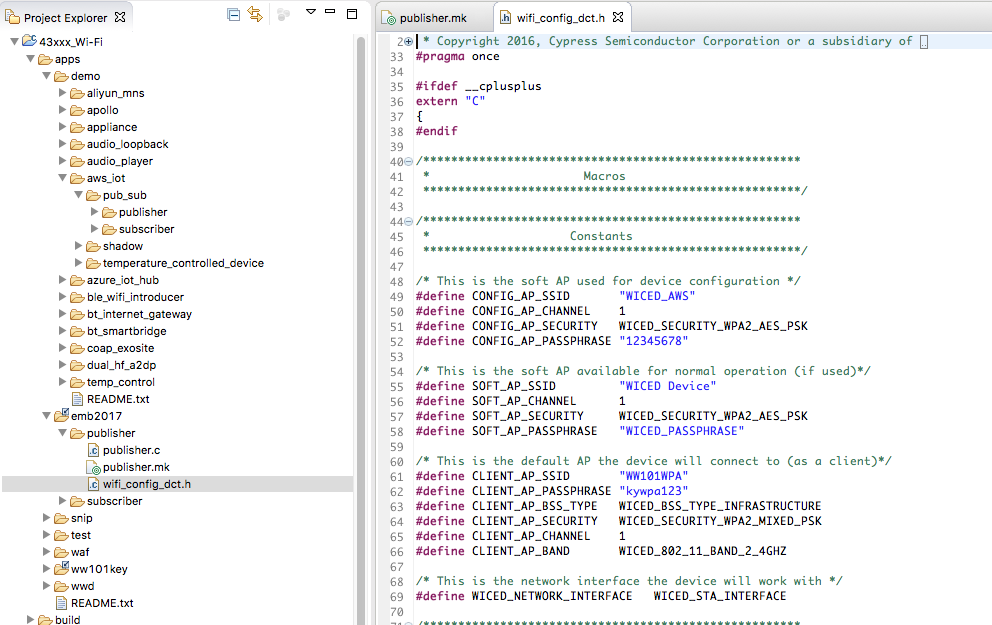
WICED WiFI: Modify & Test the Publisher App
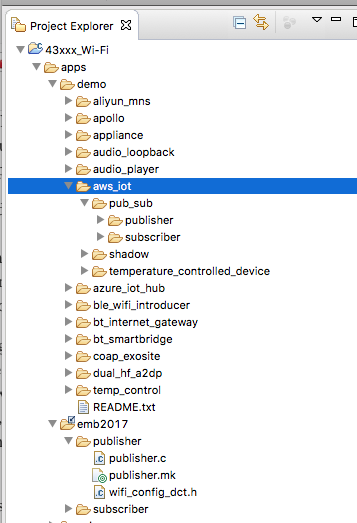
To build the application, I will copy and modify, then test the Publisher Demo App. In order to simplify things I will use the pre-exising App that already has all of the MQTT stuff in it. Cypress provide a bunch of example applications which all reside in the “apps” folder of the Project Explorer. So, I will start by creating a directory called “emb2017”. Then I will copy/paste the apps–>demo–>aws_ios–>pub_sub–>* into my emb2017 directory.
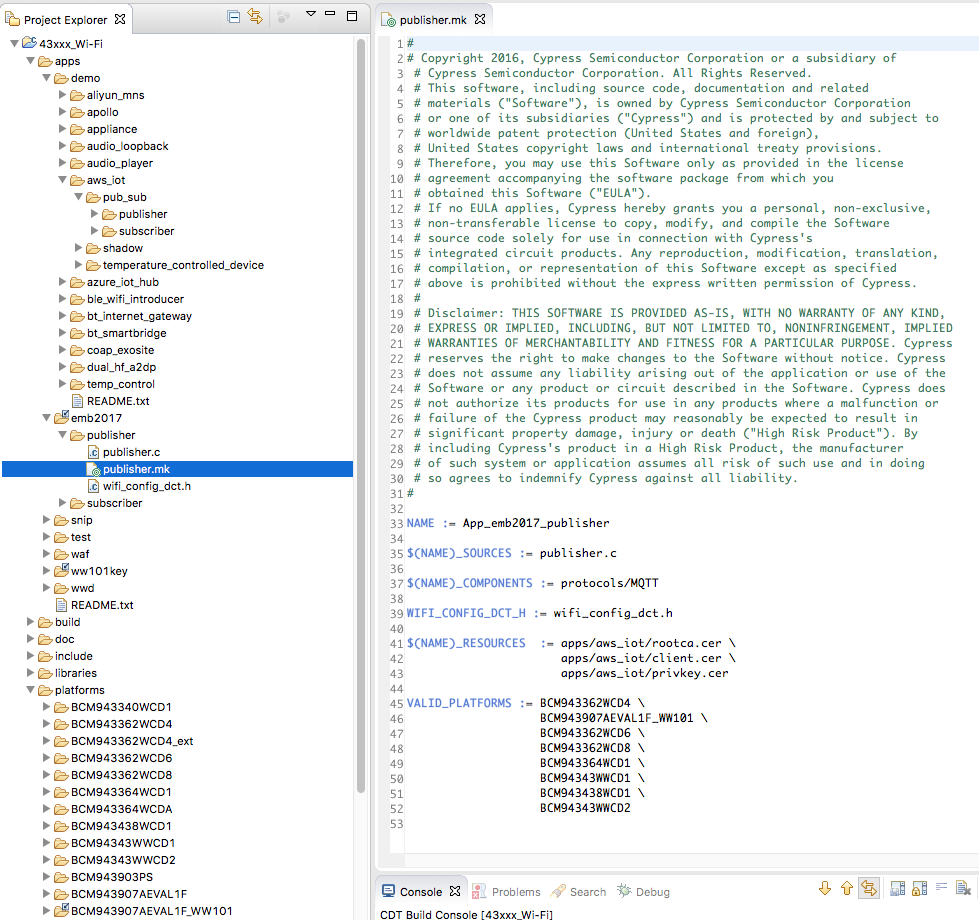
The next step is to modify publisher.mk file:
- Make the “Name” unique. Each application name must have its own unique name or your firmware will not build correctly. In this case I name it “App_emb2017_Publisher”
- Add BCM943907AEVAL1_WW101 to the valid platforms list. A platform is the WICED name for the Board Support Package. In this case we create a BSP for the PSoC Analog AFE Shield.
After the Makefile is fixed up, I will need to modify the Device Configuration Table (aka wifi_config_dct.h) so that it knows about the network at my house. The DCT is an area of flash that is used to hold security credentials, network SSIDs etc. This place can be configured either statically at build time or programmatically at run time. In this case, I will just set the SSID/Password at build time. For this example I will use the WW101WPA” network which is a pre-shared key WPA2 network with a password of “kywpa123” (Yes, if you come to my house in KY you will be able to attach with that password. If you do, please knock on the door and we can have some Bourbon together).
In order to make a TLS connection you will need to have three files:
- rootca.cer – Amazon’s Root Certificate
- privkey.cer – A private key (paired with a public key) that will allow you to establish a secure connection
- client.cer – A certificate that identifies your AWS “Thing”
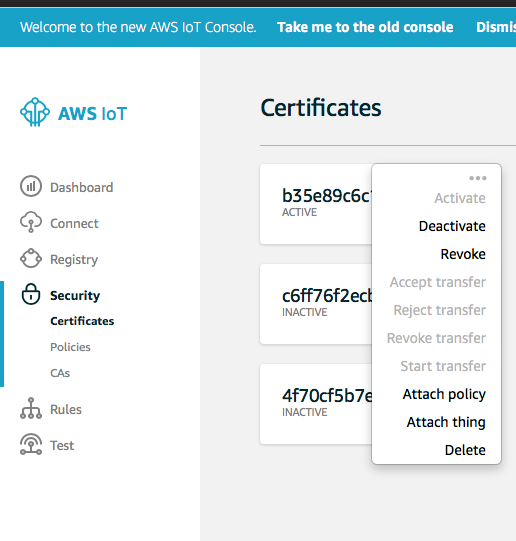
All of these files come from the Amazon IoT website and need to be copied into the “…/resources/apps/aws_iot” directory. They will be compiled along with your application and placed into the DCT of your WICED device by the Makefile. This happens as a result of this section of the Makefile:

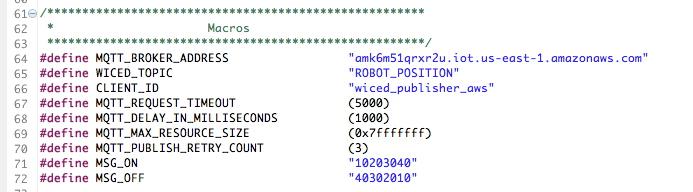
The next step in the process is to modify the publisher.c program. When you setup an Amazon IoT account, it will create a virtual machine with the Message Broker running on it. That VM will be given a unique name which you will need to hard code into your application. In addition you need to change the topic and message sent. Here are the changes that I made to publisher.c:
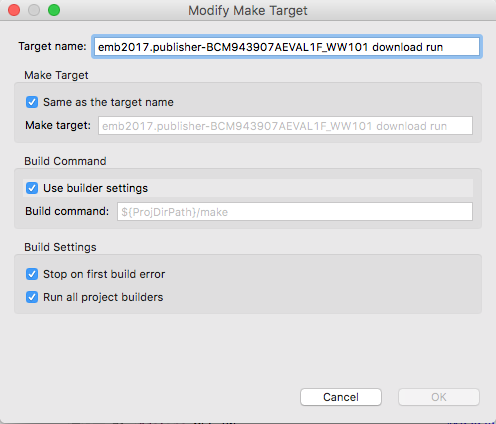
Now that all of the Firmware is setup, I need to program the board. To do that I create a new “Make Target” in the WICED Make Target window. The make target tells the makefile system:
- Which app to build, in this case “emb2017/publisher”
- Which platform to use. Platform == Board Support Package. In this case “bcm943907EVAL1F”
- Lastly what to do, in this case build, download and run
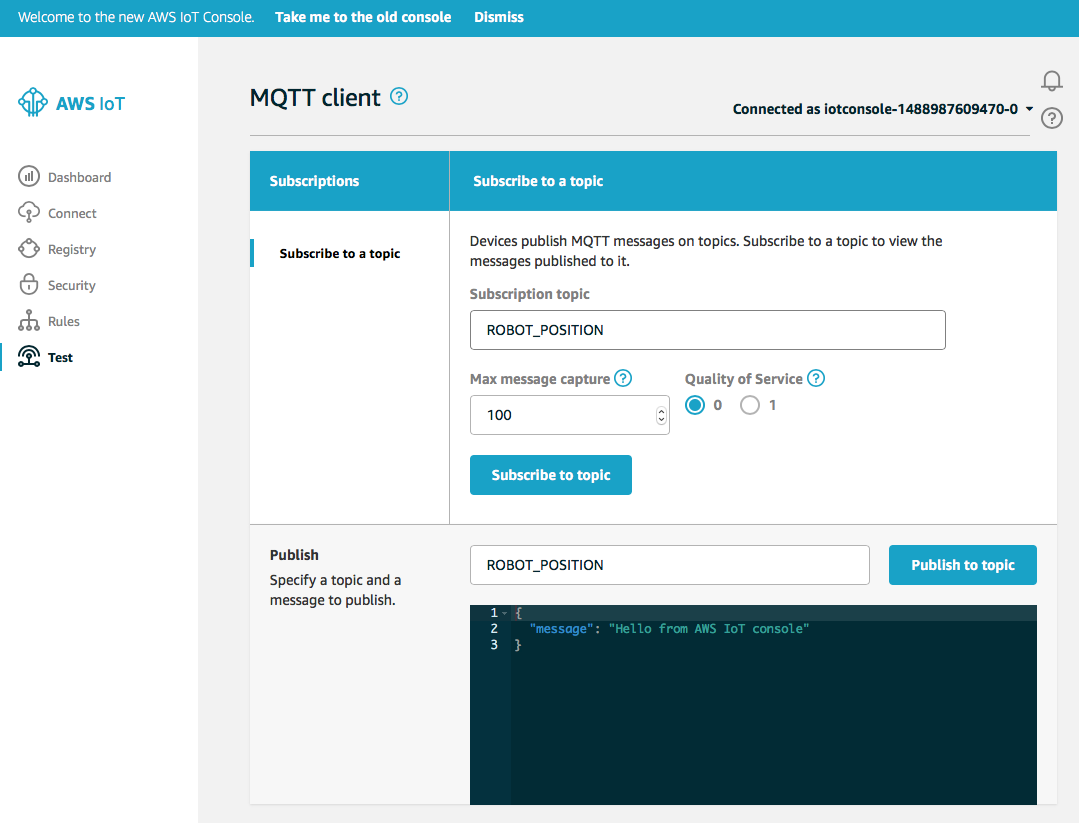
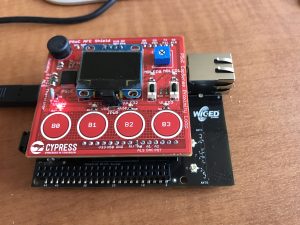
The last thing to do is program the board and then test using the Amazon IoT MQTT WebClient. This client can subscribe and publish to your Message Broker. Our application is configured to Publish to the “ROBOT_POSITION” topic. So, I will subscribe to that Topic, which will cause all messages that are published to that topic to be displayed. This happens when I push the Mechanical Button 0 the PSoC AFE Shield
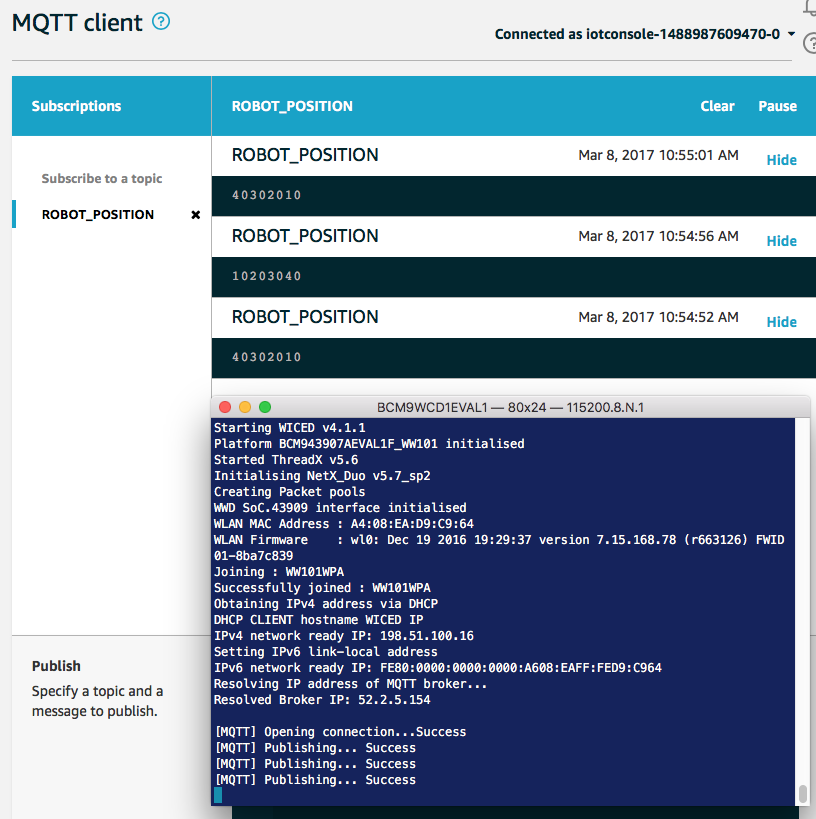
In the screen shot below you can see the console of my 943907AEVAL1F board as well as the MQTT Test Console. The board starts by turning on WICED, starting the RTOS, turning up the TCP/IP stack, then attaching to the network etc. After all of that is done it starts an MQTT connection to the Amazon IoT MQTT broker.
On the AWS MQTT client, you can see that I pressed the button three times which published three messages.
In the next Article I will take you through the creation of the Subscriber side of this application.


No comment yet, add your voice below!