Summary
A discussion of using the Infineon (Cypress) PSoC 6 with a CYW4343W and the AnyCloud Connection Manager with Modus Toolbox. The AnyCloud Connection Manager is an RTOS thread that lets you manage a connection to a WiFi network. It knows how to scan for networks, attach, detach etc. and was recently released for use with PSoC6 and 43xxx WiFi combos.
The Story
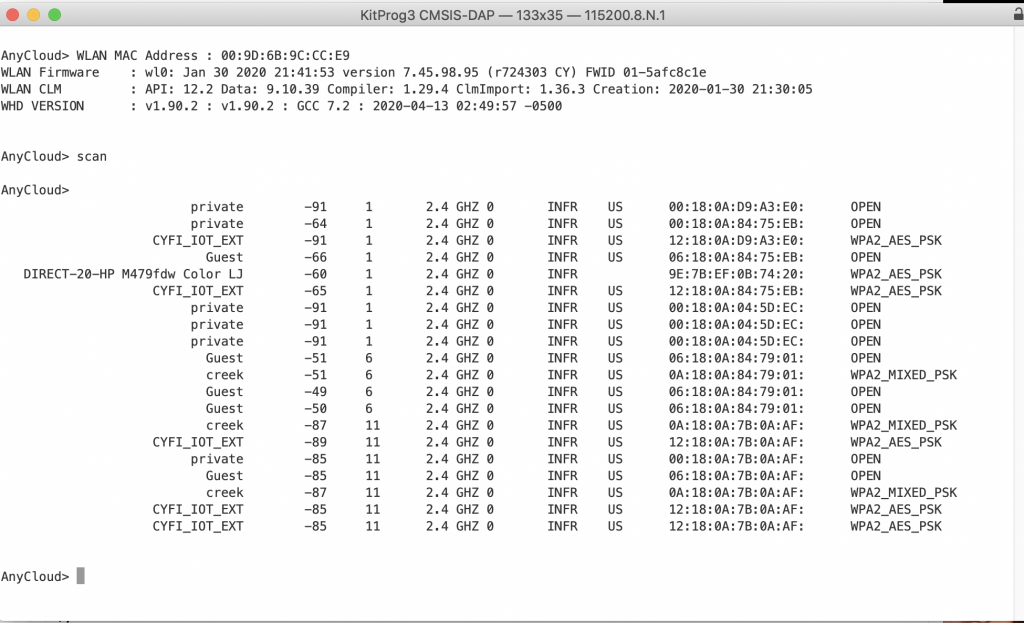
In the WICED WiFI SDK there is an example program called “test.console” which allows you to use a UART command line to do networking “stuff”. With the release of the new AnyCloud SDK I decided that I should rebuild some of that program using the PSoC and WiFi. Basically a set of commands like “scan” to interact with the Radio World! In the picture you below you can see that I use the command “scan” to list out the networks at my house.
You can also use the command “help” to list out the commands.
Architecture
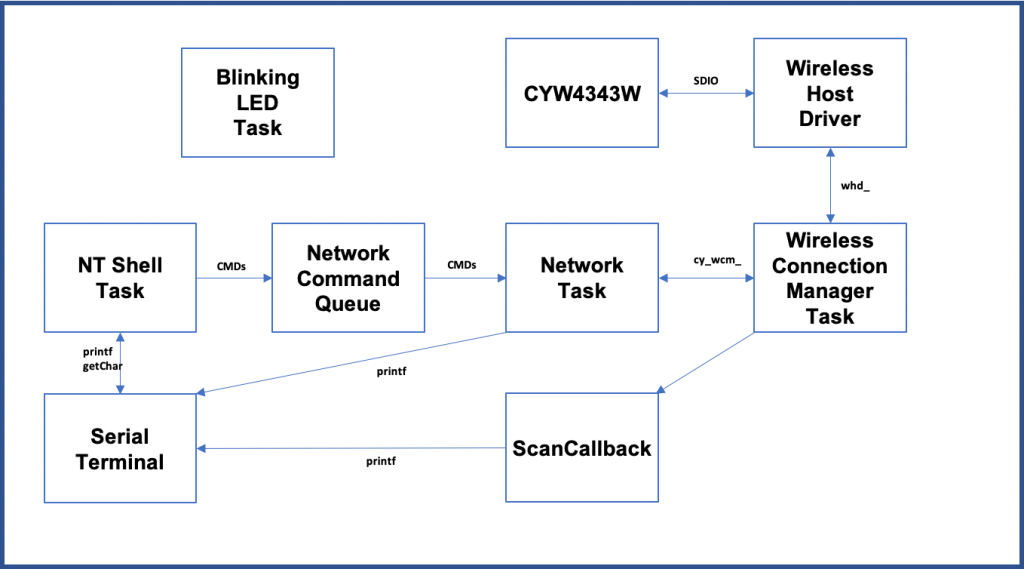
My implementation will have three tasks
- A Blinking LED Task (which doesn’t interact with any other tasks)
- The NT Shell – which will send commands to the network queue.
- The Network Task which will receive commands from the NT Shell task and trigger the Wireless Connection Manager to do something
- The Wireless Connection Manager which will interact with the WiFI Radio via the Wireless Host driver.
Make the Basic Project
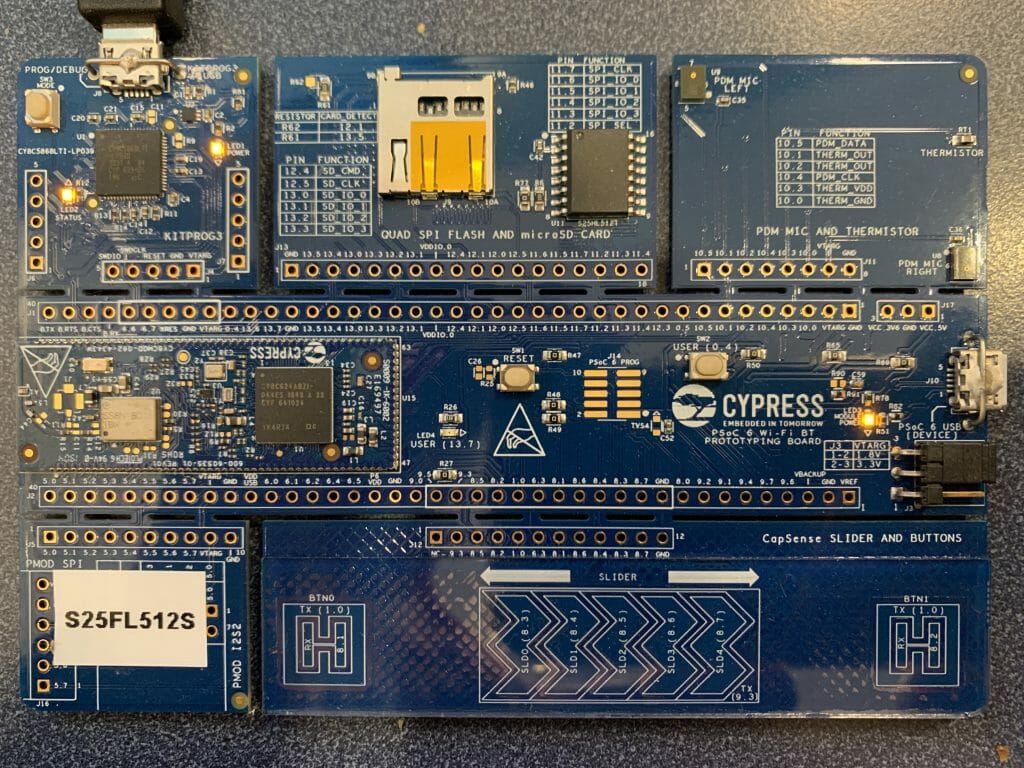
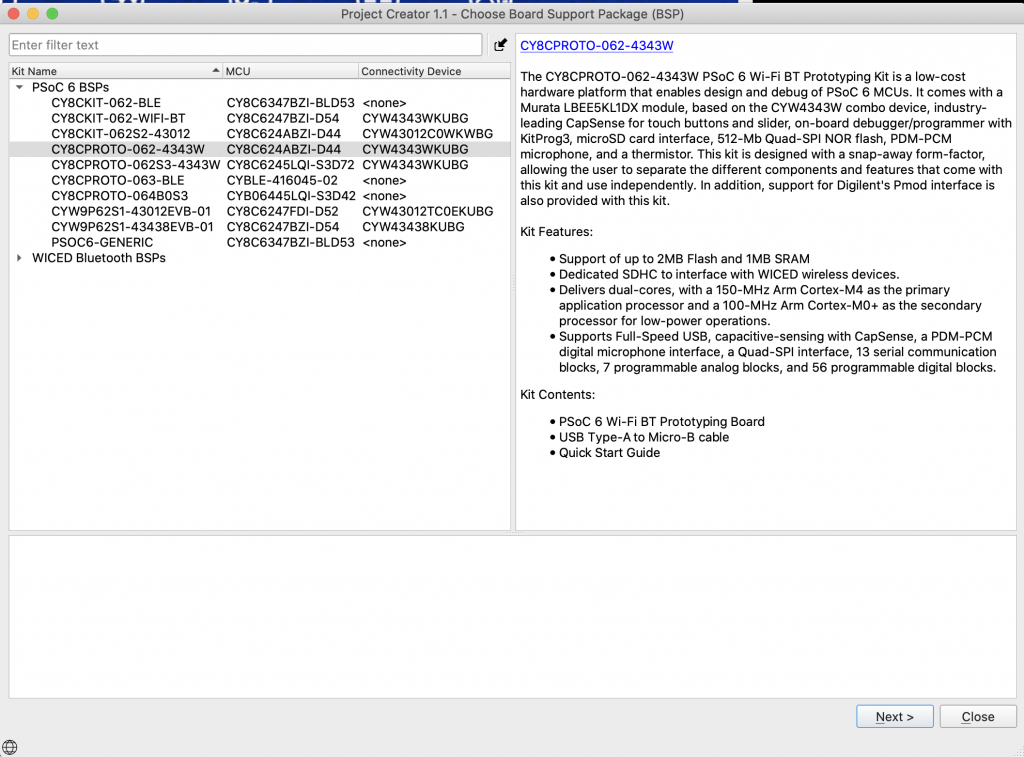
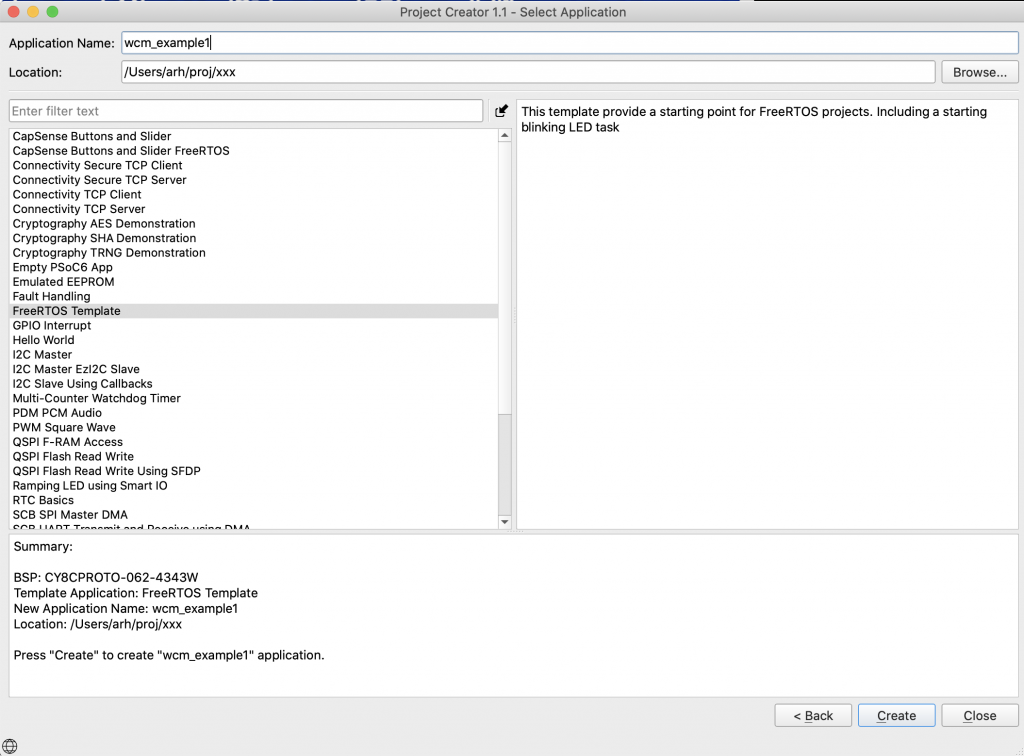
To build this project start by creating a new project. The development board that I had plugged into my computer when I began this project is a CY8CPROTO-062-4343W so this is the one I will select.
In the new project creator pick the “CY8CPROTO-062-4343W”
I created a FreeRTOS template project that does all of the right stuff. I wrote an article about how to use the IoT Expert Manifestt here, and until you add the IoT Manifest to your setup you will not get the FreeRTOS Template project.
After the new project work is done you should see
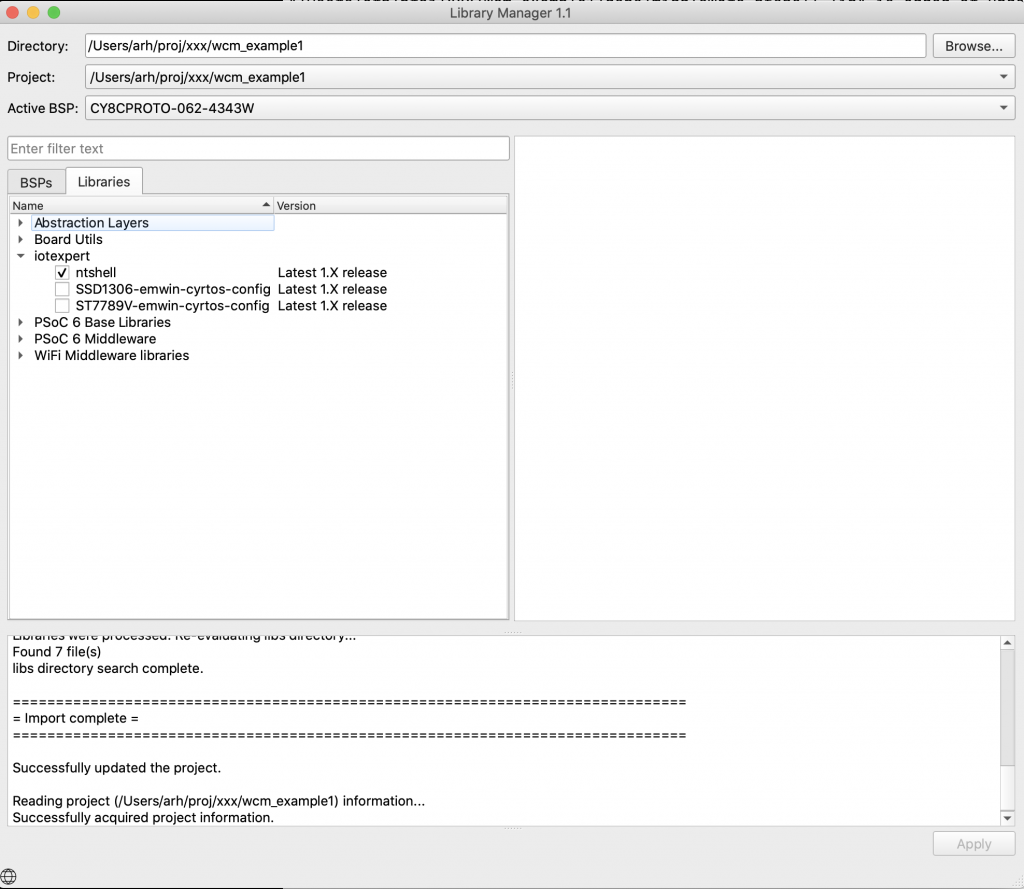
Add the nt-shell, which comes from my IoT Expert library (read about how to add the IoT Expert library here).
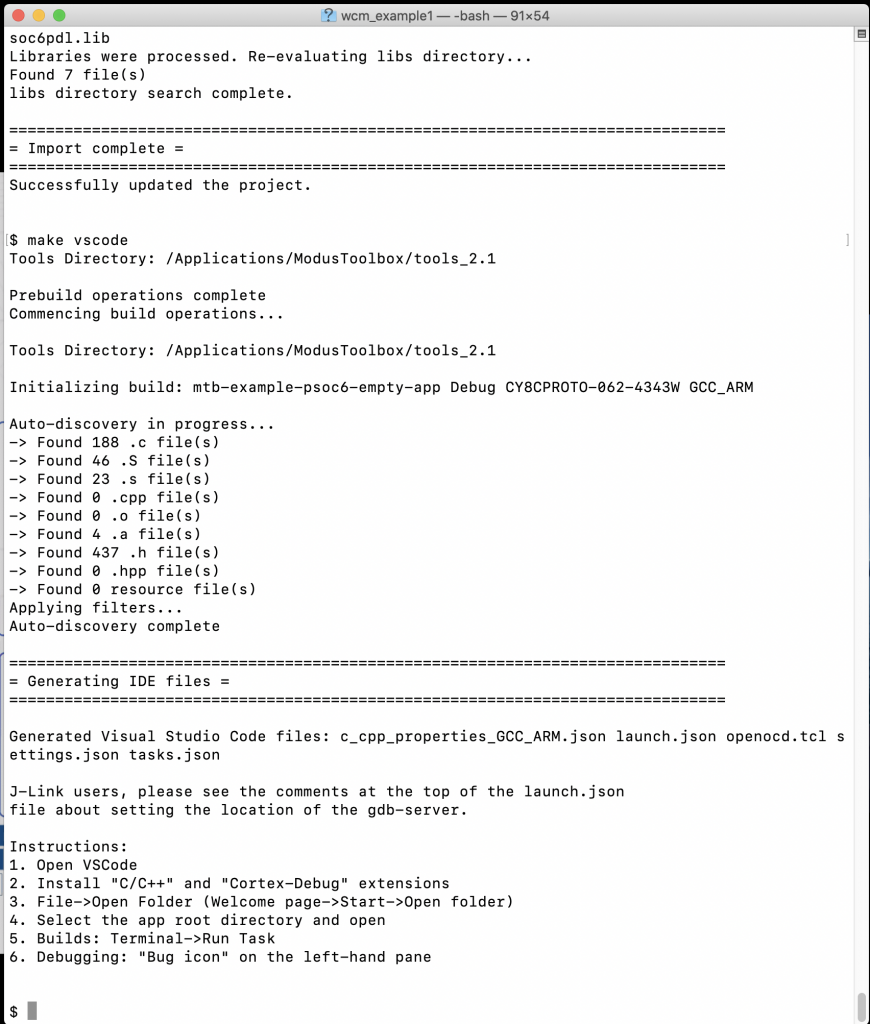
I have been on a kick of using Visual Studio code. So, run “make vscode” to setup the project for Visual Studio Code.
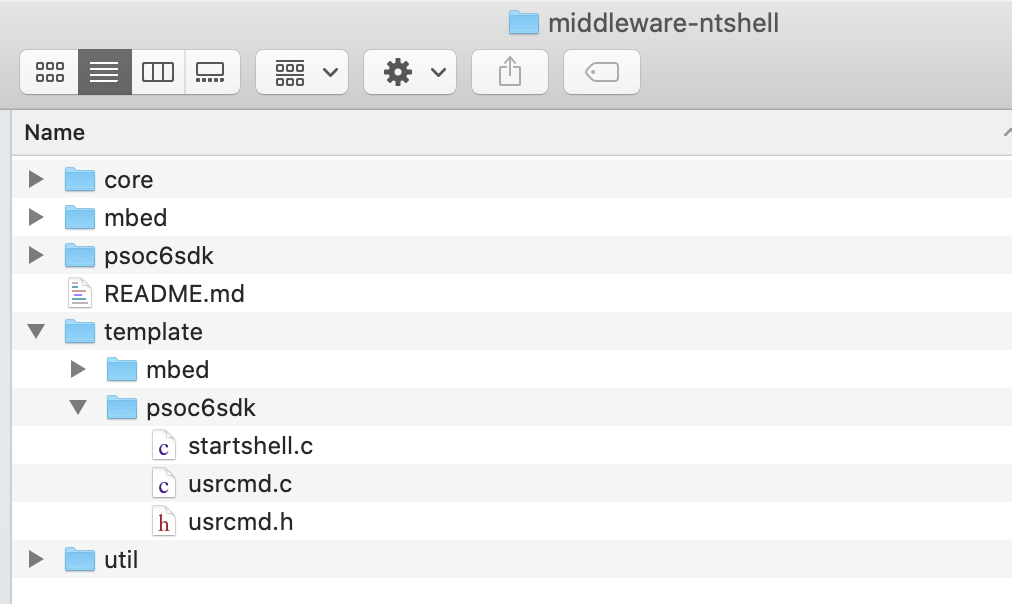
In the finder, copy the template files from nt-shell into your project.
You can also do it with the command line.
Edit main.c to include the configuration.
#include "ntshell.h"
#include "psoc6_ntshell_port.h"
Update the main.c to have the ntShellThread
// Global variable with a handle to the shell
ntshell_t ntshell;

void ntShellTask()
{

  printf("Started ntshell\n");
  setvbuf(stdin, NULL, _IONBF, 0);
  ntshell_init(
               &ntshell,
               ntshell_read,
               ntshell_write,
               ntshell_callback,
               (void *)&ntshell);
  ntshell_set_prompt(&ntshell, "AnyCloud> ");
  vtsend_erase_display(&ntshell.vtsend);
  ntshell_execute(&ntshell);
}
And start the ntshell task.
xTaskCreate(ntShellTask, "nt shell task", configMINIMAL_STACK_SIZE*2,0 /* args */ ,4 /* priority */, 0);
When you want to add a command to the shell you need to do three things
- Add a function prototype for the command
- Add the command to the command list
- Write the function
static int usrcmd_help(int argc, char **argv);
static int usrcmd_info(int argc, char **argv);
static int usrcmd_clear(int argc, char **argv);
static int usrcmd_printargs(int argc, char **argv);
static const cmd_table_t cmdlist[] = {
    { "help", "This is a description text string for help command.", usrcmd_help },
    { "info", "This is a description text string for info command.", usrcmd_info },
    { "clear", "Clear the screen", usrcmd_clear },
    { "printargs","print the list of arguments", usrcmd_printargs},
};
Here is an example of of the printargs command. The shell will call your function with a ARGC=number of arguments and ARGV[] an array of the pointers to the actual arguments.
static int usrcmd_printargs(int argc, char **argv)
{
    printf("ARGC = %d\n",argc);

    for(int i =0;i<argc;i++)
    {
        printf("argv[%d] = %s\n",i,argv[i]);
    }
    return 0;

}
Build and test your program.
Turn on the Connection Manager and Core Middleware Library
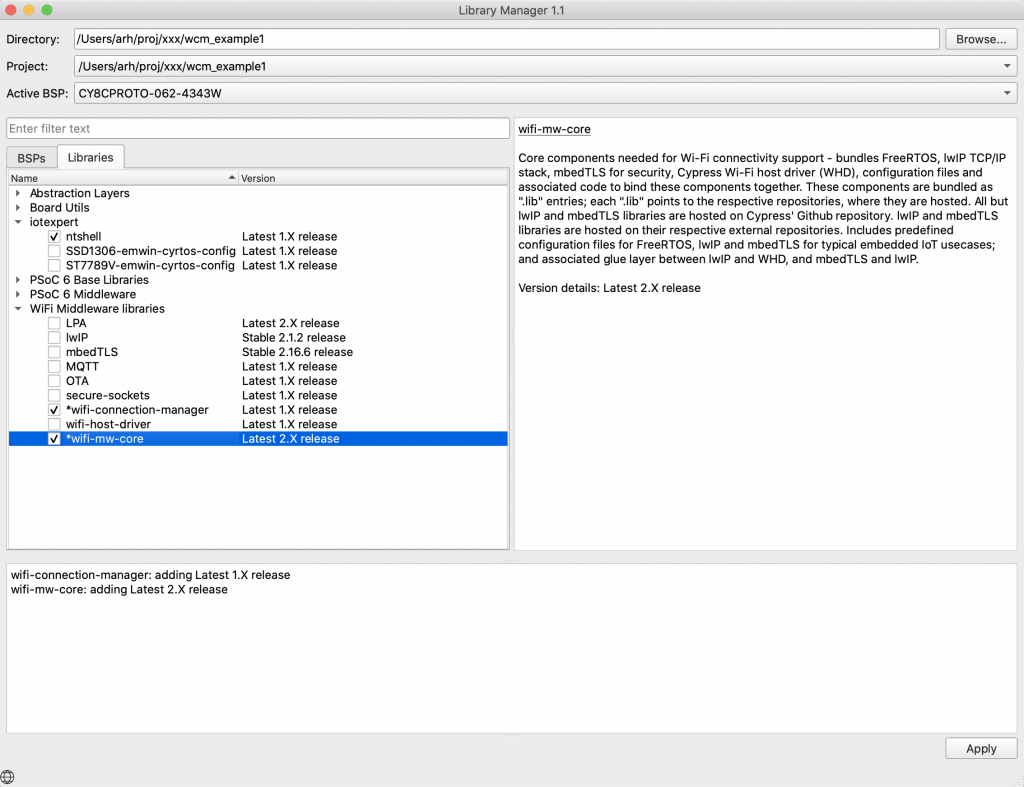
Now, add the wifi-mw-core library & Connection Manager using the library manager. You can start it with “make modlibs”. These two libraries are in the “WiFi Middleware” category.
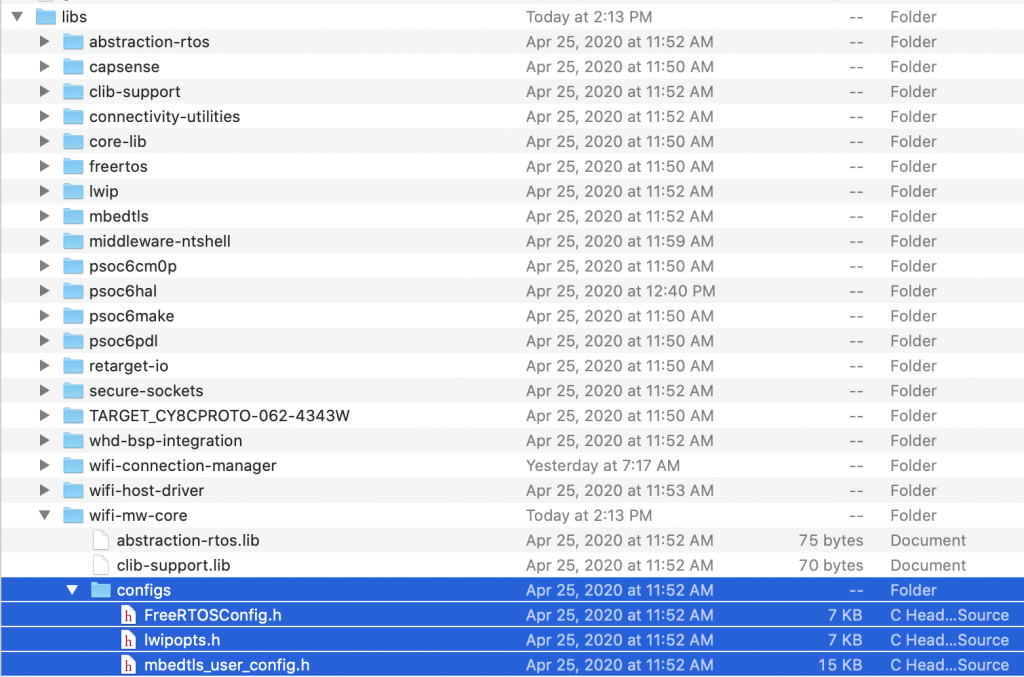
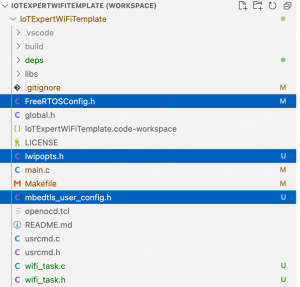
Copy the FreeRTOSConfig.h from the libs/wifi-mw-core/configs directory into your project (so you can modify it)
Update the Makefile to include the WiFi components (line 71) and the MBED TLS configuration (line 86)
COMPONENTS=FREERTOS PSOC6HAL LWIP MBEDTLS 4343W
# Like COMPONENTS, but disable optional code that was enabled by default.
DISABLE_COMPONENTS=

# By default the build system automatically looks in the Makefile's directory
# tree for source code and builds it. The SOURCES variable can be used to
# manually add source code to the build process from a location not searched
# by default, or otherwise not found by the build system.
SOURCES=

# Like SOURCES, but for include directories. Value should be paths to
# directories (without a leading -I).
INCLUDES=

# Add additional defines to the build process (without a leading -D).
DEFINES=MBEDTLS_USER_CONFIG_FILE='"configs/mbedtls_user_config.h"' CYBSP_WIFI_CAPABLE
Create networkTask.h/.c & Start the Task in main.c
Now let’s create the networkTask. This task will control all of the networking functions in the system. The first file, networkTask.h, is the public interface. It declares a Queue where you can push messages (line 5) an enumeration of the messages (lines 7-14), a definition of the message data (lines 17-22) and finally the network task declaration (line 24).
#pragma once
#include "FreeRTOS.h"
#include "queue.h"

extern QueueHandle_t networkQueue;

typedef enum {
    net_scan,
    net_connect,
    net_disconnect,
    net_printip,
    net_printmac,

} networkCmd_t;


typedef struct {
    networkCmd_t cmd;
    uint32_t val0;
    uint32_t val1;

} networkQueueMsg_t;

void networkTask(void *arg);
Ill go ahead and modify main.c to start the yet to be written network task. You need to include the header file for the task and define a handle for the task.
#include "networkTask.h"

TaskHandle_t networkTaskHandle;
Finally in main function, start the task.
xTaskCreate(networkTask, "networkTask", configMINIMAL_STACK_SIZE*8,0 /* args */ ,4/* priority */, &networkTaskHandle);
Create the file networkTask.c. Make a bunch of includes.
#include <stdio.h>
#include <stdlib.h>
#include "FreeRTOS.h"
#include "task.h"
#include "cy_wcm.h"
#include "cy_wcm_error.h"
#include "whd_types.h"
#include "queue.h"
#include "semphr.h"
#include "networkTask.h"
Now let’s define the actual task function. This function will
- Call the wcm_init function to make a WiFi Station (lines 201-203)
- Tell the task that you would like to be called back when things happen (line 205)
- Initialize the Queue to receive command messages from other tasks.
- Make an infinite loop to receive the commands and process the messages. Notice that I dont do anything with the message for now. Ill add the code later.
// The networkTask will:
// - startup the wireless connection manager
// - sit waiting on the rtos queue... getting messages from other tasks
// - and do ( net_scan, net_connect, net_disconnect, net_printip, net_printmac,)

void networkTask(void *arg)
{
	cy_rslt_t result;
	cy_wcm_config_t config;
	cy_wcm_scan_filter_t scanFilter;

	memset(&config, 0, sizeof(cy_wcm_config_t));
    config.interface = CY_WCM_INTERFACE_TYPE_STA;
	cy_wcm_init	(&config);

	cy_wcm_register_event_callback(	wcmCallback	);

	networkQueue = xQueueCreate( 5, sizeof(networkQueueMsg_t));

	while(1)
	{
		networkQueueMsg_t msg;

		xQueueReceive(networkQueue,(void *)&msg,portMAX_DELAY);  // Wait for commands from other tasks

		switch(msg.cmd)
		{
			case net_scan: // 0=stop scan !0=start scan
			break;

			case net_connect:
			break;

			case net_disconnect:
			break;

			case net_printip:
			break;

			case net_printmac:
			break;
		}
	}

}
Create Utilities for Printing out the IP and MAC Address
It the network task I want to be able to print out IP address (both IPV4 and IPV6). I also want to be able to print out 6-byte MAC address. In the Cypress drivers, an IP address is a structure that holds either a IPV4 or and IPV6 address. It then contains the 4 or 6 bytes of the address. Here is the type definition.
/**
 * IP Address Structure
 */
typedef struct
{
    cy_wcm_ip_version_t version;  /**< IP version */
    union
    {
        uint32_t v4;     /**< IPv4 address bytes */
        uint32_t v6[4];  /**< IPv6 address bytes */
    } ip;                /**< IP address bytes */
} cy_wcm_ip_address_t;
The IP v ersion is just an enumeration.
/**
 * IP Version
 */
typedef enum
{
    CY_WCM_IP_VER_V4 = 4,      /**< Denotes IPv4 version */
    CY_WCM_IP_VER_V6 = 6       /**< Denotes IPv6 version */
} cy_wcm_ip_version_t;
To print an address, figure out which version you are working on. Then dump the raw bytes. Notice in the IPV4 case it is encoded into a uint32_t as 4 continuous bytes.
void printIp(cy_wcm_ip_address_t *ipad)
{
	if(ip_addr.version == CY_WCM_IP_VER_V4)
	{
		printf("%d.%d.%d.%d",(int)ipad->ip.v4>>0&0xFF,(int)ipad->ip.v4>>8&0xFF,(int)ipad->ip.v4>>16&0xFF,(int)ipad->ip.v4>>24&0xFF);
	}
	else if (ip_addr.version == CY_WCM_IP_VER_V6)
	{
		for(int i=0;i<4;i++)
		{
			printf("%0X:",(unsigned int)ip_addr.ip.v6[i]);
		}
	}
	else
	{
		printf("IP ERROR %d",ipad->version);
	}
}
A MAC address is just an array of uint8_t of length CY_WCM_MAC_ADDR_LEN (which we pound defined to 6)
typedef uint8_t cy_wcm_mac_t[CY_WCM_MAC_ADDR_LEN]; /**< Unique 6-byte MAC address */
So, the print is just a loop. (probably should have done something slightly better so I dont end up with the trailing : – oh well)
void printMac(cy_wcm_mac_t mac)
{
	for(int i=0;i<CY_WCM_MAC_ADDR_LEN;i++)
	{
		uint8_t val = mac[i];
		printf("%02X:",val);
	}
}
Add the Scan Command
For the scan I want to print out the:
- SSID
- RSSI (in dBM)
- Channel
- Band
- Speed
- Type of Ap
- Country Code
- MAC address of the Access Point (AKA BSSID)
- Type of Security
In order to have the WCM run a scan you need to call the function cy_wcm_start_scan. What this will do is tell the 4343W to scan all the channels on the 2.4GHZ band and listen for access point beacons. This function has three arguments
- A function pointer to call back when you find an AP
- A user settable data pointer
- A filter (which can limit to an SSID, BSSID or RSSI)
cy_rslt_t cy_wcm_start_scan(cy_wcm_scan_result_callback_t callback, void *user_data, cy_wcm_scan_filter_t *scan_filter)
Here is my version of the scanCallback which I put in the networkTask.c file.
// This function is called back when the user asks for an overall scan.
// It just prints out the information about the networks that it hears about
void scanCallback( cy_wcm_scan_result_t *result_ptr, void *user_data, cy_wcm_scan_status_t status )
The result_ptr is a pointer to a structure that contains the data for the found access point.
/**
 * Structure for storing scan results
 */
typedef struct
{
    cy_wcm_ssid_t                SSID;             /**< Service Set Identification (i.e. Name of Access Point)                    */
    cy_wcm_mac_t                 BSSID;            /**< Basic Service Set Identification (i.e. MAC address of Access Point)       */
    int16_t                      signal_strength;  /**< Receive Signal Strength Indication in dBm. <-90=Very poor, >-30=Excellent */
    uint32_t                     max_data_rate;    /**< Maximum data rate in kilobits/s                                           */
    cy_wcm_bss_type_t            bss_type;         /**< Network type                                                              */
    cy_wcm_security_t            security;         /**< Security type                                                             */
    uint8_t                      channel;          /**< Radio channel that the AP beacon was received on                          */
    cy_wcm_wifi_band_t           band;             /**< Radio band                                                                */
    uint8_t                      ccode[2];         /**< Two letter ISO country code from AP                                       */
    uint8_t                      flags;            /**< flags                                                                     */
    uint8_t                      *ie_ptr;          /**< Pointer to received Beacon/Probe Response IE(Information Element)         */
    uint32_t                     ie_len;           /**< Length of IE(Information Element)                                         */
} cy_wcm_scan_result_t;
The other parameter to the callback is the status. The status will either be CY_WCM_SCAN_COMPLETE or CY_WCM_SCAN_INCOMPLETE. The first thing that to do is see if this callback is the one that tells me that the scan is complete, if so I just return (and don’t print anything)
	if(status == CY_WCM_SCAN_COMPLETE)
		return;
Then I print out the raw SSID, Signal Strength and Channel.
printf("%32s\t%d\t%d\t",result_ptr->SSID,result_ptr->signal_strength,result_ptr->channel);
Next I figure out what channel we are talking about. The 4343W is single band 2.4GHZ, however, other Cypress chips have dual band.
	switch(result_ptr->band)
	{
		case CY_WCM_WIFI_BAND_ANY:
			printf("ANY");
		break;
		case CY_WCM_WIFI_BAND_5GHZ:
			printf("5.0 GHZ");
		break;
		case CY_WCM_WIFI_BAND_2_4GHZ:
			printf("2.4 GHZ");
		break;
	}
Then I printout the maximum data rate, which is 0 for all of my test cases. I have no idea why.
printf("%d",(int)result_ptr->max_data_rate);
Then I printout what type of AP we are talking about.
	switch(result_ptr->bss_type)
	{
		case CY_WCM_BSS_TYPE_INFRASTRUCTURE:
			printf("INFR");
		break;
		case CY_WCM_BSS_TYPE_ADHOC:
			printf("ADHOC");
		break;
		case CY_WCM__BSS_TYPE_ANY:
			printf("ANY");
		break;
		case CY_WCM_BSS_TYPE_MESH:
			printf("MESG");
		break;
		case CY_WCM_BSS_TYPE_UNKNOWN:
			printf("UNKWN");
		break;
	}
Then the country code.
printf("%c%c",result_ptr->ccode[0],result_ptr->ccode[1]);
Then the Basic Service Set ID of the AP, which is also known as the MAC address of the AP.
printMac(result_ptr->BSSID);
Then the security type.
	switch(result_ptr->security)
	{
		case CY_WCM_SECURITY_OPEN:
			printf("OPEN");
		break;
    	case CY_WCM_SECURITY_WEP_PSK:
			printf("WEP_PSK");
		break;
		case CY_WCM_SECURITY_WEP_SHARED:
			printf("WEP_SHARED");
		break;
    	case CY_WCM_SECURITY_WPA_TKIP_PSK:
			printf("WPA_TKIP_PSK");
		break;
		case CY_WCM_SECURITY_WPA_AES_PSK:
			printf("WPA_AES_PSK");
		break;
		case CY_WCM_SECURITY_WPA_MIXED_PSK:
			printf("WPA_MIXED_PSK");
		break;
		case CY_WCM_SECURITY_WPA2_AES_PSK:
			printf("WPA2_AES_PSK");
		break;
		case CY_WCM_SECURITY_WPA2_TKIP_PSK:
			printf("WPA2_TKIP_PSK");
		break;
		case CY_WCM_SECURITY_WPA2_MIXED_PSK:
			printf("WPA2_MIXED_PSK");
		break;
		case CY_WCM_SECURITY_WPA2_FBT_PSK:
			printf("WPA2_FBT_PSK");
		break;
		case CY_WCM_SECURITY_WPA3_SAE:
			printf("WPA3_SAE");
		break;
		case CY_WCM_SECURITY_WPA3_WPA2_PSK:
			printf("WPA3_WPA2_PSK");
		break;
		case CY_WCM_SECURITY_IBSS_OPEN:
			printf("IBSS_OPEN");
		break;
		case CY_WCM_SECURITY_WPS_SECURE:
			printf("WPS_SECURE");
		break;
		case CY_WCM_SECURITY_UNKNOWN:
			printf("UNKNOWN");
		break;
		case CY_WCM_SECURITY_FORCE_32_BIT:
			printf("FORCE_32_BIT");
		break;
	}
With a complete scanCallback function I can now update the networkTask to deal with the queued commands of net_scan type. This simply either stops or starts the scan based on the message parameter.
			case net_scan: // 0=stop scan !0=start scan
				if(msg.val0 == 0)
					cy_wcm_stop_scan();
				else
				{
					printf("\n");
					result = cy_wcm_start_scan(scanCallback,0,0);
					if(result != CY_RSLT_SUCCESS)
						printf("Scan error\n");
				}
			break;
The last things to do is to add the scan command to the usrcmd.c
static int usrcmd_scan(int argc, char **argv)
{

    static int state=0;

    if(argc==1)
    {
        state = (state ==0)?1:0;
    }
    else if(argc == 2)
    {
        if(strcmp(argv[1],"on") == 0)
        {
            state=1;
        }
        else if(strcmp(argv[1],"off") == 0)
        {
            state = 0;
        }
        else
        {
            printf("usage: scan [on|off]\n");
            return 0;
        }

    }
    else
    {
        printf("usage scan: [on|off]\n");
        return 0;
    }

    networkQueueMsg_t msg;
    msg.cmd = net_scan;
    msg.val0 = state;
    xQueueSend(networkQueue,(const void *)&msg,portMAX_DELAY);
    return 0;
}
OK. Let it rip. You should be able to run network scans. In the next Article I will add a connect and disconnect commands.
You can find all of this example code at https://github.com/iotexpert/wcm_example




No comment yet, add your voice below!