Summary
This Article contains the exact flow and screen shots that I will follow for the IoT AdvantEdge Webinar. There will be 7 sections:
- Modus Toolbox 2.1 & AnyCloud SDK
- Basic Eclipse Flow
- Command Line Flow
- Visual Studio Code Flow
- Connectivity Core Middleware
- Low Power Assistant
- AnyCloud Libraries
Modus Toolbox 2.1 & AnyCloud SDK
What is Modus Toolbox 2.1 and the AnyCloud SDK?
- Integrated platform for compute and connectivity
- Windows, Linux and Mac
- IAR, Eclipse, ARM MDK, Visual Studio Code, MBED Studio and Command line
- We have complete integration at the company level for both IAR and the ARM MDK – Cypress is native in their tools
- Amazon FreeRTOS, FreeRTOS, MBED OS
- The entire PSoC 6 family
- The WiFi Bluetooth Combo’s 4343 and 43012
- All the Cypress 20xxx Family Bluetooth Chips (a huge step forward in making WICED and PSoC 6 look the same)
- Low Power Assistant (to build combination solutions with PSoC6 and WiFI/BT)
- A generic new project creator
- All of our configurators run on all of the platforms
- A bunch of new code examples.
- Offline support (so you don’t have to be connected to the internet)
- Major updates to the documentation
- A bunch of improvements in testing
- The AnyCloud SDK which contains Wireless Connection Manager, LWIP, MBEDTLS, SecureSockets, Low Power Assistant, Secure OTA ToolKit, New Host Driver
Basic Flow
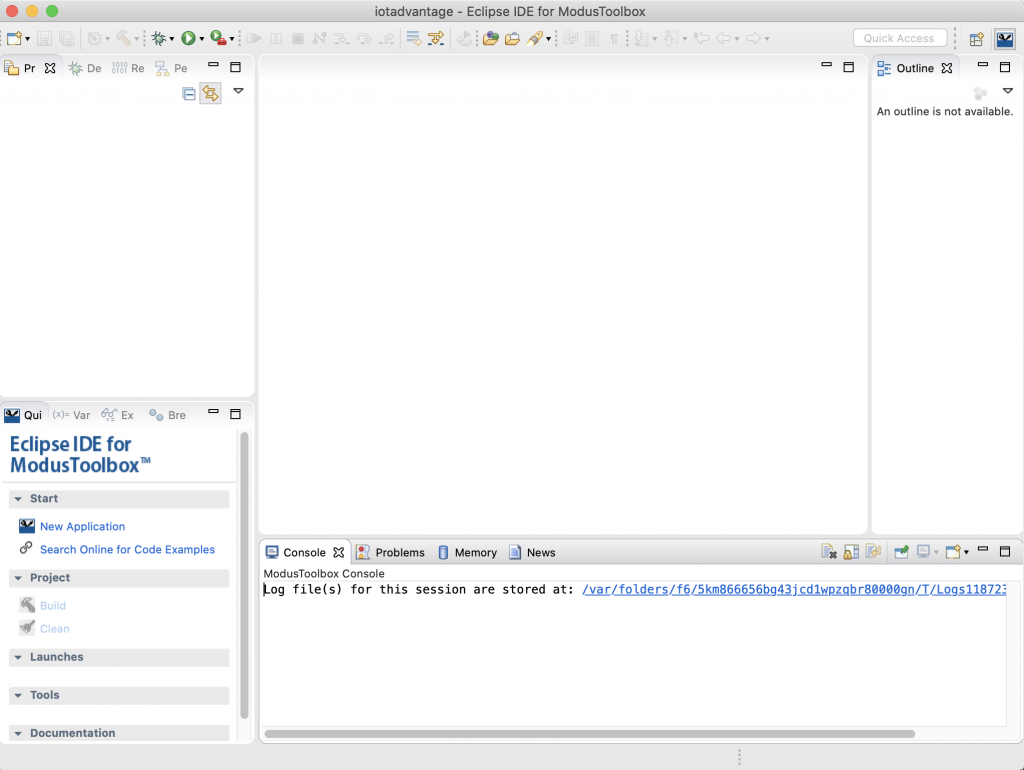
Startup the Modus Toolbox Elipse IDE…

Press “New Application” in the Quick Panel
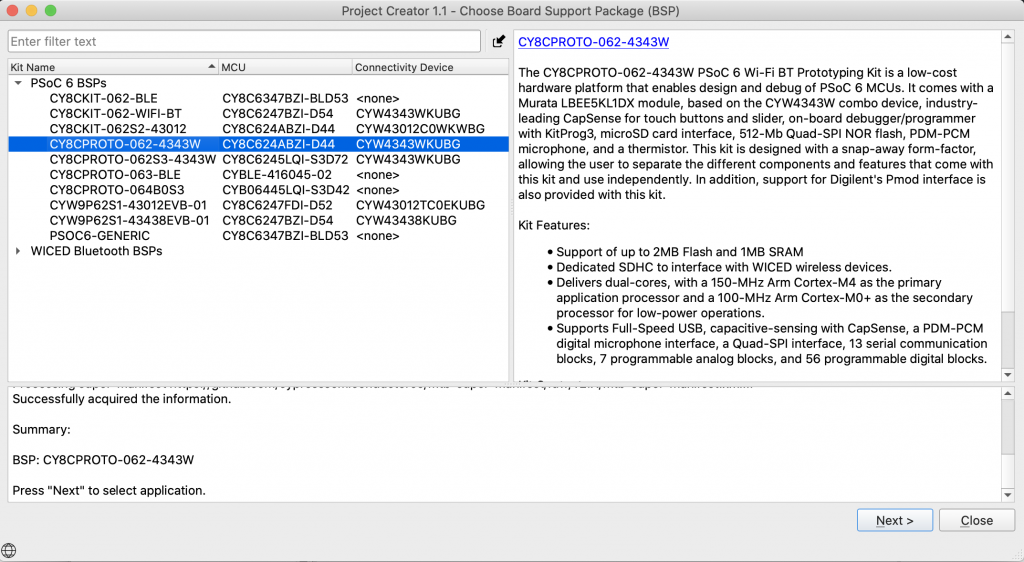
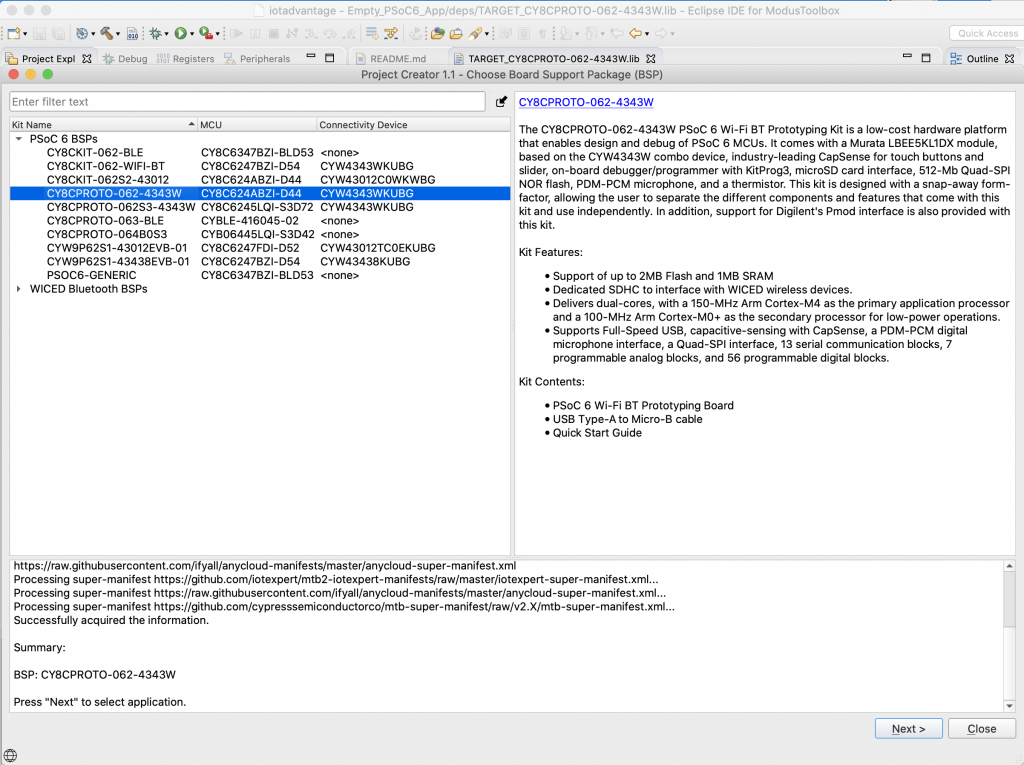
Make a new project. The development kit that I happen to be using today is the “CY8CPROTO-062-4343W”. Press “Next”
Start with the Empty project starter, notice that it goes to the GitHub on the internet because we UNCOUPLED the IDE from the SDKs and BSP (but you can do offline mode). It means we can make updates to libraries without having to change everything. In addition you can extend Modus Toolbox.
You can also start from your own template (using the import button)
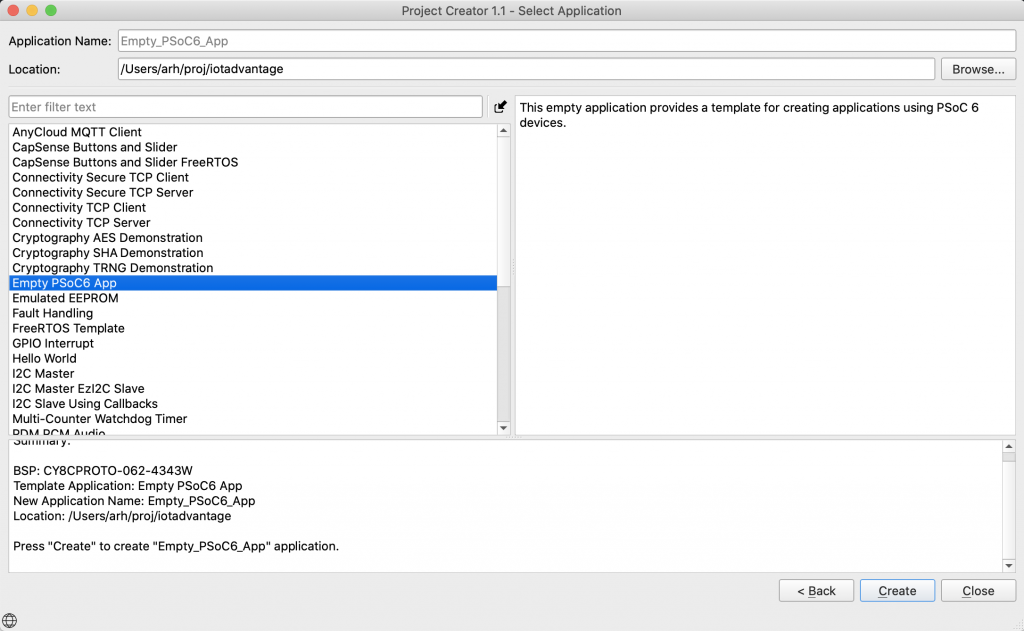
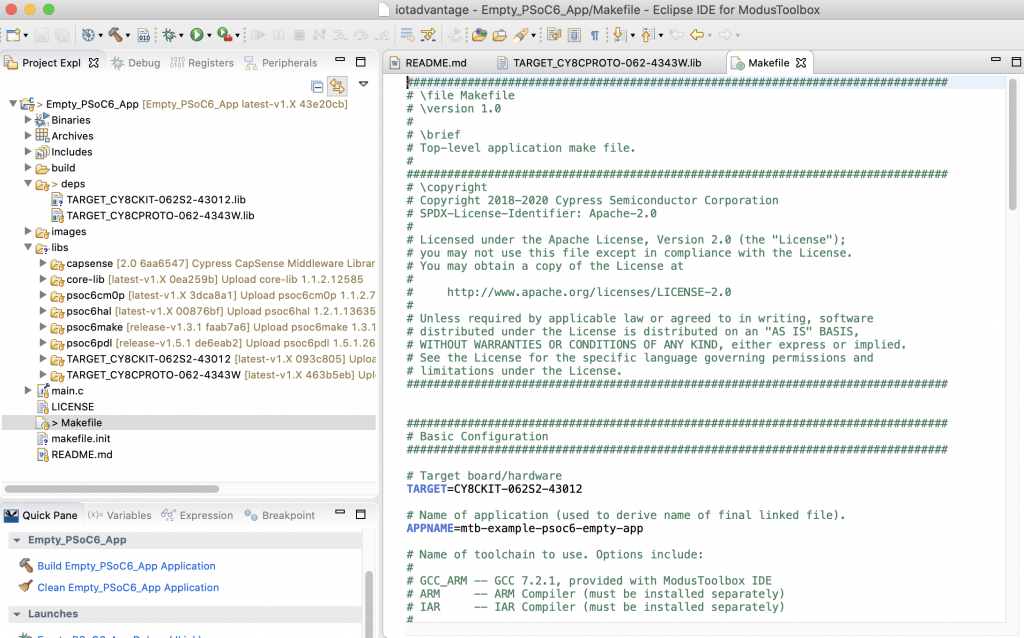
Pick the “Empty PSoC6 App” and press Create. Look at the output window … What is it doing? Simple, loading all of our code into your project as libraries.
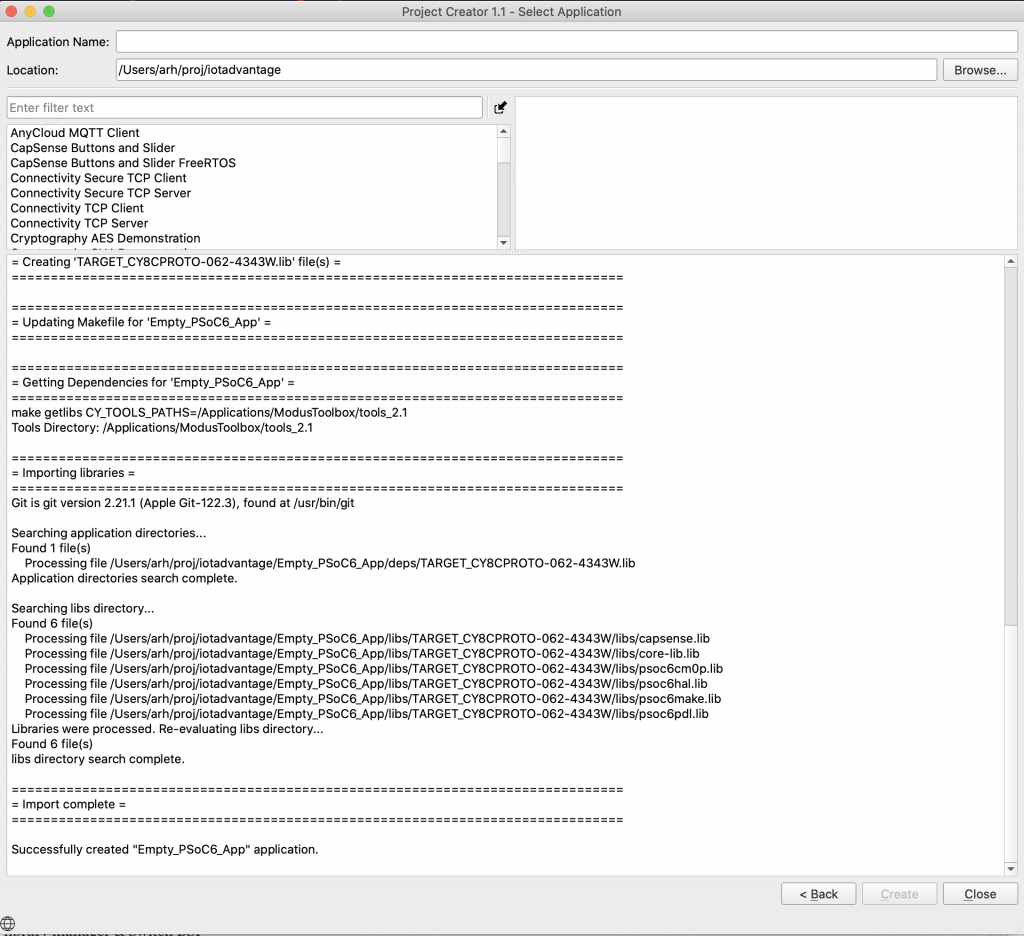
Close and notice that it takes you back to Eclipse and imports the project.
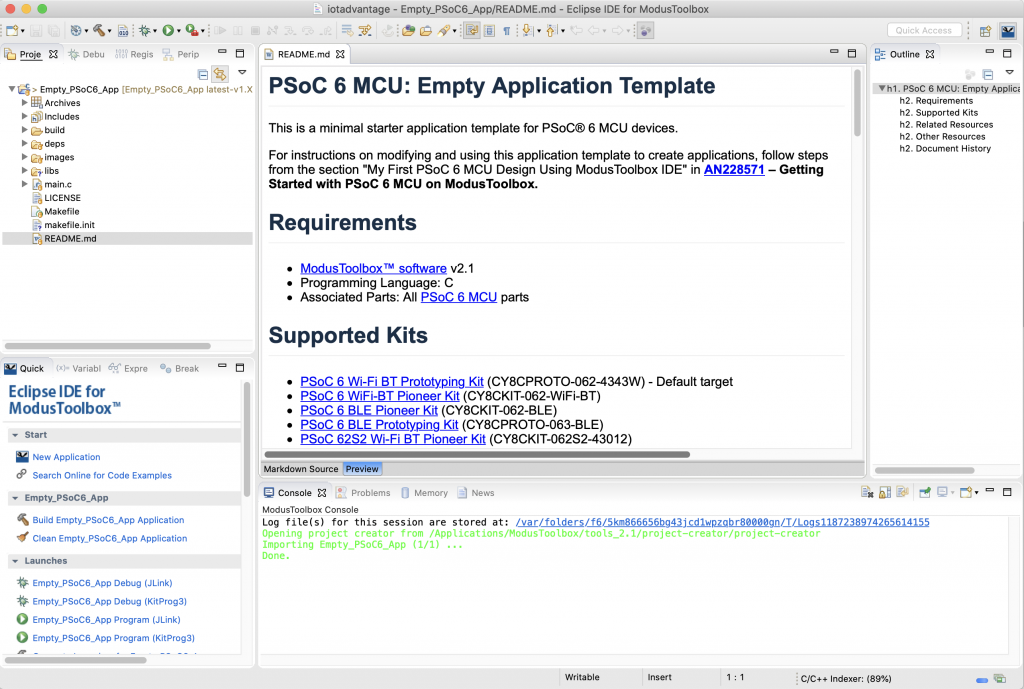
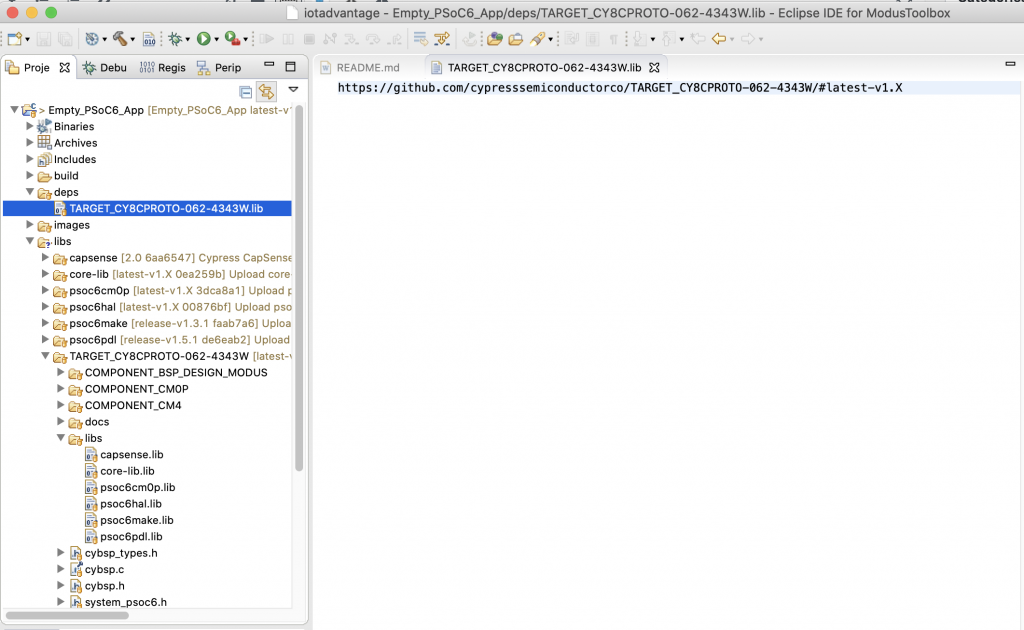
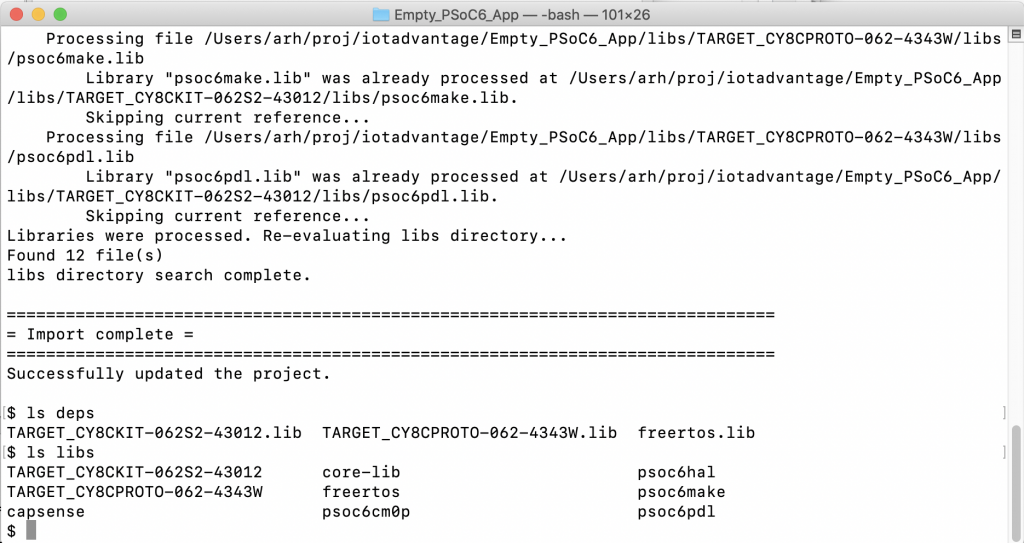
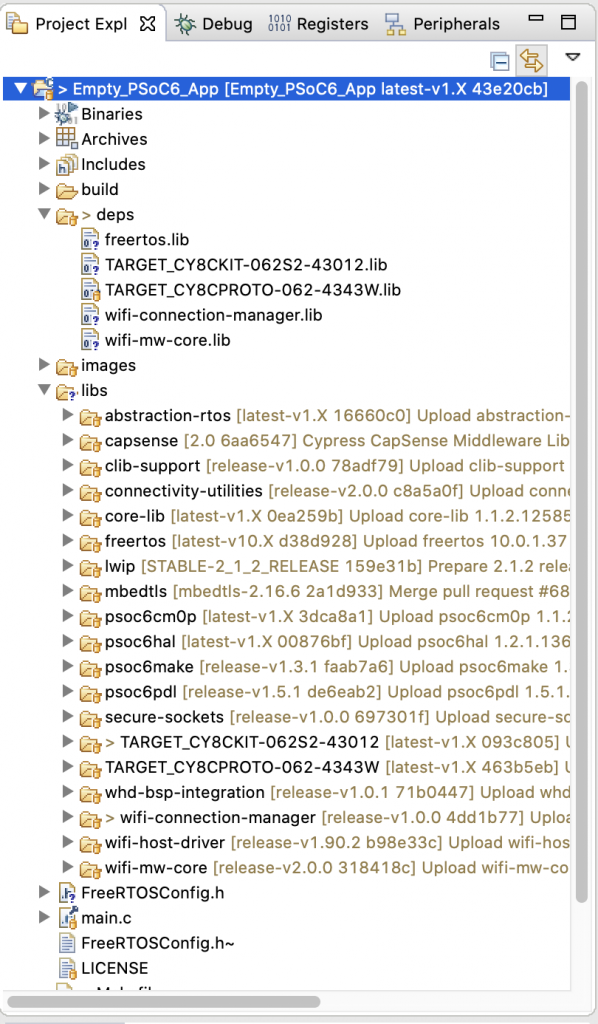
Look at the dependencies directory… then in the libraries directory. Notice that the libraries directory can get re-generated anytime by the files in the dependencies directory.
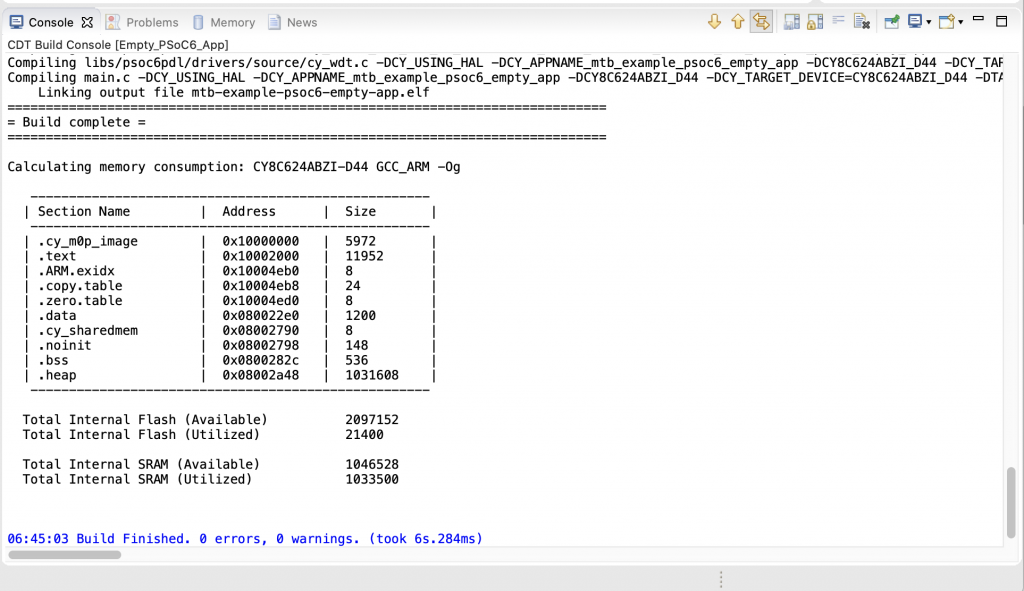
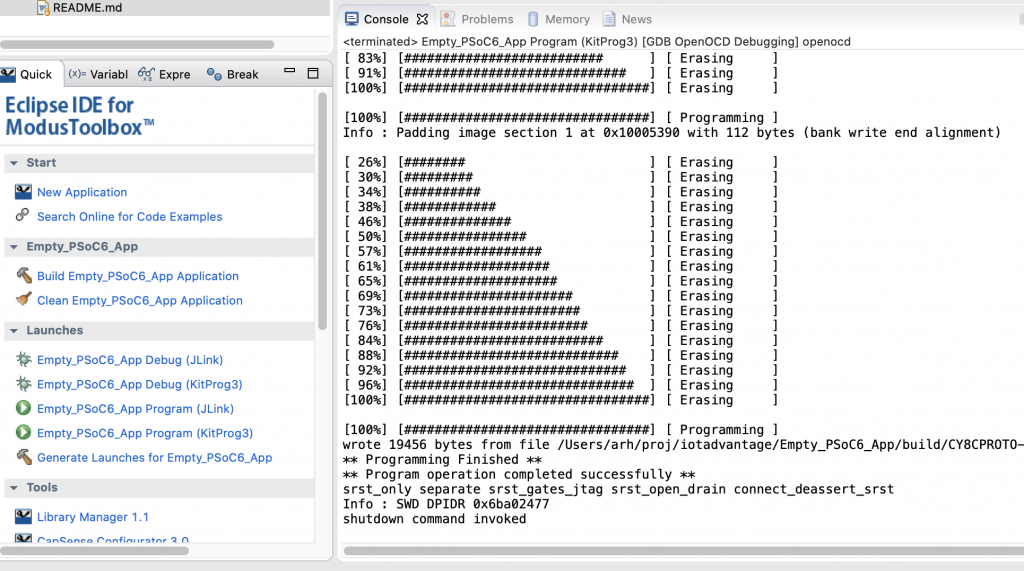
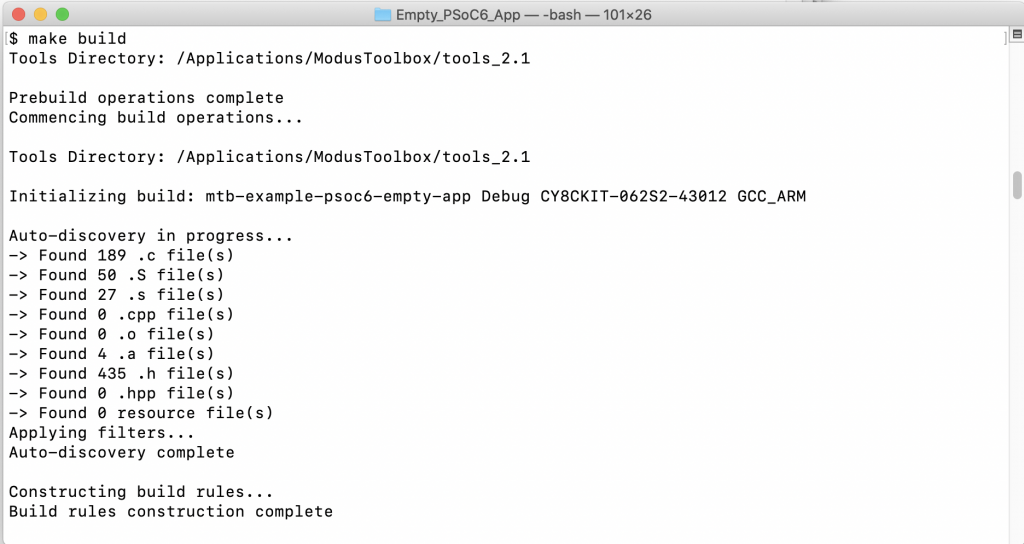
Run a build.
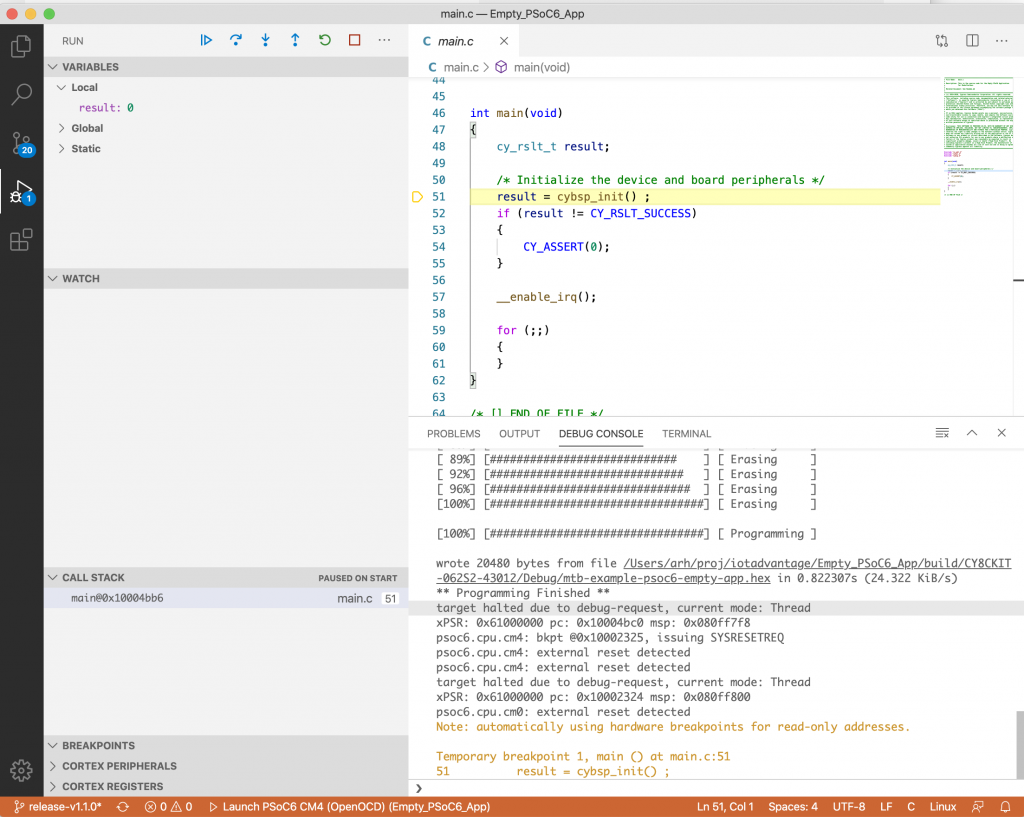
Press Program on the Quick Panel. Notice that we support JLINK and KitProg out-of-the-box.
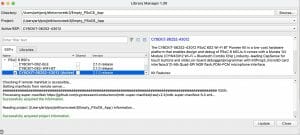
Run the library manager by clicking in the Quick Panel. This is a utility to let you manipulate the libraries in your project.
![]()
The Library Manager gives you the ability to add a new BSP to the project and change to the new BSP. Notice below that I switched to CY8CKIT-062S2-43012
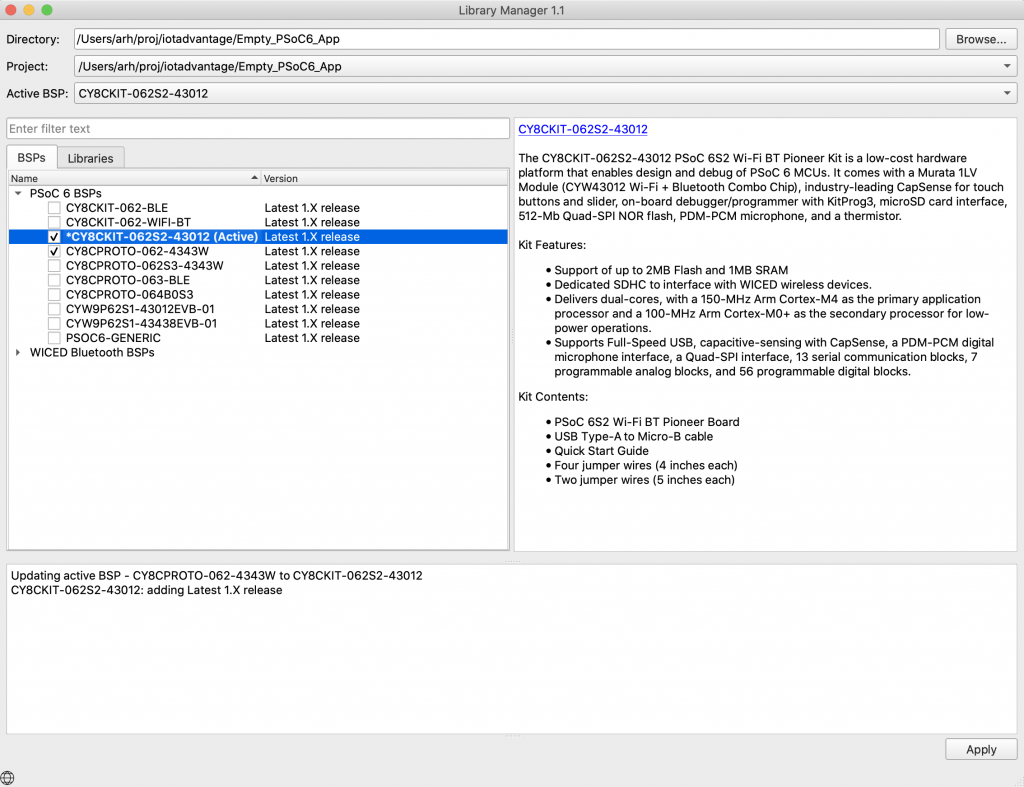
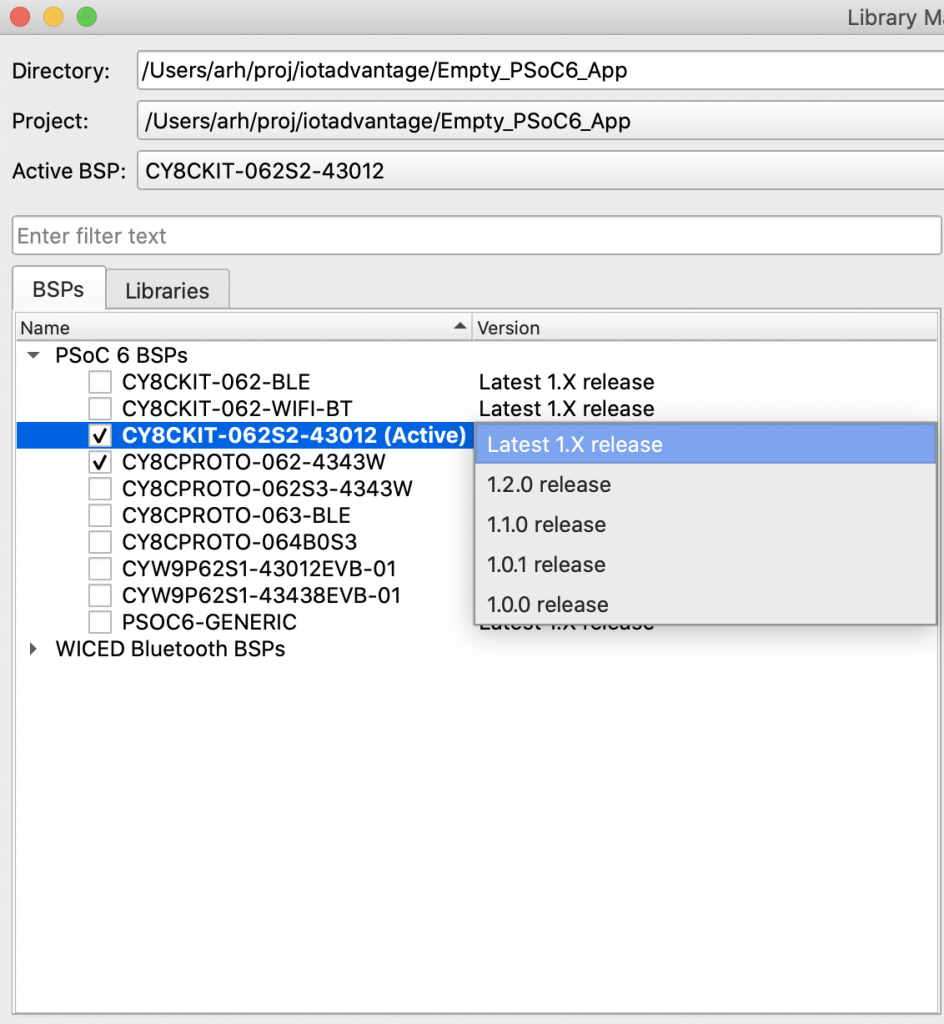
You can also upgrade latest to the latest BSP or lock to a specific version
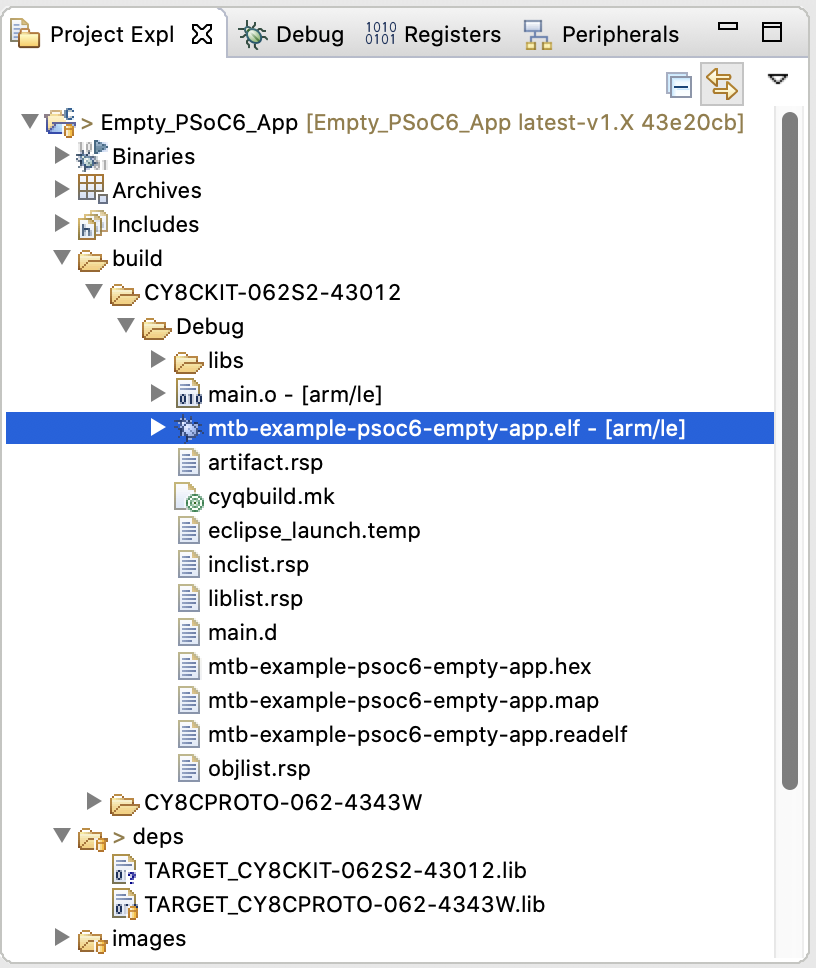
Notice that it added a file TARGET_CYKIT-062S2-43012.lib to the project. And downloaded that library into your libs directory.
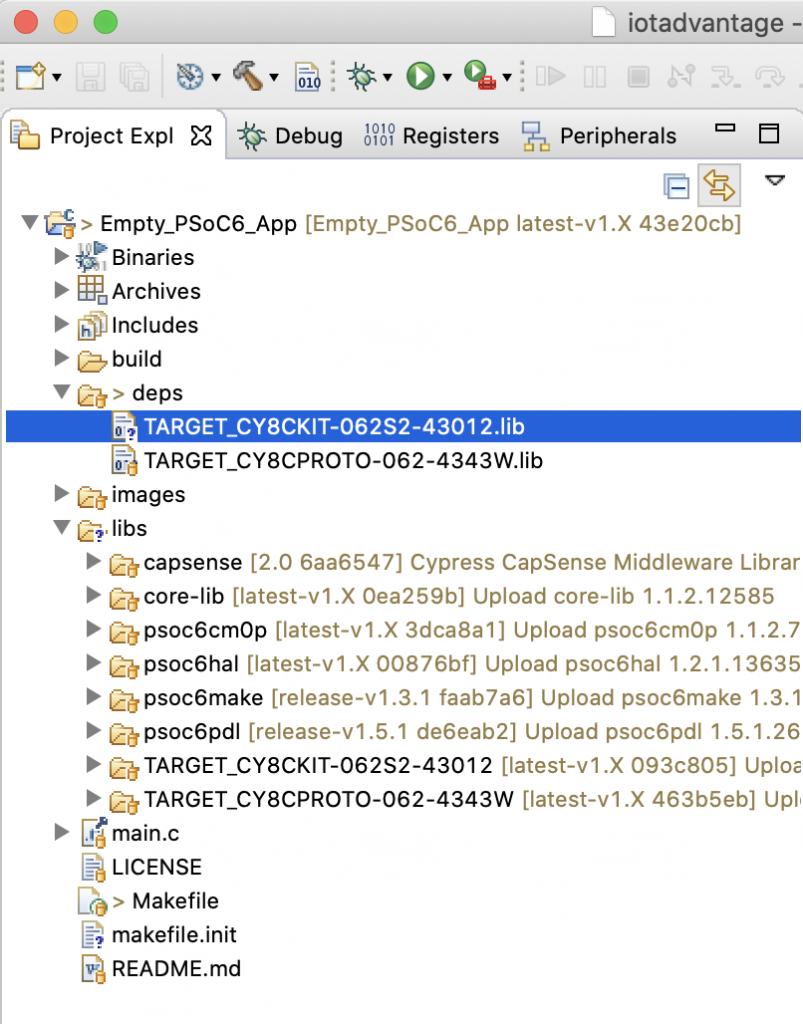
Open the Makefile. Notice the target is now the CY8CKIT-062S2-43012. You can have multiple BSPs active in your project, but only one active at a time. The inactive BSPs will be ignored by the build process.
And when you build it you will get a new Hex & Elf for that target.
Command Line
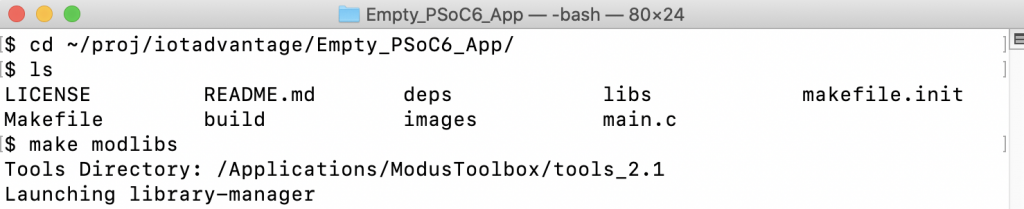
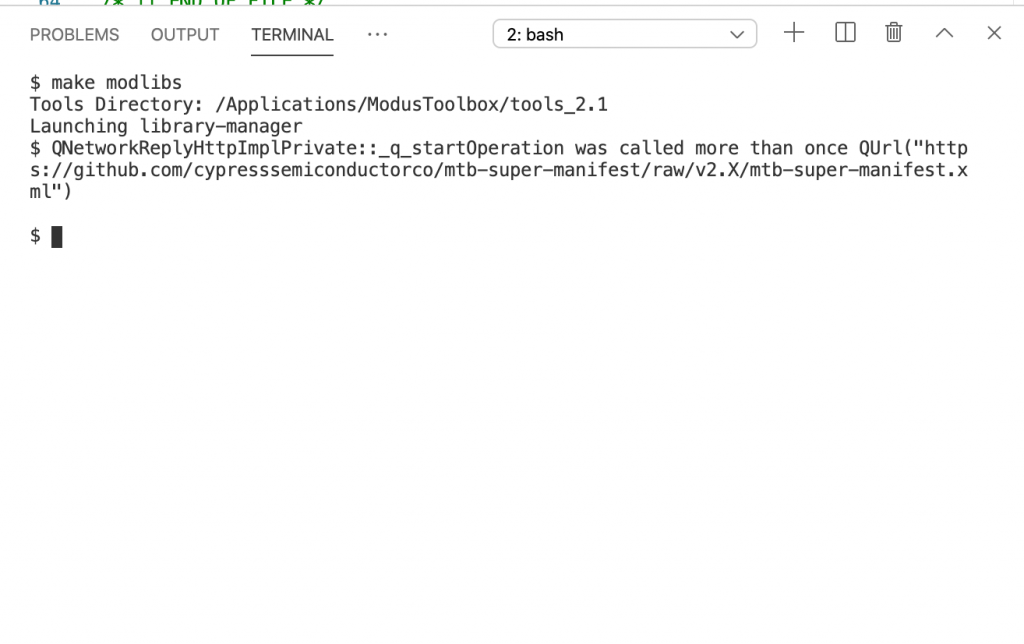
Start the command line interface, just a terminal in Mac or Linux. On Windows you can run the program “<user>/ModusToolbox/tools_2.1/modus-shell/Cygwin.bat” Change directory to your Workspace / Project folder. Then run “make modlibs”
This starts up the library manager (the exact same one you used from inside of Eclipse. This is a standalone GUI tool which runs on Mac, Linux and Windows. Click on the Libraries tab, then add FreeRTOS
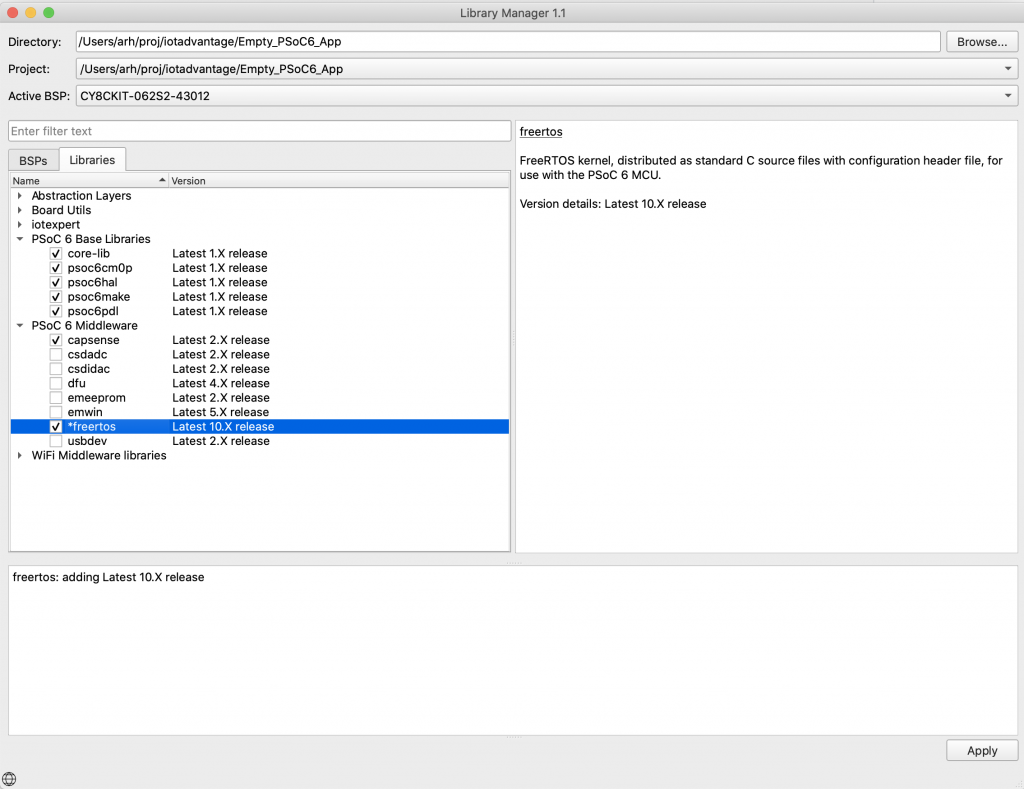
Look at the deps and libs directory
Now you can run make build
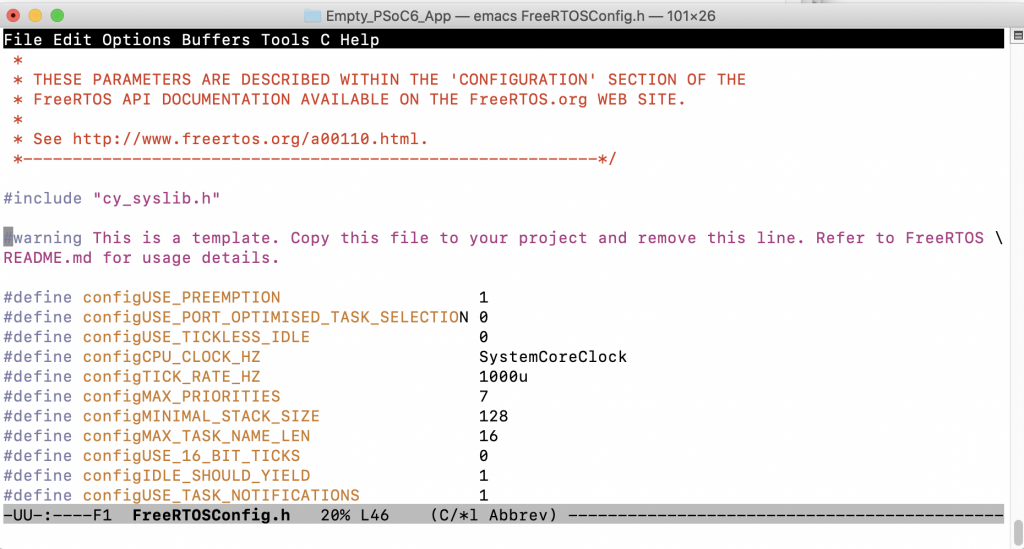
You might have noticed that there were some warning messages during the build. This is because the FreeRTOSConfig.h we provide has a warning in it saying that you should customize it.

Lets fix that by moving the template into our project with “cp libs/freertos/Source/portable/FreeRTOSConfig.h .” Then I will run emacs and fix the #warning line
When I run “make build” everything is better
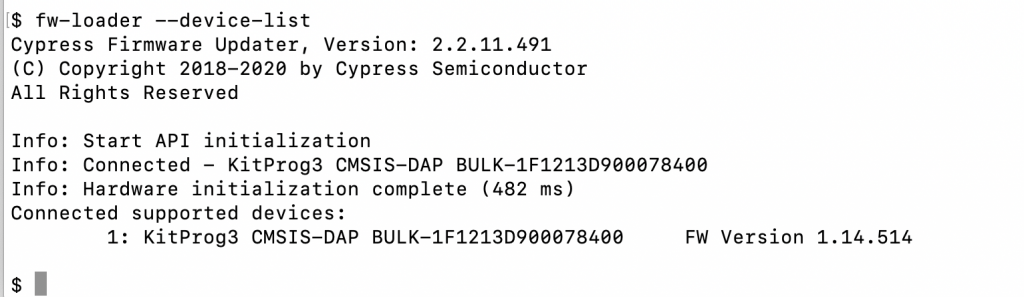
Now I can run “fw-loader –device-list” (on your computer you can find it in the Modus Toolbox directory) and it will show me that I have the development kit attached to this computer
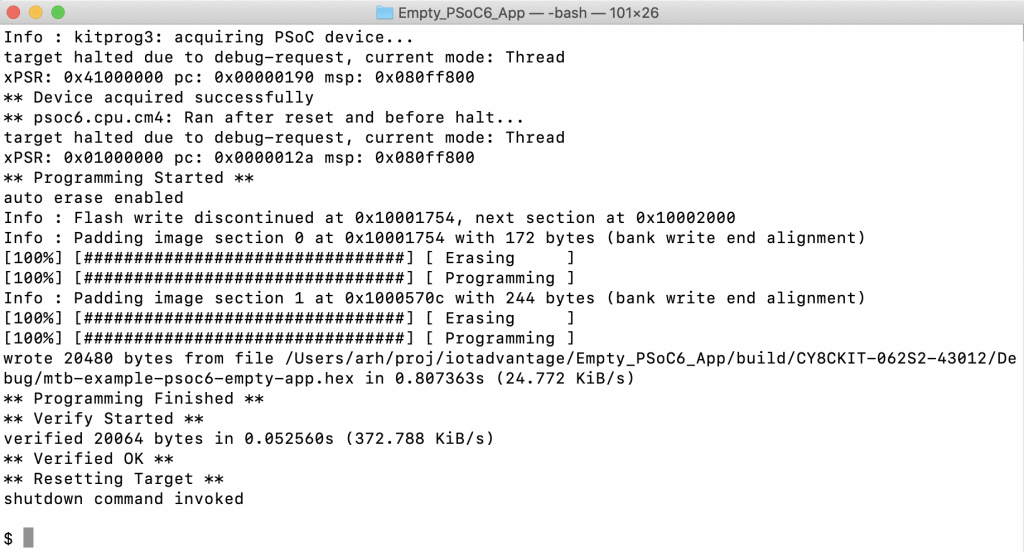
Then I can program with “make program”
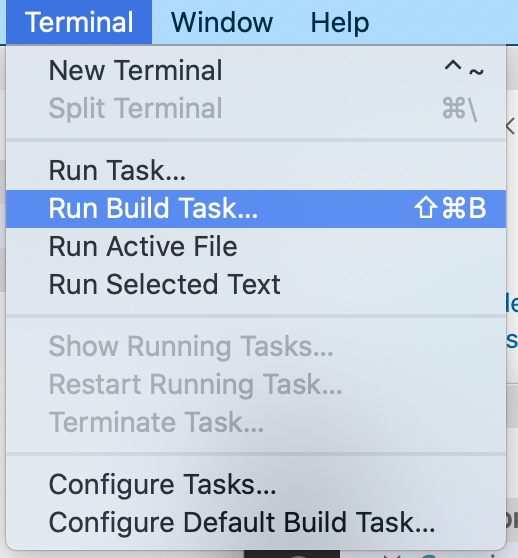
Visual Studio Code
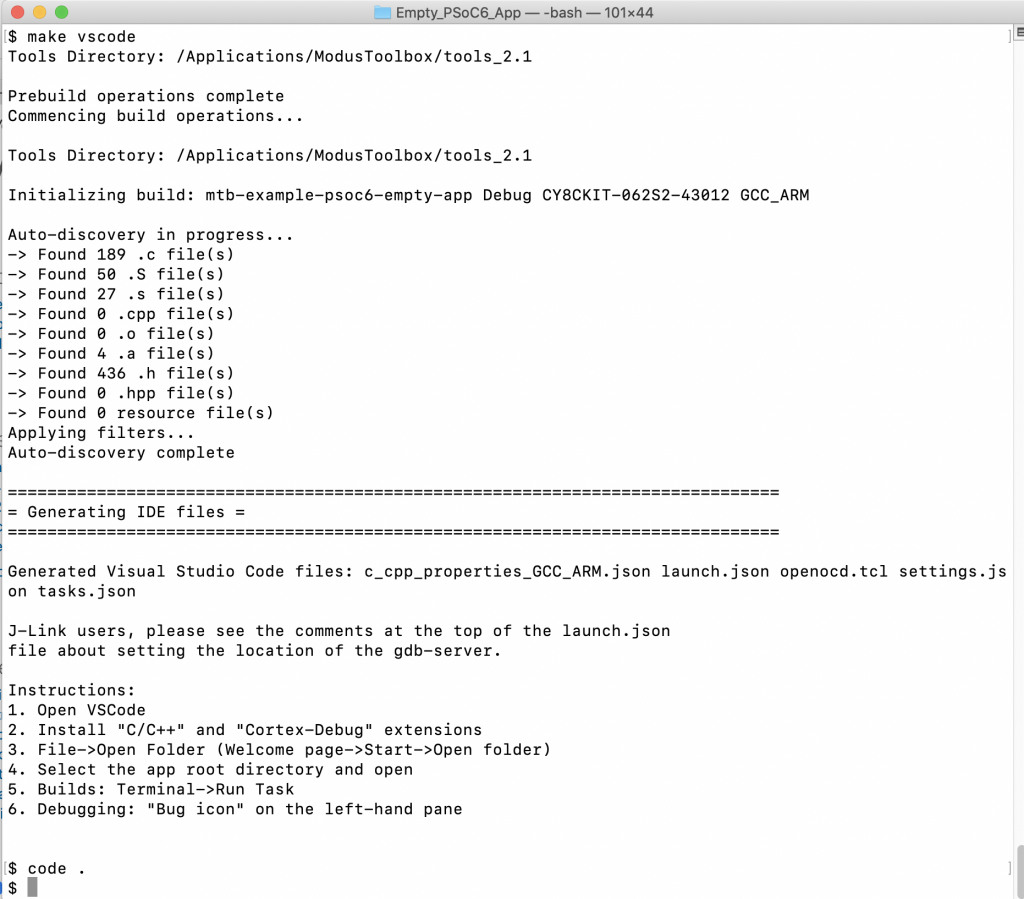
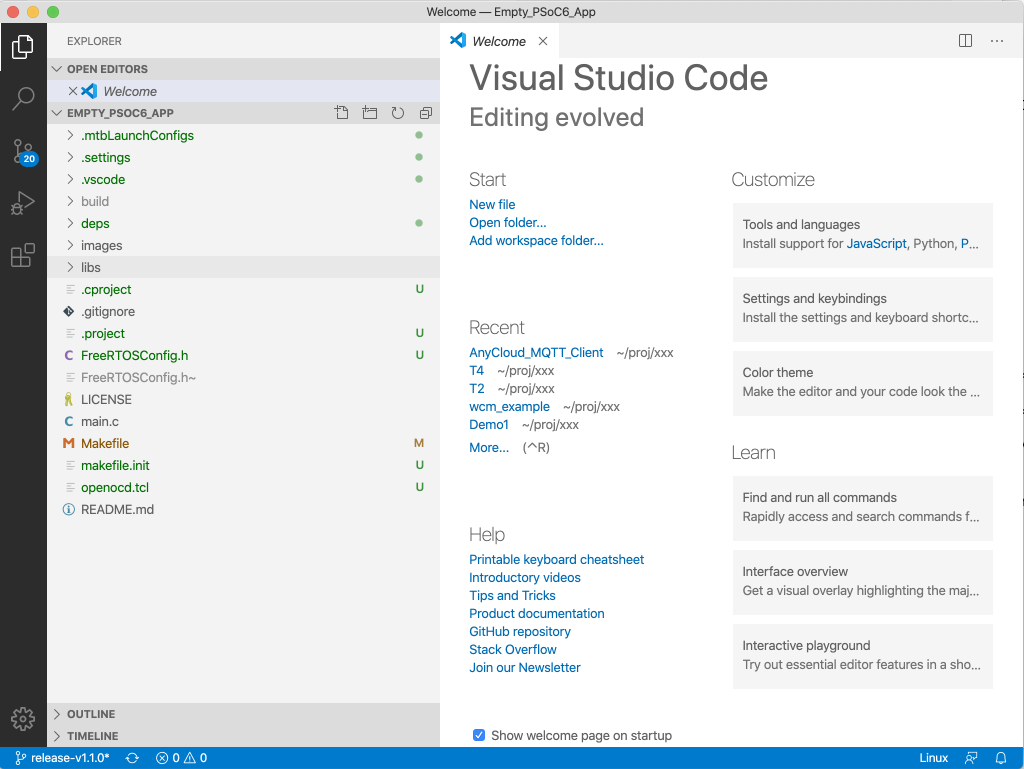
You can also use Visual Studio Code with your project. To do this run “make vscode” which sets up the files needed to make Visual Studio Code work. Then you can run Visual Studio Code with the command “code .” or you can just open the directory from the Visual Studio Code file menu.
And in Visual Studio Code you can…
… build with “Run Build Task…”
Pick out the build that you want (in this case “Debug”)
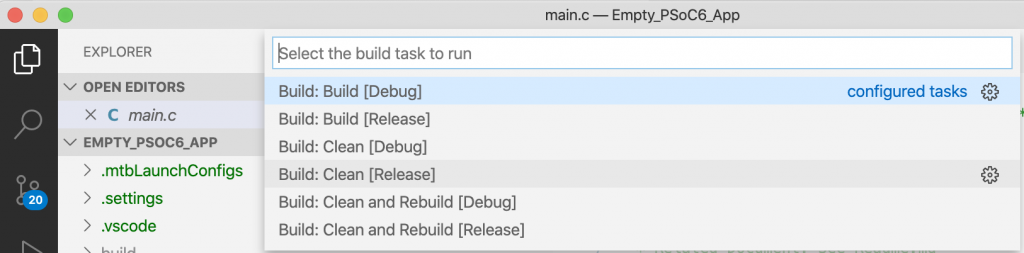
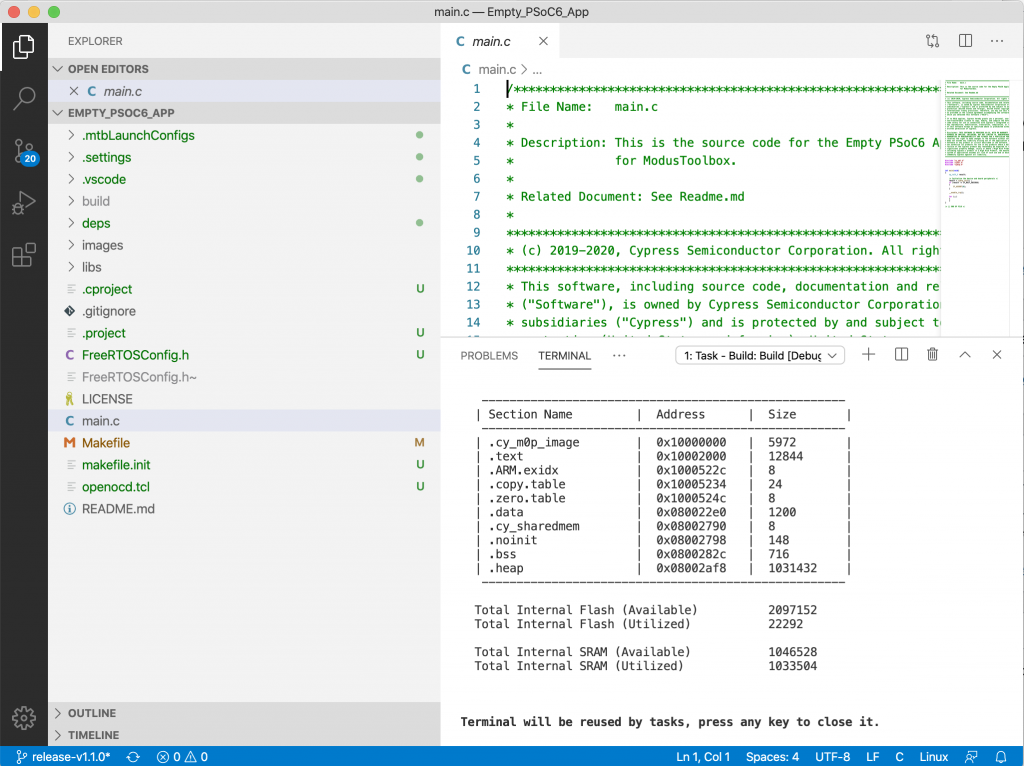
The make build system will “do the needful”
Then you can actually Program the project and start the debugger with “Run -> Start Debugging”
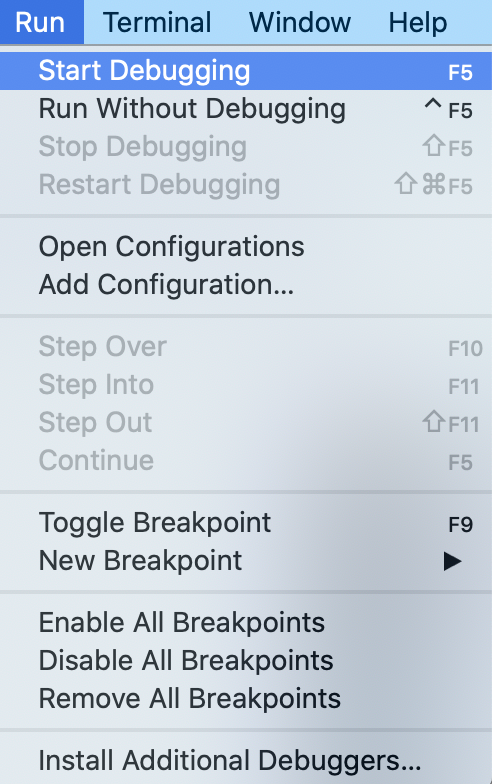
Which will program the chip and start up the debugger. Then it will halt at main.
Connectivity Core Middleware
Now run “make modlibs” so we can start to add connectivity to the project.
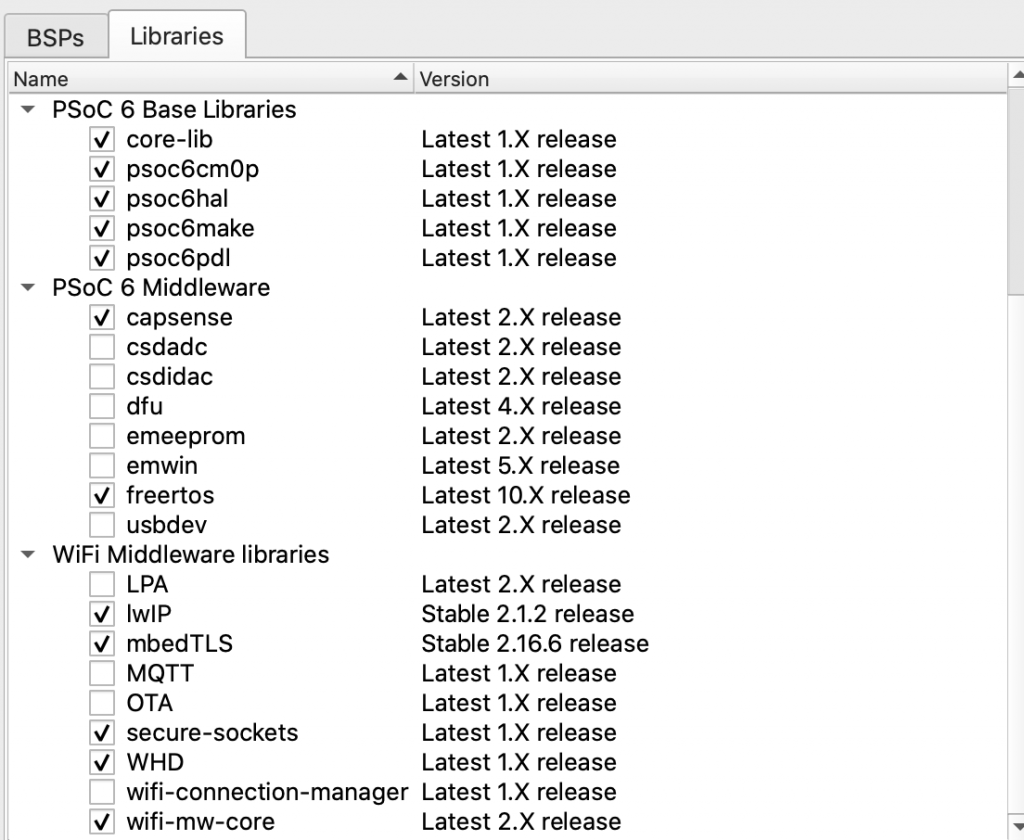
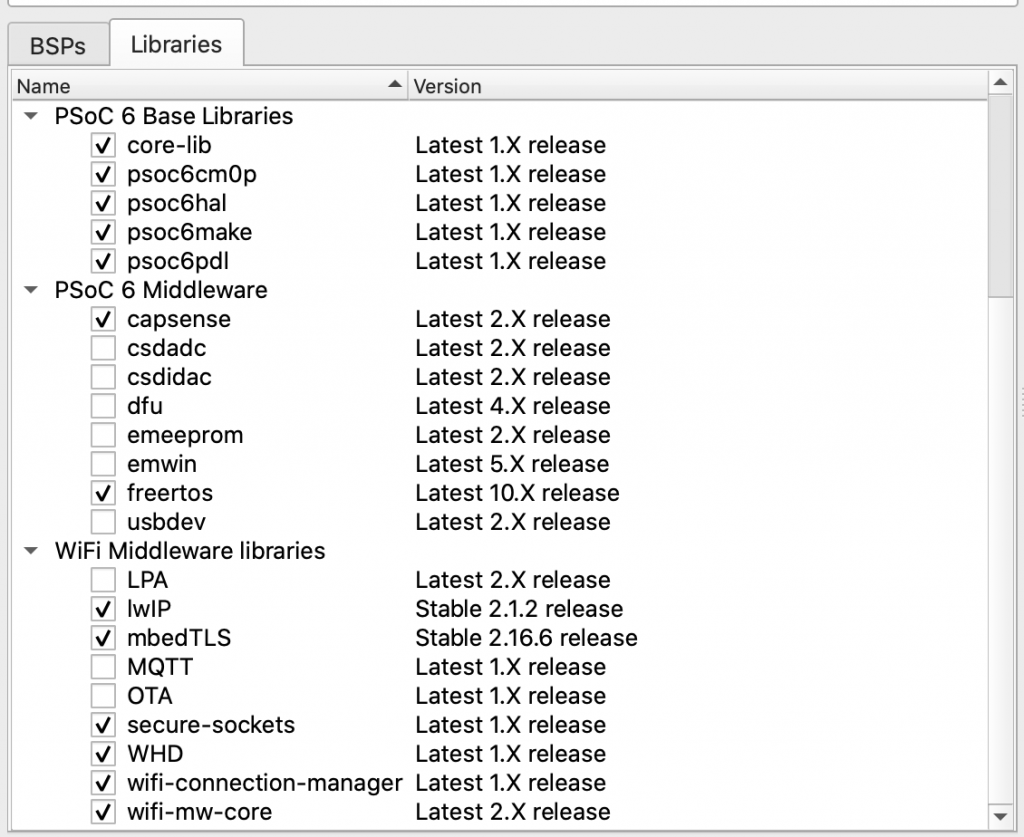
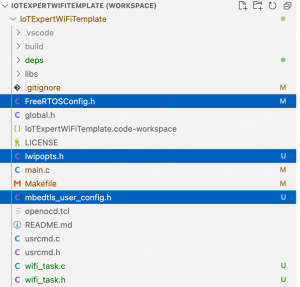
Notice that on the library tab you can see a bunch of “WiFi middleware libraries”. Choose “wifi-mw-core” and press apply
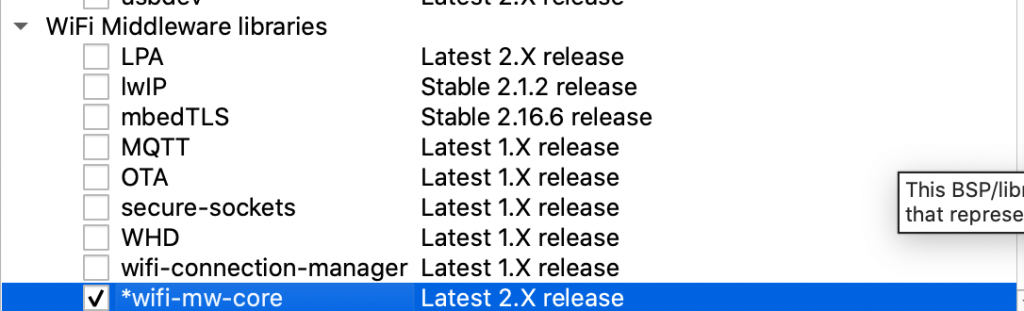
Notice that it adds lwip, mbedTLS, secure-sockets. The lwip, mbedTLS come from GitHub. We aren’t hosting them, but we do the configuration for you.
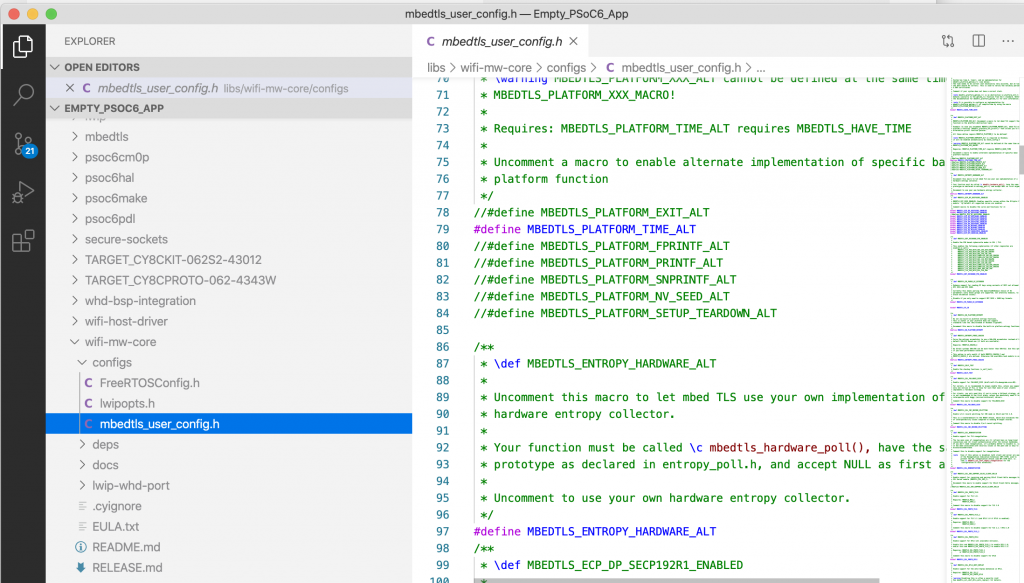
Look in mbed_tls_user_config.h
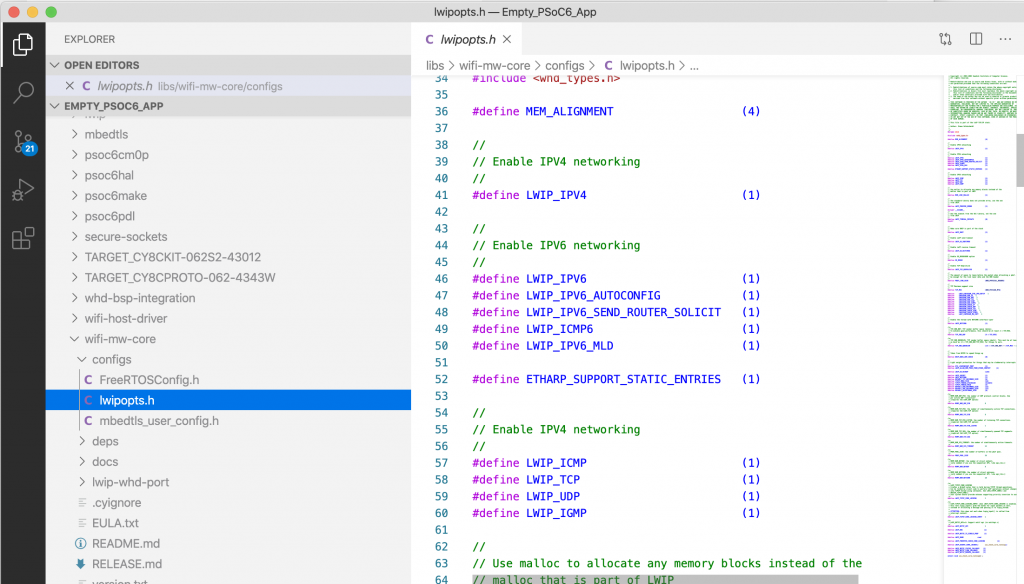
And lwip_opts.h
Go back to the library manager and add the WiFi Connection Manager. [edit: I also should have checked LPA here]
Find the doc directory for the connection manager directory. Then open the file “api_reference.html”
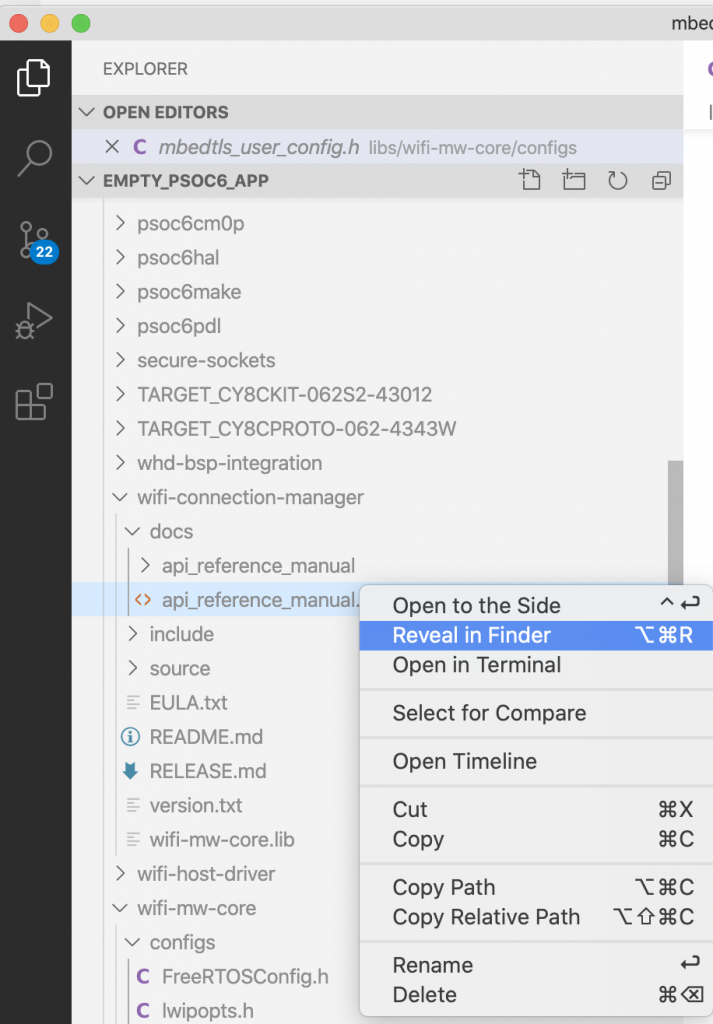
Double click on it and open it up in the web browser. 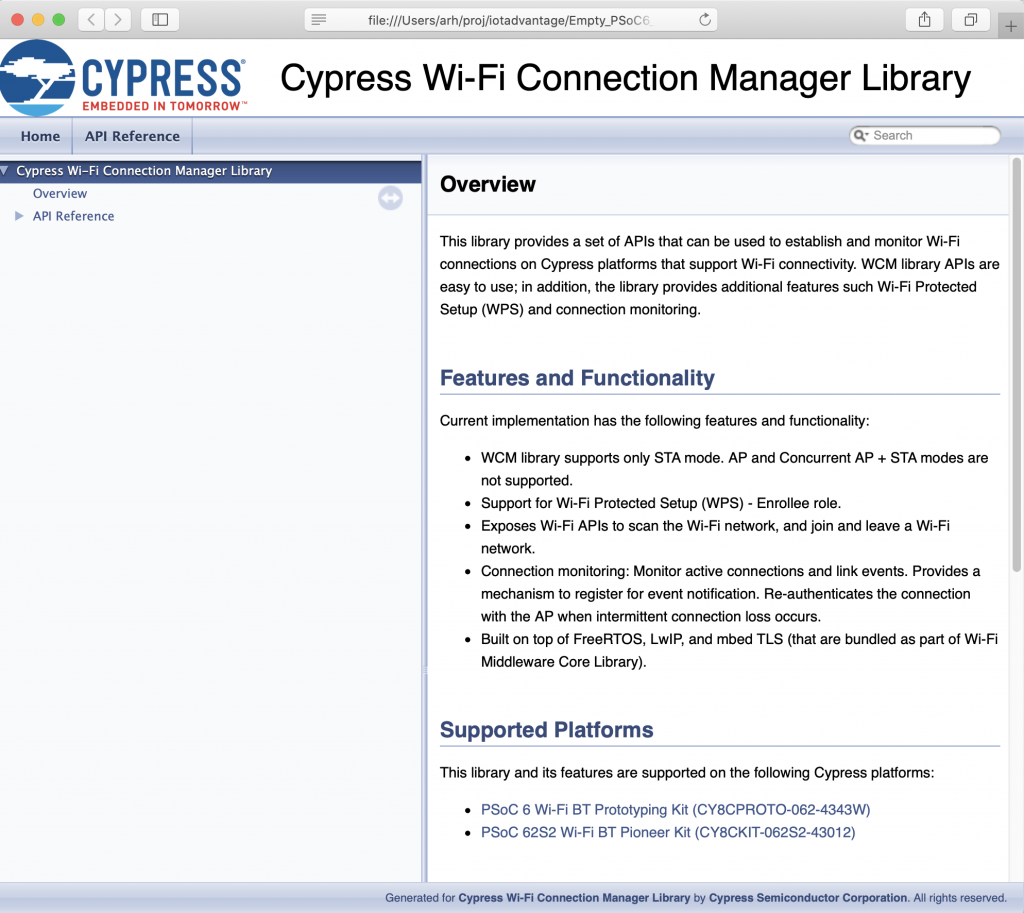
Low Power Assistant
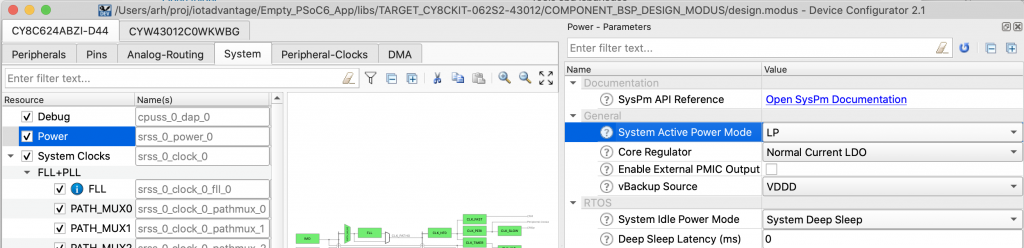
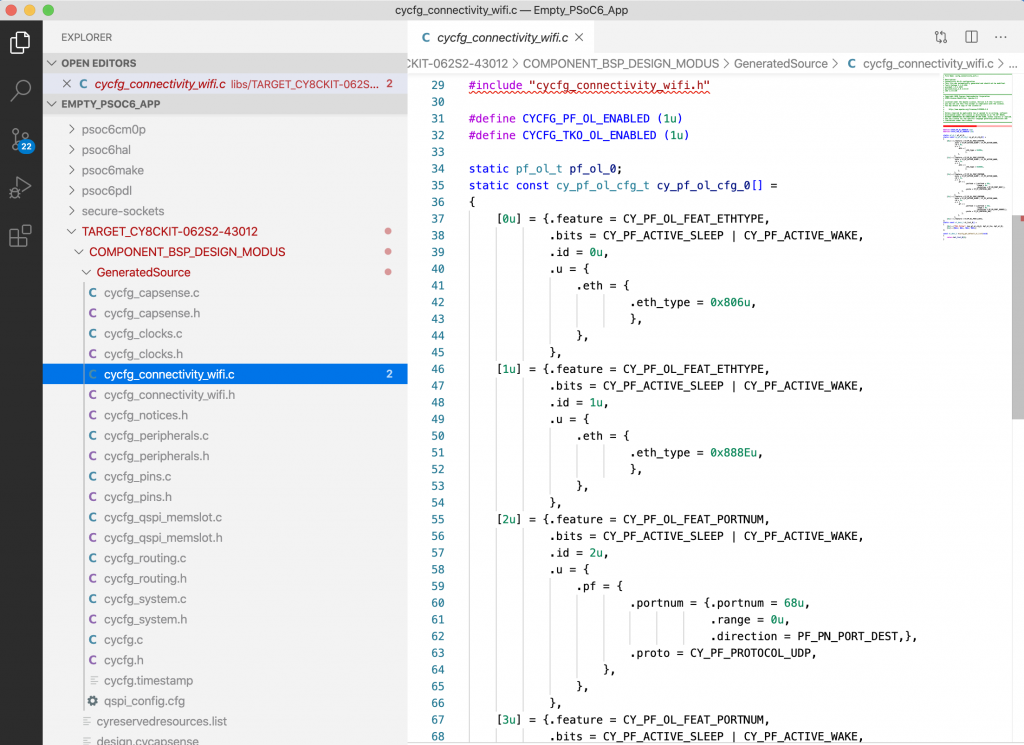
The key to low power is to STAY ASLEEP, but when you wake up, get after it! The pairing of PSoC 6 & 43xxx is key to making super lower power projects. We give you a tool called the “Low Power Assitant”. To run it start up “make config”. Then go to the “System->Power” tab.
Now click on the “CYW4…” tab. Go to the “Power” section. Then enable “wi-fi”
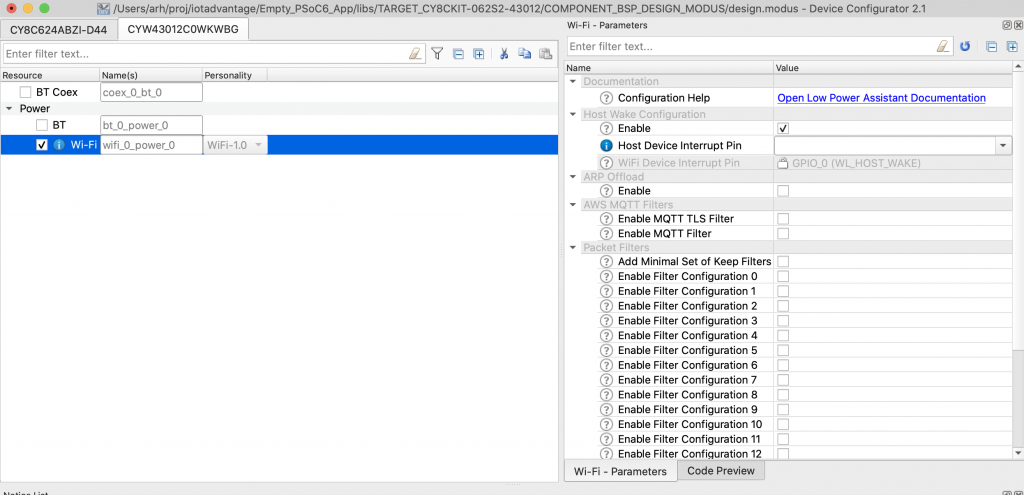
We give you a set of default filters which you can enable with “Add a Minimal Set of Keep Filters”
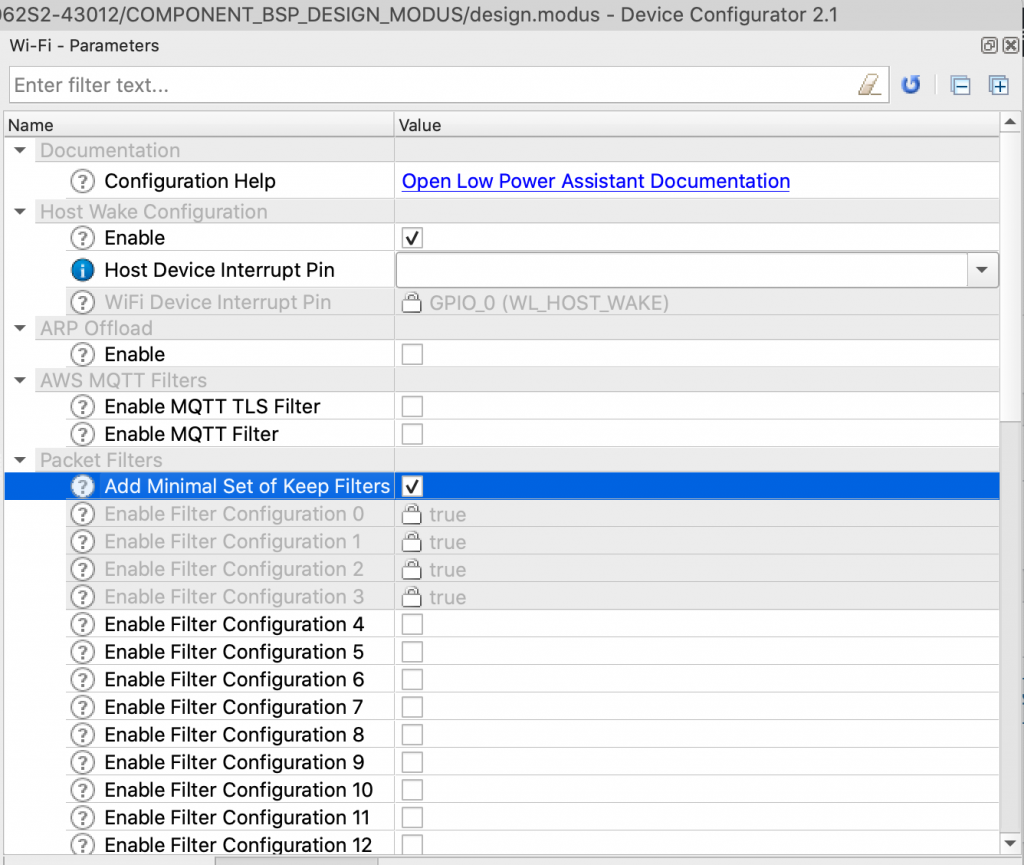
Look at the Preview tab and you will see a preview of the code that will be generated for you.
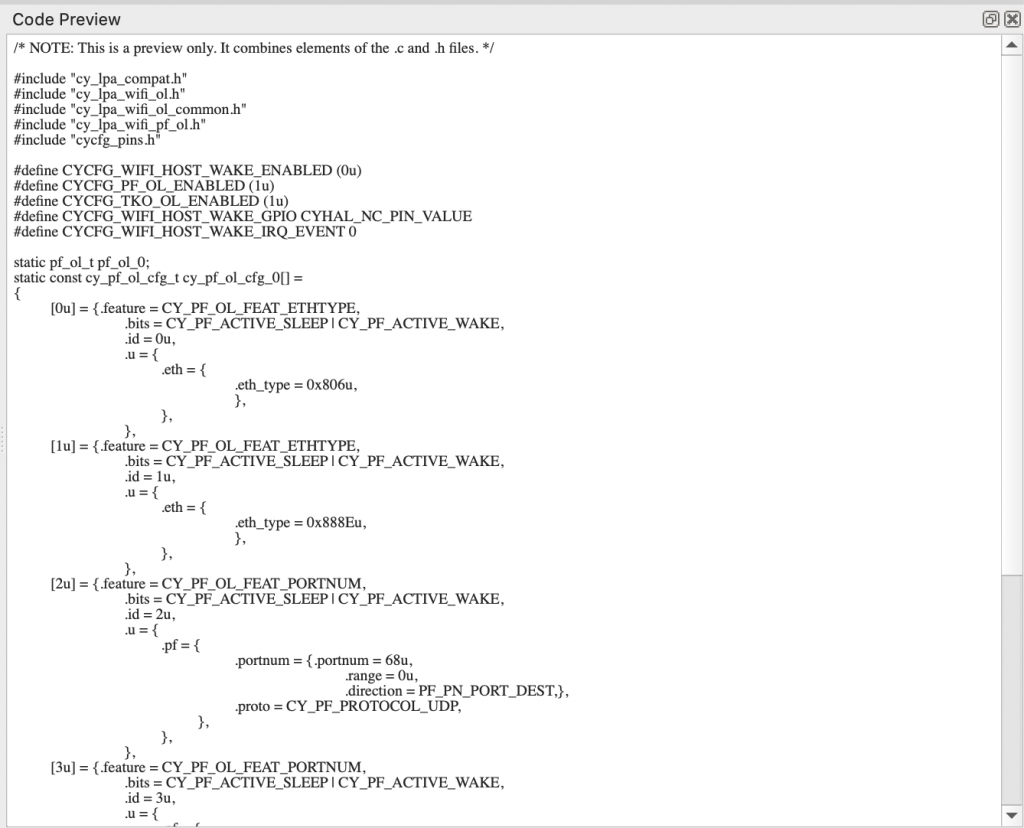
Hit save, now you can look at the actual generated code in your project. It is just normal C-Code.
AnyCloud Libraries
Quit Visual Studio Code and go back to Eclipse. This project has all of the stuff that you changed and is still a perfectly functional Eclipse project.
Now lets create a new project. Click on “New Application” in the Quick Panel.

Choose the “CY8CPROTO-062-4343W” BSP
And pick the “AnyCloud MQTT Client” starter project.
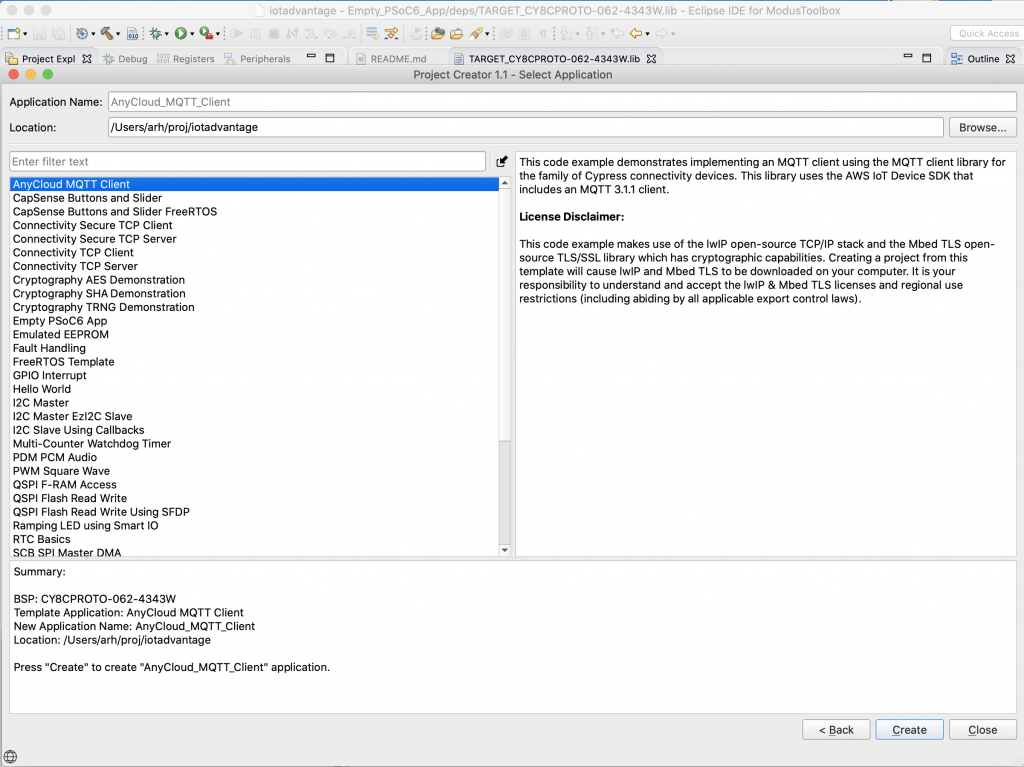
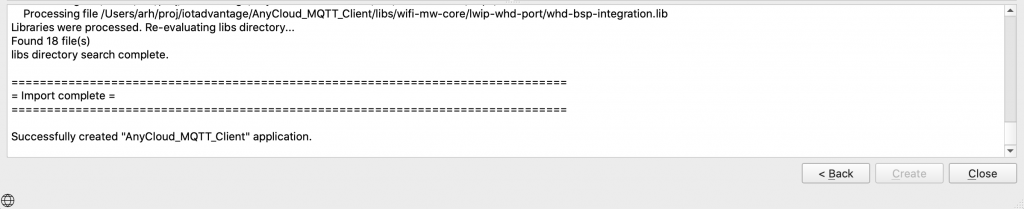
After a flash you will get a message like this in your New Project Wizard window. Click “Close”
And you will have the project
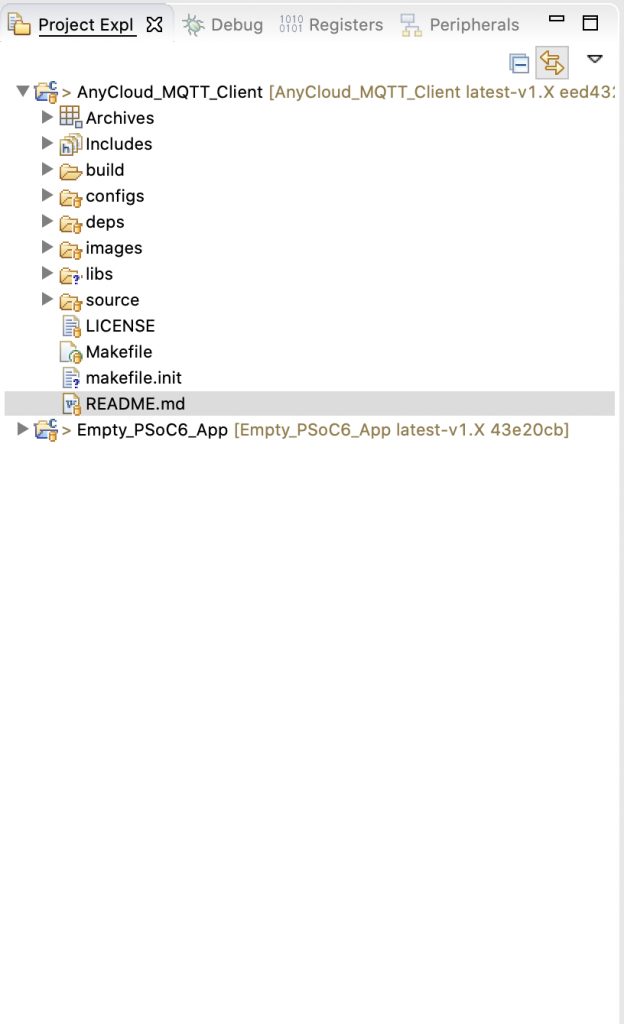
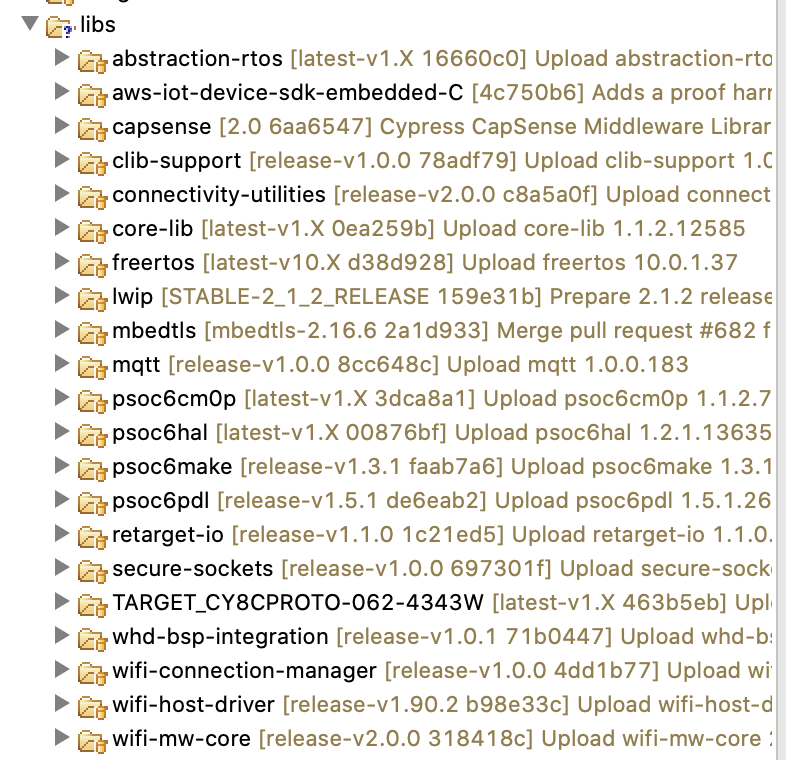
Notice that you now have some new libraries. Specifically:
- aws-iot-device-sdk-embeded-c
- mqtt
- secure-sockets
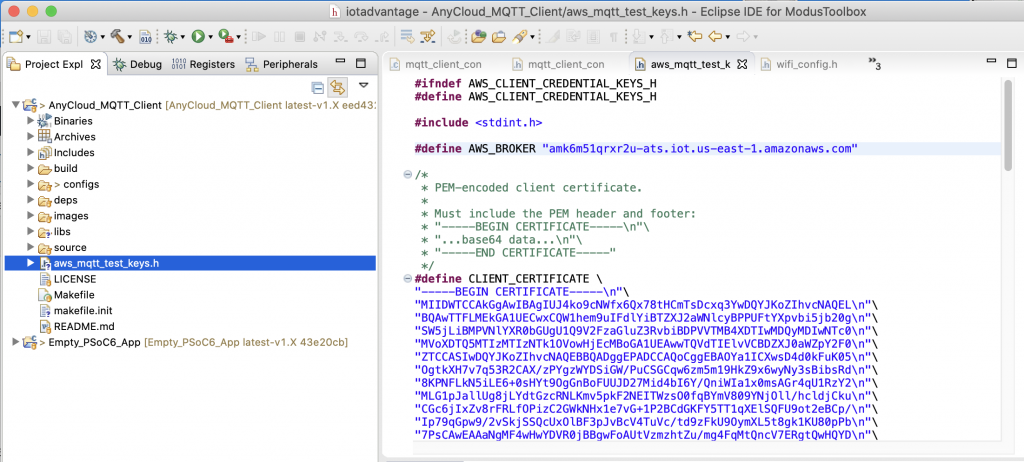
In order to make a connection to the Amazon Cloud you need to have some cryptography keys. When you create “things” on Amazon you will be given the chance to download them. I did this earlier, so I will just copy them into my project.

Now you can see the file in the project. Notice that I also defined “AWS_BROKER” to be the DNS name of my Amazon WebService IoT MQTT broker.
Edit the “mqtt_client_config.h” to include your keys. And to define the MQTT broker address. 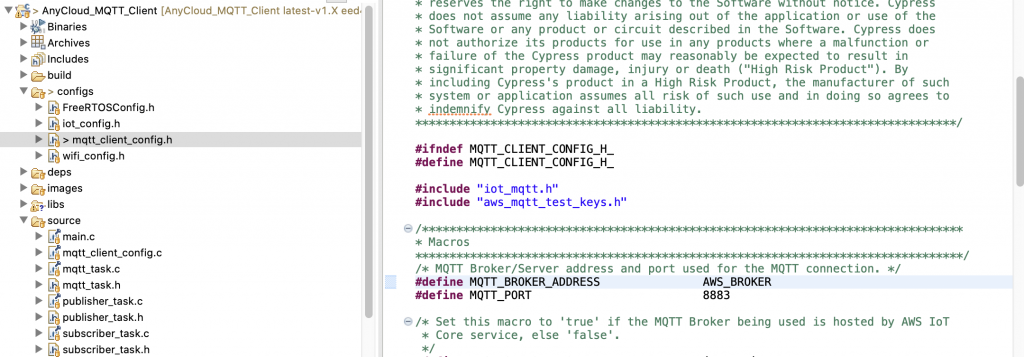
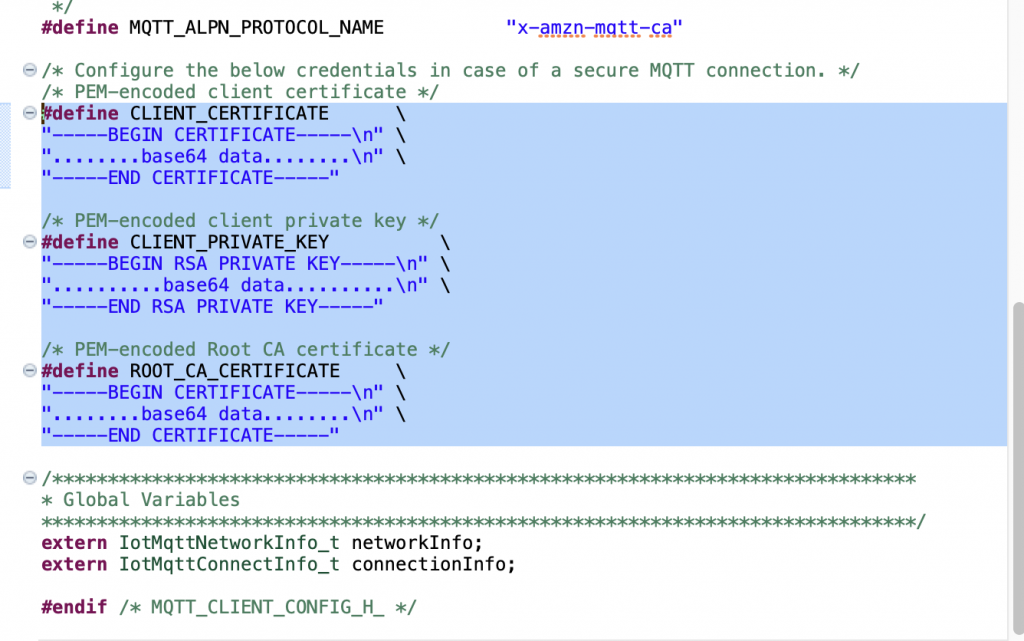
Get rid of the unused keys definitions:
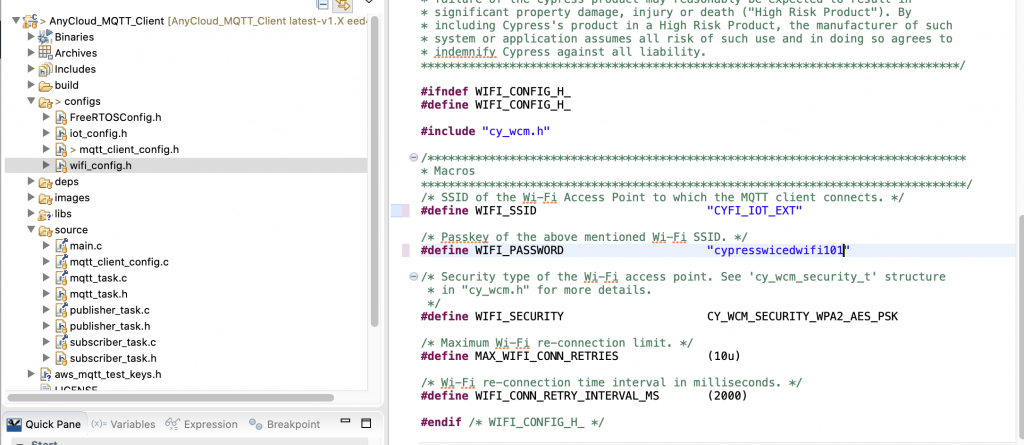
Edit the WiFI SSID and Password in “wifi_config.h”
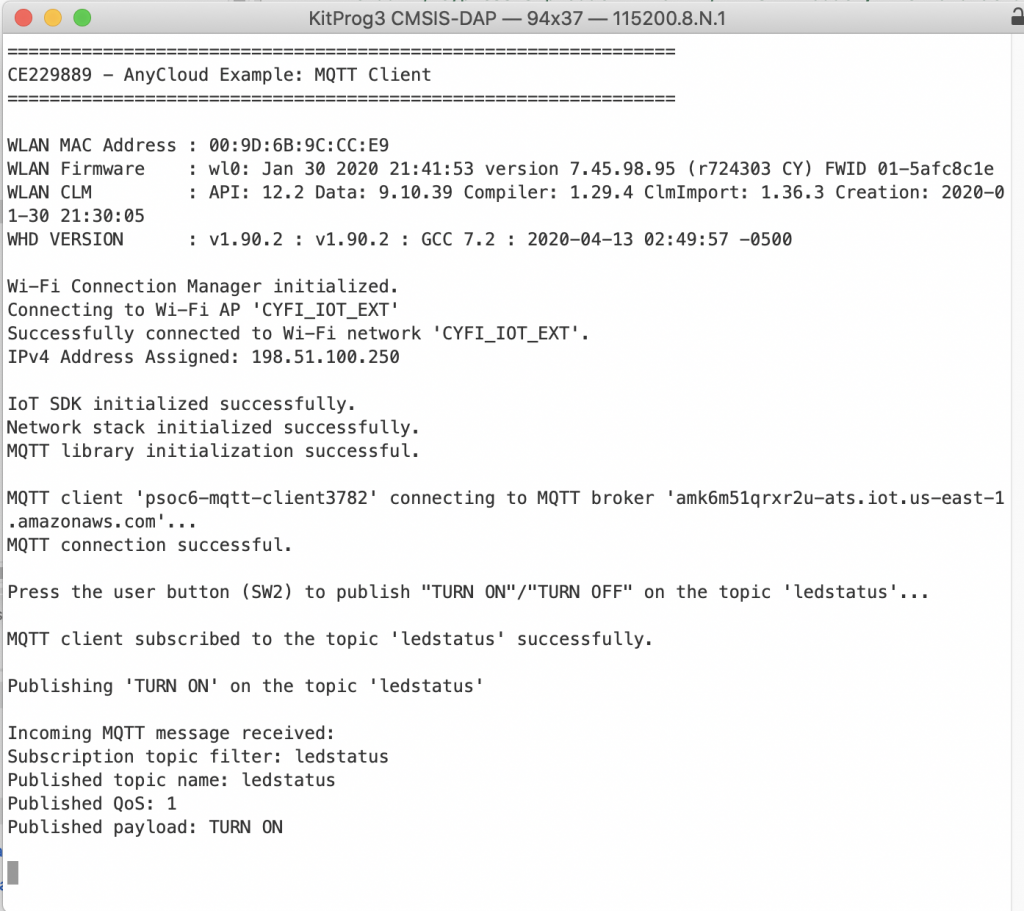
Finally program it. Once it is programmed you can see the output on a serial terminal
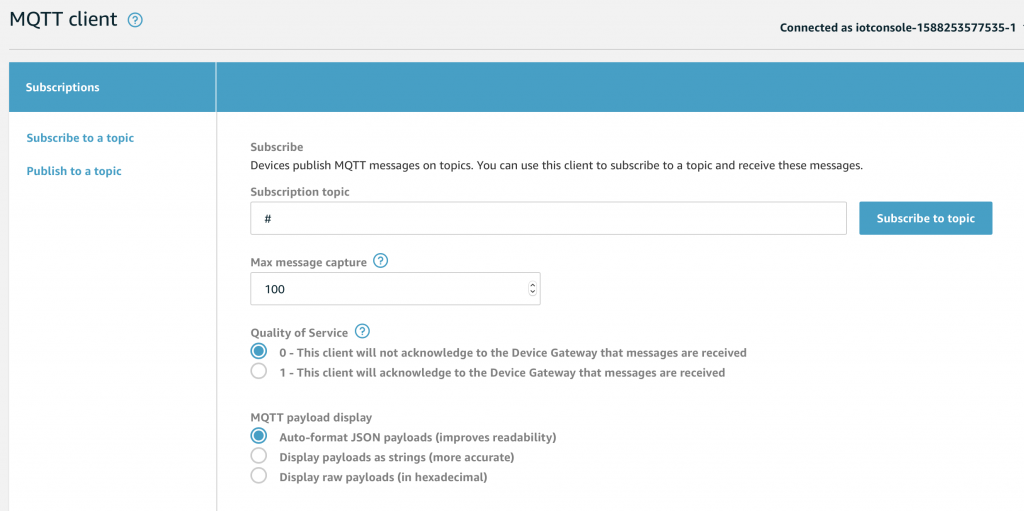
And on the AWS Web Console I can subscribe to the topic.
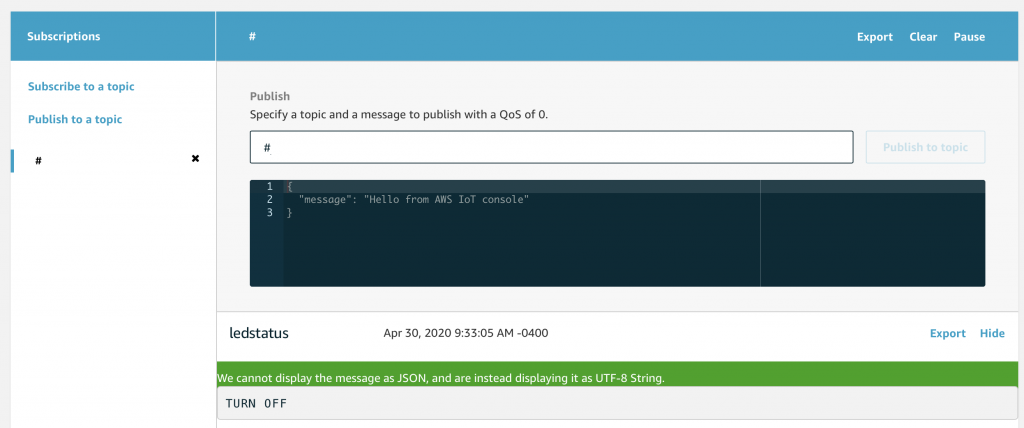
And I will see the button press messages:
1 Comment
Hi Alan,
I haven’t watched your on demand video yet but I was able to follow all the steps here and successfully connect to Amazon Cloud, thanks a lot!
– I didn’t have the aws_mqtt_test_keys.h file before so I just put my keys directly to keys definition places of mqtt_client_config.h file.
– I was hoping to have LPA application project demo, would u or your team plan to create one? or plan to add LPA demo at ModusToolbox template application (code example) in future?
Anyway, awesome materials!
Harris