In the next few posts I am going to show how to build a very simple BLE project for the shield, debug it using CySmart, make an iOS app, and finally make an Android app. I am going to try to only put in the bare minimum of feature that will enable you to see the whole project work from end to end. This next series of posts will use
- LED0: which can be turned on/off from the from the Android and iOS App
- Button0: which will be displayed as on/off on the Android and iOS App
- Bootload: you will be able to trigger the bootloader from the baseboard or by writing into the BLE Bootload characteristic
- The blue LED attached to the PRoC will blink when advertising and be solid when connected
All of this firmware is available as Example10a (for the PRoC) and Example10b for the PSoC4200m in the firmware directory on github.com/iotexpert/CY8CKIT-021
Example 10a: The PRoC Firmware
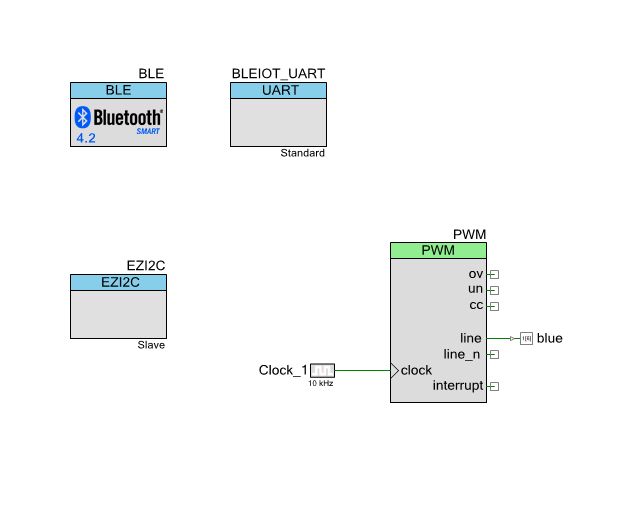
The schematic for this project has two pages. The first page has everything except for the bootloadble.
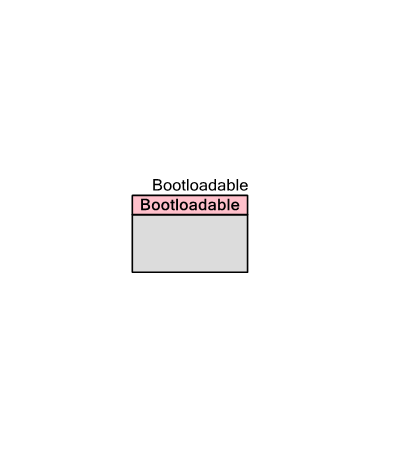
The second page of the schematic has the bootloadable. This allows me to “disable” that page if I am not using the Bootloader
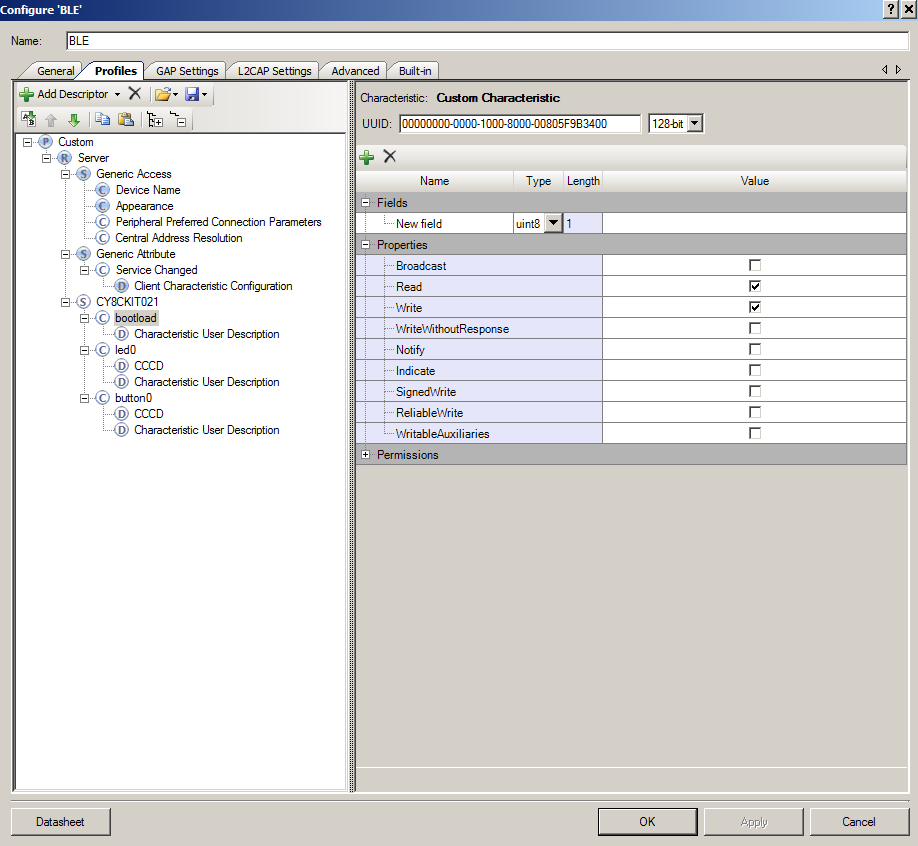
The BLE component has the “CY8CKIT021” service with three characteristics one for LED0, Button and Bootload, The Button has a notify CCCD setup. All three are uint8s.
This program is broken up into three functions
- updateGattDB: A helper function that can take data as a void* and write it into the correct place in the GattDB. For example when the app changes the LED0 Characteristic you need to write that update into the GattDB. This function is generic which will support the same logic on a bunch of different characteristic (for instance when I put in all of the other characteristics LED0/1, Button0/1, Pot, …)
- BleCallBack: This function processes the BLE Events
- Stack on or disconnect: start advertising and start blinking
- Write of characterstic from Central: store the written value into the GattDB and do something
- Connect: update the GattDB and turn on the LED
- main: This function is very simple and forms the main loop of the program.
- Start the components
- If there is a remote from the 4200M side then update the GattDB
First, the updateGattDB helper function.
// updateGattDB() -
//
// Arguments:
//  uint8* val  - a pointer to the bytes that need to be writted into the GATTDB
//  int size - the number of bytes that need to be written into the GATTDB
//  uint8 notify - if the NOTIFY is on then send a notification
//  CYBLE_GATT_DB_ATTR_HANDLE_T handle - a handle to the entry in the gatt table
//  uint8 flags - a request
//
// This is a helper function that will update the GATT database with a value.  It update the field of
// the "CYBLE_GATT_DB_ATTR_HANDLE_T"

void updateGattDB(uint8 *val,int size,uint8 notify, CYBLE_GATT_DB_ATTR_HANDLE_T handle,uint8 flags)
{

    // this little block of code doesnt make me happy...
    switch(CyBle_GetState())
    {
        case CYBLE_STATE_ADVERTISING:
            return;
        case CYBLE_STATE_DISCONNECTED:
            return;
        case CYBLE_STATE_STOPPED:
            return;
        case CYBLE_STATE_CONNECTED:
            break;
        case CYBLE_STATE_INITIALIZING:
            return;
    }
    //update the GATT Database
    CYBLE_GATTS_HANDLE_VALUE_NTF_T 	tempHandle;
    tempHandle.attrHandle = handle;
  	tempHandle.value.val = val;
    tempHandle.value.len = size;
    CYBLE_GATT_ERR_CODE_T ret = CyBle_GattsWriteAttributeValue(&tempHandle,0,&cyBle_connHandle,flags);
    if(ret != CYBLE_GATT_ERR_NONE) // this is really not a good place to be.
    {
        return;

        CYASSERT(0);
        while(1);
    }
    // if peer initiated then write response.
    if(flags == CYBLE_GATT_DB_PEER_INITIATED)
        CyBle_GattsWriteRsp(cyBle_connHandle);
    else if(notify) // If notify & local initiated
    {
        CyBle_GattsNotification(cyBle_connHandle,&tempHandle);
    }
}
The next block of code is the BleCallback. One cool thing that PSoC Creator does is give you the ability to #ifndef to remove code when a schematic page is disabled. In the code below when I have “disabled” the Bootloadable schematic page it will remove that block of code from my firmware.
/***************************************************************
 * Function to handle the BLE stack
 **************************************************************/
void BleCallBack(uint32 event, void* eventParam)
{
    CYBLE_GATTS_WRITE_REQ_PARAM_T *wrReqParam;
    switch(event)
    {
        /* if there is a disconnect or the stack just turned on from a reset then start the advertising and turn on the LED blinking */
        case CYBLE_EVT_STACK_ON:
        case CYBLE_EVT_GAP_DEVICE_DISCONNECTED:
            CyBle_GappStartAdvertisement(CYBLE_ADVERTISING_FAST);
            PWM_Start();
            memset(&notifyFlags,0,sizeof(notifyFlags));
        break;

        case CYBLE_EVT_GAP_DEVICE_CONNECTED:
            PWM_Stop();
            updateGattDB(&BLEIOT_local.led0,sizeof(BLEIOT_local.led0),notifyFlags.led0,CYBLE_CY8CKIT021_LED0_CHAR_HANDLE,CYBLE_GATT_DB_LOCALLY_INITIATED);
            updateGattDB(&BLEIOT_local.button0,sizeof(BLEIOT_local.button0),notifyFlags.button0,CYBLE_CY8CKIT021_BUTTON0_CHAR_HANDLE,CYBLE_GATT_DB_LOCALLY_INITIATED);
        break;

        case CYBLE_EVT_GATTS_WRITE_REQ:
            wrReqParam = (CYBLE_GATTS_WRITE_REQ_PARAM_T *) eventParam;
           // Bootload
            #ifndef BootLoadable__DISABLED
            if(wrReqParam->handleValPair.attrHandle == CYBLE_CY8CKIT021_BOOTLOAD_CHAR_HANDLE)
            {
                if(wrReqParam->handleValPair.value.val[0]) Bootloadable_Load();

            }
            #endif

            // LED0
            if(wrReqParam->handleValPair.attrHandle == CYBLE_CY8CKIT021_LED0_CHAR_HANDLE)
            {
                BLEIOT_updateLed0(wrReqParam->handleValPair.value.val[0]);
                updateGattDB(wrReqParam->handleValPair.value.val,1,notifyFlags.led0,CYBLE_CY8CKIT021_LED0_CHAR_HANDLE,CYBLE_GATT_DB_PEER_INITIATED);
            }

            if(wrReqParam->handleValPair.attrHandle == CYBLE_CY8CKIT021_LED0_CCCD_DESC_HANDLE)
            {
                notifyFlags.led0 = wrReqParam->handleValPair.value.val[0];
                CyBle_GattsWriteRsp(cyBle_connHandle);
            }

            // BUTTON 0
            if(wrReqParam->handleValPair.attrHandle == CYBLE_CY8CKIT021_BUTTON0_CCCD_DESC_HANDLE)
            {
                notifyFlags.button0 = wrReqParam->handleValPair.value.val[0];
                CyBle_GattsWriteRsp(cyBle_connHandle);
            }
        break;

        default:
        break;
    }
}
Finally the last block of code is the main loop
int main()
{
    CyGlobalIntEnable;
    BLEIOT_Start();

    EZI2C_Start();
    EZI2C_EzI2CSetBuffer1(sizeof(BLEIOT_local),1,(uint8 *)&BLEIOT_local);

    CyBle_Start(BleCallBack);

    for(;;)
    {

        #ifndef BootLoadable__DISABLED
        // if they write into the BLEIOT_local.bootload (from EzI2C)
        if(BLEIOT_getDirtyFlags() & BLEIOT_FLAG_BOOTLOAD || BLEIOT_local.bootload)
        {
            // enter the bootloader
            Bootloadable_Load();
        }

        #endif

        if(BLEIOT_getDirtyFlags() & BLEIOT_FLAG_LED0)
        {
            BLEIOT_updateLed0(BLEIOT_remote.led0);
            updateGattDB(&BLEIOT_local.led0,sizeof(BLEIOT_local.led0),notifyFlags.led0,CYBLE_CY8CKIT021_LED0_CHAR_HANDLE,CYBLE_GATT_DB_LOCALLY_INITIATED);
        }

        if(BLEIOT_getDirtyFlags() & BLEIOT_FLAG_BUTTON0)
        {
            BLEIOT_updateButton0(BLEIOT_remote.button0);
            updateGattDB(&BLEIOT_local.button0,sizeof(BLEIOT_local.button0),notifyFlags.button0,CYBLE_CY8CKIT021_BUTTON0_CHAR_HANDLE,CYBLE_GATT_DB_LOCALLY_INITIATED);
        }

        CyBle_ProcessEvents();
        CyBle_EnterLPM(CYBLE_BLESS_DEEPSLEEP);
    }
}
PSoC FIRMWARE
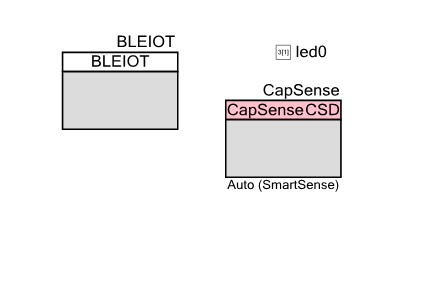
To make this project work I built the simplest firmware that I can think of for the PSoC4200M. The schematic has only the BLEIOT, CapSense and the LED.
The firmware just
- Starts the components
- If the capsense is not busy then it updates the Button0 state if it has changed then rescans
- If the PRoC side writes the LED0 then it updates the state.
// Project: Example10b - PSoC // Kit: CY8CKIT-021 Sheild // Baseboard: CY8CKit-44 PSoC4M // // This project demonstrates the simplest connection to the PRoC and BLE // It updates the LED0 based on writes from the PRoC side // It sends out updates to the PRoC based on button processes #include <project.h> int main() { CyGlobalIntEnable; BLEIOT_Start(); CapSense_Start(); CapSense_InitializeEnabledBaselines(); CapSense_ScanEnabledWidgets(); for(;;) { if(!CapSense_IsBusy()) { uint8 b0=CapSense_CheckIsWidgetActive(CapSense_BUTTON0__BTN); if(b0 != BLEIOT_local.button0) // if the state has changed then send an update BLEIOT_updateButton0(b0); CapSense_UpdateEnabledBaselines(); CapSense_ScanEnabledWidgets(); } if(BLEIOT_getDirtyFlags() & BLEIOT_FLAG_LED0) // if the PRoC side send an update, write it { BLEIOT_updateLed0(BLEIOT_remote.led0); led0_Write(!BLEIOT_local.led0); // the led is active low } } } </project.h>
Debugging using CySmart
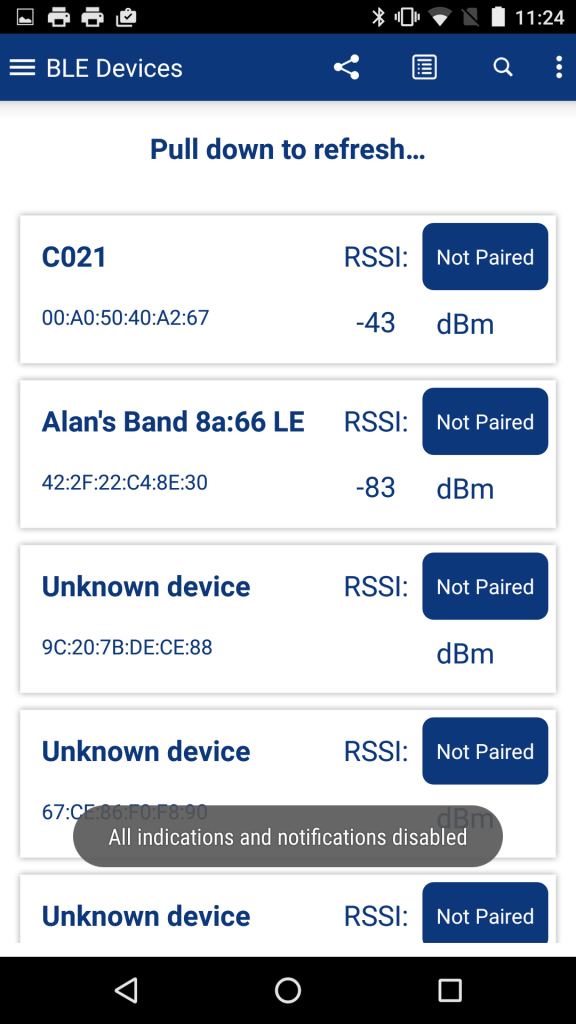
After I created all of the code and bootloaded it into the PRoC I used CySmart to debug it. Once the board is reset I can see the blinking blue LED that is connected to the PRoC. When I start CySmart I can see the “C021” board (that is the name I gave the device in the Gap settings:
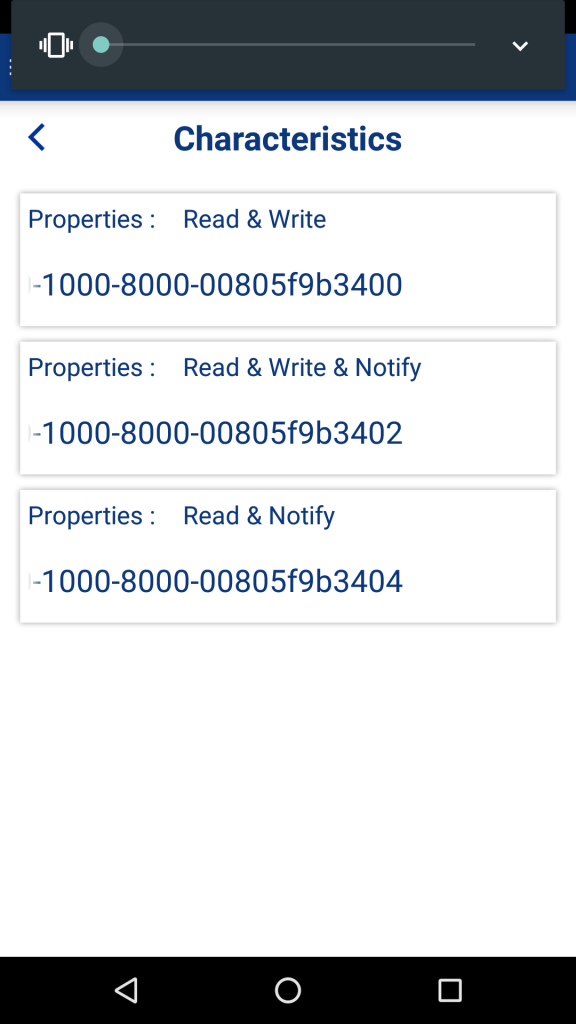
When I connect to the device and explore the Gatt Database I can see the three characteristics (Boatload, LED0 and Button0). You can recognize them from the UUIDs that I configured in the component.
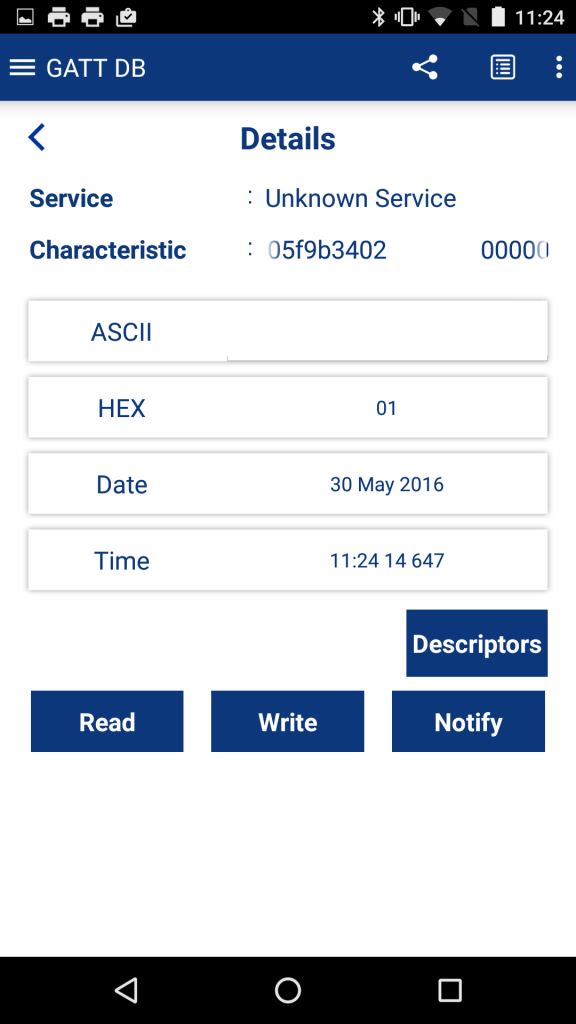
When I write a 1 into the LED0 characteristic the Green LED0 lights up.
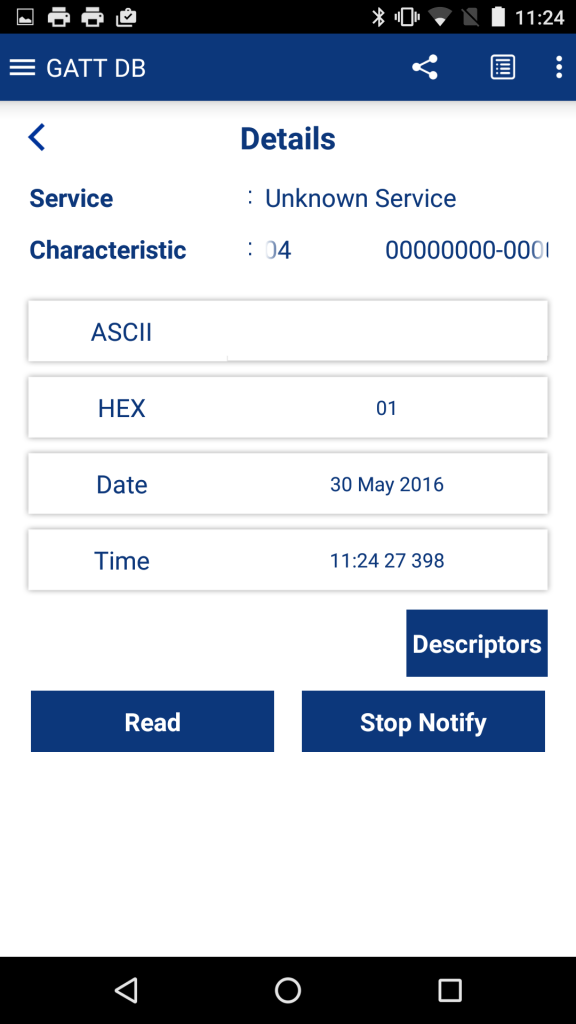
When I turn on notification for the Button0 characteristic and then touch the button I can see it turn back and forth from 0/1
Now that everything seems to be working Ill move onto the iPhone App in the next post.
index
description
CY8CKIT-021: A Simple FM/PSoC + BLE Demonstration Board
Introduction to CY8CKIT021
CY8CKIT-021: The first four example projects
Use the LEDs
Buzzer
7-Segment display and the Potentiometer
CY8CKIT-021: The next three example projects
Use theThermistor and two Capsense Examples
CY8CKIT-021: Bootloading the PRoC
How to put firmware into the PRoC
CY8CKIT-021: The BLEIOT Component
A custom component to communicate with the PRoC/PSoC
CY8CKIT-021: Using the BLEIOT Component
A full example of the tho MCUs talking
CY8CKIT-021: The PRoC BLE Firmware
How to make PRoC Firmware and use it with the BLEIOT Component
CY8CKIT-021: Example 10 - the new IOS App
How to build and IOS App to talk to the development kit

No comment yet, add your voice below!