In the previous post I gave you the instructions to get the new Mutual Capacitance buttons going on the CY8CKIT-142. In this post I will talk about how to add the Capsense Tuner to your project. The Capsense tuner can talk to your design while it is running, then report back to you the parametric of your design.
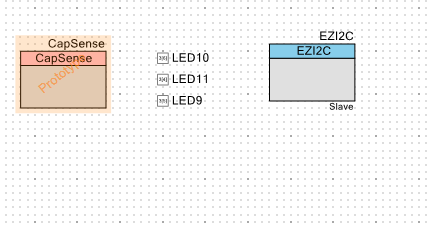
First you need to add the tuner to your project. In order to do this, start with the last design, then add an EzI2C component. Here is the new schematic:
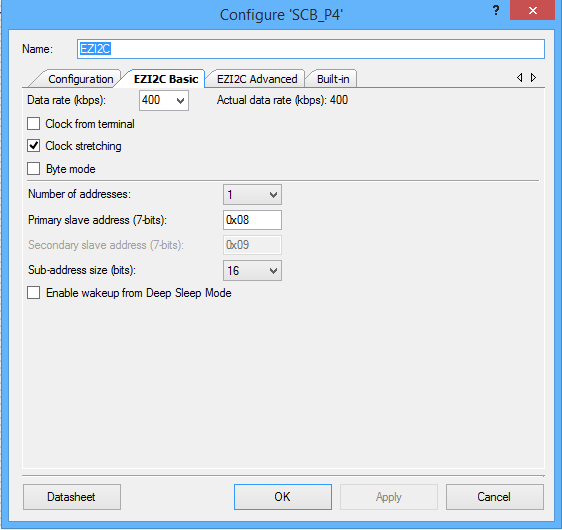
Then you configure the EZ2IC to have 16 bit sub addresses.
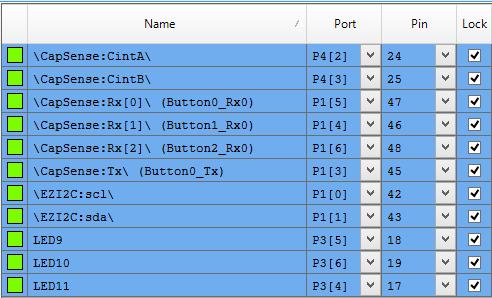
Then assign the EZI2C pins to the KitProg I2C bridge pins
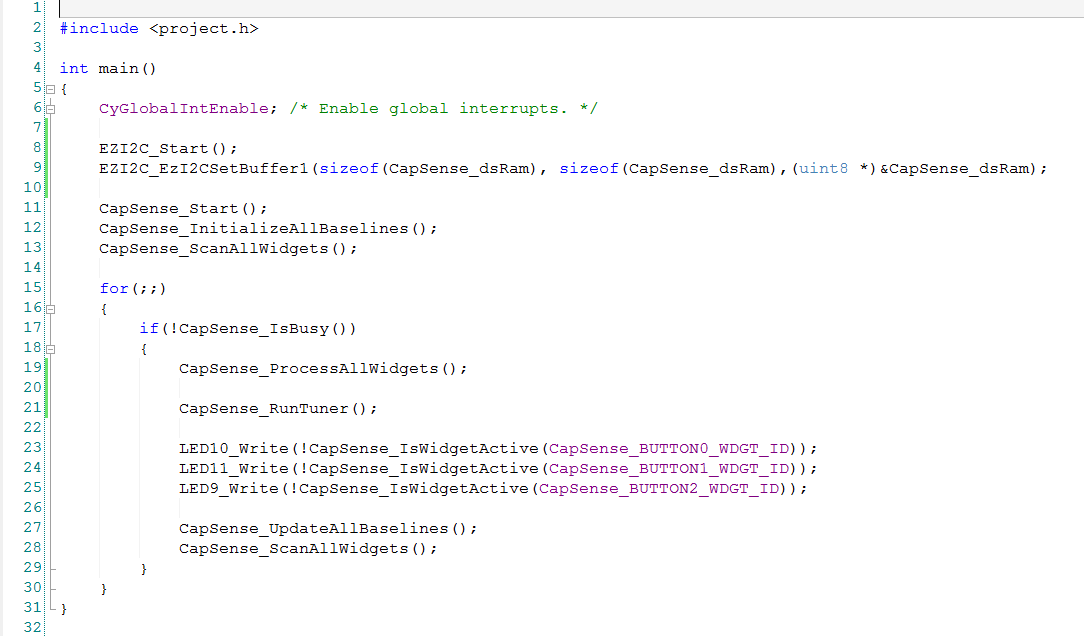
The last step is to write the firmware which is almost exactly what you had in the last project except
- Lines 8-9 which start the capsense block and setup the Capsense memory buffer to be readable by the remote host
- Line 21: which updates the Capsense memory buffer with the current state of the capsense parameters
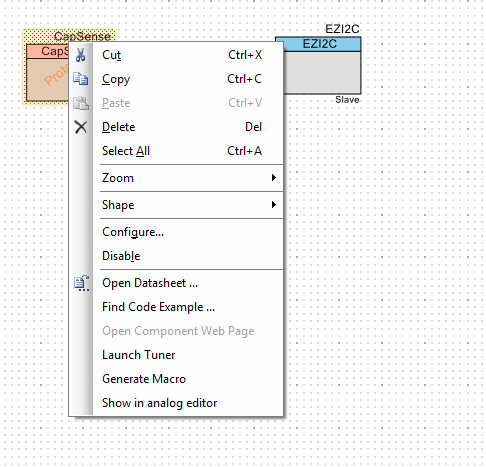
Once all of this is done, build and program the device. Then start the capsense tuner by right clicking the Capsense component in the schematic and saying “run Tuner”
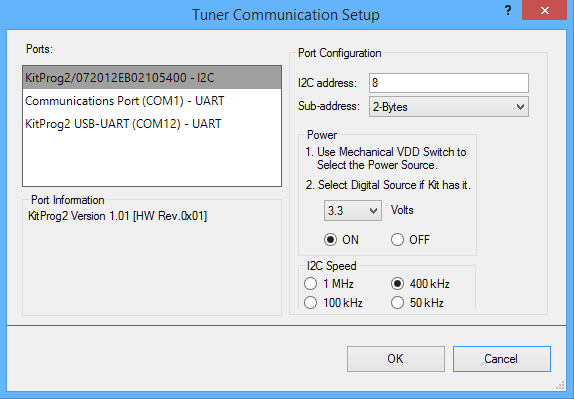
Then configure the tuner communication parameters from the “Tools->Tuner communication setup” menu. These should match what you have setup in the EZI2C component. Specifically you need set the I2C addresses to be the same, and you need to have the sub-address set to “2-bytes” which is the same as the 16-bit sub-address which you set in the component above.
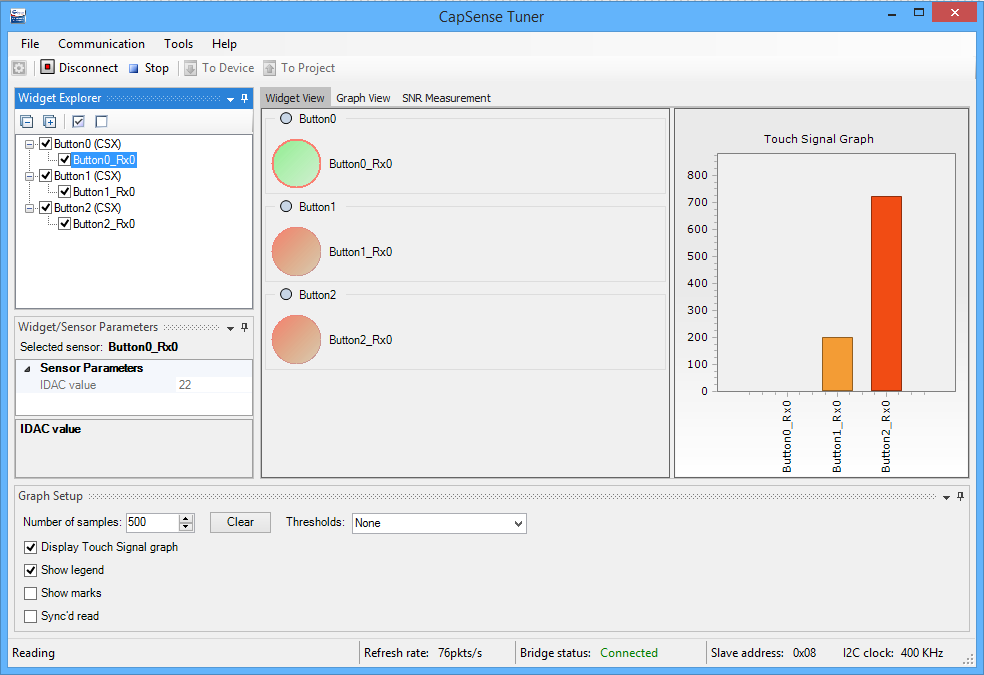
The next step is to press “connect” and the “start”. First make sure that your three buttons are working. In the picture below you can see that I am touching Buttons 1 and 2 as they are “active” (red color) which means that their signal is above the threshold.
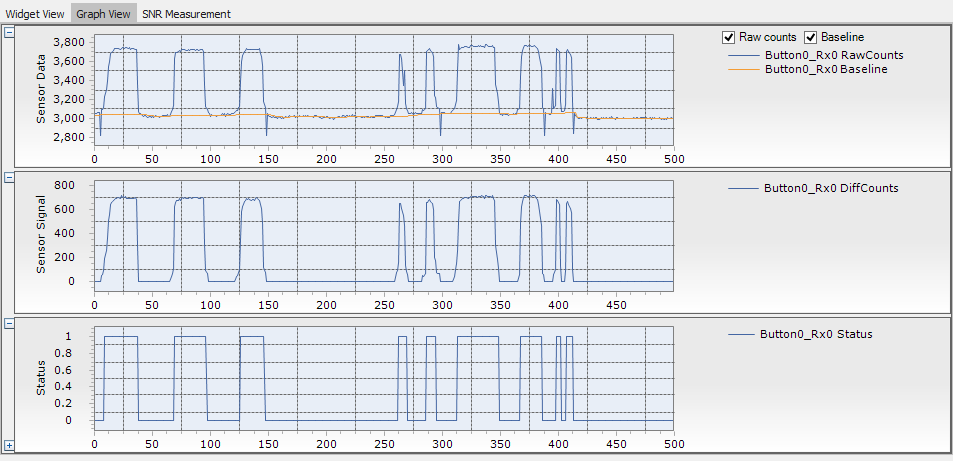
The next step is to look at a “graph view” of button 0. You can do this by pressing “graph view” and selecting Button0_Rx0. Once I switch to this view I touch the button 9 times. You can see that as there are 9 button touches in the Status window. A status of 1 means that the button is active and a status of 0 is an inactive.
In the sensor data window you can see the “baseline” which is the noise on the sensor node without a touch. The blue line is the “RawCounts” which the amount of signal on the node.
In the middle window you can see the “Sensor Signal” which is the Sensor Data minus the baseline. Any time the Sensor Signal is above the touch threshold then the sensor status is active.
The last step is to use the SNR measurement tab to see how robust your design is. First click on the “SNR Measurement” tab. Then pick out which sensor you will measure. In this case I have setup measurement on “Button_0”. Then click on “Acquire noise” and wait. It will make the graph shown below which says that my noise is about 3008-2995 or about 13 counts.

The next step is to see how much signal you get. Start this process by pressing “Acquire Signal” and touching the correct button. You can see orange line represents the amount of signal when you are touching the sensor. The system will then calculate the SNR which in this case is 56.85 which is tons.
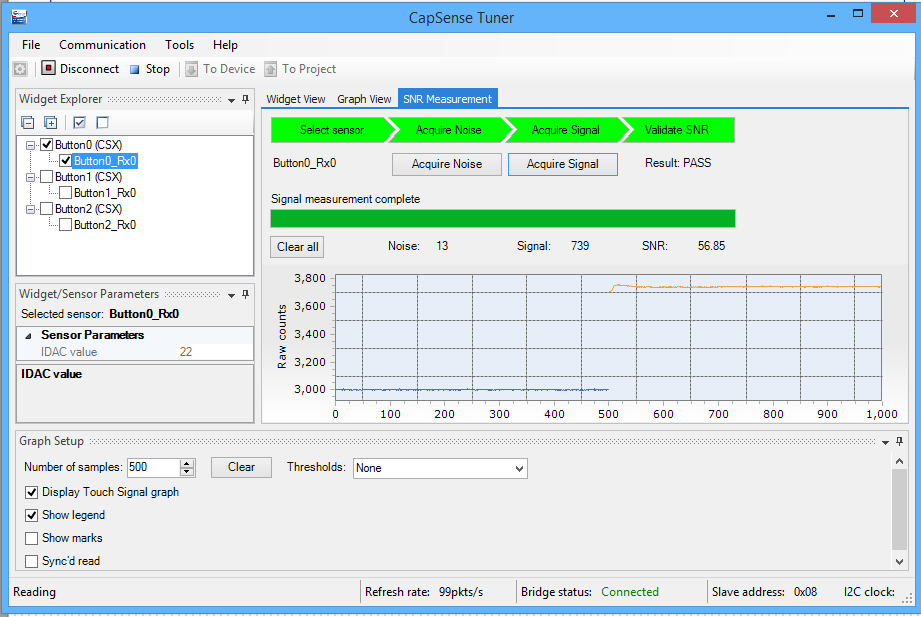
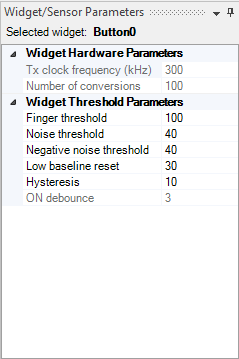
The last thing that you could do is change the Capsense parameters in the sensor parameter screen. For instance you could change the threshold from 100 to a bigger number to give more reliable touches.
OK. Now I have my capsense buttons working. In the next posts Ill be ready to talk more about the Smart IO.
You can find this PSoC Creator workspace on github in the directory called “145MutualCap”. This project is called “TunerMutualCapButtons-145”.

No comment yet, add your voice below!