How To Design With Bluetooth Mesh
You can "git" a workspace will all of these files at https://github.com/iotexpert/MouserVTWBluetoothMesh or git@github.com:iotexpert/MouserVTWBluetoothMesh.git
Summary
In this lesson I will walk you through the process of creating your first Bluetooth Mesh Network. It will be a simple network with two Dimmable Light nodes which we will control using an Android Application called Mesh Lighting.
In this exercise I will:
- Show you the CYBT-213043-MESH development kit
- Create a Dimmable Light Bulb Project and Program (two boards)
- Create a Mesh Network using MeshLighting Android Application
- Add another Dimmable Light to the Mesh
- Create Groups (a.k.a. Rooms)
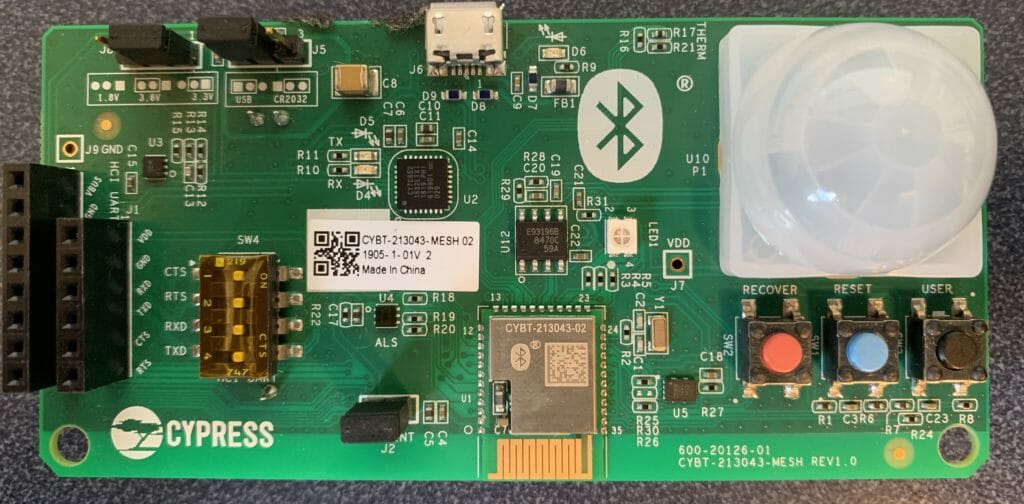
CYBT-213043-MESH
Here is a picture of one of the development boards. It has
- A CYBT-213043-02 module with a PCB antenna. The module contains a CYW20819
- A two channel UART to USB device used for programming and debug printing
- Three buttons (Reset, Recover and User)
- An Ambient Light Sensor
- An RGB LED
- A thermistor
- A PIR motion sensor
Create a Dimmable Light Bulb Project and Program (two boards)
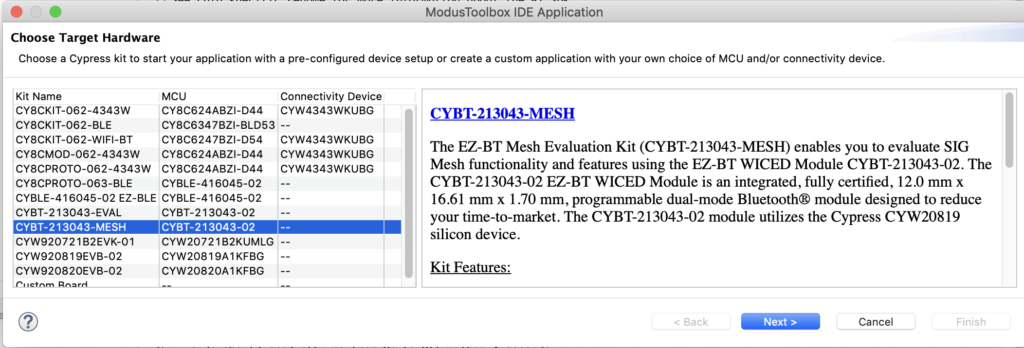
Start this process by programming two of the boards with the Dimmable Light firmware. To create this firmware start with File–>New–>Modustoolbox IDE Application

Choose the CY214043-MESH development kit
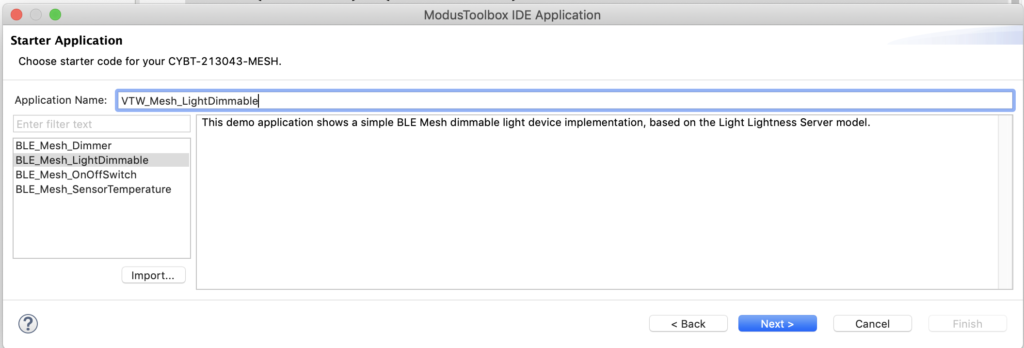
Then pick “BLE_Mesh_LightDimmable” and give it a name “VTW_Mesh_LightDimmable”
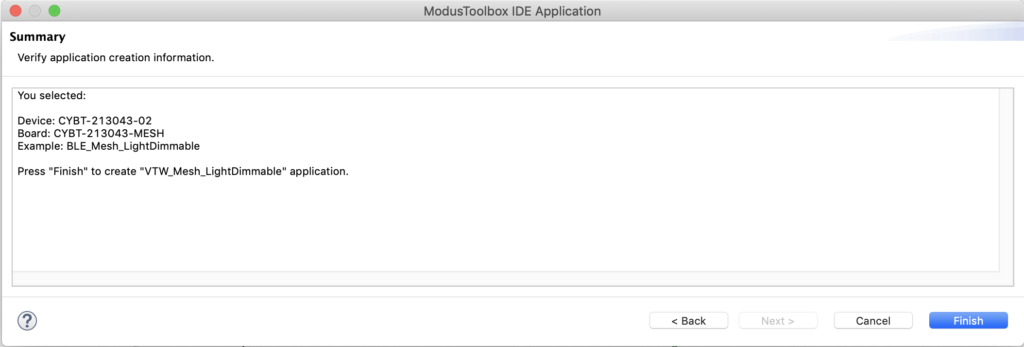
Now press finish to make the project.
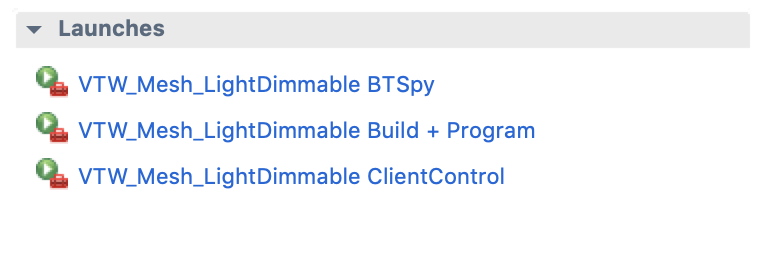
Modus Toolbox provides a Launches window on a “quick panel” right below the workspace explorer. Pick “VTW_Mesh_LightDimmable Build + Program”
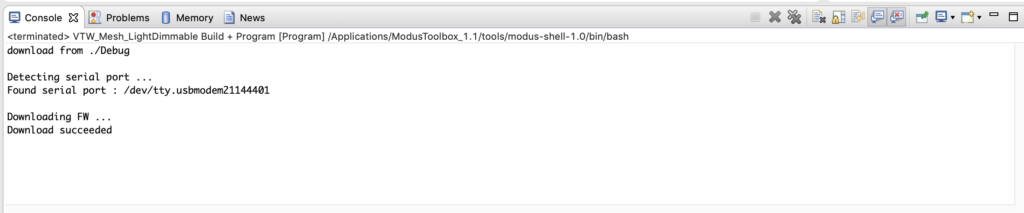
The compiler will run and make an executable. Then it will program the flash of the CYW20819.
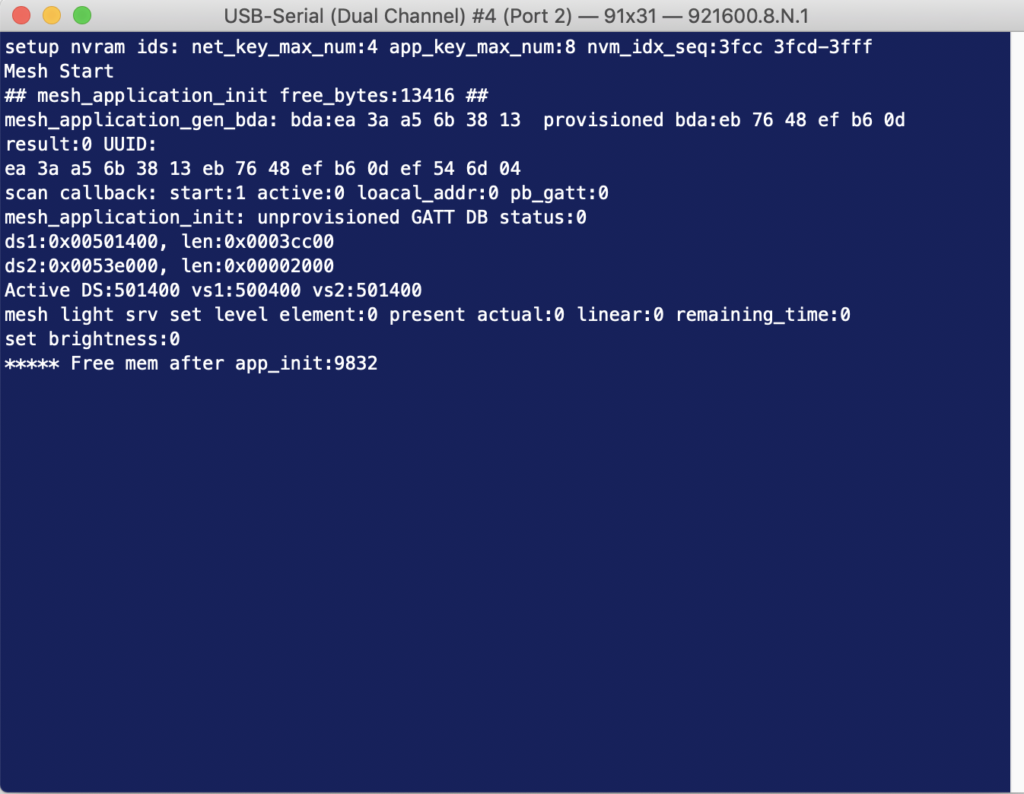
On a Serial Console you should see the Application Bootup (notice that the baud rate is 921600). Remember there are 2 UART channels on each kit – one primarily used for programming and one used for debug messages. Make sure to connect to the second channel called the peripheral UART or PUART.
Create a Mesh Network using MeshLight Android Application
We provide the Android Application called “WICED Mesh Lighting App” and all of the source code as part of the SDK distribution in Modus Toolbox. You can find it here:
![]()
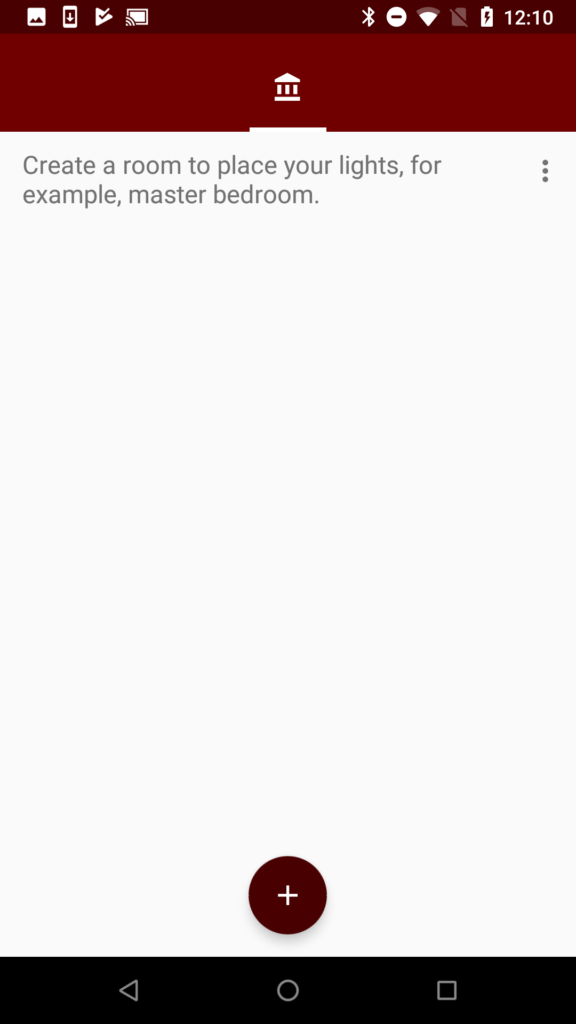
Start the process on your Android phone by running the “WICED Mesh Lighting App”
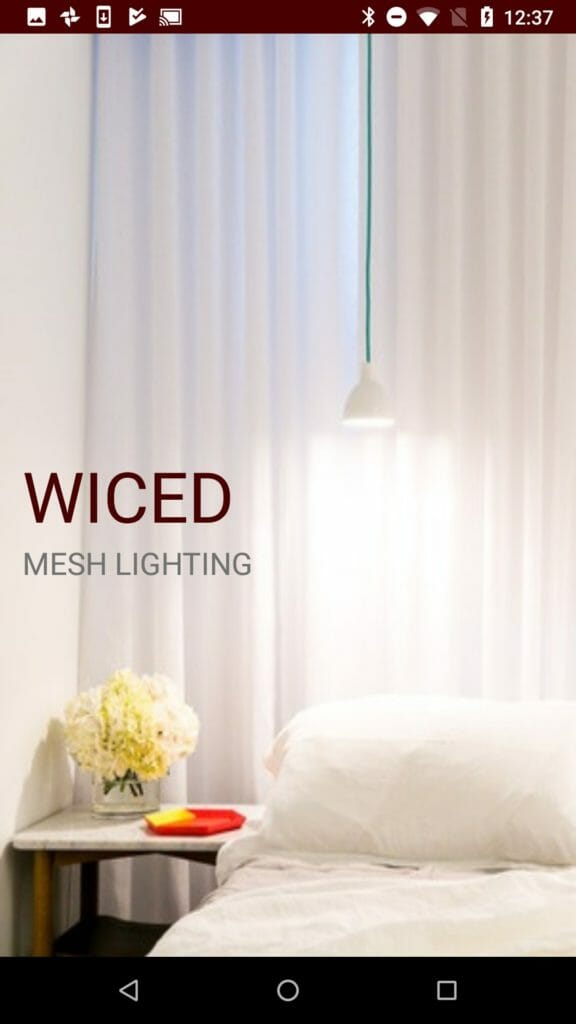
Once the App starts, your screen should look like this:
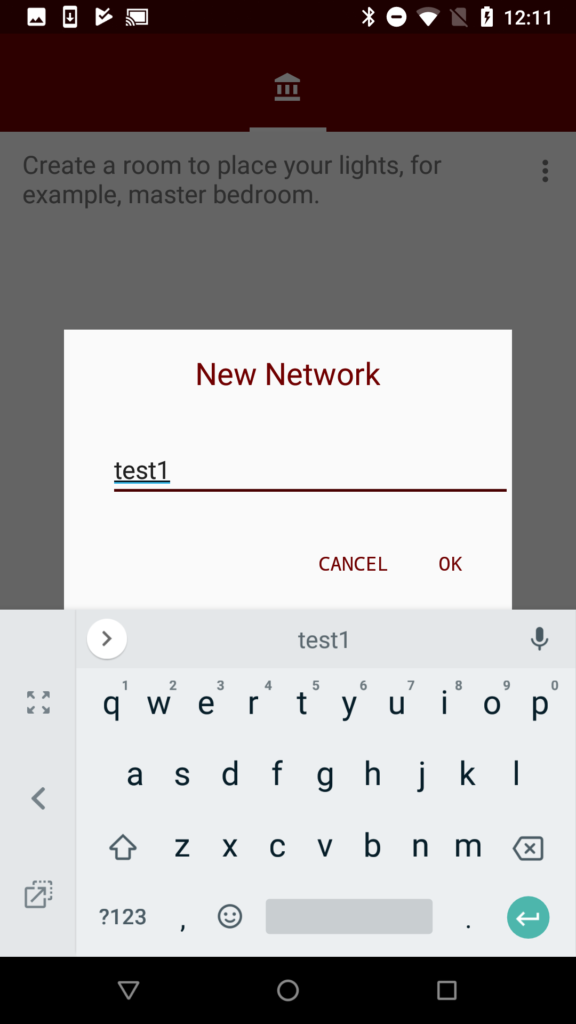
Press the three dots icon and select “Create Network”

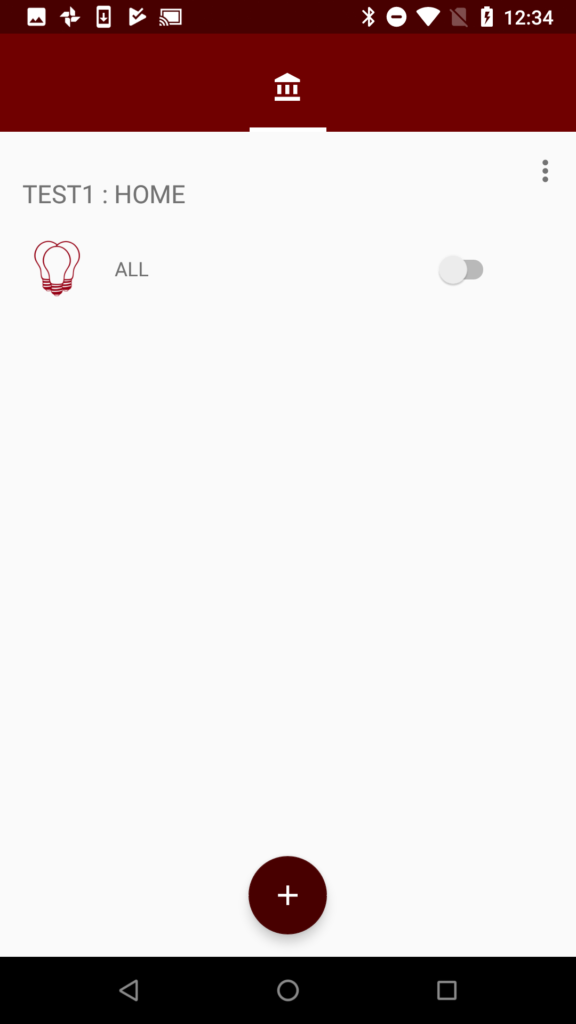
Give it a name. In this case I chose “test1”
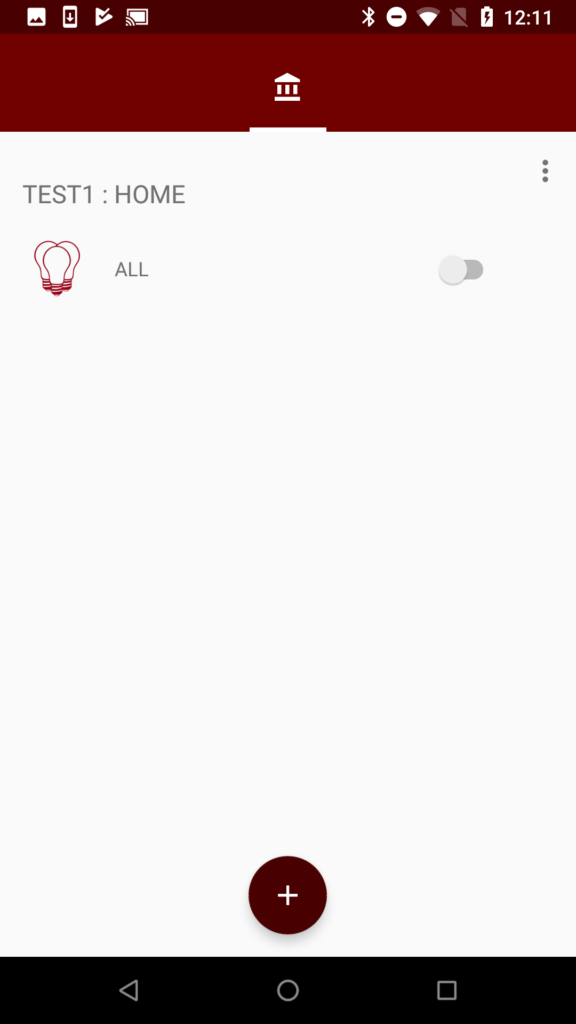
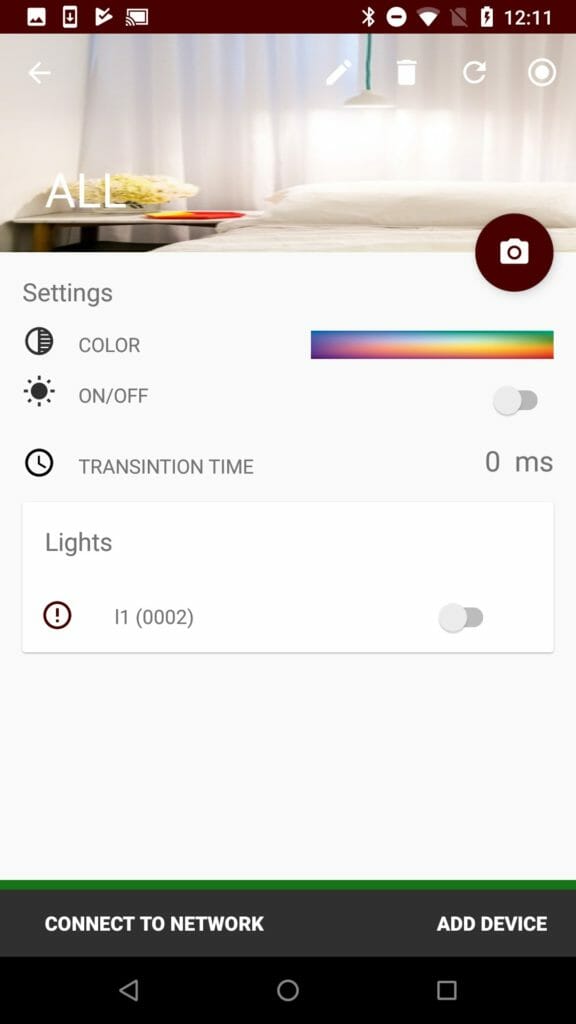
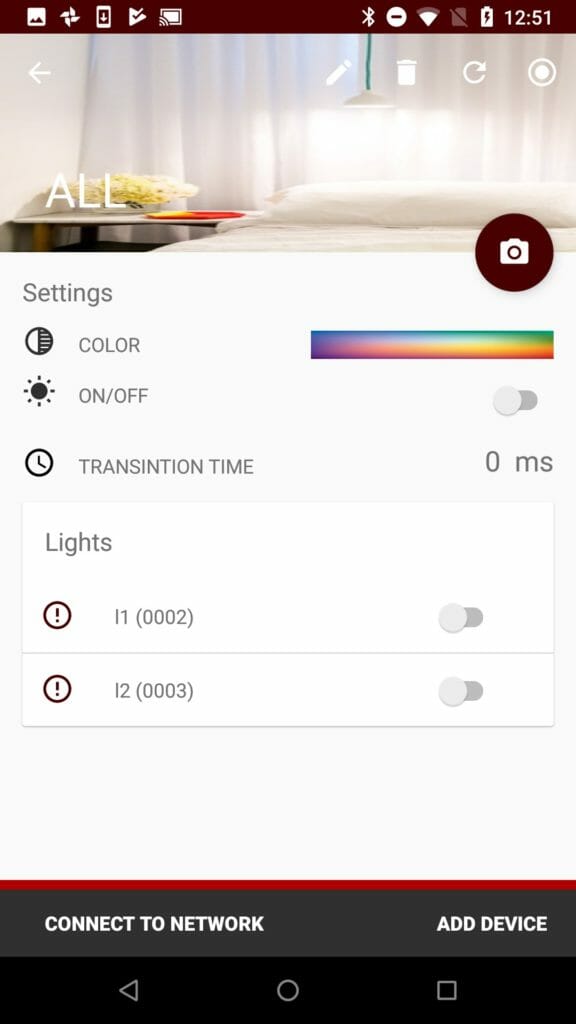
Click on “ALL”
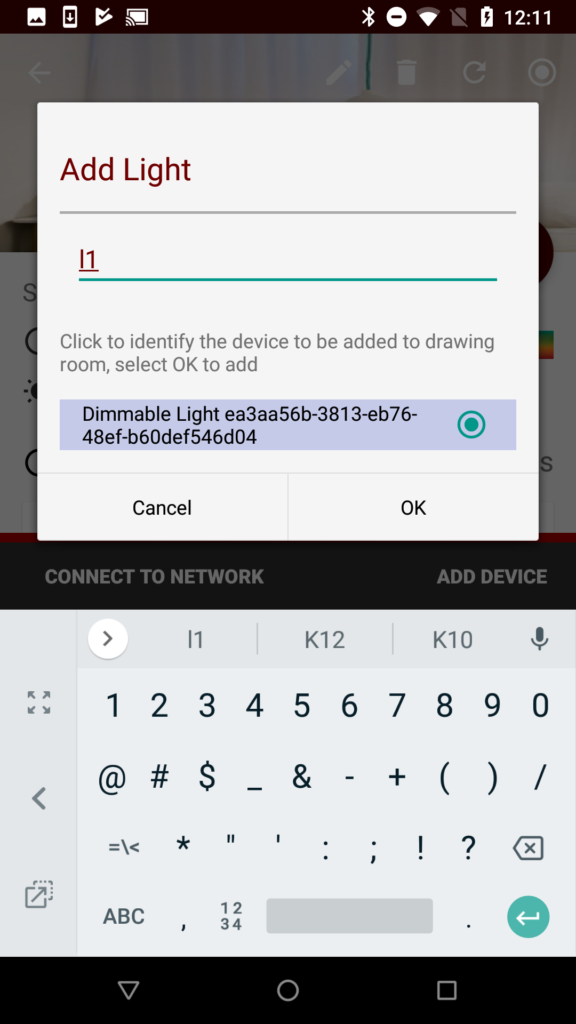
Then press “Add Device”. Your screen will search for an Unprovisioned Mesh Device. When it finds one it will bring up the Name of the device along with the UUID. I give the device the name “l1” and I attach that name to the “Dimmable Light….”. After you get that done press OK.
After you press OK the App will provision and configure your Dimmable Light. After that is done, your screen will look like this.
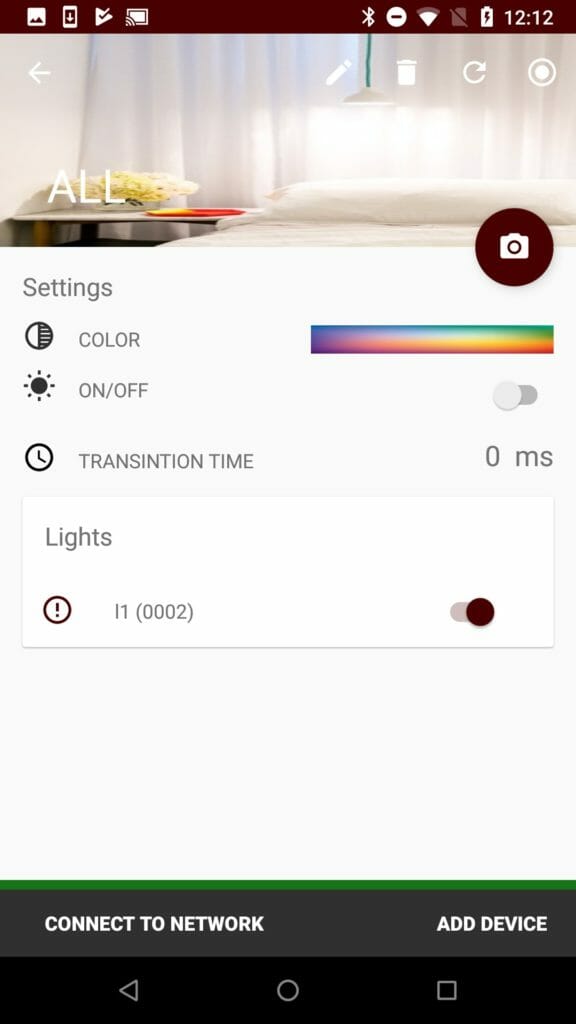
The green bar along the bottom of the screen indicates that your phone is connected to the network – if it is red, you can click on “Connect to Network”. You can now control the LED using the little switch icon on the right. In this picture I have the L1 turned on.
Add another Dimmable Light to the Mesh
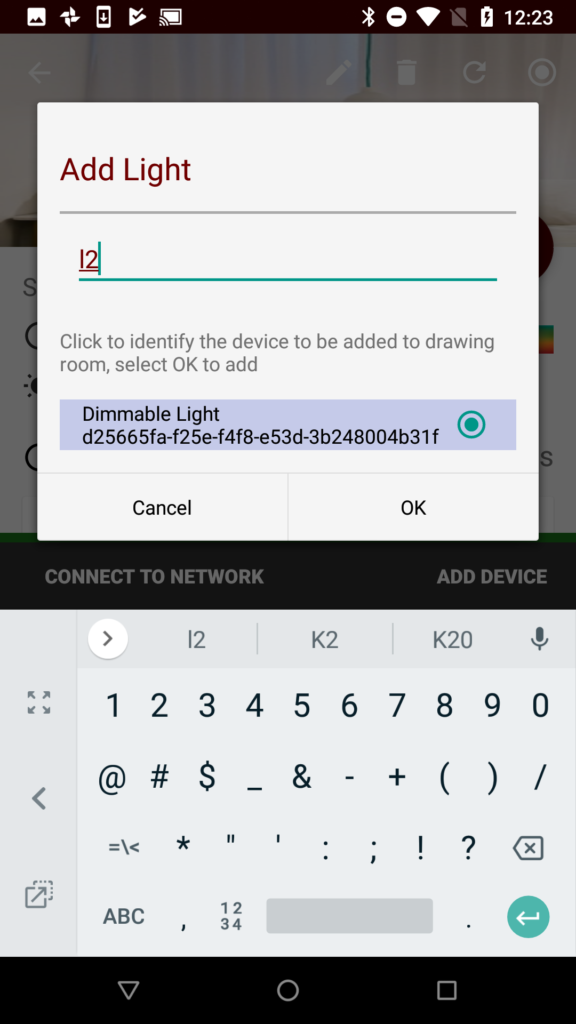
One Dimmable Light, this is not much of a mesh. To fix that I program another development kit. Then I click on all and “Add Device” After a bit you can add the next kit to your network. Notice I call this one “l2”
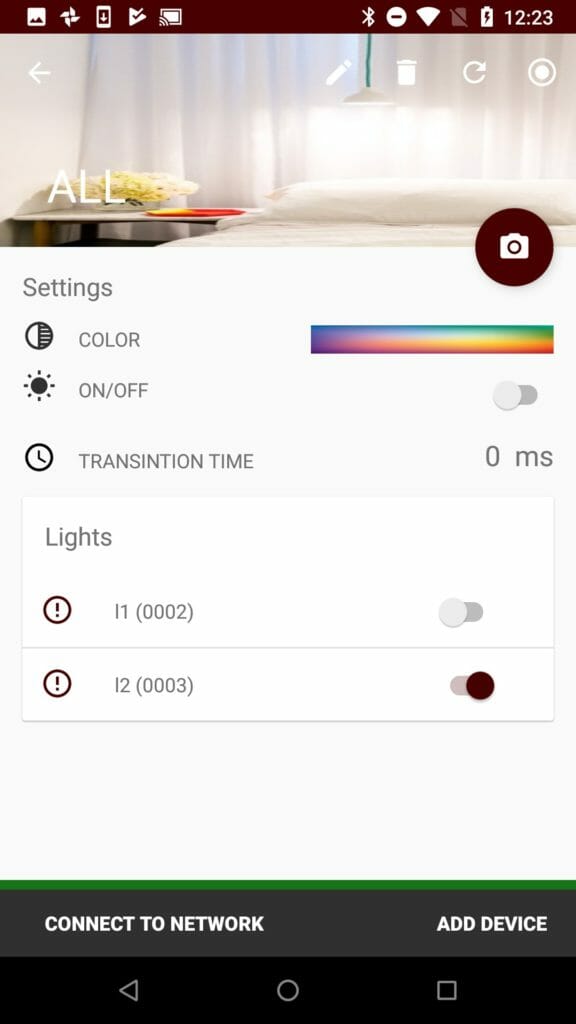
After the provisioning and configuring your screen will look like this. Once again you can turn the lights on individually or as a group.
Create Groups (A.K.A. Rooms)
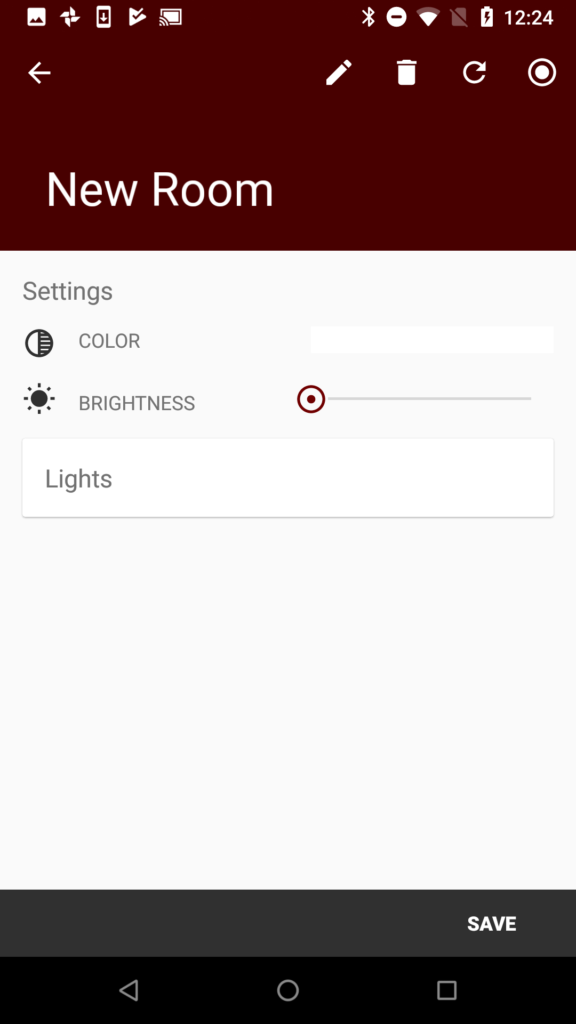
It is common for the home automation system to have “Rooms”. In the world of Bluetooth Mesh these are called “Groups” To create a group start on the main screen and click the “+” to create a new room
On the New Room screen click the pencil icon.
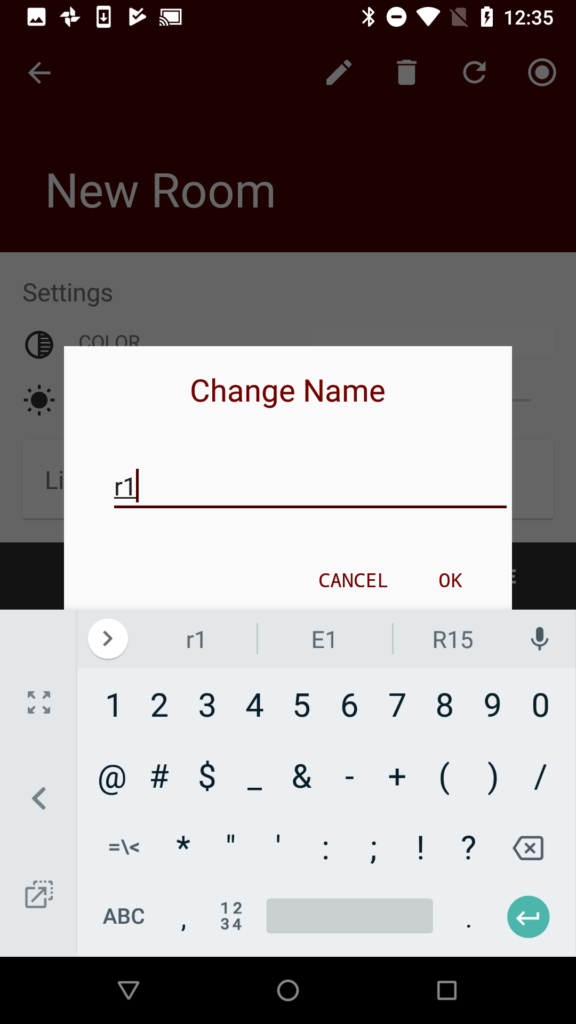
Then type the name of the room. In this case “r1”
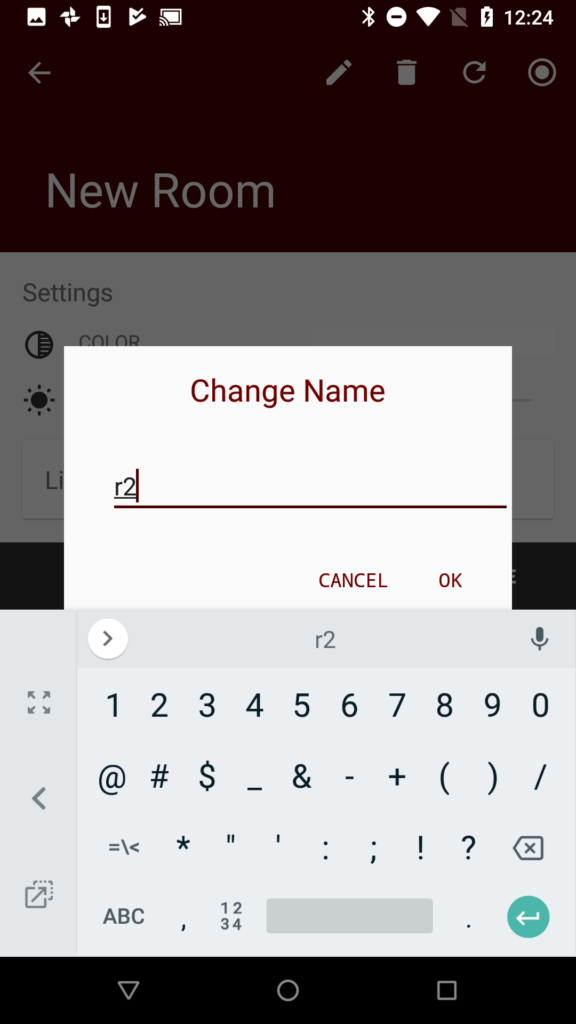
Now do the same thing to make “r2”
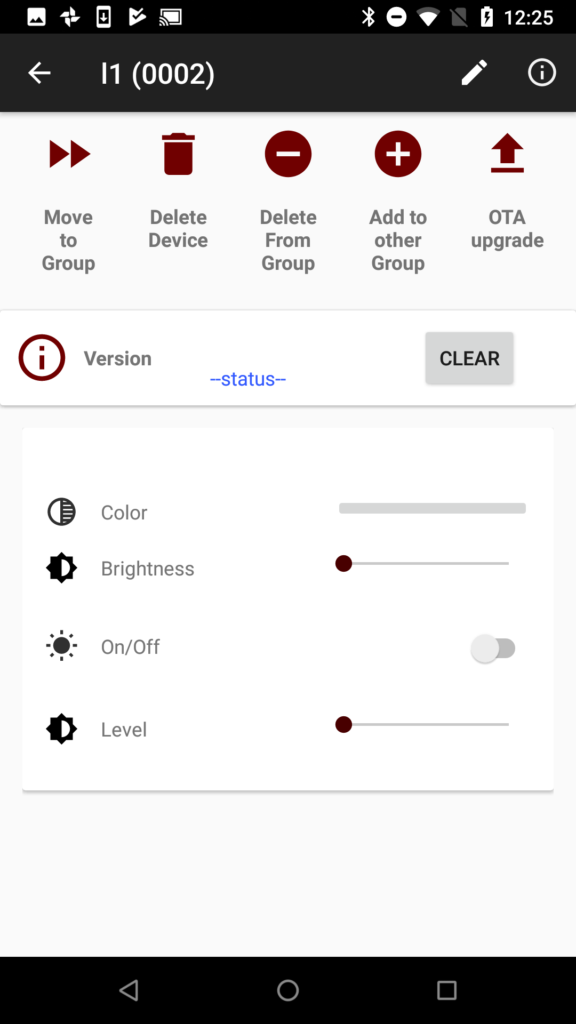
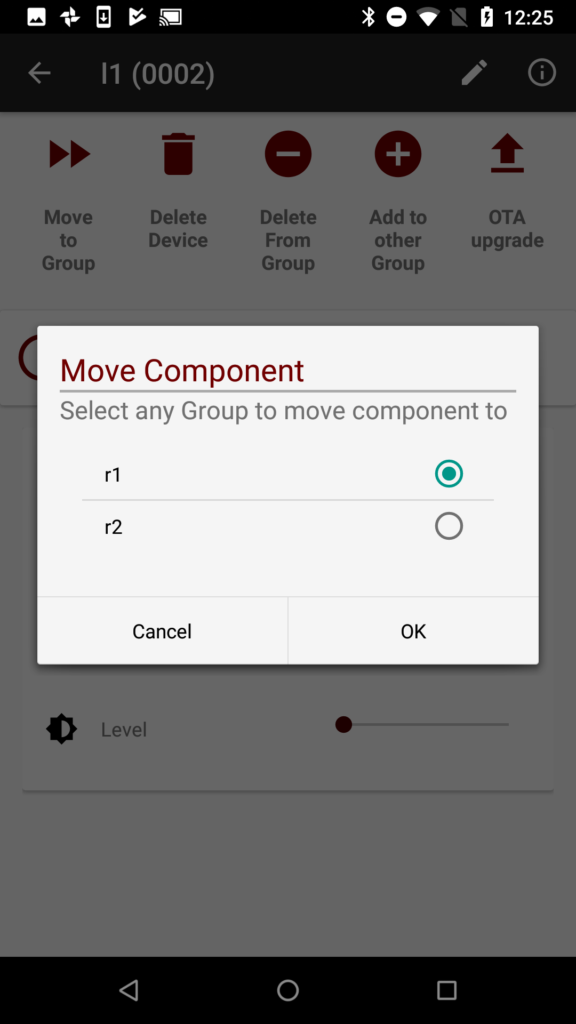
Back in the “All Screen” you can click on the individual Dimmable Lights to move them around. Start by moving l1 by clicking on it.
Click on the “Move to Group” button.
And assign l1 to r1
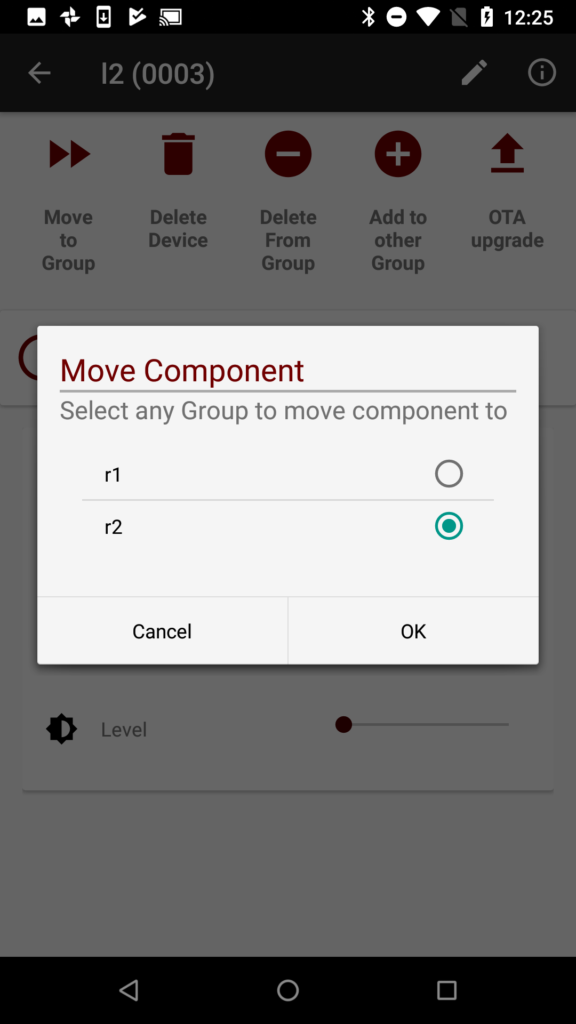
Go back. Then click on l2.

And move it to “r2”
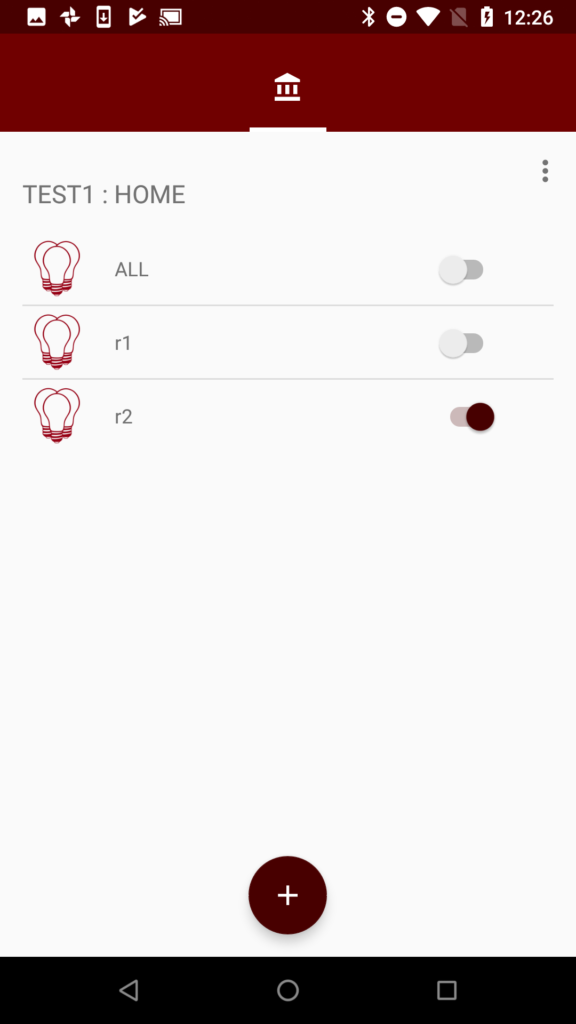
Now you have this. Three groups. ALL, r1, and r2. You can turn everything in those groups on by pressing the switch. In the screen capture below I turned on “r2”
One more interesting thing to do is to add l1 and l2 to the All group.
Start on the main screen and click “r1”.
Then click “l1”.

Press “Add to other Group” and select “ALL”
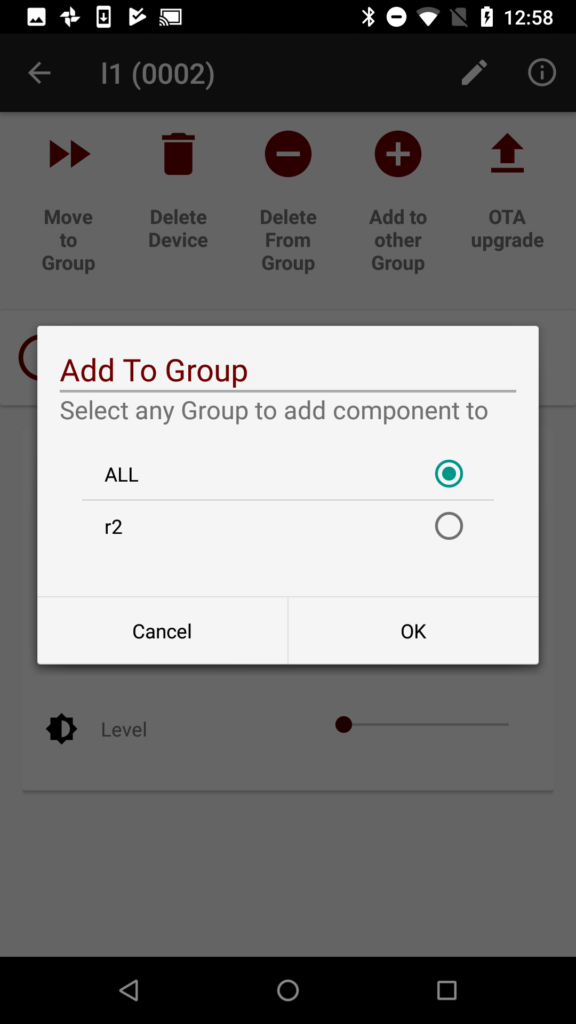
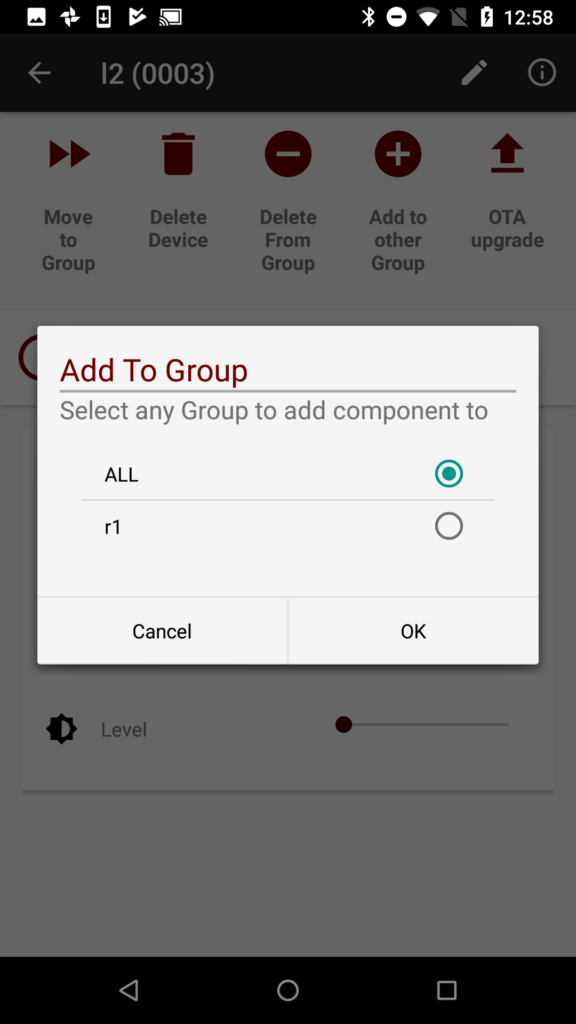
Go back and press on “r2”, select “l2” and then press “l2” and “Add to other Group”.
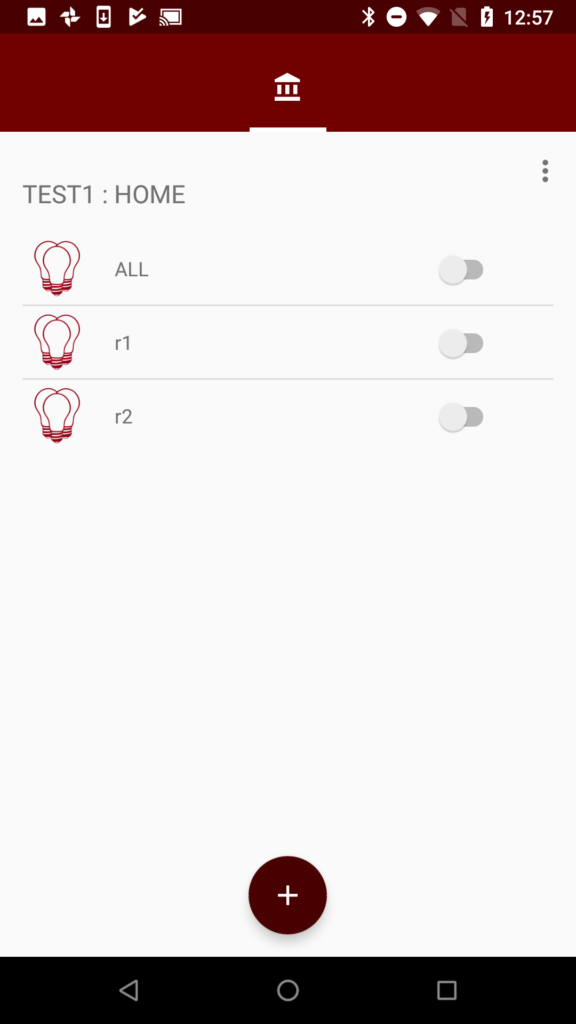
Now you can control the “All” group, “r1” or “r2”.
No comment yet, add your voice below!