[Edit] Since I published this article, Tom Nardi at Hackaday wrote an article entitled “The unnecessary? Art of Connector Crimping” about my article where he pointed out that I am not the first person to come to that conclusion. He made reference to several useful things
[Edit] The Wikipedia article on JST has a nice table.
Summary
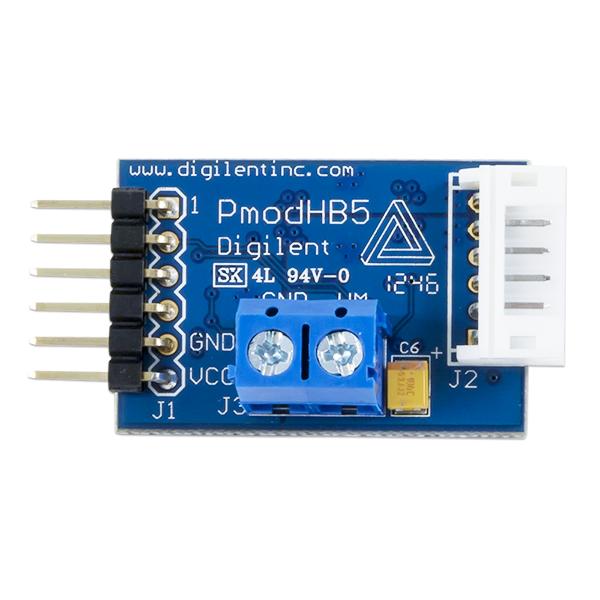
Last week I was using a CY8CKIT-062-BLE PSoC 6 development kit with a Digilent PMOD-HB5 connected to the PMOD port. Specifically, I was using the PMOD HB5 as a solid state switch to drive a higher voltage, higher current than the GPIO on the PSoC 6 can drive. In order to do this I needed to connect to the “6-pin JST connector for direct connection” which is on the right side of the board in the picture below.
But, what I might ask, is a JST Connector? And, how might you make a connection to it. Well, this where the insanity starts. The first thing that you will discover is that “JST” stands for Japan Solderless Technology and that they make about 50,000 different types of connectors. The next thing that you will discover is that all around the internet on the maker websites you will find people referring to connections as “JST” and acting like there is only one type of JST connector. Then you will discover that there are tons of youtube videos that “show” you how to crimp JST connectors, and that most of them are absolute crap, particularly if you are 50 years old can barely see the freaking crimp connectors. Finally, you will discover that there are a boatload of crimping tools that range in price from $10 (for a crap pair of pliers) to $500 (for the OEM JST Crimpers)
For this article I am going:
- Tour the common version of the JST connectors, where they are used.
- Consider not crimping
- Show pictures of a proper crimp
- Show some JST crimping tools
- Take you through my crimping procedure – which seems to work
- Some other videos/resources
Honestly the whole thing is pretty annoying. The crimps are a bit hard to make and there is this inherent assumption everywhere that you should have just “known” how to do this.
I will also observe that the “JST” problem extends to some other crimp connectors including “Molex” and “Dupont” (which has a crazy history). I will write about these other two types later on.
The JST Connector Series
| Series | Pitch | Wire | Connector | Use |
|---|---|---|---|---|
| PH | 2.0 | 24 | 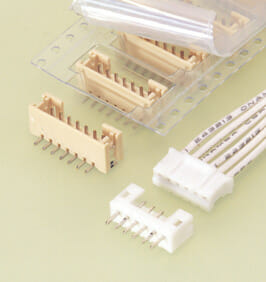 |
 |
| SM | 2.5 | 28 | 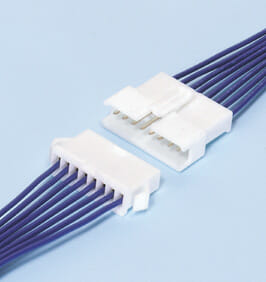 |
Adafruit 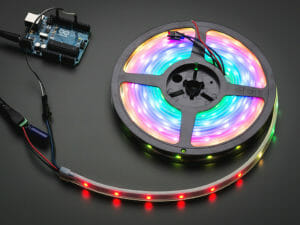 |
| SH | 1.0 | 28 | 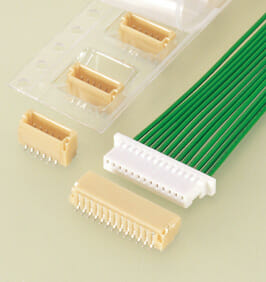 |
Spark Fun QWIIC  |
| XH | 2.5 | 22 | 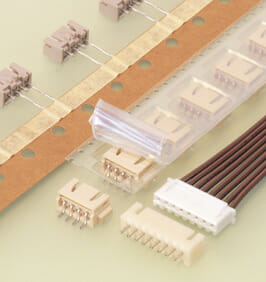 |
Some batteries 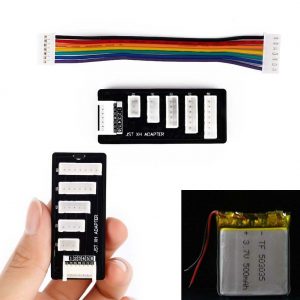 |
| ZH | 1.5 | 26 | 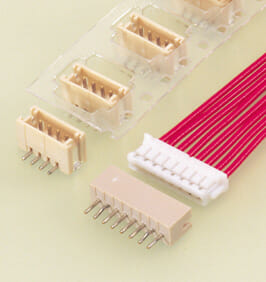 |
Consider not Crimping
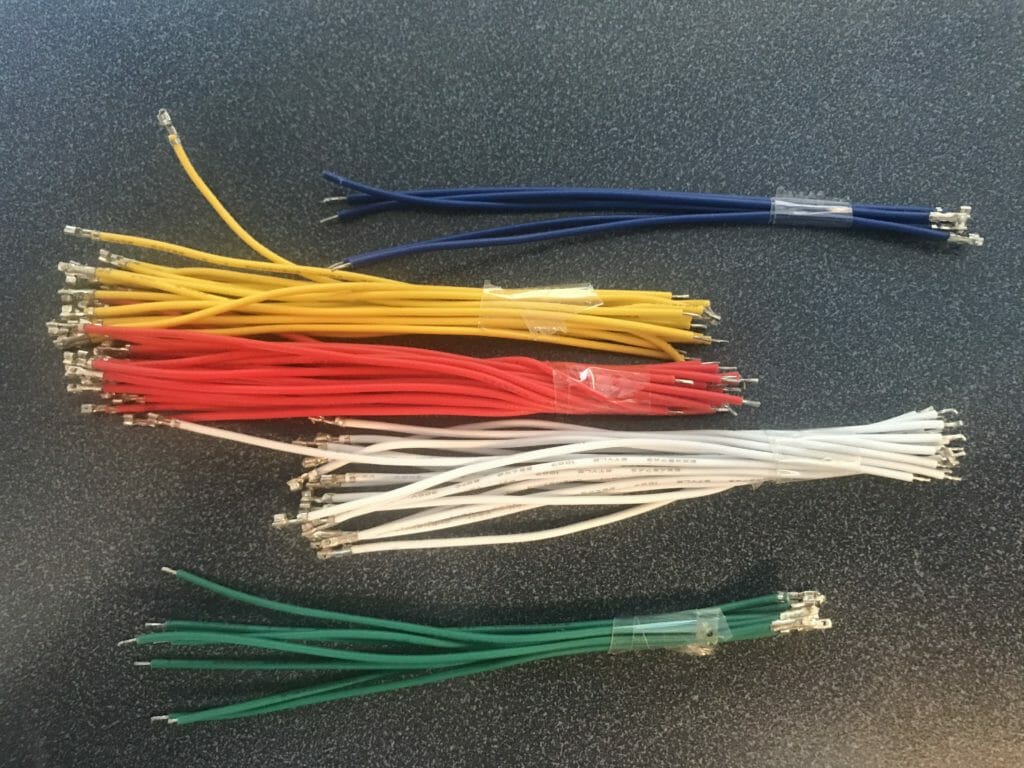
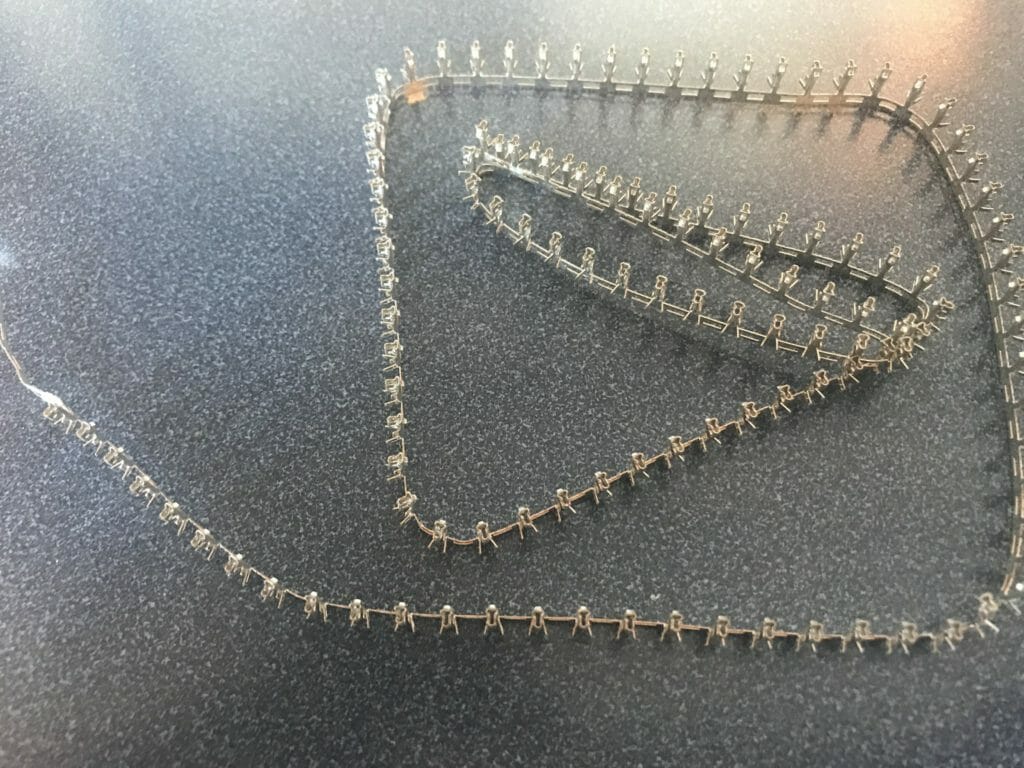
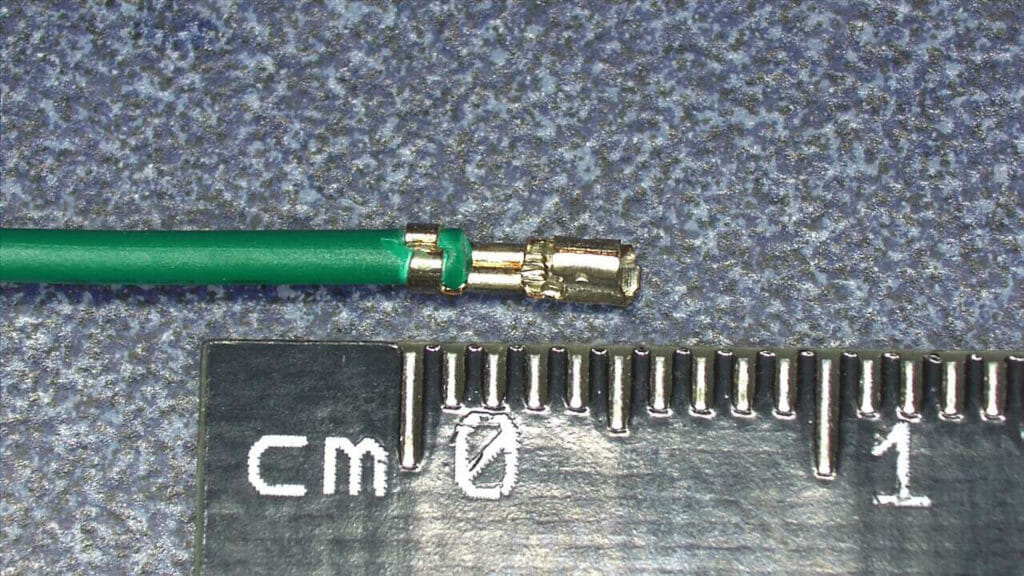
The first thing that I will say about the crimping process is that you should consider not doing it. It is possible that purchase pre-crimped wires which will then easily slip inside of the connector housing to create almost any combination you might want. Here is a pile of the the raw wires with crimps on one end:
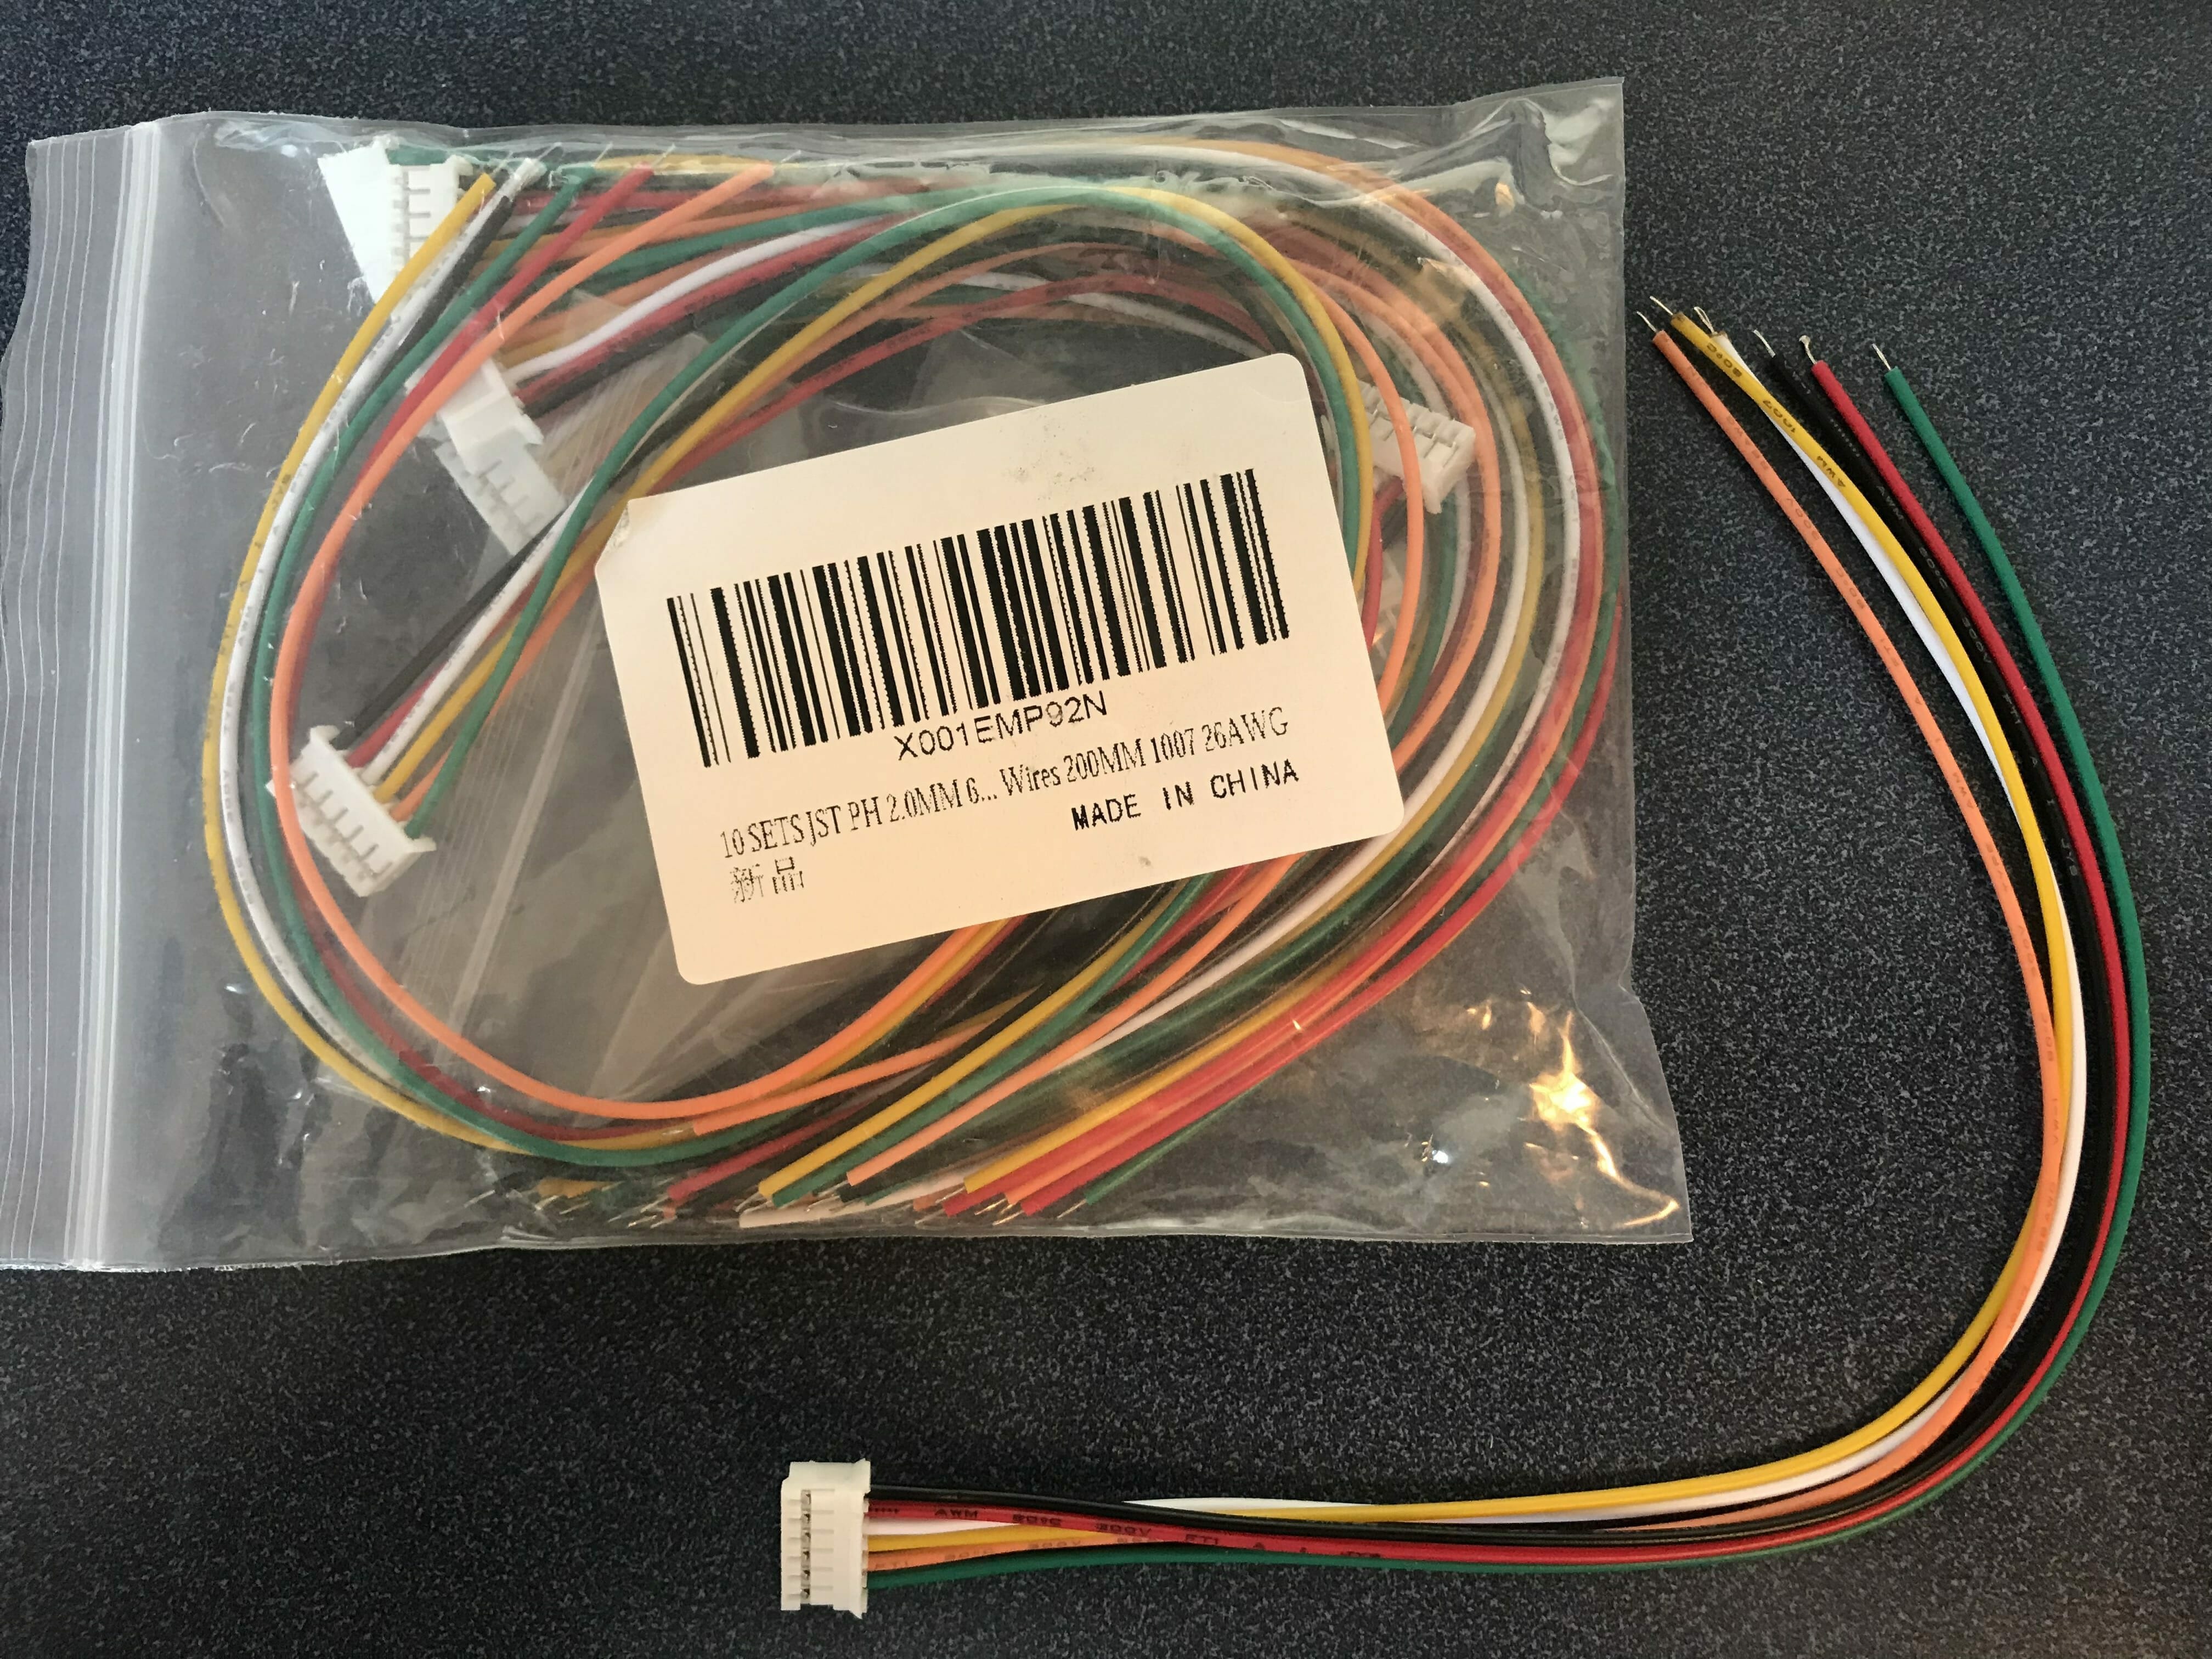
And here are some that are pre-made into 6-pin connections.
A Good Crimp
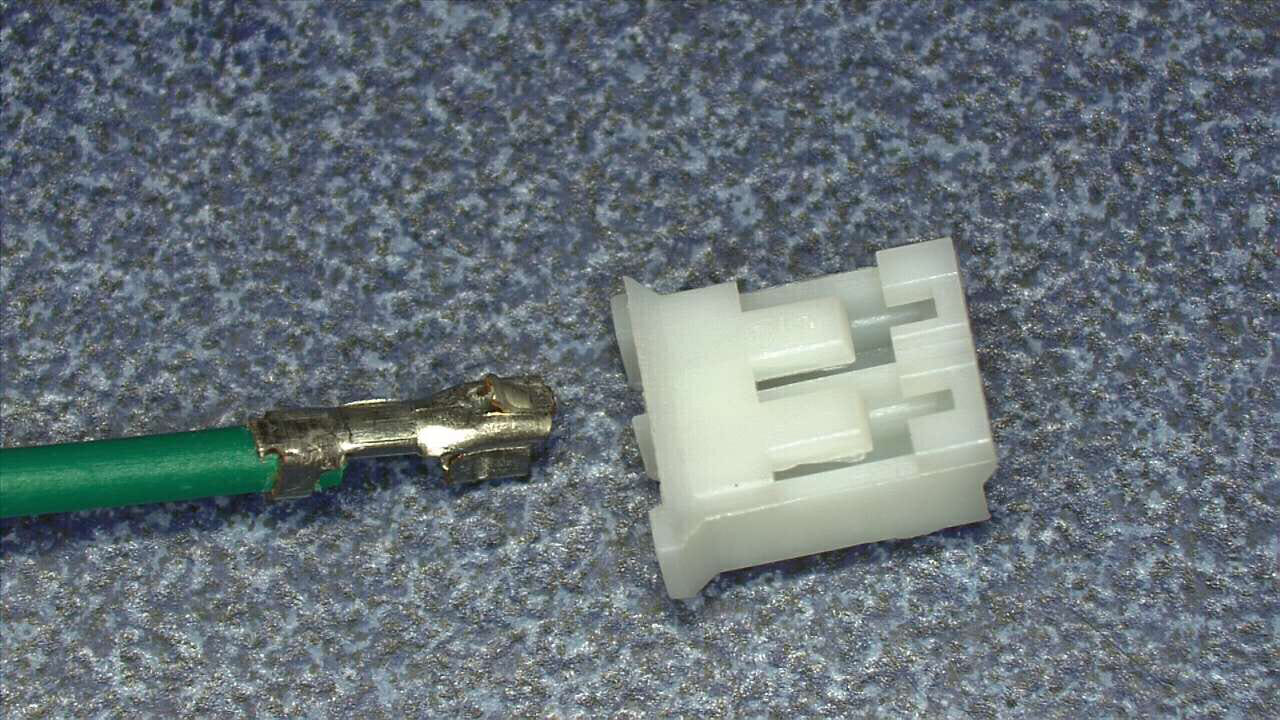
So… you really want to make your own crimps? OK. Before I tell you HOW to do a good crimp, I want to show you what you are trying to do. When you buy the crimp connectors, they will come on a metal strips which are meant to go through a machine that automatically crimps wires in China (obviously we are going to do it manually).
Each crimp connector has two sets of wings, which you will bend during the process. One set holds the wire and the other holds the insulation. Here is a zoom of some of the connectors where you can see the wings.
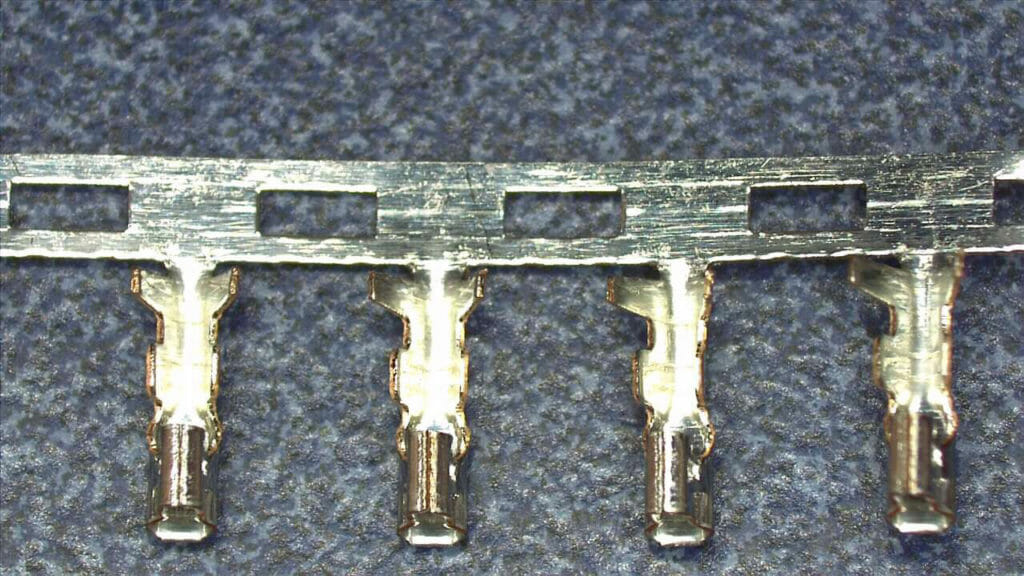
In the picture below you can see that there are two sets of wings. The set in the middle crimps the raw wire. The set that is near the strip is for the insulation.
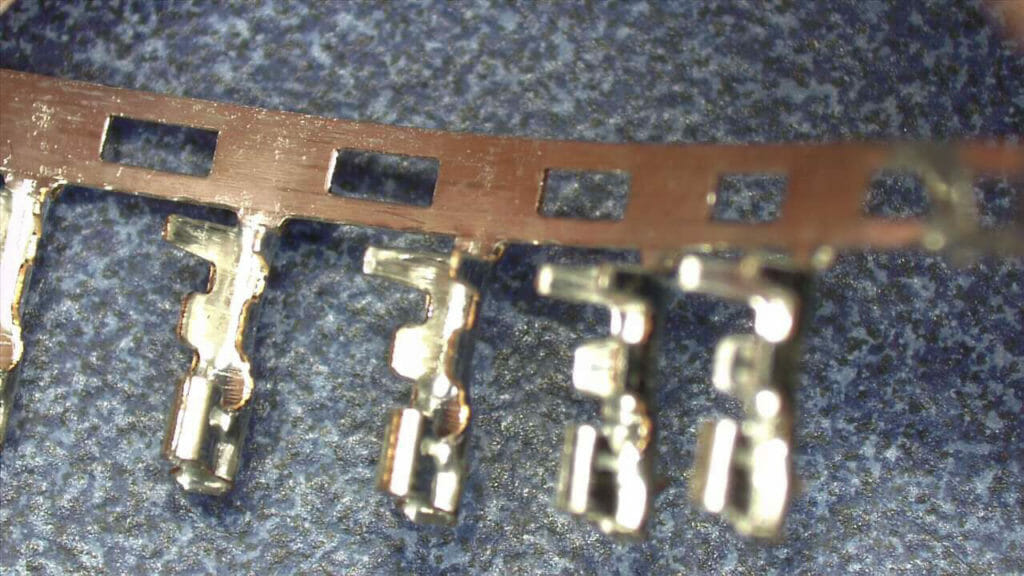
Here is a picture of what we are trying to achieve with the crimp. You can see that the inner crimp grabs all of the wires and the outer crimp grabs the insulation on the wire.
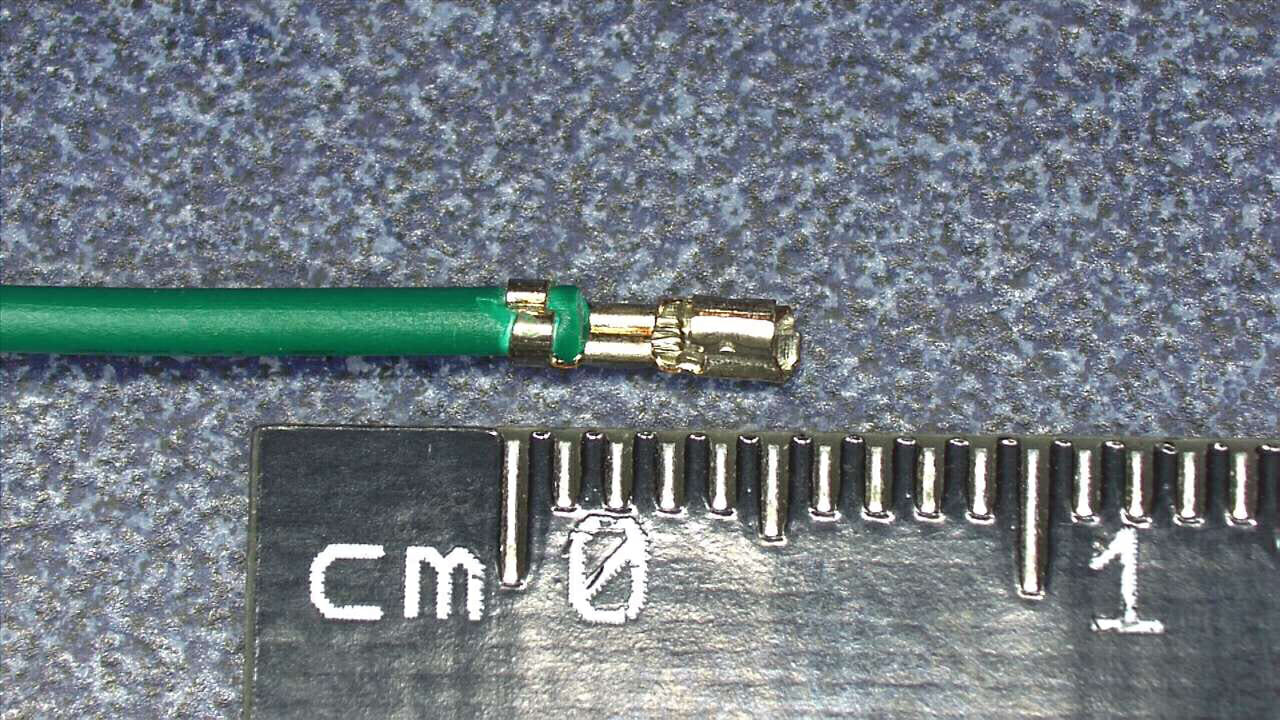
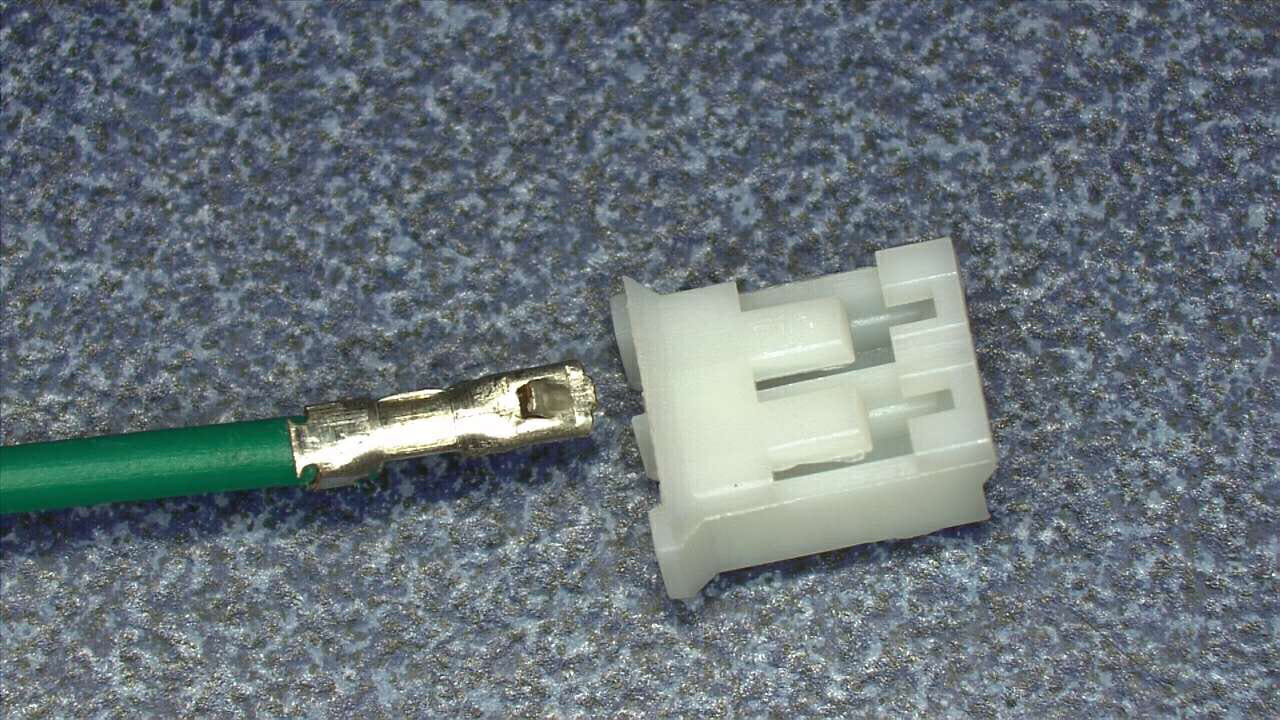
Once you have the wires crimped they will snap into a plastic housing that gangs them together. In the picture below you can see that on the backside of the crimp connector there is a little piece that is bent up. That will snap under the little plastic tab on the housing. (it is a 2-pin housing)
In this picture you can see another view of the piece of metal that is bent up to grab the plastic.
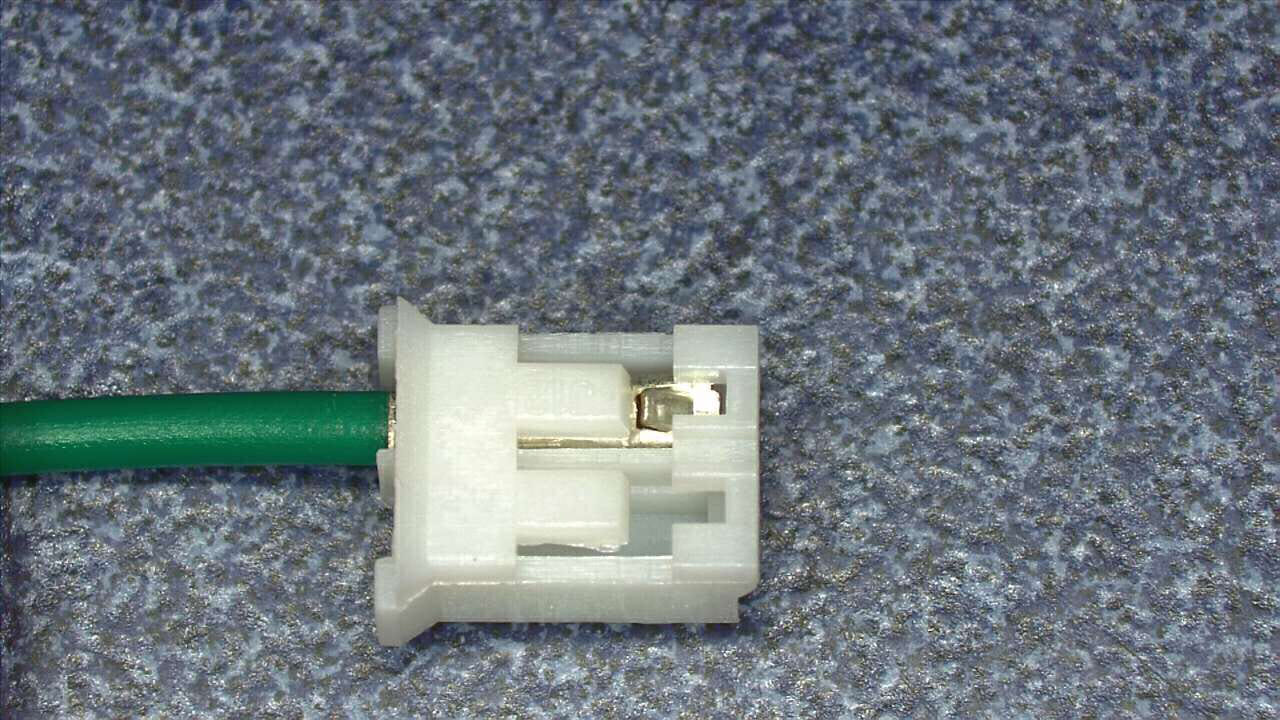
Once you stick the crimp connector into the housing it will look something like this. When you push the wire into the housing you will get a very satisfying little click (assuming you haven’t destroyed the crimp connector metal too much)
Crimping Tools
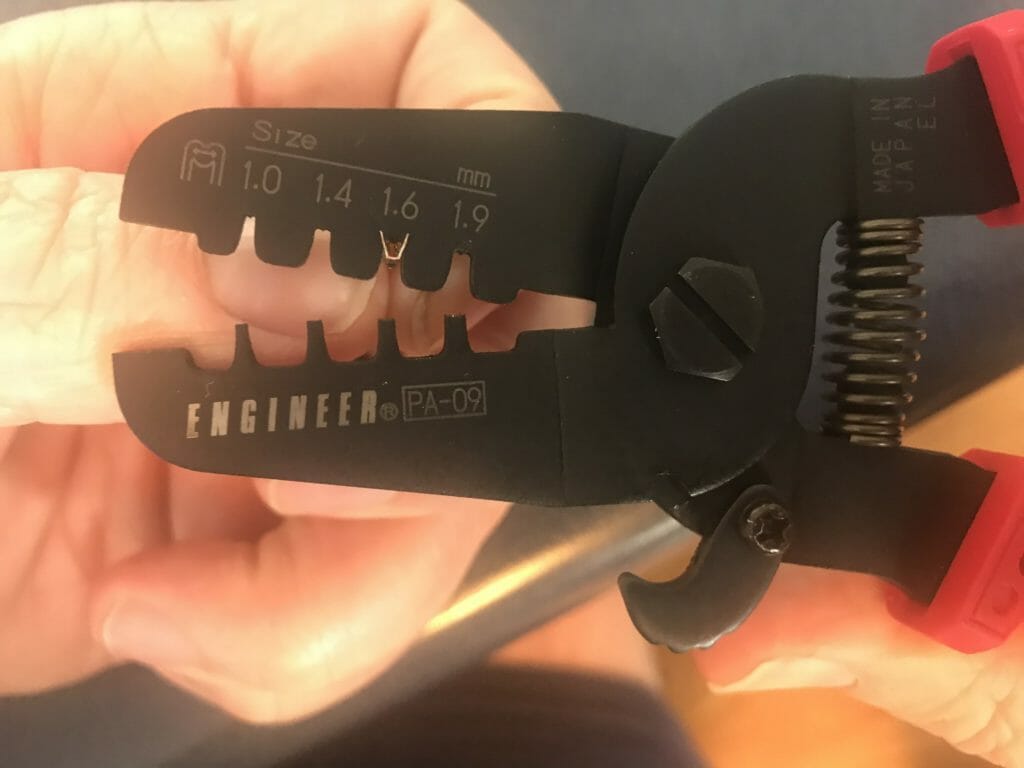
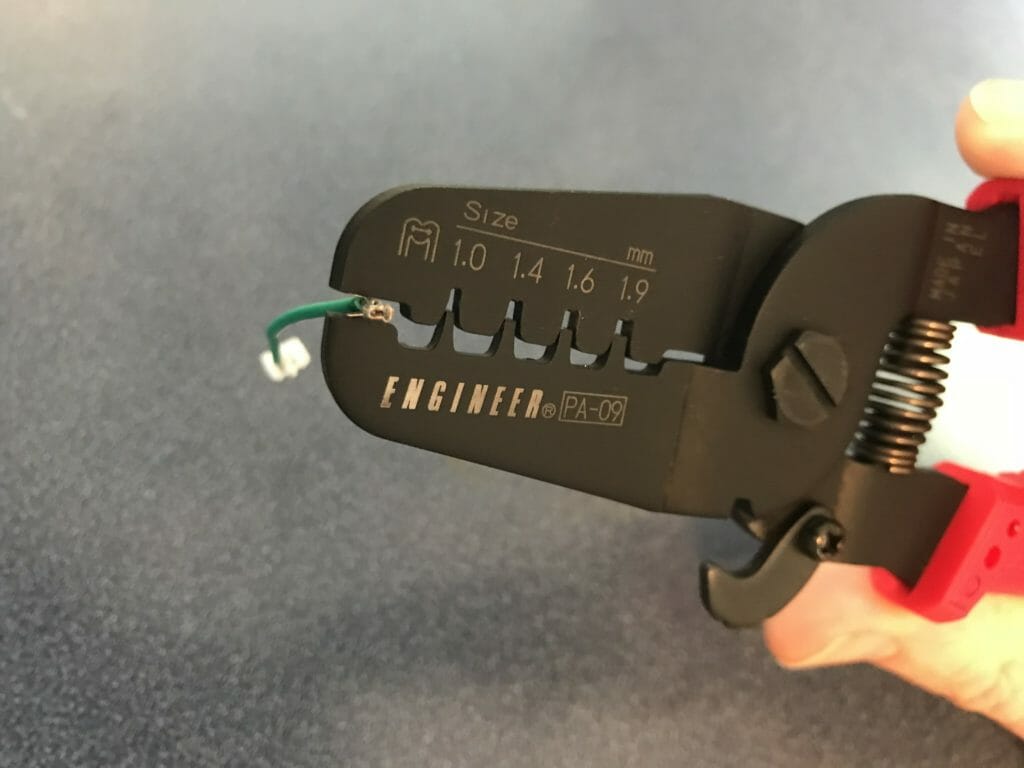
I bought a range of tools, but these tools from a Japanese company called “Engineer” seemed to be the best. These tools are less “efficient” because you have to crimp twice, once for the wires and once for the insulation, but they seem to be easier not to screw up with. The difference between PA-09 and PA-20 is the range of crimp sizes that you can do.
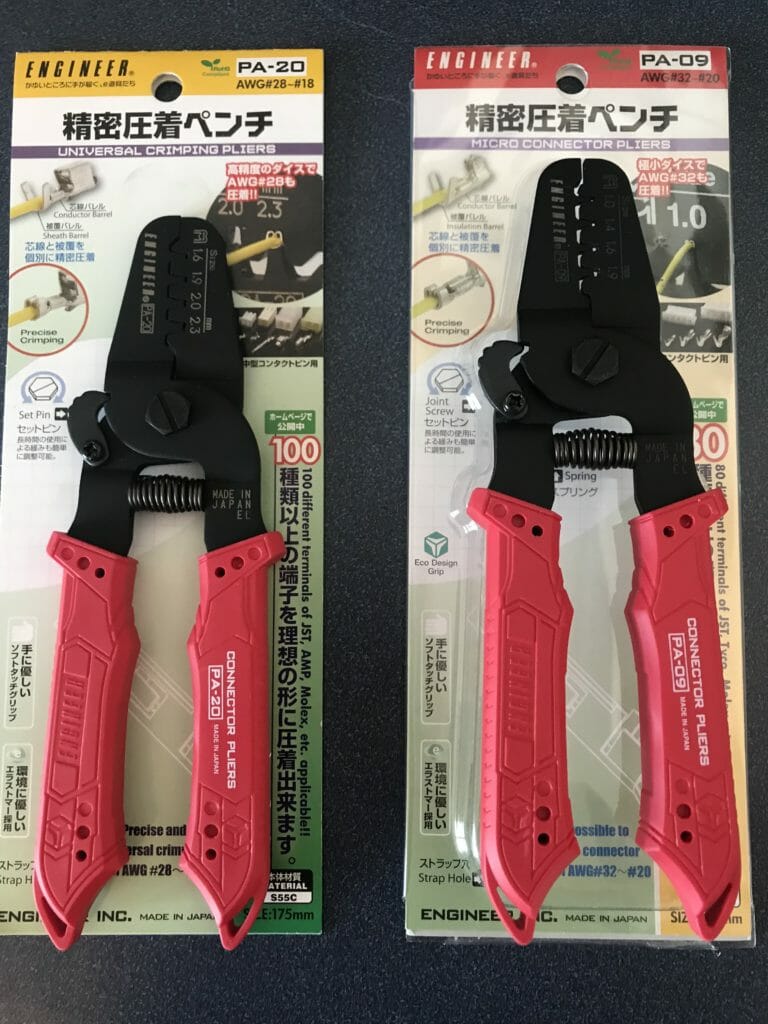
I bought these two tools from Amazon for about $20… and they crimp both sets of wings at one time… but I have not had good luck with them.
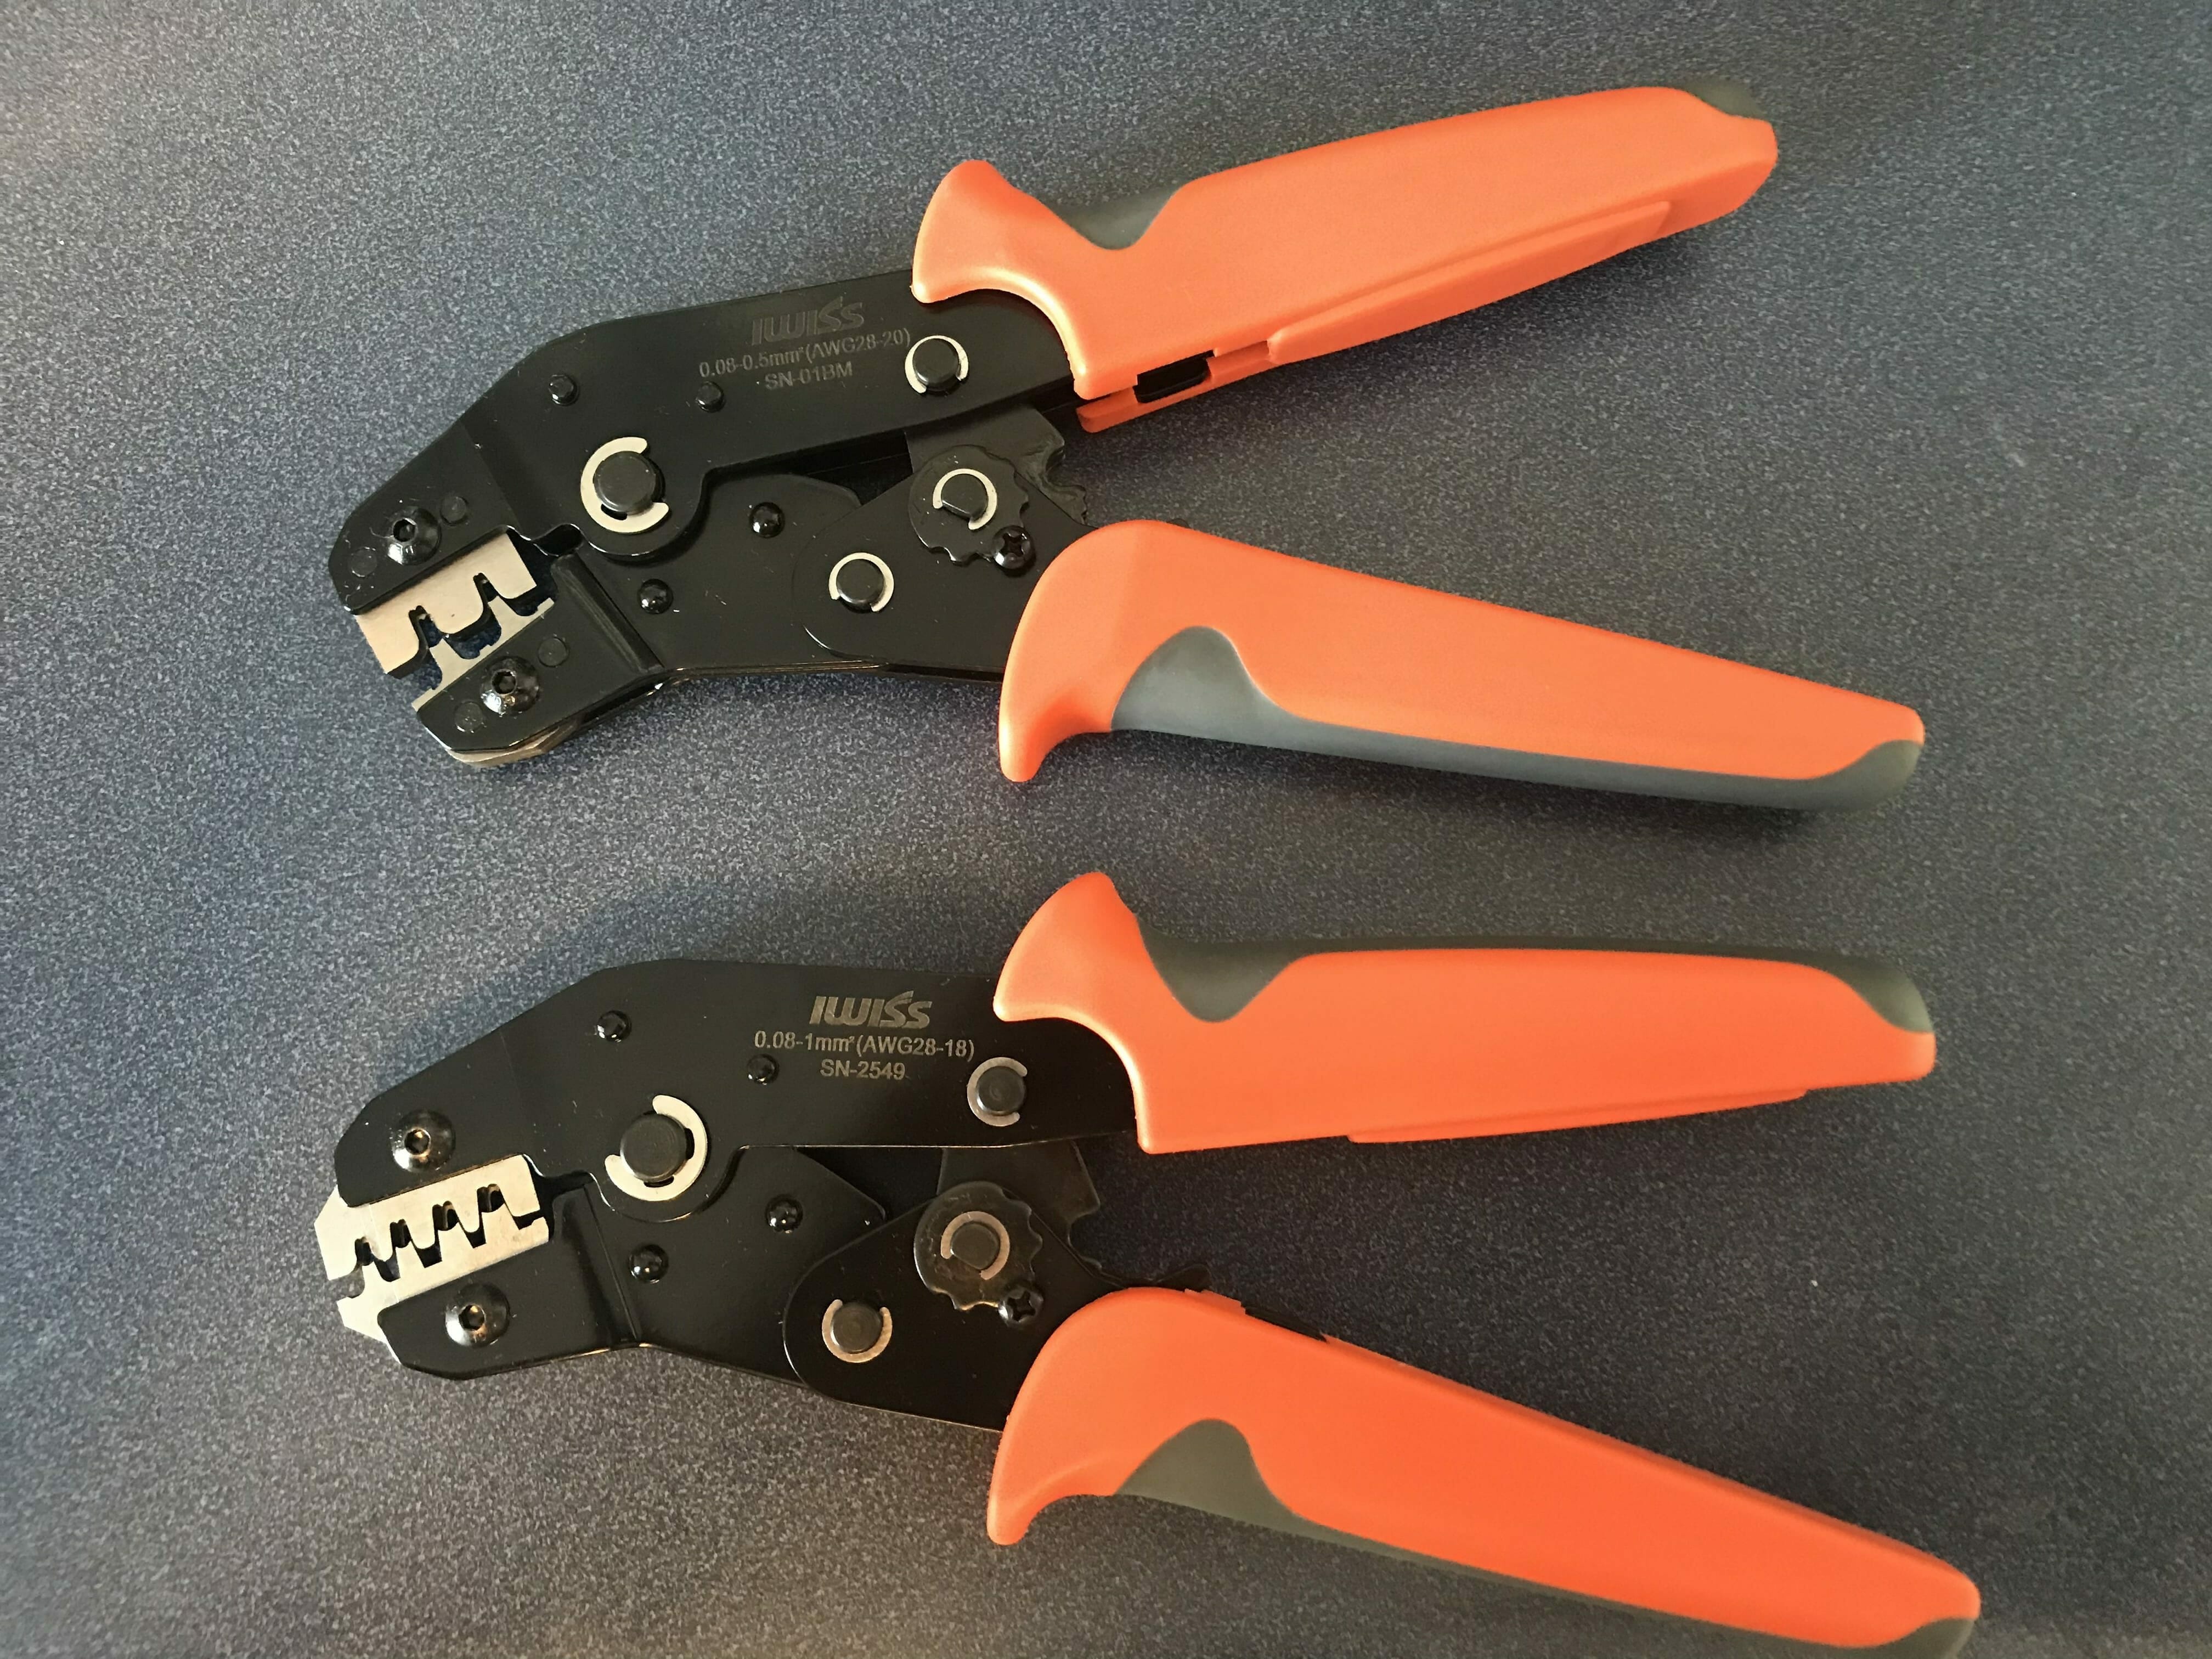
The actual JST crimper is really cool, but it had better be for $470. I haven’t tried it because the Engineer PA-09 worked so well. It can crimp both sets of wings at the same time and automatically positions the crimp connector to the exact right place. But it also only works for one type of connector, in this case the JST-PH
JST Connector Crimping Procedure
I would not say that my process is canonical, but it works.
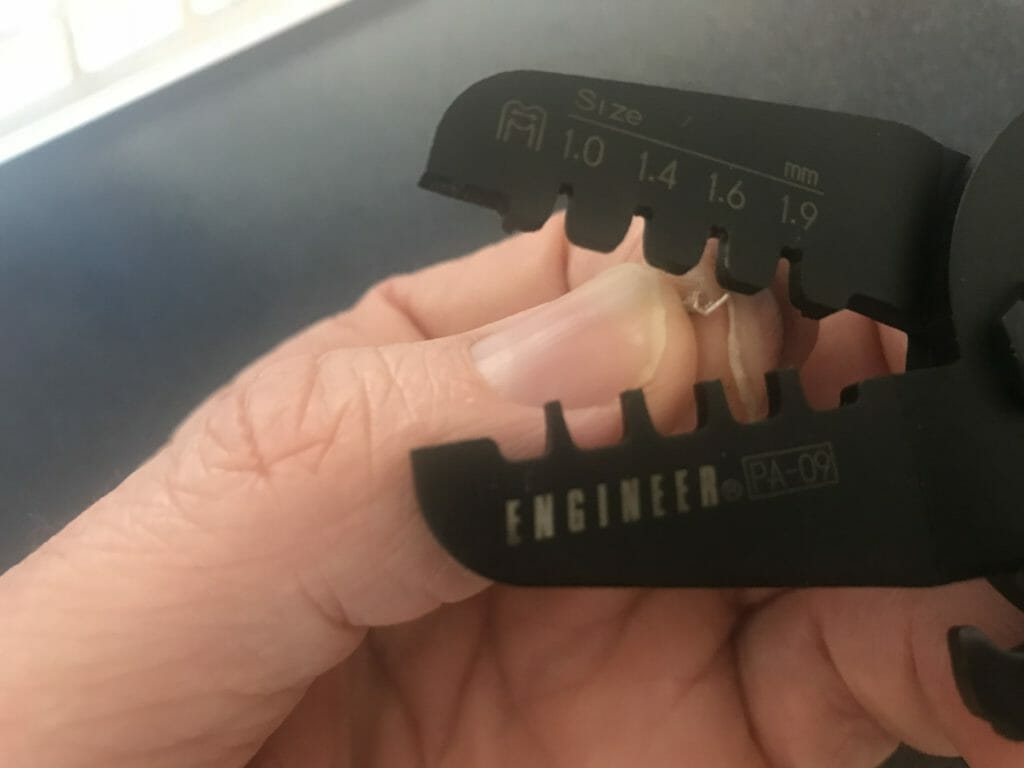
(1) Start by stripping the end of your wire, then giving it a little twist. I use a stripping tool called a “Knipex 12 42 195”. The strip should be about 2-3mm
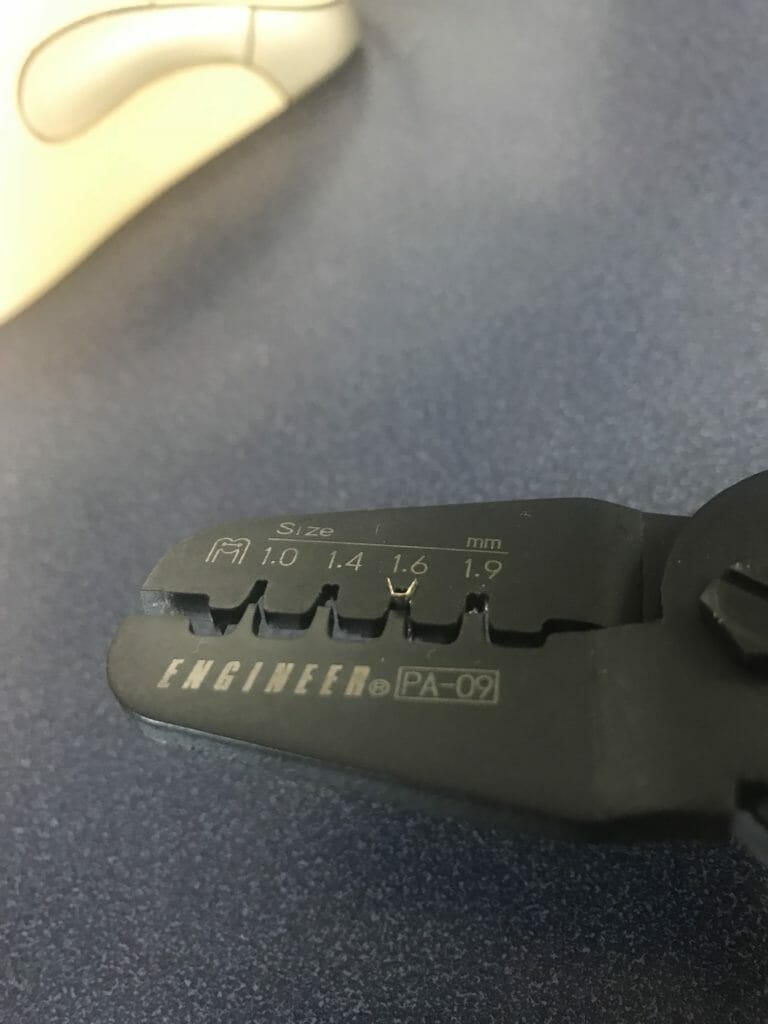
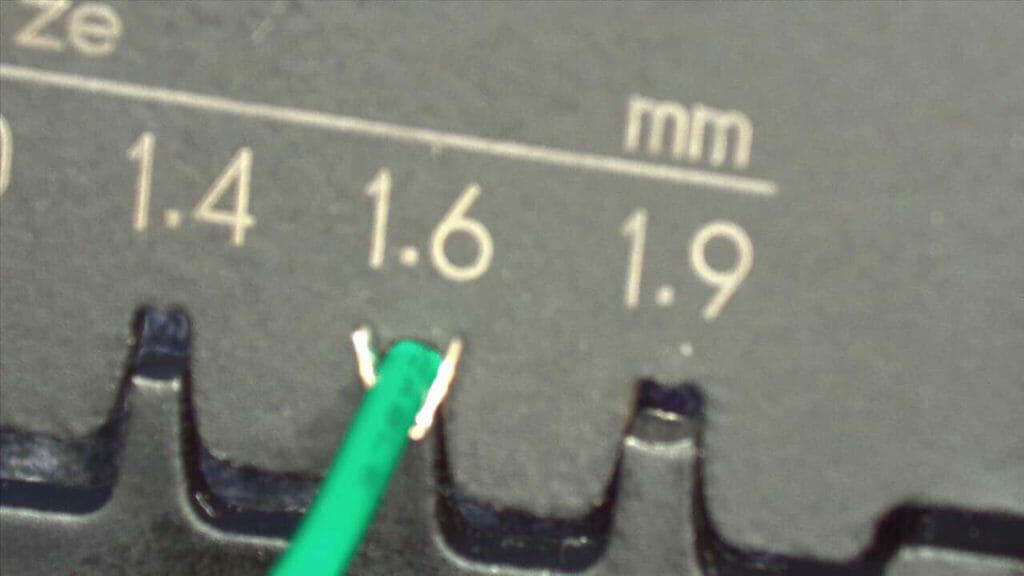
(2) Then break off a crimp connector from the strand. Hold it in your left hand and stick the wire wings into the 1.6mm section of the tool. The wings should point into the crimper (look at the picture) so that when you crimp, that they bend back on themselves. You want to make sure that the outer insulation wings are not in the crimper, meaning we are only going to crimp the inside wings on the first crimp.
Here is a picture where you can see that things are all lined up.
Dont crimp yet, but push down a little bit to hold the crimp connection in place while you use your left hand to pick up the wire.
(3) Insert the wire into the crimp connection. The plastic insulation should end at the edge of the crimper (it should not stick into the connection). In my experience, the insulation is too big to go into the connection and the side of the crimp tool keeps it from going in.
(4) Then crimp it… and you will have something that looks like this. You can see that the strands of the wire are under the newly folded wings… and the outer wings are still open.
(5) Use the end of the crimper to bend the out wings in just a little bit so that it can fit into the crimp tool. Just make them so that they are parallel.
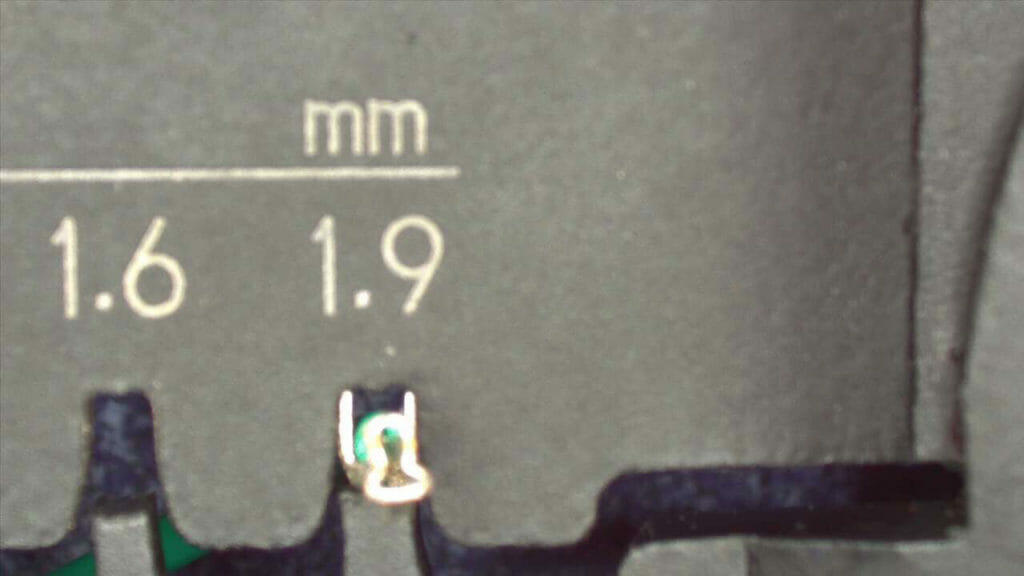
(6) Next put it in the crimp connection into the 1.9mm slot (from the other side) & crimp.
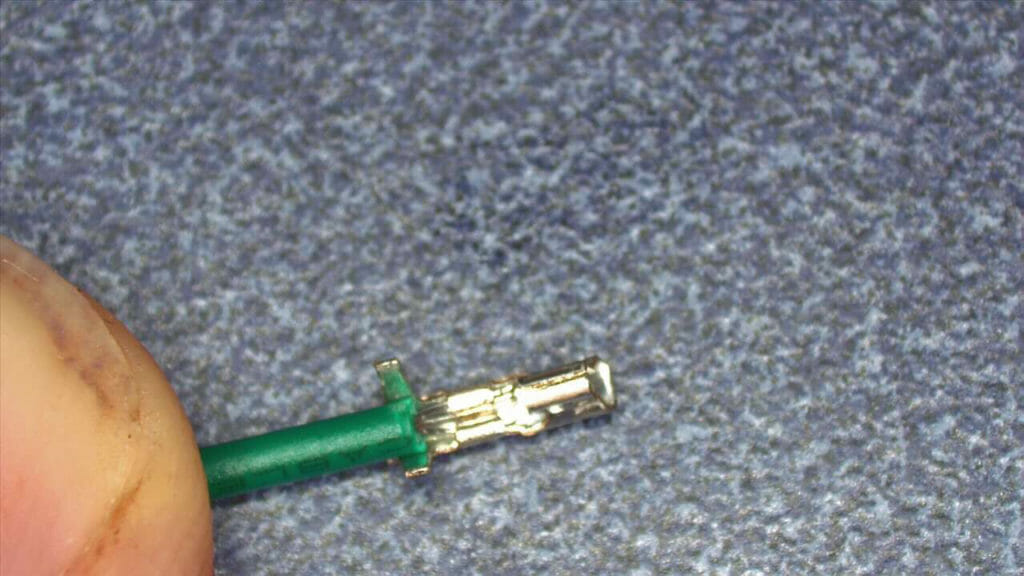
Now you should have a crimped connection
And here is a short video of me completing a JST Connector crimp
In my experience the thing that go wrong when crimping a JST Connector are
- I over crimp and bend the crap out of the connection
- I strip either too much or not enough wire
- I dont push the wire in far enough, which ends up with me not crimping insulation.

54 Comments
Where these precrimped wires can be bought? eBay? AliExpress?
Please share some links?
https://www.amazon.com/2-0MM-Female-Single-Connector-Wires/dp/B01IZWYK7I/ref=cm_sw_em_r_dp_dz_UP_n07yAbH4D3WMB_im
All types redially available at Banggood.
Yup…
You don’t have to spend $470 for a real JST PH crimper. You can spend much, much more!
I’m lucky to have this one in my lab at work:
https://www.digikey.com/product-detail/en/jst-sales-america-inc/YRS-241/455-2047-ND/1634788
It also only crimps PH contacts, and is a whopping $1,500 !! It is a joy to use though. You feed the strip of contacts in on one side, lining up the first contact with the die. Insert your stripped wire, give it a satisfying squeeze and the resulting crimp will hug the wire strands and insulator perfectly every time. It also snips off the used part of the cut strip during the crimping motion, so you push the strip in and it’s ready to go again.
I look forward to having to use it, which is once in a blue moon. To justify that expense and get a return on your investment you’d want to have the tool in use making cables constantly.
You got that right… as I said… Insanity…. or at least insanity for a normalish home lab.
I’ve compared the crimps resulting from my Engineer PA-09 to the Molex crimper at work, and had favorable results.
I was not going to buy a $200+ crimper for the rare occasion that I needed a Molex terminal crimped, and another $300+ for the JST, and however much more for the Dupont pins…
I will say that the Engineer crimpers are much higher quality than the knock off of them that I’d initially ended up with, not knowing that the cheep Chinese crimpers were as poorly fabricated as they turned out to be.
The jaws are much tighter fitted, and the machining is more precise in the Japanese made Engineer ones. The cheaper ones didn’t even have a forming/dimpling bump in the top of the jaw as shown in the pictures above, where the terminals are formed to curl back down and into or across the wire being crimped.
I agree… I think that the Engineer crimpers work the best… particularly given how infrequently I crimp
Great article, well done. Thank you for the excellent pictures. I do have a question. No one seems to cover what to do with the female ends of the JST plugs. How do I connect them securely to a wire? They are just straight pins.
Is it blindingly obvious and I am missing it? How do you attach the wires to them? My kit does not include a separate type of connecting crimp. Please help as I am utterly floored that there is no info on what to do.
The males and females have exactly the same crimping stuff on the back of them.
Alan
I assume you mean the male shrouded connectors that come with the JST-XH crimping kits. Haha! I have been hoping to discover this secret for about a year now. I just solder wires onto the pins and apply heat-shrink insulation, which just feels so wrong, like I’m missing something important. Also, it’s so tricky to avoid heat damage to the plastic connector sheath.
Like, what’s the point of the male crimp pins then? Are we supposed to pull the existing pins out of the connectors, and push the newly crimped male pins into the holes? But they don’t really fit, and they’re less sturdy and perform terribly in comparison.
Solder the wire… yes… as you say that is sooo sooo wrong. I have done it a few times… but it ALWAYS ends badly.
Alan
You mean the male side, i.e. the one with the pins? Proper JST XH, PH etc, don’t have crimpable male ends. That side is intended to be soldered to a board. Only the female is crimped. The female is the plug part for XP,PH etc.
In the case of JST SM both sides are crimpable.
Yes… I just re-read what I wrote and I am not exactly sure which place I didnt say male/female… But as Dan pointed out some/many/most of the connectors you only crimp the female part of the connector… and the other side is meant to be soldered onto the board.
Alan – FINALLY I’ve found some correct info on how to use the PA-09 crimpers! THANKS SO MUCH!
A Swiss fellow made a posting that turned me on the PA-09 vs the heavy ratchet monsters. I’ve made some successful crimps with the 09 – but I now think they were just dumb luck. After seeing your very helpful vid on using these great crimpers – it’s a whole new ball game. I should be able to crimp “fearlessly” now. I’ve seen 5 or 6 vids on crimping and none hit the points you did. A big KUDOS!
=Alan R.
Dear Grass Hopper,
You have not yet arrived at the central truth of this issue. More years of study are required for you Grass Hopper. But since this is such a
simple and elegant truth…I shall illuminate the real culprit, vile and evil in all of its forms: DAMNED WIRES.
Join the movement to eliminate the very existence of these vile creatures that have three heads for each one of them. SLAY the WIRES as surely as one would slay any dragon.
True dat DazRite-san.
I have a piece of equipment using 2.5mm pitch connectors that is similar but not identical to the XH series. I even have a cable with a ‘real’ XH connector on one end and this one on the other. The body of this light tan , almost pink connector is stamped ‘XH’ , but the keyway design is completely different. It’s possible to use ‘DuPont’ connectors with the board connectors, but they do not lock in place. The pins are of a different design also. Does not look like anything that I can find on the JST site. Pix on request – Thanks, Pete
I dont know what to tell you… But I think that I named this article correctly.. these connectors are totally insane.. .or they will drive you insane
I needed to crimp JST XH pins and bought the IWISS SN-01BM crimp tool. It works beautifully on these pins. Because the pins are not very long, it is difficult to fit them into the tool. But I found, that as mentioned in this blog, if I squeeze the insulation pair of wings so that they are parallel I can push them into position with my fingers and they will hold fast. Then I can close the jaws to the first click and hold the pin solidly while I insert the wire.
If the insulation wings are ever so slightly inside the die and not flush with the edge, you will get a perfect crimp.
Now I am trying to figure out how to strip the 26ga wire consistently to the right length.
That is good stuff.
To get the right length… use a Knipex stripper.
Excellent article, very helpful for those of us who have to strip to make ends meet.
You are welcome
This is a great tutorial. Thanks much!
Ha! Great post. JUST BUY THEM READY-MADE, PEOPLE! Life is too short. I bought a (relatively) fancy crimper from RS and spent a miserable day getting to the point where I could get ~90% success rate. As you say, really not worth the effort. Just yesterday I bought a big bag of ready made cable assemblies for less than the cost of the housings and crimps from RS. Just don’t do it guys.
Yes… that is exactly the conclusion of my article
I am looking for pre-made cables that would be used for production. What scares me is, how do I know the seller will be around in the future? What happens when I go to buy more and they are no longer available? I know this is a common problem for all types of components, but thought I would see if you can recommend an established seller who is likely to be around for awhile.
All I can say is Digikey… but I dont really know
This is the best article I have found on this topic. The pictures are superb. I wanted to say thank you! And, as my gift, I’ll add that I was failing because I was inserting the connector “wings up” into the crimped (the brand you don’t like). I can see from your pictures why it needs to be “wings down”. Maybe you can call out the proper orientation more in your explanation? It’s not intuitive to hobbyists like me and they are too small for me to figure out visually. Thank you for the great help you have provided!
Thanks… I updated the article
Success on first attempt. Thanks!
Also came to say thanks. The PA-09 is a game changer! Also, an additional (hard learned) tip: feel free to go all hulk on crimping the bare wire wings (the first crimp), but use a gentler touch with the second crimp, especially with solid core wire. As soon as you feel the wings give way, stop crimping! All you need to do is get the wings to bite into the insulation. Additional pressure will just cause the second pair of wings to break the conductor. Then you’ll drive yourself nuts with unreliable connections and wires that break off.
Check out pre crimp leads on https://gam-gec.com/
I have a tool similar to the upper of the two orange-handled crimp tools, AND a similar, bigger tool used for creating nice double-roll crimps on the standard 1/4″ auto spade connectors (and a few others, including the round molex connectors seen on computer hard drives)
I have used the bigger tool for a number of years, and found that the best way to set up a crimp is to place the empty connector into the ralative position in the jaw, correctly positioned so that the two sets of prongs are properly placed in the positions where they will roll. Close the tool to the first ratchet click. I then insert my pre-stripped wire into the waiting end of the connector until the end of the insulation stops against the small step between the 2 sets of roll formers.
Crimp
When the finished crimp is ejected, i inevitably have a neat, double roll crimp one on the wires, and a bigger double roll crimp on the insulation.
The illustrated tool i mentioned works exactly the same way, just smaller.
Doing it this way, one hand holds the tool, the other holds the connector in position until you close to that first click, then that hand is freed to hold and insert the wire. Trés simplé!
Thank you… those comments are super helpful. If you wanted I would happily post pictures 🙂
I have lost some wire that go into the housing
They have the little spring or clip that keeps them in
Where can I buy just the wire with the spewing clip on them
To go in an existing housing…header
Thank you
If you search on eBay for “jst with wires” you will find tons of options.
Alan
Spring clip that is
While we are talking about hardware necessary for the same tools are the most important part of it. The help of the tools makes our life so easy. One can not thing routine without hardware tools. For the same only was searching the details for new updates on it and read your blog . This is such a valuable tools information thank you for details.
Thank you Alan for the awesome writing and images. I am one of those weirdos that likes to hand-craft my stuff, and started doing it with ethernet cables many years ago. Many tools later and a large collection of connectors and wire, I like making my own gear for the robotics I work on, and the networks that support them. The software too.
At the ripe age of 55, I do not know if I will ever achieve my youth-time goal of being an electrical or software engineer, especially at today’s education costs, but learning a new process that involves my passion always makes what I have accomplished worth it.
I sincerely appreciate your contribution, and found it very educational and certainly entertaining. Thank you!
Gary (Hop of HopWorks – Embedded Imagination)
You are welcome
Thank you for making this guide. I was able to crimp 4 connections (in 5 attempts) using your instructions and this crimper (which is a bit cheaper).
(I also bought some pre crimped wires, but was able to get the job done before they got here.
https://www.amazon.com/gp/product/B078WNZ9FW/ref=ppx_yo_dt_b_asin_title_o03_s00?ie=UTF8&psc=1
You are welcome
Thats better than me 🙂
Alan
Thank you… honestly I was beginning to think it was just me… I have a drawer full of crimpers and a new pair arrived yesterday from Amazon because I was not willing to give up on crimping those little JST pins. I 100% agree, buy pre crimped but there are always times when you need that one special cable or some special length and I really wanted to master this… The one yesterday came with Dupont assortment and JST assortment and SN028B crimper. I will admit the Sn028B crimper works AWESOME for the dupont connectors. Doesn’t work worth dung for JST. Being the stubborn type, I see a PA-09 crimper in my future. If I can’t crimp nicely with them I won’t blame you, I will know its me at that point and give up!
Great post.
Never accept that you can’t figure it out.
Keep on digging.
Alan
This is an excelent tutorial and I wish i could have found it before learning under the “School of Hard Knocks” methodology. Kudo’s to you and your time and patience to do this.
Thank you…
~”Experience is a bitch of a teacher… it gives the test first and then the lesson.”
Alan
I tried a few “cheap” tools then purchased the PA09 back then they were over $50 + Shipping. I came across IWISS IWS-3220 a few years ago and was amazed, the jaws are stepped so it only takes one crimp, after you set the connector into the jaw and squeeze gently they lock allowing you to insert the wire without worrying about the pressure on the handles and a big item is the notch on the connector that locks it in place, they catch it and hold it outside of the jaw. Just did another batch of XH connectors, perfect. I liked the IWISS tool so I purchased their PEX pipe crimp tool, another winner, I can get into areas my other tools can’t. Oh, 50 was fun, wait until you’re 72…
72 is something to look forward to for sure!
Great and informative article. I appreciate the work, information, and layout. Frustrates me when I am looking for information and I have to filter through 3 paragraphs (or 10 minutes if it is a video) of introductions and backgrounds before getting to the meat of the subject. If the contributor needs to stroke their own ego, then do it at the end.
However, you went immediately into what brought viewers to this article in the first place. You also clearly and intelligently divided the article into sections, giving the reader the ability to go straight into what was most important to them.
I have been using MOLEX, Dupont, and JST-VH pins for a long while for connections on Duet 2 and 3 as well as custom cables for PC enthusiasts. I have always used a ratchet tool that crimps the wire and insulation barrel at the same time. I just introduced a new tool board that uses these connections across most of the board. Your article has been a lifesaver. I just ordered the proper tool and also decided to switch from the 12 62 180 SB to the 12 42 195 that you featured here.
Again, thank you for the information and the work performed to present it in an awesome way.
Hi, great article!
How do you know to use the 1.6 for the wire crimp and the 1.9 for the insulated part of the wire?
Is it a test and see what slot fits the connector?
I’ve had good luck with the IWiss Crimpers though my biggest problem is I don’t get the wire in far enough or too far in.
I probably need to make a wire ruler and mark exactly how far the wire goes in for each different connector.
But I’ve seriously am considering the Engineer tools you mentioned and only do one connector at a time.
Im sure that there is a real way to figure out 1.6 and 1.9 … but I just screw up a few every time to get started…
When crimping a JST pin, leave it attached to the collating strip. Use the collating strip as a handle, and break the pin off AFTER crimping! MUCH MUCH easier!
That is a good idea