Embedded World 2021 - Infineon ModusToolbox PSoC 6 Drone
#
Description
0
Introduction & Resources
1
FreeRTOS & CapSense
2
3-D Magnetic Sensing XENSIV Joystick
3
WiFi
4
MQTT
5
Low Power
6
BLDC Motor Control
7
WS2812 Strip LEDs
Summary
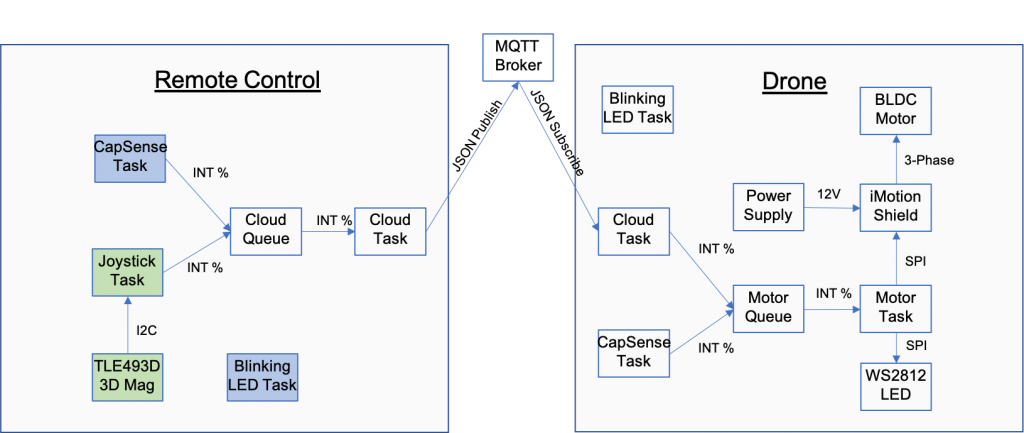
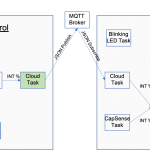
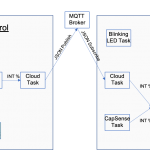
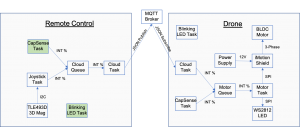
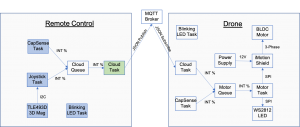
In lesson 2 we will add the Infineon XENSIV 3-D Magnetic Sensor with a Joystick to the project . At the end of lesson two you will have the “JoyStick Task” colored green. Here is the architecture:
Learning Objectives
In this lesson I will teach you about
- Libraries & the Library Manager
- Multiple RTOS Tasks
- XENSIV 3-D Magnetic JoyStick
Procedure
I am going to follow these steps:
- Look at the Sensor GUI
- Start a new project
- Add the TLx493D library
- Create the joystick_task public header
- Create the joystick_task implementation file
- Test
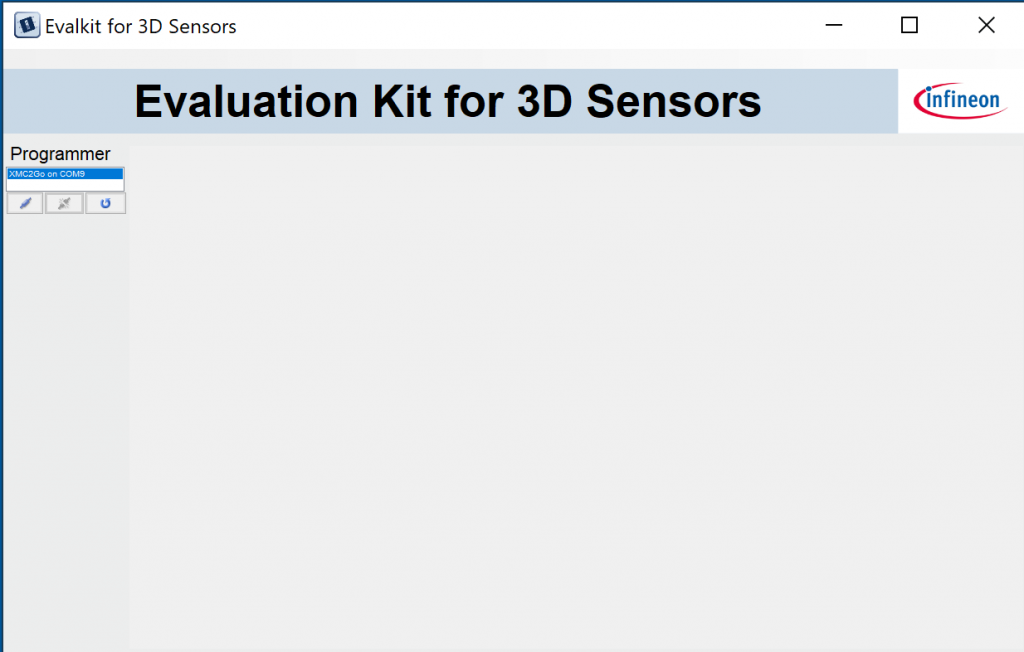
1.Look at the Sensor GUI
Start the GUI and click the connect button.
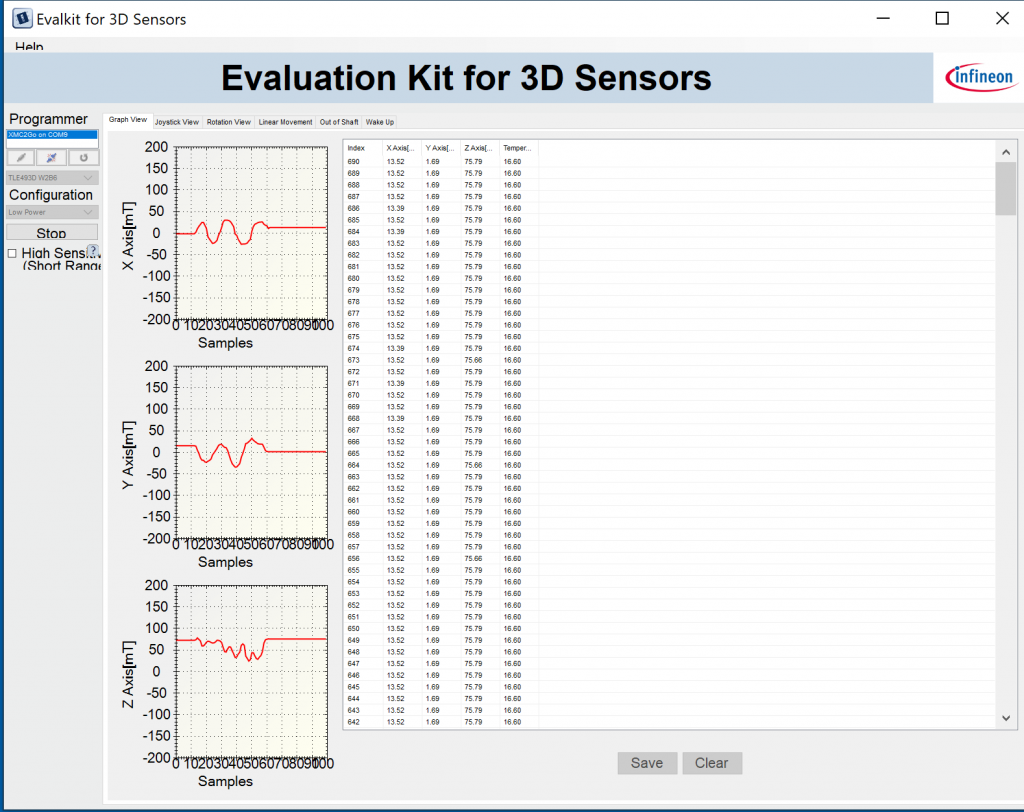
Press start and you will now see x,y,z values.
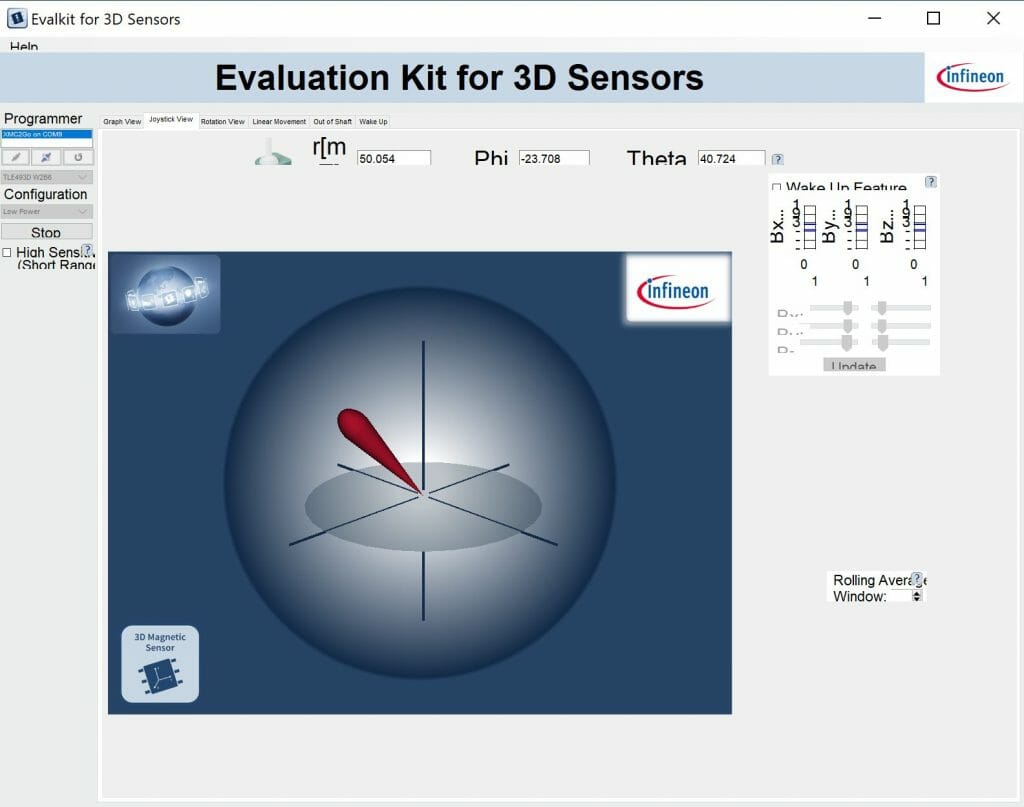
Click on the joystick view to see how it looks as a joystick.
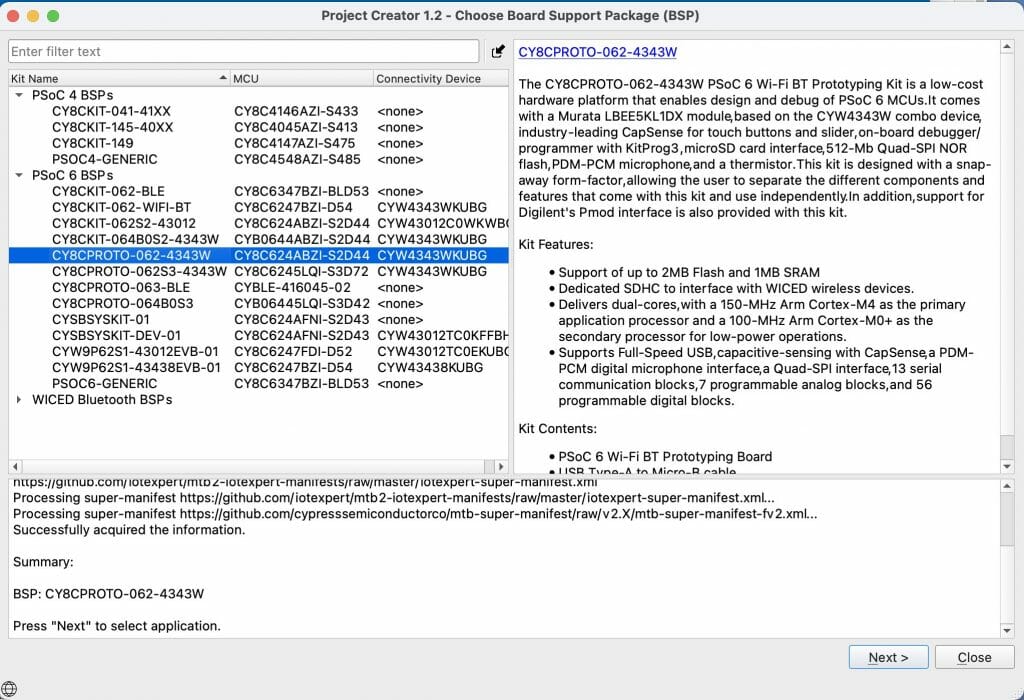
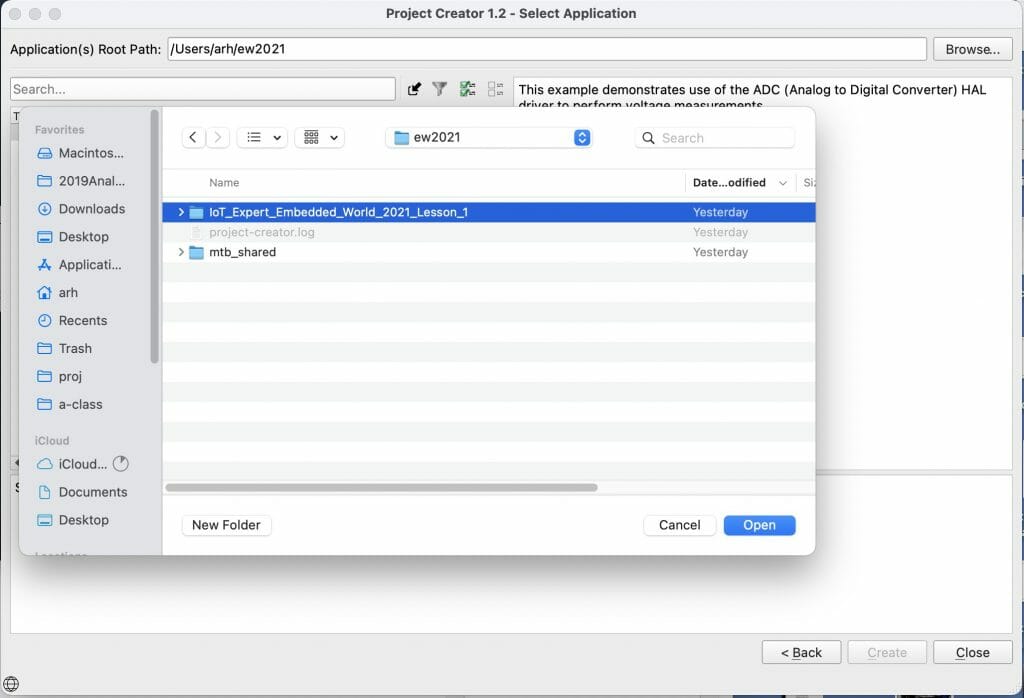
2. Start a new project
Start the new project creator and pick out “CY8CPROTO-062-4343W”
This time I will start from the previous project. Press the “Import” button and select your old project to open.
Give your project a new name (notice that we are starting from 1 as the template)

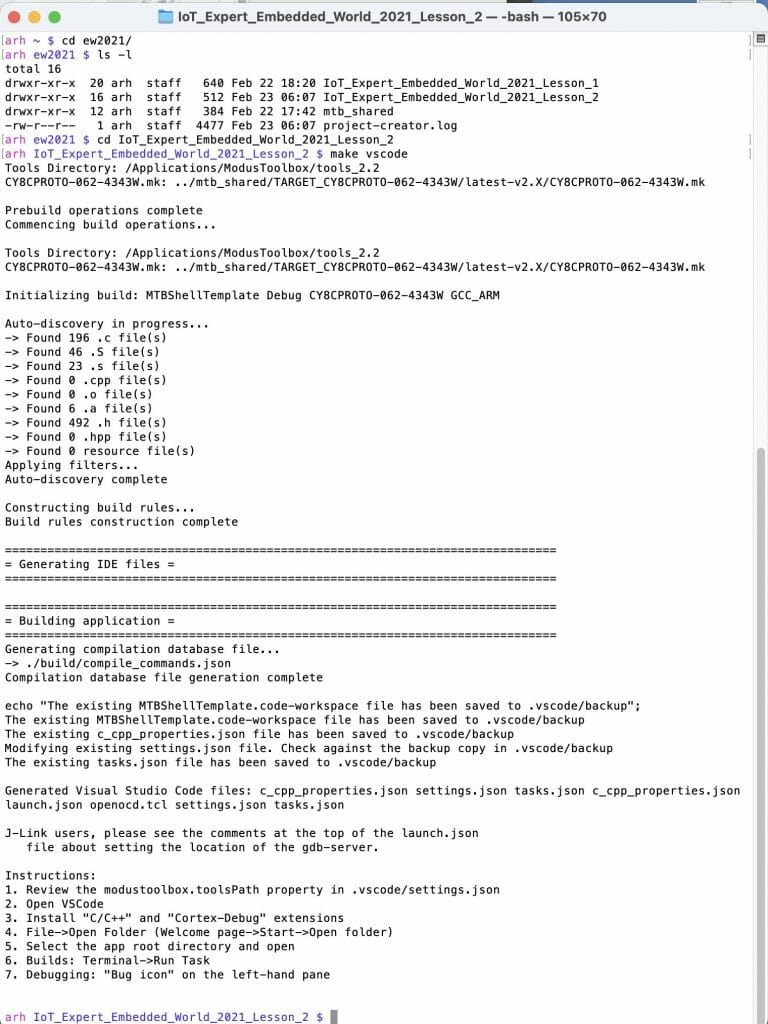
Open up the command line and make vscode.
Do a command line build/program by running “make -j program”.
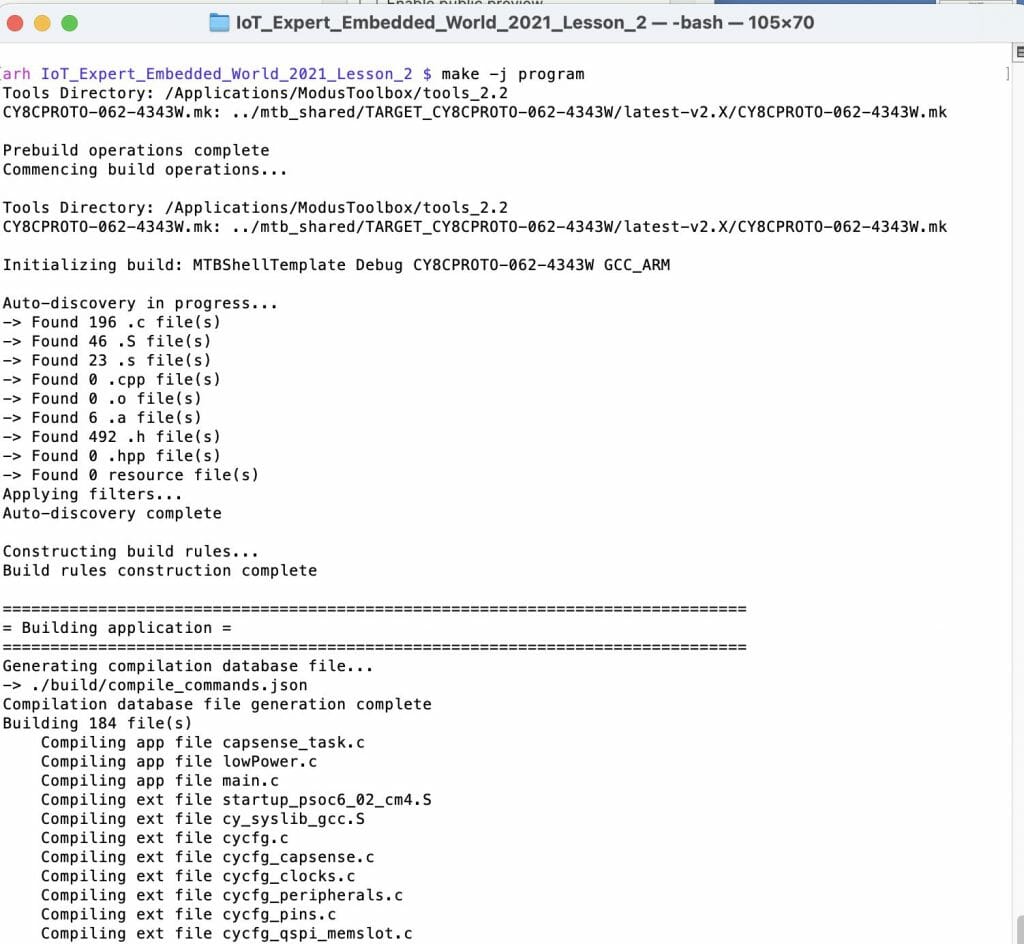
It will finish compiling and then program your board.
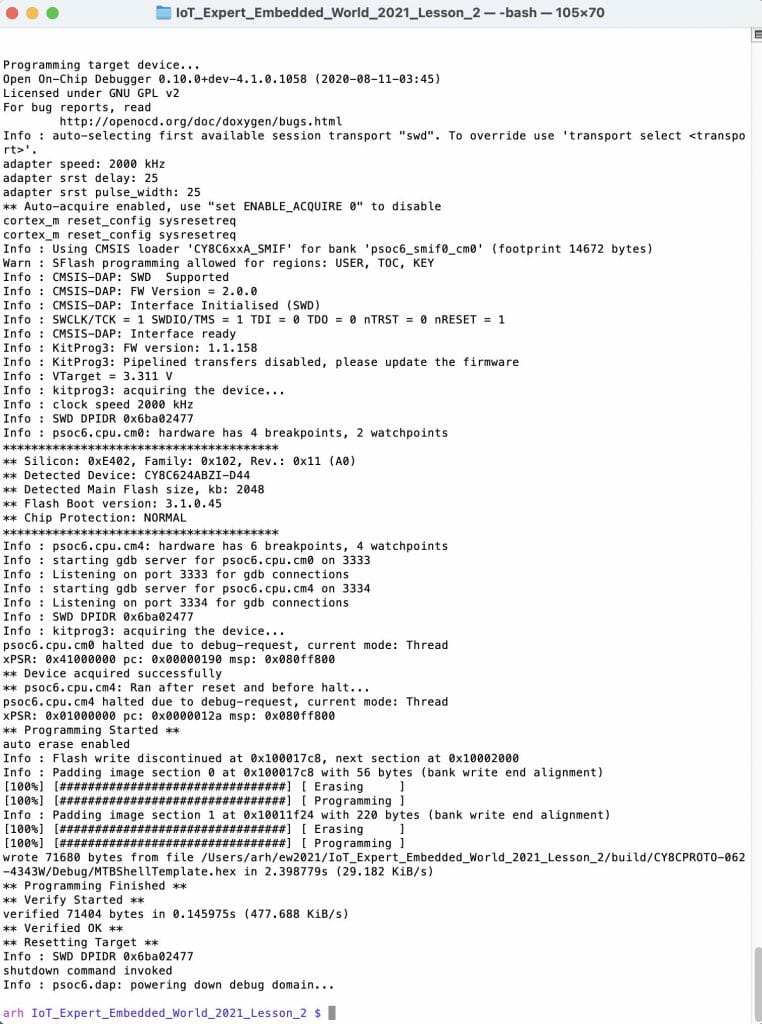
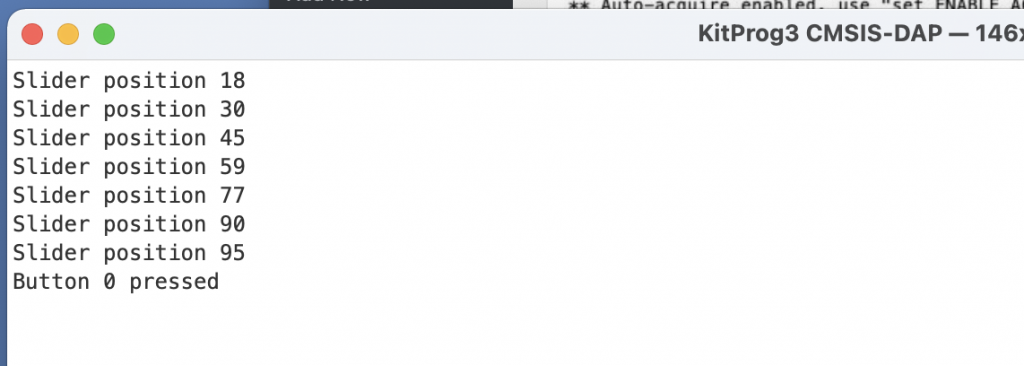
Now look at the serial terminal and make sure that the CapSense is still working
3. Add the TLx493D library
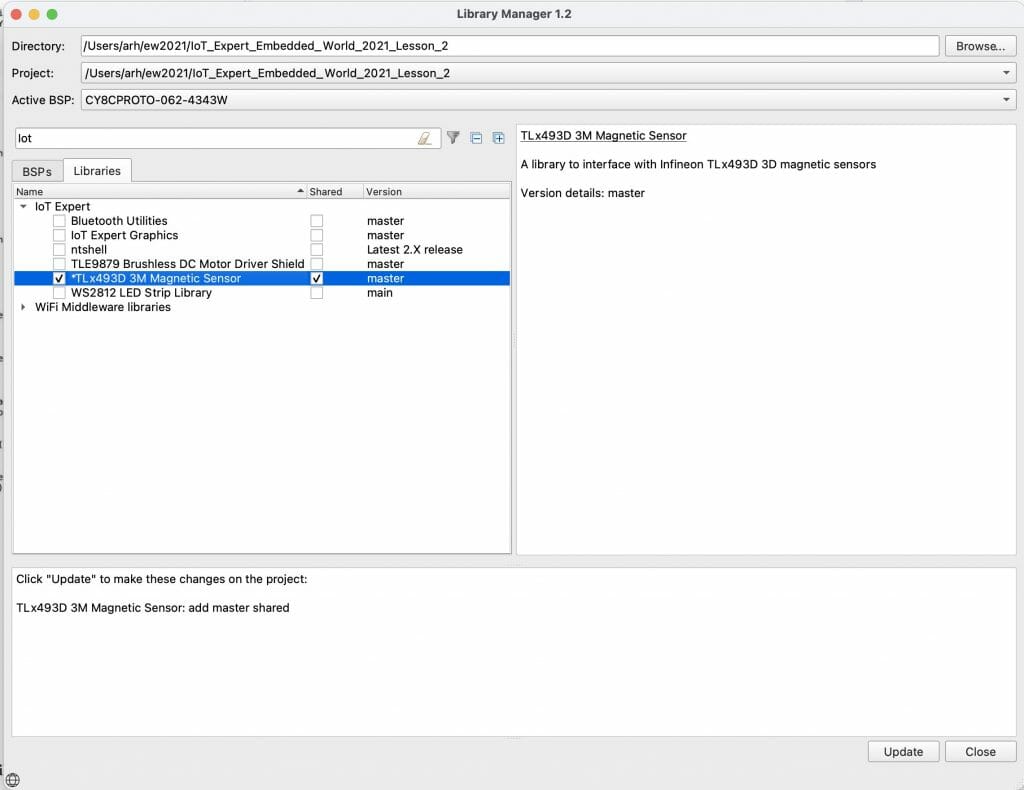
In order to interact with the TLx493D it would be much simpler if you had a library. Well, I have just the solution for that. Start the library browser and filter for IoT. Notice that one of your choices is the TLx493D 3D Magnetic Sensor library. Check the box, then press Update. Once the update finishes, press Close.
After running the update you will notice some new stuff. First there is a file in your “deps” directory. We will look at that in a second. Also notice that there is a new directory in the mtb_shared directory.
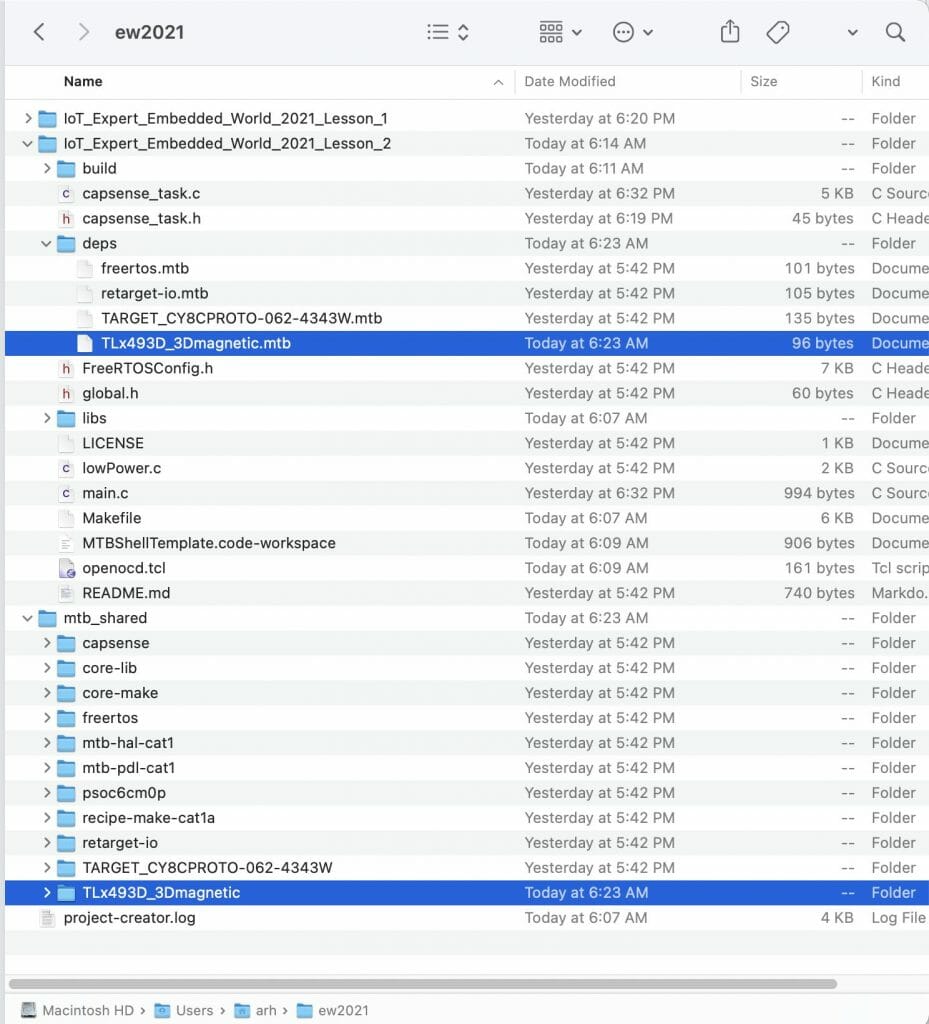
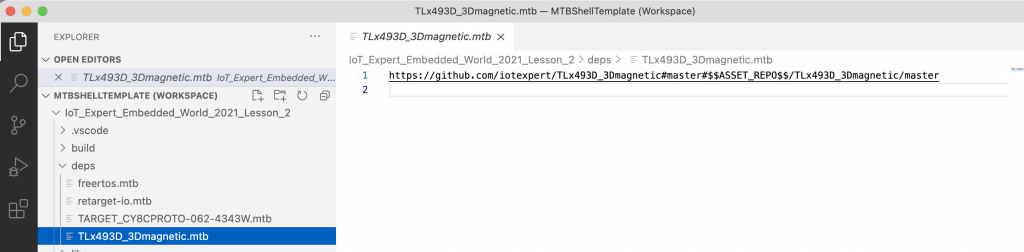
When you look at the dot-MTB file you will see that it is just a
- URL to GitHub
- A branch name = “master”
- A location to put it = mtb_shared/TLx493D_3Dmagnetic/master
This is JUST A SIMPLE GIT REPOSITORY.
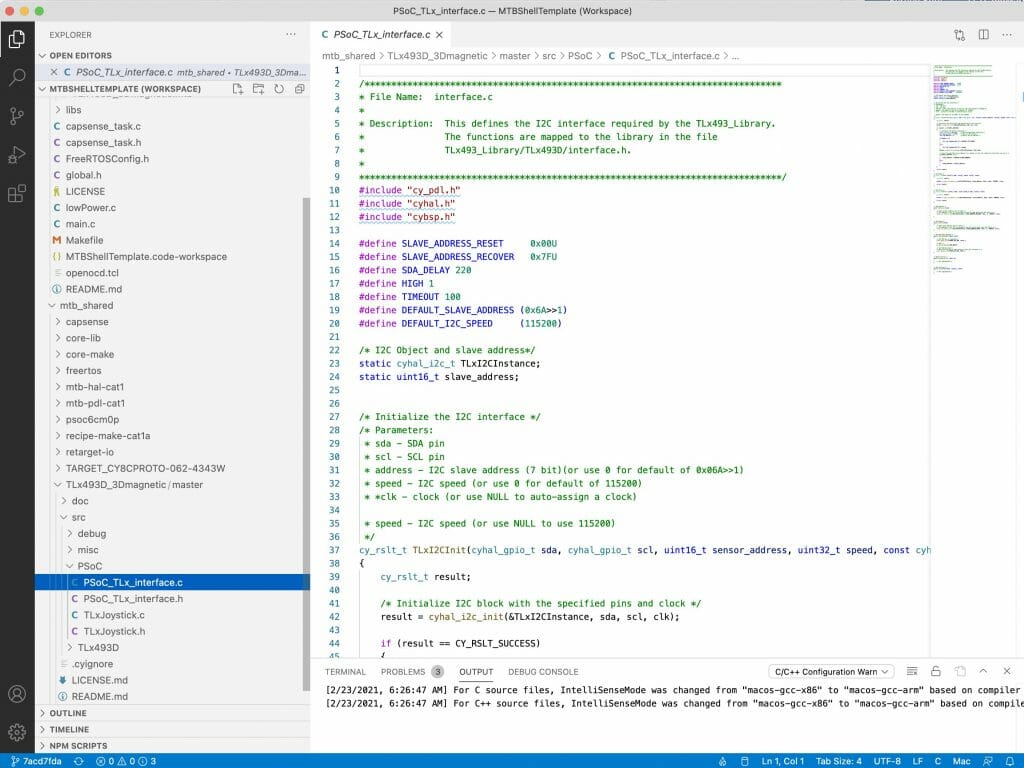
When you open vscode and look in the repository you will see normal c-code.
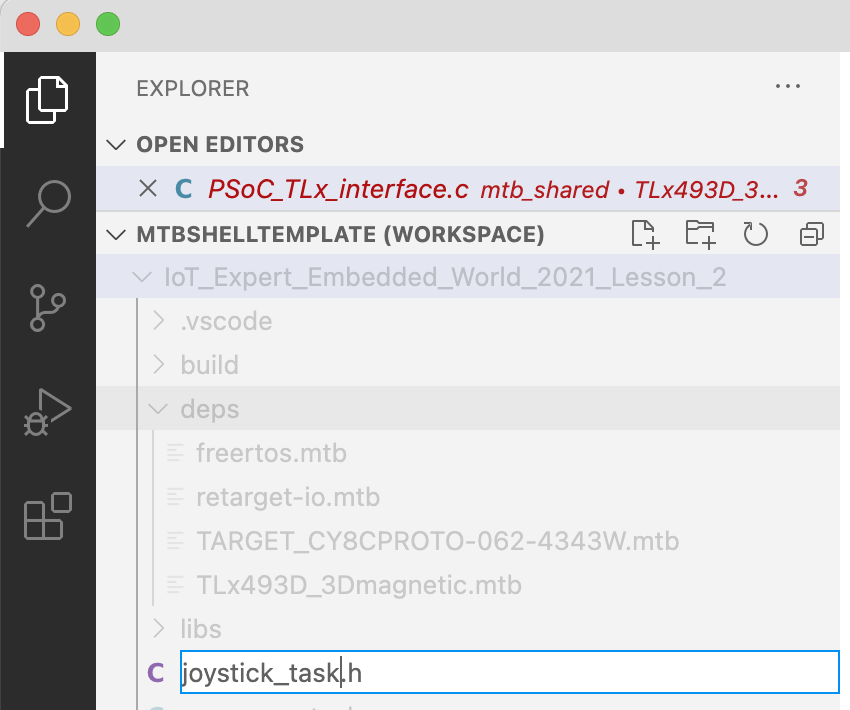
4. Create the Joystick_task public header
We want to have a task called “joystick_task”. So create the public header file for that task.
Then add the long and extensive code. Just a function prototype for the joystick task.
#pragma once

void joystick_task(void *param);
5. Create the joystick_task implementation file
Now the actual code for the joystick is straight forward
- Some includes
- The task definition
- Initialize the interface to the joystick with TLxI2CInit
- Initialize the library with TLx493xInit
- Loop repeatedly
- Read one frame from the joystick sensor
- Convert the frame to x-y coordinates
- If there is a new position print it.
- Save the old data
- Wait a bit
- Loop back to the start
#include "cybsp.h"
#include "FreeRTOS.h"
#include "task.h"
#include <stdio.h>

#include "joystick_task.h"

#include "PSoC_TLx_interface.h"
#include "TLxJoystick.h"

#define JOYSTICK_INTERVAL_MS    (100)   /* in milliseconds*/
#define JOYSTICK_HYSTERESIS		(1)

/*******************************************************************************
* Function Name: task_joystick
********************************************************************************
* Summary:
*  Task that initializes the Joystick block and processes the input.
*
* Parameters:
*  void *param : Task parameter defined during task creation (unused)
*
*******************************************************************************/
void joystick_task(void* param)
{
    (void)param;

    cy_rslt_t result;

    TLx493D_data_frame_t frame;
    TLxJoyStickXY_t joystick_curr;
    TLxJoyStickXY_t joystick_prev;

    /* Initialize I2C interface to talk to the TLx493D sensor */
    TLxI2CInit(CYBSP_I2C_SDA,
                        CYBSP_I2C_SCL,
                        0 /* Use Default Sensor Address */,
                        0 /* Use Default Speed */,
                        NULL /* Use Auto-assigned clock */);


    /* Configure the TLx493D sensor */
    result = TLx493D_init();
    if (result != CY_RSLT_SUCCESS)
    {
    	printf("Joystick not detected. Exiting Joystick task.\n");
    	vTaskDelete(NULL);
    }

    /* Set Sensor to Master Control Mode */
    TLx493D_set_operation_mode(TLx493D_OP_MODE_MCM);

    /* Repeatedly running part of the task */
    for(;;)
    {
        TLx493D_read_frame(&frame);

        TLxJoystickCovertXY(&frame,&joystick_curr);

        /* Only update/print new value if it has changed by more than the hysteresis value */
        if((joystick_curr.x > (joystick_prev.x + JOYSTICK_HYSTERESIS)) || (joystick_curr.x < (joystick_prev.x - JOYSTICK_HYSTERESIS)))
        {
            printf("Joystick Position: %d\n", joystick_curr.x);

            joystick_prev.x = joystick_curr.x;
            joystick_prev.y = joystick_curr.y;
        }
        vTaskDelay(JOYSTICK_INTERVAL_MS);
    }
}
6. Edit main.c
In main.c you need to include the joystick_task.h and then start the task
#include "cyhal.h"
#include "cybsp.h"
#include "cy_retarget_io.h"
#include <stdio.h>
#include "FreeRTOS.h"
#include "task.h"
#include "capsense_task.h"
#include "joystick_task.h"

volatile int uxTopUsedPriority ;

void blink_task(void *arg)
{
    cyhal_gpio_init(CYBSP_USER_LED,CYHAL_GPIO_DIR_OUTPUT,CYHAL_GPIO_DRIVE_STRONG,0);

    for(;;)
    {
    	cyhal_gpio_toggle(CYBSP_USER_LED);
    	vTaskDelay(500);
    }
}


int main(void)
{
    uxTopUsedPriority = configMAX_PRIORITIES - 1 ; // enable OpenOCD Thread Debugging

    /* Initialize the device and board peripherals */
    cybsp_init() ;
    __enable_irq();

    cy_retarget_io_init(CYBSP_DEBUG_UART_TX, CYBSP_DEBUG_UART_RX, CY_RETARGET_IO_BAUDRATE);

    // Stack size in WORDs
    // Idle task = priority 0
    xTaskCreate(blink_task,    "blink"     ,configMINIMAL_STACK_SIZE*1  ,0 /* args */ ,0 /* priority */, 0 /* handle */);
    xTaskCreate(capsense_task, "CapSense"  ,configMINIMAL_STACK_SIZE*4  , NULL, 1, 0);
    xTaskCreate(joystick_task, "Joystick"  ,configMINIMAL_STACK_SIZE*4  , NULL, 1, 0);

    vTaskStartScheduler();
}
7. Test
When you test, you will see that the joystick moves around and prints new values. Plus the CapSense still works.

Resources for Project
You can find this completed project in your project creator dialog by filtering for “IoT Expert Embedded”. This is lesson2

You can also clone this project at git@github.com:iotexpert/ew21-lesson2.git or https://github.com/iotexpert/ew21-lesson2
No comment yet, add your voice below!