Like any good engineer, the first thing I did after unboxing the HomeTroller was to take it apart. In this case, I had two motives. First, I wanted to make a backup of the SD Card that runs the Raspberry Pi. Second, I am always interested in what can be learned by looking inside. In this case, you have fairly normal Rasberry Pi with a nicely executed case. The case was held together with 4 screws on the back. It included a cover for the SD card (in the lower left of the photo). The interesting thing – to me anyway – was the clear plastic LED guides. You can see them in the upper right. Their function is to redirect the light of the LEDs to come through the top of the case so as to be visible on the outside.

Included in the case is an 8 GB SD Card which holds Linux + the Hometroller software. I checked on the Homeseer web site on the Support->downloads->current downloads page and was not able to find the HomeTroller Raspberry Pi image. I found it curious that there is also a Support->downloads->older downloads which contained current software – specifically drivers.
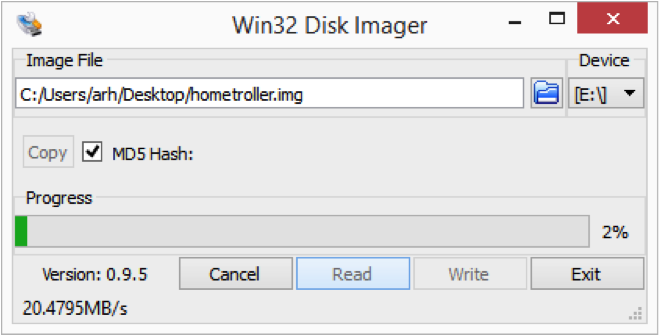
All that being said, it is good to make a backup of the SD Card before you start. For this task (on my Windows 8.1 PC) I used the Win32 Disk Imager, which can be downloaded from their Sourceforge website. If you have a Mac or a Linux computer, you can find the instructions for this process on the Raspberry Pi website. The process is straight forward. First, insert the SD Card and figure out which drive letter it was assigned using the Windows explorer. Then enter the destination file (in my case hometroller.img on the desktop), select the “copy” check box, then press read. A few minutes later, you will have a binary image file of the card which can be restored to your SD card (or another one) using the reverse process.
After you have completed the backup process, reassemble the whole thing and plug in the power and an ethernet cable. The RPi will then boot and join your network using DHCP to get its IP address. After a couple of minutes, you will be able to access the webserver running on the RPi. To find your HomeTroller, go website http://find.homeseer.com and it will search your network. In this case, you can see that I have two of them plugged in.

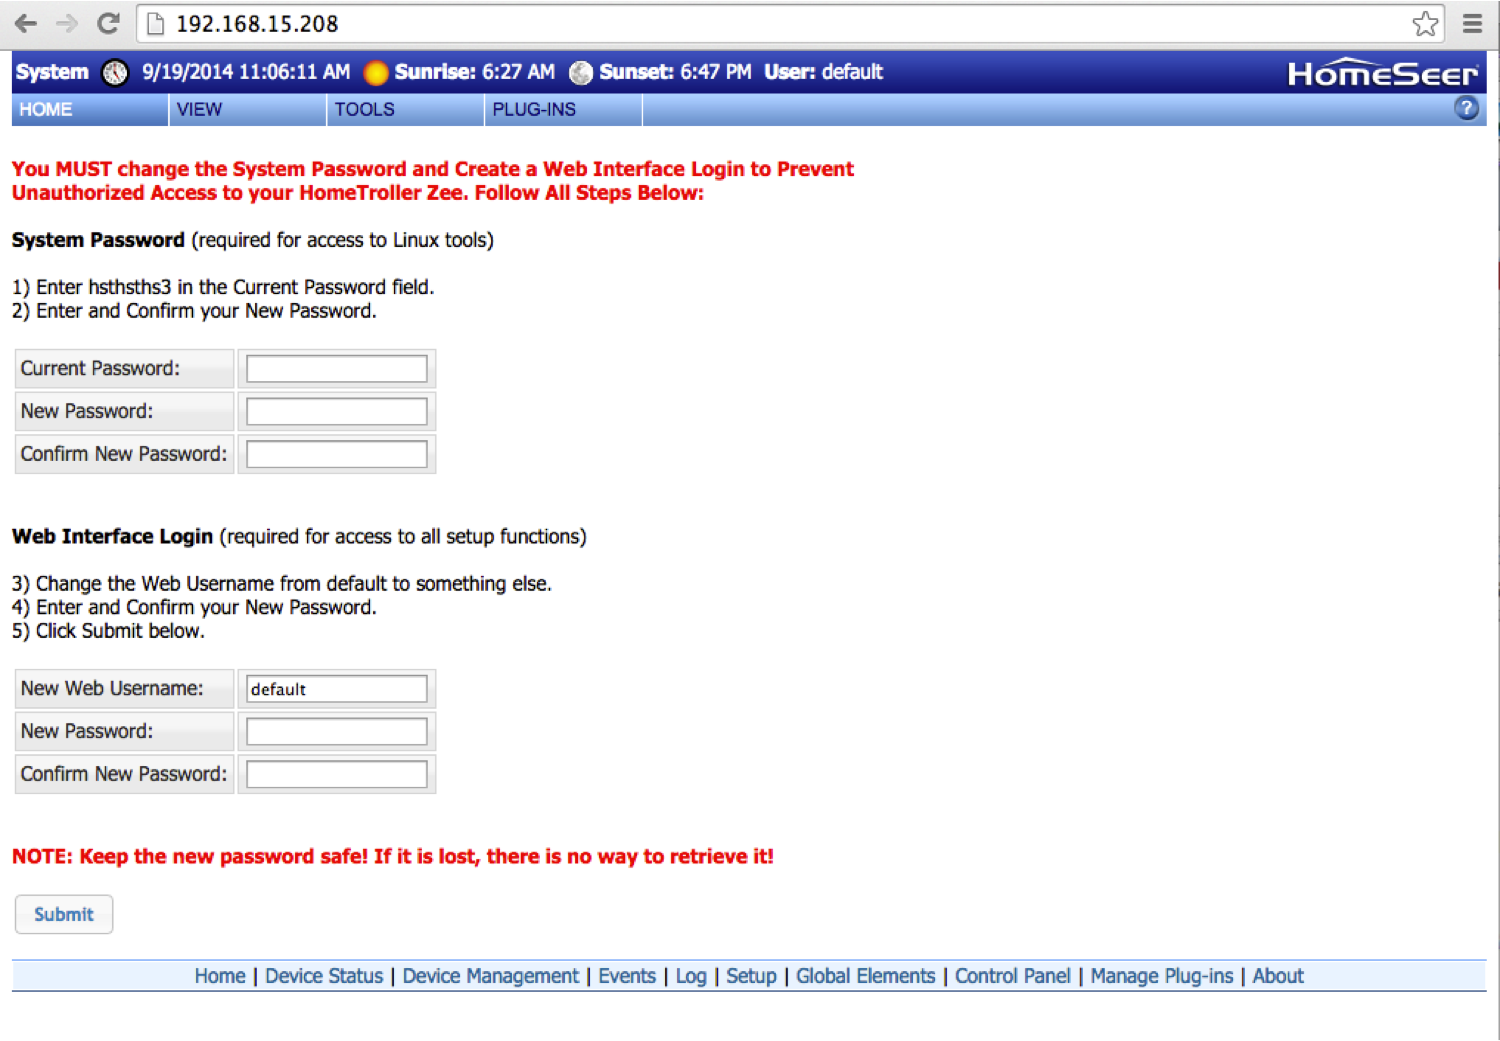
Click on IP address and your browser will open up a web page on the HomeTroller to setup the accounts and passwords.
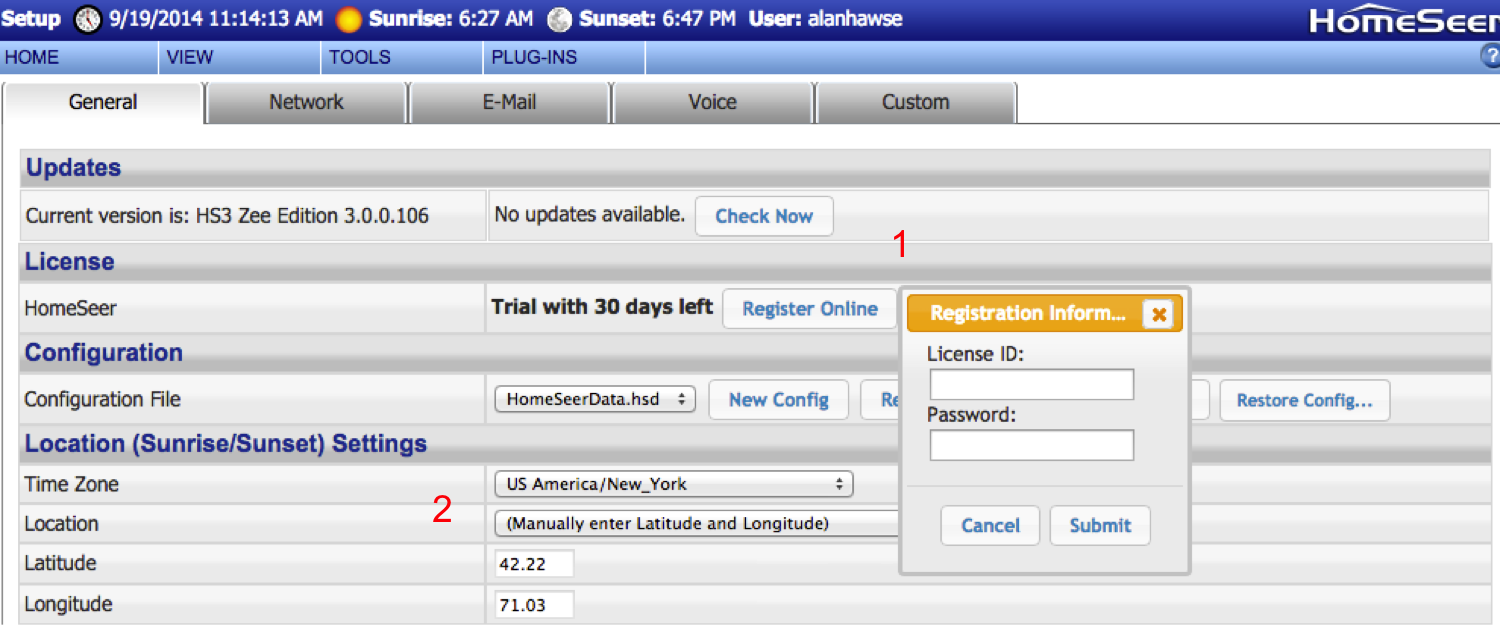
The next step is to setup your HomeTroller. To do this, go to Tools->setup. Then:
1. Enter your license information (your ID and Password is on the back of the RPi)
2. Setup the physical location and timezone.
3. If you are going to use WiFi, click on the network (1) tab and configure the SSID etc (2). In my case, I am using a USB WiPi Wifi dongle. I plugged in the dongle while the RPi was alive (specifically while I was typing this tutorial) and the RPi immediately went offline. After the system rebooted, I went to the tools->setup page, clicked the network tab, then entered my WiFi networking parameters (SSID, Security type and network key). Then I shutdown the RPi using Tools->System->shutdown. Once the RPi was shutdown, I removed the ethernet cable and then unplugged/replugged the power. After two more minutes, the RPi came back online attached to Wifi. However, just to make things interesting, it had a new IP address – because it had a new mac address, so the DHCP server assigned it a new address, so you will need to go to the find website again.
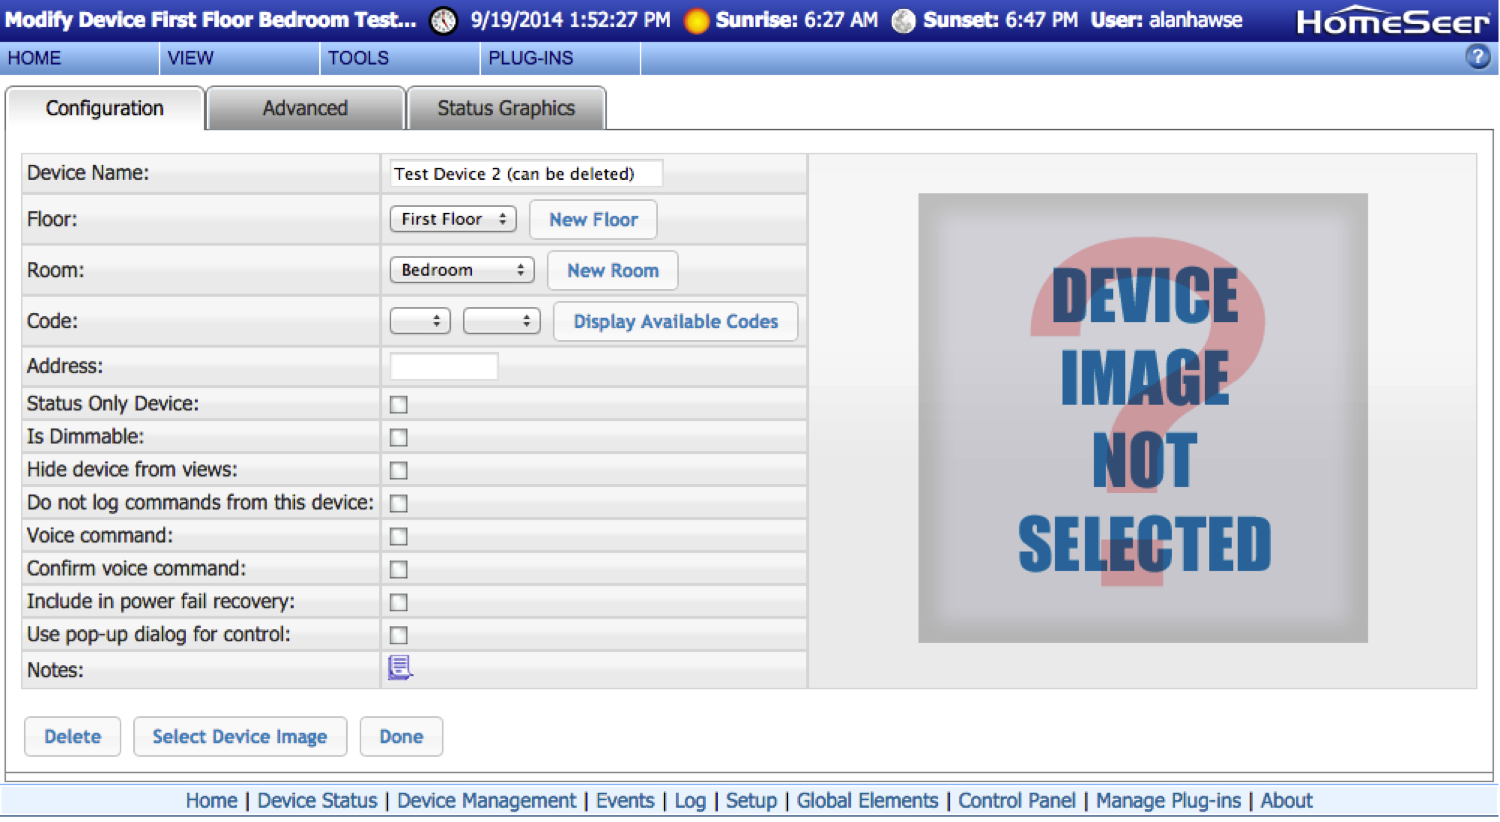
The last thing that I did after configuring my HomeTroller was clean out the bogus example devices. You can do this by going to view->device management.
 Lastly, click “Test Device 2 (can be deleted) and then delete it.
In the next post, I will describe the process of installing and attaching the light switch to the network.
Index
Description
Home Automation with Zwave and the HomeTroller Zee (Part 1)
An Introduction to Zwave
Home Automation with Zwave and the HomeTroller Zee (Part 2)
Installing HomeSeer
Home Automation with Zwave and the HomeTroller Zee (Part 3)
Installing the switches
Home Automation with Zwave and the HomeTroller Zee (Part 4)
Building the Zwave network
Home Automation with Zwave and the HomeTroller Zee (Part 5)
The HSTouch Server
Home Automation with Zwave and the HomeTroller Zee (Part 6)
Zwave in the garage
2 Comments
Outstanding article – wish I’d found it before I started my Hometroller Zee.
Thanks…
Notice Dr. Zwave is now posting here and he is quite expert in that platform.