In the previous posts I installed the HomeTroller and the Zwave switch. In order to do anything you now need to read the network information out of the Zstick into the HomeTroller. In order to accomplish this first:
Select “Plug-ins->Zwave->Controller Management”

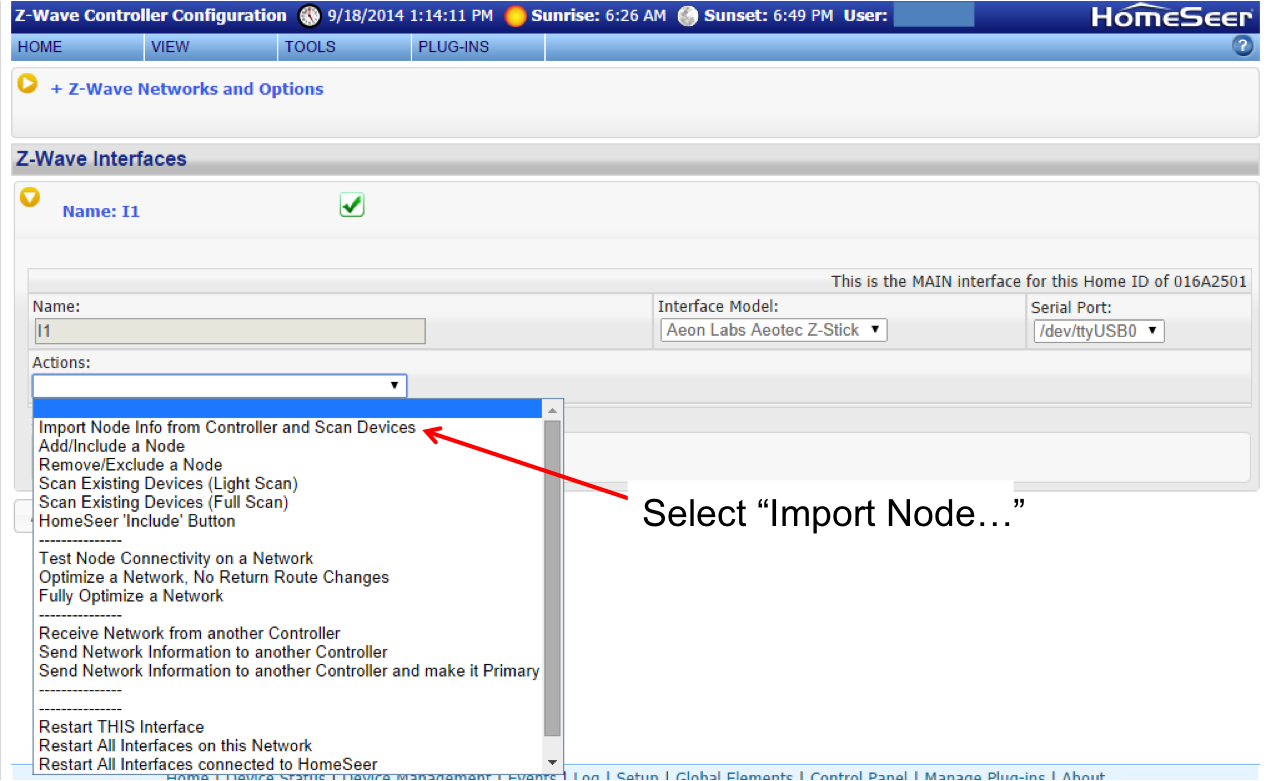
Then click the yellow arrow to open the interface menu.

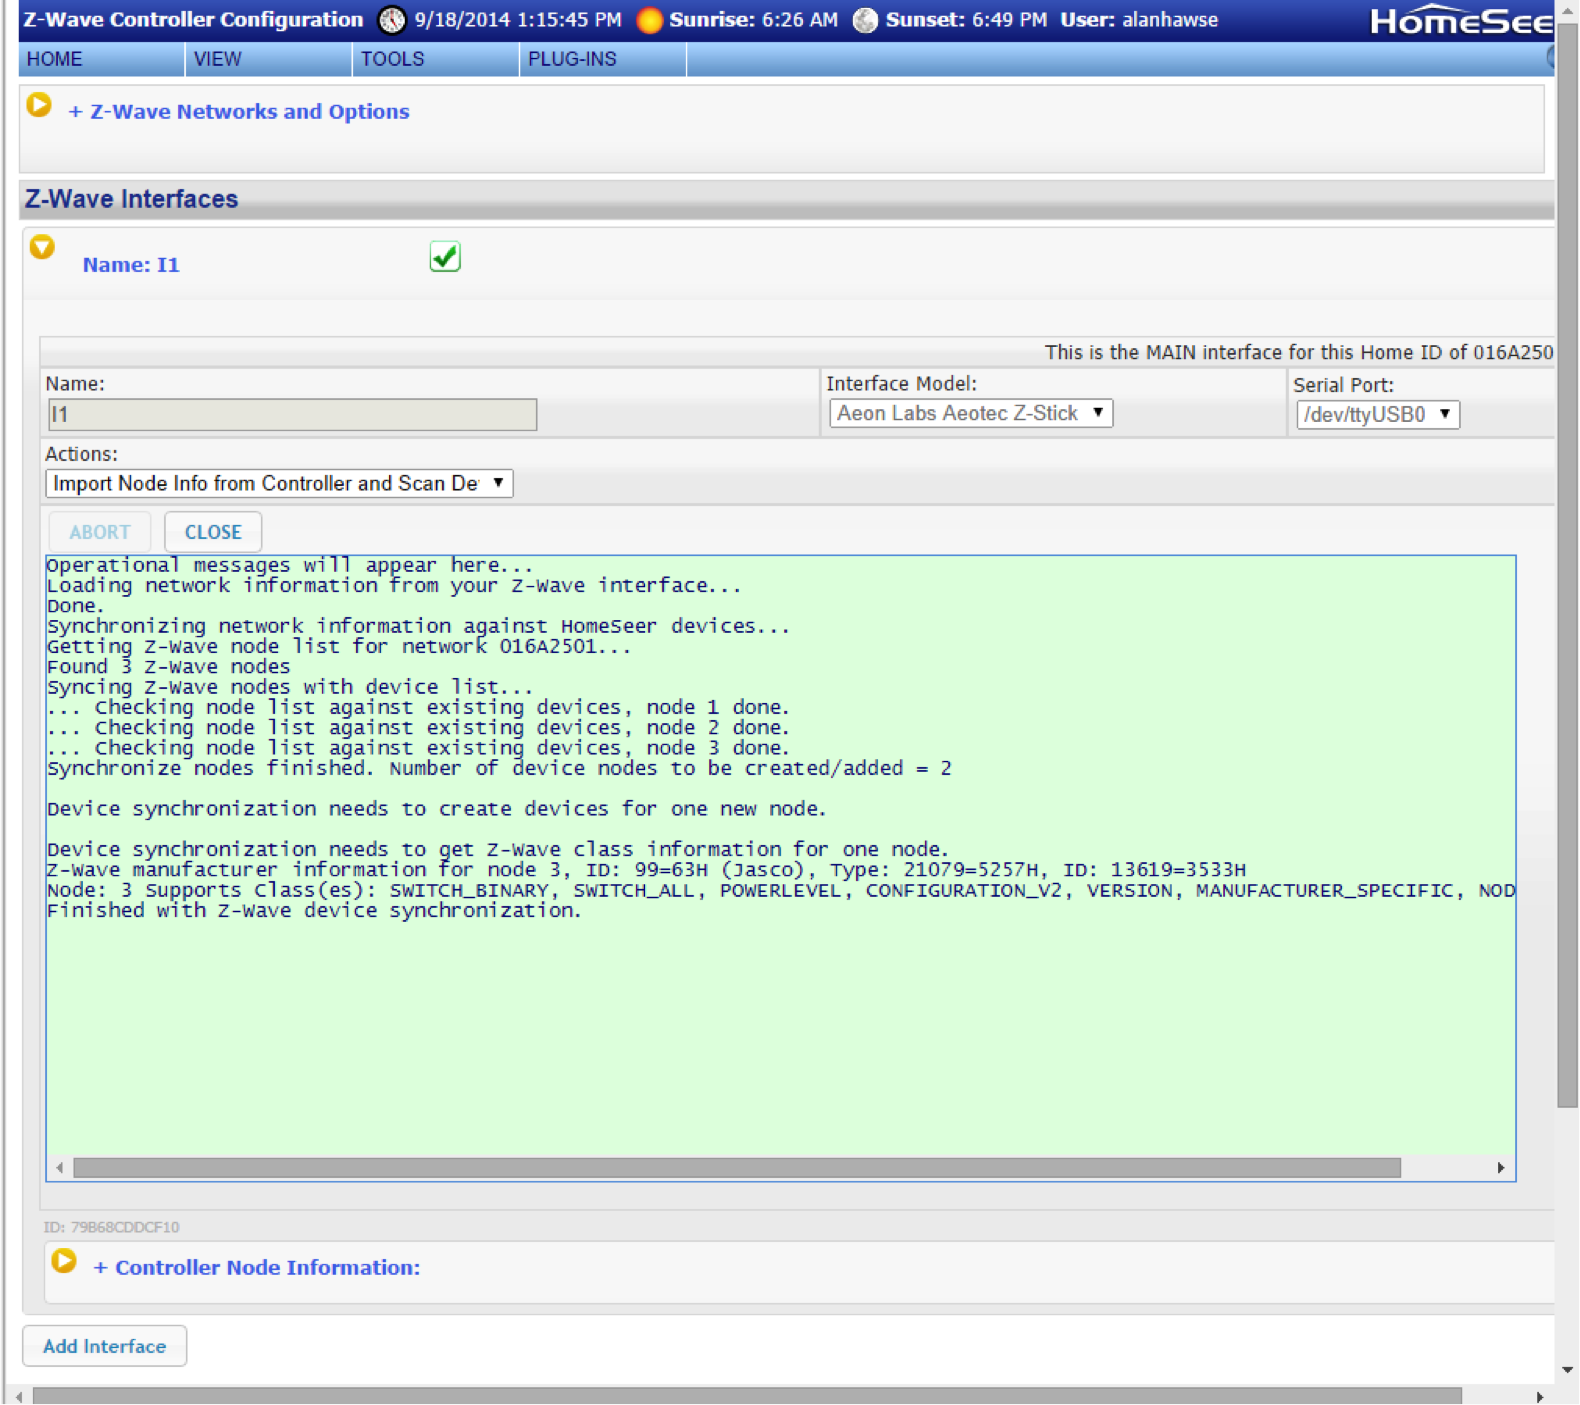
Then select “Import Node Info from the Controller and Scan Devices”. This will read the binding information out of the Zstick and initialize all of the required HomeTroller databases.
After clicking start, you will get a screen that shows the status of your import process.
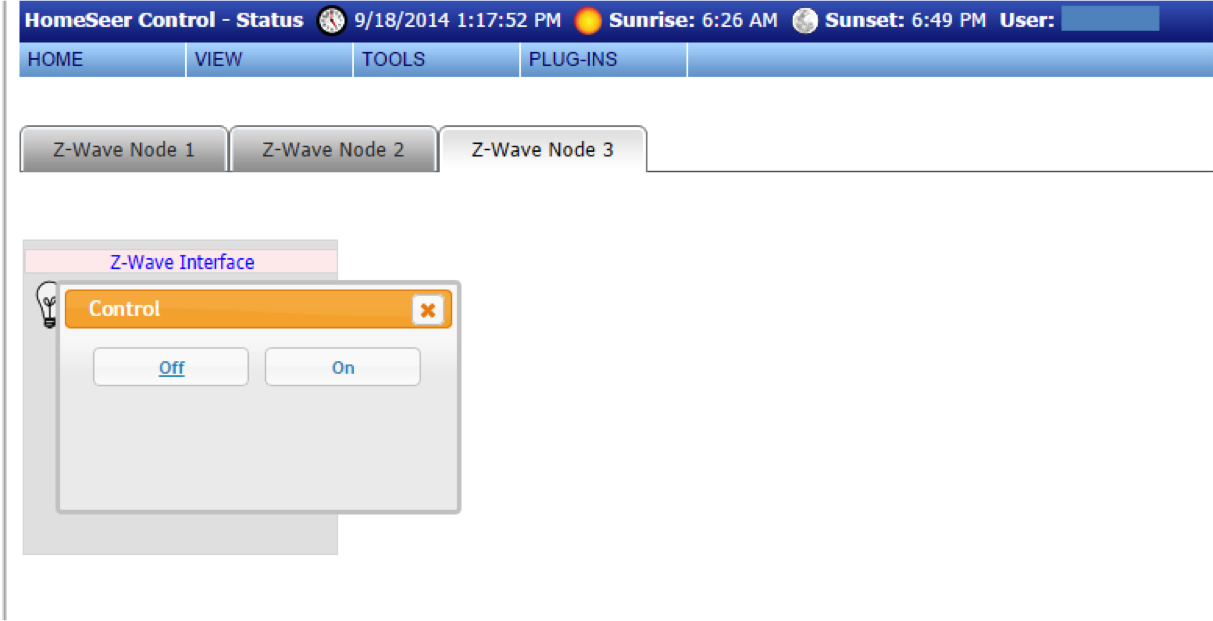
I am now able to control the lights from the web server interface. First select “View->Device Status”
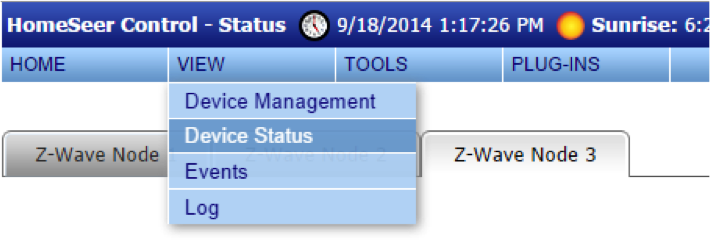
Then click on the correct “node” tab. Then click on the light bulb.
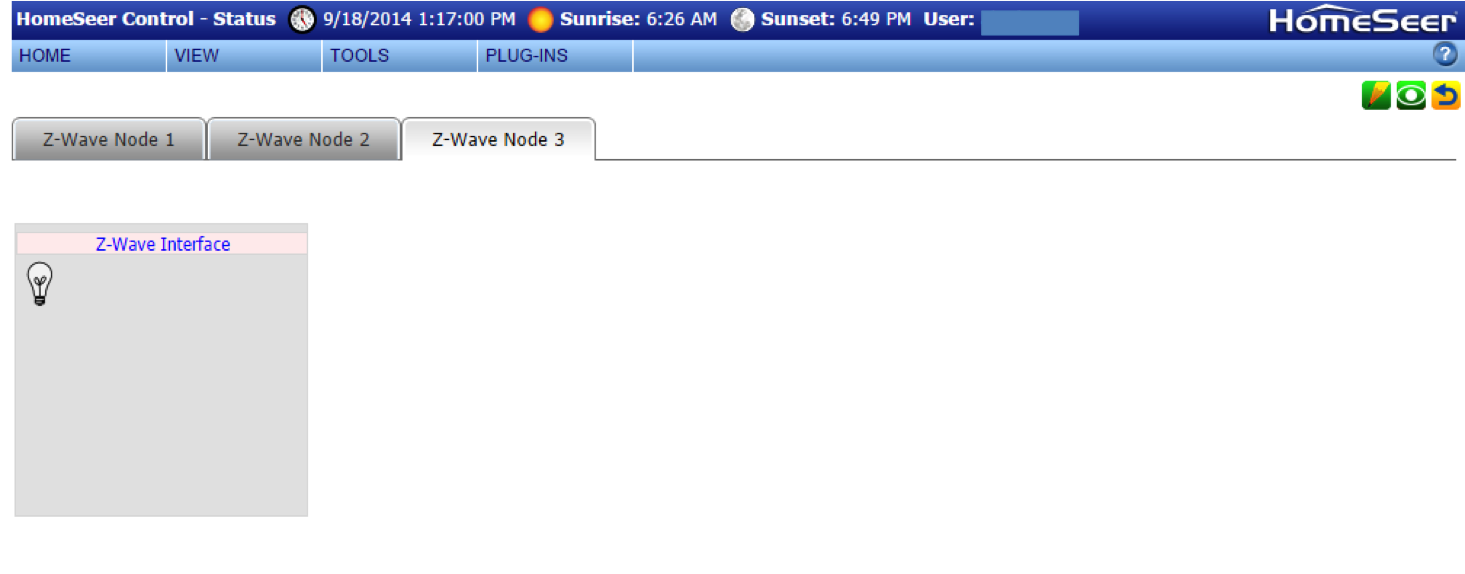
You will then be able to turn it “on” or “off”
Another method is to use the “View->Device Management” screen. You will be able to turn on or off the lights from the right side of the table.
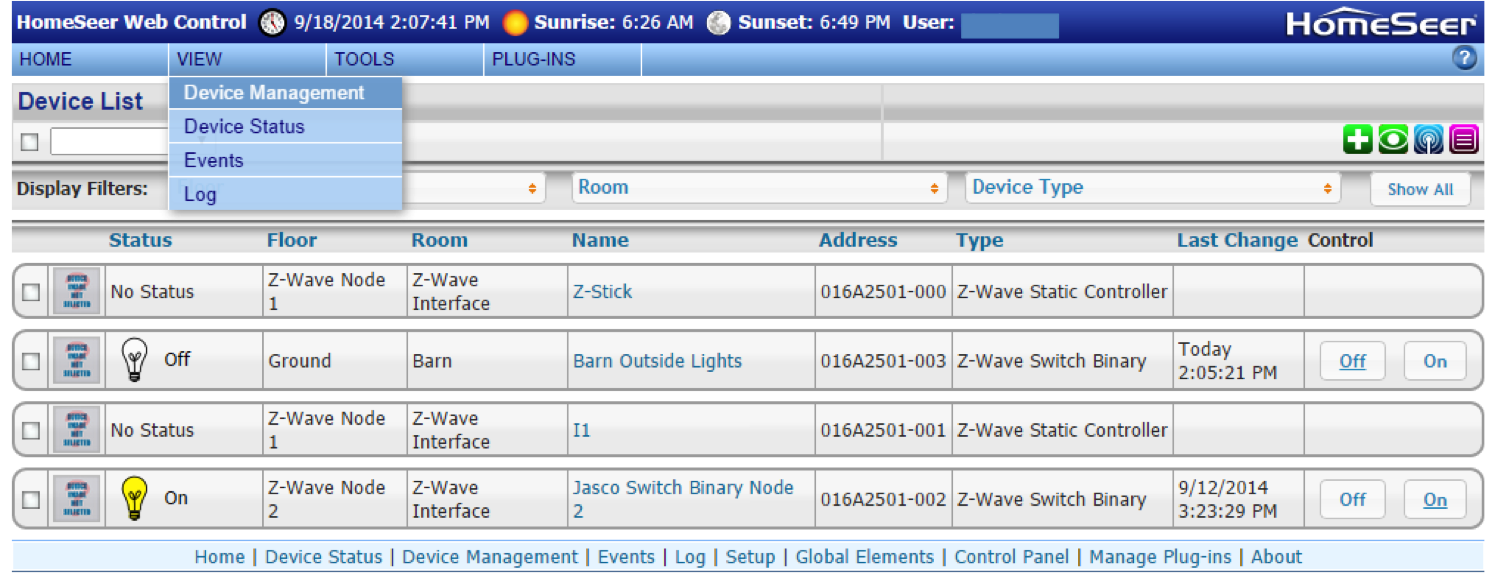
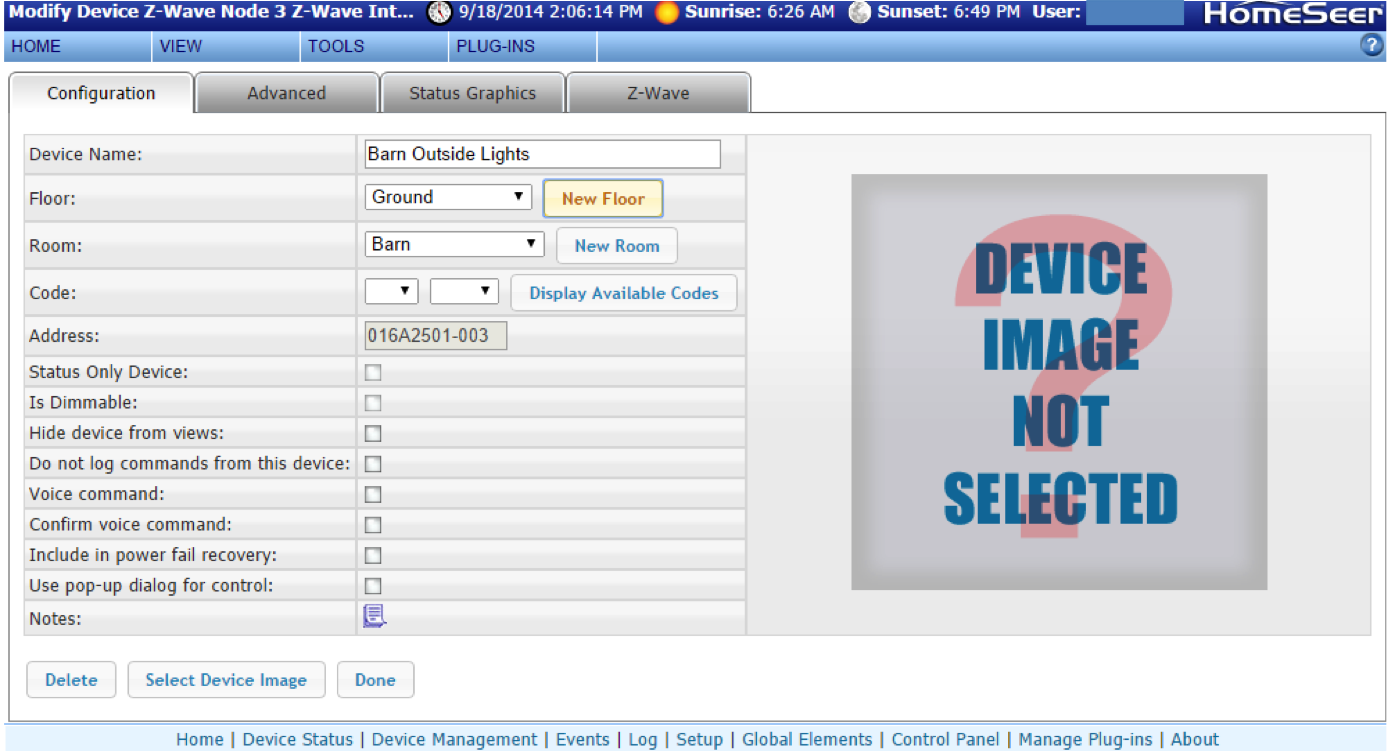
The last thing that you can do to make things a little bit simpler is to assign a sensible name and location to the switches. You do this by clicking on the current name (looks like a hyperlink). It will then show up with its new name and location.
In the next post I will describe attaching the HomeTroller to the internet and using the iOS app to control the switches.
Index
Description
Home Automation with Zwave and the HomeTroller Zee (Part 1)
An Introduction to Zwave
Home Automation with Zwave and the HomeTroller Zee (Part 2)
Installing HomeSeer
Home Automation with Zwave and the HomeTroller Zee (Part 3)
Installing the switches
Home Automation with Zwave and the HomeTroller Zee (Part 4)
Building the Zwave network
Home Automation with Zwave and the HomeTroller Zee (Part 5)
The HSTouch Server
Home Automation with Zwave and the HomeTroller Zee (Part 6)
Zwave in the garage
No comment yet, add your voice below!