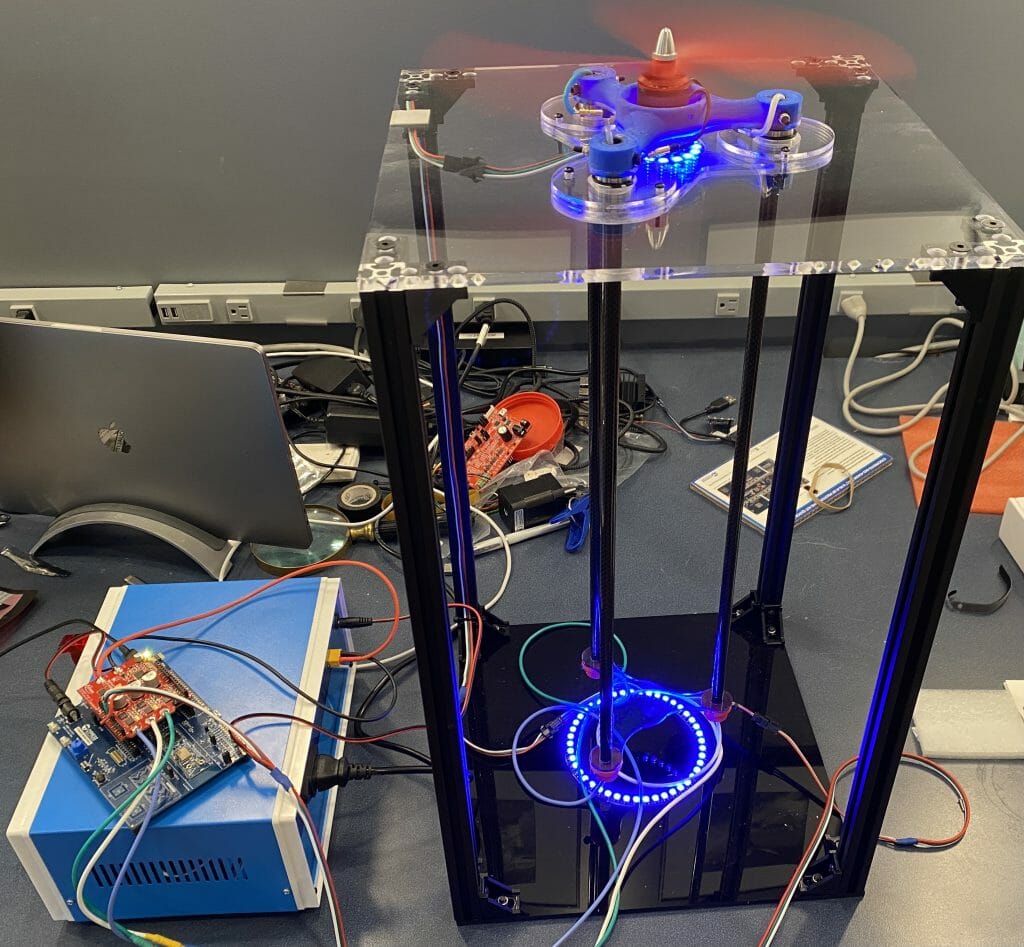
Embedded World 2021 - Infineon ModusToolbox PSoC 6 Drone
Summary
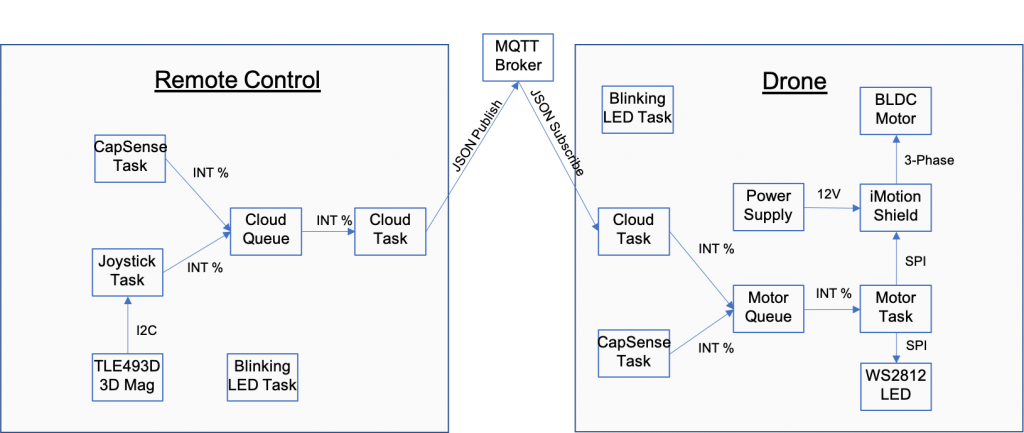
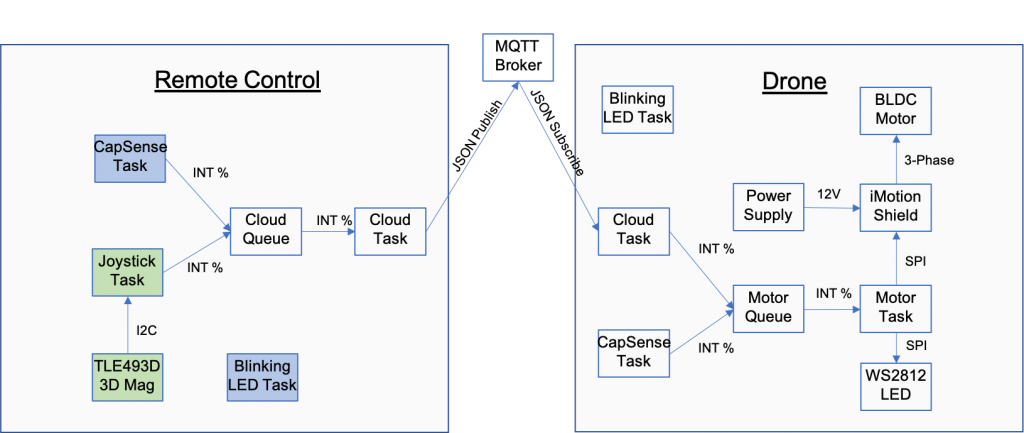
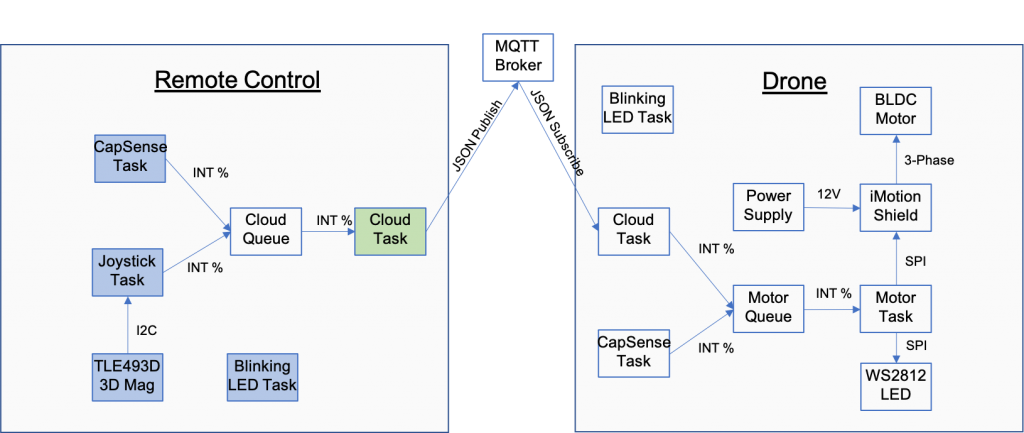
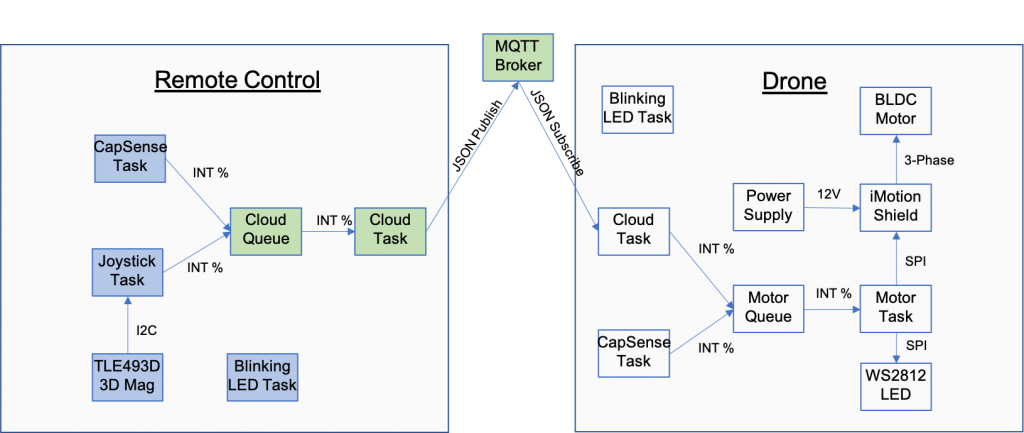
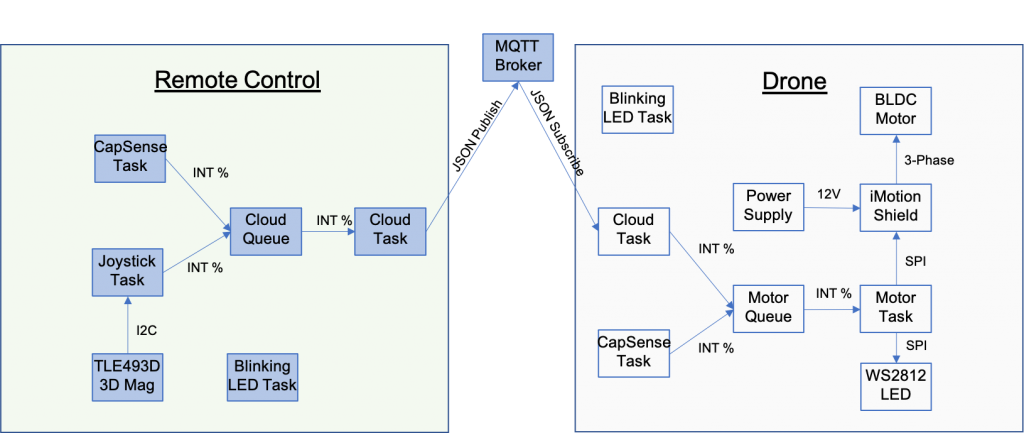
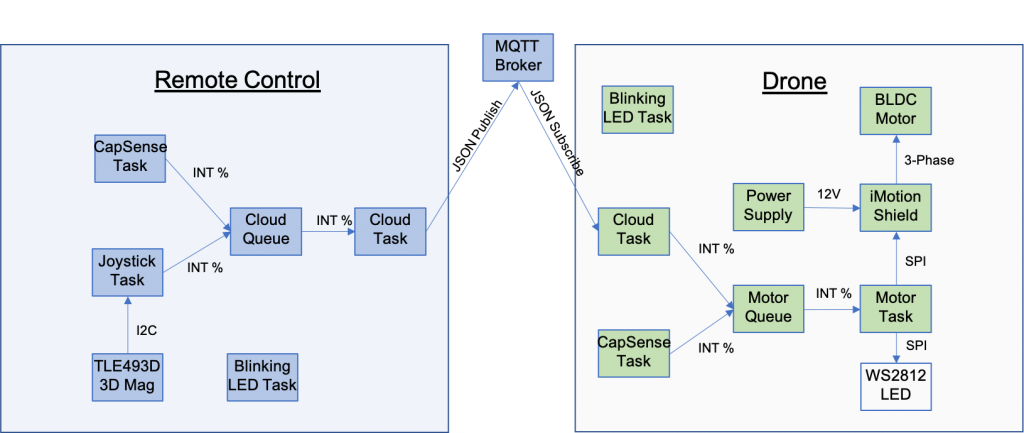
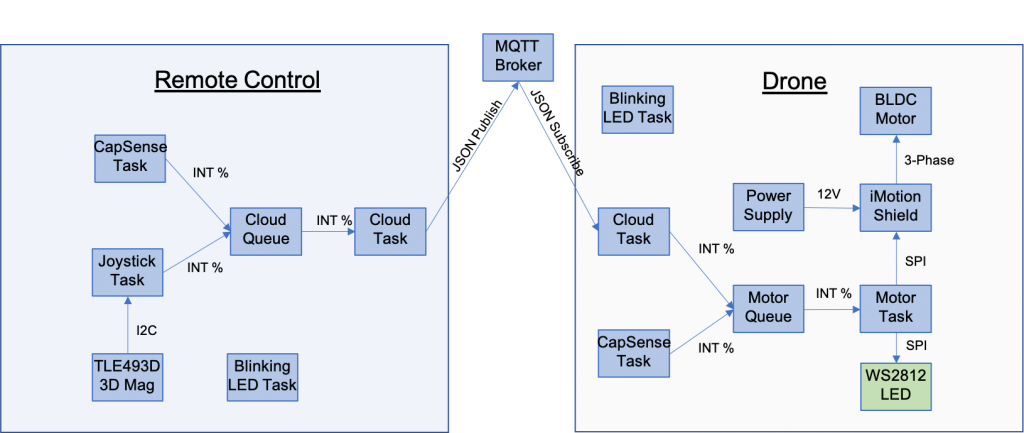
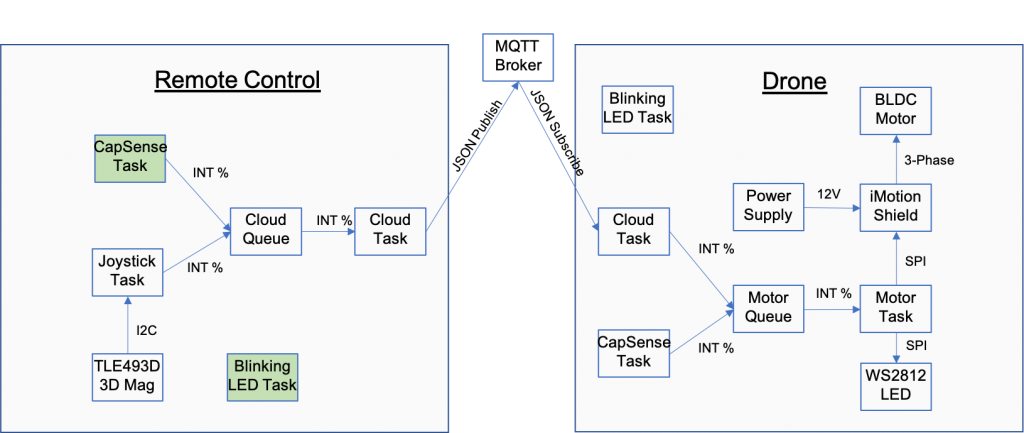
In lesson 1 we will create our first project, which like every good embedded project, will start with the blinking LED. Then I will show you how to add a CapSense slider and two buttons. At the end of lesson one you will have the “CapSense Task” colored green. Here is the architecture:
Learning Objectives
By the end of this lesson I would like you to know about:
- Creating and building your first ModusToolbox PSoC 6 MCU Project
- The organization of a ModusToolbox project
- An introduction to CapSense
Procedure
We will follow these steps:
- Update manifest.loc
- Create the new project
- A Tour of your project
- Test the basic project
- Add a CapSense task header file
- Add a CapSense task dot-c file
- Update main.c
- Test the CapSense
1. Update the manifest.loc
After you install ModusToolbox, there is a subdirectory in your home directory called “.modustoolbox”. You will almost never need to look in this directory. However, it contains two interesting things:
- A cache of the libraries (more on this later)
- A file called “manifest.loc” which will allow you to extend the functionality of Modus Toolbox.
By adding a URL to the manifest.loc you can add in new
- Middleware
- Board Support Packages
- Example Projects
To make the Embedded World easier, I have extended ModusToolbox to give you access to some example projects and libraries that I created. To get access you need to add the line “https://github.com/iotexpert/mtb2-iotexpert-manifests/raw/master/iotexpert-super-manifest.xml” into the manifest.loc file. You can do that with any editor. Here is how it looks on my Mac.
arh ~ $ cd .modustoolbox/
arh .modustoolbox $ ls
cache		manifest.loc	manifest.loc~
arh .modustoolbox $ more manifest.loc
https://github.com/iotexpert/mtb2-iotexpert-manifests/raw/master/iotexpert-super-manifest.xml
2. Create the new project
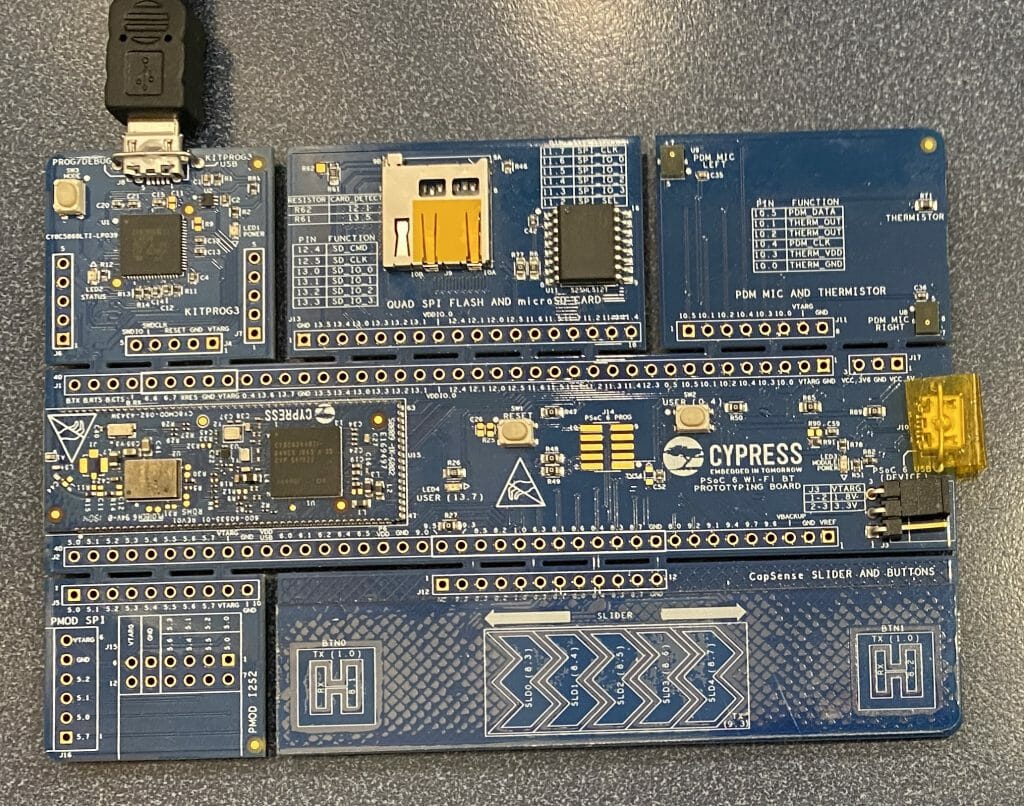
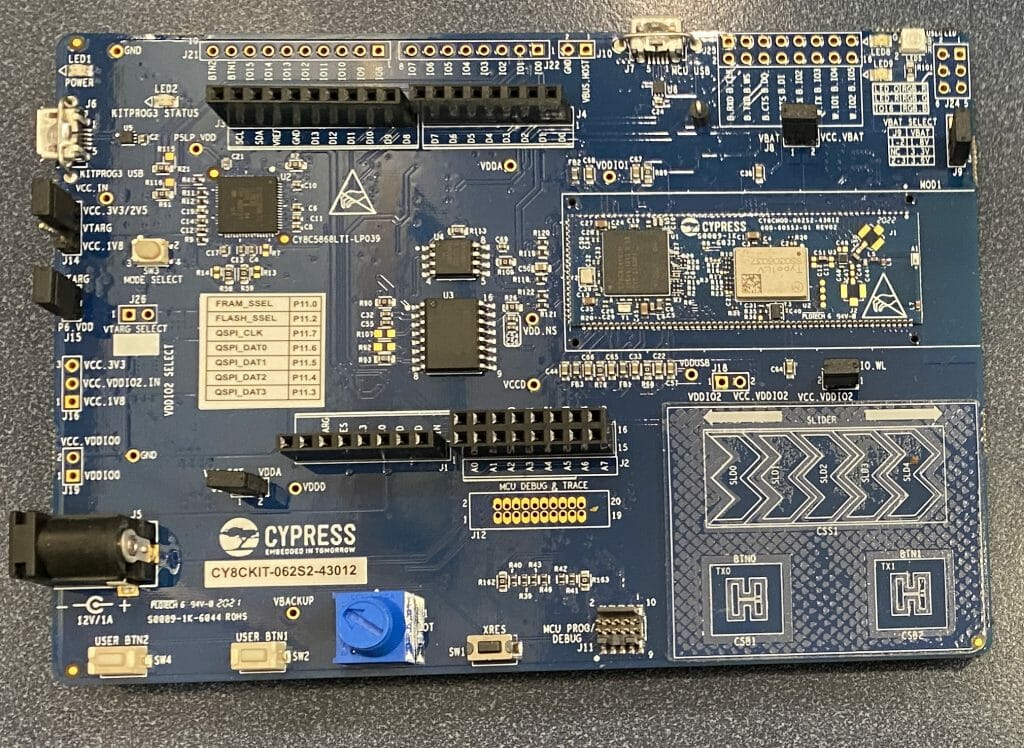
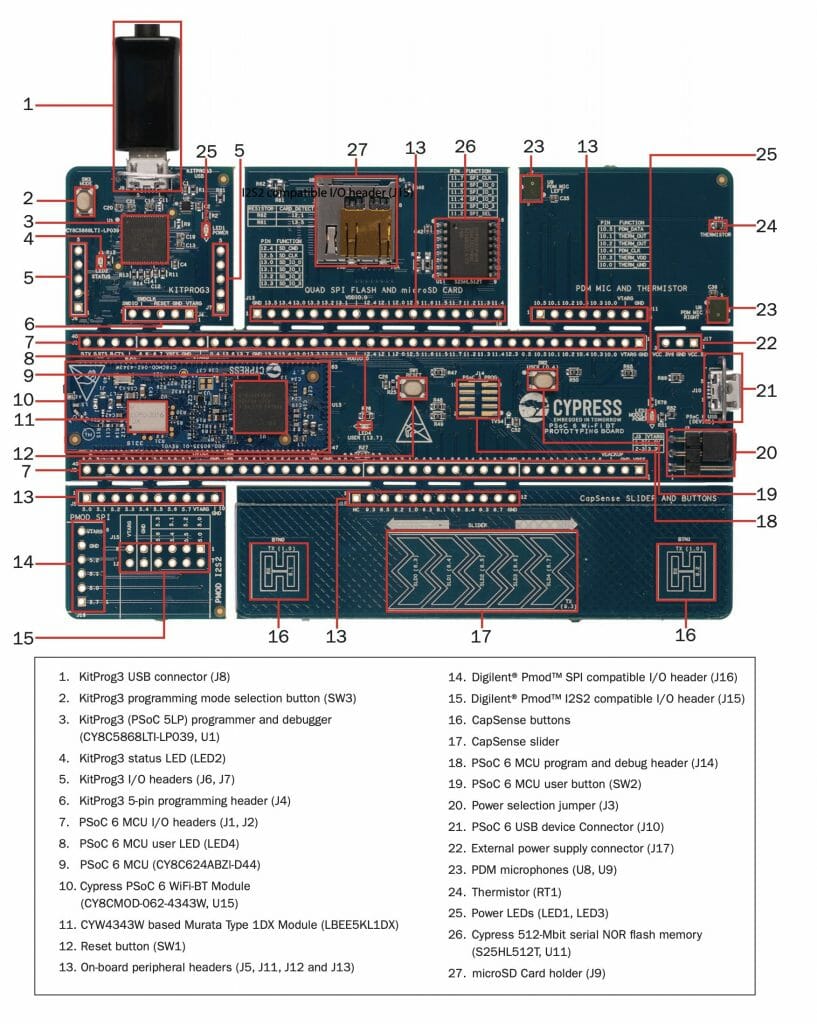
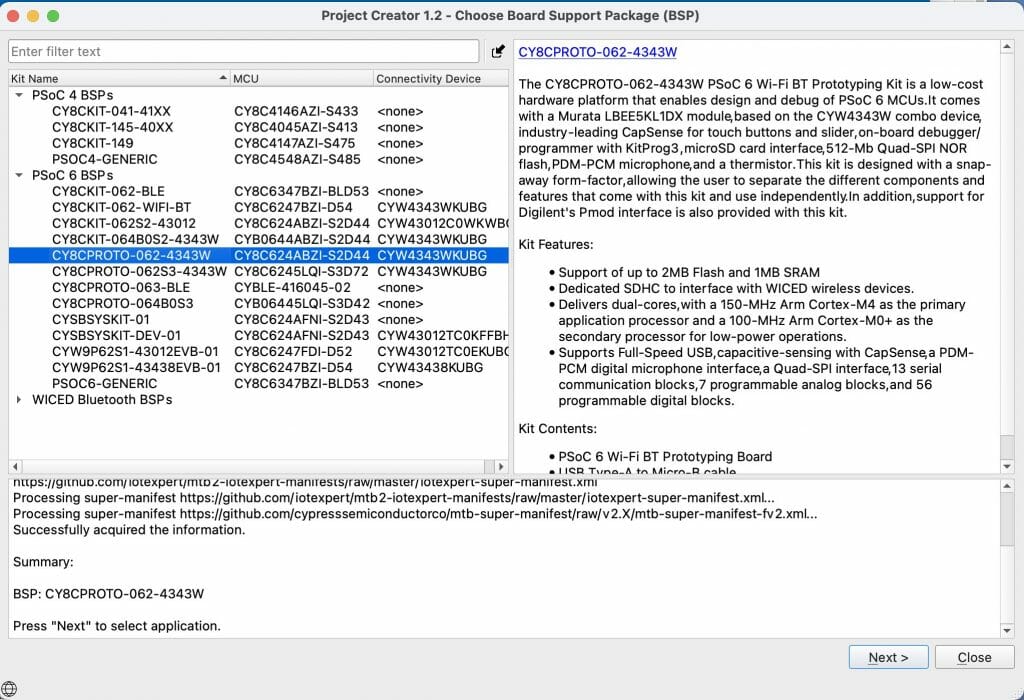
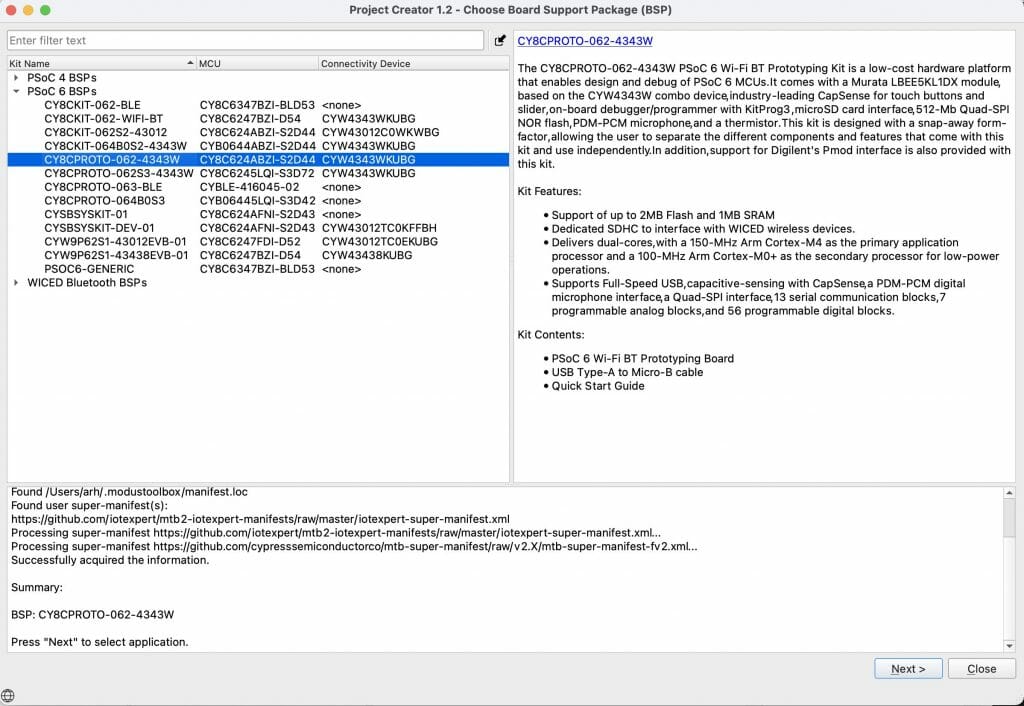
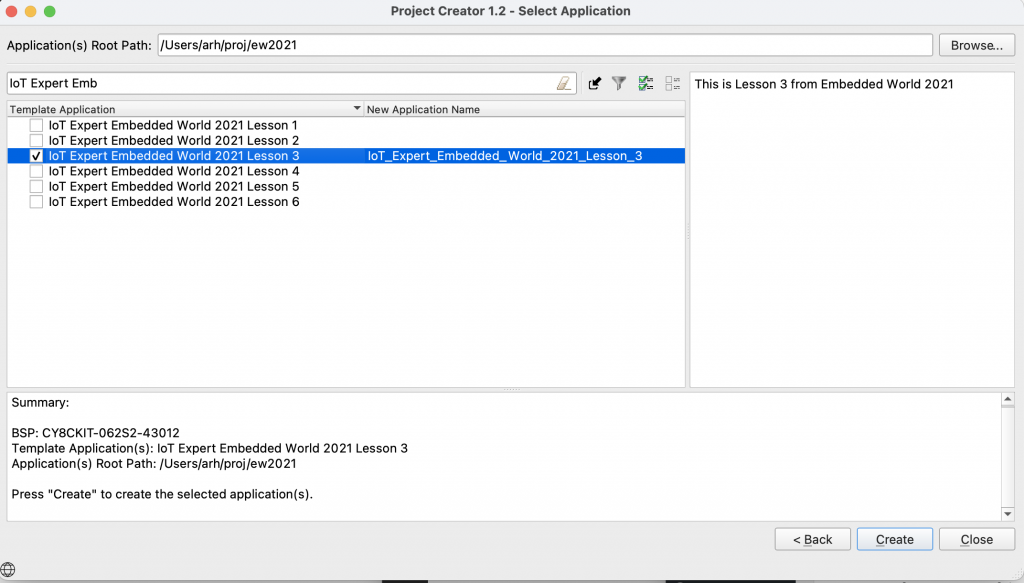
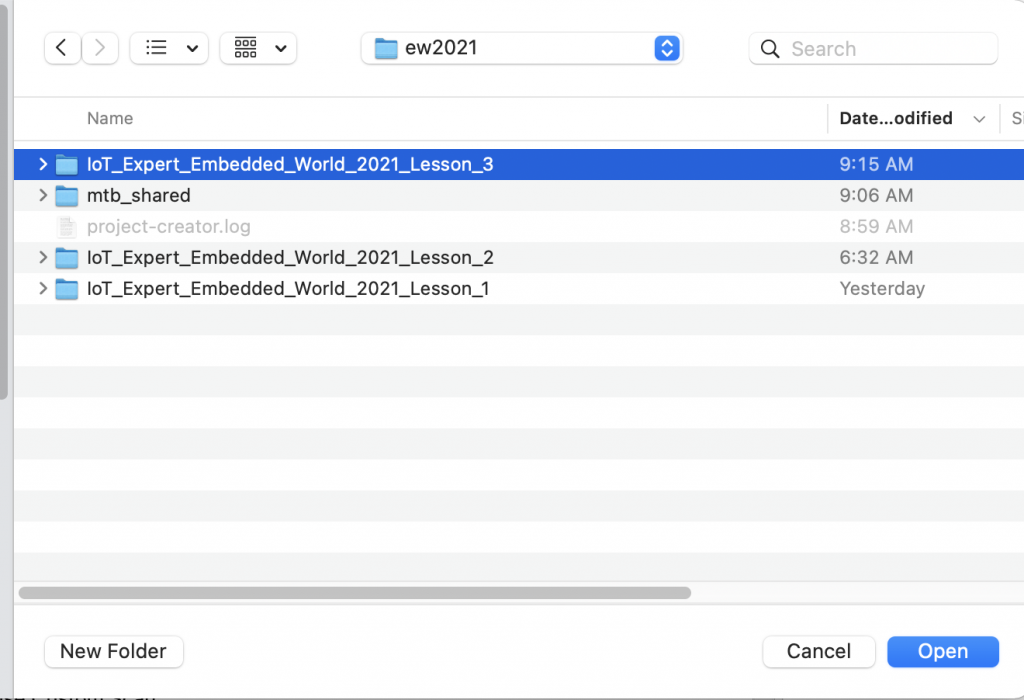
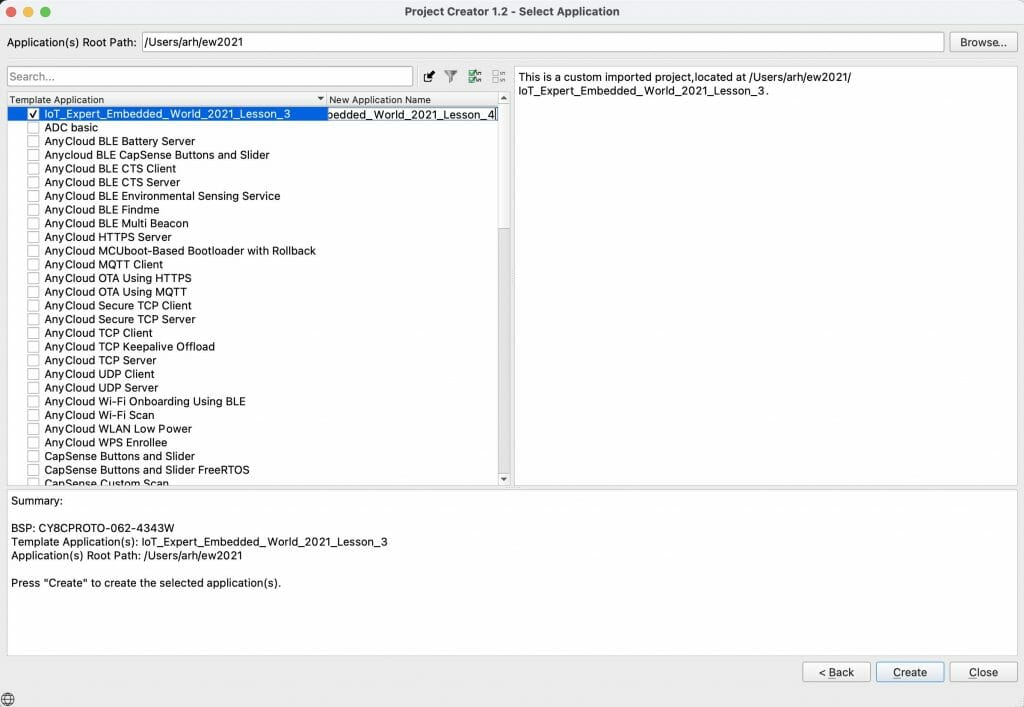
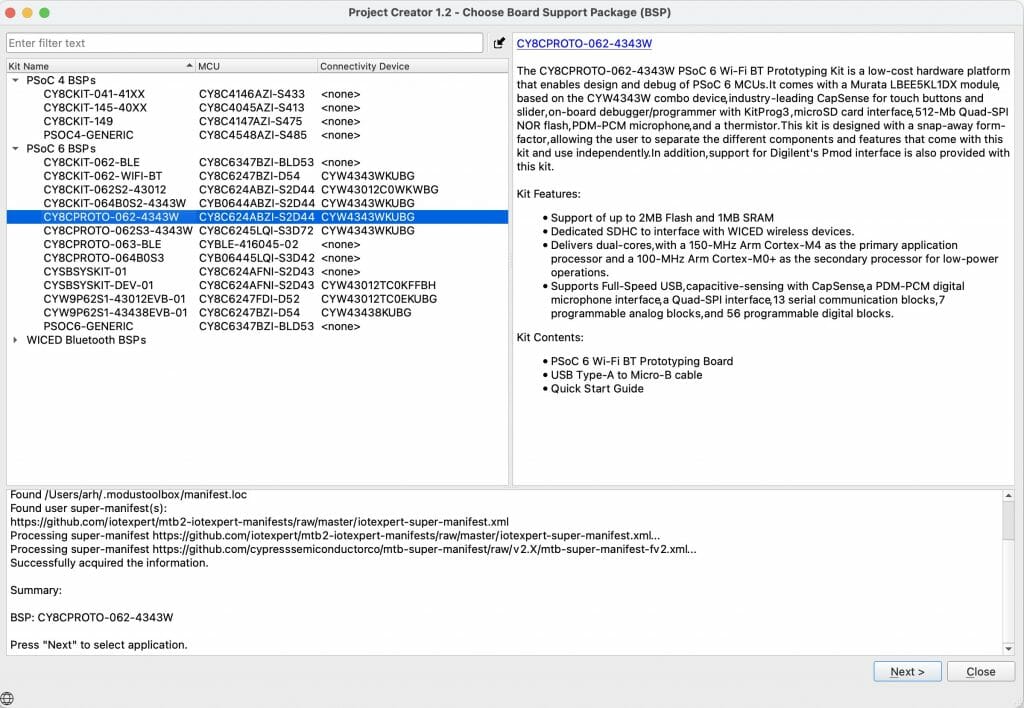
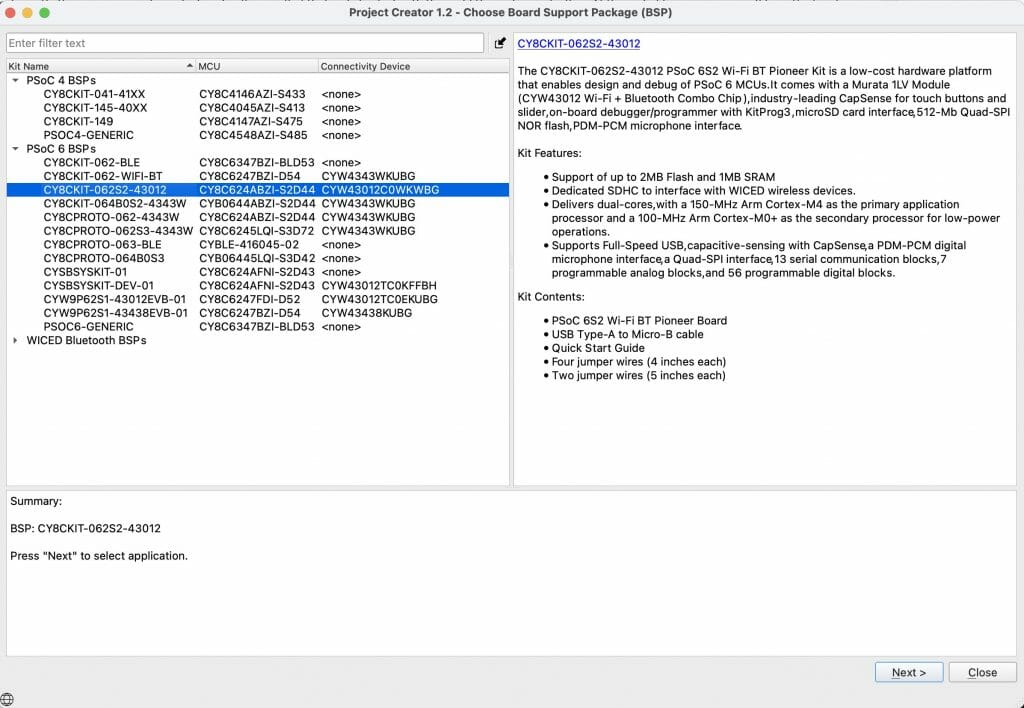
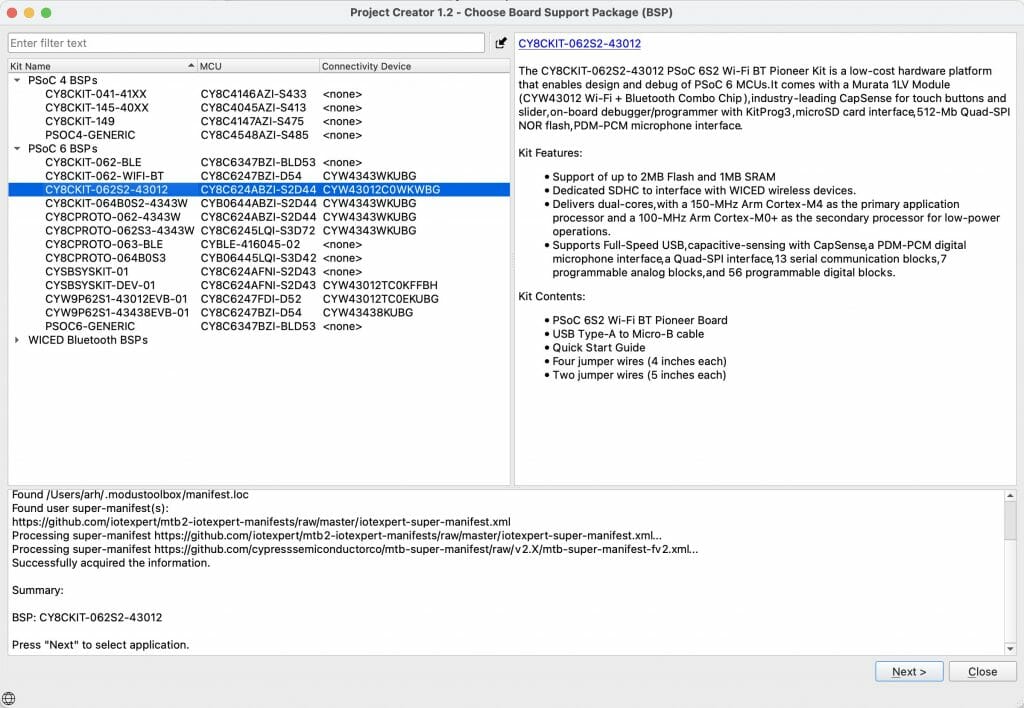
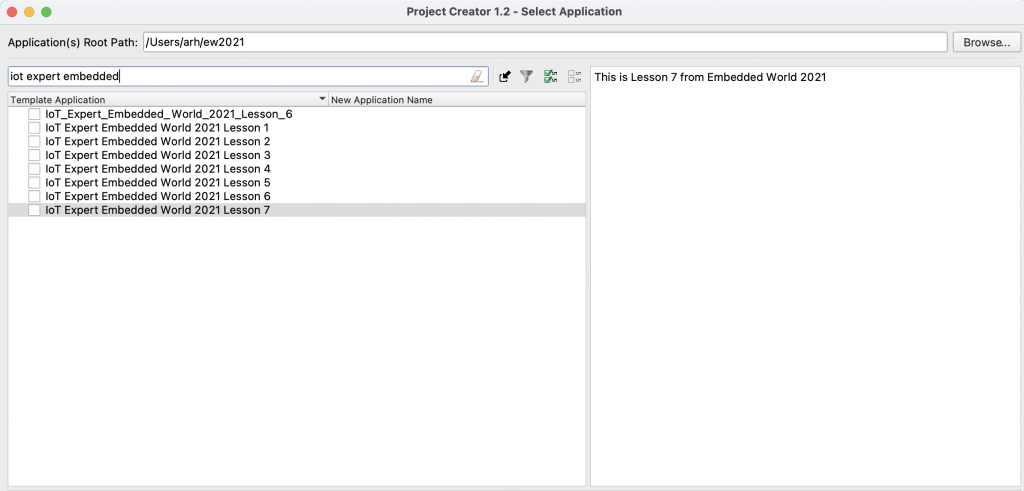
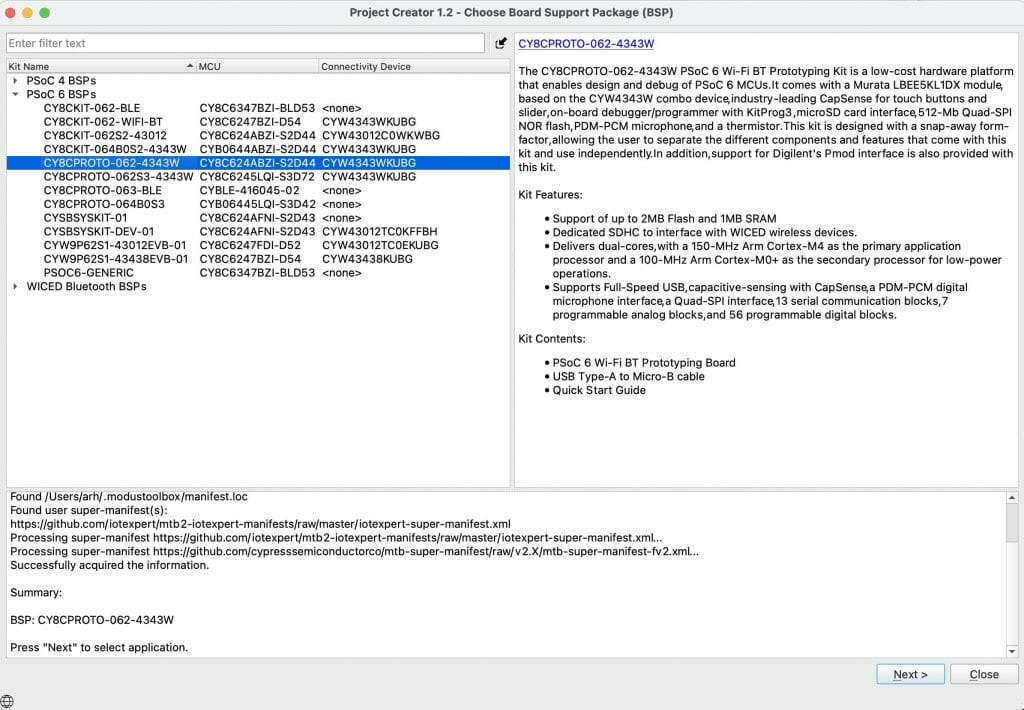
Now I start the new project creator from the start menu. Our first project will be using the CY8CPROTO-062-4343W, pick it and press next.
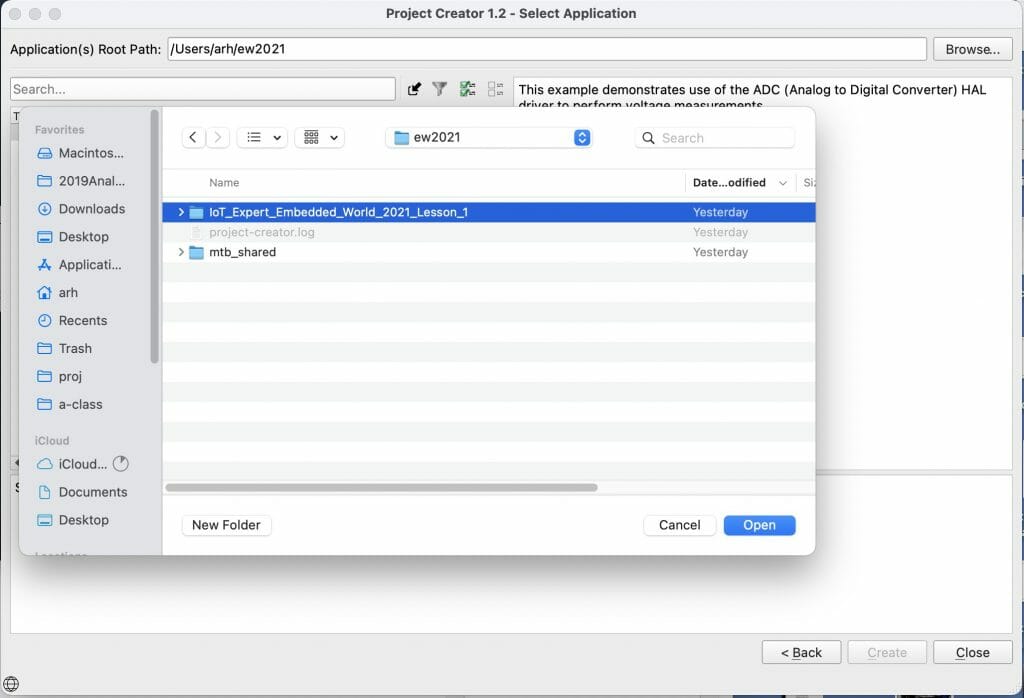
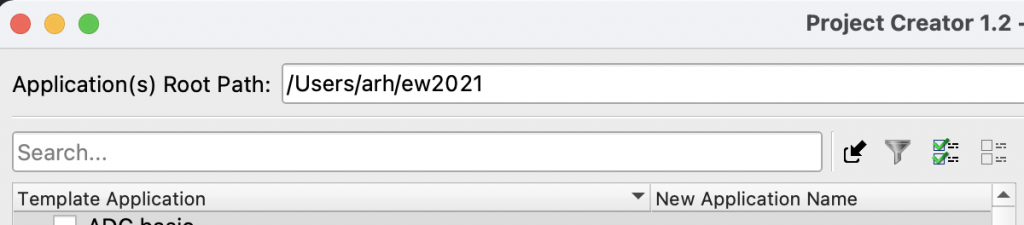
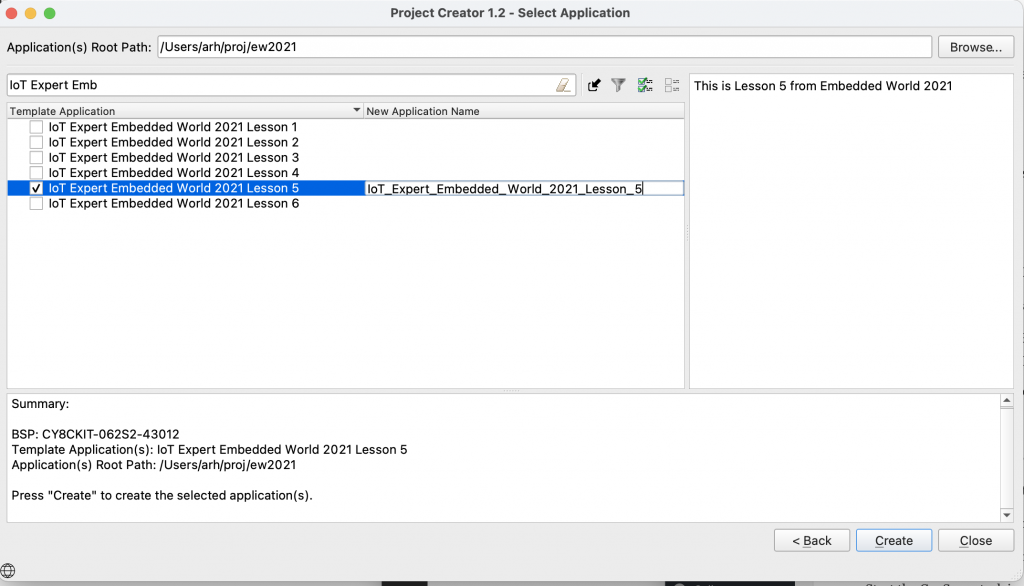
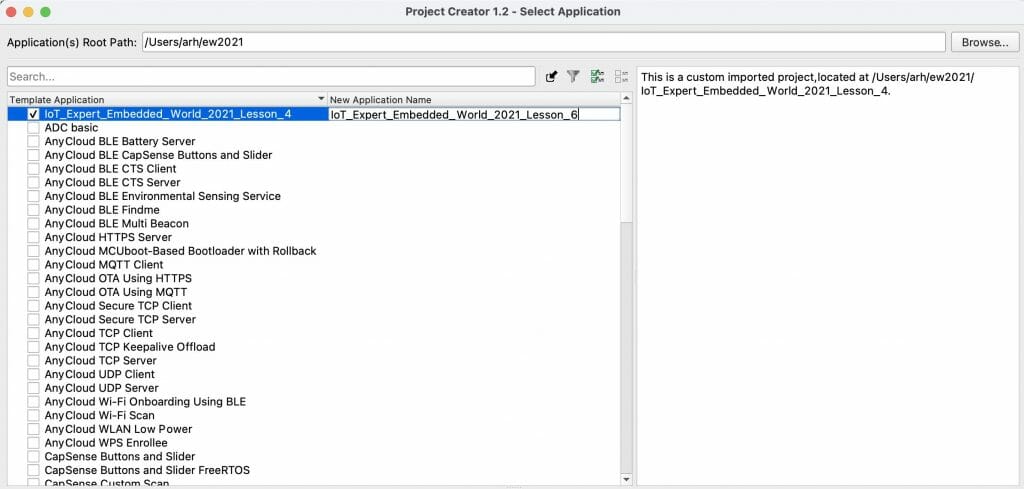
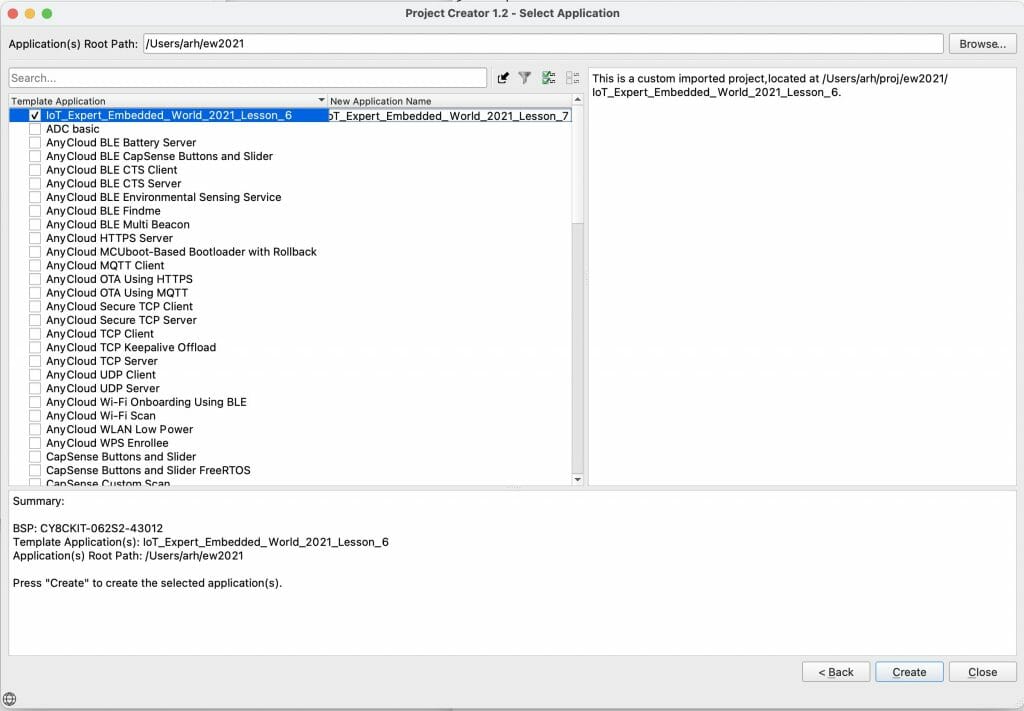
In the filter box type “IoT” which will filter to my template projects. To start with we will use the “IoT Expert FreeRTOS Template” which is a basic project I created that gives you a blinking LED, a UART console and FreeRTOS. Pick that and give it a sensible name.
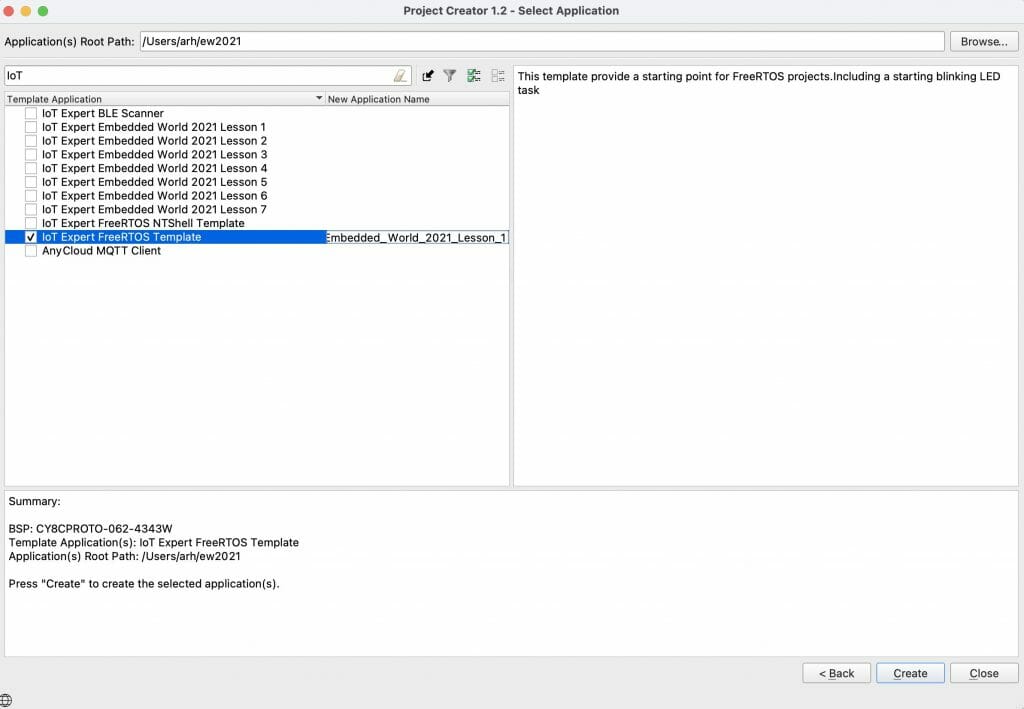
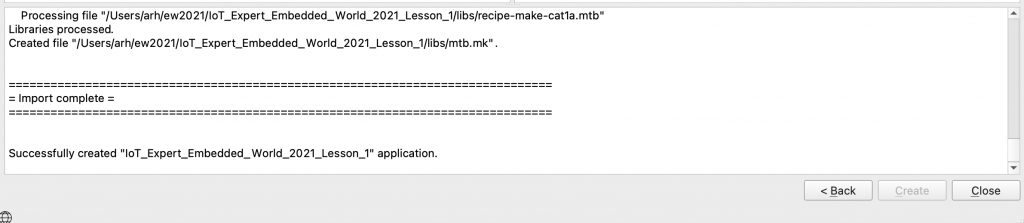
After a bit of processing you will have a new application, press close.
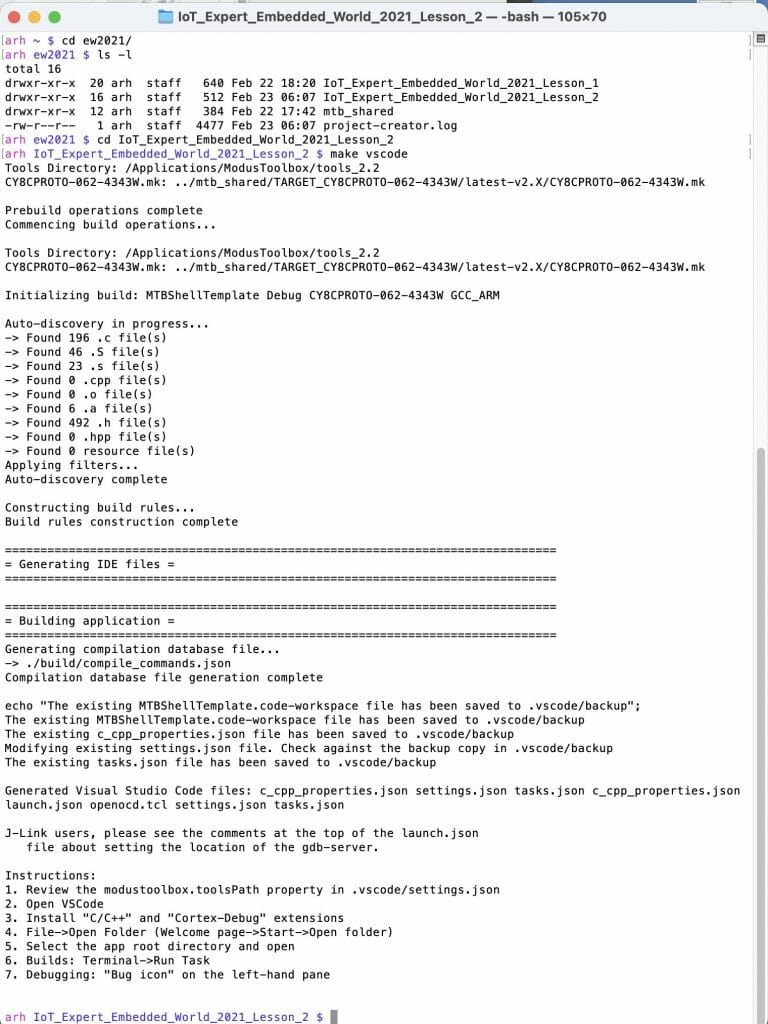
For this class I am going to use Visual Studio Code. ModusToolbox also has an Eclipse IDE which you can use, or you can use the command line, IAR, or MicroVision – it’s entirely up to you. To tell Visual Studio code about my project I will run “make vscode” which will build a vscode project. Then I run vscode with “code .”
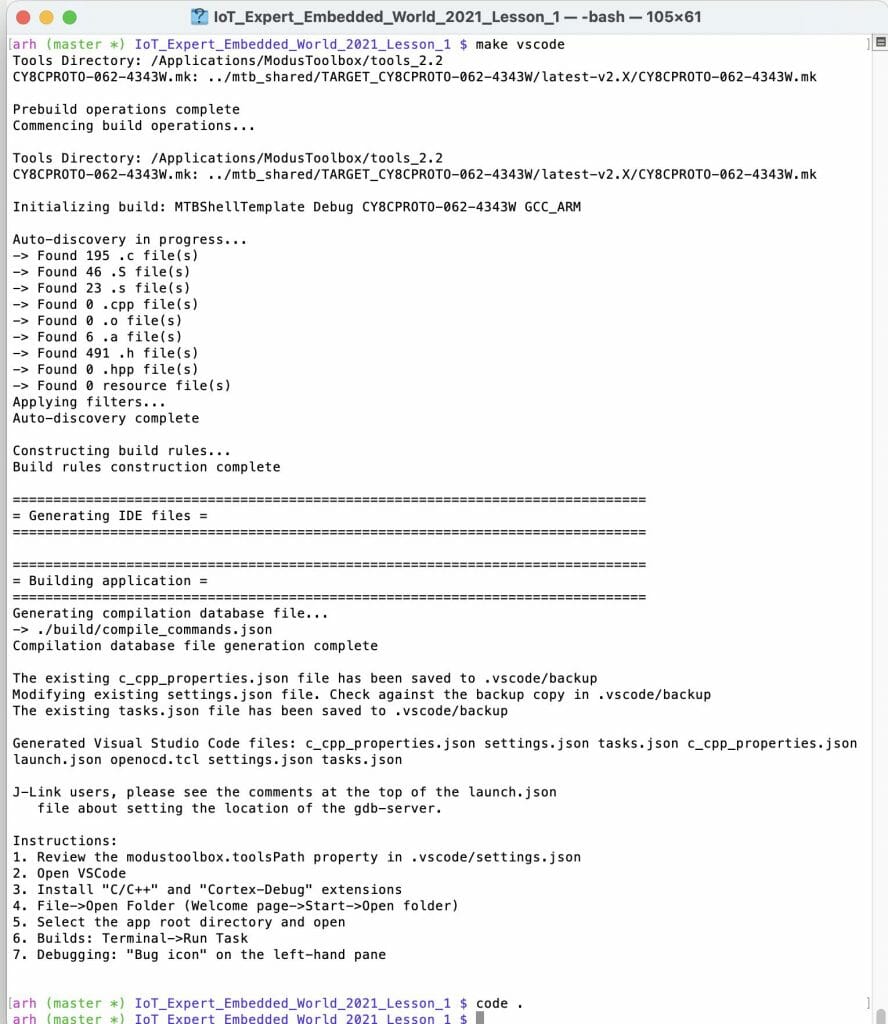
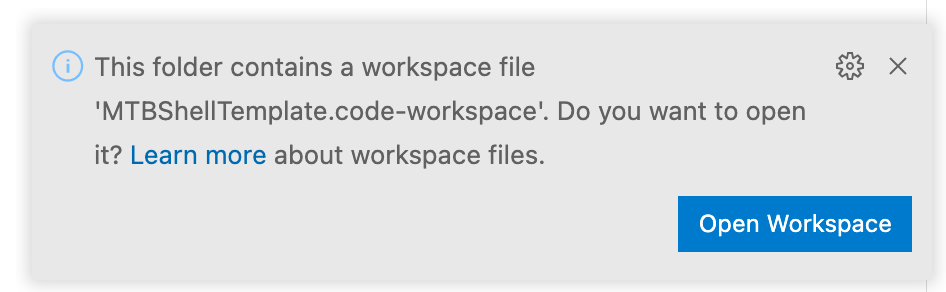
The make vscode will build all of the files you need including a workspace. Click”Open Workspace”
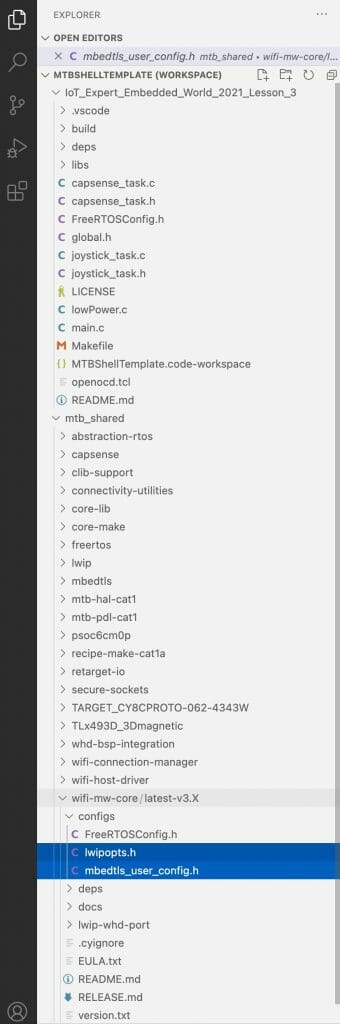
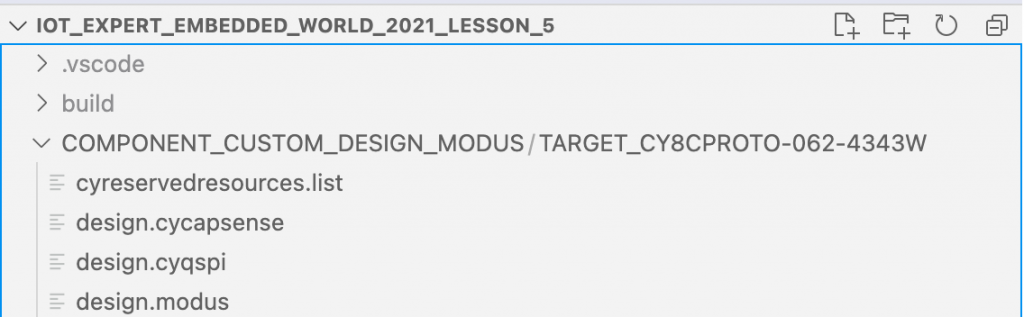
3. A Tour of your Project
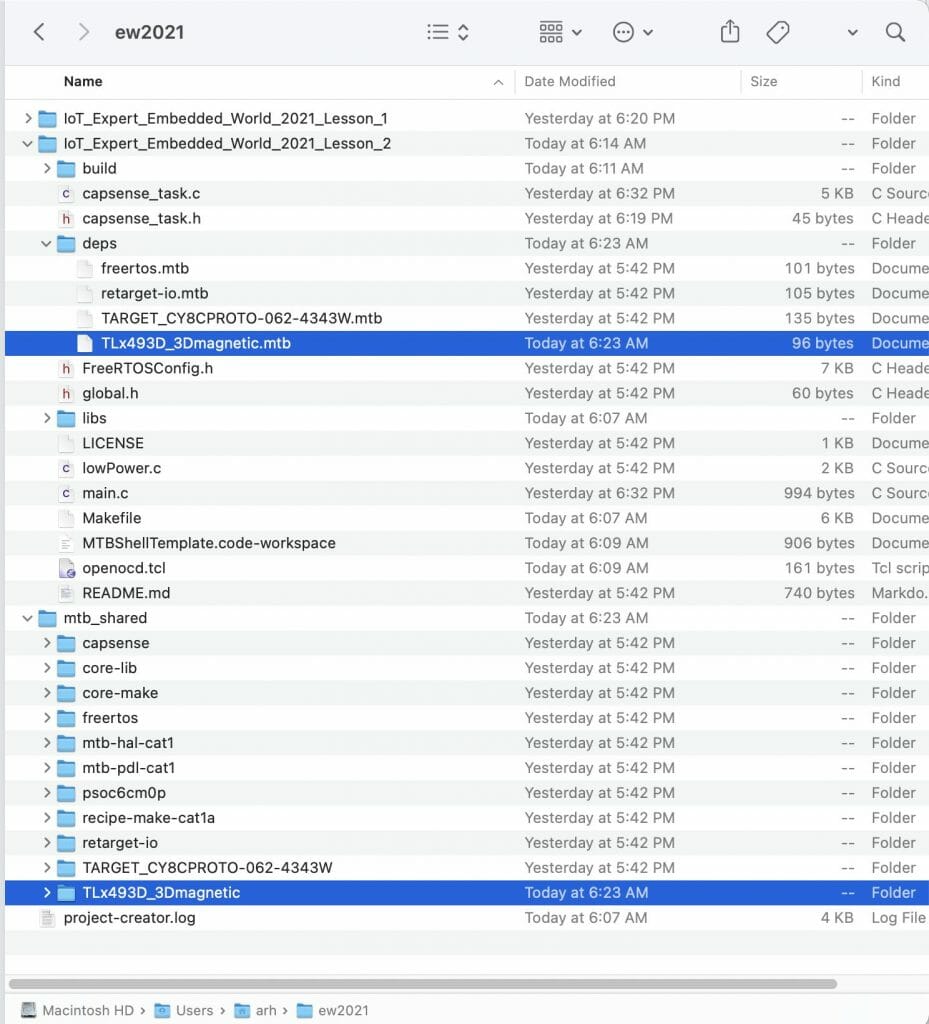
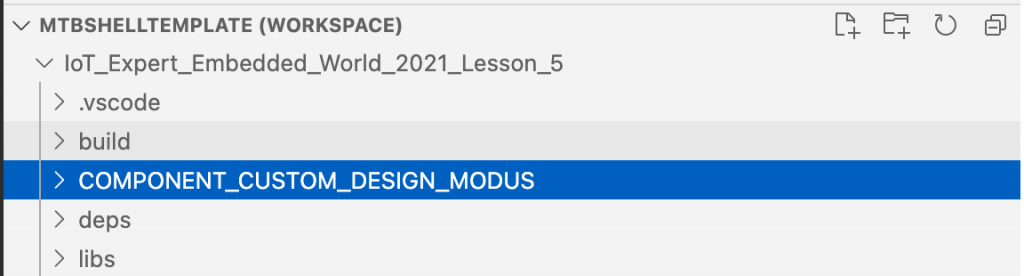
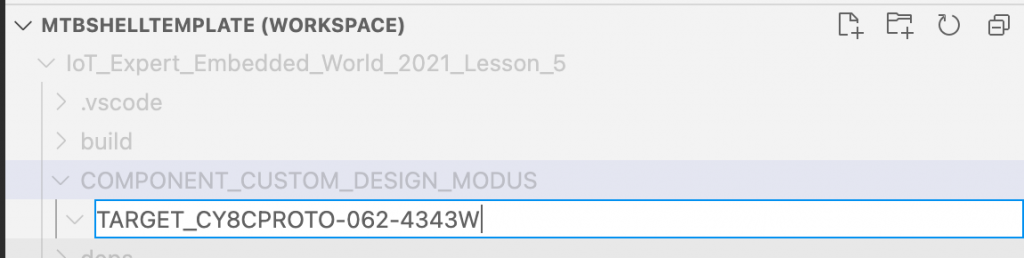
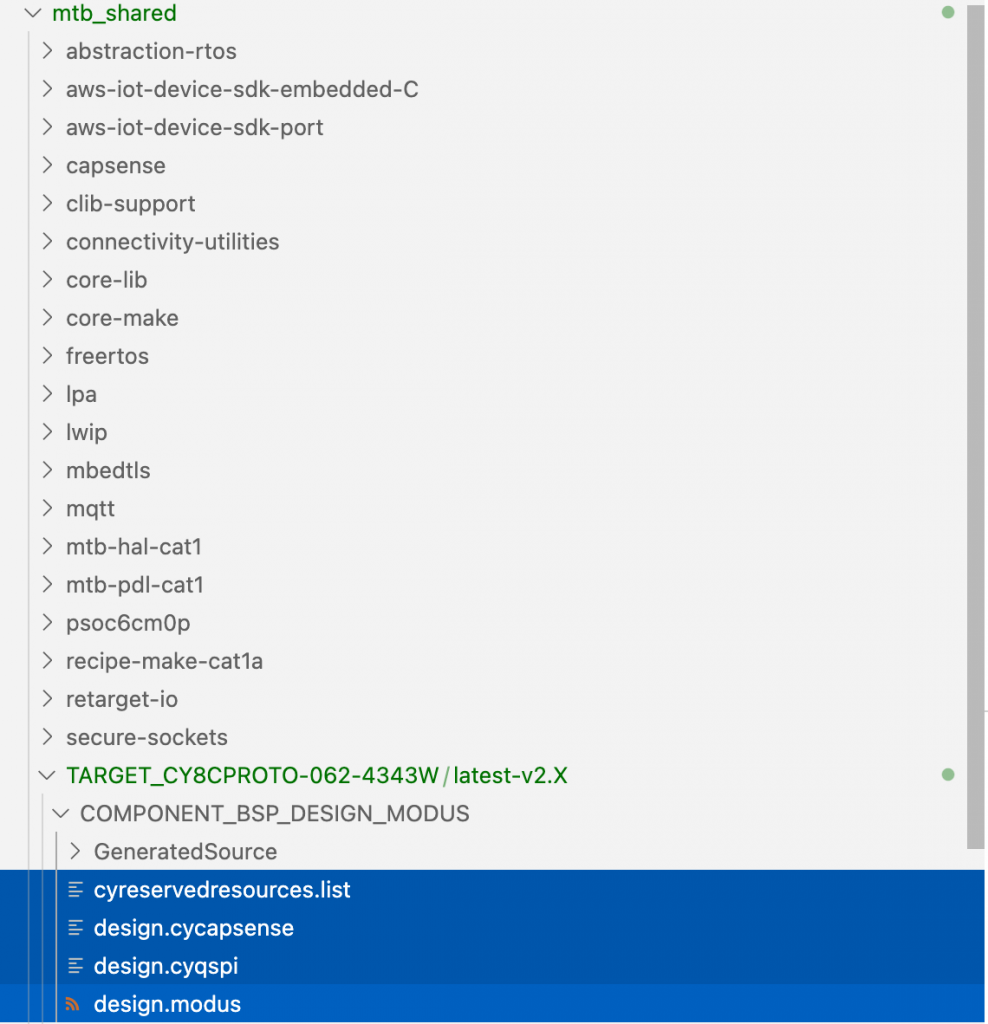
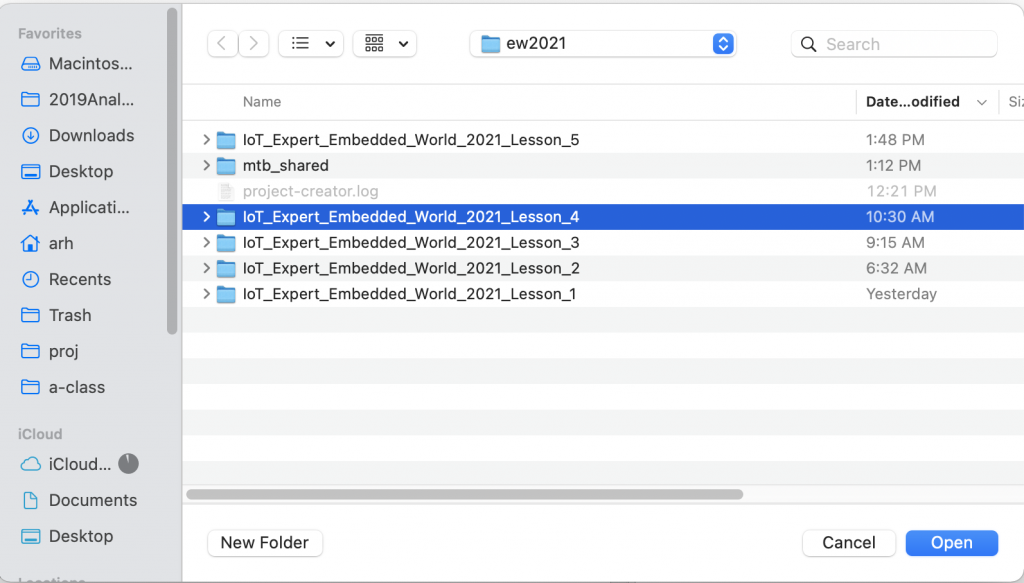
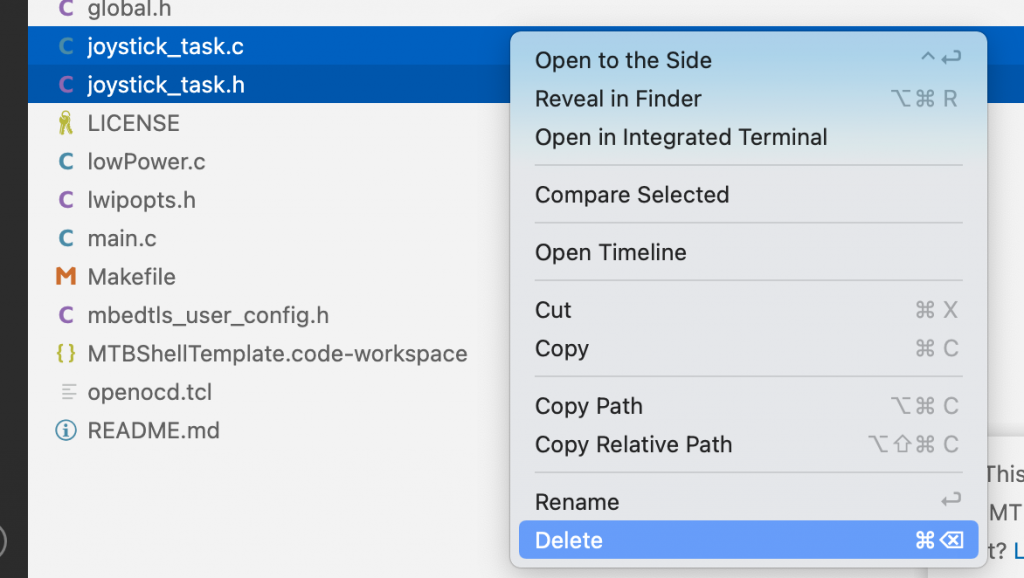
Start a file browser and look around inside your project.
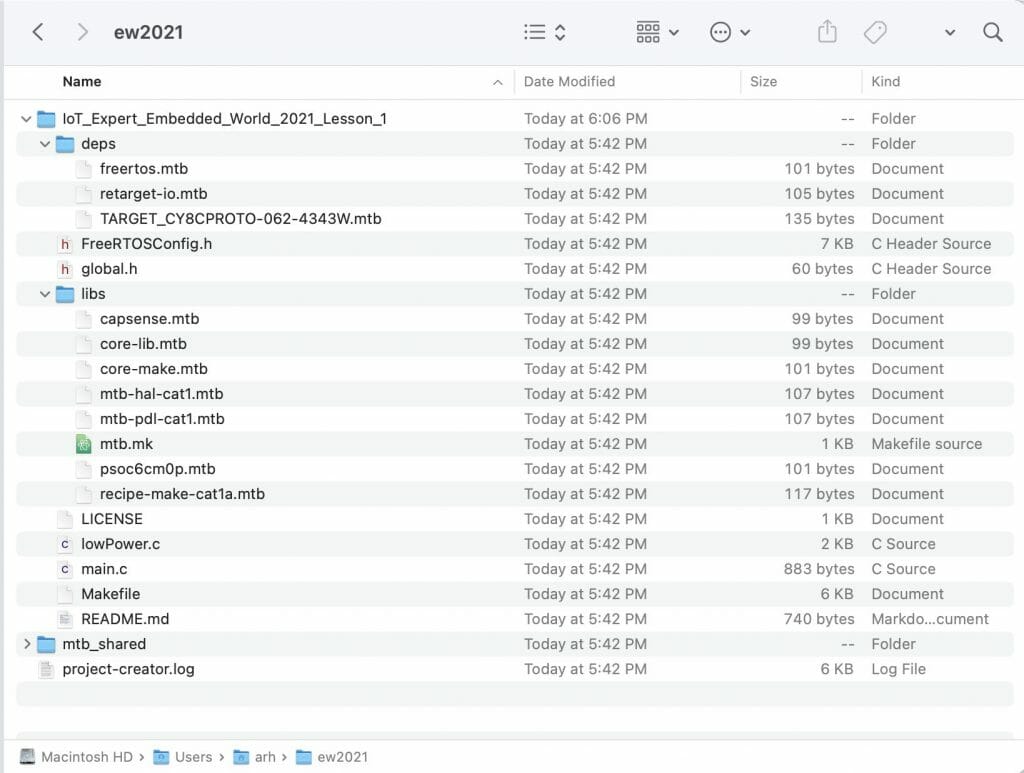
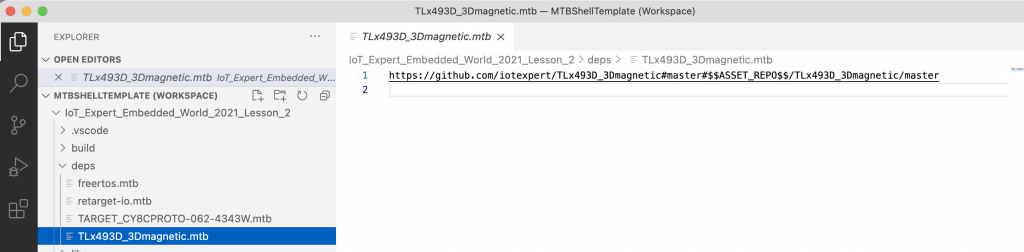
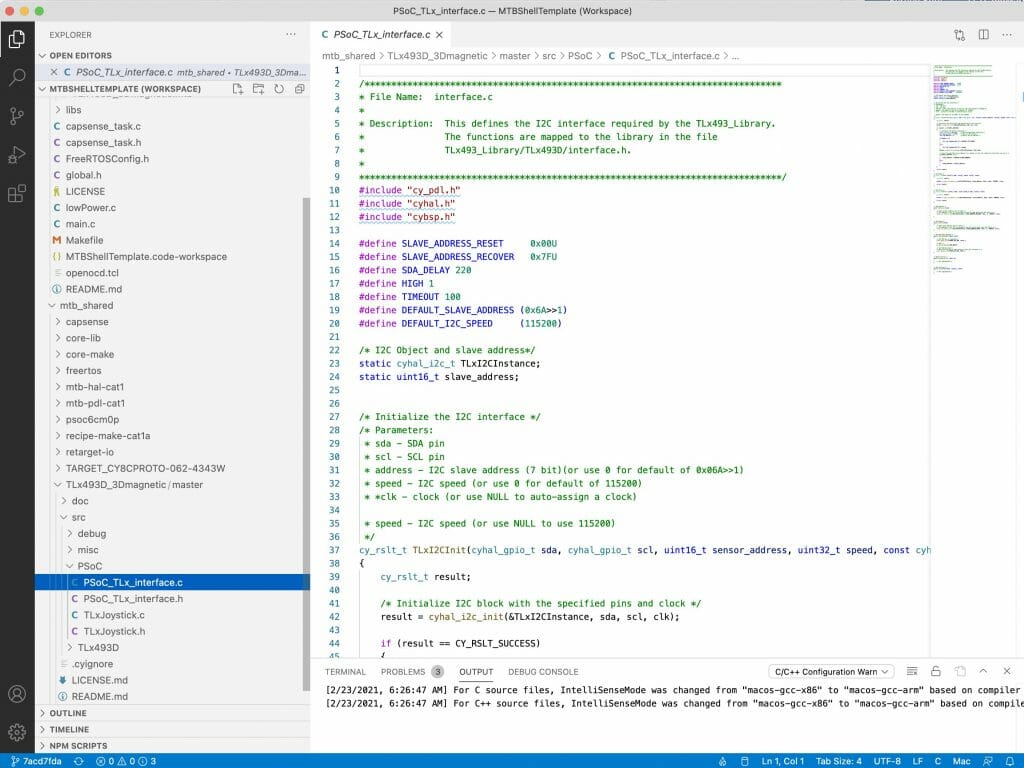
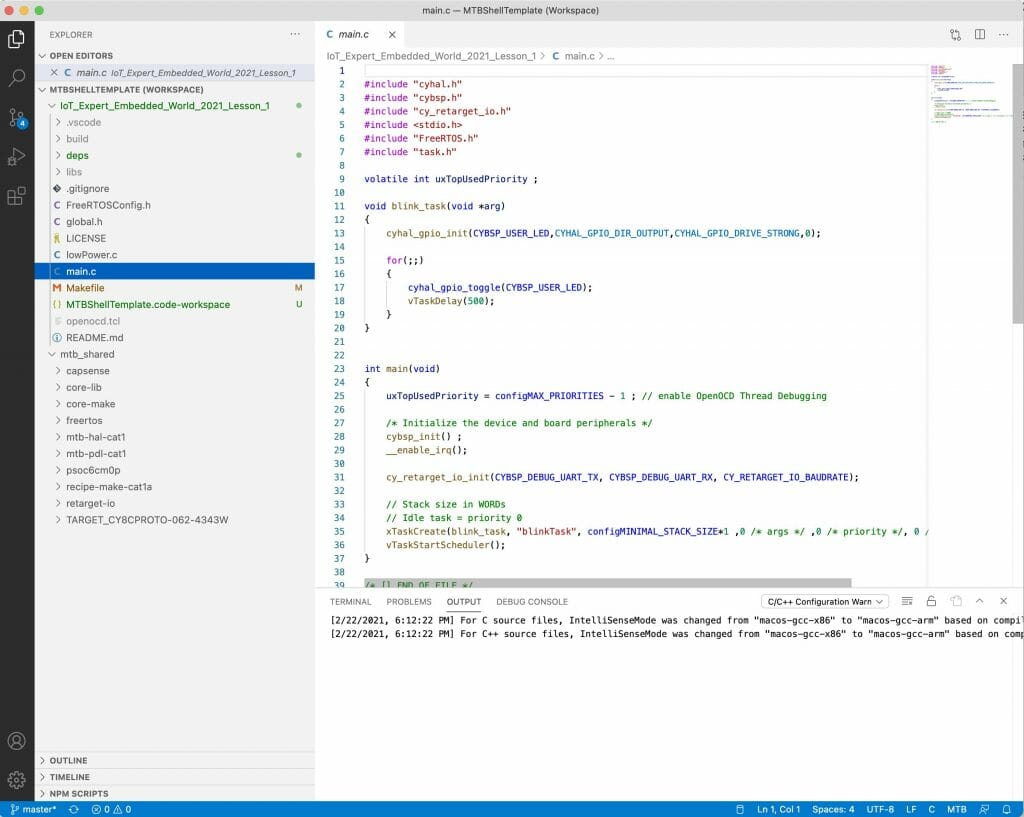
You can also see these in Visual Studio Code.
4. Test the basic project
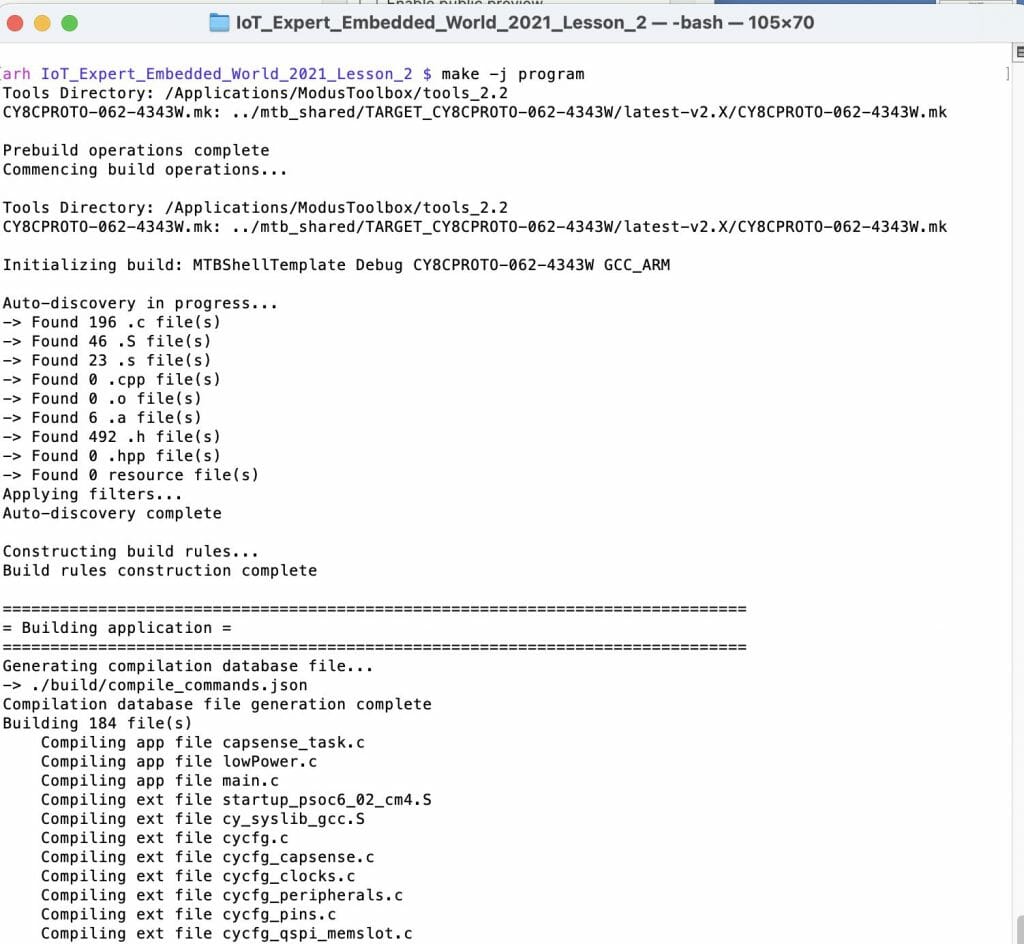
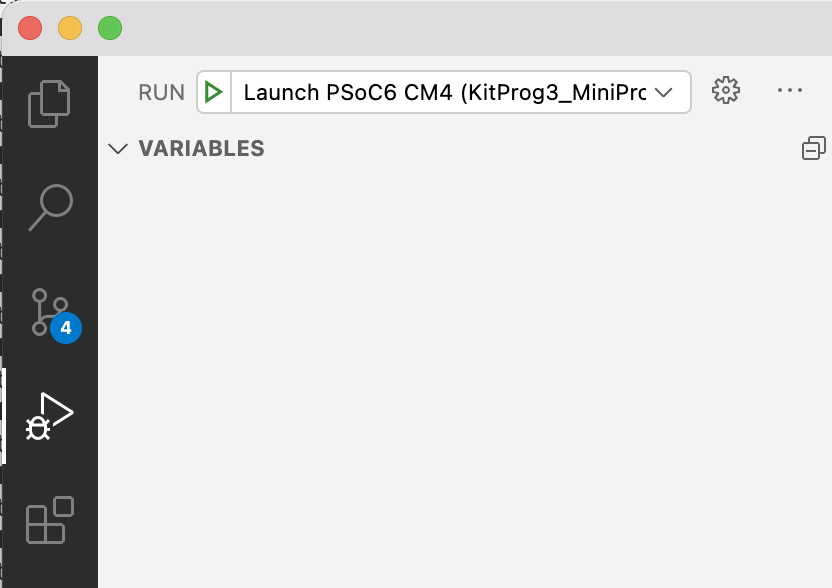
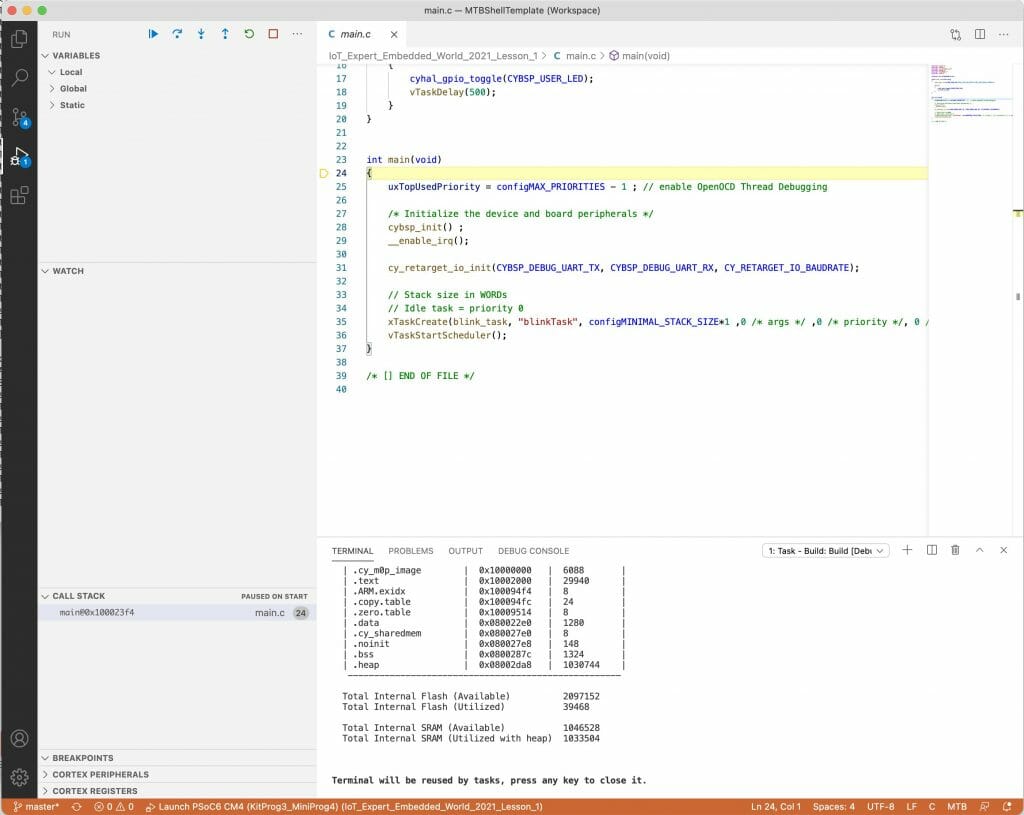
Now click the debug icon along the left and click the play button to build the project, program it and launch the debugger.
(You can use the drop-down menu to select “Program (KitProg3_MiniProg4)” and then click the play button if you just want to build and program without launching the debugger.)
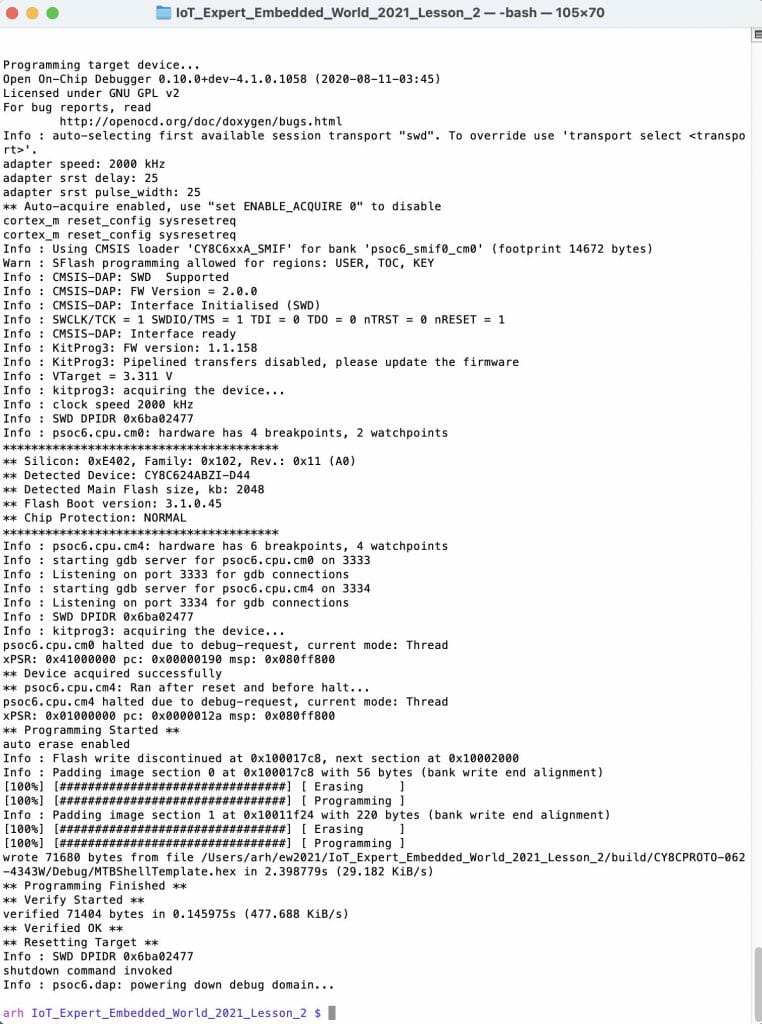
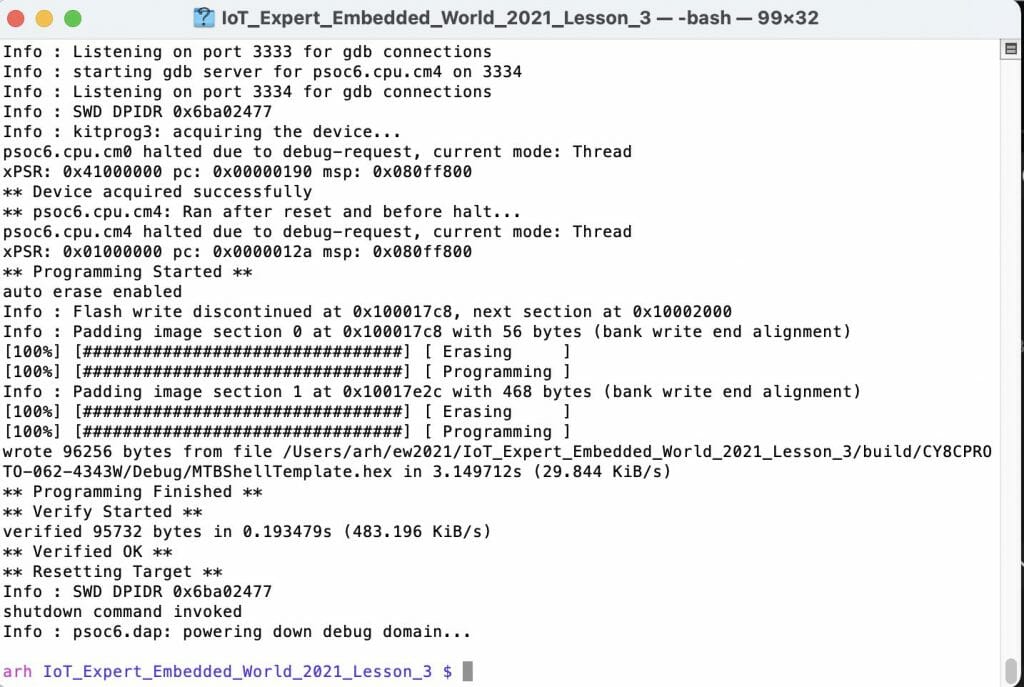
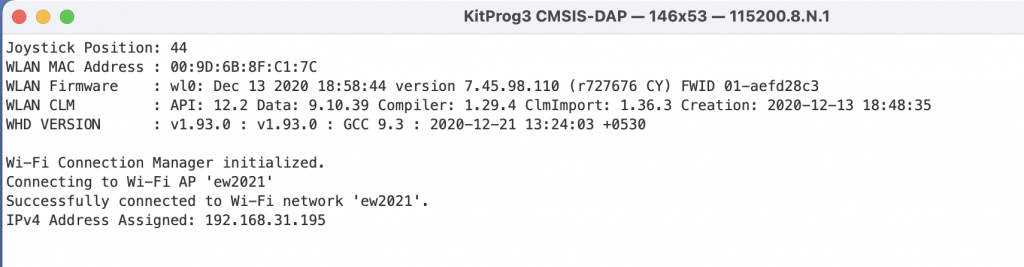
Notice on the console a bunch of stuff comes ripping out… then it programs your development board.
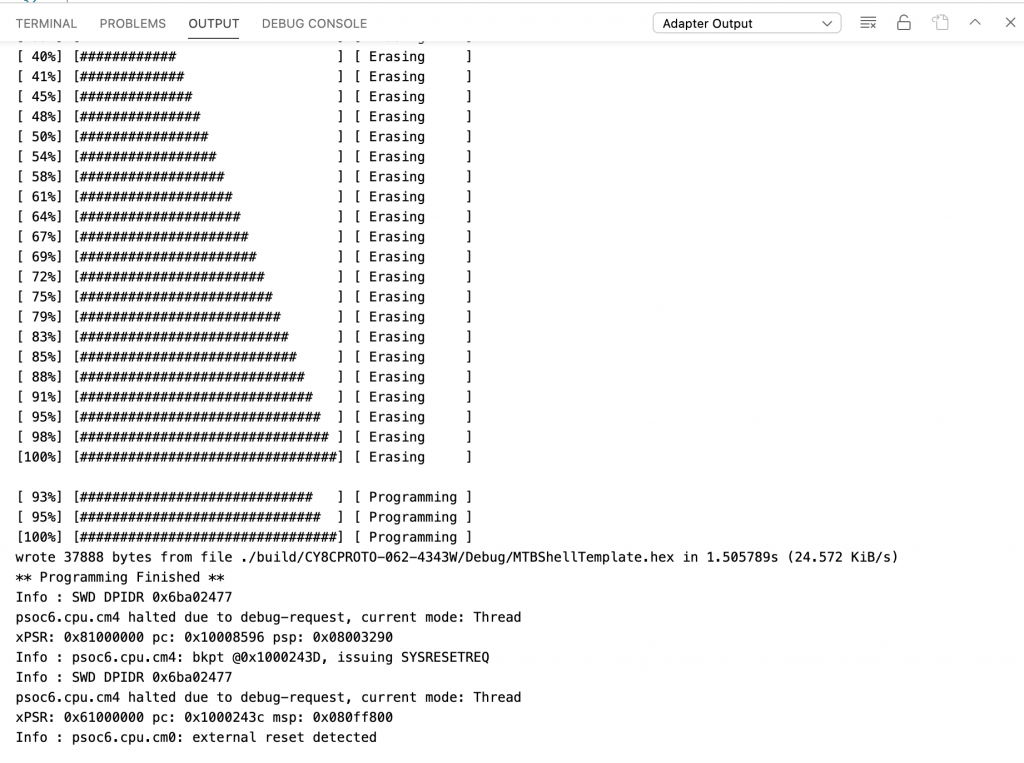
Once that is done the debugger starts and runs until the start of main. Press play to get things going.
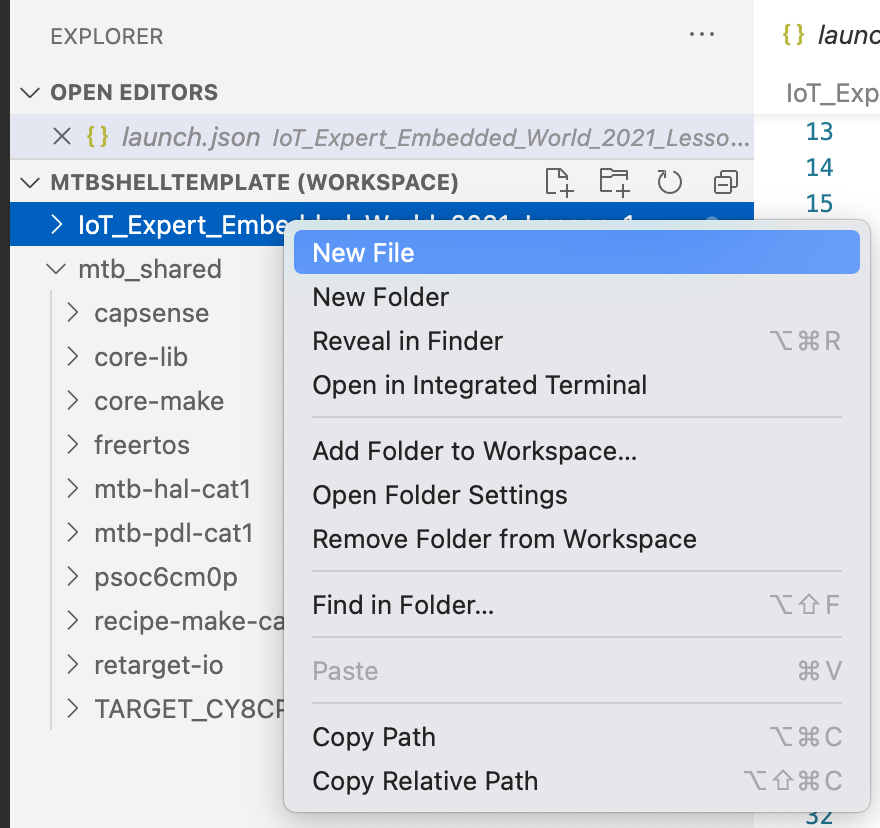
5. Add a CapSense task header file
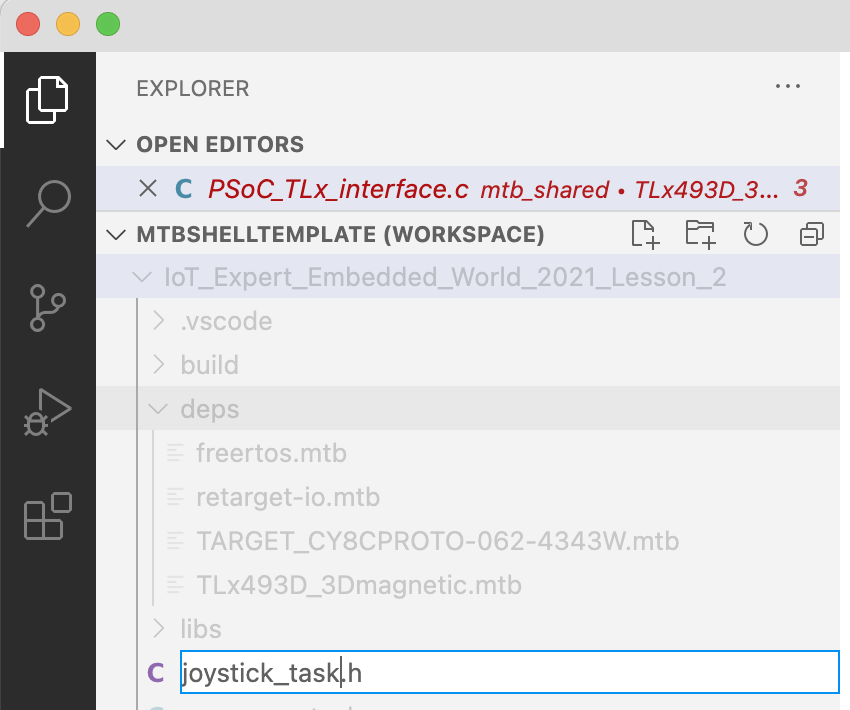
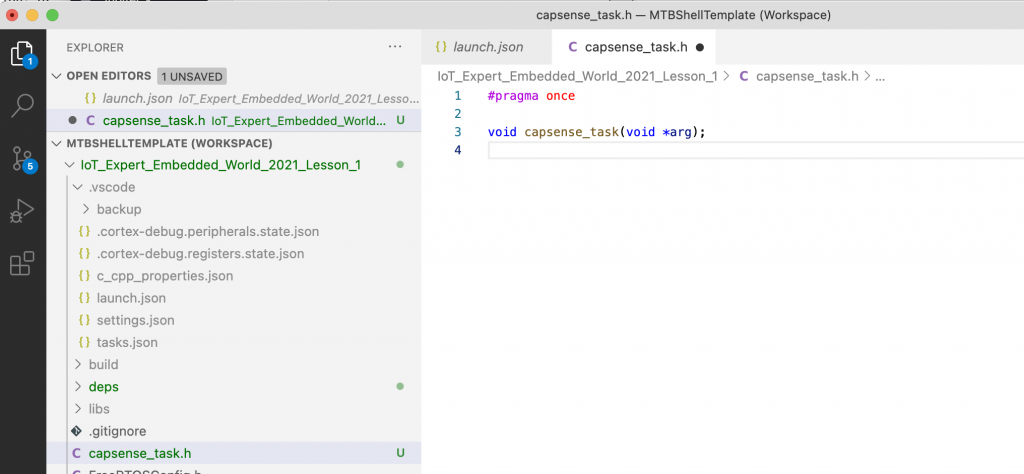
Now that we have a functioning blinking LED project, let’s add CapSense. Remember from the architecture picture above that I am going to have a task just for CapSense. Start by making the public header file called “capsense_task.h”
In that file there will only be the definition of the task.
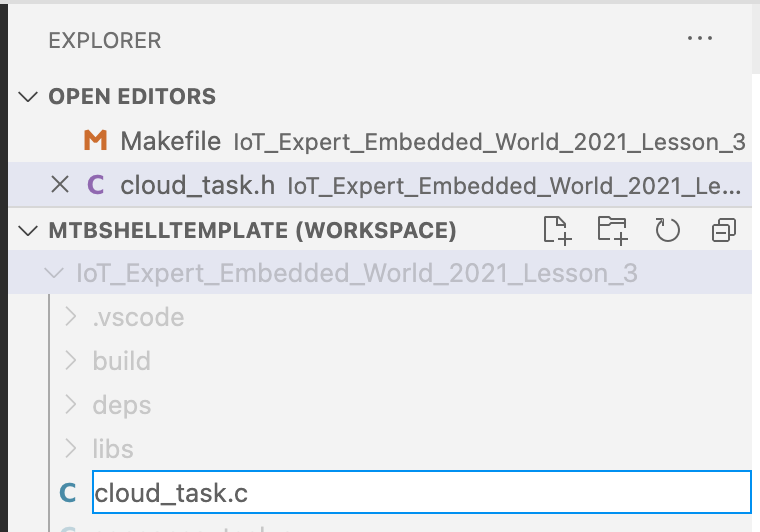
6. Add a CapSense task dot-c file
Now we will create capsense_task.c. In that file, you will need some includes to bring in the Infineon drivers. After the includes I will define several functions
- capsense_init: Starts up the CapSense block
- process_touch: Figures out what is being touched on the buttons and slider
- capsense_isr: Used by the CapSense middleware to process the CapSense interrupt
- capsense_end_of_scan_callback: Tells your application when the scanning is done
- capsense_register_deepsleep: This allows the CPU to know when it can go to Deep Sleep without interfering with CapSense
Finally I will define a semaphore to use to block my task until the CapSense scanning is done.
#include <stdio.h>

#include "cybsp.h"
#include "cyhal.h"
#include "cycfg.h"
#include "cycfg_capsense.h"

#include "FreeRTOS.h"
#include "task.h"
#include "semphr.h"

#include "capsense_task.h"

static void capsense_init(void);
static void process_touch(void);
static void capsense_isr(void);
static void capsense_end_of_scan_callback(cy_stc_active_scan_sns_t* active_scan_sns_ptr);
static void capsense_register_deepsleep(void);
static QueueHandle_t capsense_done; // Semaphore set in Capsense Callback End of Scan
The capsense_task function is called by FreeRTOS when it starts up. This function does what it says
- Sets up a sempahore
- Initializes the CapSense
- Starts scanning
- Waits for a scan to complete using a semaphore
- Process the widgets
- Looks at the touches
- Starts another scan
- Waits, then loops back
/*******************************************************************************
* Function Name: task_capsense
********************************************************************************
* Summary:
*  Task that initializes the CapSense block and processes the touch input.
*
* Parameters:
*  void *param : Task parameter defined during task creation (unused)
*
*******************************************************************************/
void capsense_task(void* param)
{
    (void)param;

    capsense_done = xQueueCreateCountingSemaphore(1,0);

    capsense_init();

    Cy_CapSense_ScanAllWidgets(&cy_capsense_context);

    for(;;)
    {
        xSemaphoreTake(capsense_done,portMAX_DELAY);

        Cy_CapSense_ProcessAllWidgets(&cy_capsense_context);
        process_touch();
        Cy_CapSense_ScanAllWidgets(&cy_capsense_context);
        vTaskDelay(50); // ~20hz update
    }
}
To initialize the CapSense you need to
- Initialize the CapSense block
- Setup the CapSense interrupt
- Register the DeepSleep function
- Ask to be called back when a scan finishes
- Enable the CapSense block
/*******************************************************************************
* Function Name: capsense_init
********************************************************************************
* Summary:
*  This function initializes the CSD HW block, and configures the CapSense
*  interrupt.
*******************************************************************************/
static void capsense_init(void)
{
    Cy_CapSense_Init(&cy_capsense_context);

    static const cy_stc_sysint_t capSense_intr_config =
    {
        .intrSrc = csd_interrupt_IRQn,
        .intrPriority = 7,
    };

    /* Initialize CapSense interrupt */
    Cy_SysInt_Init(&capSense_intr_config, &capsense_isr);
    NVIC_ClearPendingIRQ(capSense_intr_config.intrSrc);
    NVIC_EnableIRQ(capSense_intr_config.intrSrc);

    capsense_register_deepsleep();
    Cy_CapSense_RegisterCallback(CY_CAPSENSE_END_OF_SCAN_E,
                                              capsense_end_of_scan_callback, &cy_capsense_context);

    Cy_CapSense_Enable(&cy_capsense_context);
}
Infineon provides the ISR which is part of the CapSense scanning engine
/*******************************************************************************
* Function Name: capsense_isr
********************************************************************************
* Summary:
*  Wrapper function for handling interrupts from CSD block.
*
*******************************************************************************/
static void capsense_isr(void)
{
    Cy_CapSense_InterruptHandler(CYBSP_CSD_HW, &cy_capsense_context);
}
When a scan is done we want to unlock the capsense_task by giving the semaphore.
/*******************************************************************************
* Function Name: capsense_end_of_scan_callback
********************************************************************************
* Summary:
*  CapSense end of scan callback function. This function sends a command to
*  CapSense task to process scan.
*
* Parameters:
*  cy_stc_active_scan_sns_t * active_scan_sns_ptr (unused)
*
*******************************************************************************/
static void capsense_end_of_scan_callback(cy_stc_active_scan_sns_t* active_scan_sns_ptr)
{
    BaseType_t xYieldRequired;

    (void)active_scan_sns_ptr;
    xYieldRequired = xSemaphoreGiveFromISR(capsense_done,&xYieldRequired);

    portYIELD_FROM_ISR(xYieldRequired);
}
The DeepSleep registration function looks like this:
/*******************************************************************************
* Function Name: capsense_register_deepsleep
********************************************************************************
* Summary:
*  Wrapper function for setting up the Deep Sleep callback for CapSense.
*  This is necessary so that a transition from active to Deep Sleep does not
*  occur during a CapSense scan.
*
*  See the "MTB CAT1 Peripheral driver library documentation > PDL API Reference > SysPM"
*  link in the Quick Panel Documentation for information on setting up the SysPm callbacks
*******************************************************************************/
static void capsense_register_deepsleep(void)
{
    static cy_stc_syspm_callback_params_t callback_params =
    {
        .base       = CYBSP_CSD_HW,
        .context    = &cy_capsense_context
    };

    static cy_stc_syspm_callback_t capsense_deep_sleep_cb =
    {
        Cy_CapSense_DeepSleepCallback,
        CY_SYSPM_DEEPSLEEP,
        0,
        &callback_params,
        NULL,
        NULL
    };

    Cy_SysPm_RegisterCallback(&capsense_deep_sleep_cb);
}
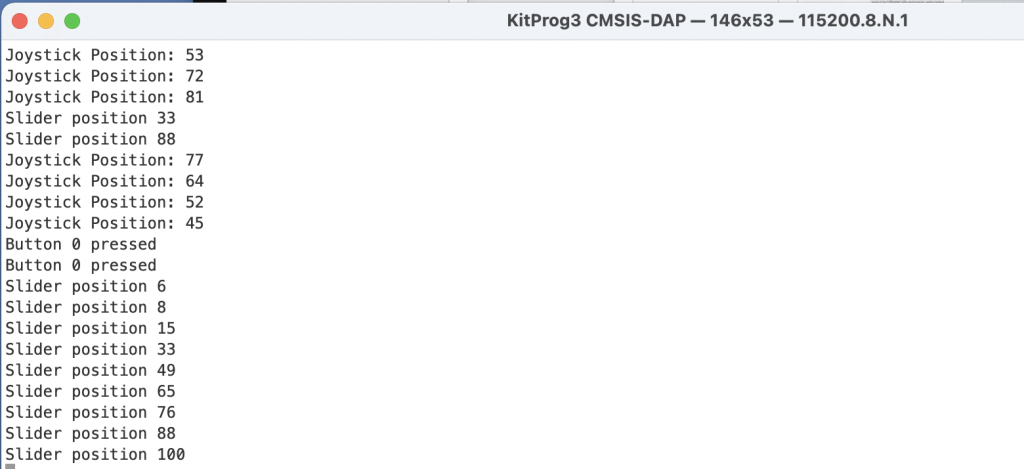
The last bit of magic is the processing of the touches. We will
- Look at the buttons
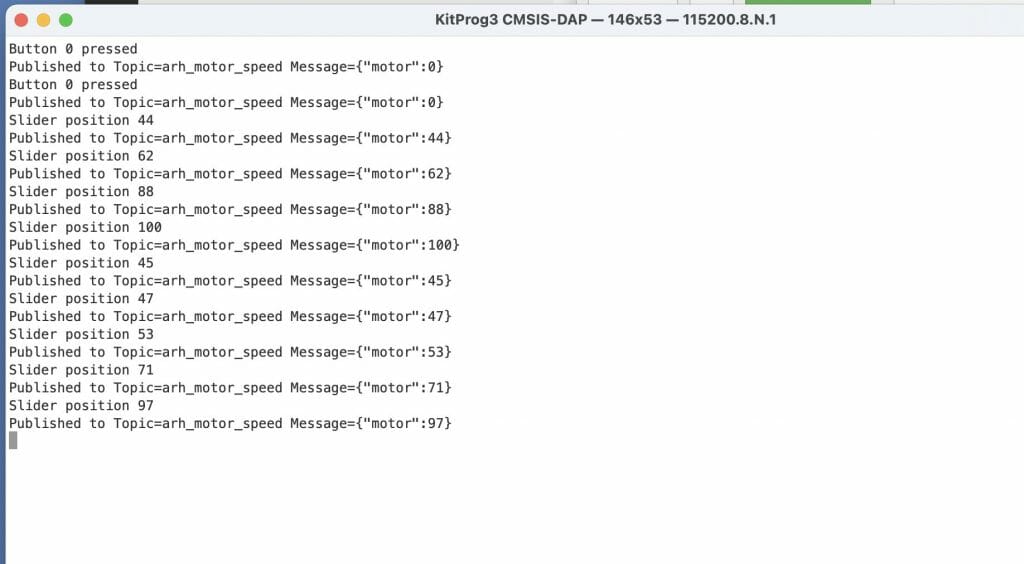
- If they are pressed do a print out
- Look a the slider (which gives you a value between 0 and 300).
- If the slider is being pressed, print out the value
- Save the current state of the buttons and slider for next time around.
/*******************************************************************************
* Function Name: process_touch
*******************************************************************************/
static void process_touch(void)
{
    /* Variables used to store previous touch information */
    static uint32_t button0_status_prev = 0;
    static uint32_t button1_status_prev = 0;
    static uint16_t slider_pos_prev = 0;

    uint32_t button0_status = 0;
    uint32_t button1_status = 0;
    uint16_t slider_pos = 0;
    uint8_t slider_touched = 0;
    cy_stc_capsense_touch_t *slider_touch;

// Process the buttons

    button0_status = Cy_CapSense_IsWidgetActive(CY_CAPSENSE_BUTTON0_WDGT_ID,&cy_capsense_context);
    button1_status = Cy_CapSense_IsSensorActive( CY_CAPSENSE_BUTTON1_WDGT_ID, CY_CAPSENSE_BUTTON1_SNS0_ID, &cy_capsense_context);

    if((0u != button0_status) && (0u == button0_status_prev))
    {
        printf("Button 0 pressed\n");
    }

    if((0u != button1_status) && (0u == button1_status_prev))
    {
        printf("Button 1 pressed\n");
    }

// Process the slider
    slider_touch = Cy_CapSense_GetTouchInfo( CY_CAPSENSE_LINEARSLIDER0_WDGT_ID, &cy_capsense_context);
    slider_pos = (slider_touch->ptrPosition->x / 3); // Transform 0-300 into 0-100
    slider_touched = slider_touch->numPosition;

    if((0u != slider_touched) && (slider_pos_prev != slider_pos ))
    {
        printf("Slider position %d\n",slider_pos);
    }

    button0_status_prev = button0_status;
    button1_status_prev = button1_status;
    slider_pos_prev = slider_pos;
}
7. Update main.c
In main.c we need to include the capsense_task header file
#include "capsense_task.h"
And startup the capsense_task
xTaskCreate(capsense_task, "CapSense", configMINIMAL_STACK_SIZE*4, NULL, 1, 0 );
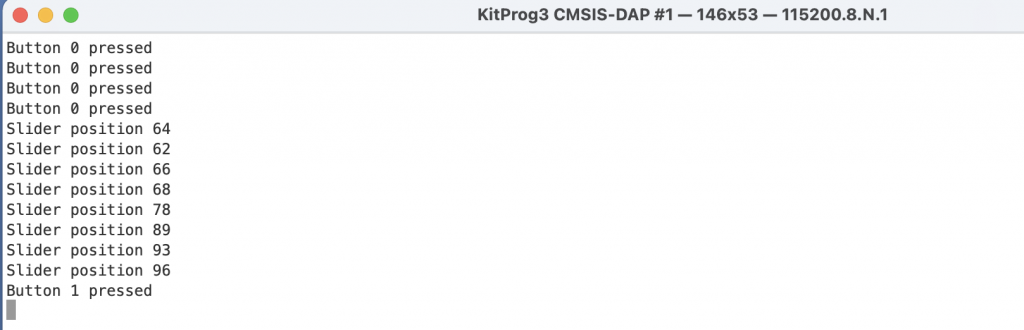
8. Test the CapSense
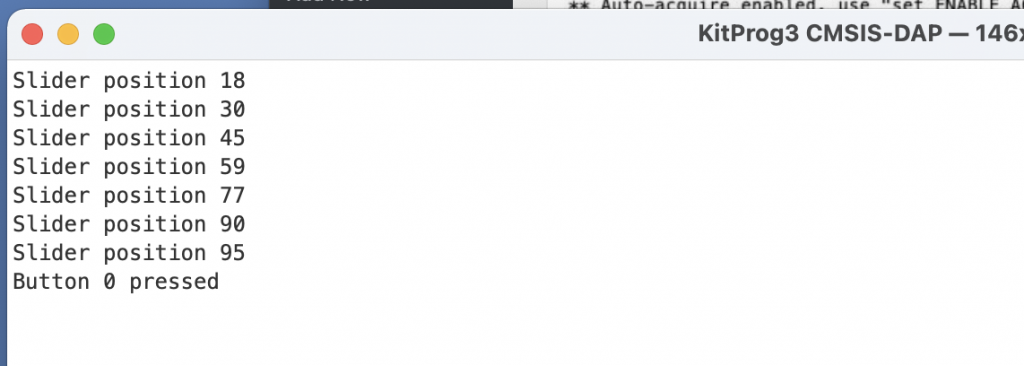
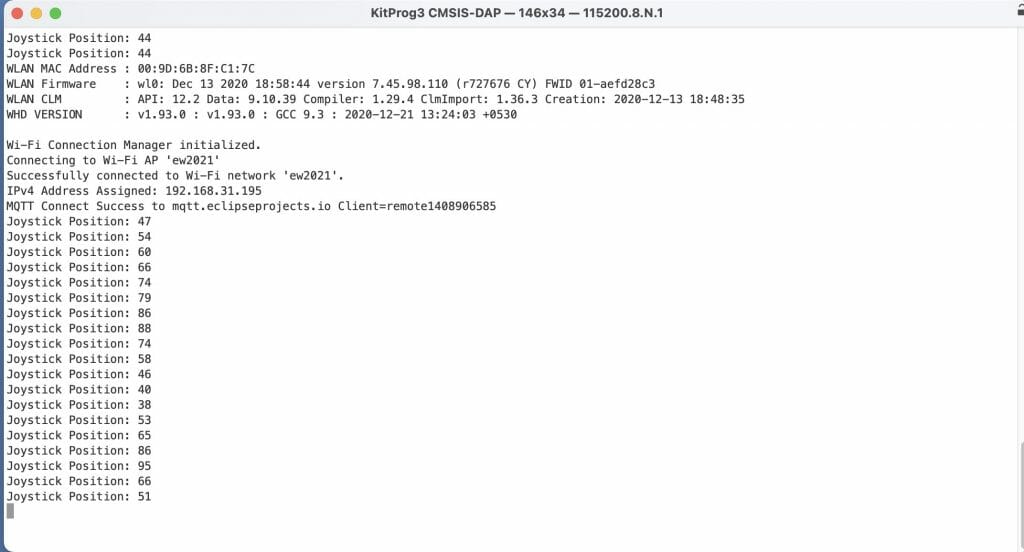
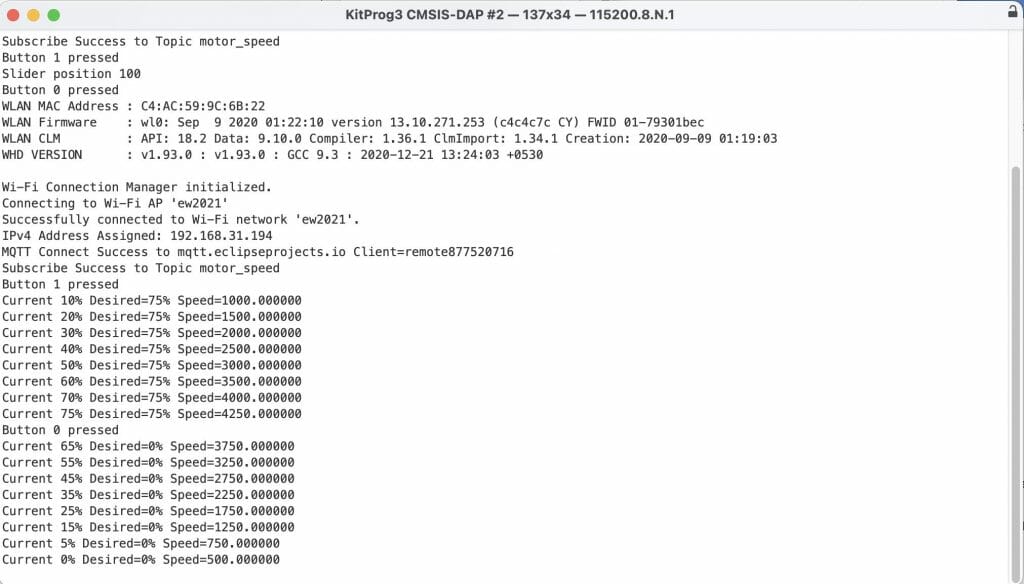
Program your kit and you will be able to press the buttons and slider.
Resources for Project
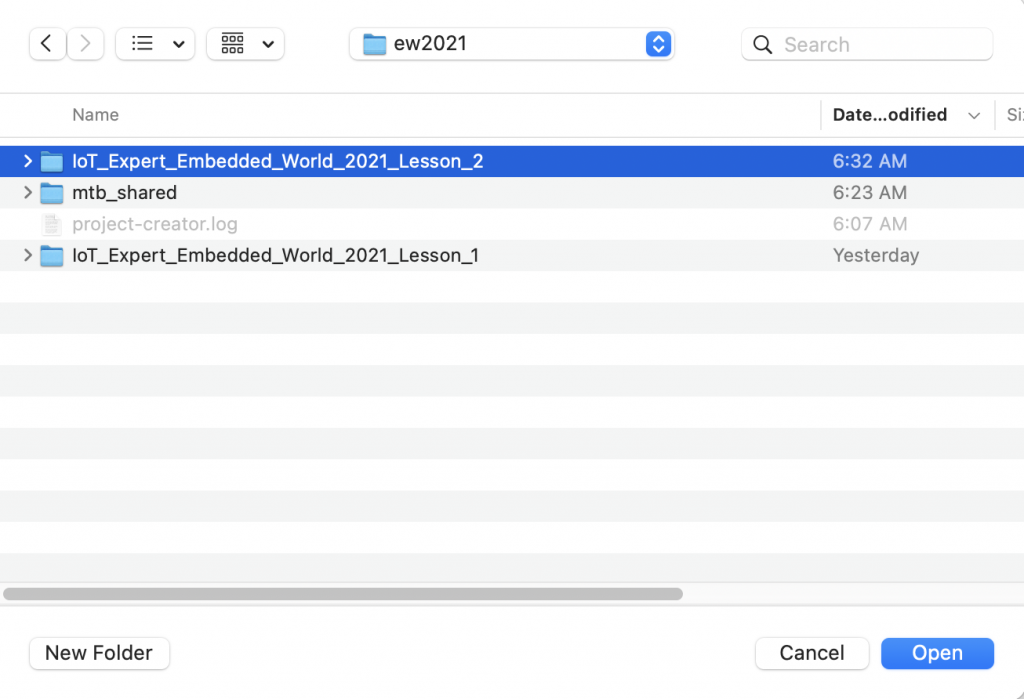
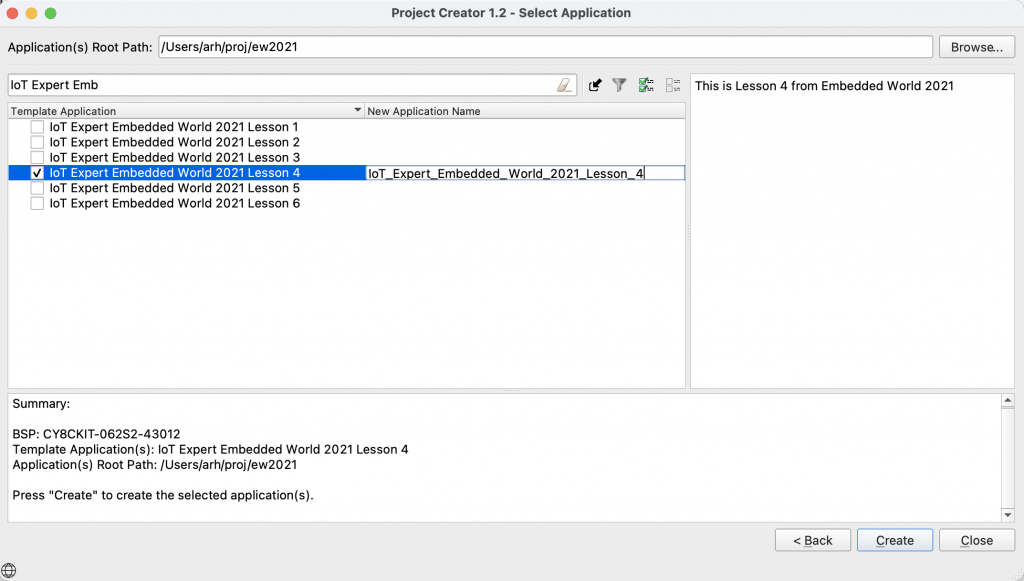
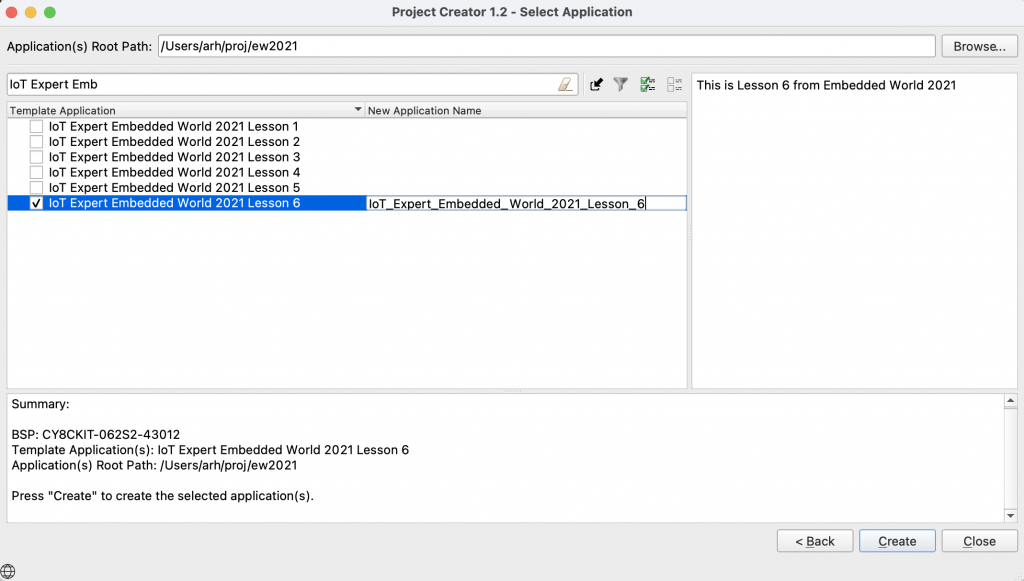
Remember above when I started the project creator there was a list of projects. This exact completed project is available to you as “IoT Expert Embedded World 2021 Lesson1”
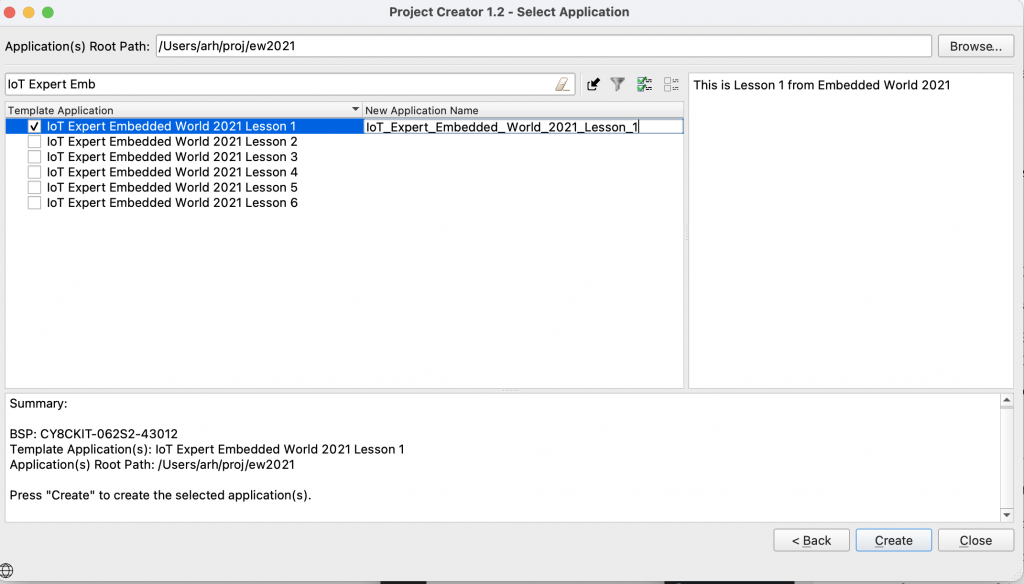
You can also clone this project from git@github.com:iotexpert/ew21-lesson1.git or https://github.com/iotexpert/ew21-lesson1.git
For reference, here is the whole capsense_task.c file in one chunk
#include <stdio.h>

#include "cybsp.h"
#include "cyhal.h"
#include "cycfg.h"
#include "cycfg_capsense.h"

#include "FreeRTOS.h"
#include "task.h"
#include "semphr.h"

#include "capsense_task.h"

static void capsense_init(void);
static void process_touch(void);
static void capsense_isr(void);
static void capsense_end_of_scan_callback(cy_stc_active_scan_sns_t* active_scan_sns_ptr);
static void capsense_register_deepsleep(void);

static QueueHandle_t capsense_done; // Semaphore set in Capsense Callback End of Scan

/*******************************************************************************
* Function Name: task_capsense
********************************************************************************
* Summary:
*  Task that initializes the CapSense block and processes the touch input.
*
* Parameters:
*  void *param : Task parameter defined during task creation (unused)
*
*******************************************************************************/
void capsense_task(void* param)
{
    (void)param;

    capsense_done = xQueueCreateCountingSemaphore(1,0);

    capsense_init();

    Cy_CapSense_ScanAllWidgets(&cy_capsense_context);

    for(;;)
    {
        xSemaphoreTake(capsense_done,portMAX_DELAY);

        Cy_CapSense_ProcessAllWidgets(&cy_capsense_context);
        process_touch();
        Cy_CapSense_ScanAllWidgets(&cy_capsense_context);
        vTaskDelay(50); // ~20hz update
    }
}

/*******************************************************************************
* Function Name: process_touch
*******************************************************************************/
static void process_touch(void)
{
    /* Variables used to store previous touch information */
    static uint32_t button0_status_prev = 0;
    static uint32_t button1_status_prev = 0;
    static uint16_t slider_pos_prev = 0;

    uint32_t button0_status = 0;
    uint32_t button1_status = 0;
    uint16_t slider_pos = 0;
    uint8_t slider_touched = 0;
    cy_stc_capsense_touch_t *slider_touch;

// Process the buttons

    button0_status = Cy_CapSense_IsWidgetActive(CY_CAPSENSE_BUTTON0_WDGT_ID,&cy_capsense_context);
    button1_status = Cy_CapSense_IsSensorActive( CY_CAPSENSE_BUTTON1_WDGT_ID, CY_CAPSENSE_BUTTON1_SNS0_ID, &cy_capsense_context);

    if((0u != button0_status) && (0u == button0_status_prev))
    {
        printf("Button 0 pressed\n");
    }

    if((0u != button1_status) && (0u == button1_status_prev))
    {
        printf("Button 1 pressed\n");
    }

// Process the slider
    slider_touch = Cy_CapSense_GetTouchInfo( CY_CAPSENSE_LINEARSLIDER0_WDGT_ID, &cy_capsense_context);
    slider_pos = (slider_touch->ptrPosition->x / 3); // Transform 0-300 into 0-100
    slider_touched = slider_touch->numPosition;

    if((0u != slider_touched) && (slider_pos_prev != slider_pos ))
    {
        printf("Slider position %d\n",slider_pos);
    }

    button0_status_prev = button0_status;
    button1_status_prev = button1_status;
    slider_pos_prev = slider_pos;
}


/*******************************************************************************
* Function Name: capsense_init
********************************************************************************
* Summary:
*  This function initializes the CSD HW block, and configures the CapSense
*  interrupt.
*******************************************************************************/
static void capsense_init(void)
{
    Cy_CapSense_Init(&cy_capsense_context);

    static const cy_stc_sysint_t capSense_intr_config =
    {
        .intrSrc = csd_interrupt_IRQn,
        .intrPriority = 7,
    };

    /* Initialize CapSense interrupt */
    Cy_SysInt_Init(&capSense_intr_config, &capsense_isr);
    NVIC_ClearPendingIRQ(capSense_intr_config.intrSrc);
    NVIC_EnableIRQ(capSense_intr_config.intrSrc);

    capsense_register_deepsleep();

    Cy_CapSense_RegisterCallback(CY_CAPSENSE_END_OF_SCAN_E,
                                              capsense_end_of_scan_callback, &cy_capsense_context);

    Cy_CapSense_Enable(&cy_capsense_context);
}

/*******************************************************************************
* Function Name: capsense_end_of_scan_callback
********************************************************************************
* Summary:
*  CapSense end of scan callback function. This function sends a command to
*  CapSense task to process scan.
*
* Parameters:
*  cy_stc_active_scan_sns_t * active_scan_sns_ptr (unused)
*
*******************************************************************************/
static void capsense_end_of_scan_callback(cy_stc_active_scan_sns_t* active_scan_sns_ptr)
{
    BaseType_t xYieldRequired;

    (void)active_scan_sns_ptr;
    xYieldRequired = xSemaphoreGiveFromISR(capsense_done,&xYieldRequired);

    portYIELD_FROM_ISR(xYieldRequired);
}

/*******************************************************************************
* Function Name: capsense_isr
********************************************************************************
* Summary:
*  Wrapper function for handling interrupts from CSD block.
*
*******************************************************************************/
static void capsense_isr(void)
{
    Cy_CapSense_InterruptHandler(CYBSP_CSD_HW, &cy_capsense_context);
}

/*******************************************************************************
* Function Name: capsense_register_deepsleep
********************************************************************************
* Summary:
*  Wrapper function for setting up the Deep Sleep callback for CapSense.
*  This is necessary so that a transition from active to Deep Sleep does not
*  occur during a CapSense scan.
*
*  See the "MTB CAT1 Peripheral driver library documentation > PDL API Reference > SysPM"
*  link in the Quick Panel Documentation for information on setting up the SysPm callbacks
*******************************************************************************/
static void capsense_register_deepsleep(void)
{
    static cy_stc_syspm_callback_params_t callback_params =
    {
        .base       = CYBSP_CSD_HW,
        .context    = &cy_capsense_context
    };

    static cy_stc_syspm_callback_t capsense_deep_sleep_cb =
    {
        Cy_CapSense_DeepSleepCallback,
        CY_SYSPM_DEEPSLEEP,
        0,
        &callback_params,
        NULL,
        NULL
    };

    Cy_SysPm_RegisterCallback(&capsense_deep_sleep_cb);
}