Summary
This morning I saw something exciting. When I went to the ARM mbed-os GitHub site I saw the latest accepted merge commit was from vmedcy and it says something interesting. “Add Cypress PSoC 6 Targets”. I cannot even begin to describe how gratifying it is to see this commit.
But what does it mean? Lets look. I am using a Mac, so I simply install the MBED-CLI using the instructions found on the MBED CLI webpage.
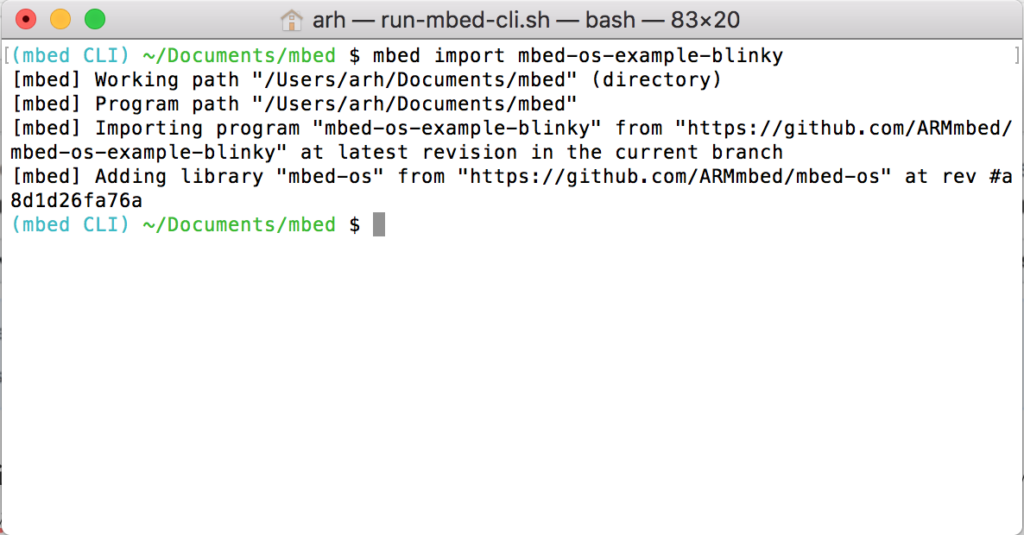
Like all good embedded people, the first thing to do is make sure that the toolchain and everything else works using a simple blinking LED project. And, the easiest way to do this is to import the ARM example using: “mbed import mbed-os-example-blinky”.
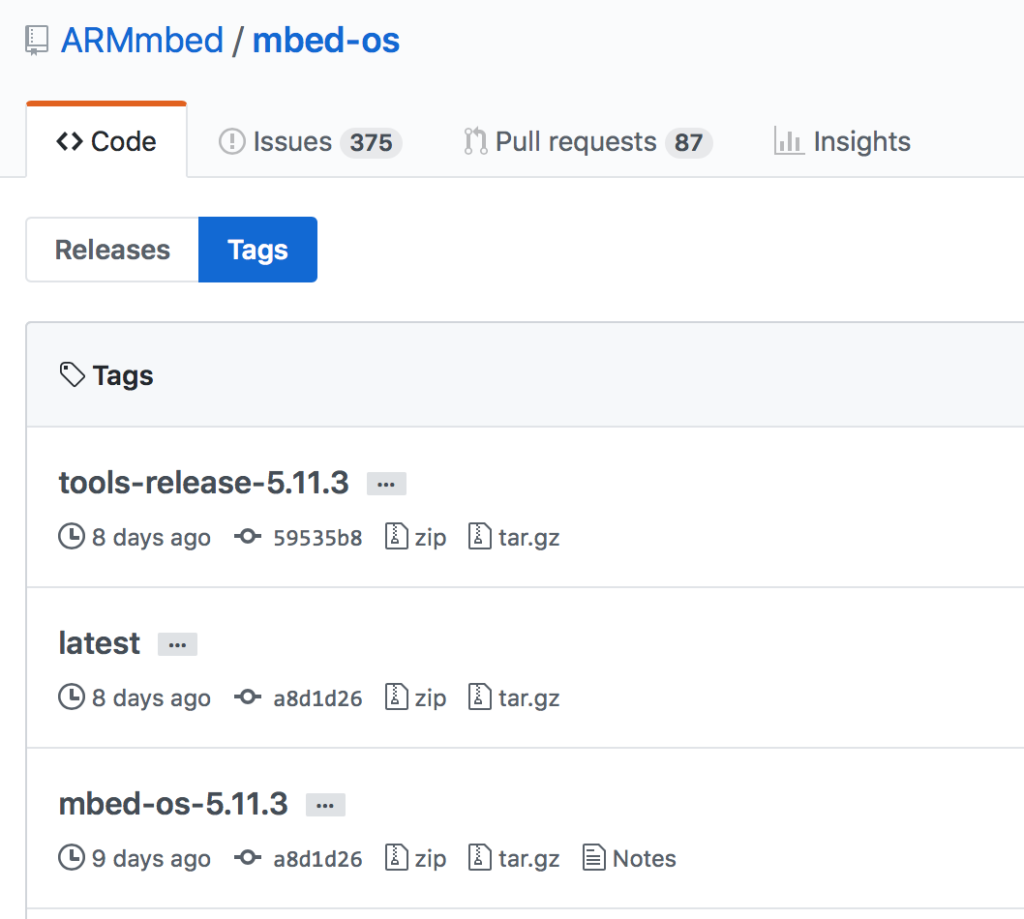
The current release of mbed-os is 5.11.3 which you can see on the Tags page of the mbed-os GitHub site. Notice in the screenshot above that the commit number for mbed-os is “a8d1d2…” which means that by default, when you import a project it gives you the “latest” version of mbed-os, which really means the latest official release.
But, I want to use the version that was accepted with the new Cypress stuff (which will become part of the official release starting with mbed-os-5.11.4). I can do this by running “cd mbed-os” and “mbed update master”. This will move the git repository to point at the head of the master branch, AKA the latest and greatest. When I do that I get a version that looks like “32525…”
And when I look at the commit history in GitHub I can see the interesting commit has the same number.
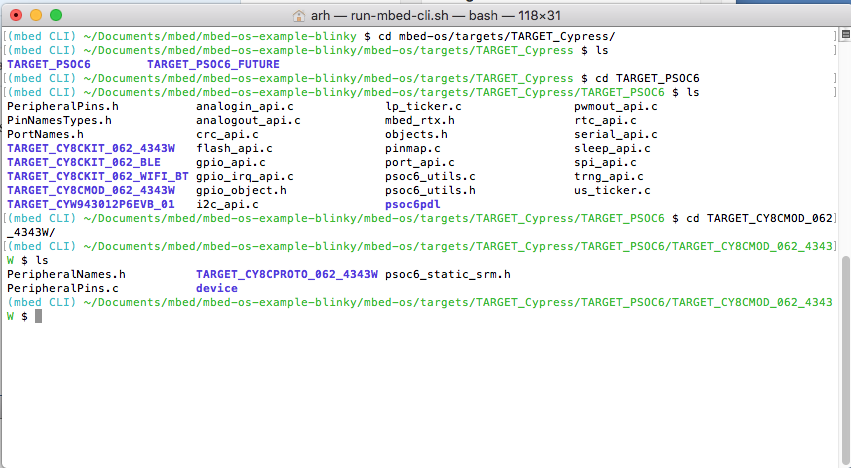
Now to the good stuff. When I look in the targets directory I see that there is a TARGET_CYPRESS. Where is see two targets:
- TARGET_PSOC – the stuff that Cypress created
- TARGET_PSOC6_FUTURE – a really cool target that Future Electronics created.
When when I look in the Cypress directory I see a bunch of my favorite Cypress PSoC 6 and WICED wireless development Kits.
- TARGET_CY8CKIT_062_BLE
- TARGET_CY8CKIT_062_4343W
- TARGET_CY8CKIT_062_WIFI_BT
- TARGET_CYW943012P6EVB_01
- TARGET_CY8CMOD_062_4343W
- TARGET_CY8CPROTO_062_4343W
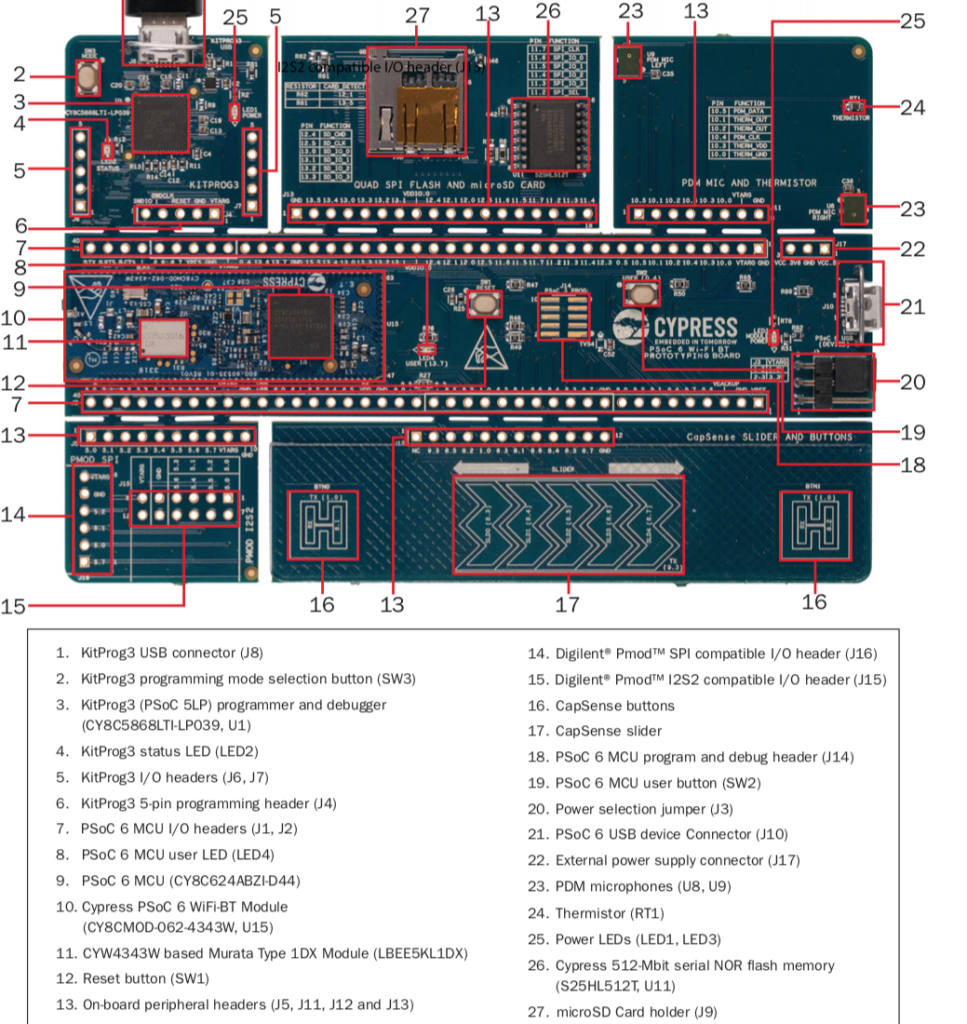
I happen to have a CY8CPROTO_062_4343W on my desk at home. This kit has a bunch of cool stuff on it, but most importantly it a 4343W WiFi Bluetooth Combo chip and a PSoC 6 together. Finally, A PSoC 6 2M (which is really called CY8C624ABZI-D44) and a WICED 4343W – a Dual Band 802.11n and Bluetooth 5.0 Combo. Here is a picture from the development kit guide.
Now we have something to program. Let’s look at the blinking LED example program. It resides in the file “main.cpp” which is in the root directory of the “mbed-os-example-blinky”
/* mbed Microcontroller Library
 * Copyright (c) 2018 ARM Limited
 * SPDX-License-Identifier: Apache-2.0
 */

#include "mbed.h"
#include "stats_report.h"

DigitalOut led1(LED1);

#define SLEEP_TIME                  500 // (msec)
#define PRINT_AFTER_N_LOOPS         20

// main() runs in its own thread in the OS
int main()
{
    SystemReport sys_state( SLEEP_TIME * PRINT_AFTER_N_LOOPS /* Loop delay time in ms */);

    int count = 0;
    while (true) {
        // Blink LED and wait 0.5 seconds
        led1 = !led1;
        wait_ms(SLEEP_TIME);

        if ((0 == count) || (PRINT_AFTER_N_LOOPS == count)) {
            // Following the main thread wait, report on the current system status
            sys_state.report_state();
            count = 0;
        }
        ++count;
    }
}
This looks simple enough, but I am never a fan of “other” stuff in the blinking LED example. So Ill trim it down to the most basic.
/* mbed Microcontroller Library
 * Copyright (c) 2018 ARM Limited
 * SPDX-License-Identifier: Apache-2.0
 */

#include "mbed.h"

DigitalOut led1(LED1);

#define SLEEP_TIME                  500 // (msec)

// main() runs in its own thread in the OS
int main()
{
    while (true) {
        // Blink LED and wait 0.5 seconds
        led1 = !led1;
        wait_ms(SLEEP_TIME);
    }
}
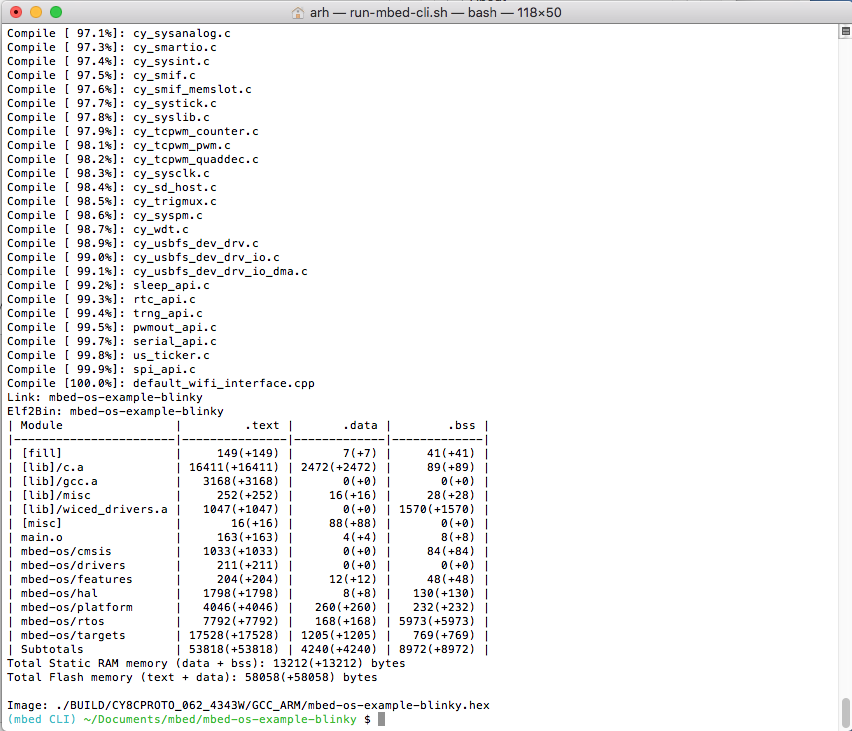
All-right, how do I compile this? Well, run the mbed command line interface with “mbed compile -m CY8CPROTO_062_4343W -t GCC_ARM“… and after a bit of compiling you should end up with a window like this:
Now I have a “hex file”. How do I program it? There are three ways.
#1 You can add the “-f” option to the command line and it will “flash” the device after it gets done compiling using PyOCD. In order to do this your development kit’s KitProg 3 must be in the DAPLink mode. To get into this mode hold down the KitProg button for 2 seconds and the LED will turn off. (If the LED turns on that means you put the programmer into CMSIS-DAP mode, so hold down the button for 2 seconds again). At the time of this writing the -f option doesn’t work in the released version of mbed-cli, but that will be fixed shortly with an update to the program debug system in mbed (hopefully by the time you read this)
#2 Copy the hex file from the BUILD directory onto the Mass Storage device called “DAP Link” using the finder. (drag and drop). To use this method your KitProg needs to be in DAPLink mode. (so follow the steps above)
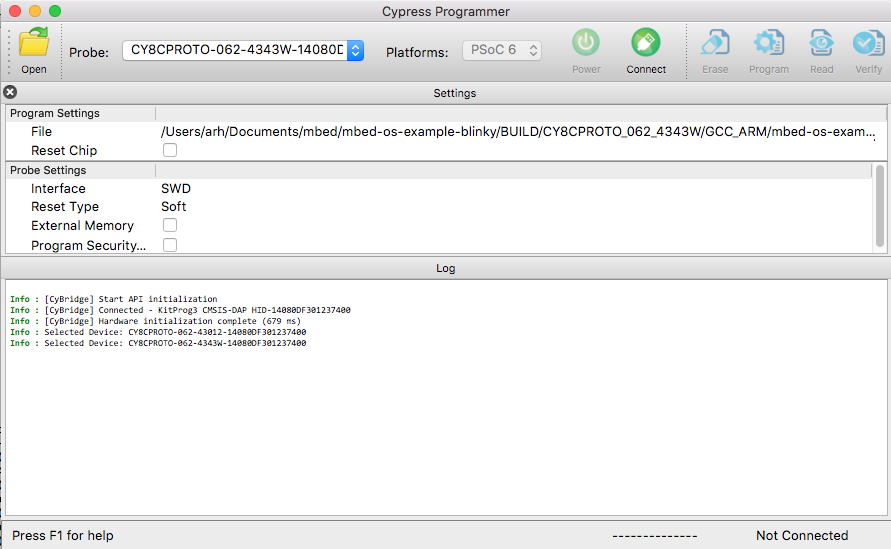
#3 Use the “Cypress Programmer” to program the flash. You can download it for Windows, Mac or Linux from this link on cypress.com When I run Cypress Programmer it looks like this:
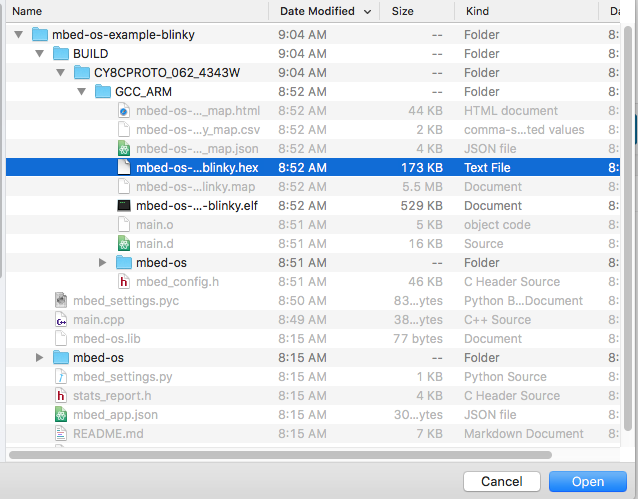
Open the hex file by pressing the “Open” button and navigating into the BUILD directory to find the hex file called “mbed-os-example-blinky.hex”
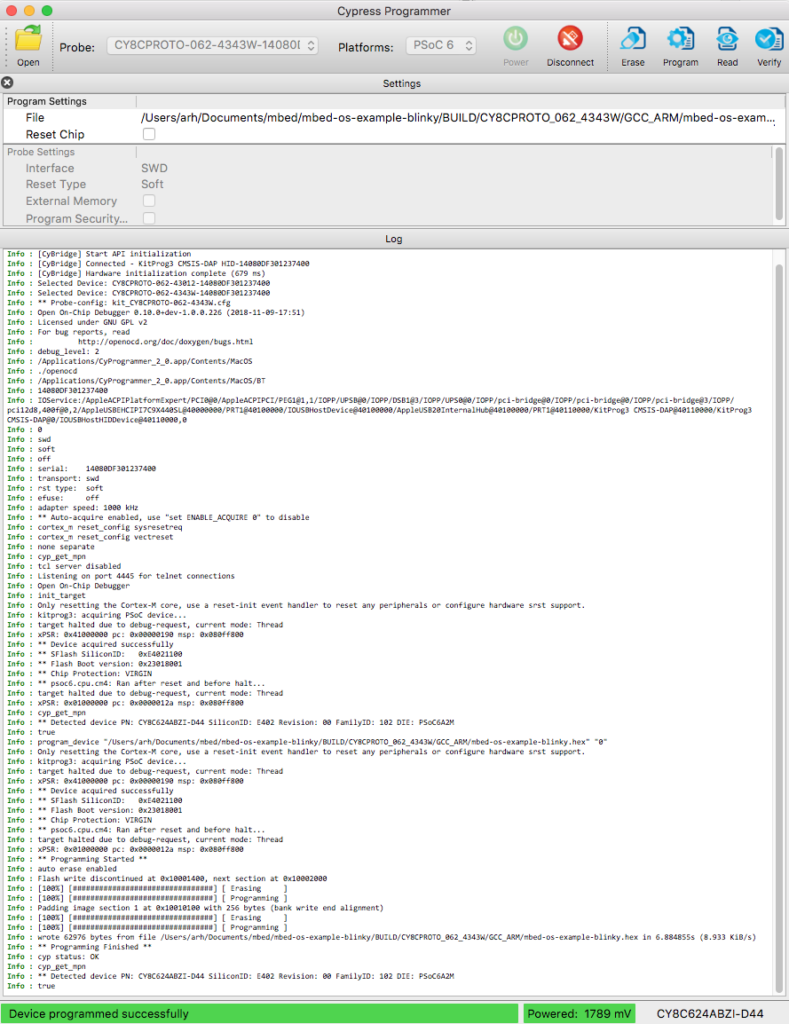
Then press “connect” and “program”
Nothing happens on my development kit? So I press the reset button and now I get a blinking LED. But why do I have to press reset? Do you see the “Reset Chip” checkbox at the top of the “Program Settings” window? That has to be clicked. Now when you program, the debugger will reset the chip and you will be off to the races.
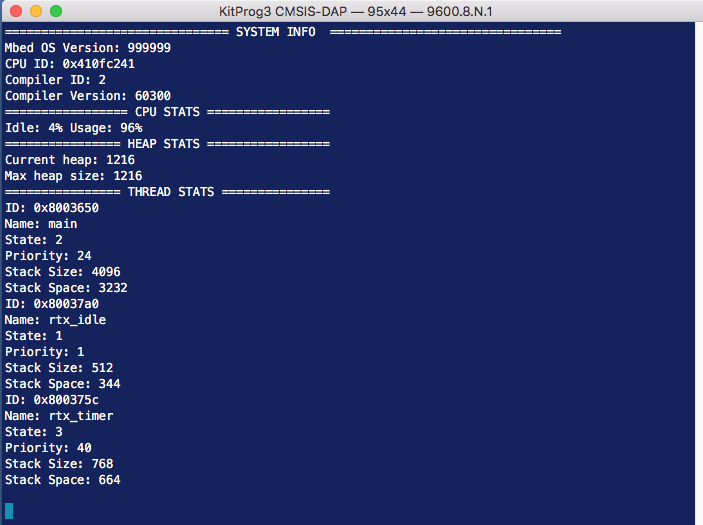
So, what was going on with the rest of that program that came by default? If you attach a serial terminal to the devkit you will see that the blinky example program is putting out information about the RTOS.
It turns out the mbed-os is really an os… an operation system. Actually it is a real time operating system that traces it genealogy to RTX, a product from the old Keil Corporation which was acquired by ARM…. a lot more on this later.
One final note that may cause confusion (I certainly have been confused). There are four different modes of KitProg 3 (the programmer that is built into most of the Cypress development kits).
| Mode | LED | Change modes |
|---|---|---|
| CMSIS-DAP BULK | Solid LED | Short button press toggles between BULK and HID |
| CMSIS-DAP HID | Breathing LED | Short button press toggles between BULK and HID |
| DAPLink | LED Off | Hold KitProg button for >2 seconds (gets in and out of this mode) |
| B00tloader | Fast blinking LED | hold reset button and plug in kit |
In order to program from the command line using “mbed compile -f” you need to be in “DAPLink” mode. In order to program with Cypress Programmer you need one of the CMSIS-DAP modes.






6 Comments
Alan,
I too got real excited with the news of mbed on psoc 6 but I tried to follow your tutorial using the CY8Ckit-62-ble and I can not get it to run. it compiles and i can load it onto the board, but it wont run.
Are there anythings you did to the board to make it run?
Thanks,
Rob Berry
What firmware did you have on the programmer? What did you program it with? If you email me Ill see if I can help you sort it out.
It does work and I really like the CY8CPROTO_062_4343W prototyping board. I only wish mbed OS had the WICED WiFi libraries pre-bundled. Imagine my surprise when I found out SoftAP or WiFi Direct was going to take me weeks to get working properly. 🙁 I guess I should expect software to never keep up with hardware, but sadly the software was already written, just not pushed to this new platform. And as development platforms go, it would be nice to see a smooth integration of mbed OS and Visual Studio Code. Can you say, “First to Market.”
There’s two, million dollar ideas I just let loose into the wild. If Cypress jumps on them, good times will be had by all. I might even move to Kentucky.
Oh, one other thing…
Be careful updating mbed os to 5.12.3, you may find a memory limitation knocking at the door. 😉 Hopefully this gets fixed prior to 4343W features being added.
Yes… I know SoftAP and WiFi direct… they are in our future.
As to the other things… soon you will see a dramatic improvement in memory… and vscode .. and a big improvement in BT.
Hi Alan,
I have basic mbed Blinky example going. I am excited to finally see boards with WiFi coming to mbed. I am looking to exercise the wifi interface, any info on how to get say scan and/or tcp client going on CY8CPROTO_062_4343W?
Thanks,
Venkat
The stock mbed-os-example-wifi example runs. It pretty straight forward. I posted info for running the example on the kit here. https://blog.packetp.com/running-wifi-example-on-cy8cproto_062_4343w/