Summary
This article discusses a detailed Bluetooth Capture using Linux and a Frontline Bluetooth Scanner. With those tools I discover the cause of my bug.
This series is broken up into the following 12 articles with a few additional possible articles. Tilt Hydrometer (Part 1) Overview & Out-of-Box Tilt Hydrometer (Part 2) Architecture Tilt Hydrometer (Part 3) Advertising Scanner Tilt Hydrometer (Part 4) Advertising Packet Error? Tilt Hydrometer (Part 5) Tilt Simulator & Multi Advertising iBeacons Tilt Hydrometer (Part 6) Tilt Simulator an Upgrade Tilt Hydrometer (Part 7) Advertising Database Tilt Hydrometer (Part 8) Read the Database Tilt Hydrometer (Part 9) An LCD Display Tilt Hydrometer (Part 10) The Display State Machine Tilt Hydrometer (Part 11) Draw the Display Screens Tilt Hydrometer (Part 12) CapSense Tilt Hydrometer: LittleFS & SPI Flash (Part ?) Tilt Hydrometer: WiFi Introducer (Part ?) Tilt Hydrometer: WebServer (Part ?) Tilt Hydrometer: Amazon MQTT (Part ?) Tilt Hydrometer: Printed Circuit Board (Part ?) You can get the source code from git@github.com:iotexpert/Tilt2.git This repository has tags for each of the articles which can be accessed with "git checkout part12" You can find the Tilt Simulator at git@github.com:iotexpert/TiltSimulator.git.
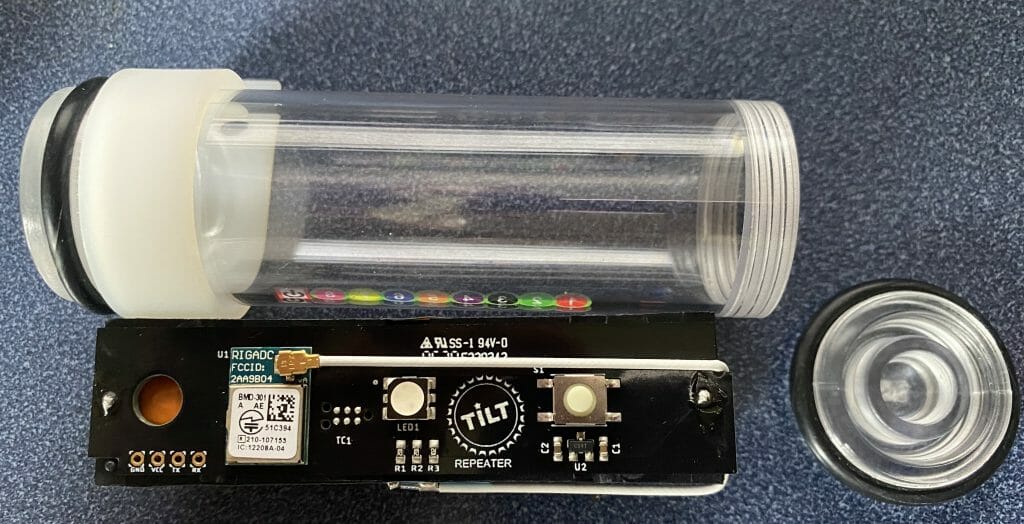
Where is the Tilt?
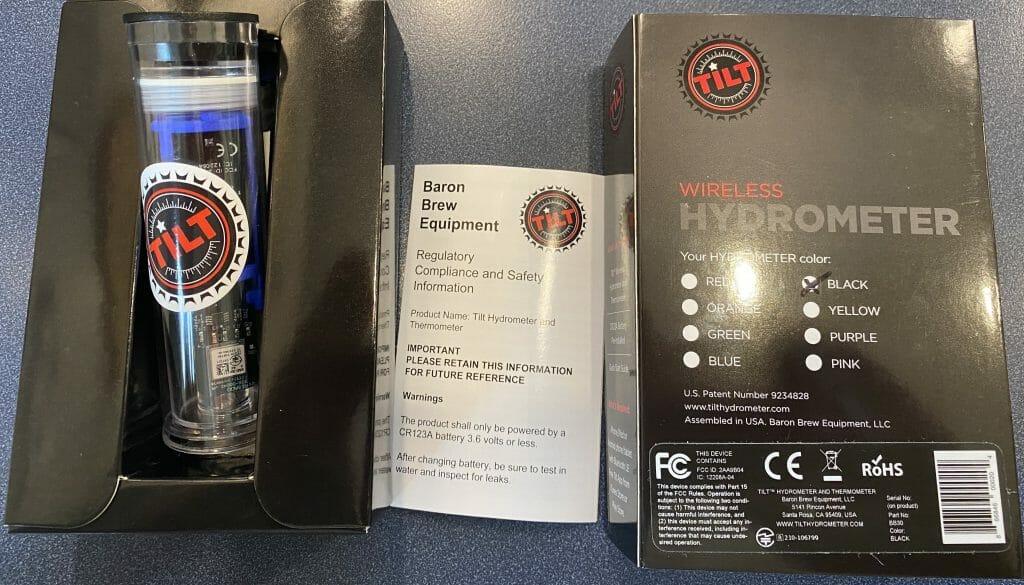
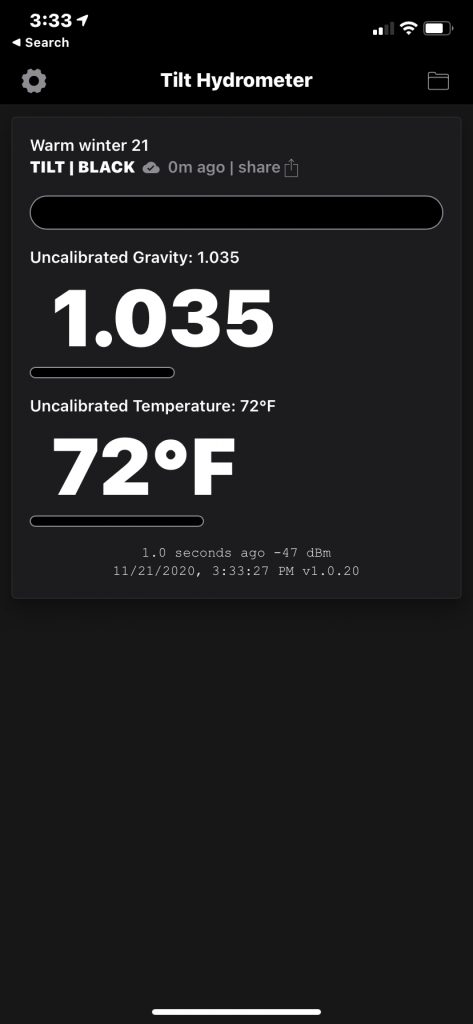
As I was trying to get the program running, I was faced with a problem that sent me down a serious serious rabbit hole. The problem was that I could see the Tilts on the iPhone App, but they were not printing out on the screen. But why?
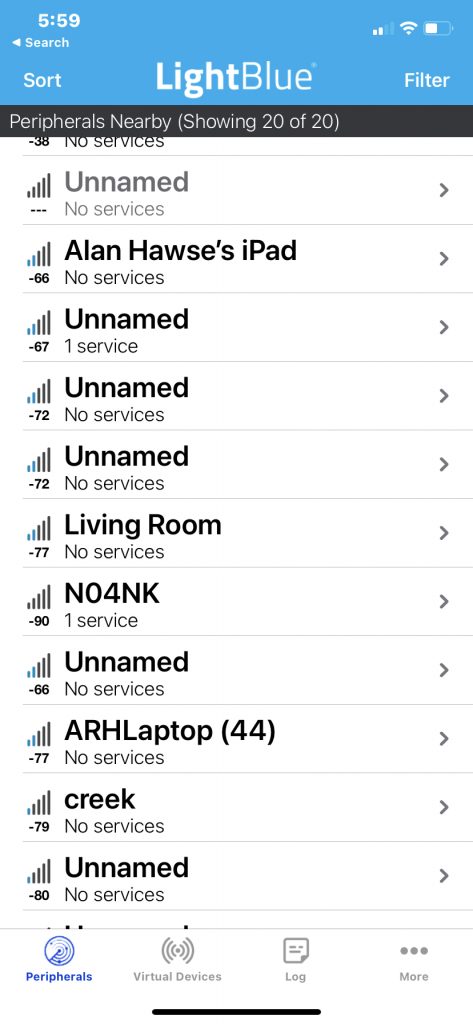
I ran Light Blue, but there are so many Bluetooth Devices in range that I couldn’t see a way to sort it out.
What in the world is “hcidump”
On Karl’s blog he writes that you should use hcitool and hcidump to view what is going on. Well, I am mostly an embedded guys, but OK.
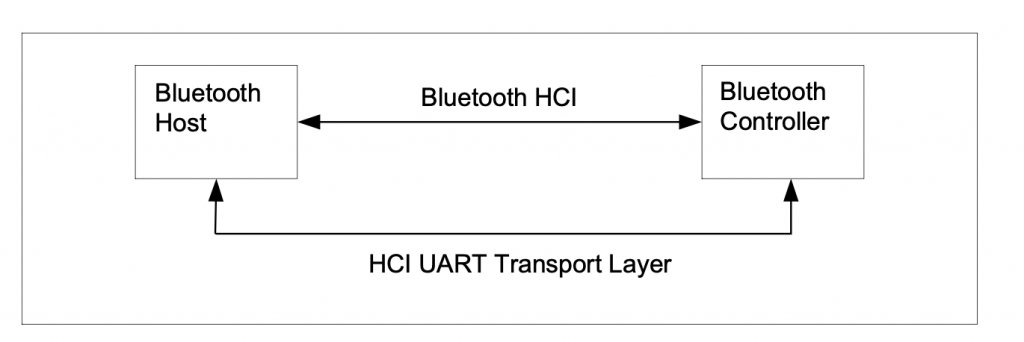
I first install Linux on a Raspberry Pi 3B+ which has a Cypress CYW43455 WiFi Bluetooth Combo device onboard. In this configuration the Bluetooth framework is split into a controller running on the CYW43455 and a Host Stack running on the Raspberry Pi Linux chip BCM2837B0. The Host and the Controller communicate with each other through a UART. The protocol that is used on that UART is called “HCI”

Specifically, what Karl told you to do is:
- In one window tell the Bluetooth Controller to start looking for advertising packets “lesscan”
- In another windows, start snooping on the HCI bus and printing out the packets in hex
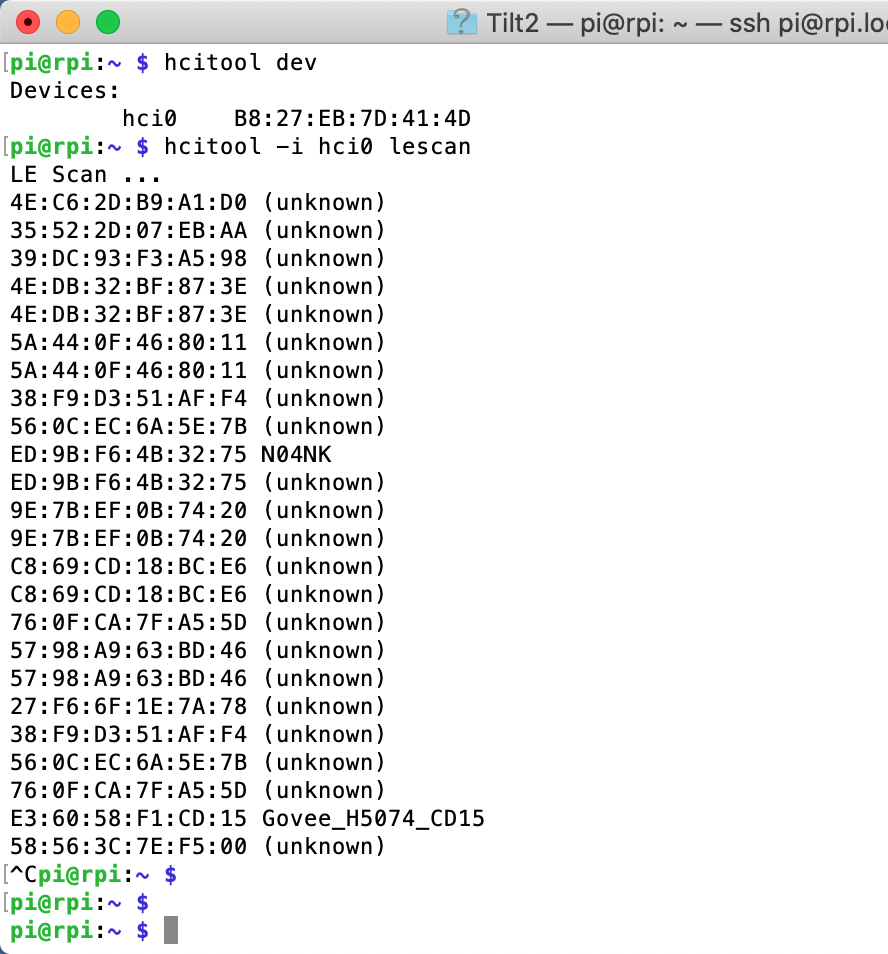
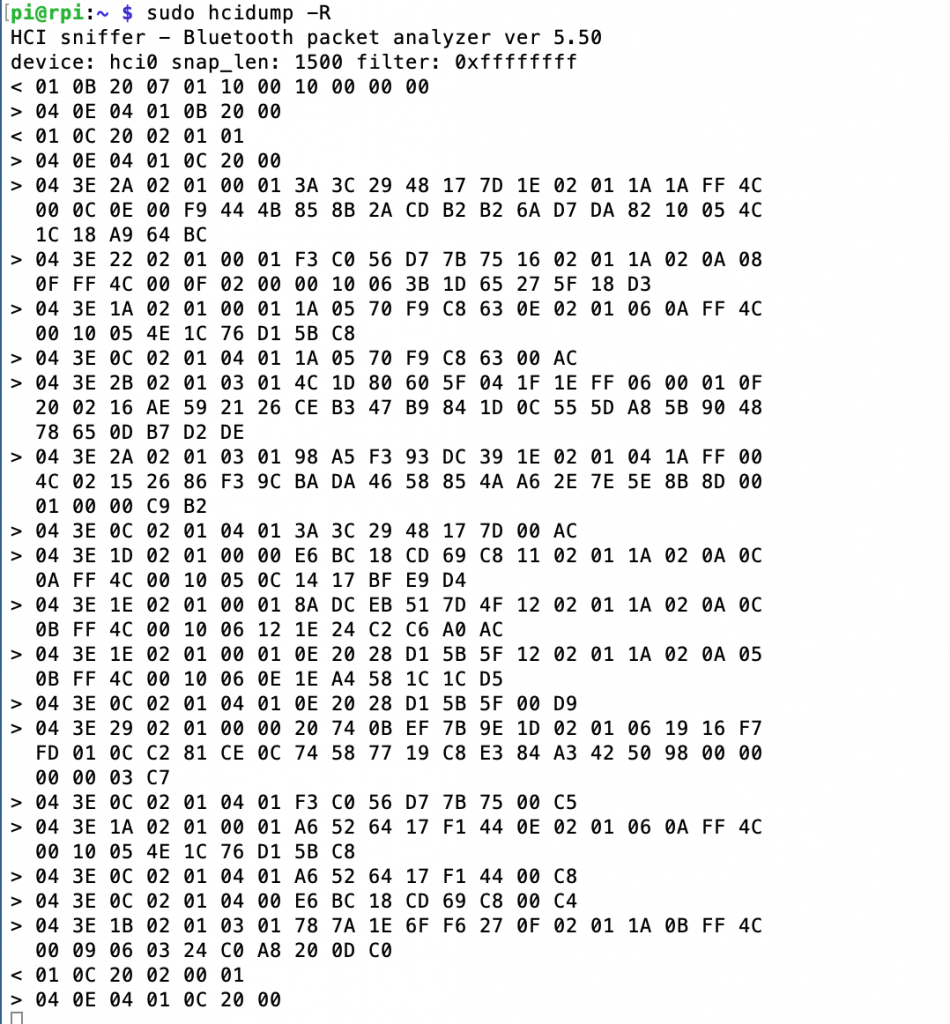
In the picture below you can see that I first run “hcitool dev” to get a list of the Bluetooth Devices. It turns on out the Raspberry Pi configuration that I have there is only one bluetooth device and it is called “hci0”. Then I use “hcitool -i hci0 lescan” to send a command to the controller to start BLE scanning. The hcitool command will report just the MAC address and possibly the name (if it happens to be in the advertising packet). Its too bad that hcitool lescan doesn’t have a switch to display the advertising packets.
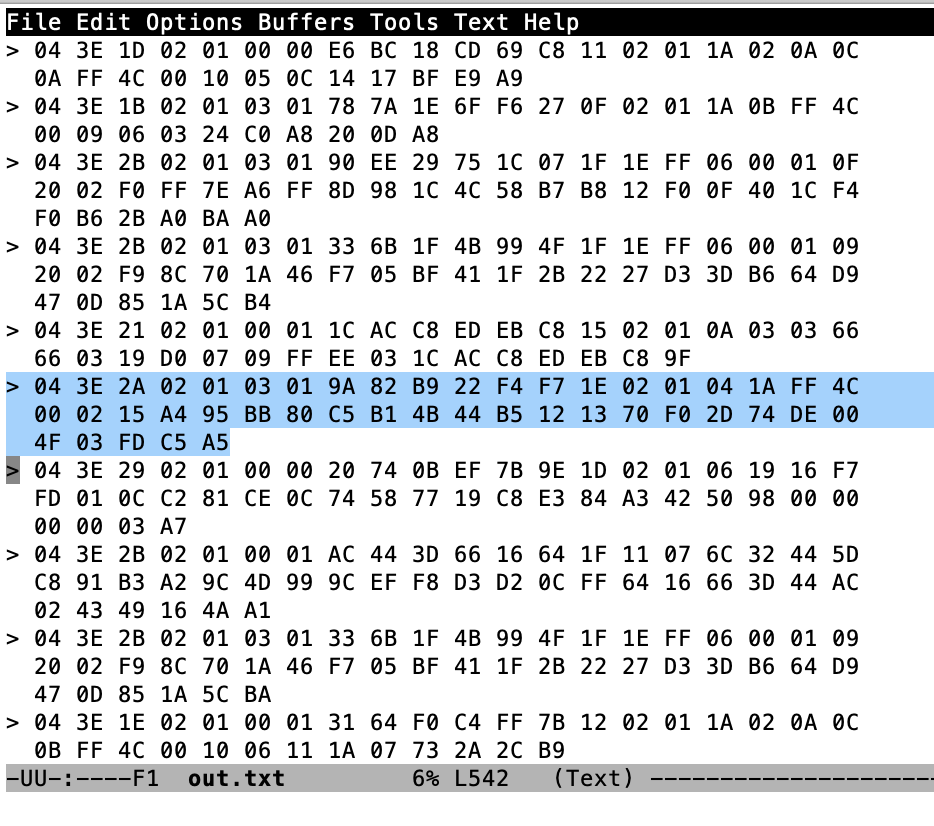
In another window I run “sudo hcidump -R > out.txt”. The hcidump command will “snoop” on the HCI uart and will print out all of the raw packets going between the host and the controller. After a while, I open on the out.txt and start looking through the raw data to find my Tilt. I recognize the Tilt by looking for the UUID in the iBeacon which is “A4 95 BB …”
But what is all of the other stuff on that line? For that answer we will need to dig through the Bluetooth core spec. If you look in Volume 4 (HCI), Part A (UART Transport Layer), Chapter 1 (General) it starts with a nice picture of the system.
Then in Chapter 2 (Protocol) it says:
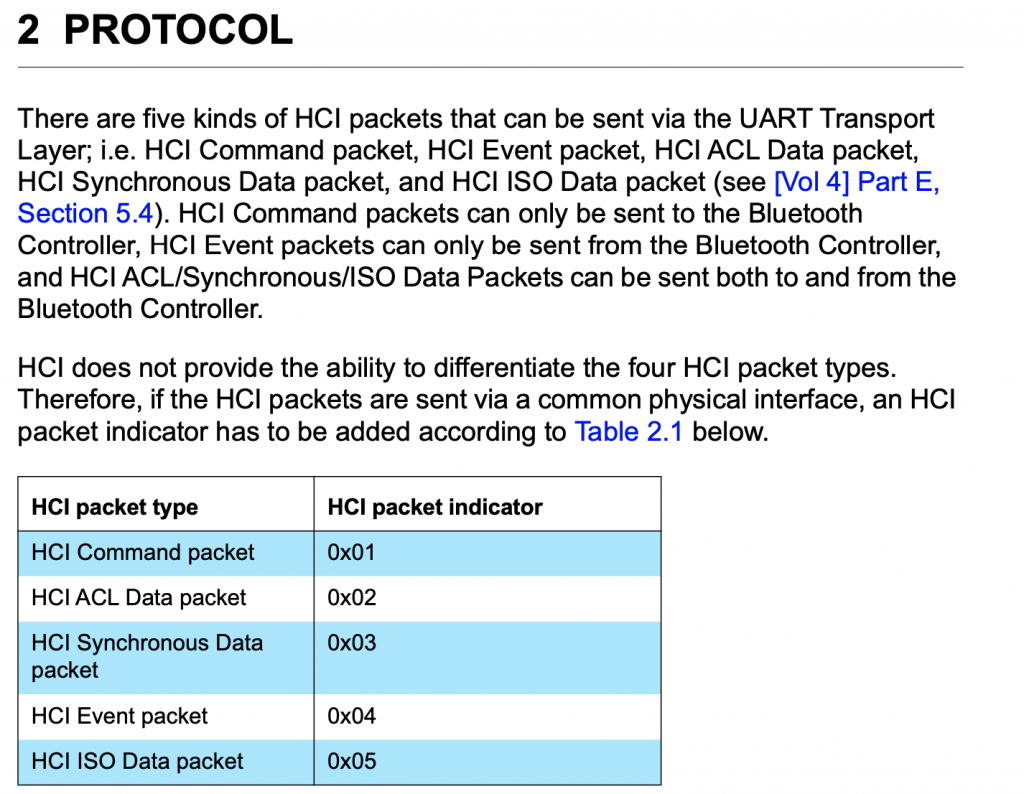
So, first byte, the 0x04 means that this is an “HCI Event Packet”, meaning this is something that happened on the controller which is going back to the Host. In fact if you look at the log above you will see that the lines are preceded by a “>” which means packets coming into the Host. Now we know that there is an event packet, so we follow further down into the spec in Part “E” which describes the event packet.

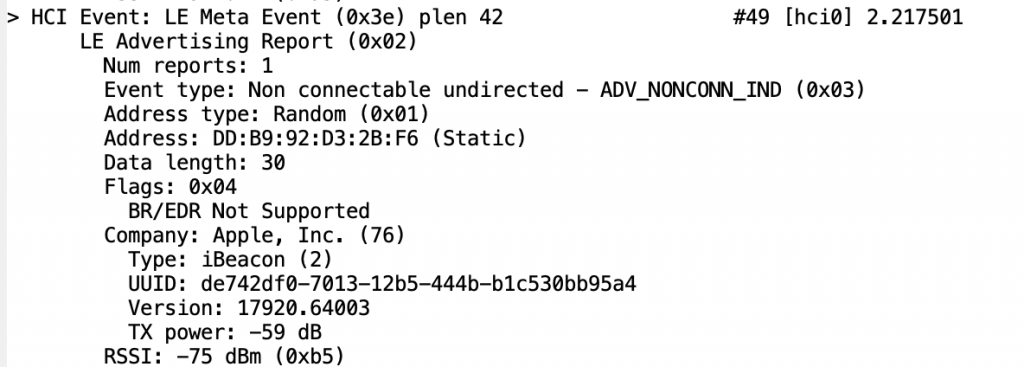
The first byte, the “0x3E” is an event code and the 0x2A is the length of the packet (count from the 0x02 through to the end)

Keep digging further down into the spec to find out what the “event code 0x3E” and you will find that it is a “LE Meta event”.
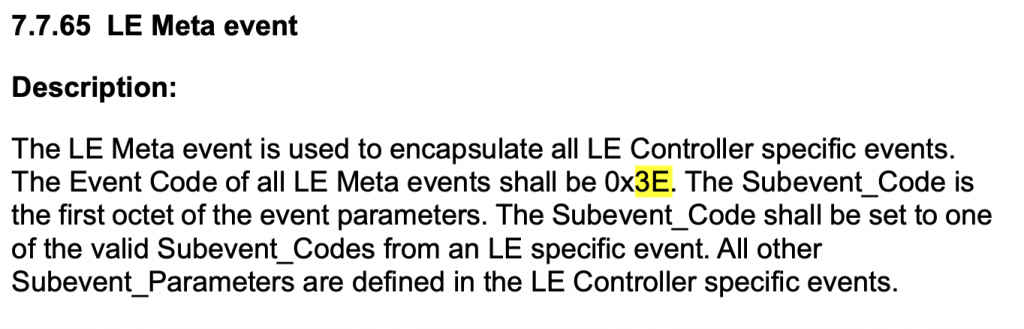
OK so that means that the “02” is the “Subevent_Code”. OK keep digging and you will find that the 02 Subevven_Code is “HCI_LE_Advertising_Report”. Then it gives you a list of what data will follow.
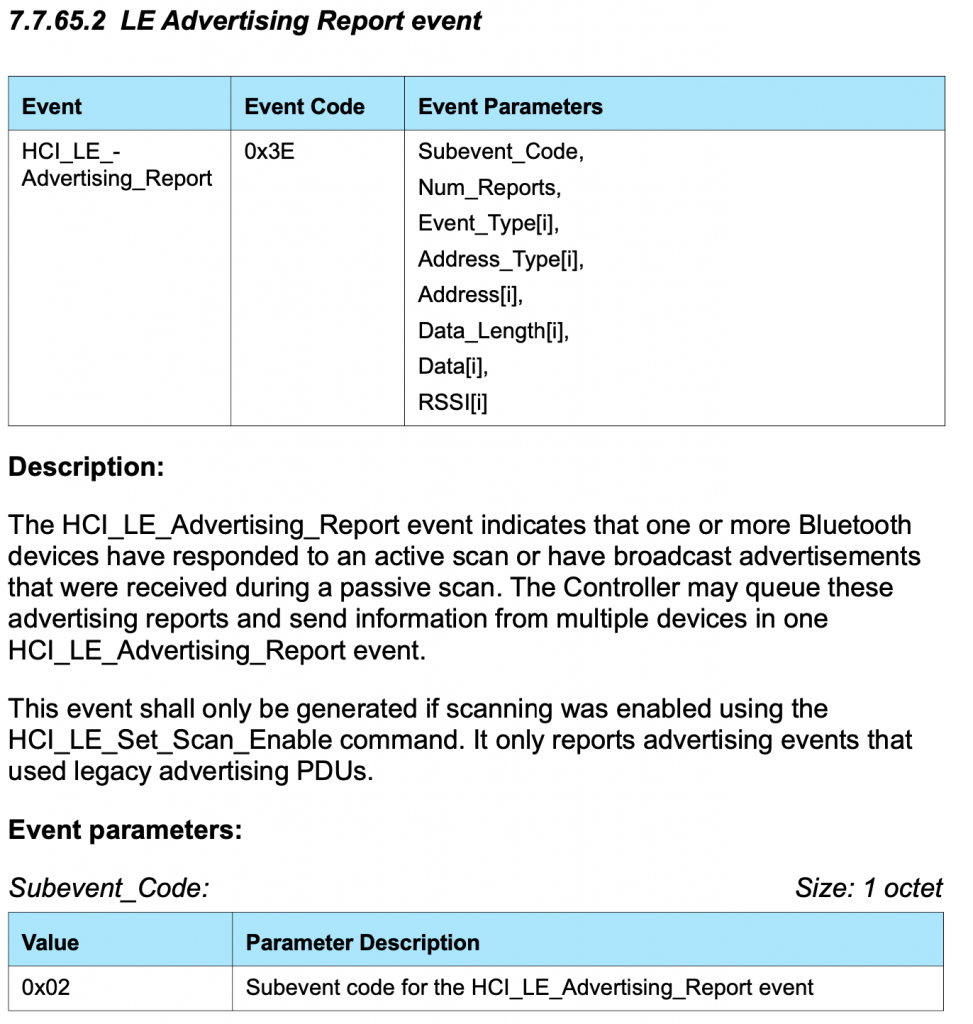
So, the 02 is an advertising report. The 01 says that there is only 1 advertising report. Q: Why is this a parameter? A: Because the controller can save a few bytes by clubbing multiple advertising reports into 1 HCI packet. Which it did not do in this case.

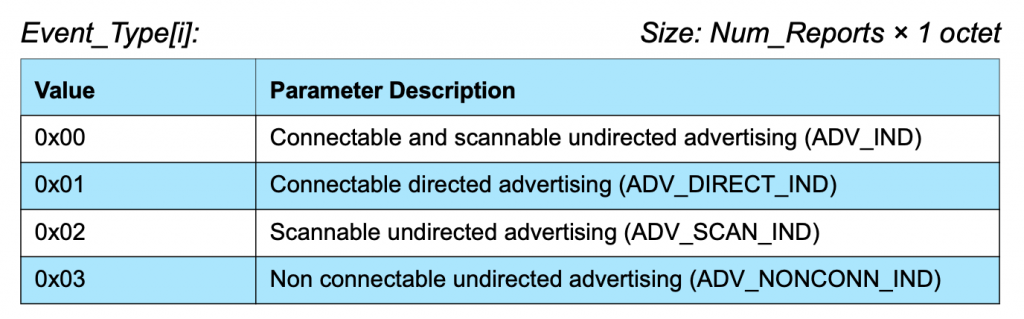
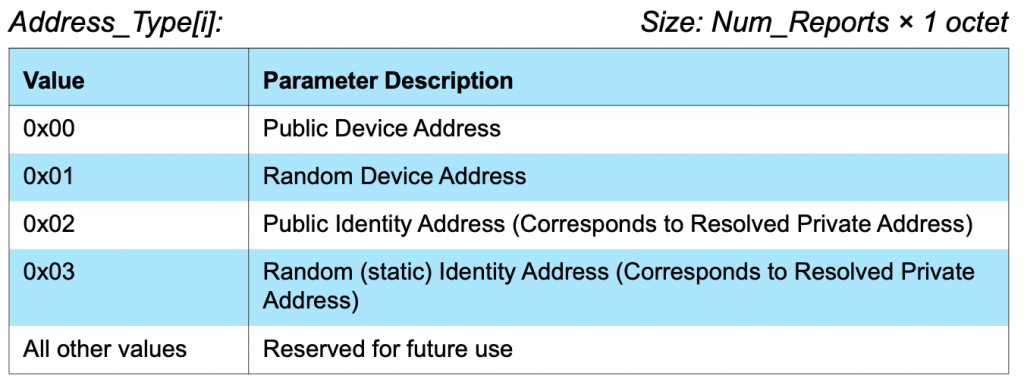
Next is the 03 which is the “Event_Type[i]”. In this case it says that this thing is non connectable undirected advertising. (more on this later)
OK what about 01 …

The 01 says that it is a random address and then the next 6 bytes is the MAC address.
Now the 0x1E is the length of the data in the advertising packet

The actual advertising pack is next.

Recall the format from section 11.
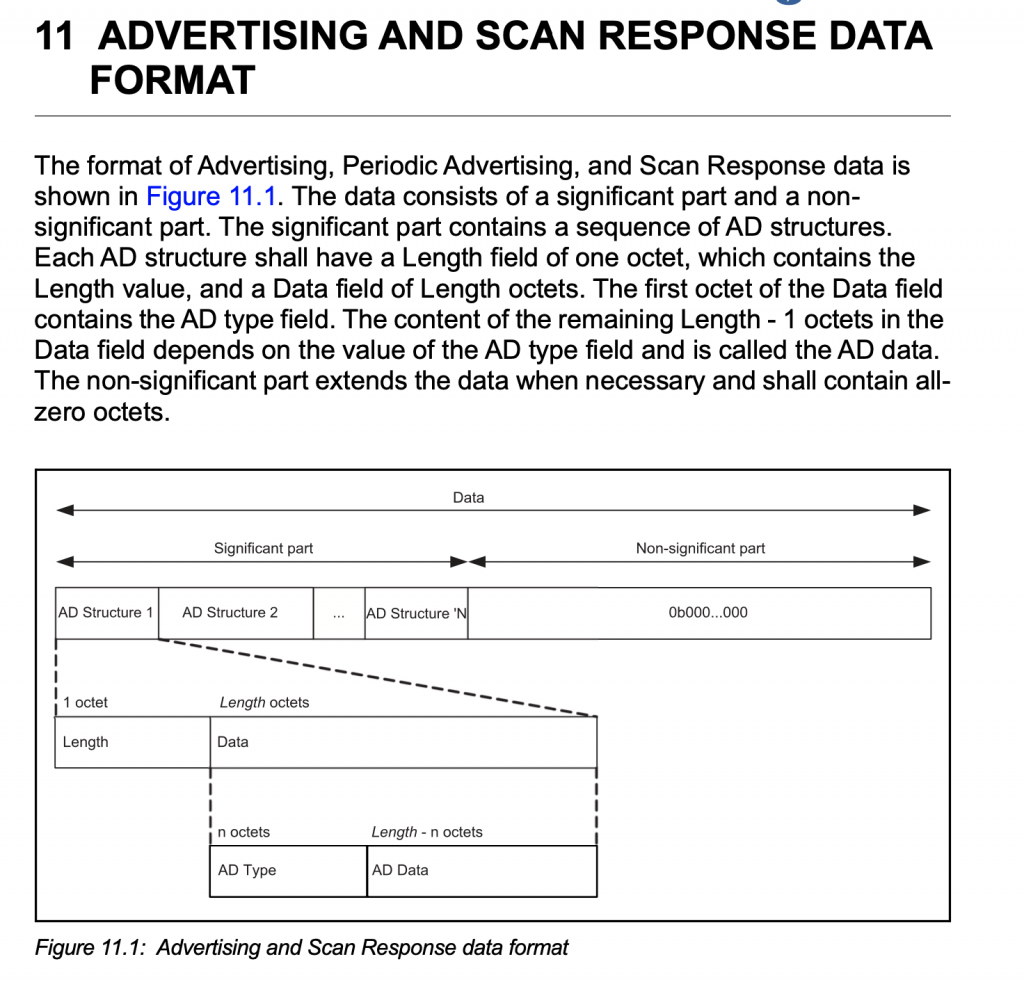
The 02 01 04 is the first field of the advertising packet and it represents
- 02 – length of the field
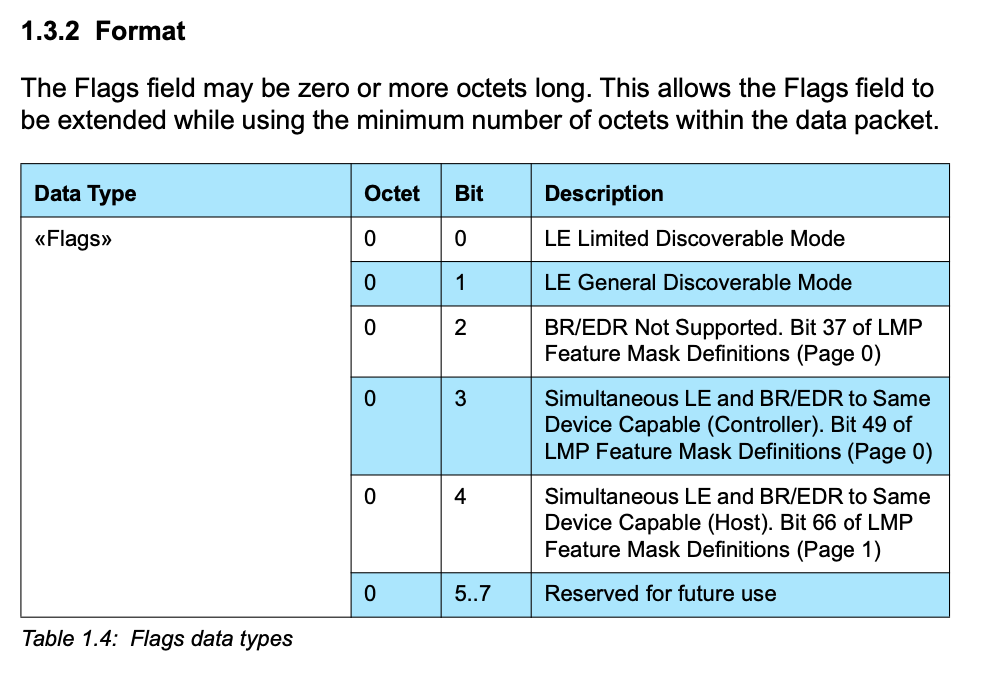
- 01 – «Flags»
- 04 – flags

You can find the 01 from the “Assigned numbers and GAP”

Then when you look in the Core Specification Supplement Part A section 1.3 you will find that the “4” means “BR/EDR not supported”
The next field is 0x1A in length and a field type of “0xFF” – Ah…. manufacture specific data

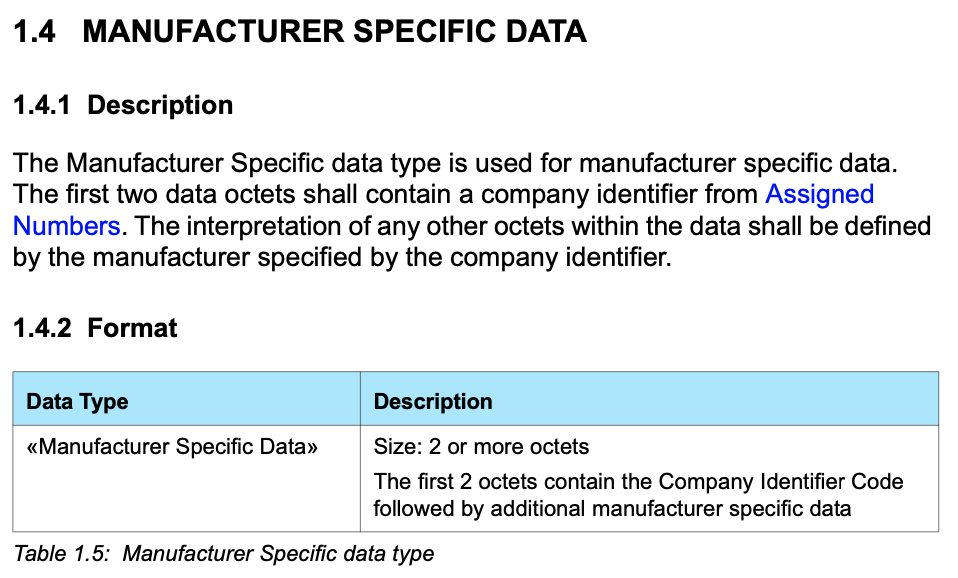
The 4C 00 is Apples Company Identifier Code.

Which you can find on the Bluetooth Sig Company Identifiers page.

From the previous article we know the rest is an iBeacon
- 02 – iBeacon subtype
- 0x15 – length
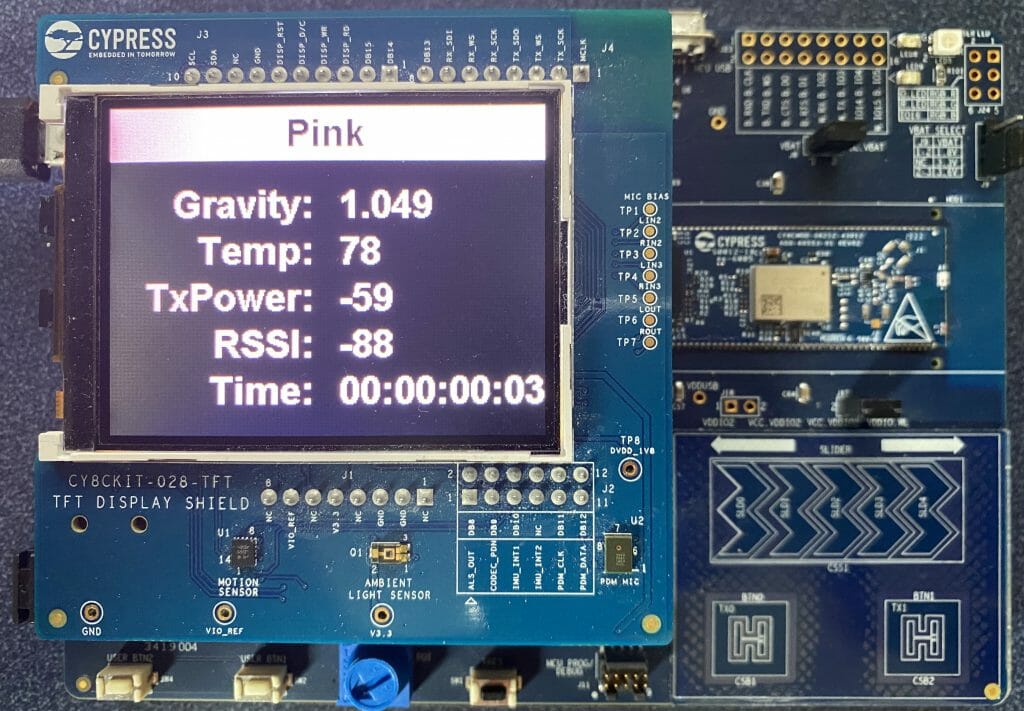
- Then the A4…. is UUID which maps to a “Pink” Tilt

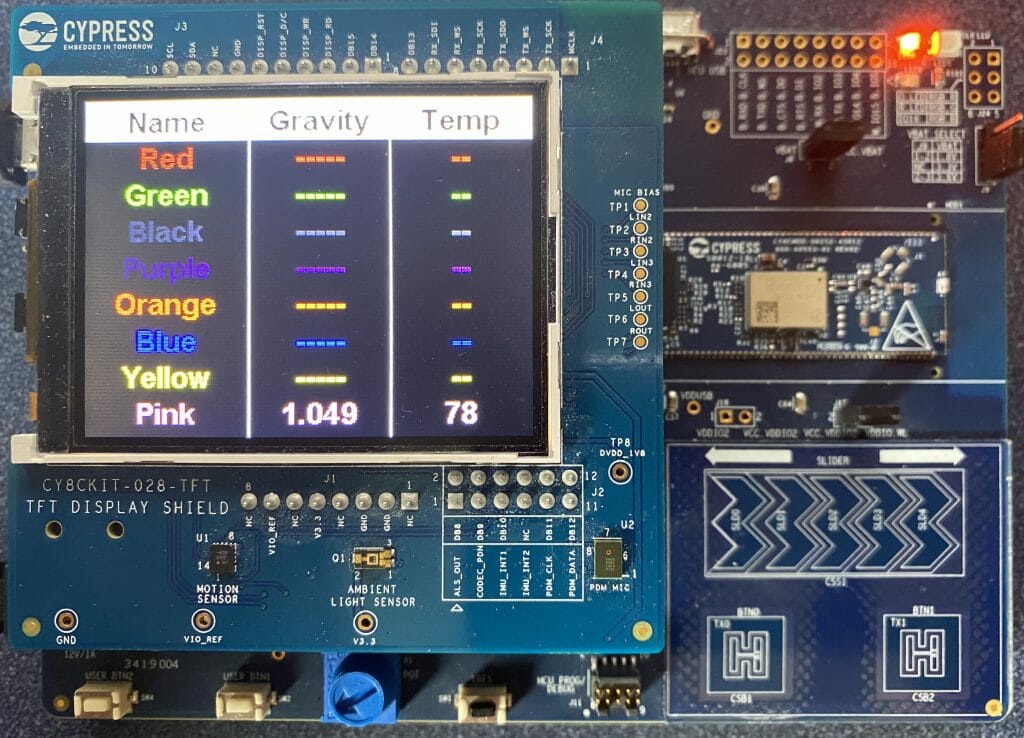
Then we get the Temperature 0x004F (BIG ENDIAN!!!!) also known as 79 Degrees F (see Imperial… my people)

Then the gravity 0x03FD also known as 1.021 – NOTICE THIS IS BIG ENDIAN!!!!

Then transmit power C5 (also known as -59)

Finally the RSSI 0xA5 which is also known as -91 (2’s complement 1 byte)

Debugging the Linux Bluetooth
I had a few problems getting this going which led me to the door of some interesting questions (which I won’t answer here). But, here are the problems and solutions.
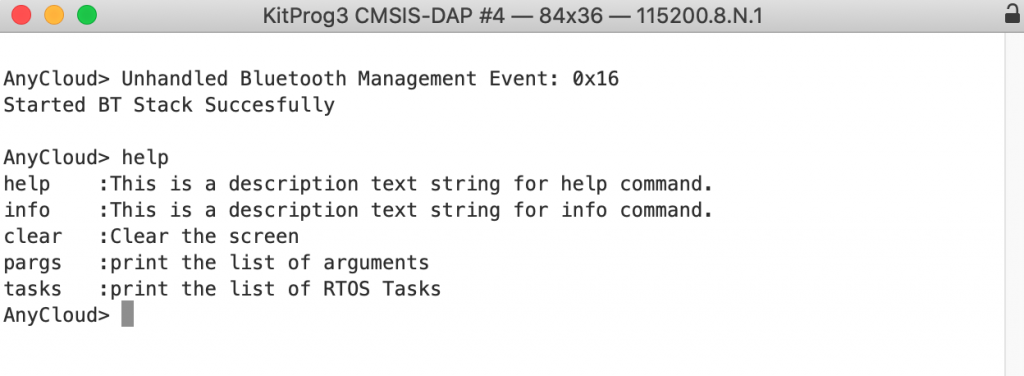
Q1 When I “hcidump -R” I only get this:

A1 You need to be root to see the raw data. Run “sudo hcidump -R”
Q2: I don’t see my device?
A2: If you start the scan before your run the hcidump you might miss the device. When you scan try running “hcitool lescan –duplicates” which will turn off duplicate filtering.
Q3: I get “Set scan parameters failed: Input/output error”
A3: I am not totally sure I have this right because I was not able to recreate the problem (which I had in spades when I started). But, try doing a “sudo hciconfig hci0 down” followed by a “hciconfig hci0 up”
Q4: I read that “hcitool” and “hcidump” are deprecated.
A4: I read the same thing. If you don’t have them try “sudo apt-get install bluez-tools”. I would like to know the “real” answer to this question
Q5: How does hcidump get the packets from the HCI?
A5: I have no idea. But I would like to know that answer to this question
Q6: I tried “btmon”. Does that work?
A6: Yes
Q7: What is the bluetoothd?
A7: I dont know.
Q8: Do hcidump and hcitools talk to the BluetoothD or do they talk to dbus or do they talk to the kernel through a socket?
A8: I don’t know
Q9: Why can’t I see the Tilt in my advertising scanner
A9: Keep reading 🙂
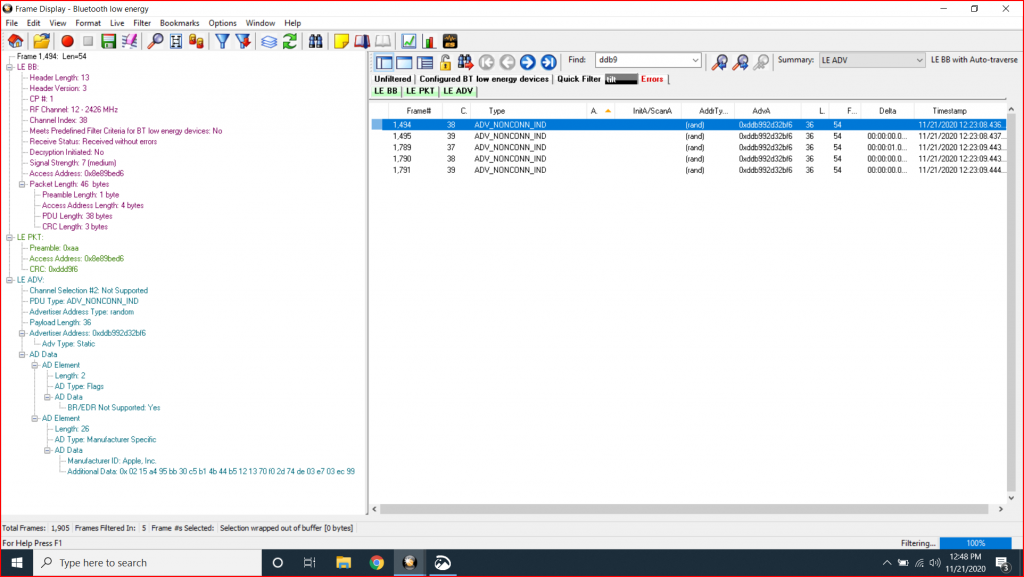
Frontline Bluetooth Scanner
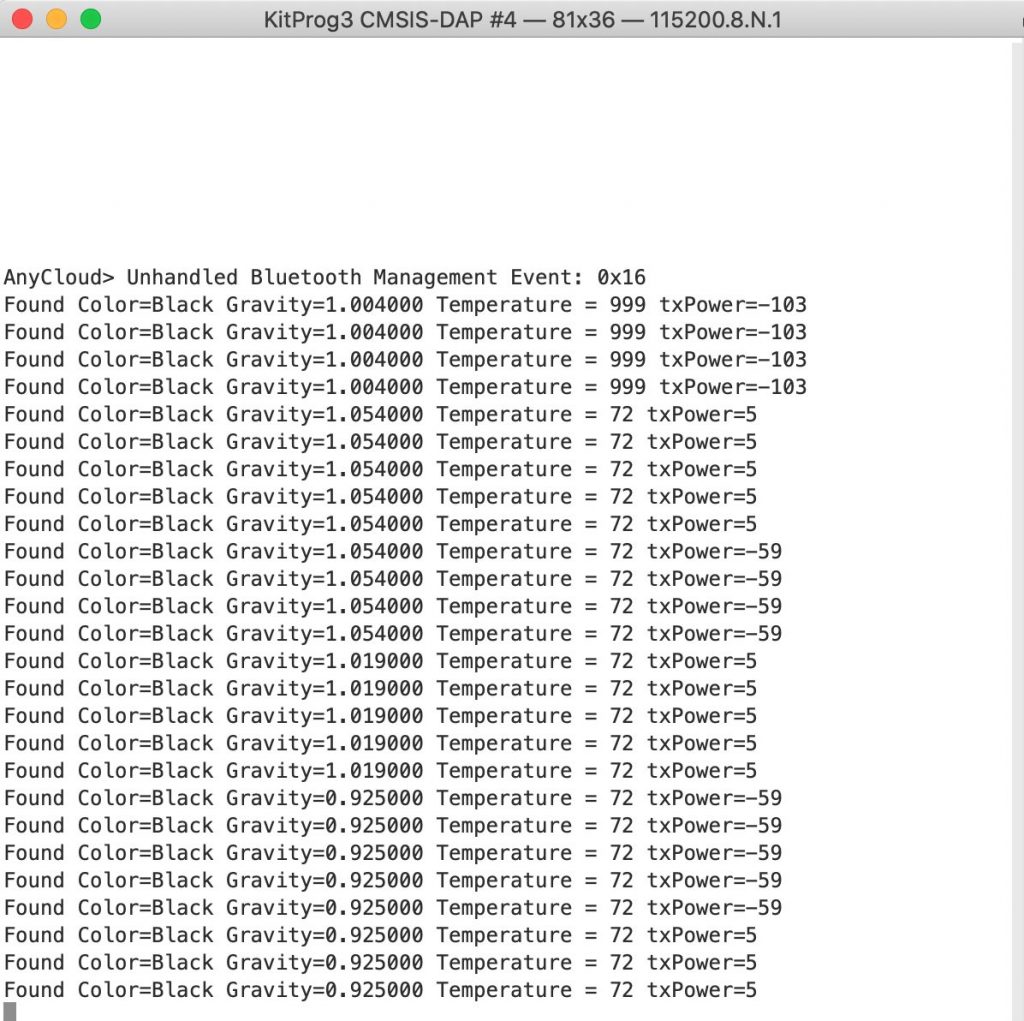
I can see the Tilt in the Linux and on the iPhone, but I still can’t see it in my AnyCloud project. Why? The next thing that I did was get a Frontline Bluetooth Sniffer. When I started capturing packets I could see the device. Here is the “Tilt”
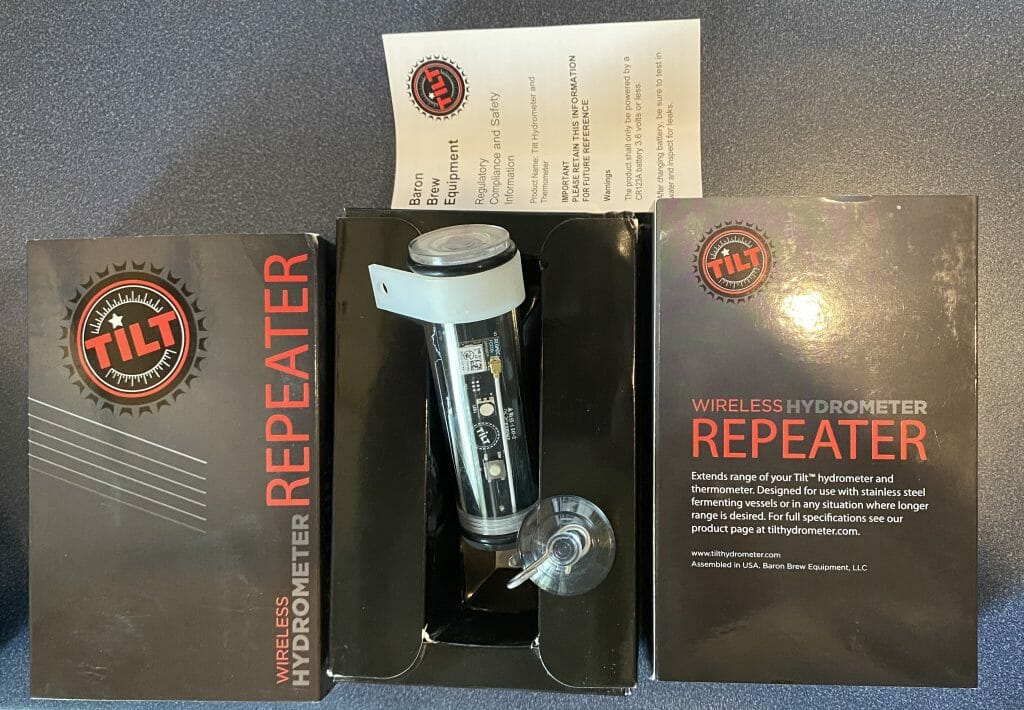
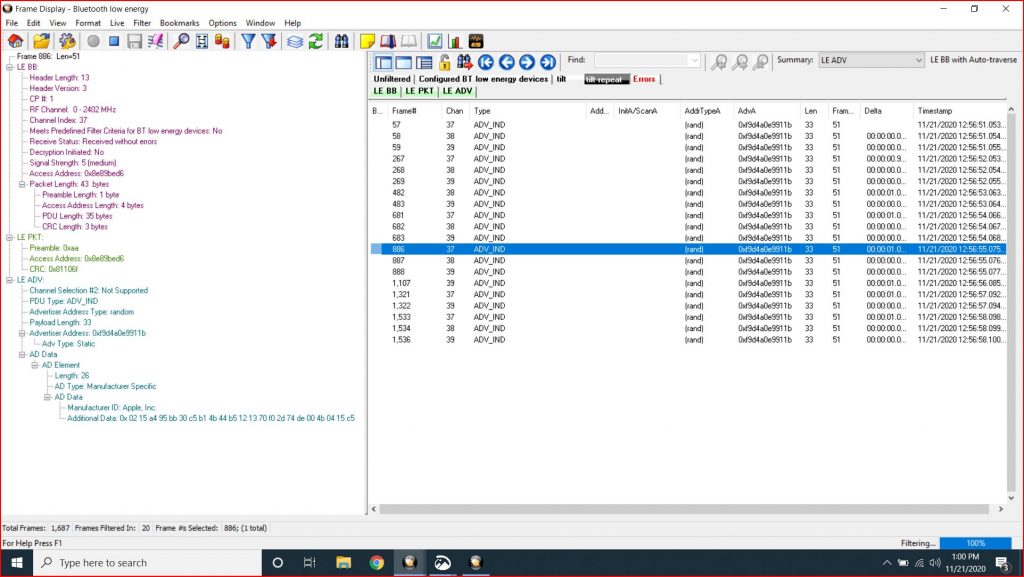
And here is the “Tilt Repeater”
Fix the Advertising Scanner
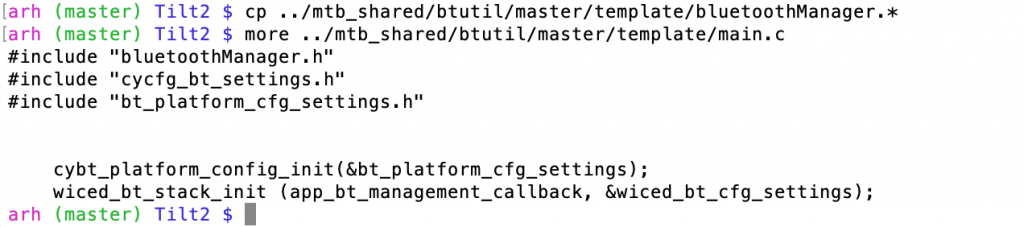
After more digging I figured it out. Remember from earlier that the Tilt advertises as “Non connectable”. Well it turns out that when I built the advertising scanner I used the function “wiced_bt_ble_scan”. This function was put into WICED to use for the connection procedure. In other words it FILTERS devices that are non connectable. In order to see those devices you need to call “wiced_bt_ble_observe”. Wow that was a long article to explain that one little bug. Oh well it was a fun learning experience.