Summary
Sometimes when you are building an IoT system it is very convenient to have a command line interface. This enables you to use the keyboard to run functions inside of your program. I often implement a really simple command processor that looks like this:
while(1)
{
   c=getchar();
   switch(c)
   {
      case 'a':
         doSomeCommand();
      break;

      case 'b':
         doSomeOtherCommand();
      break;
   }
}
I generally do this because it is really simple and doesn’t require much work and is easily typed and doesn’t require a parser. However, this implementation is not very rich as it doesn’t deal with more interesting commands, like ones with arguments. This weekend while I was looking around I found the Natural Tiny Shell an open source project by Shinichiro Nakamura. I thought that it was pretty cool, so I ported it to PSoC and MBED OS. And, after using it a bit I decided to turn it into an MBED OS library so that it was easy to import into new projects.
This article has the following parts
- A Survey of the NT Shell Code
- Creating a MBED OS Library
- Using the Template Project to make an MBED OS Program
- Adding new commands to the shell
A Survey of the NT Shell Code
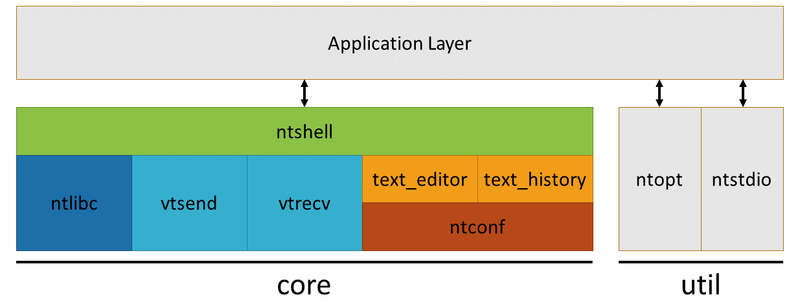
On the NTShell website there is a picture of the architecture of the code. This picture is trying to show several things
- Your application code talks to:
- ntshell = the actual guts of the shell
- ntopt = a command line argument parser used by your program to figure out what commands arguments have been given to the shell
- ntstdio = a set of wrapper functions around stdio that allows for “multiple” standard I/Os
- vtsend and vtrecv a library of functions to control vt100 terminals
- ntlibc – a set of ntshell specific implementation of libc functions like strlen, strcmp, etc
- ntconf – #defines that setup the parameters for the system
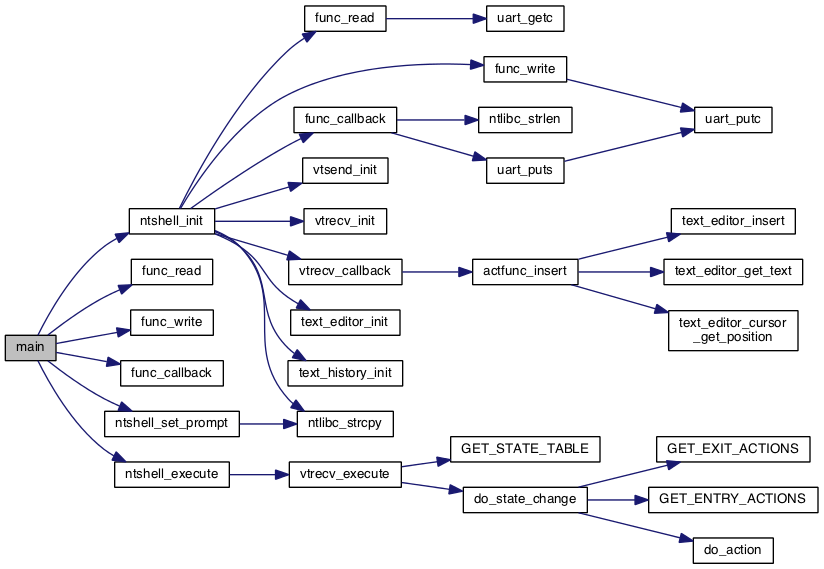
He also provides a call graph of the functions. You can see from this graph that you are responsible only for providing
- func_read – read 1 character from the input device, in my case the uart
- func_write – write 1 character to the output device
- func_callback – a function that will be called by the shell when a command is matched by the shell and you need to do something with it.
You call
- ntshell_init – to setup the shell
- ntshell_set_promopt – to setup the prompt (imagine that)
- ntshell_execute – to run the shell (it never returns from this function)
Creating a MBED OS Library
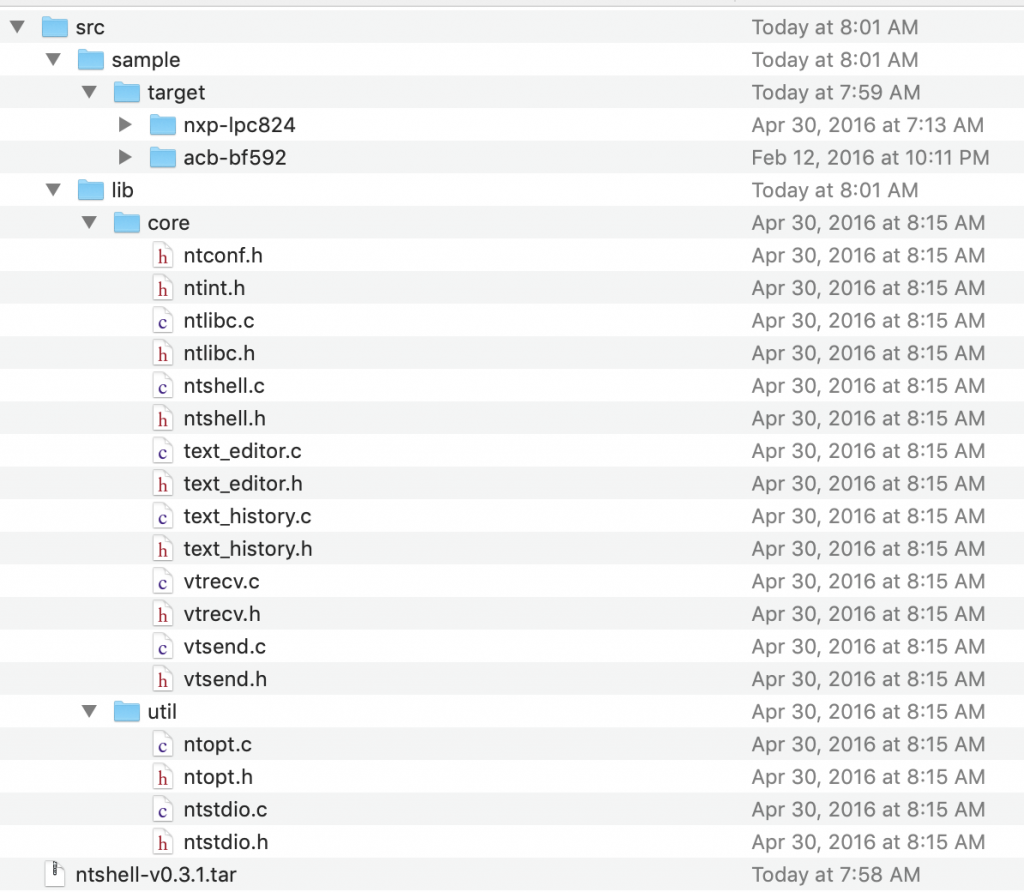
I wanted to create a github library that I could mbed add. So, I started by downloading the source code from the CuBeatSystems ntshell download site. I ended up with a tar file which needed to be expanded. Once done you will have 3 basic directories:
- sample = two example implementations
- lib = the actual c-source code for the shell
- util = contains c-source files for managing stdio and parsing argument strings
To make this more usable for MBED OS I decided to do several things
- Create a github library that can put into your project with “mbed add”
- Create the porting layer functions func_read and func_write and put them in an “mbed” directory in the library
- Create a template for the user command functions (usrcmd.h/c)
- Create a template with the ntshell in a thread
- Create a template main.cpp
Porting Layer
As I described earlier you need the porting function func_read, func_write and the nutshell callback to make the shell work. These function reside in mbed-os-ntshell/mbed/util/mbed_port.h/c The read function just uses the mbed stdio command “getchar” to read the correct number of characters. And the ntshell_write uses the “putchar” to go the other way.
#include "ntshell.h"
#include "ntlibc.h"
#include "usrcmd.h"
#include <stdio.h>

int ntshell_read(char *buf, int cnt, void *extobj)
{
  int i;
  (void)extobj;
  for (i = 0; i < cnt; i++) {
    buf[i] = getchar();
  }
  return cnt;
}

int ntshell_write(const char *buf, int cnt, void *extobj)
{
  int i;
  (void)extobj;
  for (i = 0; i < cnt; i++) {
    putchar(buf[i]);
  }
  return cnt;
}
The callback function simply called into the user command module (which I provided a template for) with the command that was run by the user.
int ntshell_callback(const char *text, void *extobj)
{
  ntshell_t *ntshell = (ntshell_t *)extobj;
  (void)ntshell;
  (void)extobj;
  if (ntlibc_strlen(text) > 0) {

      usrcmd_execute(text);
  }
  return 0;
}
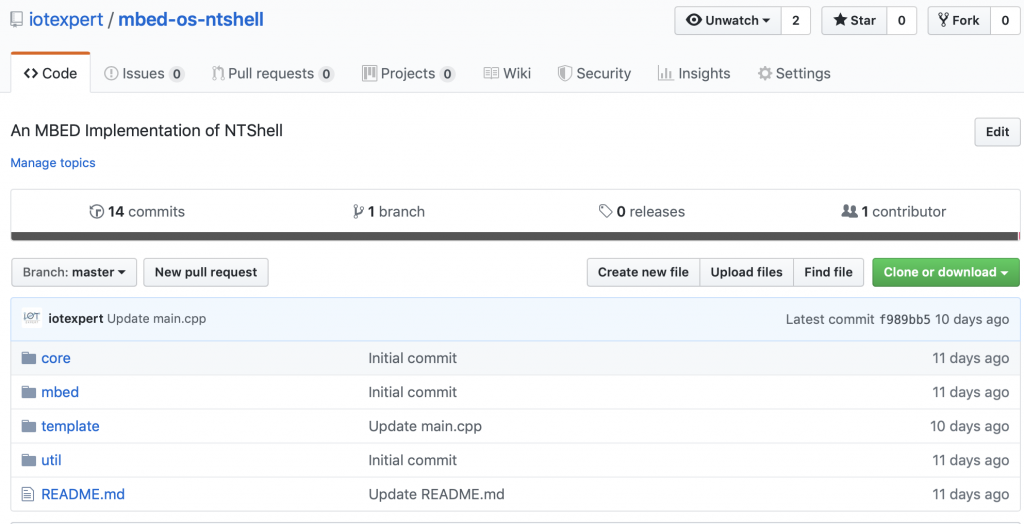
After I took these step I created a github site to hold it all. You can use:
- mbed add git@github.com:iotexpert/mbed-os-ntshell.git
or
Using the NT Shell Library and Template in your Project:
The steps to use the NT Shell Library are:
- Create a new MBED OS Project
- Add the library to your project
- Copy the template files into your project
- Modify your main.cpp to start the ntShellThread
- Add new commands to the shell
1. Create a new MBED OS project
- mbed new testNTShell
2. Add the NT Shell Library to your project:
- mbed add git@github.com:iotexpert/mbed-os-ntshell.git
or
- mbed add https://github.com/iotexpert/mbed-os-ntshell.git
3. Copy the template files into your project
Inside of the library there is a directory called template. This directory has the following files:
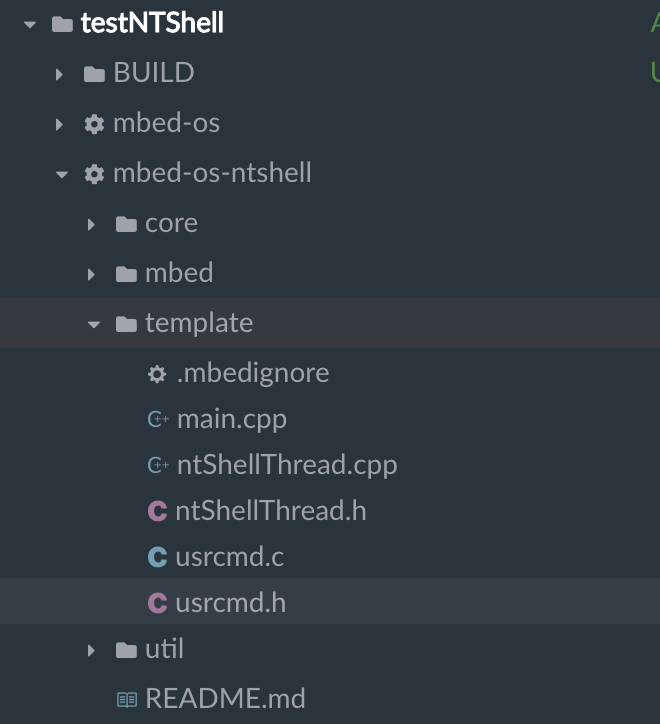
I want to use all of these files to kickstart my project. So I run:
- cp mbed-os-ntshell/template/* .
4. Use main.cpp to start the ntShellThread
One of the files in the template directory was a main.cpp. This program does two things
- Starts up the NT Shell Thread
- Starts 1Hz blinking LED in the main thread
#include "mbed.h"
#include "ntShellThread.h"

Thread ntShellThreadHandle;

DigitalOut led1(LED1);

int main()
{
    printf("Started NTShellThread\n");
    ntShellThreadHandle.start(ntShellThread);
    while(1)
    {
        led1 = !led1;
        wait(0.5);
    }

}
Add new commands to the shell
I also provide you template files for the user commands in the directory mbed-os-ntshell/template/usrcmd.h&c. To add your own commands you need to:
- A function prototype for your command
- Add your command to the command table
- Create the actual function for your command.
The function prototype must match and will look like this (notice there are four commands in my template)
typedef int (*USRCMDFUNC)(int argc, char **argv);

static int usrcmd_help(int argc, char **argv);
static int usrcmd_info(int argc, char **argv);
static int usrcmd_clear(int argc, char **argv);
static int usrcmd_printargs(int argc, char **argv);
And the command table looks like this:
typedef struct {
    char *cmd;
    char *desc;
    USRCMDFUNC func;
} cmd_table_t;

static const cmd_table_t cmdlist[] = {
    { "help", "This is a description text string for help command.", usrcmd_help },
    { "info", "This is a description text string for info command.", usrcmd_info },
    { "clear", "Clear the screen", usrcmd_clear },
    { "printargs","print the list of arguments", usrcmd_printargs},

};
Finally your command function will look like this command which just prints out the commands.
static int usrcmd_printargs(int argc, char **argv)
{
    printf("ARGC = %d\n",argc);

    for(int i =0;i<argc;i++)
    {
        printf("argv[%d] = %s\n",i,argv[i]);
    }
    return 0;

}
2 Comments
I am honored to be introduced here!
Thank you so much!
Your shell is excellent.. thank you for your work.
Alan