IoT Design with Cypress PSoC® 6 MCUs and Wi-Fi/Bluetooth using Arm® Mbed™
#
Lesson
GitHub Project
0
Introduction
1
Developer Resources
2
Your First Project & The Blinking Thread
https://github.com/iotexpert/mouser-mbed-02.git
3
Display Thread
https://github.com/iotexpert/mouser-mbed-03.git
4
Temperature Thread
https://github.com/iotexpert/mouser-mbed-04.git
5
CapSense Thread
https://github.com/iotexpert/mouser-mbed-05.git
6
WiFi & NTP Thread
https://github.com/iotexpert/mouser-mbed-06.git
7
The CY8CKIT-062-WiFi-BT
https://github.com/iotexpert/mouser-mbed-07.git
8
Amazon AWS MQTT Thread - Part1
https://github.com/iotexpert/mouser-mbed-08.git
9
Amazon AWS MQTT Thread - Part2
https://github.com/iotexpert/mouser-mbed-09.git
You can “mbed import https://github.com/iotexpert/mouser-mbed-09.git“ to make a copy of the project in your workspace.
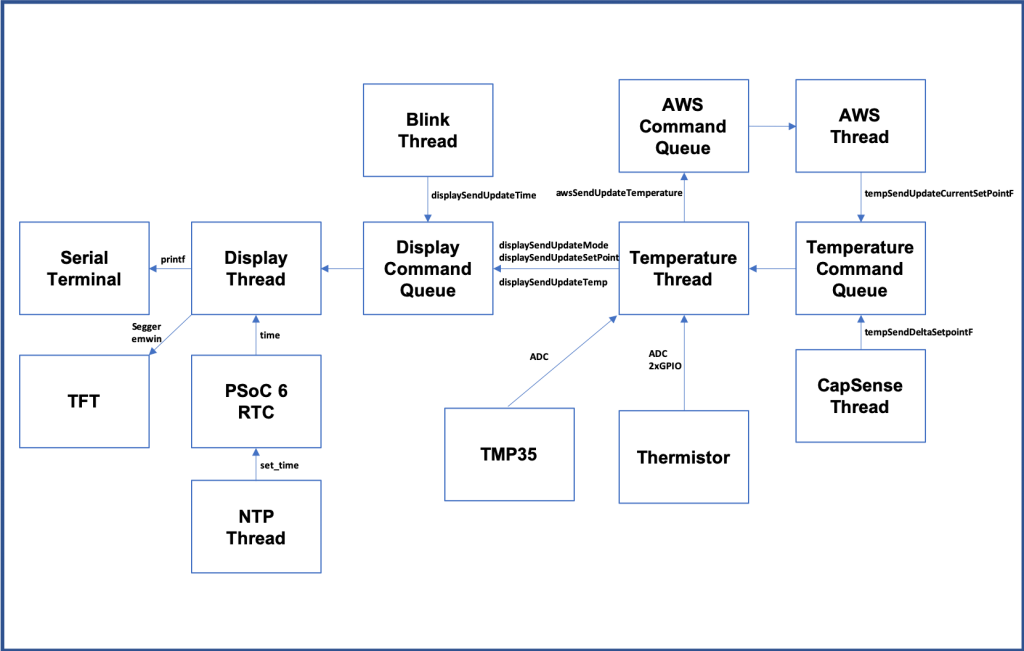
The final architecture of the thermostat looks like this.
Summary
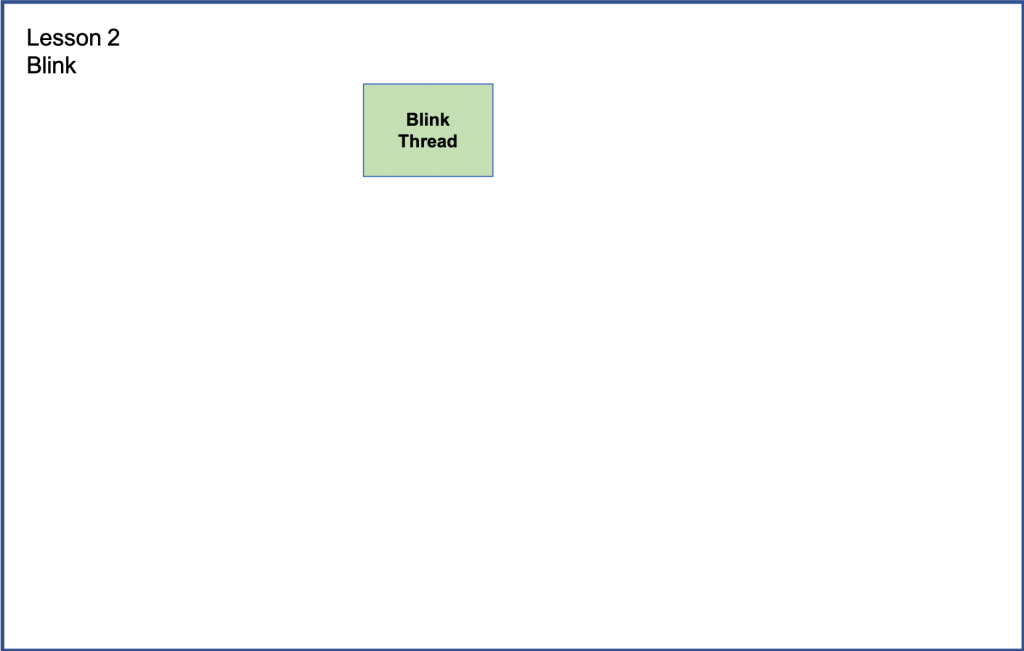
Here we are again. The blinking LED. I always start with a basic Blinking LED project just to make sure that everything is working. What is everything? The whole tool flow, from the editor, to the programmer, to the chip to the SDK. The only thing that will be a little different than usual is that I will run the blinking LED in a thread by itself. This is useful for looking at the development kit and knowing that the RTOS is still running and the blinking LED thread is at least OK even if the rest of your program is trashed.
In each of the following lessons I will add on a new block (or two) into the architecture. The blocks colored “green” will be the ones that are done in that lesson. In future lessons the blocks that are blue will be from the previous lessons.
For all of these projects I will be using the Mbed Studio program to create, edit, build and program the development board.
To implement the blinking LED thread I will:
- Make a new Mbed OS Program from the blank template
- Create & code “blinkThread.h”
- Create & code “blinkThread.cpp”
- Update main.cpp
- Give a Tour of Targets
- Compile and Program
Make a new Mbed OS Program from the blank template
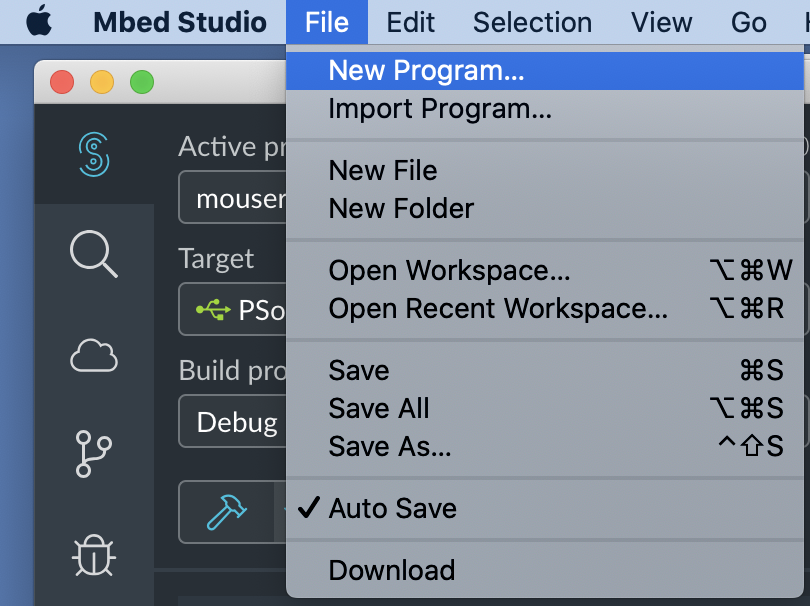
Start Mbed Studio. Then run “File->New Program…”
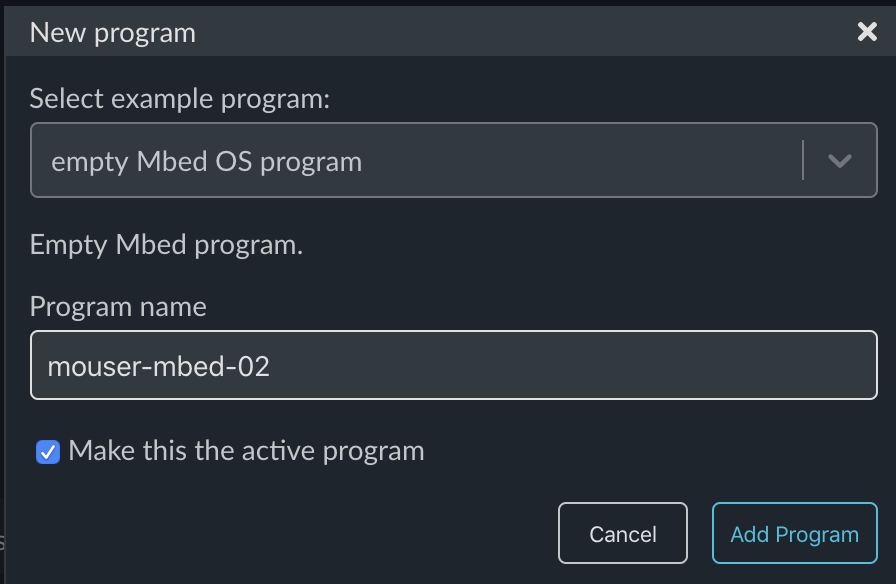
Mbed Studio will then give you the ability to start with a template project. To get started use “empty Mbed OS program”. For each of the projects I will give it a name that corresponds to the lesson number, in this case “mouser-mbed-02”. When you have all that selected click “Add Program”.
This will create a brand new project for you with Mbed OS setup and a blank main.cpp.
Create & code “blinkThread.h”
In each of the following lessons I will be creating different threads to perform the different pieces of system functionality. I will put each thread in a separate set of files with the name “functionThread.h” and “functionThread.cpp”. As I am sure everyone knows, the “dot h” file is supposed to be the public interface to the “dot cpp” file. In other words that file has all of the functions, objects and variables that other files are allowed to access.
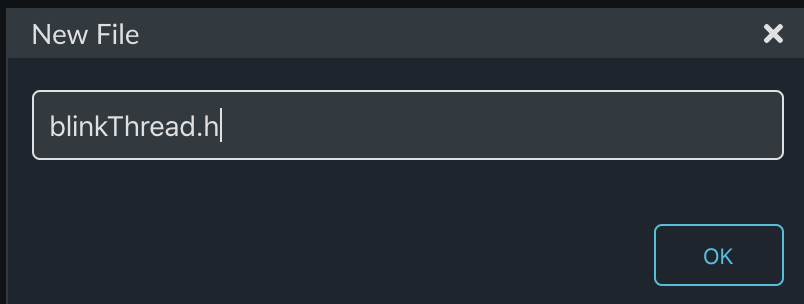
To create a file you “right click” on the project and select “New File”
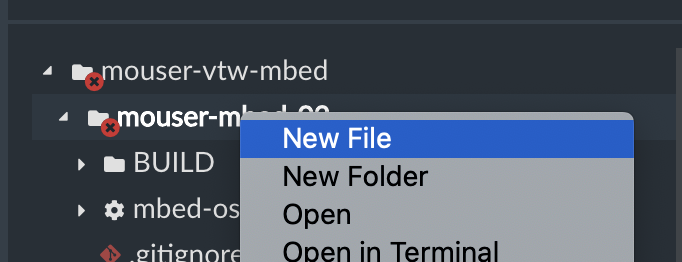
And then give the file a name. In this case it will be “blinkThread.h”.
This file will have the guards, to keep it from being included more than once, and just the function prototype for the thread. In all of the coming lessons I will name the thread “functionThread”. In this case the function is “blink” so the thread is called “blinkThread”
#ifndef BLINK_THREAD_H
#define BLINK_THREAD_H

void blinkThread();

#endif
Create & code “blinkThread.cpp”
Now I am ready to write the actual function which acts as the blinking LED thread. Right click on the project and select “New File”
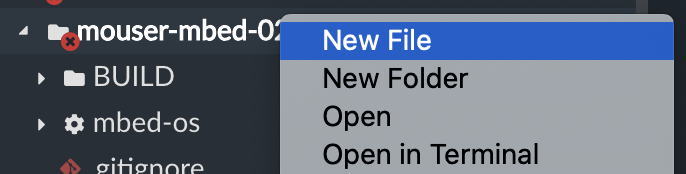
Then give it the name “blinkThread.cpp”. Just like the “dot h” files, the “dot cpp” files will be named “functionThread.cpp”. In this case the function is blink so the file will be called “blinkThread.cpp”.

This is a really simple thread. It wants to talk to the LED on the board. All Mbed OS development boards are required to have at least one LED and that LED must be named “LED1”. In reality the LED1 is just a map to the PSoC pin name of “P1_1” (this happens in the BSP/Target – more on this later).
By creating an object of type “DigitalOut” with an initializer argument of “LED1” I will have access to writing 1’s and 0’s to that pin. Notice that I give the object definition the keyword “static” to limits its scope to this file.
The next thing that I need is the actual function which serves as the thread. Notice that it is an infinite loop, which just does the following:
1. Inverts led1 by reading the pin, inverting it with the “!”, and then writing it back to the pin.
2. Doing a delay of 500 ms using the Mbed OS library function “sleep_for”. For those of you who aren’t CPP people the “ThisThread::” just tells the compiler that the sleep_for function is in the namespace “ThisThread”.
#include "mbed.h"
#include "blinkThread.h"


static DigitalOut led1(LED1);

void blinkThread()
{

    while (true)
    {
        led1 = !led1;
        ThisThread::sleep_for(500);
    }
}
Update main.cpp
In each of the following lessons, each time I create a new file, I will be making the same basic change to main.cpp. Specifically I will startup the thread when the main function starts. To do this:
- Include the new “functionThread.h” (in this case “blinkThread.h”).
- Declare an object to hold the new thread (in this case “blinkThreadHandle”).
- Start the thread by calling the start method with a function pointer to the actual thread function (in this case “blinkThread”).
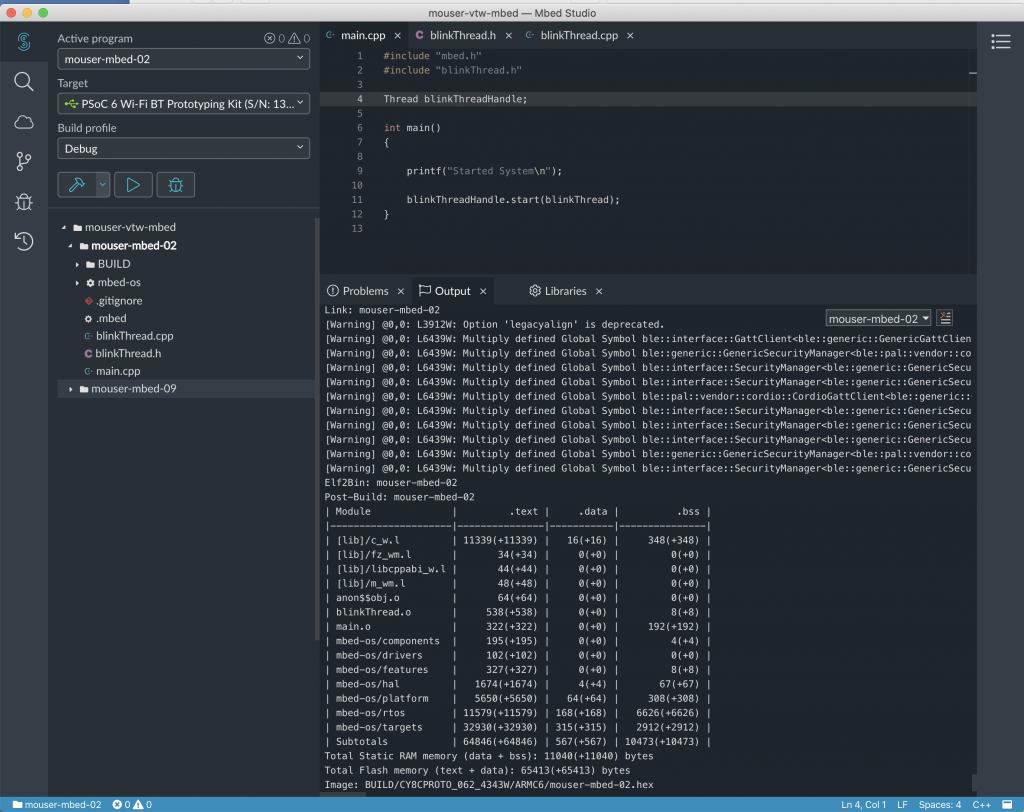
#include "mbed.h"
#include "blinkThread.h"

Thread blinkThreadHandle;

int main()
{

    printf("Started System\n");

    blinkThreadHandle.start(blinkThread);
}
Targets Tour
Mbed OS abstracts all information about a development board into a set of files called the Target. These files reside in the mbed-os/targets directory. This files are classically called the board support package (BSP). This including information about which chip, startup code, libraries, and peripherals exist on the board.
In order to build a project you need to tell Mbed OS which target you are using. This can be done in the Mbed CLI with “mbed config target CY8CPROTO_062_4343W” or by selecting the correct target in the Mbed Studio IDE.
You should look in the following directories/files:
- mbed-os
- targets directory
- targets.json
- TARGET_Cypress directory
- One directory per Target
Compile and Program
There are several things that you should notice on the panel to the left of your code.
- The active program (this is a drop down menu with each project in your workspace).
- Which “target”. When you plug in the development kit, Mbed Studio will recognize that you have attached a target that it recognizes.
- The “hammer” button runs the Build process.
- The “play” button runs a “Build” then programs the development kit.
Press the “Play” button to Compile and Program. And with any luck you should have a blinking LED.
Notice that it compiles a bunch of different files… actually all of the files in mbed-os. This will take a while on a PC, but is much faster on a Mac or Linux. This full compile step only needs to happen the first time for a project – each subsequent time will only compile your changes.
2 Comments
If you are experiencing issues with the Cypress board connecting to Mbed, the Firmware Loader might need to be upgraded.
Mbed Studio or Mbed CLI requires DAPLink CMSIS-DAP (modified version of CMSIS-DAP that enables web debugging.)
It is available on GitHub at http://github.com/cypresssemiconductorco/Firmware-loader.
Follow the instructions to get the things fixed and create a mass storage device. Each PSoC 6 development kit has an LED
that will be solid, fast ramping (~1 Hz), or really fast ramping (~2 Hz) to indicate the mode. The ~2Hz indicates DAPLink CMSIS-DAP mode for Mbed.
Thanks for the answer…
Alan