PSoC 6 Introduction
#
Title
Comment
0
A Two Hour PSoC 6 Class
An introduction to the PSoC 6 class with links to all of the documents
1
Resources
Links to all of the Cypress PSoC 6 information including videos, application notes etc.
2
Your First Project
Learn how to build a PSoC 6 project and program your CY8CKIT-062-BLE development kit
3
FreeRTOS and a Debugging UART
Build a project using FreeRTOS including a debug console with the UART
4
CapSense
Build a project using the Mutual Cap Buttons and Self Cap Slider
5
Bluetooth Low Energy
Build a CapSense project using BLE and CySmart
Since I did the webinar several things have happened
- Lesson 4: I fixed an error in the stack size for FreeRTOS
- Lesson 5: The PSoC Creator BLE PDL has been upgraded to greatly simplify the notifyCapSense function
All of the projects are available at git@github.com:iotexpert/psoc-6-introduction.git or www.github.com/iotexpert/psoc-6-introduction
Project Description
This will be your first PSoC 6 project. You will build a simple blinking LED project that uses an internal clock and a Pulse Width Modulator (PWM) to drive the RED LED on the CY8CKIT-062-BLE.
How does it work?
The PWM will take as input a 1 KHz clock and divide it by 1000 (period=1000) aka 1 Hz with a 50% duty cycle (compare = 500) to create an LED that blinks at 1 Hz.
How am I going to do it?
- Start PSoC Creator and tour the Workspace
- Make a new PSoC 6 project
- Walk through Workspace
- Create a schematic including assigning pins
- Write the firmware
- Program the PSoC 6 BLE
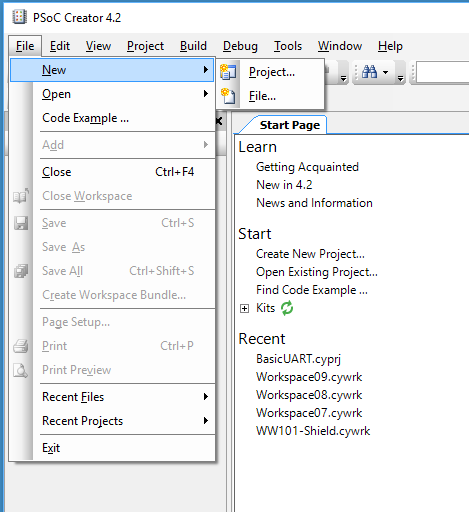
Start PSoC Creator
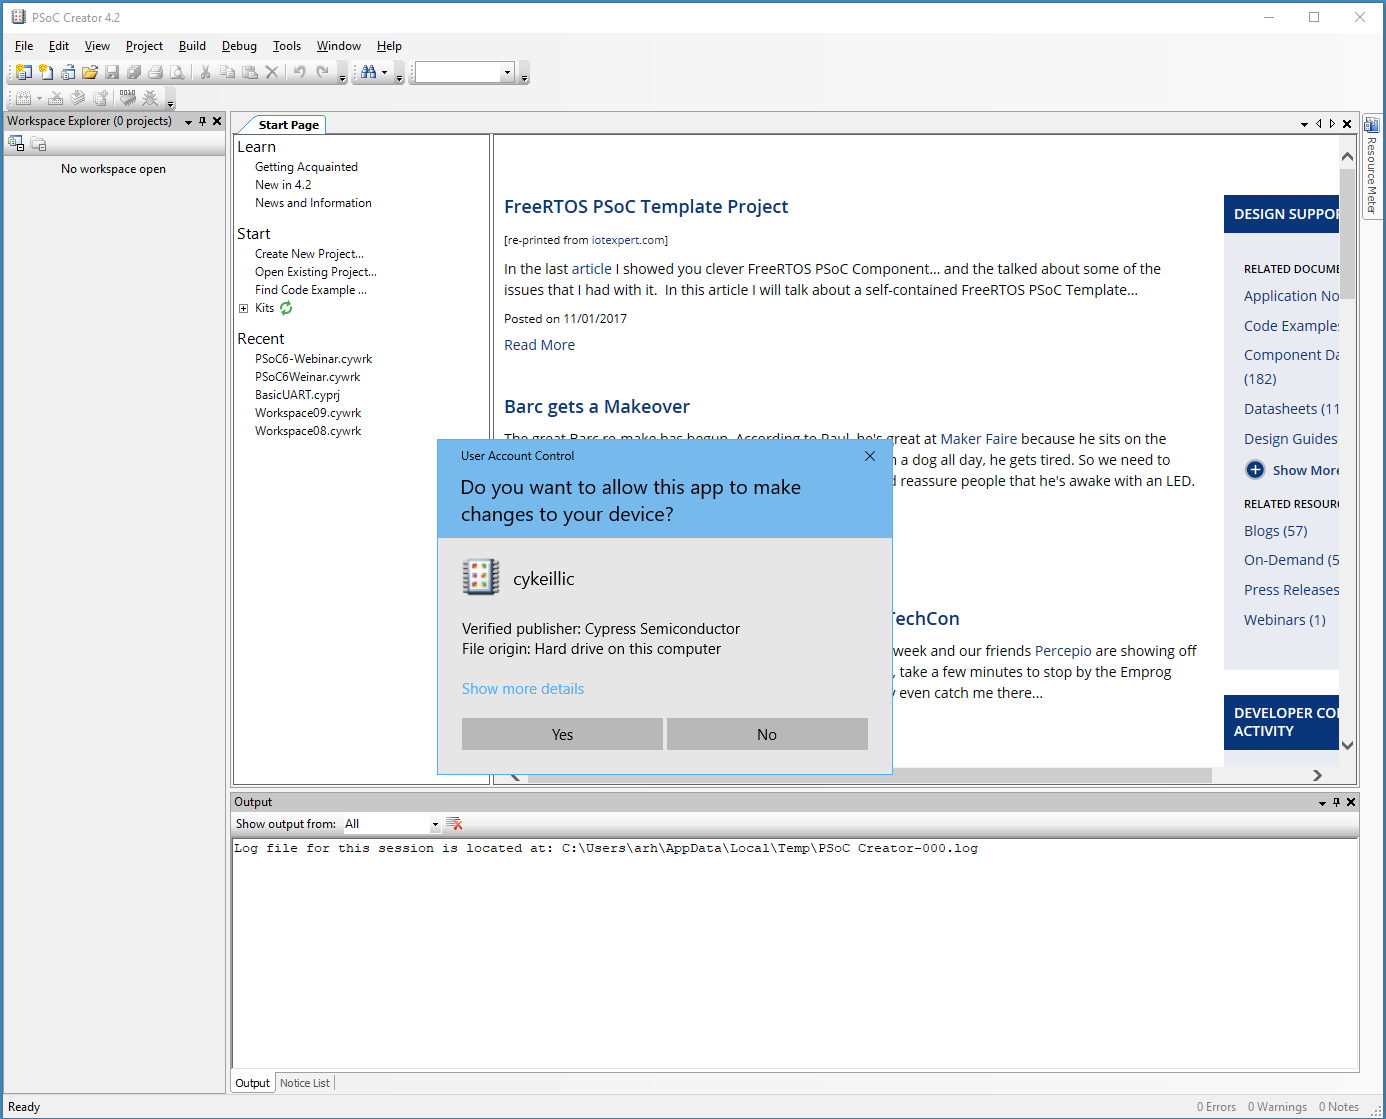
When you first run PSoC Creator 4.2 you will get a screen that looks like this:

If you get a screen that looks like this, just click “No”. This screen is asking for you to register the Keil Compiler and get a license. This is only used for PSoC3
On the left is the Workspace Explorer which will contain all of the files & projects in your workspace… more to follow
The Start page has a bunch of clickable links to take you to learning, new projects, etc. It also has a web browser that shows the stream of posts from the Cypress PSoC Creator blog.
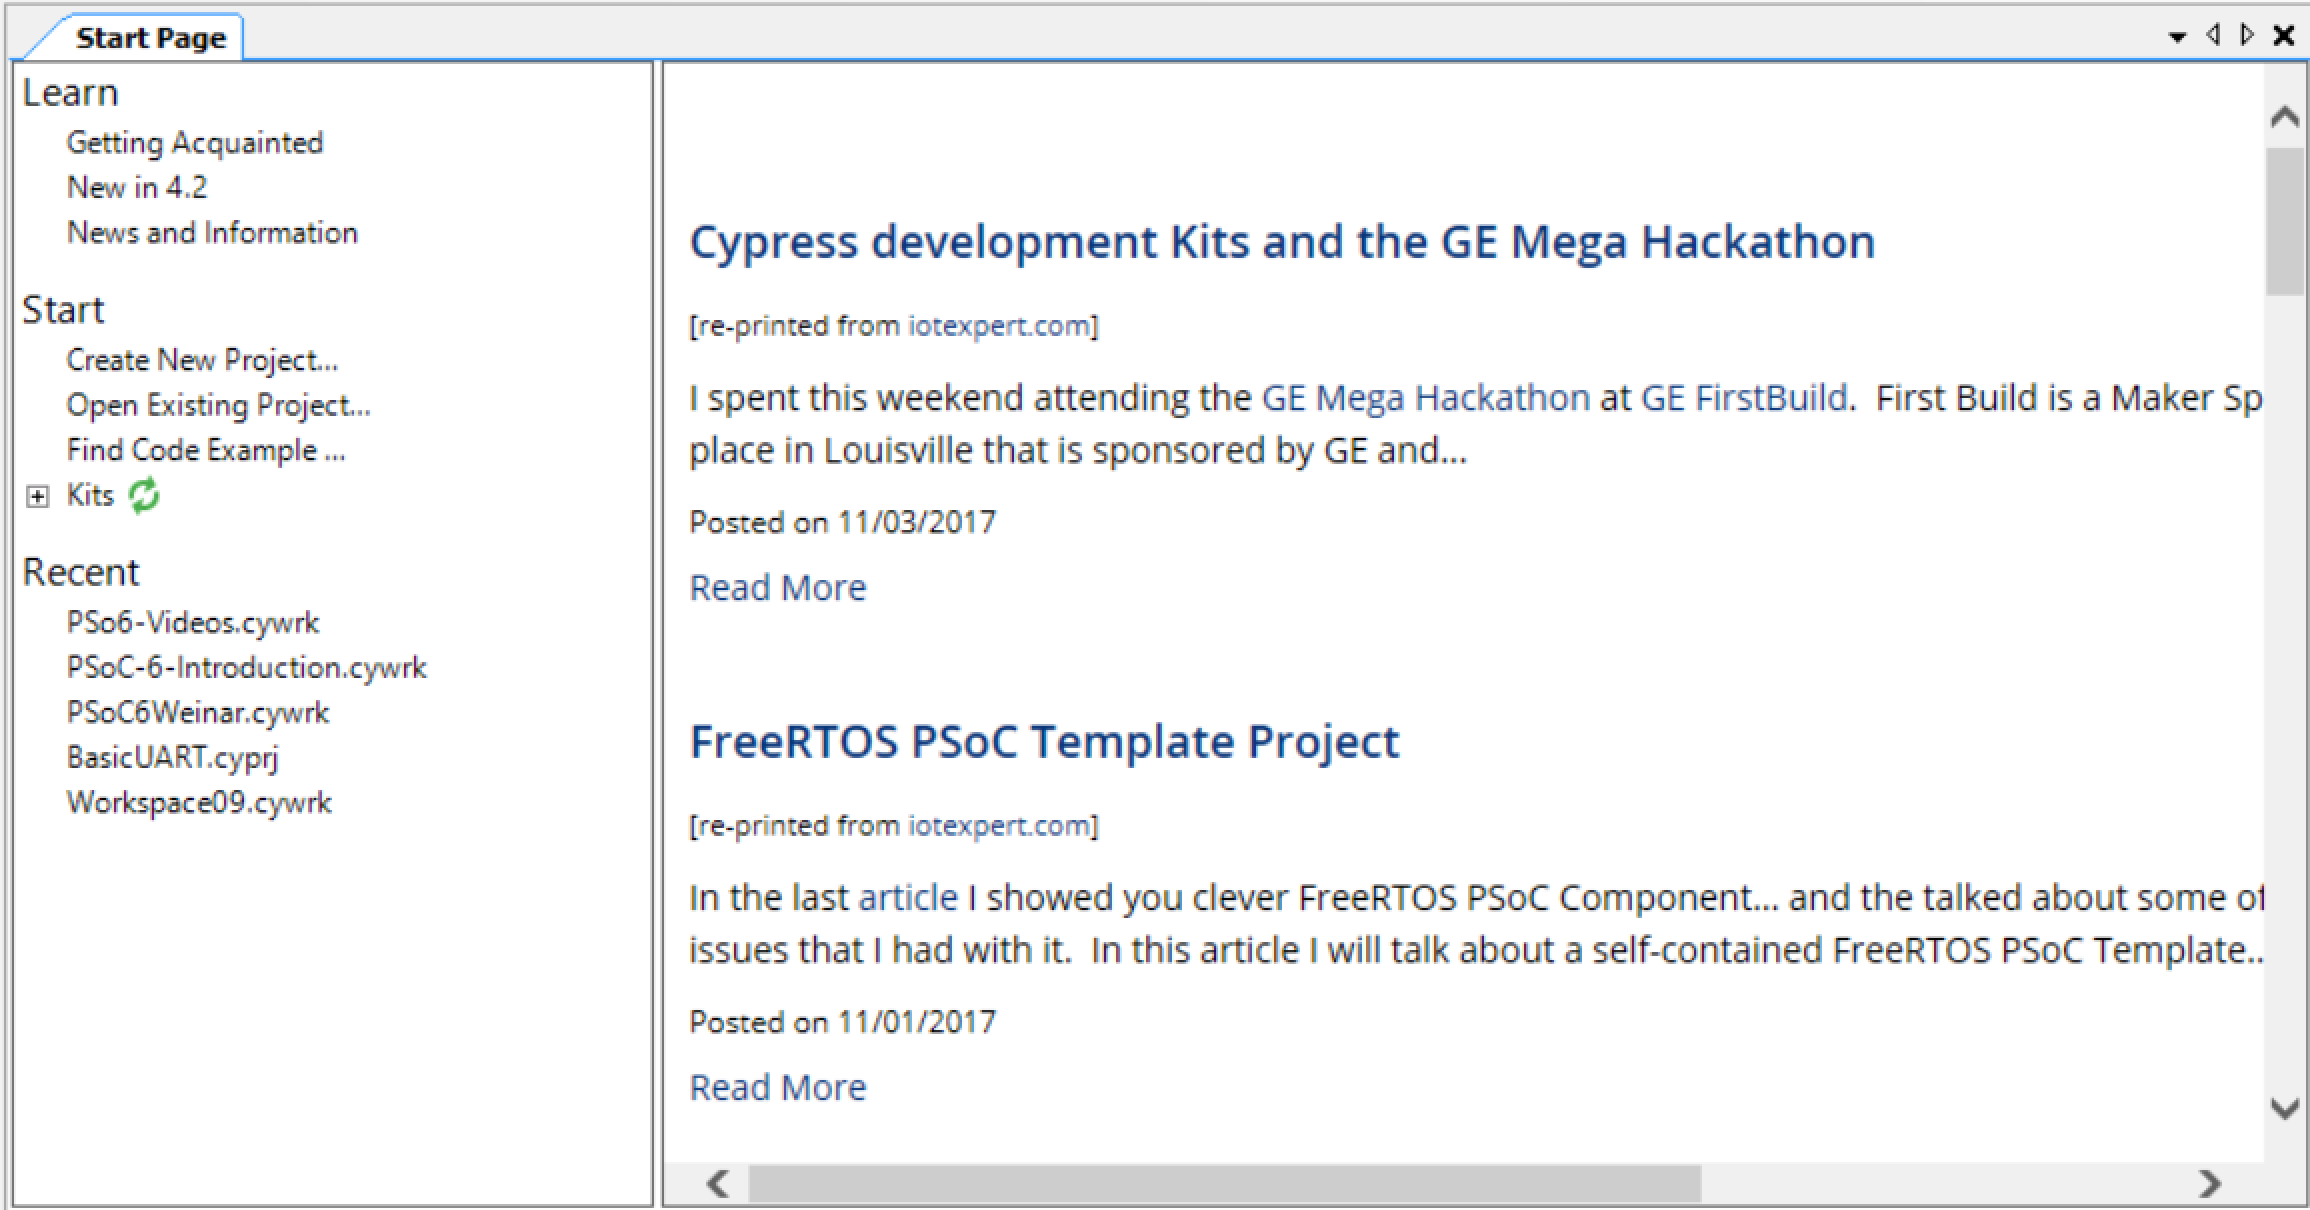
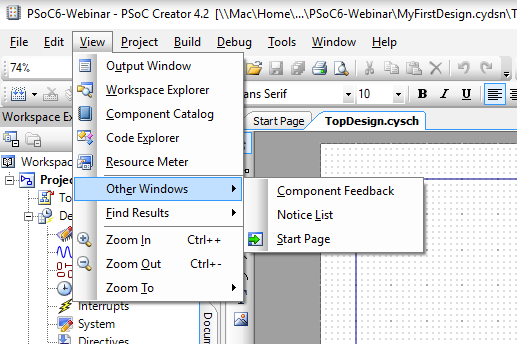
If you loose this screen you can bring it back by going to View –> Other Windows –> Start Page
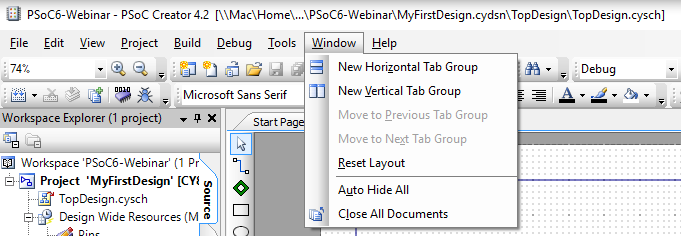
If your windows get screwed up you can always Window->Reset Layout
The Output window will contain messages from PSoC Creator including errors, compiler output etc… more to follow
Make a New PSoC 6 Project
Start your first project with File –> New –> Project
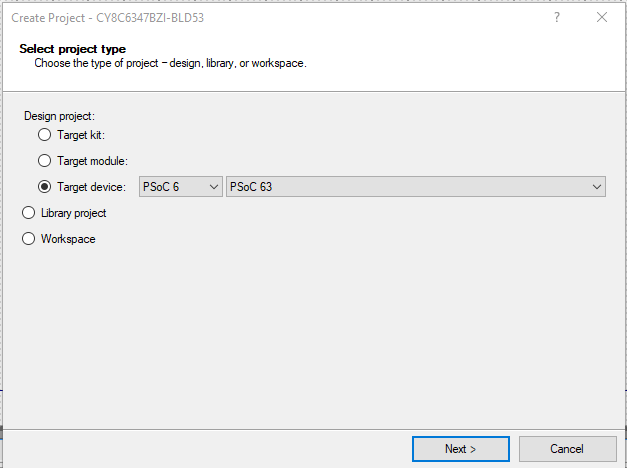
You need to choose to make a Design Project, a Library Project or a Workspace. I want to make an actual design. In order to know what chip the design is using I need to pick one of three options:
- Which development kit I have (PSoC Creator knows all of the Chips on the development kits)
- Which module (e.g. a bluetooth module)
- Which device
When you pick device it will let you start by picking the family (e.g. PSoC3/4/5/6) and then which specific device in the family. The CY8CKIT-062-BLE has a PSoC 6 family PSoC 63 device on it.
If you have previously built a project it will default to that device.
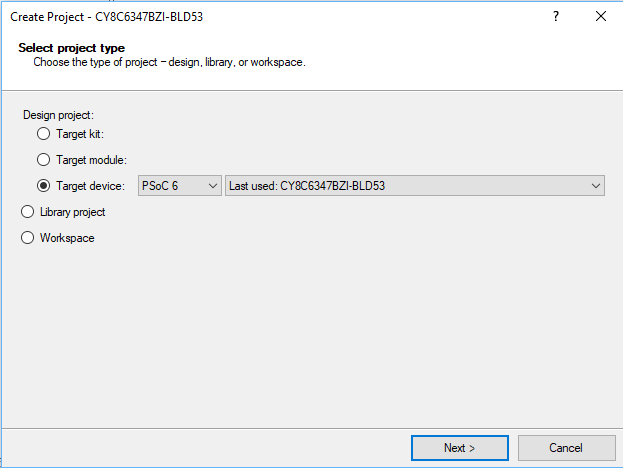
If you need to switch just use the pulldown menu
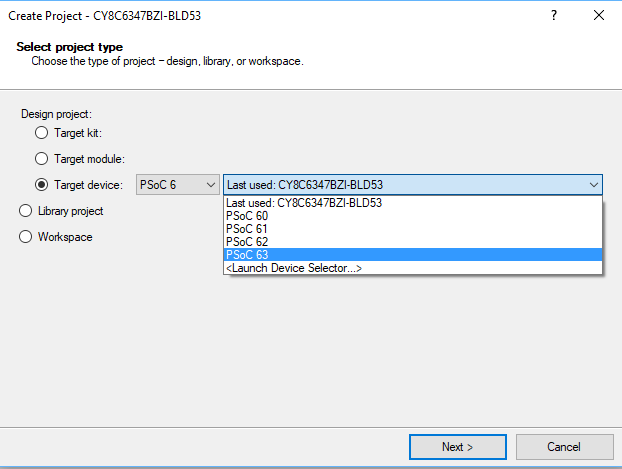
If you have some specific device, you can use the “device selector” which has all of the 50 million options. The screenshot has a section of the PSoC 6 devices.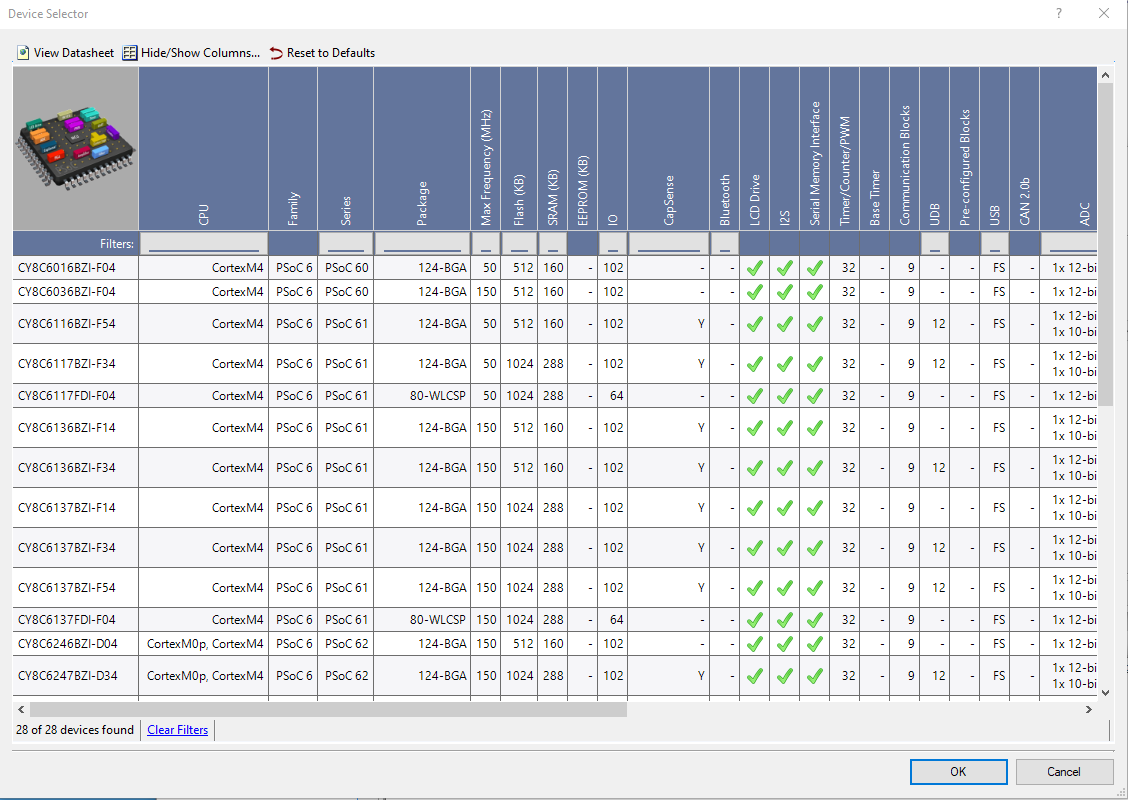
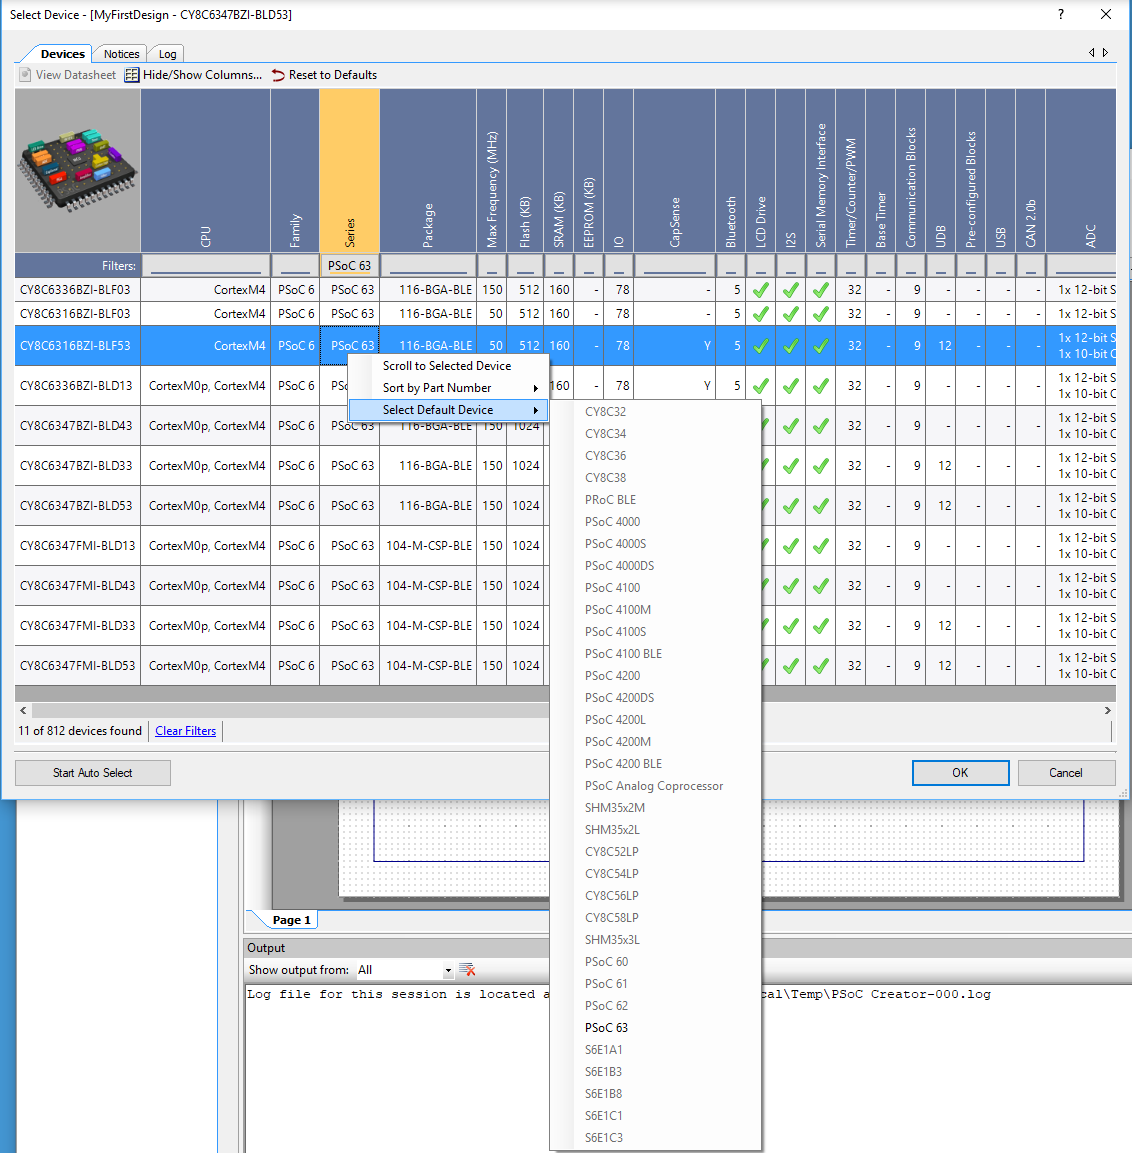
An excellent trick is that you can pick the default device by right clicking, then choosing “Select Default Device” and the family. The default device will almost always be the device with all of the options that is installed on the development kit.
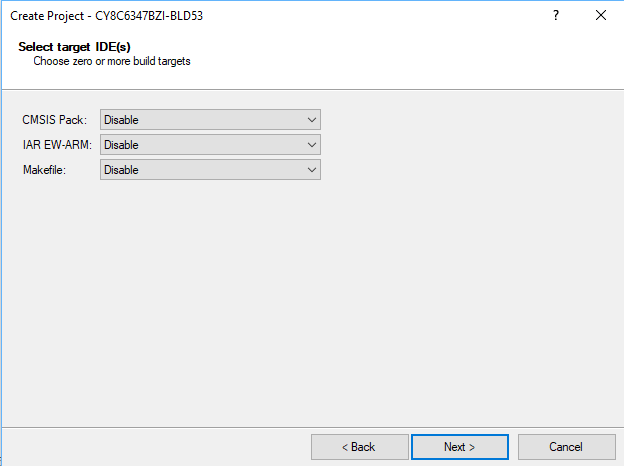
After the device is selected, you can setup the project to be exported to IAR, Keil, etc… (I am not going to show any of these but application note AN219434 talks about how to do it)
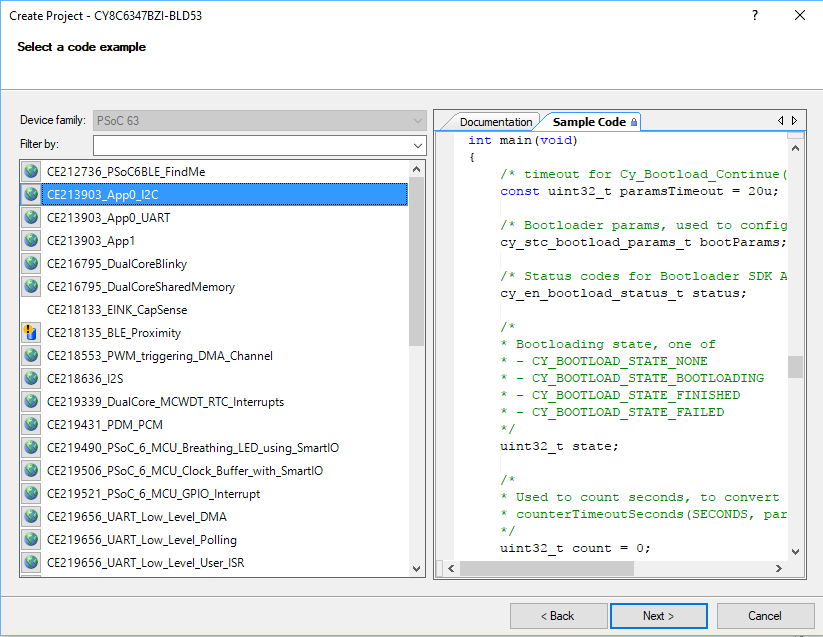
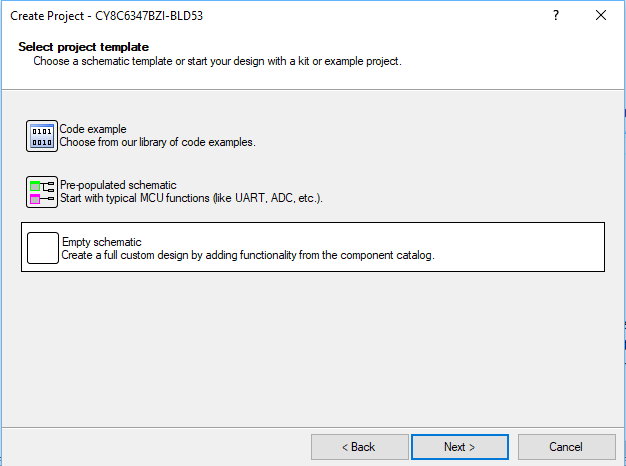
We give you the choice of building from a code example.
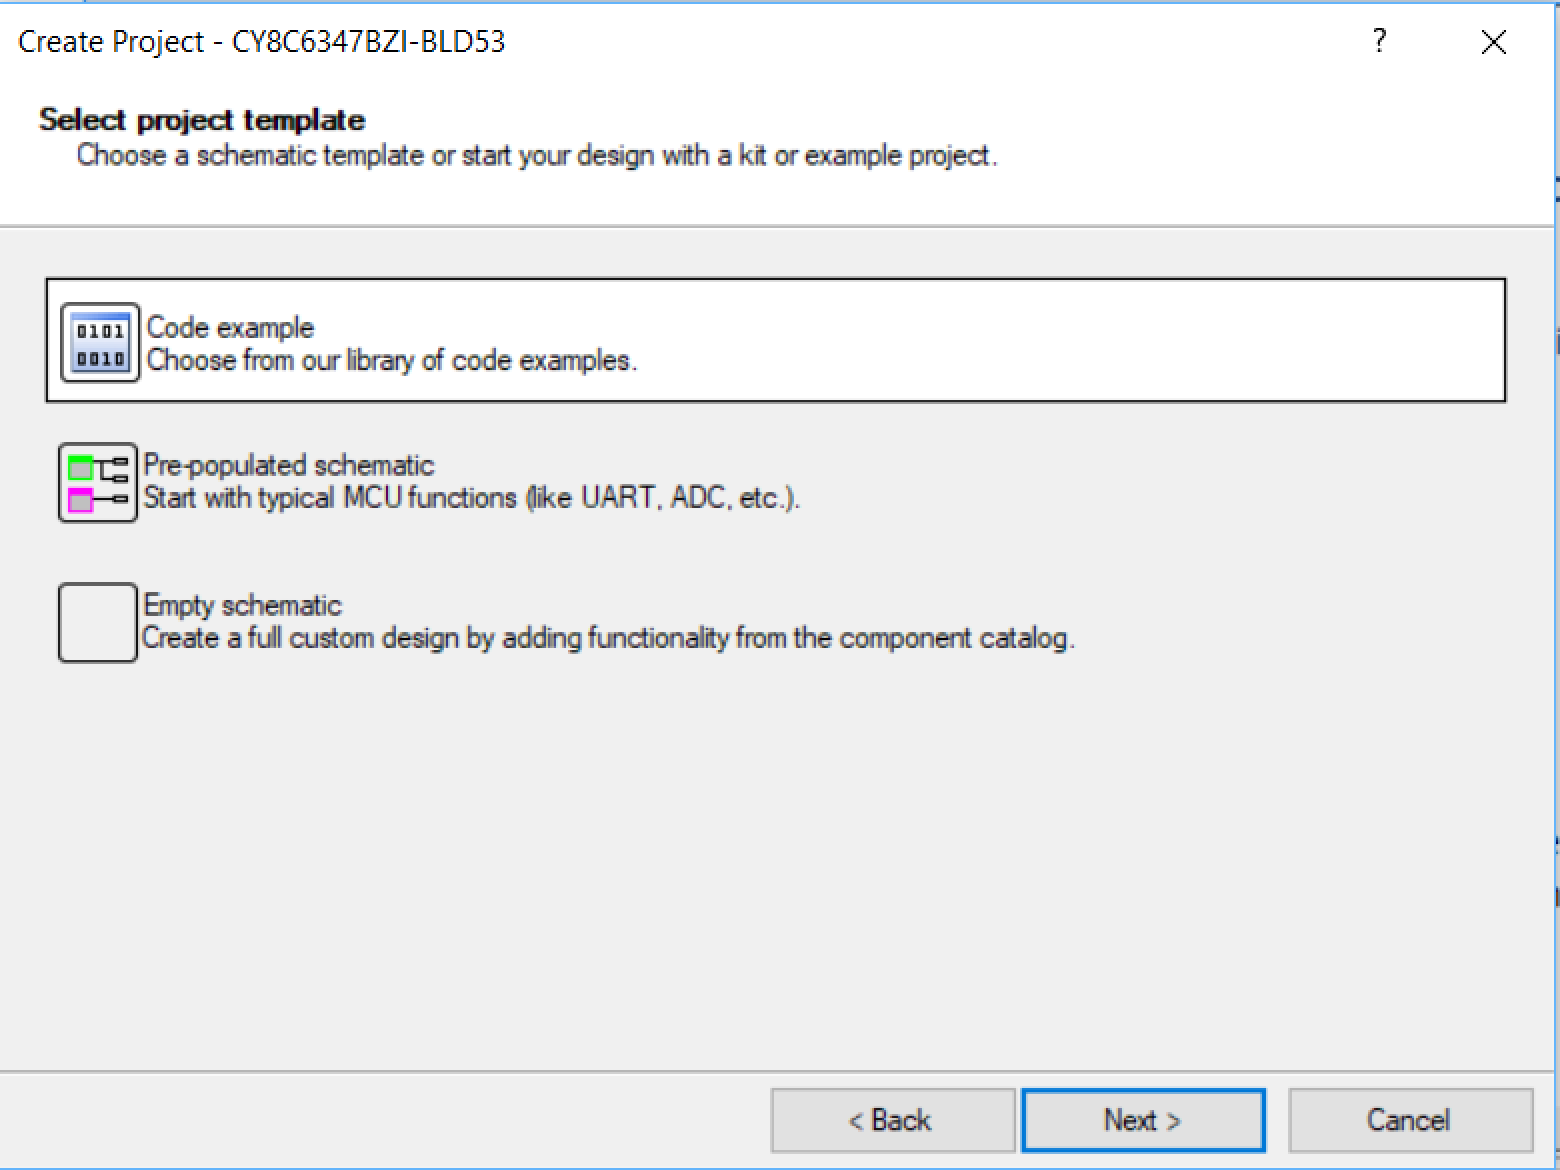
If you choose this option it will bring up the code example explorer
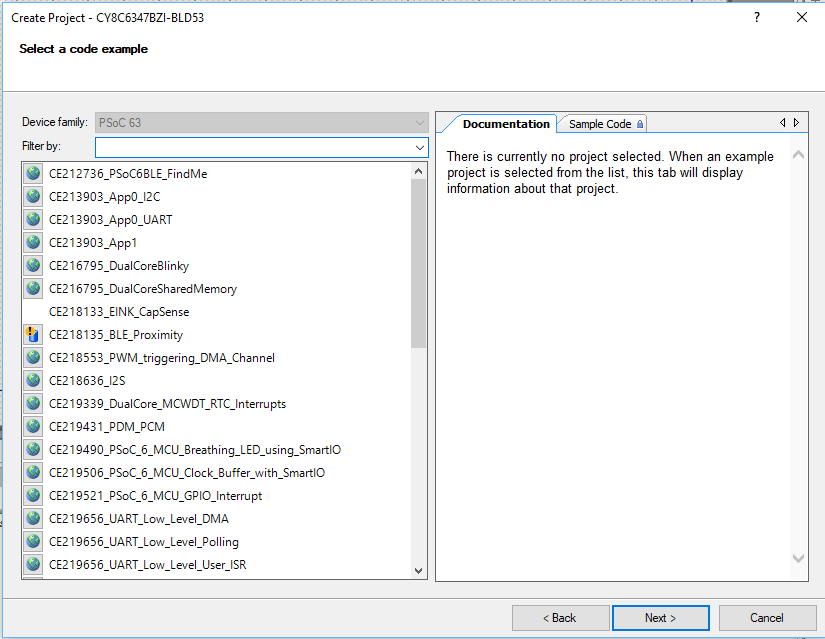
If you click on a code example and the sample code tab in the window you can look and see how the firmware works without making a new project.
Or a pre-populated schematic which has a bunch of components that are already configured “normally” (whatever that means). I tend to never do this, but it does prevent you starting with a blank project.

Or an empty schematic (this is what I will do for all of the projects in this series)
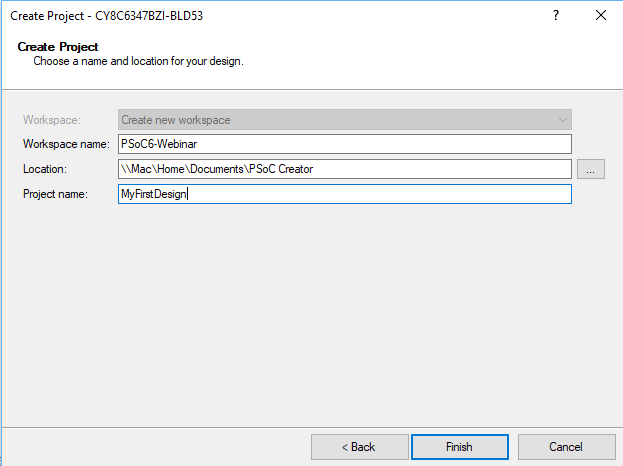
You need to specify the name of the workspace and the name of your project.
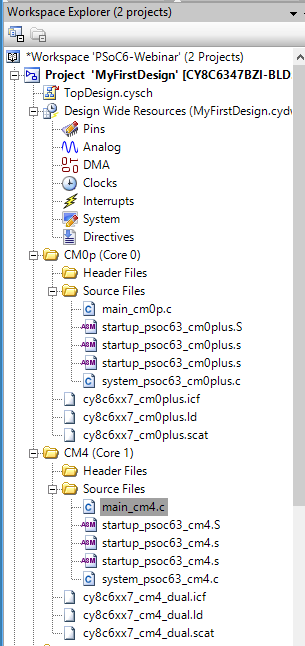
Walk through Workspace
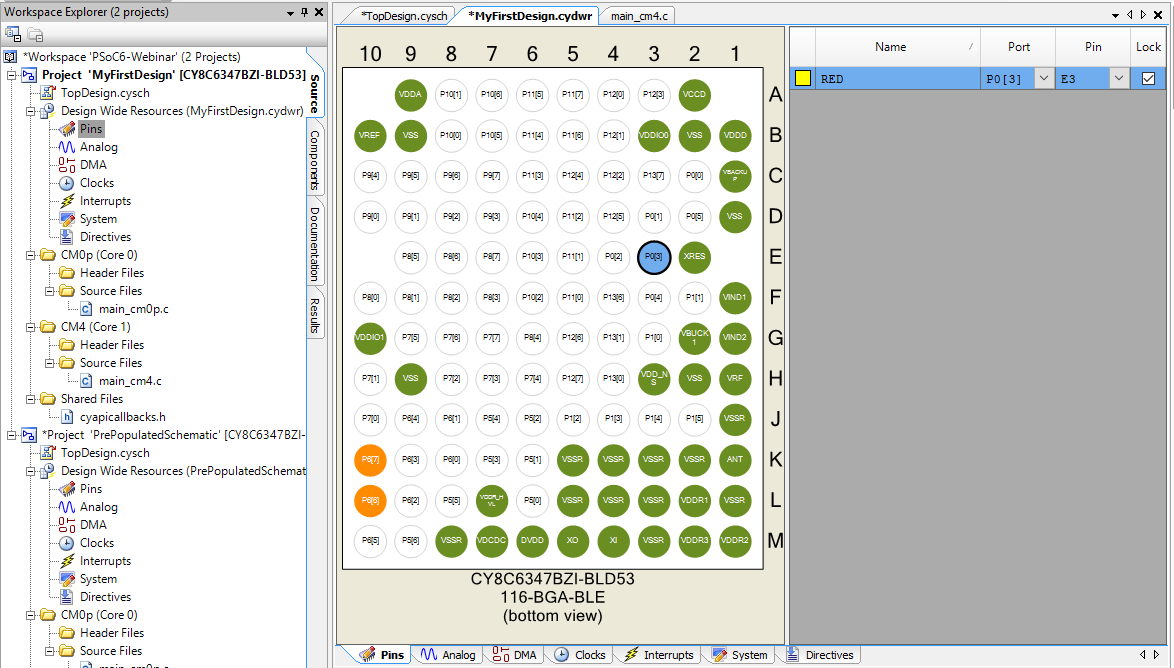
Starting with the Workspace Explorer. PSoC Creator has the notion of a workspace which is a container for MULTIPLE projects. When you double click any of the rows in the workspace explorer, PSoC Creator will open up that “File” for editing in the proper editor (code, schematic, etc)
Notice that in the picture below there are two projects. The one in bold is called the “active” project… this is also known as the one that will program or build. One of the great errors that people make is to edit a project other than the active one… then build and program… and then not understand why nothing is happening.
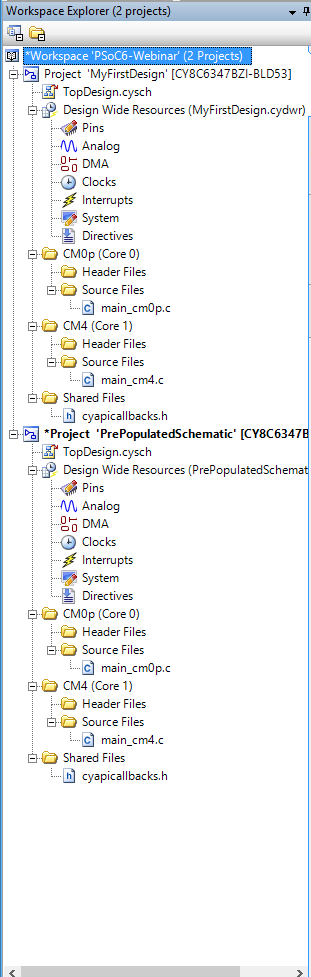
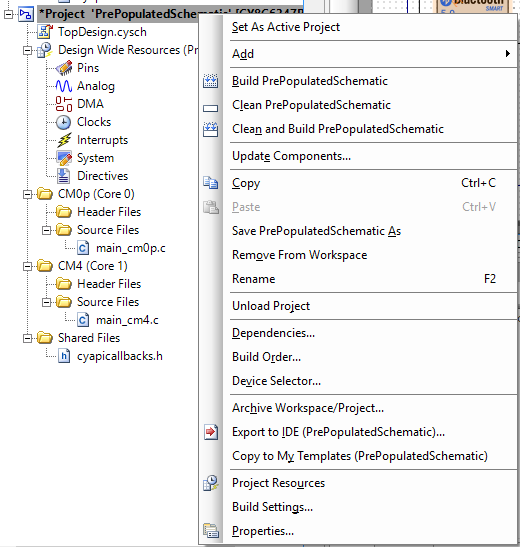
When you switch projects you need to right click on the project then select “Set As Active Project”
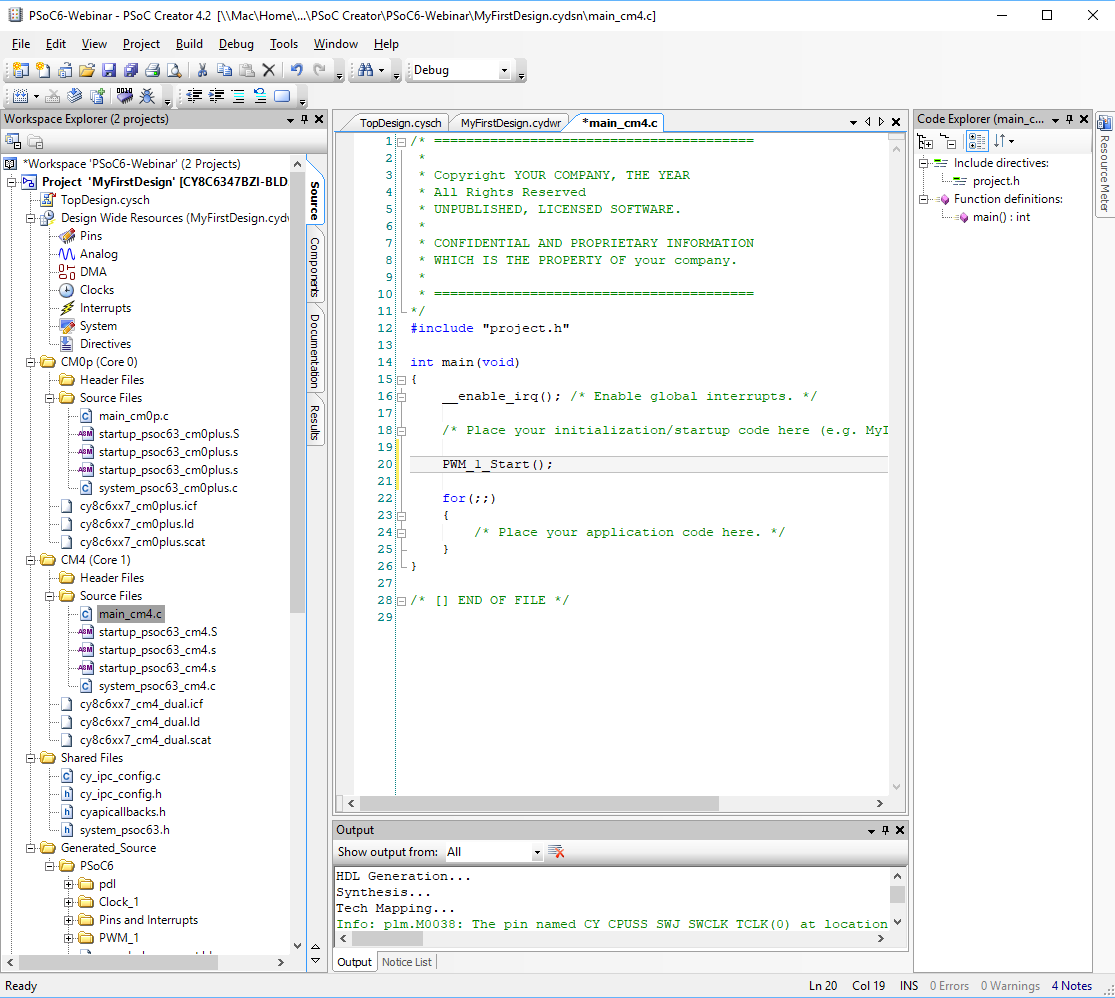
In the middle of the screen you will have a multiple tab thing. Each tab represents one of the open documents. There are different types of editors. In the picture below you can see three documents are open.

On the far right are the components that are available to be placed into your project. (more to follow).

Create a Schematic Including Assigning Pins
The first thing that I will do is make the blinking LED project. The Hello World of MCUs.
(1) Place a digital output pin by dragging and dropping it from the component catalog.
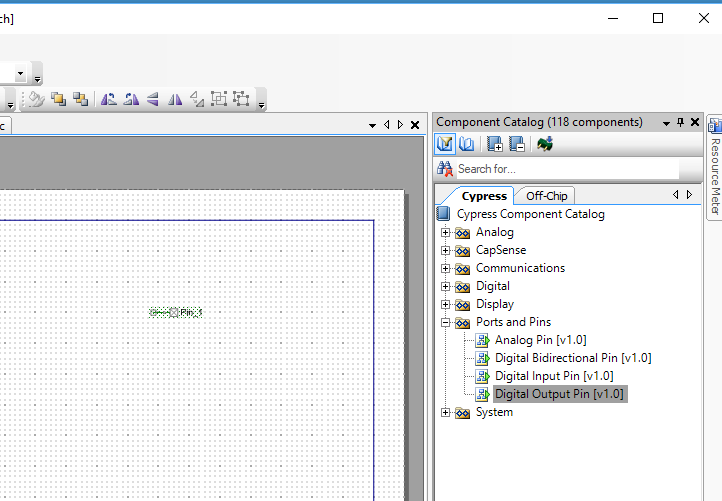
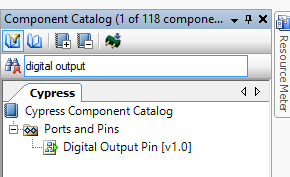
You can also find the digital output pin by typing into the search box
(2) Place a TCPWM
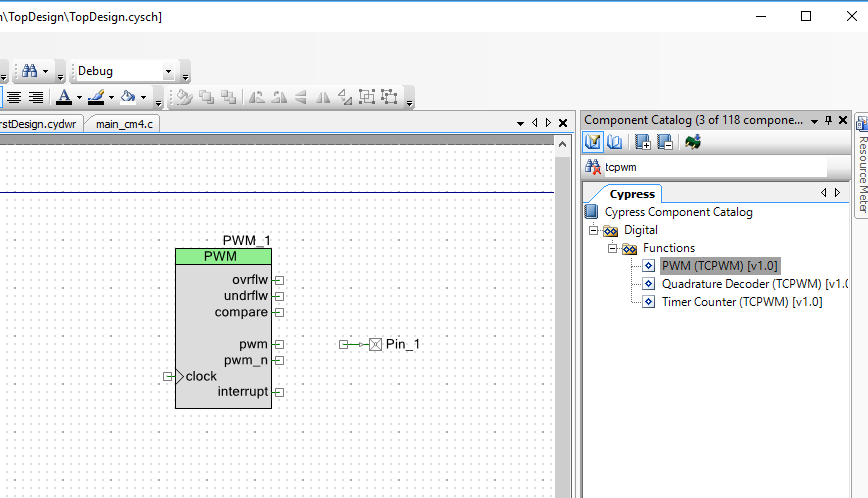
(3) Place a Clock

(4) Wire the three of them together (press the wire symbol under the pointer symbol) or press “w” on the keyboard. Then click on the pin boxes.
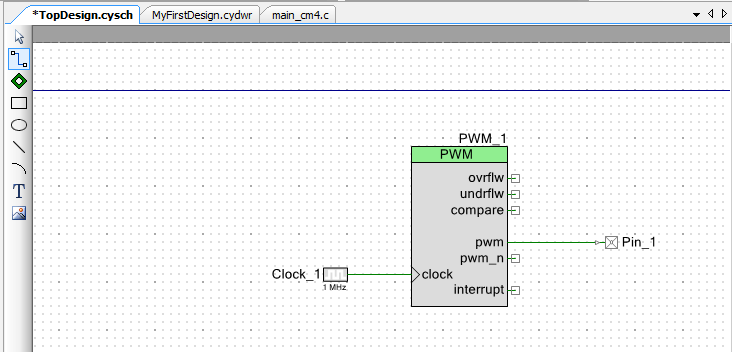
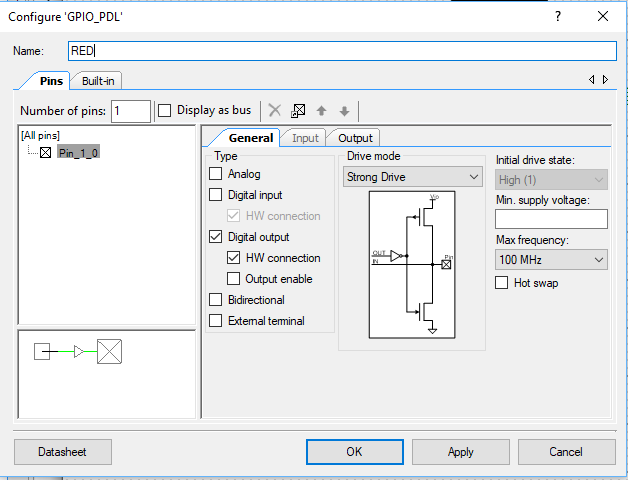
(5) Configure the pin to be called “RED” by double clicking and change the name
Now the schematic should look like this:
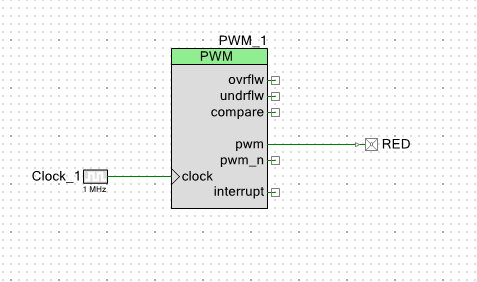
(6) Configure the clock to 1000 Hz
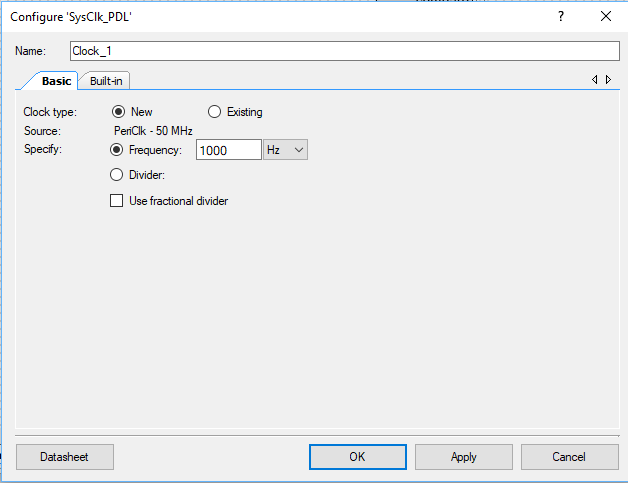
(7) Configure the TCPWM Period to 1000 and the Compare to 500 (this will divide the input clock by 1000 which will make a nice even blinking 1 Hz LED)

(8) Assign the RED Pin to P0[3]
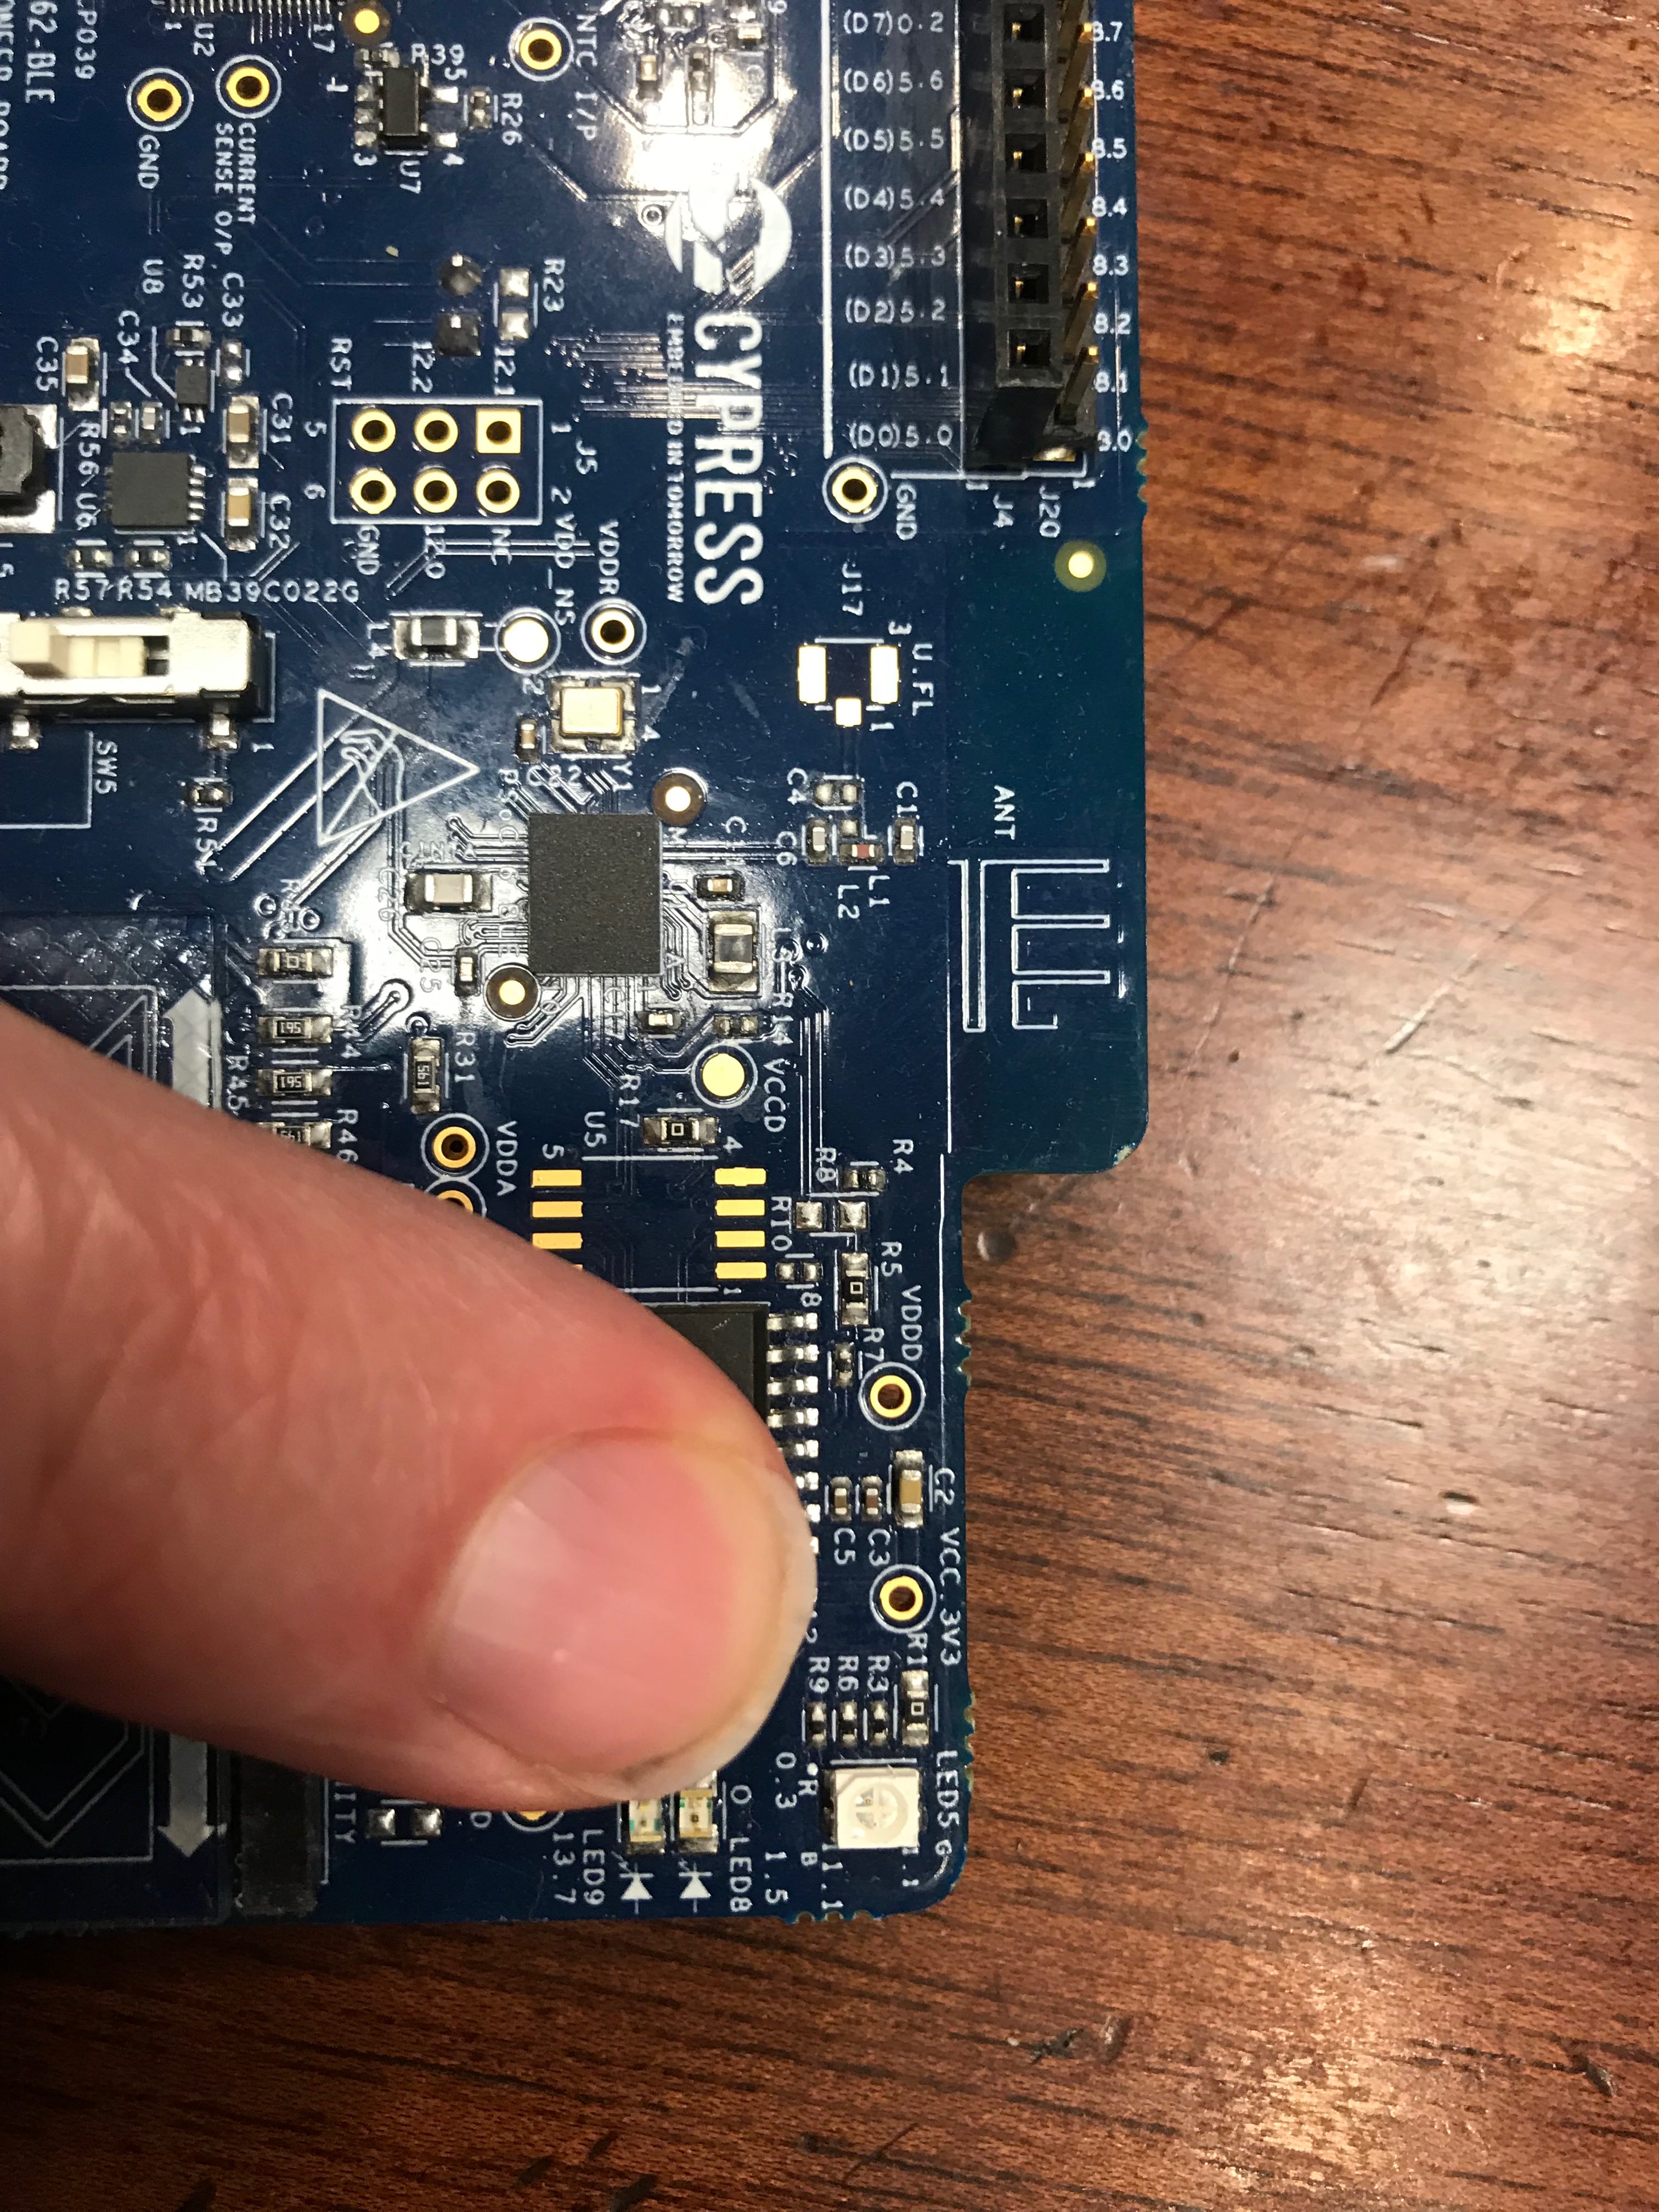
Here is a picture of that section of the CY8CKIT-062-BLE
Write the Firmware and Program
Click on Build –> Generate Application which will place and route the design and then bring in all of the required Peripheral Driver Library (PDL) functions into your project. You can see all of the steps that PSoC Creator is executing in the “Output Window”
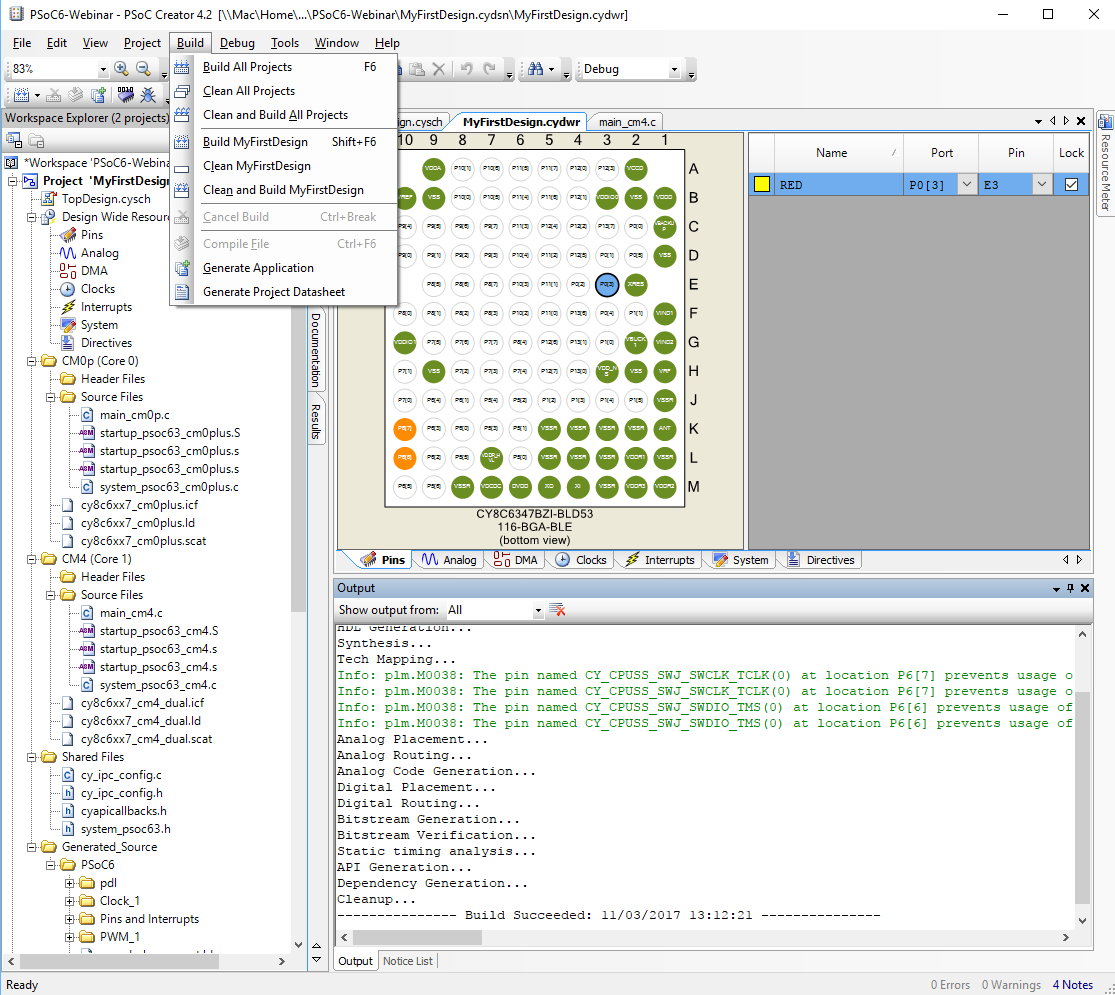
The next step is to edit the main c file. There are two in this chip. One called “main_cmop.c” for the Cortex-Mo Plus and one called “main_cm4.c” for the Cortex-M4
In order for the TCPWM to work you need to turn it on, with the “PWM_1_Start()” function call. You can do this in “main_cm4.c” which you can edit by double clicking it.

Program the PSoC 6 BLE
You can build and program the design by
- Pressing the little chip button (just to the left of the debug bug)
- Pressing Ctrl-F5
- Selecting Debug->Program
When you click program, PSoC Creator will bring up a window that looks like this. It shows that there are two ARM MCUs connected to the programmer. It doesn’t matter which one you select as the programming target because they are both connected to the same Flash (remember it is a shared memory multi processor)

After you click OK, PSoC Creator will compile all of the file and then program the chip
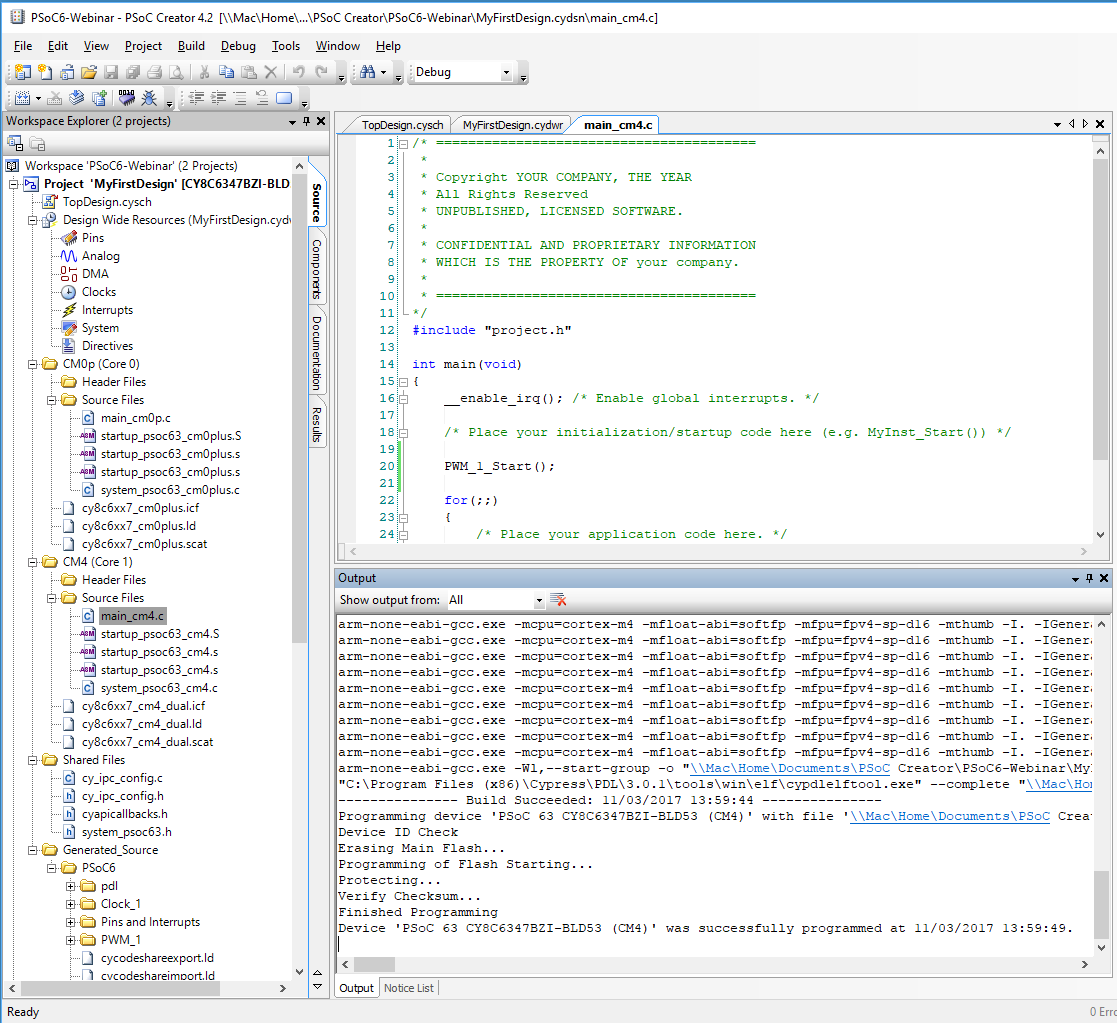
As soon as it is done, you will see a message “Finished Programming” and ” … successfully programed …” Then you should see the PSoC 6 LED start blinking. (yes that is my finger … sorry)


1 Comment
Alan,
Good walk through (especially after watching you go through this live LED blinking starting example via the Mouser Webinar today).