Summary
I have been building up pieces of code that are going to allow me to show the PSoC Analog CoProcessor –> WICED WiFi –> Amazon IoT –> WICED WiFi –> Secret New Chip –> Robot Arm. In the previous two articles (part1, part2) I have shown you how to build most of the WICED firmware. In this article I am going to focus on the PSoC Analog CoProcessor firmware (but if you look real close you can see the secret new chip’s development kit).
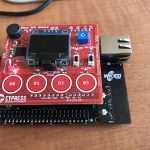
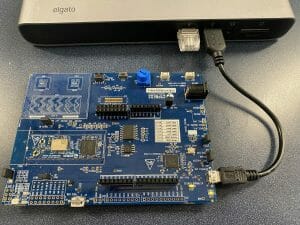
In the picture below you can see the red shield board. This is a shield with the PSoC Analog CoProcessor plus a bunch of sensors that show the power of that chip. The shield also includes 4x CapSense Buttons which I am going to use to set the position of the Robot Arm. The PSoC will serve as a front end companion to the WICED WiFi Development Kit. They will communicate via I2C with the PSoC acting as an I2C Slave and the WICED WiFi as a master. Here is a picture of the all of parts minus Amazon.com’s cloud.

PSoC Analog CoProcessor
The PSoC Analog CoProcessor has the new Cypress CapSense block that gives you a bunch of new features, including enough measurement range to measure a capacitative humidity sensor (which you can see in the upper left hand part of the board). For this demonstration I am just going to use the 4 CapSense buttons. They will serve as the user interface for the Robot Arm. The 4 buttons will set 4 different positions, 20%,40%,60%,80%. I will be talking in much more detail about this shield in coming posts (later next month)
PSoC Analog CoProcessor Schematic
The PSoC Creator schematic is pretty straight forward. I use the EZI2C slave to provide communication for the WICED board. There are 4x LEDs that sit right next to the CapSense buttons, and there are the 4x CapSense buttons. The only slightly odd duck is the Bootloadable component which I use because when I designed the shield I did not put a programmer on it. The BootLoadable allows me to me to load new firmware into the PSoC via the I2C interface. Here is the PSoC Creator Schematic:

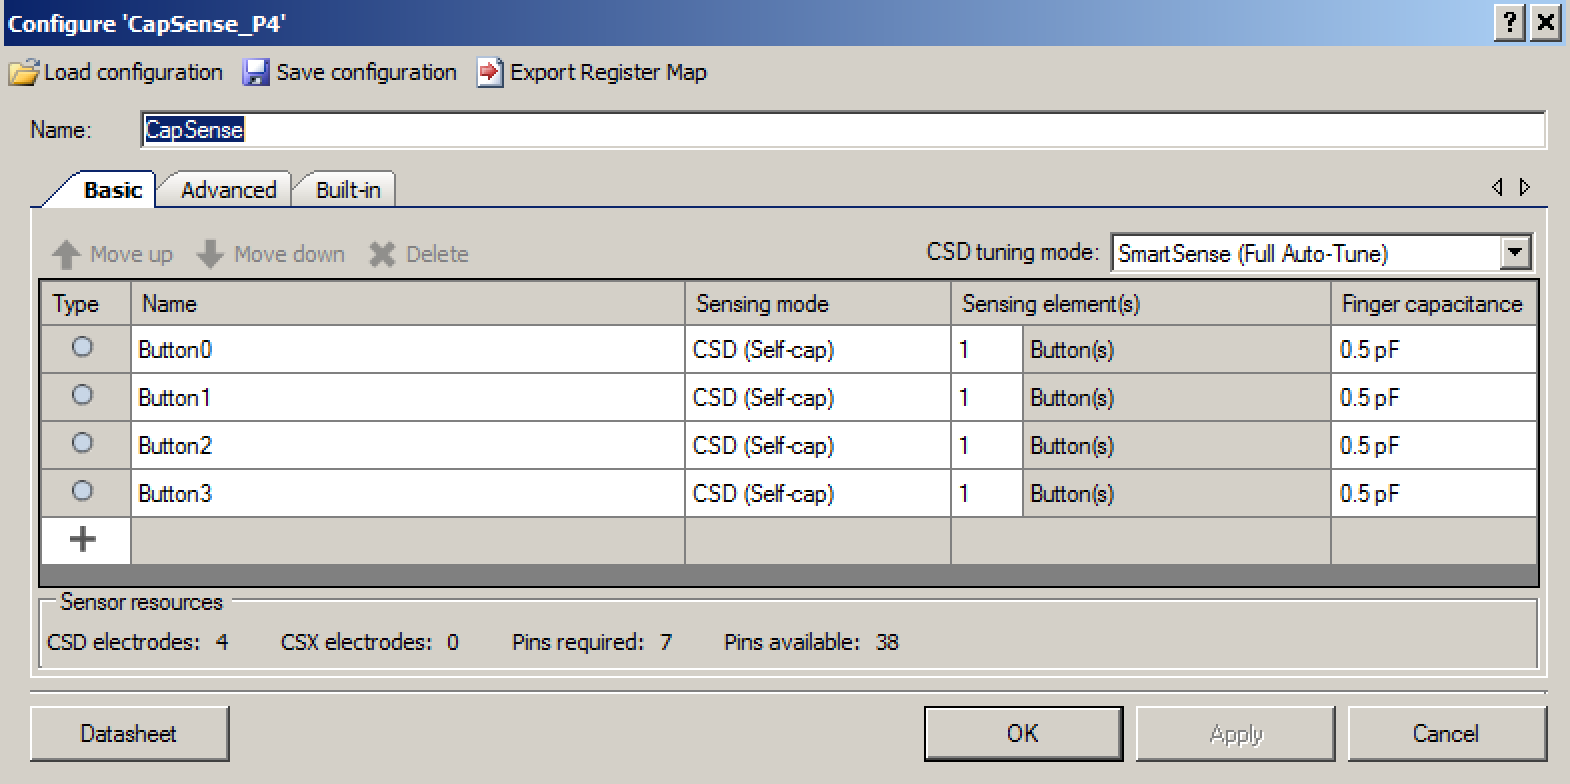
The CapSense configuration just specifies the use of 4x CapSense buttons that are automatically tuned by the Cypress magic.
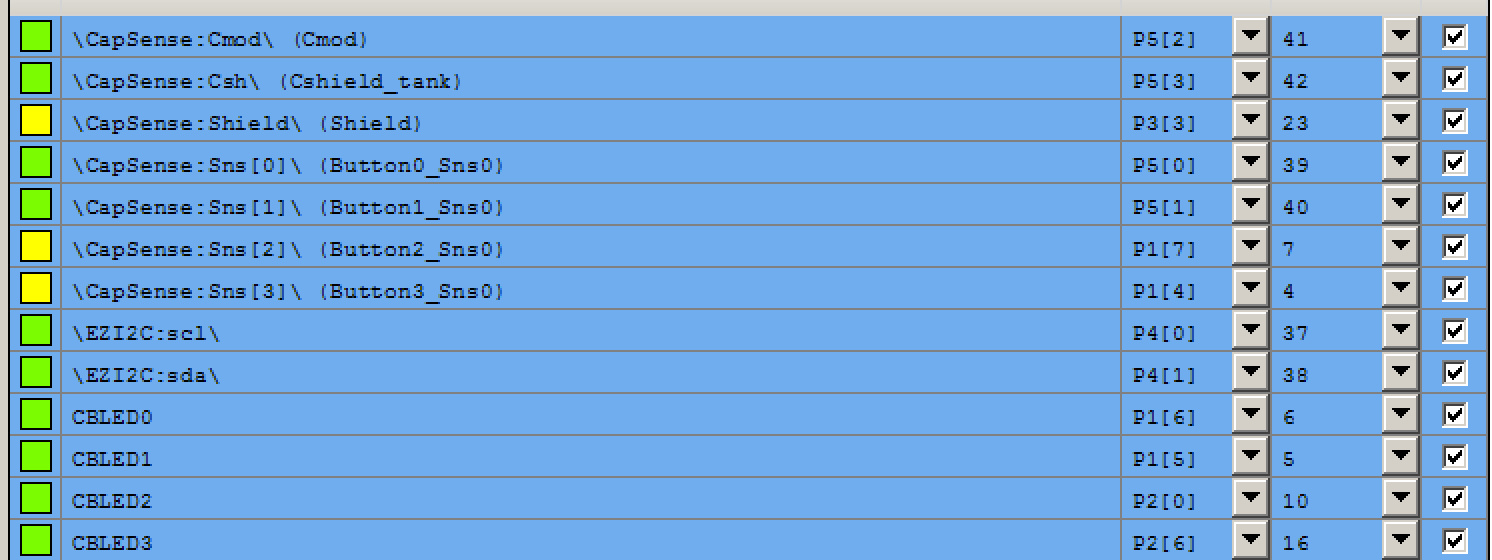
The last step in configuring the schematic is to assign all of the pins to the correct locations.
PSoC Analog CoProcessor Firmware
One of the great things about all of this process is how easy the firmware is to write.
- Line 3 declares a buffer that will be used to relay the position information to the WICED board. I start the position at 50%
- Lines 8-9 start the EZI2C which starts up the EZI2C protocol and tells it to read from the “position” variable
- Lines 10-11 gets the CapSense going
Inside of the infinite while(1) loop, I read from the CapSense and do the right thing
- Lines 17-22 reads the CapSense status
- Lines 24-27 set the correct position based on which buttons are pressed (notice that if no button is pressed then the position stays the same)
- Line 29 turns on the Bootloader if B0 & B3 are pressed

Testing the PSoC Analog CoProcessor System
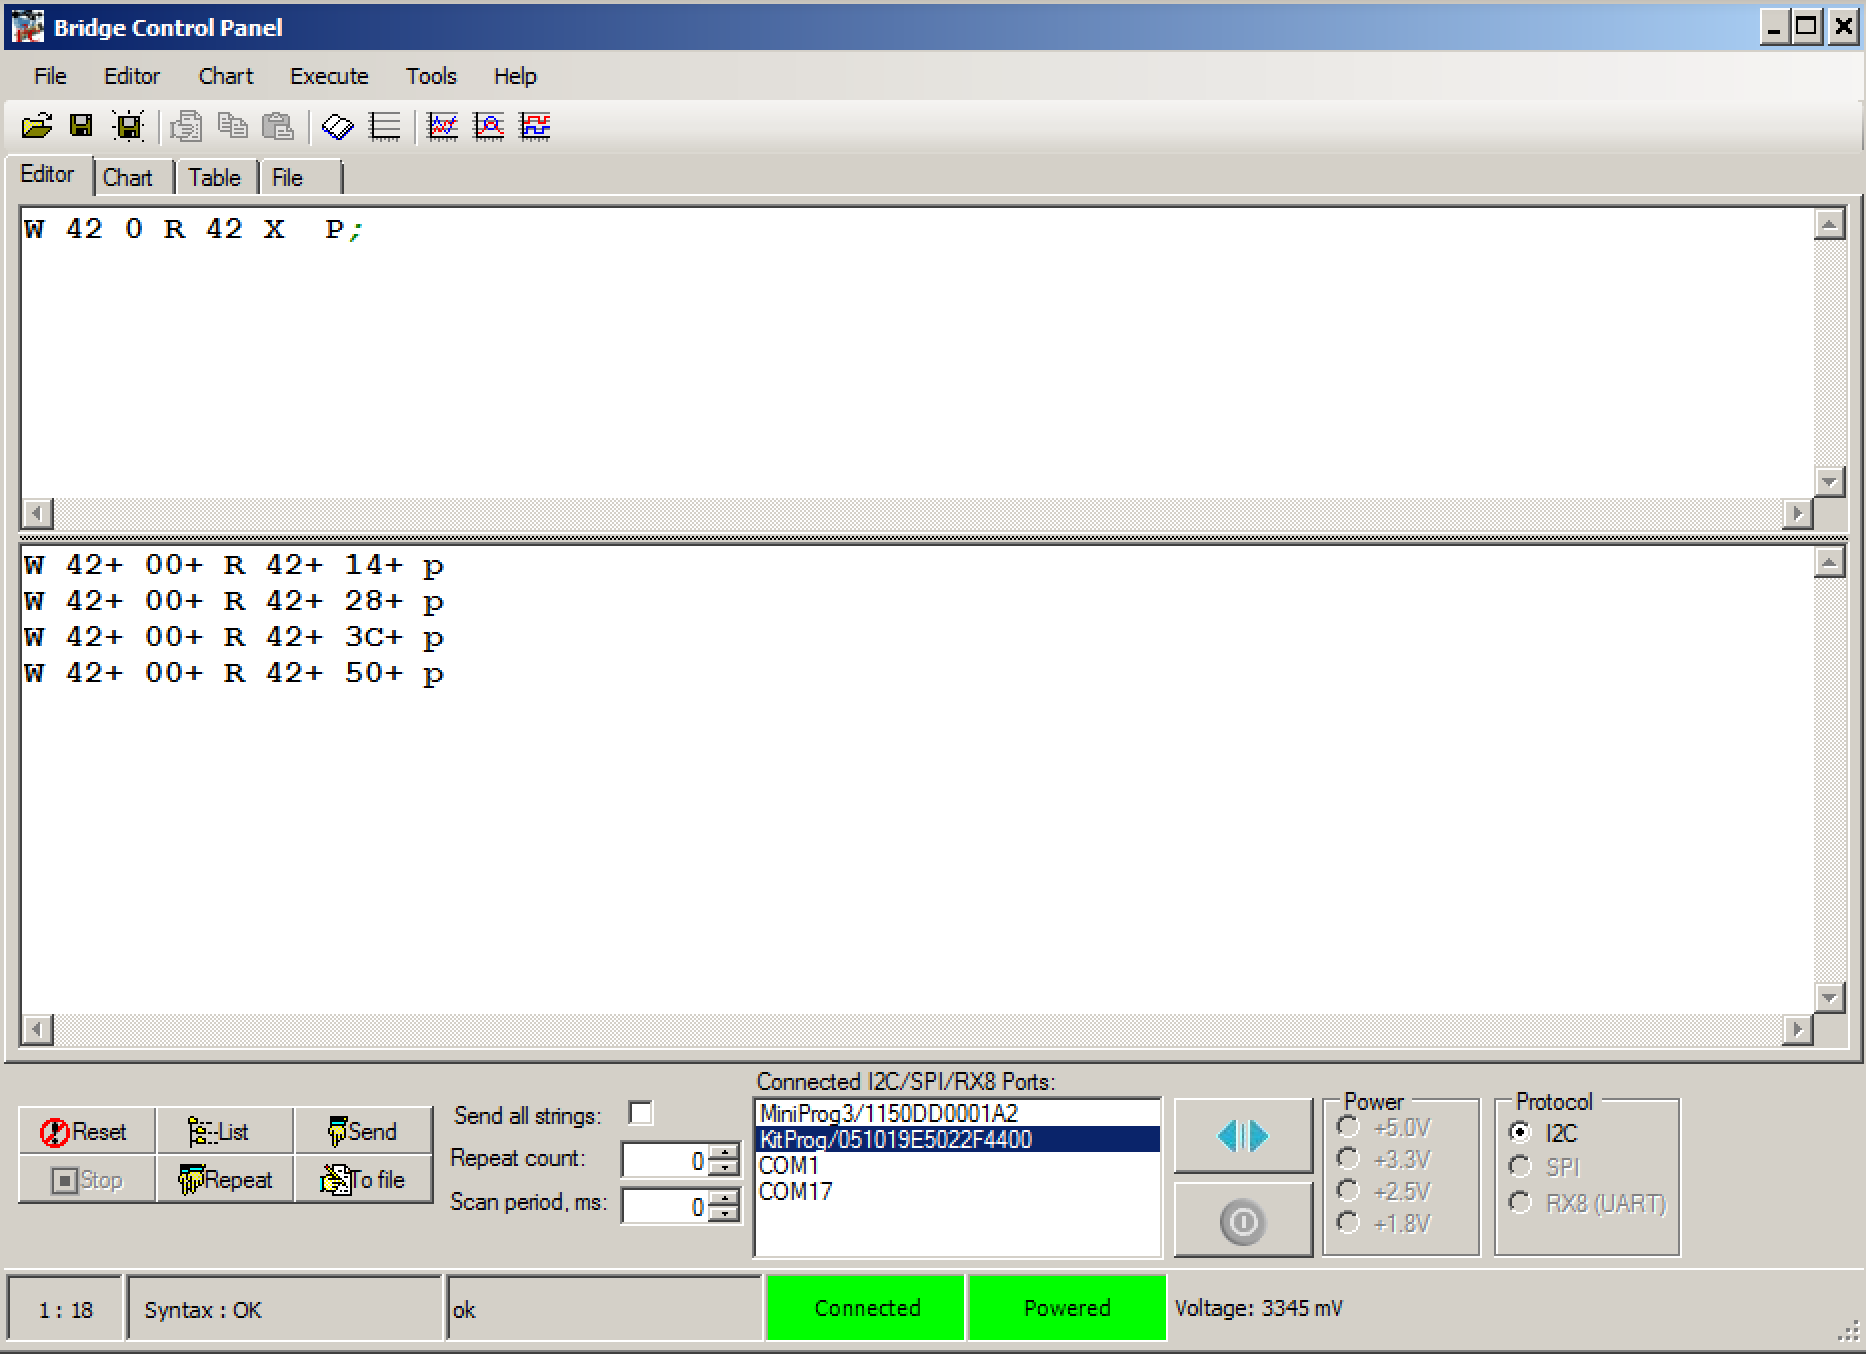
The easiest way to test the system is to use the Bridge Control Panel which comes as part of the PSoC Creator installation. It lets me read the value from the EZ2IC buffer to make sure that the CapSense buttons are doing the right thing. The command language is pretty simple. You can see in the editor window that I typed “W42 0 R 42 X p;” Everytime I press “enter” it sends the I2C commands:
- Send an I2C start
- write the 7-bit I2C address 0x42
- write a 0
- send a restart
- read from address 0x42
- read one byte
- send a stop
You can see that I pressed each button and indeed got 20,40,60,80 (assuming you can convert hex to decimal… but trust me)
In the next article I will modify the WICED Publisher to poll the PSoC Analog CoProcessor and then publish the current state.
No comment yet, add your voice below!