Internet Insanity

Summary

It was pure Internet Insanity at my house this weekend.  On Saturday I was looking at one of my Meraki MR18 access points and realized that it was not plugged into  the LAN via Ethernet.  In other words it was operating as a mesh repeater.  That situation really sucked given that it was only about 20 feet (through a wall) to the main LAN switch.

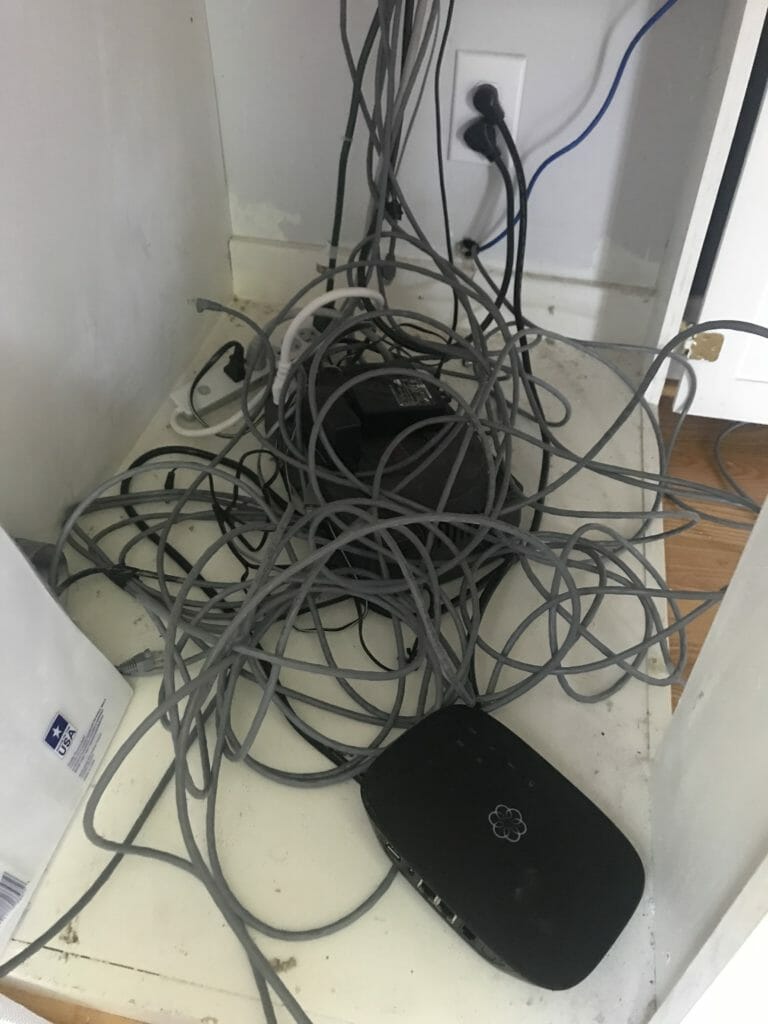
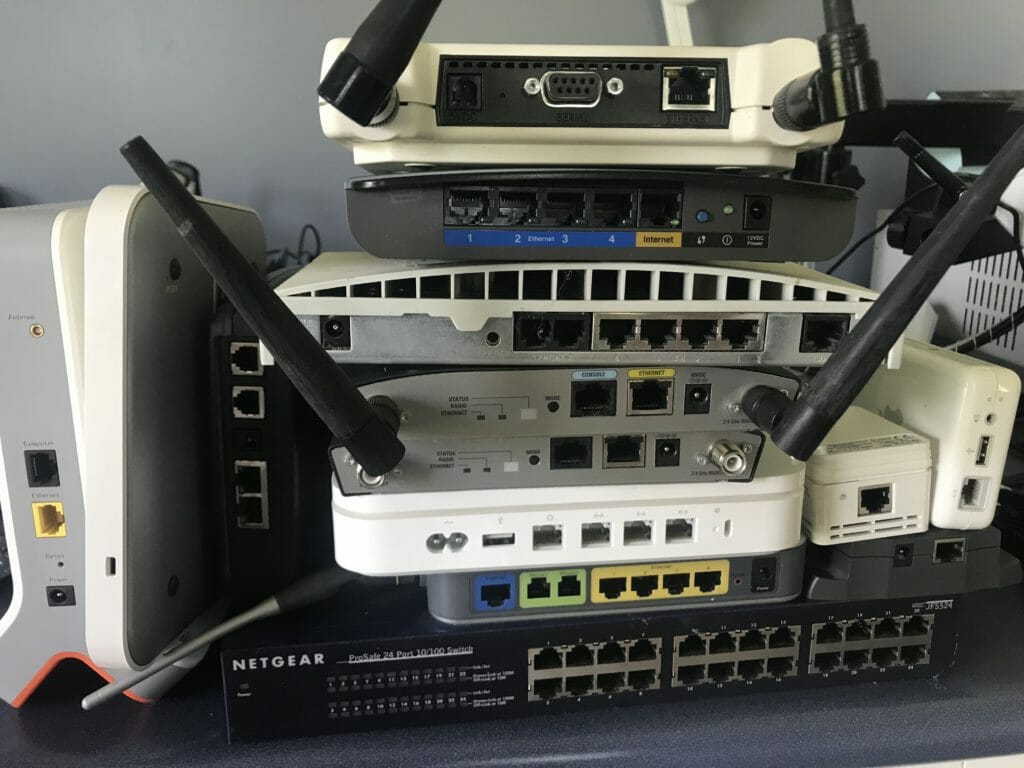
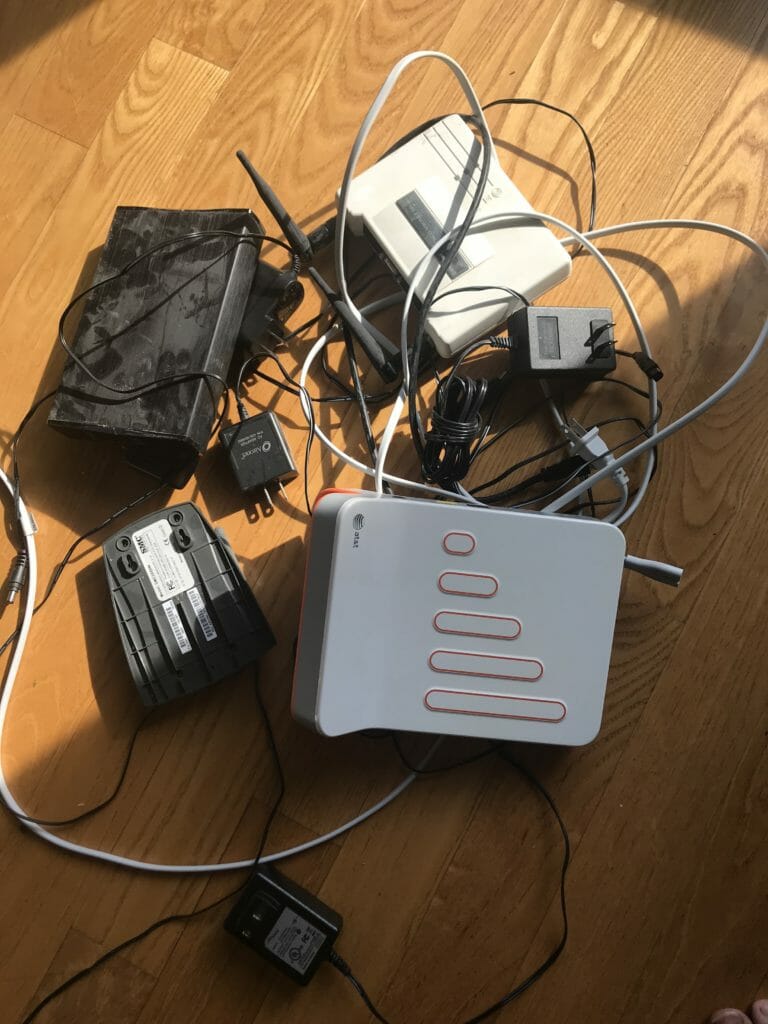
But it was even worse than it seemed because I had 20 years of networking equipment stacked up in my wiring closet.  Yes, my house has a wiring closet.  Doesn’t yours?  The first order of business was to yank it all out except the current stuff.  Check out this pile of old stuff.

Apparently over the years I have used about 7 different WiFI and Ethernet solutions.  How is that given that there hasn’t been that many 802.11s?  Hell if I know.  But this turned into a major major job.  Everywhere I looked there was a pile of wires.

And this insanity … you wouldn’t believe how many ethernet cables there were hidden in the cabinet…

So Nicholas and I headed to Lowes (actually 4 times) and got shelfs, wire zip ties etc.  Then I put him to work. My wiring closet is actually under the stairs, so he first installed rubber tiles on the floor.  Then a shelf, and finally reinstalled all of the networking gear.

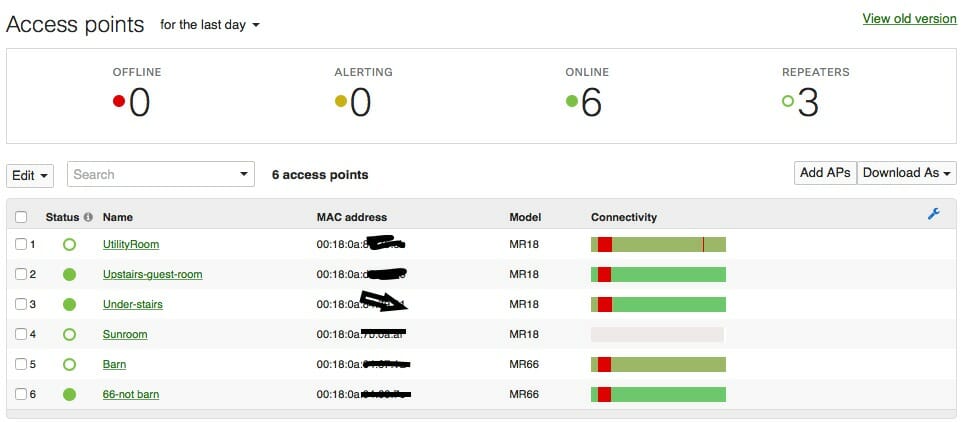
Now things are much better on my network.  I use Meraki MR18’s which are 802.11ac radios.  They also have the ability to mesh with each other.  The three radios that you see in the picture with the green circle (not filled) are meshed into the network.

And my gigabit ethernet switch.

The MR18s can look at the spectrum usage… looks like 5ghz is basically empty.

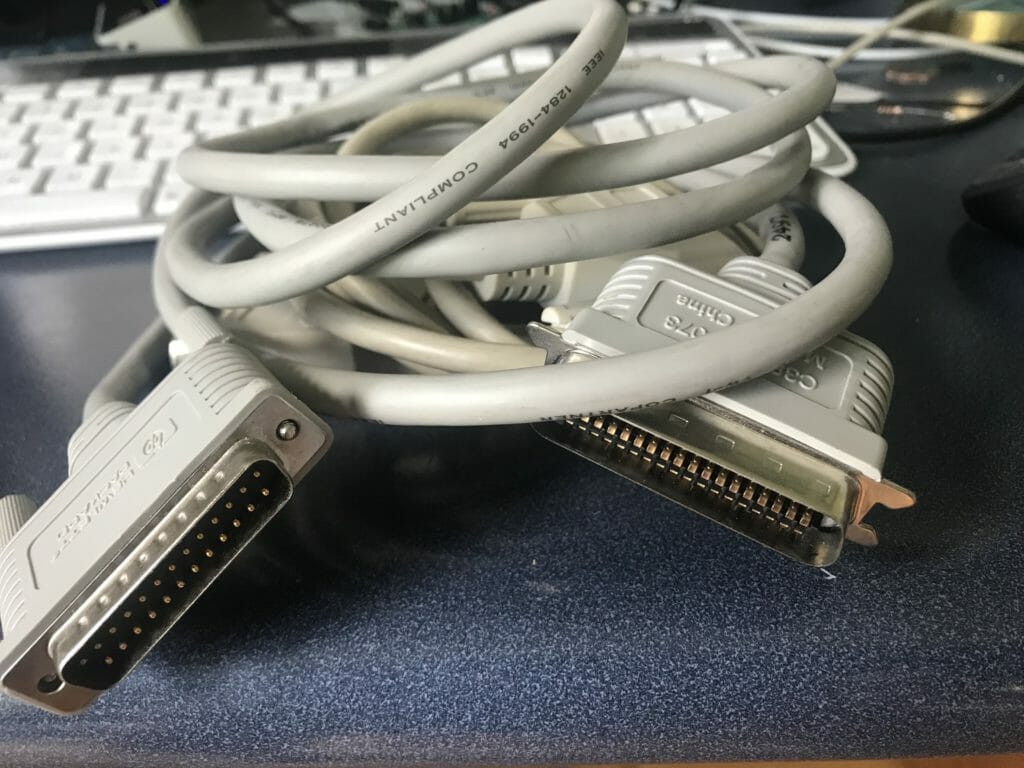
While I was cleaning I found two of this cable… Ill bet you don’t know what it is…


Install AMQP + MQTT + RabbitMQ + Docker + Vagrant + VirtualBox

A couple of weeks ago I told you about teaching the first Cypress Academy WICED WiFi class.  In that class, one of the things that I taught people is how to connect a WICED WiFi devkit to the Amazon AWS IOT Cloud using MQTT (which I am going to will publish here).  At the time I was writing the material I wanted to create a “cloud” server that ran on the LAN for the classroom, but there were too many moving parts for me to attack that.  However, the last couple of days I have had some free time so I have gone through all of the steps to create the first part of the Cypress Academy Cloud.  The cloud will have:

  • An RabbitMQ MQTT server
  • An RabbitMQ AMQP server
  • A COAP server (future)
  • An HTTP server

Each of these four protocols are in common use by IoT devices to transfer data to the cloud as they are all lightweight.

In order to simply things, I wanted to run MQTT and AMQP in Docker containers.  And to make matters a bit more fun, on my laptop I only run test stuff inside of a virtual machine (VirtualBox in this case), never on the bare metal.  In order to facilitate the provisioning of the virtual machine I use a tool called Vagrant which can create and configure a virtual machine from a single configuration file called “Vagrantfile”.

Nicholas, my son, always comes in my office and asks “what are you doing”.  I decided years ago to always do my best to answer this question.  On Tuesday, when he asked the question I started talking and quickly realized that this whole thing was a little bit complicated…. well, actually a lot complicated.  So, I did what I always do, drew a picture:

mqtt-network-pic

The get all of this going I:

  1. Install VirtualBox 5.1 on the Mac (Use the simple Mac installer)
  2. Install Vagrant 1.8.7 on the Mac (Use the simple Mac installer)
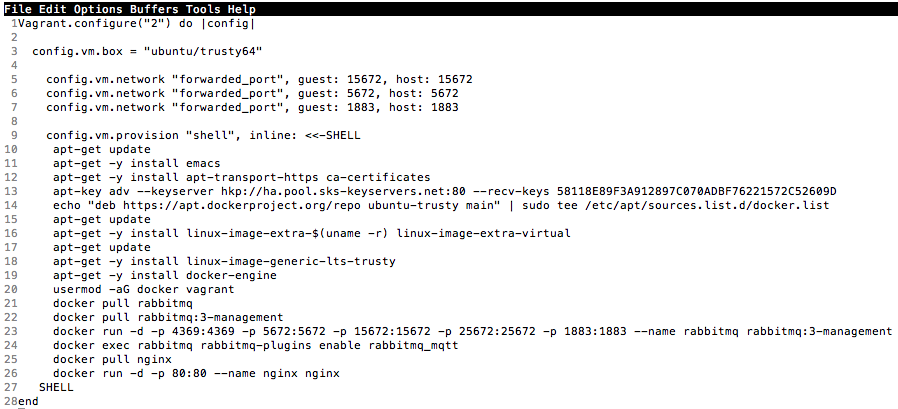
  3. Create a “Vagrantfile” (by running “vagrant init”) that:
    1. (line 3) Creates a Ubuntu trusty installation in VirtualBox
    2. (lines 5-7) Forwards ports TCP ports 15672, 1883 and 5672
    3. (line 11) Install emacs (which is the best editor)
    4. (lines 12-20) Installs Docker into the Ubuntu 14.04 (Trusty) virtual machine using instructions from the docker website.  There is a vagrant Ubuntu box based on Precise Pangolin 12.04 but the built in kernel does not seem to work with Docker and it wasn’t worth figuring out why/how to fix it.
      1. (line 21-22) Configures Docker to get the RabbitMQ and Management docker images using instructions from the docker rabbitmq website
        1. (line 23) Creates a Docker container called “rabbitmq” and forwards ports 15672, 1883, and 5672
        2. (line 24) Enables the MQTT Plugin
      2. (line 25)Configures Docker to get the NGINX HTTP container
        1. (line 26) Create and run a docker container with NGINX and forward Port 80

screen-shot-2016-11-25-at-9-51-57-am

The networking aspect of this was a bit tricky to understand when I first went through the process.  Docker and VirtualBox both create private networks for the virtual machines/containers to run in.   In order to get from the native Mac –> Ubuntu VirtualBox –> Docker RabbitMQ container you need to setup port forwarding tables.

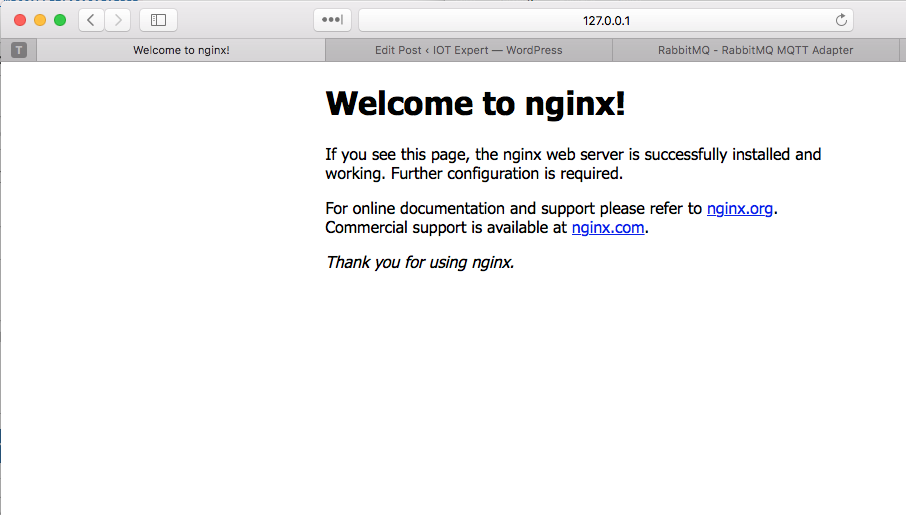
To test all of this first prove that the NGIX server is working go to http://127.0.0.1:8000

screen-shot-2016-11-25-at-10-16-19-am

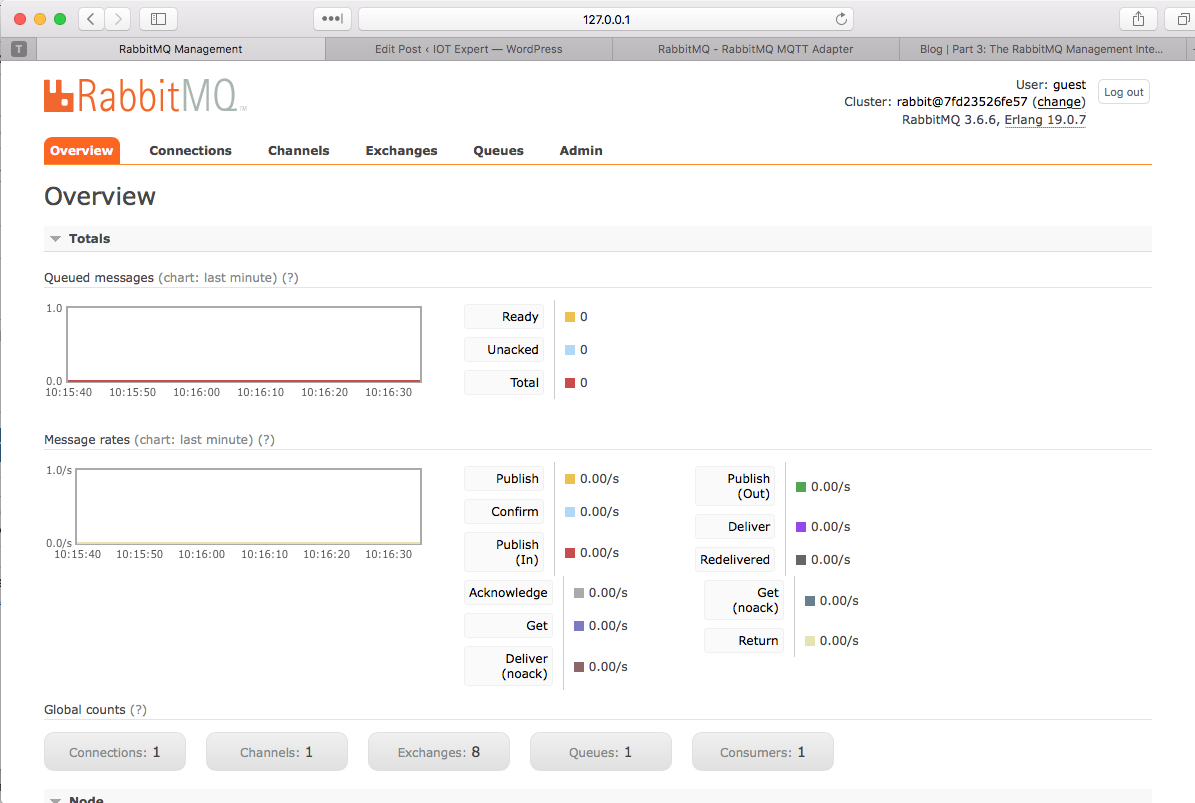
And the RabbitMQ Management Console at http://127.0.0.1:15672

screen-shot-2016-11-25-at-10-16-37-am

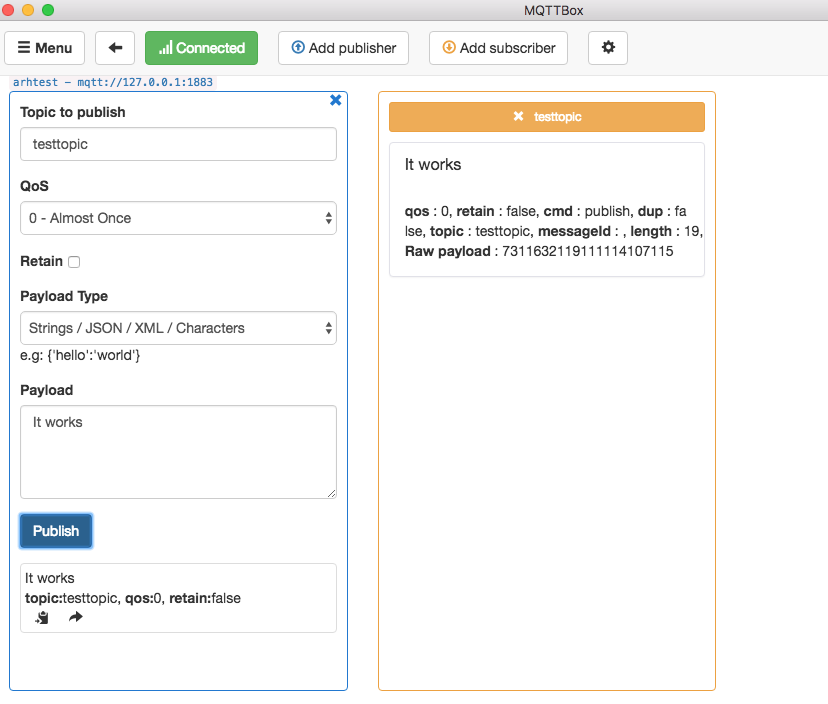
And test the MQTT server on port 1883 using MQTTBox

screen-shot-2016-11-25-at-10-17-37-am

RADIUS + Meraki + Beef Brisket

Last weekend was one of those times I felt like jabbing an icepick in my ear.  My “simple” project of cooking a beef brisket turned into a cascading series of pain.  What do brisket and IOT have to do with each other?  Here is the story:  A beef brisket needs to be smoked for no less than 12-15 hours.  This is a total PITA without some computer help as by far the most important variable in doing this right is the temperature of the Pit.  To solve this, I use the Cyber-Q from BBQ Guru.

CyberQ

This little box has

  1. 4x thermocouple based temperature probes (one for the “pit” and 3 for the BBQ)
  2. A Fan controlled by a PID
  3. WIFI with a build-in web server

This box turns your smoker into an IOT device.  What it really means is that you can pay very little attention to your smoker and it will stay within a few degrees of the target.  Which is awesome.  It can also be attached to your network so that you can monitor it from wherever you are (assuming you are willing to poke a hole in your firewall).

On Saturday I get up at 4:00AM to start the Brisket, but when I plug in the Cyber-Q the damn thing won’t attach to my freaking WIFI network.  With this box, this happens to me approximately 50% of the time.  I start and stop it a half a dozen times with the hope that it will attach, but to no avail which causes me nothing but frustration.  The WIFI at my house is protected using WPA2 Personal and all I can figure is that the Microchip WIFI  chipset in the Cyber-q is flaky but I suppose that it could also be the Meraki AP.

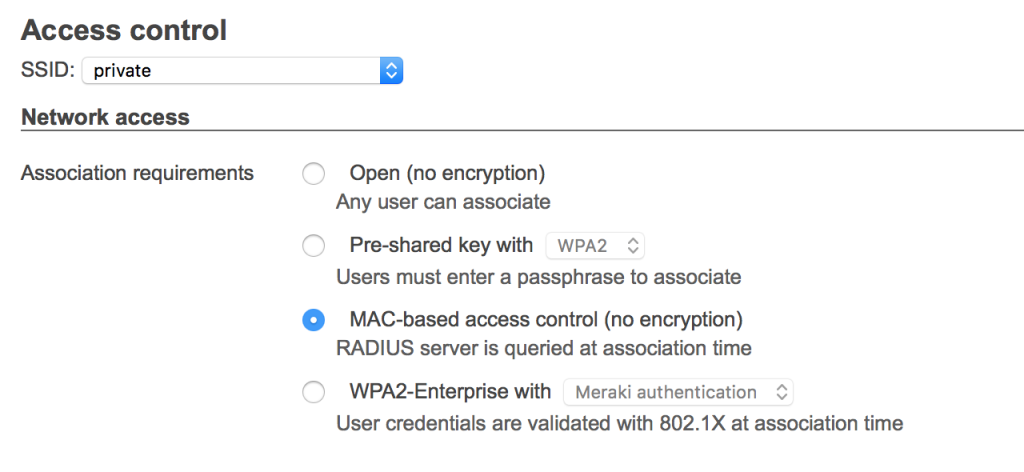
To attempt to fix the problem I decide to create an open WIFI network and attach the Cyber-Q to it.  That works fine, but now I have an open network which is mostly OK since I live out in the country, but it is still annoying.  When I created the new SSID I noticed that Meraki allows for MAC based access control using a RADIUS server.

Screen Shot 2016-07-18 at 8.30.07 AM

That is cool now all I have to do is figure out how to build a RADIUS server.  Actually, I need to start by figuring out what RADIUS server is.

It turns out that RADIUS stands for Remote Authentication Dial In User Server.  The “Dial In” part of the name gives you the hint that it has been around for a long time.   Basically a RADIUS server was built to perform three functions, Authentication, Authorization and Accounting in dial up networks.  When someone dialed in the RADIUS server validated the password, gave them access to the network and then kept track of their usage.  Since the days of dial-up, RADIUS servers have undergone the out of control process of creeping functionality and they now support a frightening number of possible setups.

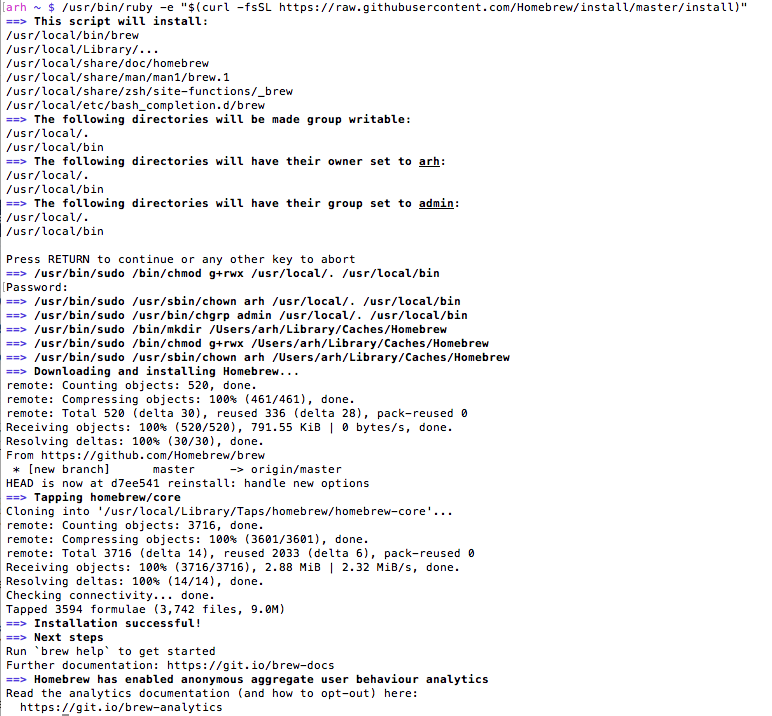
My fist step in this journey was to look around on the internet and find a suitable RADIUS server.  FreeRadius seems to be the most popular tool around and it runs on my mac server.  When I looked on their website, there was no prebuilt version… go fish.  I started the process of getting Free Radius to build, but when I was looking around for a solution to one of the install problem I found “HomeBrew” which claims to be the missing package manager for Mac.  To install Brew you just need to run

/usr/bin/ruby -e "$(curl -fsSL https://raw.githubusercontent.com/Homebrew/install/master/install)"

Screen Shot 2016-07-18 at 10.16.43 AM

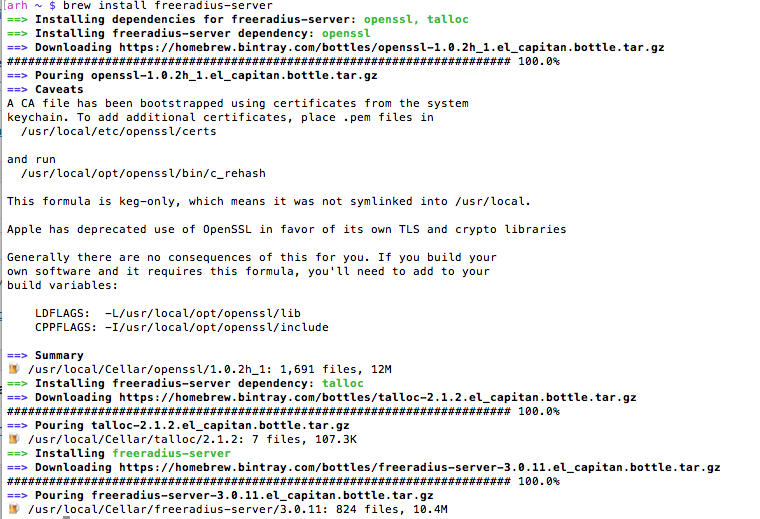
After that I can use brew to install FreeRadius using the following command:

brew install freeradius-server

Screen Shot 2016-07-18 at 10.18.56 AM

After running the brew command you will have a built version of FreeRadius in /usr/local/Cellar/freeradius-server/3.0.11

So how does it work?  When a device tries to attach to the network, the Meraki will query the Radius server to see if their is a user/password combination that matches the mac address of the device.  To make this work I just add a username/password to the …/freeradius-server/3.0.11/etc/raddb/users file so that it looks like this:

001ec020425a Cleartext-Password := “001ec020425a”

The “001ec020425a” is just the MAC address of the Cyber-q.

The next step is to tell the Mac OS-X to start the Radius server when it boots.  To do this you need to create  “plist” file with the right stuff in it to make the Launchd start the daemon when the Mac boots.  There is a tutorial on the web here.

The first step is to create a file called org.freeradius.radius-server.plist and put it into the directory /Library/LaunchDaemons.  The file just contains instructions to the launchd to start the radiusd (daemon) when the mac starts.  Here is the file:

<?xml version="1.0" encoding="UTF-8"?>
<!DOCTYPE plist PUBLIC "-//Apple//DTD PLIST 1.0//EN" "http://www.apple.com/DTDs/PropertyList-1.0.dtd">
<plist version="1.0">
<dict>
<key>Label</key>
<string>org.freeradius.radius-server</string>
<key>Program</key>
<string>/usr/local/Cellar/freeradius-server/3.0.11/bin/radiusd</string>
<key>RunAtLoad</key>
<true/>
</dict>
</plist>

After that you need to run:

  • sudo launchctl load org.freeradius.radius-server

Then

  • sudo launchtl start org.freeradius.radius-server

Now that I have a radiusd running I need to tell the Meraki about it.  To do that I change the SSID setup

Screen Shot 2016-07-18 at 10.22.42 AM

There are a few problems with this setup.

  1. The devices that are attached to the open WIFI broadcast in the open
  2. It is easy enough to change the MAC address of device and then hack your way onto the network.
  3. Any broadcast packets from the private network  are broadcast in the open on the WIFI network

But none of these problems are serious enough given that I am in “gun range” of anyone who is within “hacking range.”

The Creek: Meraki Network

I have very mixed emotions about posting a diagram of the network at my house.  On one hand the network is super cool and lets me do all kinds of interesting things so I think a lot of people will be interested in it.  On the other hand giving information that could be used by hackers might not be such a good idea.  I don’t think I am giving away to much crucial information, but I don’t know that to be the case.

OK.  Here it is.  I use a bunch of Meraki networking equipment from Cisco.  Meraki is a cloud managed infrastructure company that was bought by Cisco in 2012.   Cisco seems to position it for smallish companies who need first class networking but don’t have lots of people to support it.  Cisco handles all of the patching, network maintenance, etc. but you still have complete control to do about whatever you want.  In my case, it can do more things that I am capable of doing.

I wanted a network that could:

  • Provide a wide physical area of WiFi coverage (I live out in the country in lots of space)
  • Provide private and public WiFi on separate VLANs
  • Wirelessly extend both the WiFi and the ethernet network into the barn
  • Traffic shape all of the networks onto the Internet
  • Manage my children access to the Internet
  • Provide excellent firewall services

I have a close friend who works at Cisco as an Application Engineer who convinced me to choose Meraki.  Overall I am sure that there is a premium that you need to pay, but it works great and is easy to learn and administrate.

First the physical diagram:

meraki-physical-a

The MR60W was designed to be a complete small office solution.  It has

  • 5 ports of 1G ethernet
  • WiFi (Both 5G Hz and 2.4GHz)
  • Firewall
  • Connection to Internet

The MR60W has been superseded by the MR64W, Cisco appears to have removed the MR60W product landing page from their website or I would have linked to it, but I did find a review here.  They call this the “security appliance” as it is the principal device in securing your network.

The MS22P (which has also been obsoleted) is a 24 port, power-over-ethernet, gigabit ethernet switch.  It supports all of the switching things that I needed to do to have separate VLANs.  This looks like it has been replaced by the MS220-24.  In my office I have several devices that I run on wired ethernet including a couple of MACs, and a 17TB dual ethernet Segate RAID box.

The MR66s are outdoor access points that I use to

  • Bridge between the Barn and my house (they have Yagis)
  • Provide Wifi in the barn and around the back of my house
  • Provide ethernet in the Barn

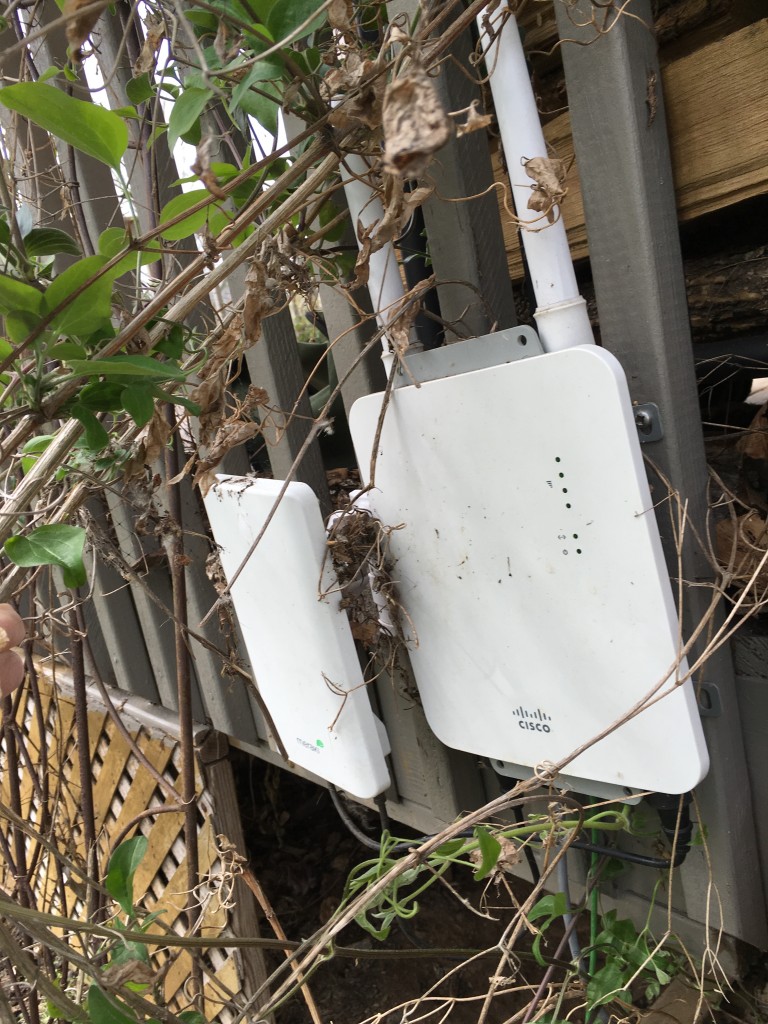
This is a picture of the access point attached to the side of my porch.  You can see the Yagi antenna on the left.

IMG_2781

This is a picture of the “other end” of the bridge.  The Yagi points towards my house and the other Yagi.

IMG_2783

The MR16 is is a WiFI access point (that has been superseded by the MR18).  It is located in the far corner of my upstairs and provided Wifi for the front part of the house.  It runs off of Power-over-Ethernet (which made it easy to install).

Configuration

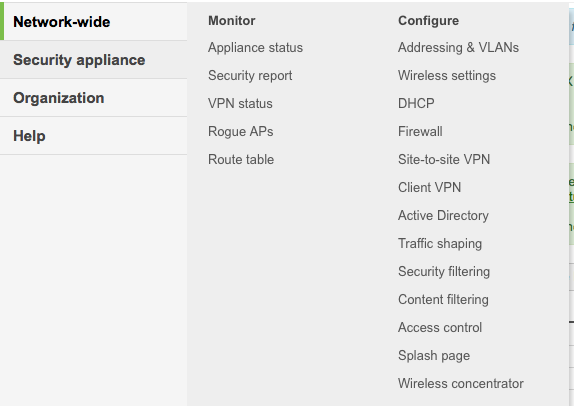
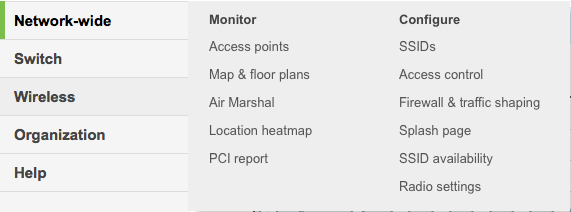
When you enter the Meraki control website there are an unbelievable number of configuration and monitoring screens that you have access to.  Here are a few of the menus:

Screen Shot 2016-04-07 at 5.39.04 AM

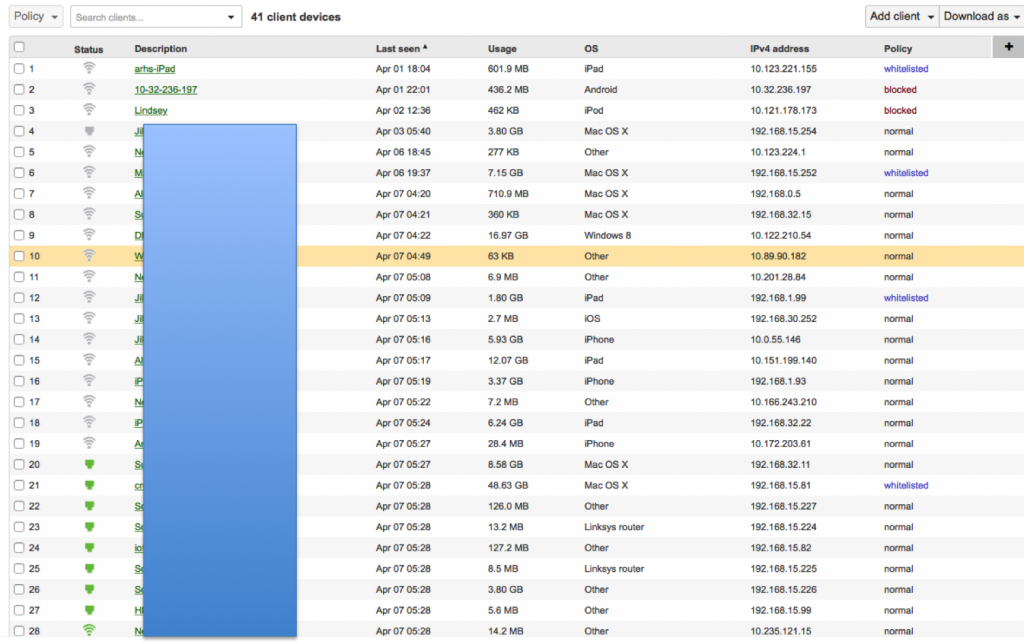
The “Cients” menu give you this screen where you can monitor the clients that are accessing your network and whitelist or blacklist them.  Notice that I have two unknown people who joined the guest network blocked (probably the neighbors kids).

clients

This menu gives you access to all of the configuration settings of your network including VLANs, Wireless network, DHCP etc.  The system will also allow you to create VPN tunnels between offices.

Screen Shot 2016-04-07 at 5.39.13 AM

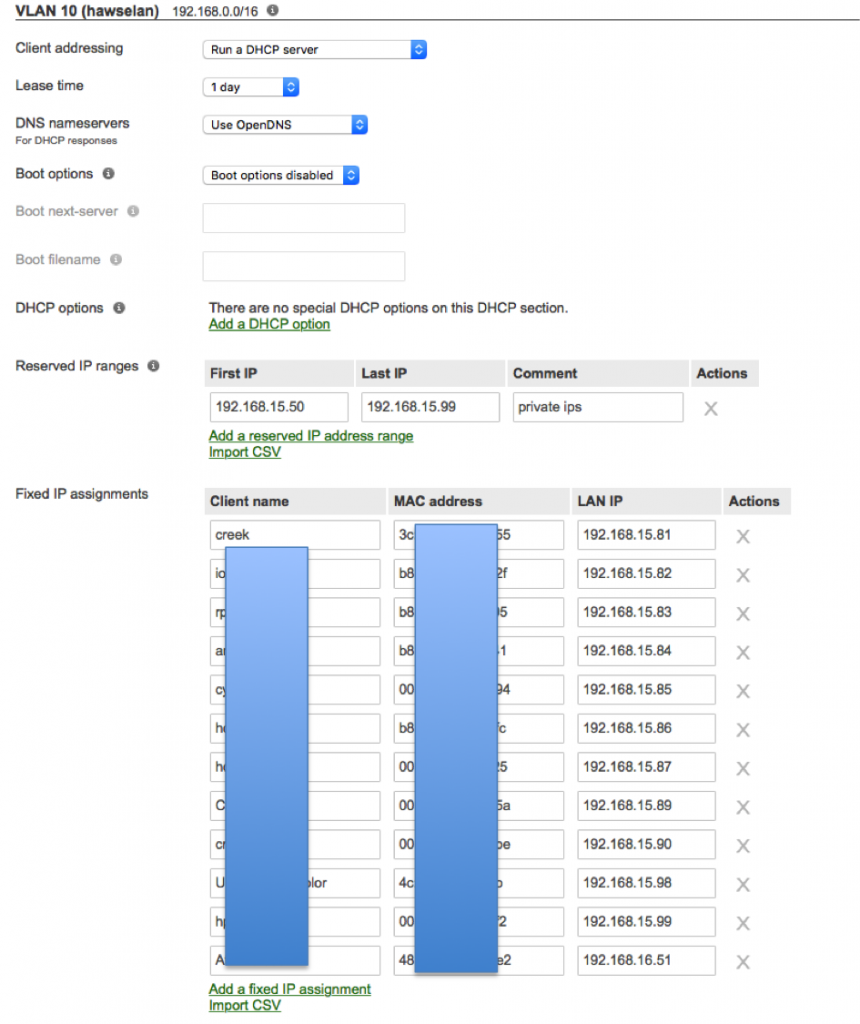
Here is the DHCP screen.  You can see that I have a number of “fixed” IP assignment based on ethernet mac addresses.

dhcp

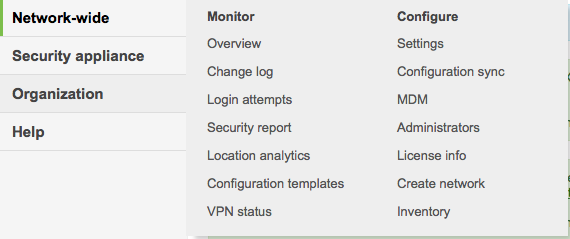
This menu has global settings about your network, for instance the Administrators menu where you can configure everyone who is allowed to log into the management web page.

Screen Shot 2016-04-07 at 5.39.22 AM

This menu allows you to control the switches on your network.

Screen Shot 2016-04-07 at 5.39.52 AM

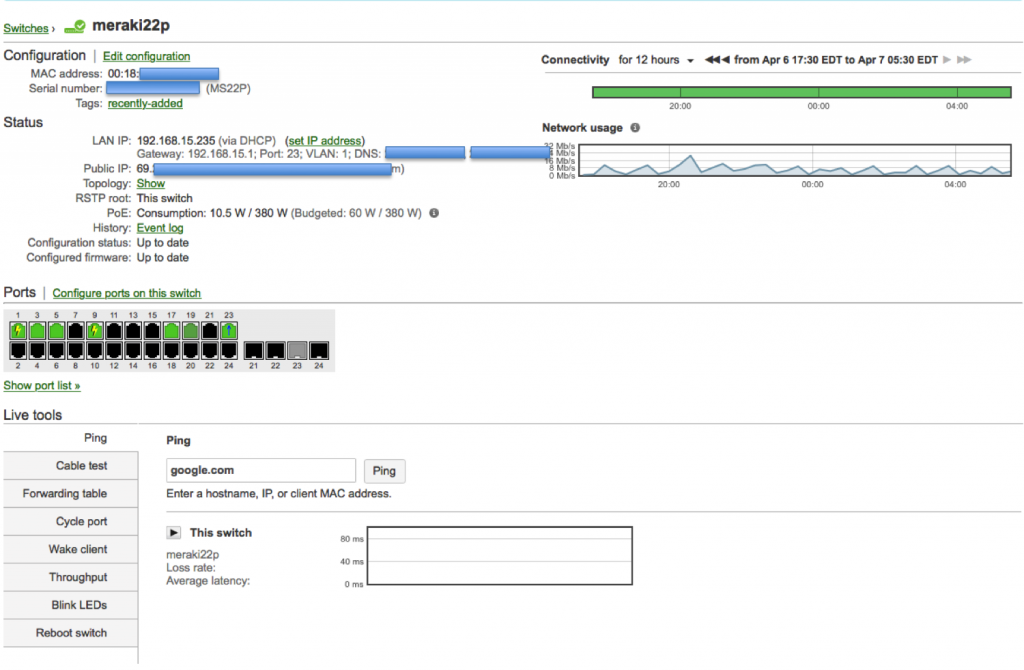
Here is a screenshot of the MS22P Ethernet Switch:

m22p

This menu allows you to control your wireless networks.

Screen Shot 2016-04-07 at 5.40.00 AM

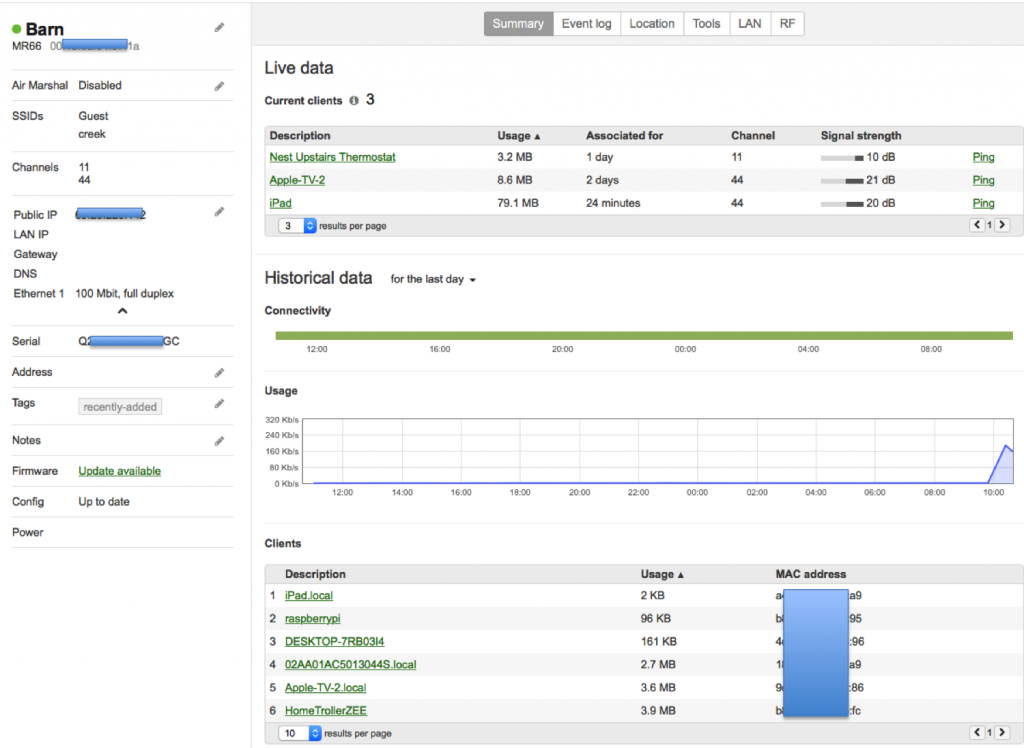
Here is the screen that shows the status of one of the WiFi Access Points

mwireless

All in all the network works very well.  Send me an email or leave a comment if you have a question.

Git and SSH

Summary

In a previous post I talked about the steps I took to repurpose my old Mac Mini as a server.  In this post I will explain the steps that I went through to make it act as a “Git” server.  Although I am an active github.com user it is sometimes nice to have something stored locally as well.  The easiest (and best) way to make a git server on your network is to use SSH.  In order to make SSH work you need to know about encryption and keys.  I knew in an abstract way about encryption but I hadn’t really dug through how all of the parts operate in detail which I had to do to figure this out.  I will start by explaining the practical mechanics of encryption, and then take you through the rest of the steps to setup and use Git.

  1. Symmetric and Asymmetric Encryption: A Foundation
  2. Setup Git as user on your Server
  3. Create RSA Keys for a User
  4. Give user permission to write into Git User Account
  5. Create a new repository called “repoName”
  6. Using the new repository

Symmetric and Asymmetric Encryption: A Foundation

SSH stands for Secure SHell.   The reason it is called Secure is that it uses an encrypted channel for all communication.  But how can that be?  How do you get a secure channel going?  And what does it mean to have a secure channel?  What is secure?  This could be a very complicated topic as establishing a fundamental mathematical understanding of encryption requires competence in advanced mathematics that is far beyond most everybody on the face of this planet.  It is also beyond what there is room to type in this blog.  It is also far beyond what I have the ability to explain.  But, don’t despair.  The practical aspects of getting this going are actually pretty simple.

First a word of caution.  When you make the changes to your computers/network to make this stuff work, you are playing with fire.  If you are not careful, you will compromise the security of your system.  At this point all of the computer and operating system vendors have spent considerable amounts of time and money making computers safer by installing firewalls and closing security holes.  For as much as they have spent making security, the fucking hackers, the Chinese government and the assholes in US government have put 10x that energy into trying to steal your information.

All encryption does the same thing.  It takes un-encrypted data, combines it with a key, and runs it through an encryption algorithm to produce encrypted data.  You then transmit the encrypted data over the network.  When the other side receives the data it decrypts the encrypted data by combining it with a key, and running the decrypt algorithm.

There are two types of encryption schemes, symmetric and asymmetric.

Symmetric means that both sides use the same key.  That is, the key that you encrypt with is the same as the key you unencrypt with.  Examples of this type of encryption include AES and DES.  This type of encryption is preferred because it is very fast and secure.  However, both sides need to know the key before you can use it.  If you have never talked before how do you get both sides to know the key?  This is a big problem.

Asymmetric, often called Public Key, encryption techniques use two keys that are mathematically related.  The keys are often referred to as the “public” and the “private” keys.  The private key can be used to decrypt data that the public key encrypted and vis versa.  This is super cool because you can give out your public key to everyone, they can encrypt data, then only your private key can be used to decrypt it.  The problem with this encryption technique is that it is slow.

What now?  The most common technique to communicate is to

  • You open an unencrypted connection to a server
  • You give out your public key to the server
  • The server then creates a random symmetric key
  • The server then encrypts its newly created random symmetric key using your public key and sends it back to you
  • You use your private key to decrypt the symmetric key
  • You open a new channel using symmetric key encryption

public-key-exchange

This scheme is completely effective against eavesdropping.  What happens if someone eavesdrops the original public key?  That is OK because they won’t have the “client private key” required to decrypt the symmetric key.  What this scheme doesn’t work against is called man-in-the-middle (MIM).  An MIM attack works by

  • You open an unencrypted connection to a server [but it really turns out that it is a MIM]
  • You send your public key to the MIM
  • The MIM opens a channel to the server
  • The MIM sends its public key to the server
  • The Server encrypts a symmetric key using the MIMs public key and send it back to the MIM
  • The MIM decrypts the symmetric key using its private key
  • The MIM send you the symmetric key encrypted with your public key
  • You unencrypt the MIM symmetric key using your private key
  • Then you open new channel to the MIM using the symmetric key
  • The MIM opens up a channel to the server using the symmetric key

Once the MIM is in the middle it can read all of the traffic.  You are only vulnerable to this attack if the MIM gets in the middle on the first transaction.  After that things are secure.  However, the MIM can easily happen if someone gets control of an intermediate connection point in the network-like e.g. WIFI access point.  The only way to protect against MIM attacks is to have a Certificate Authority (CA).  A CA works by verifying that the Public Key actually belongs to who you think it belongs to by using a cryptographic hash.  If the MIM sends you its public key then you check with the CA and find out that the MIM public key does not belong to the server that you are trying to connect to, then you know that you are being subjected to an MIM attack.  How do you prevent an MIM when talking to a CA?  This is done by building in known valid certificates into your program.   This morning when I looked at the certificates on my Mac there were 179 built in, valid certificates.  This is cool for HTTPS but what about SSH?  With SSH you will need to manually verify the public key of the host you are attaching to.  There is a nice discussion of this topic here.

When you configure your GIT server you will manually copy your public keys onto the GIT server.  This will prevent MIM attacks and will support the establishment of a symmetric encrypted connection.  This is called an out-of-band (OOB) key exchange.  On github this is done with a browser.   For other security systems it could be a USB stick or other scheme.  More on that later.  Now onto the mechanics of making the Git server work.

Setup Git as user on your Server

First you need to enable Remote Login (ssh) from the System Settings –> Sharing.  Make sure that it enabled for All Users
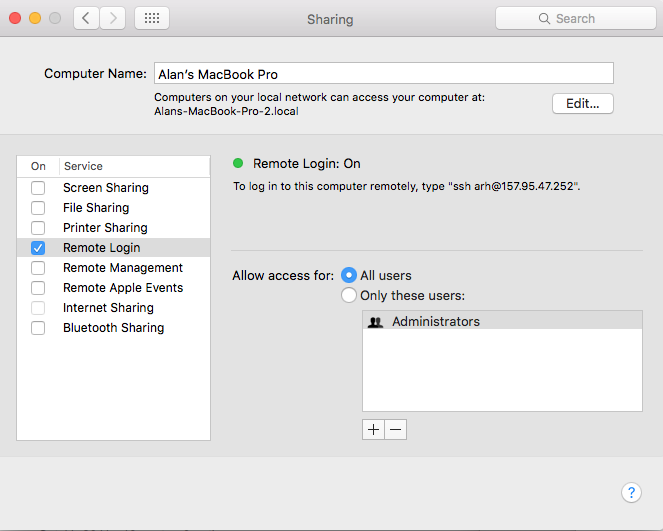
Remote Login

Then you need to turn on the firewall  System Settings –> Security & Privacy
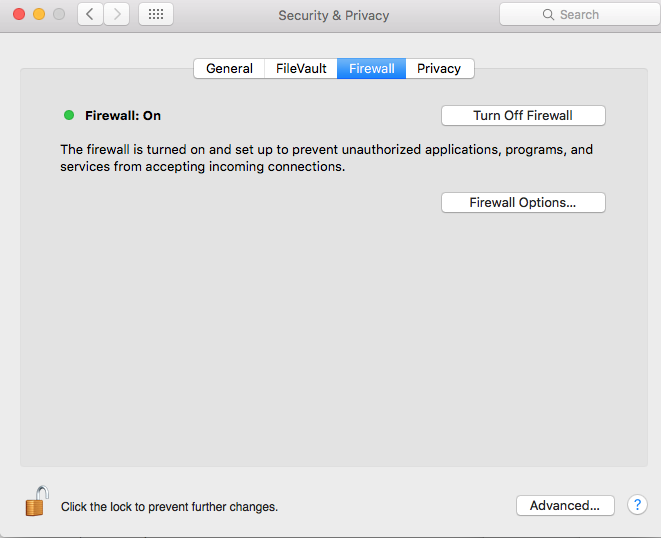
Firewall

Press the “Firewall Option…” turn off the “Block all incoming connections” and then allow Remote Login (SSH)
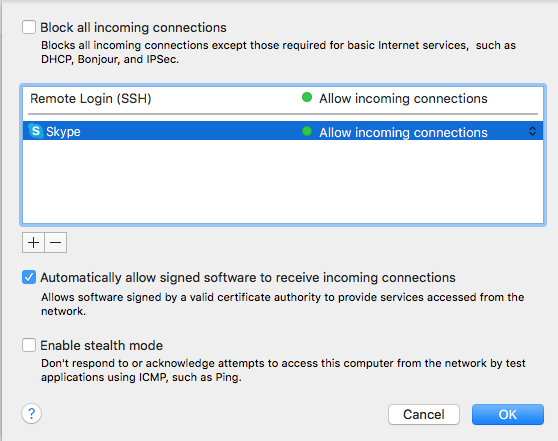
Firewall Remote Login

Then you need to create a “git” user account.  The account should be a standard account.
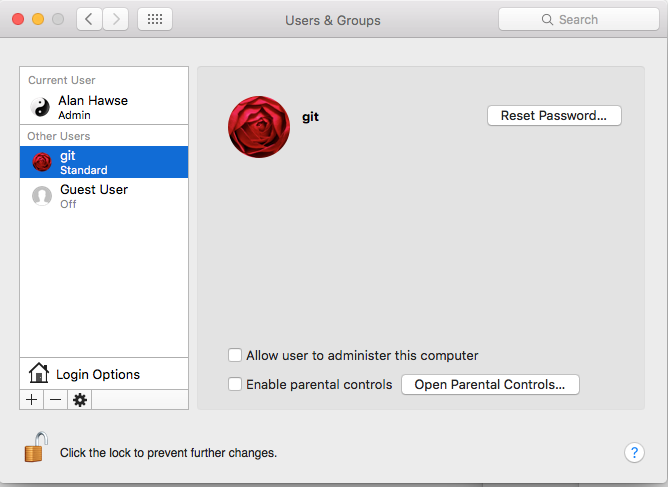
Create GIt Account

The next step needs to be done in a terminal window.  You need to have root access (your account need to be authorized as an administrator) to follow these steps.  This will create the place to store the SSH RSA Keys.

command comment
su – git log in a the git user.  You will need to type the password that you set when you setup the git account
mkdir .ssh Create the directory with the public and private secure shell keys
chmod 700 .ssh This directory should only be redable by the git user
cd .ssh
touch "authorized_keys" Create a file that you will add public keys to of the people who are allowed to upload to this server
sudo chpass -s /usr/bin/git-shell git Make the git user so that it can only do git commands.  This is a way to enhance security by not letting the git account do anything other than local git commands.

Create RSA keys for a user

In order for a user to have access to the git account on the server he will need to have RSA Keys.  Specifically, in the ~/.ssh directory of the user you will need two files, id_rsa and id_rsa.pub  These files are the public and the private keys of the user.  When you run the command

  • ssh-keygen -t rsa -b 4096 -C “user@computer”

it will first ask you where to store the keys.  If you already have keys it will give you the option to store them someplace other than the default location.  Then ssh-keygen will ask you for the password to encrypt the private key file.  I don’t use a password on my private key file, but the security would probably be better if I did.  The “-C” option just inserts the text in quotations into the key file as a comment so that when you look at the file you can figure out what the key is associated with.
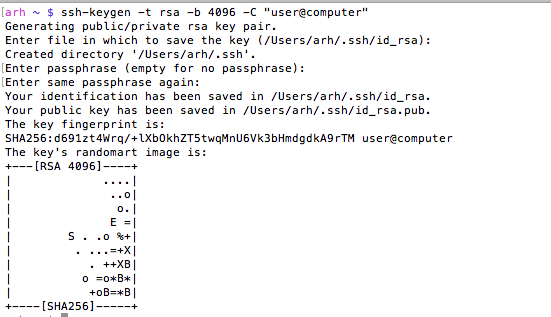
Screen Shot 2016-03-29 at 7.24.22 AM

You can look at the MD5 signature (which is what github displays) of a public key by running

ssh-keygen -E md5 -lf  id_rsa.pub

Give user permission to write into your Git User Account

In order for a user to be able to access the git server you will need to append his public key to the “~git/.ssh/authorized keys” file.  As I talked about above, in the users home directory you will find a directory called “.ssh”.  In that directory there will be two files, one is called “id_rsa.pub” which is the RSA public key, the other is called “id_rsa” which is called the private key.  You should be very careful to only copy the public key.

  • sudo cat id_rsa.pub >> ~git/.ssh/authorized_keys

In this example both users were on the same computer, but they don’t have to be.  In that case you will need to copy the file some other way (ftp, scp, the browser, …)  Then append it to the ~git/.ssh/authorized_keys file.

Create a new repository called “repoName”

Once you have everything setup with the git user and the SSH RSA keys you will need to create a “bare” repository

  • cd ~git
  • sudo git init –bare repoName.git
  • sudo chown -R git repoName.git

Using your new repository

The last thing to do is to setup git remotes for the new repository.  To do this, on your client machine you can either clone it with

  • git clone git@githost:repoName.git

Or if you have an existing repo you can

  • git remote origin git@githost:repoName.git
  • git push origin master


Other random topics

When I was trying to figure out how all of this worked I found a couple of places (on google) that talked about modifying the file /etc/ssh/sshd_config.  This turned out to be a red herring as the default Mac OS X settings work fine.

When you open a new shell on your client computer, then start your first SSH, the client shell automatically starts a daemon called “ssh-agent”.  This daemon reads all of your key information and caches it.  You can see the information that it is storing by running “ssh-add -l”.  If for some reason you change your rsa keys you will need to either restart the daemon or tell it to read the new keys “ssh-add ~/.ssh/id_rsa”.  You can read more about this in these articles ssh-agent-forwarding and ssh-agent-keys in the github documentation.

If for some reason you are using multiple rsa key files then you need to create a “~/.ssh/config” file to setup which key is used in which situation.  I have this situation because I use github for my personal stuff as well for my iotexpert stuff.   By default ssh uses the keys in “~/.ssh/id_rsa”.  If you need to setup a different key for other hosts you can:

  • Create an ssh name called “github.com” which uses “~/.ssh/id_rsa”
  • Create and ssh name called “iotexpert.github.com” which uses “~/.ssh/id_rsa_iotexpert”
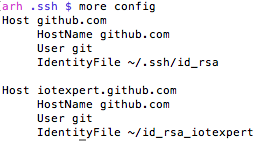
Screen Shot 2016-03-30 at 7.14.13 AM

There is a daemon running called the ssh-agent.  It is used to cache and deliver the keys.  You can see what keys it knows about by running

ssh-add -L

You can delete the cache by running

ssh-add -D

You can add keys to the cache by running

ssh-add ~/.ssh/id_rsa

ssh-add ~/.ssh/id_rsa_iotexpert

To test all of this (with github) you can run

ssh -T git@iotexpert.github.com

or

ssh -T git@github.com

These commands will test the key exchange to make sure that the right key is being mapped to the correct user.

Then to setup the different remotes I do

  • git remote add origin git@github.com/someuser/repository.git to use the id_rsa key
  • git remote add origin git@iotexpert.com:iotexpert/repository.git to use the id_rsa_iotexpert key

The thing that was intensely confusing is “iotexpert.github.com” isn’t actually the name of a computer.  It is just an ALIAS that ssh uses… when SSH runs it looks in the config file and if it sees a “Host” alias that matches what you typed, then it substitutes the value of “HostName” in place of where you gave it “Host”.
 

Mac Mini –> Mac Server

In 2011, I bought a Mac Mini Server to act as my main desktop.  That computer had 2GBs of RAM and 2 internal 500gb hard drives.  I originally setup that computer as RAID1, meaning that the two drives were in a mirror configuration.  This meant that if one failed that I didn’t loose my data and things kept going.  As I am paranoid about my data I also had a Time Capsule that made regular backups using Time Machine.  I will admit that I am an Apple fan boy.  When I got married in 1992 the asshole photographer misprocessed the film, which resulted in all of the pictures being destroyed.  Since then, I have been really really paranoid so I also backup my backup to the Cloud using Mozy.

In the fall of 2014 I switched to using a MacBook Pro as my main computer, so I moved the Mac Mini onto my kids desk.  And, as computers seem to do, the Mac Mini became slower and slower as more crap was loaded onto it.  Earlier this year I bought them a new Mac Mini and set my old workhorse to the side.   About 6 weeks ago, I decided that I was interested in building a new cloud server and I decided to refurbish the Mac Mini as a server.

I started the process by installing two 8 GB SIMMs which I bought from MacSales.com because they have really excellent tutorials on their website.  16GB made a huge difference in the performance of the machine.  The install process is pretty simple.  The Mac just has a cover which twists off giving access to the two SIMM slots.  Here is the video tutorial that they provide

https://player.vimeo.com/video/139638226?title=0&byline=0&portrait=0

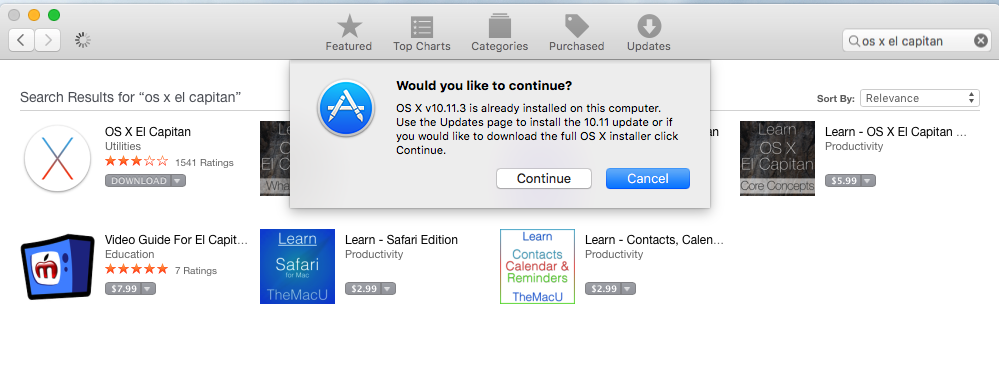
I then reinstalled the OS, which was a total pain in the neck.  At some point in the last couple of years Apple stopped delivering an operating system DVD, moreover I wanted to make a clean install of the most recent version of the operating system and I wanted a backup.  I found the instructions for creating a USB stick on Apples website.  The problem was I didnt have the directory /Application/Install OS X El Capitan.app.  Now what?  After a bunch of google and false starts I figured out that you have to download it from the Appstore, even if you already have it installed on your computer.

To create a USB stick with the most recent Mac OS you need to take the following steps.

  • Get the installation for Mac OSX  from the App Store
    • Press “download”
    • When the installation screen starts, use the menu to quit.  If you don’t do this it will try to install the OS on your computer.

PastedGraphic-2

  • Insert a USB stick and start a terminal
    • run the command “sudo /Applications/Install\ OS\ X\ El\ Capitan.app/Contents/Resources/createinstallmedia –volume /Volumes/MacOSX/ –applicationpath /Applications/Install\ OS\ X\ El\ Capitan.app/”
    • The “/Volumes/…” is the path to the USB stick.  You can figure that out using the command “df”
    • When you run the “sudo …” it will ask you for your password, it will then erase the “/Volumes/…”  Make SURE that you don’t erase your hard disk by picking the wrong directory
    • I had an old USB stick and it took a very long time (about an hour) to make the copy

To emphasize, if you don’t quit the installer it will remove the installation directory from the “/Applications/Install…” folder and you will not be able to create the media.

If you don’t want to do this you can use DiskMaker which provides a GUI that does exactly the same thing.  You can find it at http://diskmakerx.com

The next step is to reboot your Mac from the USB Stick.  To do this, reboot and press the “Option” key to start the “Startup Manager”.   I found an Apple Knowledge Base Article with a list of all of the startup commands here.  After the computer reboots run the “disk utility” program to reformat the hard disks.  When I ran the disk utility I found that one of my hard disks was dead.  I guess that it was a good thing that I was running RAID.  I decided to run on just one disk as this computer was going to be used only for testing, so I picked the good disk to reformat and went for it.  After the disk was formatted I quit the disk utility and then continued the Mac OS installation.
With all of that done I found it remarkable how much faster the computer was.   Night and day difference.

Fast forward several weeks.  My experiments with cloud services were turning more serious (there will be a bunch of posts on this topic).  This set me to worrying about the good disk going bad, which would be annoying, but I suppose, not a horrible problem as I had the belt-and-suspenders-setup.  It seemed like installing two SSDs in RAID would make another leap in performance.  So, I went back to macsales.com and bought a pair of 1TB SSDs, the toolkit to install them, and an external USB 3.0 drive enclosure so that I could read data off of the one good drive.  Doing the installation was quite complicated and took me the better part of two hours.  On the macsales.com website there is an outstanding video of the process.

https://player.vimeo.com/video/139637589?title=0&byline=0&portrait=0

After I got the drives installed the next step was to get RAID1 going again.  Unfortunately, Apple in their infinite wisdom has discontinued support for RAID in the diskutility program.  In order to get the RAID working you need to run diskutility from the command line.  To do that:

  1. Reboot the Mac while holding down the option key with your USB stick installed.  If you are using a PC keyboard on your mini then you are out of luck.  Specifically, there is no option key on a PC keyboard and the only way I could get the option to be held down was to use an old Mac keyboard that I had laying around.
  2. When the Install OS screen comes up run the “Utilities -> Terminal”
  3. In the command window run “diskutil appleraid create mirror MyHardDisk JFHS+ disk0 disk1”  This will create a new volume called “MyHardDisk” that is RAID1 (aka Mirror).  Be aware that this ERASES your hard disks so be careful.  There were several discussions I found on this topic on the internet including this one.

For me the last step was to restore my image from the time capsule.  To do that I

  1. Rebooted the Mac and held down the “Command-R” which starts an internet recovery.  I had to do this because my hard disk doesn’t have a recovery partition
  2. Select recover from Time Capsule

There are two troublesome things about what I have done.

  1. Apple seems to be discontinuing their support for RAID which makes me question how good an idea it is to run.  There doesn’t seems to be any support infrastructure so Im not sure how I would know if there was a problem
  2. The first MacOS USB drive I made worked to install the OS.  The second one did not.  After I compared them, the second one was missing a file called “.IAProductInfo”.  I copied that file from the first to the second drive and things started working.  When I googled around I found a couple of references to this problem.  I have no idea why the second install didnt have the .IAProductInfo.

If you have an answer, or an opinion about either of these topics then please email me or leave a comment.

In future posts I will talk about installing VMware, PHP and a bunch of other tools.