AnyCloud WiFi Template + WiFi Helper Library (Part 2): Enable the WiFi Network

Summary

Instructions on using the AnyCloud Wireless Connection manager to enable WiFi.  This article is Part 2 of a series that will build a new IoT Expert template project for WiFi.

Article
(Part 1) Create Basic Project & Add Cypress Logging Functionality
(Part 2) Create New Thread to manage WiFi using the Wireless Connection Manager
(Part 3) Create a New Middleware Library with WiFi helper functions
(Part 4) Add WiFi Scan
Add WiFi Connect
Add WiFi Disconnect
Add WiFi Ping
Add Gethostbyname
Add MDNS
Add Status
Add StartAP
Make a new template project (update manifest)

Story

In the last article I got things going by starting from the old template, fixing up the Visual Studio Code configuration, adding the new Cypress Logging functionality and then testing everything.

In this article I will

  1. Create new task to manage WiFi
  2. Add Wireless Connection Manager to the project
  3. Create wifi_task.h and wifi_task.c
  4. Update usrcmd.c to send commands to the WiFi task

Create New Task to Manage WiFi

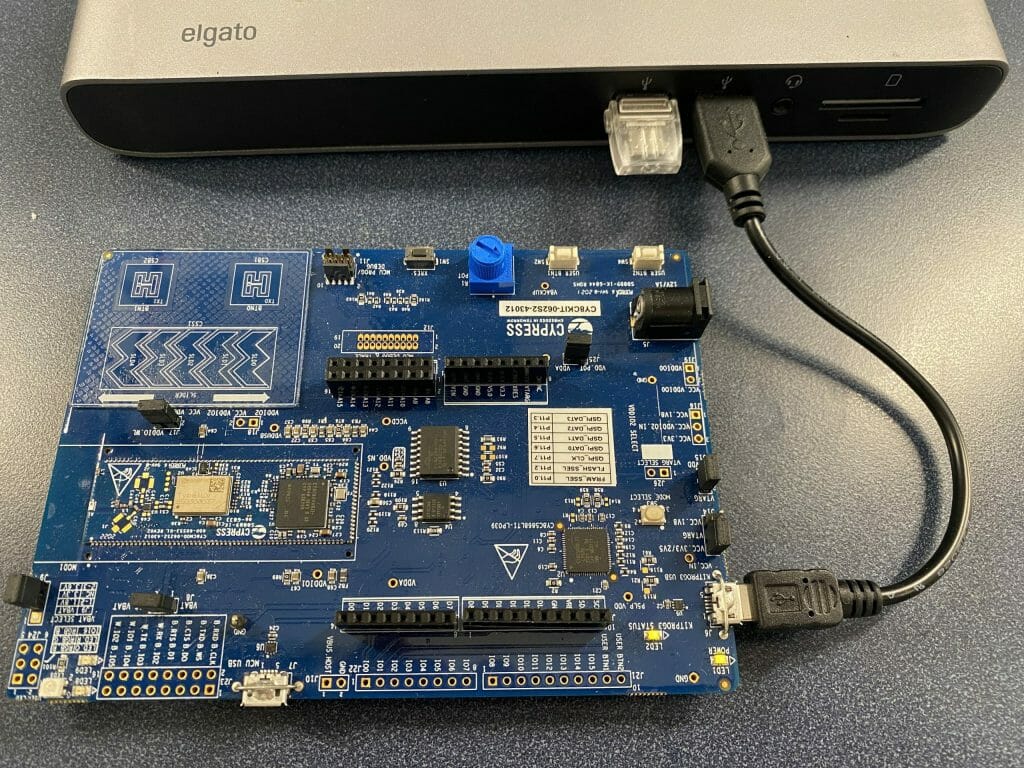
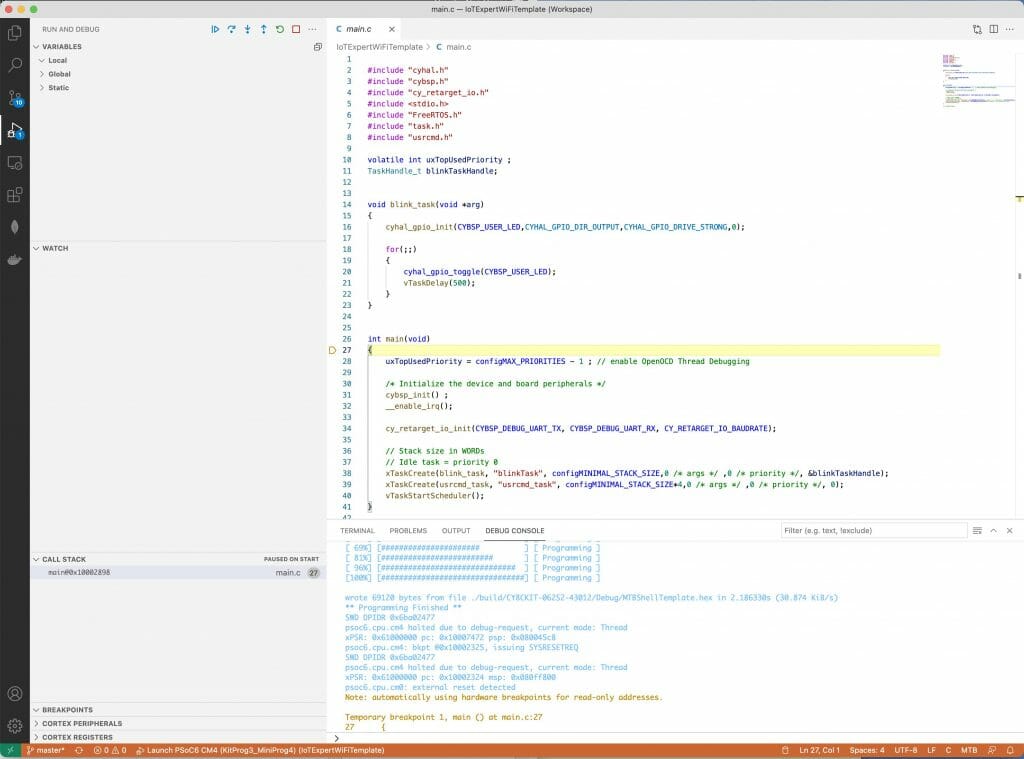
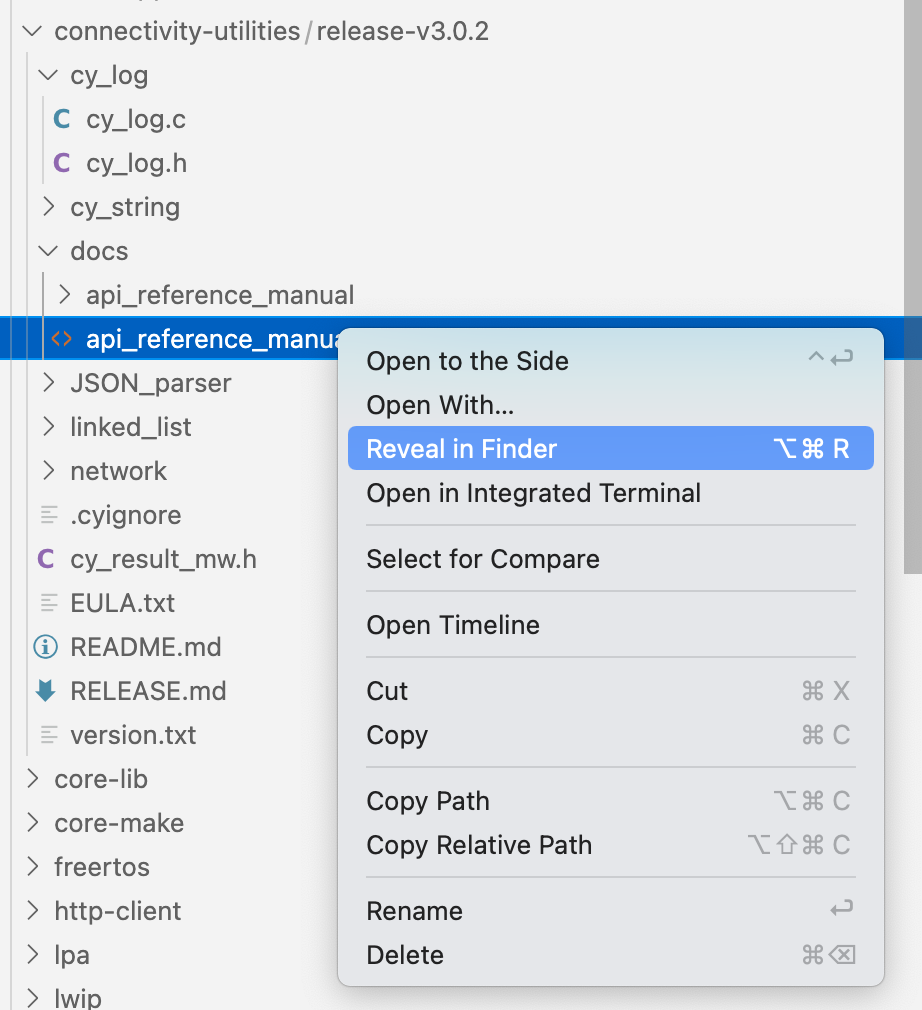
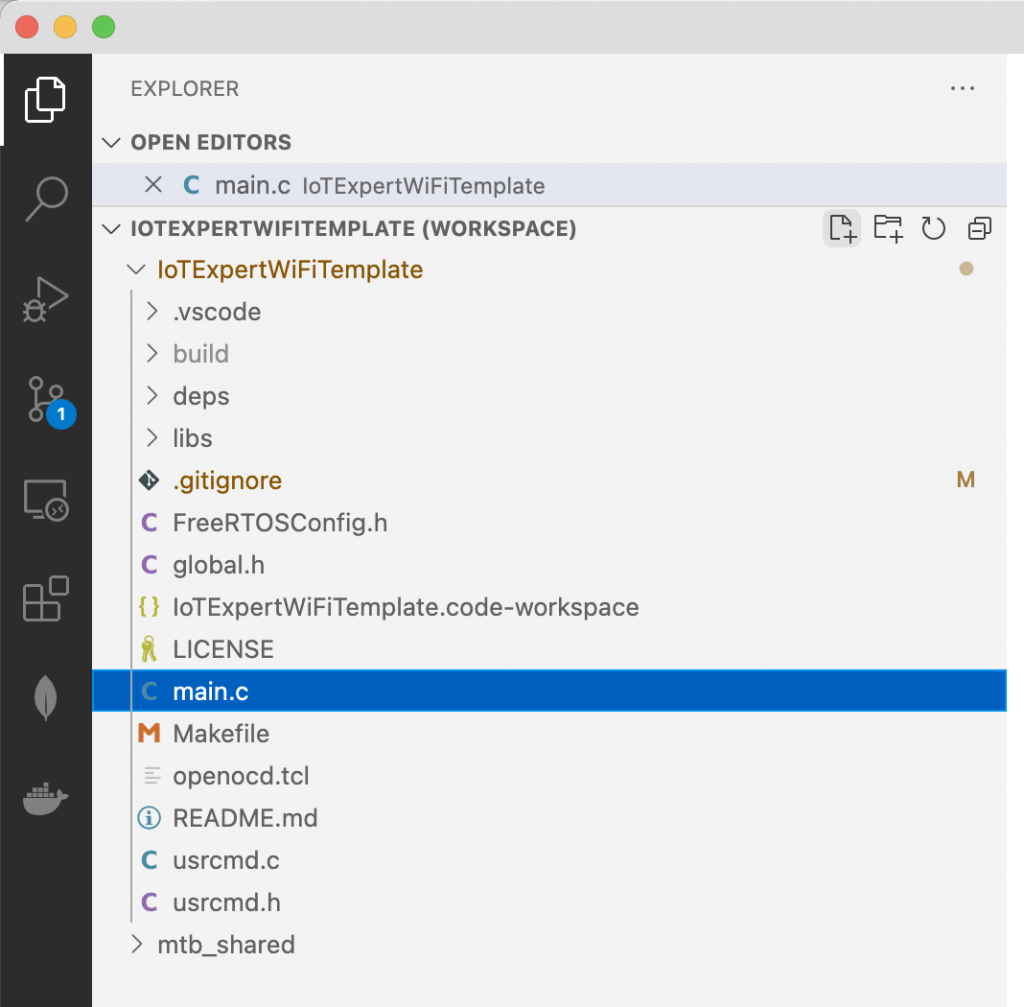
I am going to start by creating new a new task (called wifi_task) that will be responsible for managing the WiFi connection.  In Visual Studio Code you can create a new file by pressing the little document with the + on it.  You will need a file “wifi_task.h” and one “wifi_task.c”

Once you have wifi_task.h you will need to add the function prototype for the wifi_task.  In addition add a “guard”.  I like to use “#pragma once”

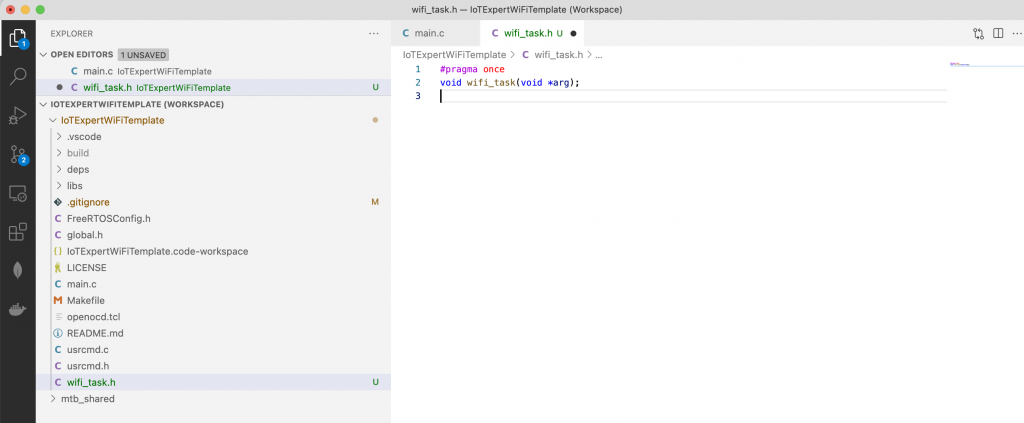
Here is copyable code.

#pragma once
void wifi_task(void *arg);

In wifi_task.c Ill start with a simple blinking LED function.  Well actually it will do a print instead of a blink.  Here it is:

#include "wifi_task.h"
#include "FreeRTOS.h"
#include "task.h"
#include <stdio.h>

void wifi_task(void *arg)
{
    while(1)
    {
        vTaskDelay(1000);
        printf("blink\n");

    }
}

Now that I have a wifi_task (which doesn’t do much) lets update main.c.  First include the wifi_task.h

#include "wifi_task.h"

Then create the task.  Notice that I start with a pretty big stack.

xTaskCreate(wifi_task,   "WiFi"       , configMINIMAL_STACK_SIZE*20,0 /* args */ ,0 /* priority */, 0);

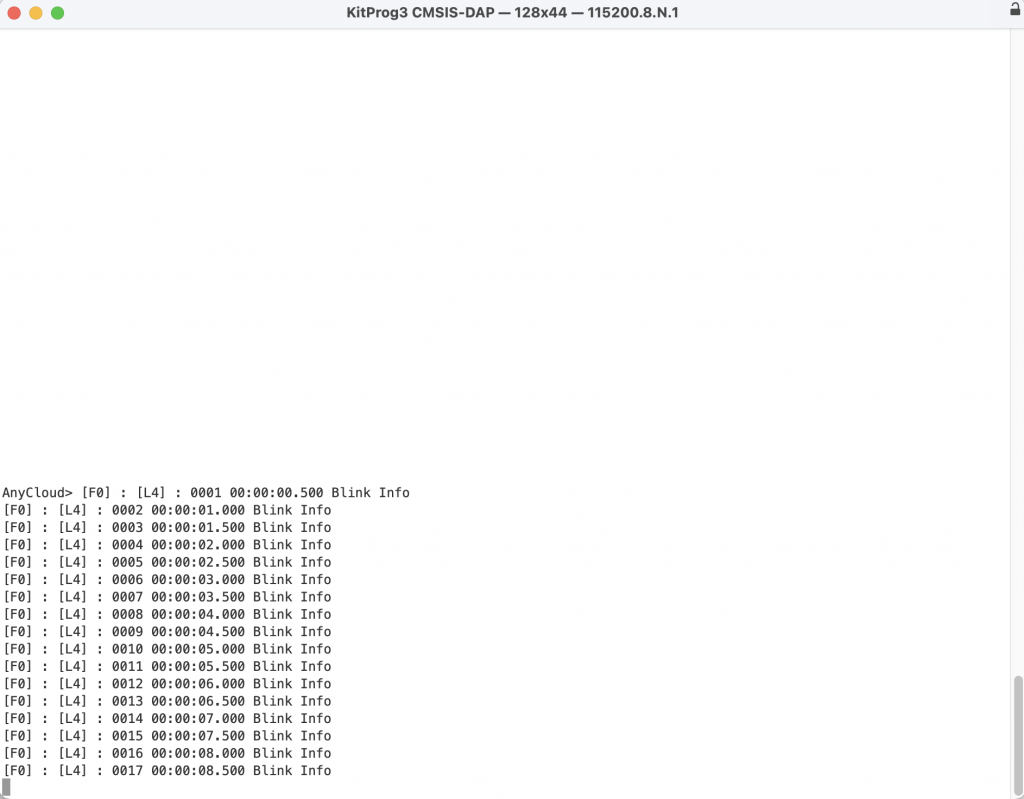
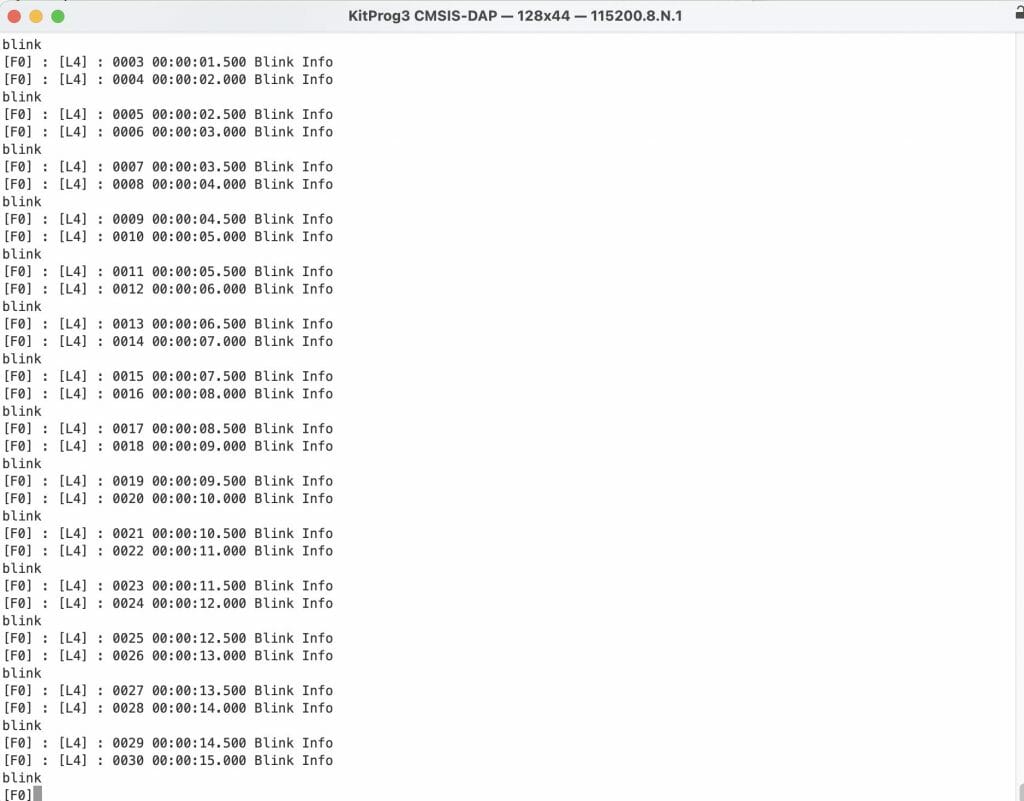
When you run this, you will have the “blink” interleaved with the blink from the last article.

Add Wireless Connection Manager

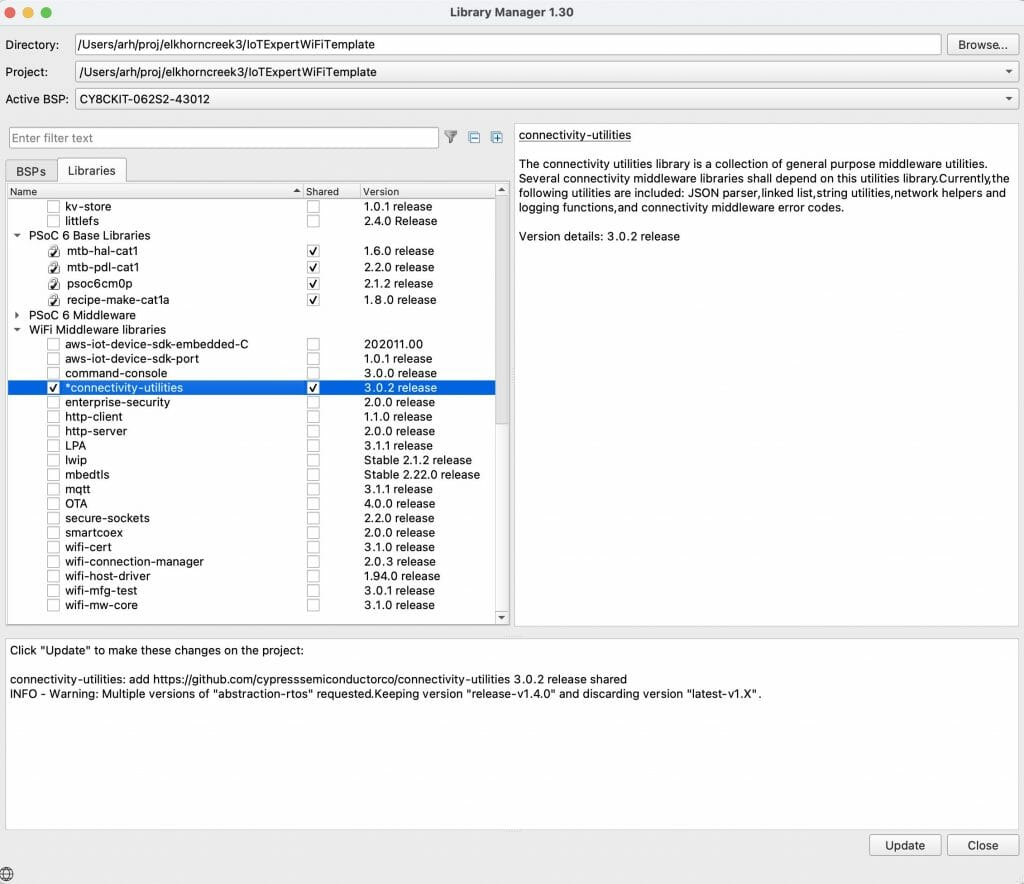
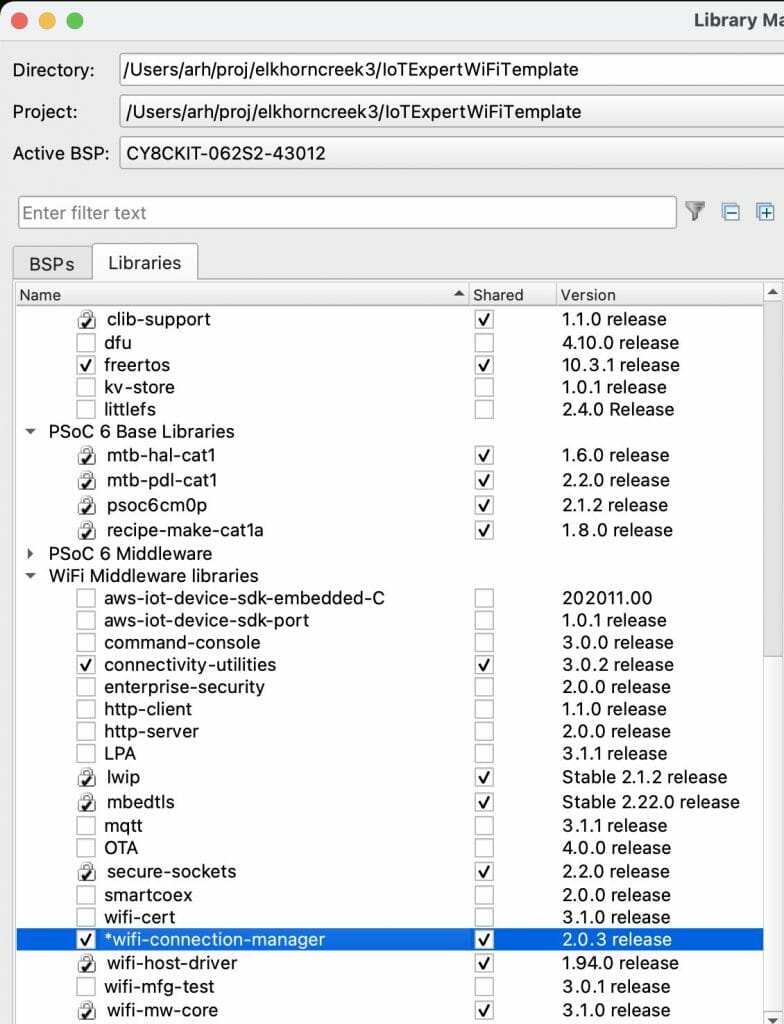
You next step is to add the wireless connection manager.  Start the library browser by running “make modlibs”.  Then click on the wifi-connection-manager”.  Notice that when you do that, it will bring in a bunch of other libraries as well.  These are all libraries that it (the WiFi-Connection-Manager) is depend on.

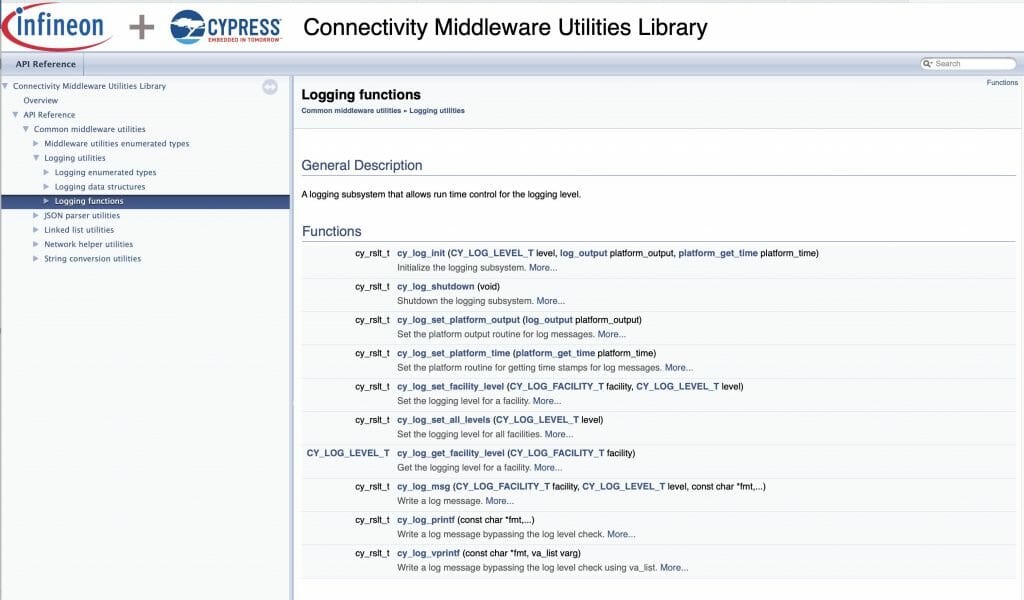
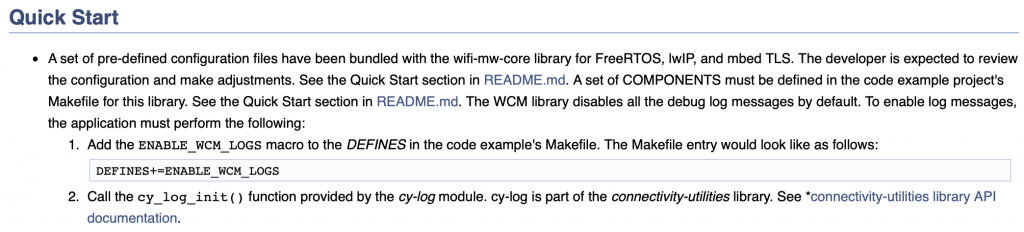
If you look in the wireless connection manager documentation you will find this nice note.  It says that the WCM uses the Cypress logging functionality and you can turn it on with a #define.  That’s cool.  So now I edit the Makefile and add the define.

The the documentation also says that this library depends on the “Wi-Fi Middleware Core”

If you go to the Wi-Fi Middleware core library documentation you will see instructions that say that you need to

  1. Enable & Configure LWIP
  2. Enable & Configure MBEDTLS
  3. Enable & Configure the Cypress RTOS Abstraction

In order to do that you will need to two things

  1. Copy the configuration files into your project
  2. Setup some options in the Makefile

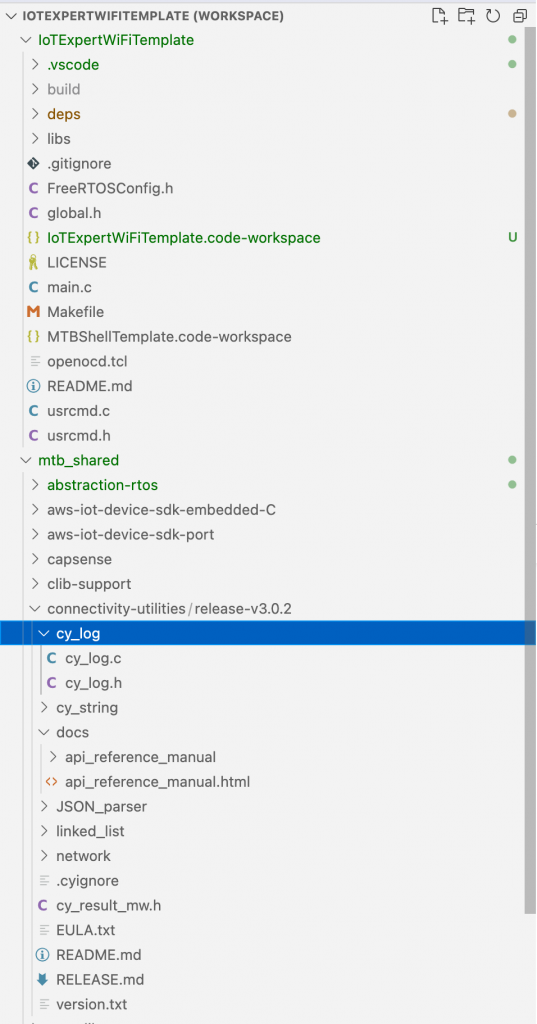
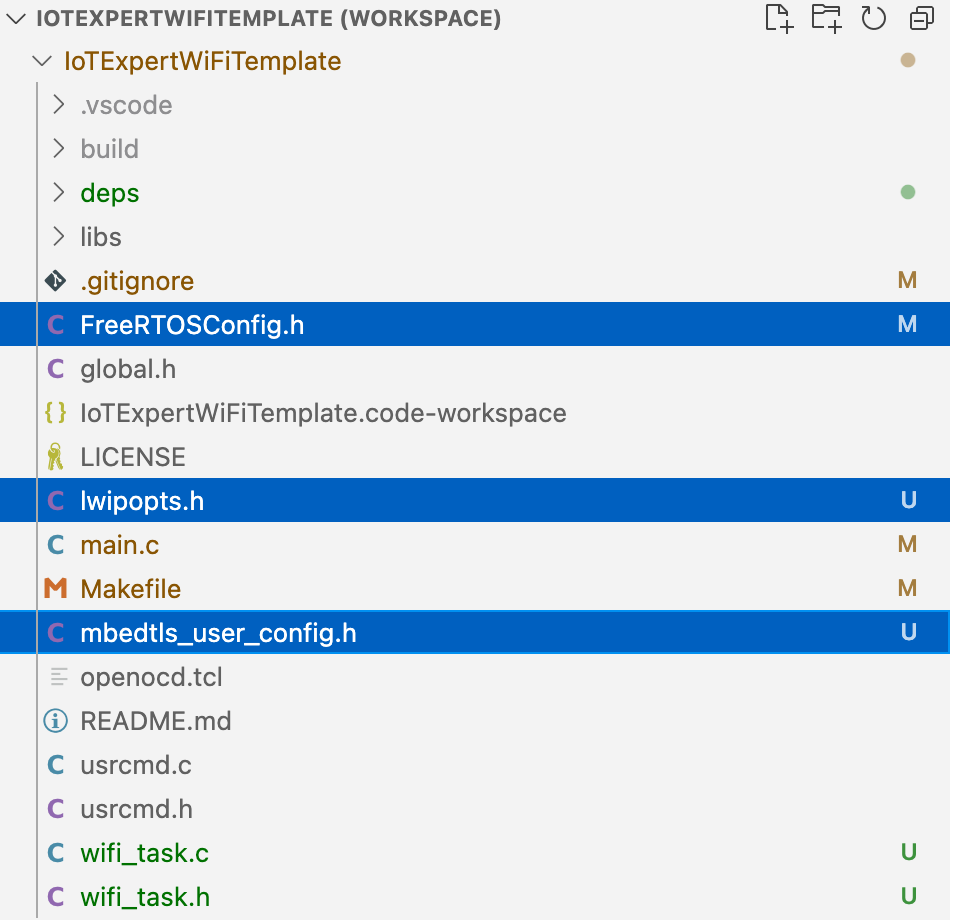
Start by copying the file.  They give you default configurations in mtb_share/wifi-mw-core/version/configs.  You will want to copy those files into your project.  This can be done in the Visual Studio Code interface using ctrl-c and ctrl-v

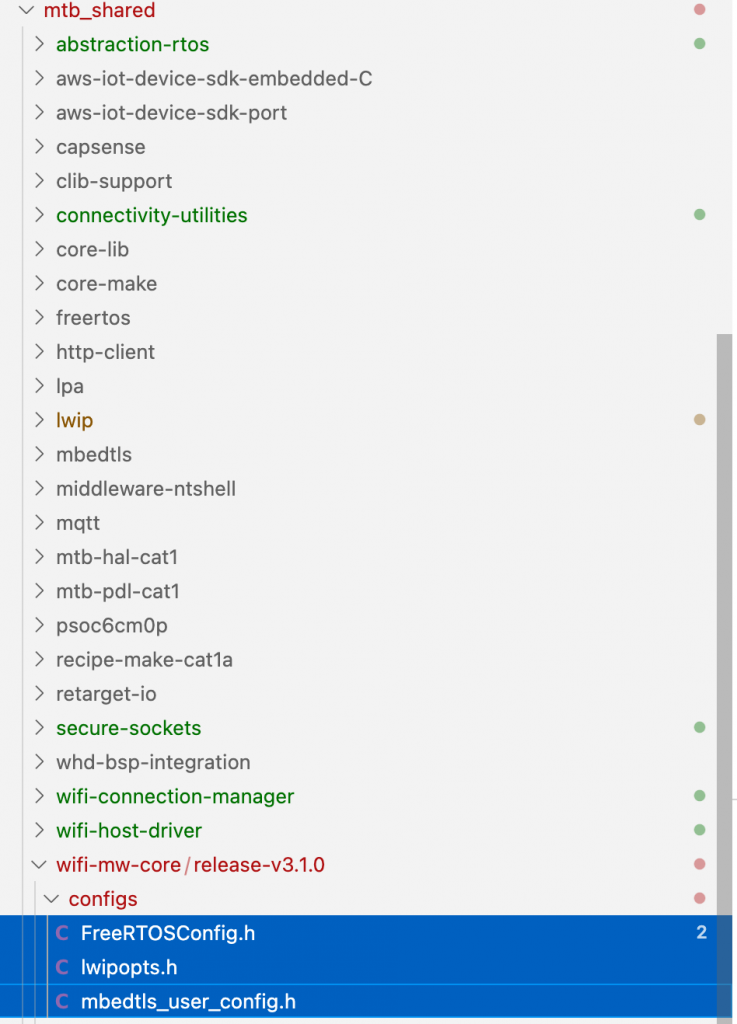
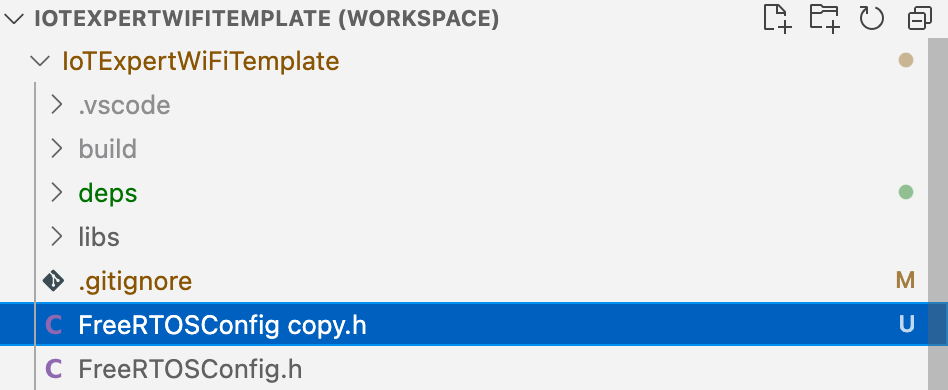
Notice that I now have two FreeRTOSConfig files.  So, delete the original file and rename the copied file.

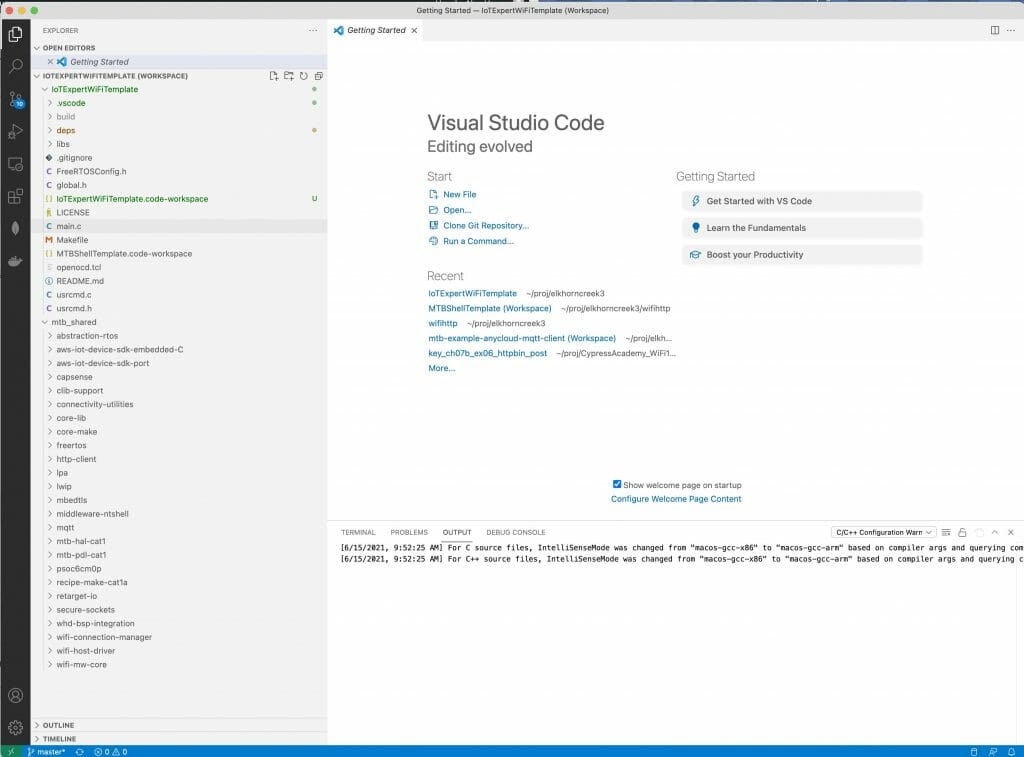
Now your project should look like this:

The next step is to fix the Makefile by adding some defines.


DEFINES=CY_RETARGET_IO_CONVERT_LF_TO_CRLF
DEFINES+=CYBSP_WIFI_CAPABLE CY_RTOS_AWARE
DEFINES+=MBEDTLS_USER_CONFIG_FILE='"mbedtls_user_config.h"'
DEFINES+=ENABLE_WIFI_MIDDLEWARE_LOGS

The add the required components

COMPONENTS=FREERTOS LWIP MBEDTLS PSOC6HAL

Update wifi_task.c

My wifi task is going to work by

  1. Sitting on Queue waiting for messages of “wifi_cmd_t”
  2. When those messages come in, execute the right command.

Start by adding some includes to the wifi_task.c

#include <stdio.h>
#include "wifi_task.h"
#include "FreeRTOS.h"
#include "task.h"
#include "queue.h"

#include "cy_wcm.h"

Then define the legal commands.  I will add a bunch of more commands in the future articles.  But for this article there will be only one command.  Enable.  The command message is

  1. The command
  2. Three args of unknown type

In addition you will require

  1. The command queue
  2. An initialize state variable
  3. A way to keep track of what mode you are in (AP, STA or APSTA)
typedef enum {
    WIFI_CMD_ENABLE,

} wifi_cmd_t;

typedef struct {
    wifi_cmd_t cmd;
    void *arg0;
    void *arg1;
    void *arg2;
} wifi_cmdMsg_t;


static QueueHandle_t wifi_cmdQueue;
static bool wifi_initialized=false;
static cy_wcm_interface_t wifi_network_mode;

The first “command” that I will create is the enable.  This will

  1. Setup the interface
  2. Initialize the WiFi.  The simple init command actually does a bunch of stuff, including powering on the wifi chip, downloading the firmware into it, setting up all of the tasks in the RTOS, enabling the LWIP and MBEDTLS
static void wifi_enable(cy_wcm_interface_t interface)
{
    cy_rslt_t result;
    cy_wcm_config_t config = {.interface = interface}; 
    result = cy_wcm_init(&config); // Initialize the connection manager
    CY_ASSERT(result == CY_RSLT_SUCCESS);

    result = cy_wcm_register_event_callback(wifi_network_event_cb);
    CY_ASSERT(result == CY_RSLT_SUCCESS);

    wifi_network_mode = interface;
    wifi_initialized = true;
    
    printf("\nWi-Fi Connection Manager initialized\n");
    
}

In the previous block of code notice that I register a callback.  The callback looks like a switch that prints out messages based on the event type.  Notice that there are three lines which are commented out – which we will fix in the next article.

static void wifi_network_event_cb(cy_wcm_event_t event, cy_wcm_event_data_t *event_data)
{
    cy_wcm_ip_address_t ip_addr;

    switch(event)
    {
        case CY_WCM_EVENT_CONNECTING:            /**< STA connecting to an AP.         */
            printf("Connecting to AP ... \n");
        break;
        case CY_WCM_EVENT_CONNECTED:             /**< STA connected to the AP.         */
            printf("Connected to AP and network is up !! \n");
        break;
        case CY_WCM_EVENT_CONNECT_FAILED:        /**< STA connection to the AP failed. */
            printf("Connection to AP Failed ! \n");
        break;
        case CY_WCM_EVENT_RECONNECTED:          /**< STA reconnected to the AP.       */
            printf("Network is up again! \n");
        break;
        case CY_WCM_EVENT_DISCONNECTED:         /**< STA disconnected from the AP.    */
            printf("Network is down! \n");
        break;
        case CY_WCM_EVENT_IP_CHANGED:           /**< IP address change event. This event is notified after connection, re-connection, and IP address change due to DHCP renewal. */
                cy_wcm_get_ip_addr(wifi_network_mode, &ip_addr, 1);
   //             printf("Station IP Address Changed: %s\n",wifi_ntoa(&ip_addr));
        break;
        case CY_WCM_EVENT_STA_JOINED_SOFTAP:    /**< An STA device connected to SoftAP. */
 //           printf("STA Joined: %s\n",wifi_mac_to_string(event_data->sta_mac));
        break;
        case CY_WCM_EVENT_STA_LEFT_SOFTAP:      /**< An STA device disconnected from SoftAP. */
//            printf("STA Left: %s\n",wifi_mac_to_string(event_data->sta_mac));
        break;
    }

}

Now I want to update the main loop of the WiFI task.  It is just an infinite loop that processes command messages (from other tasks).

void wifi_task(void *arg)
{
    wifi_cmdQueue = xQueueCreate(10,sizeof(wifi_cmdMsg_t));

    wifi_cmdMsg_t msg;

    while(1)
    {
        xQueueReceive(wifi_cmdQueue,&msg,portMAX_DELAY);
        switch(msg.cmd)
        {
            case WIFI_CMD_ENABLE:
                printf("Received wifi enable message\n");
                wifi_enable((cy_wcm_interface_t)msg.arg0);
            break;

        }
    }
}

In the other tasks in the system you “COULD” create a message and submit it to the queue.  I always think that it is easier if you create a function which can be called in the other threads.  Here is the wifi_enable function.  This function takes a char * of either “STA”, “AP”, or “APSTA” and then submits the right message to the queue.

bool wifi_cmd_enable(char *interface)
{
    wifi_cmdMsg_t msg;
    msg.cmd = WIFI_CMD_ENABLE;
    msg.arg0 = (void *)CY_WCM_INTERFACE_TYPE_STA;

    if(strcmp(interface,"STA") == 0)
        msg.arg0 = (void *)CY_WCM_INTERFACE_TYPE_STA;

    else if(strcmp(interface,"AP") == 0)
        msg.arg0 = (void *)CY_WCM_INTERFACE_TYPE_AP;

    else if(strcmp(interface,"APSTA") == 0)
        msg.arg0 = (void *)CY_WCM_INTERFACE_TYPE_AP_STA;
    
    else
    {
        printf("Legal options are STA, AP, APSTA\n");
        return false;
    }

    xQueueSend(wifi_cmdQueue,&msg,0);
    return true;
}

Once I have the nice function for the other tasks, I add it to the public interface in wifi_task.h

#pragma once
#include <stdbool.h>
void wifi_task(void *arg);
bool wifi_cmd_enable(char *interface);

Add a new user command “net”

Now that I have the wifi_task setup I want to add a “net” command to the command line shell.  Start by adding the include.

#include "wifi_task.h"

Then create a function prototype for a new command.

static int usrcmd_net(int argc, char **argv);

Add the command to the list of commands that the shell knows.

static const cmd_table_t cmdlist[] = {
    { "help", "This is a description text string for help command.", usrcmd_help },
    { "info", "This is a description text string for info command.", usrcmd_info },
    { "clear", "Clear the screen", usrcmd_clear },
    { "pargs","print the list of arguments", usrcmd_pargs},
#ifdef configUSE_TRACE_FACILITY 
#if configUSE_STATS_FORMATTING_FUNCTIONS ==1
    { "tasks","print the list of RTOS Tasks", usrcmd_list},
#endif
#endif
    { "net","net [help,enable]",usrcmd_net},
};

Then create the net command.  I want a BUNCH of net commands.  They will include help, enable, connect, disconnect, …. but for now we will start with enable.  This function just calls the wifi_enable command that we added to the wifi_task.h interface.

static int usrcmd_net(int argc, char **argv)
{
    if(argc == 1 || strcmp("help",argv[1]) == 0)
    {
        printf("net [help,enable,connect,disconnect,mdns,scan,ping,lookup]\n");

        printf("%-35s %s\n","net enable","Enable the WiFi Driver & load the WiFi Firmware");

        return 0;
    }

    if(strcmp("enable",argv[1])==0)
    {
            if(argc == 2)
                wifi_cmd_enable("STA");
            else
                wifi_cmd_enable(argv[2]);        
            return 0;
    }

    return 0;
}

Test

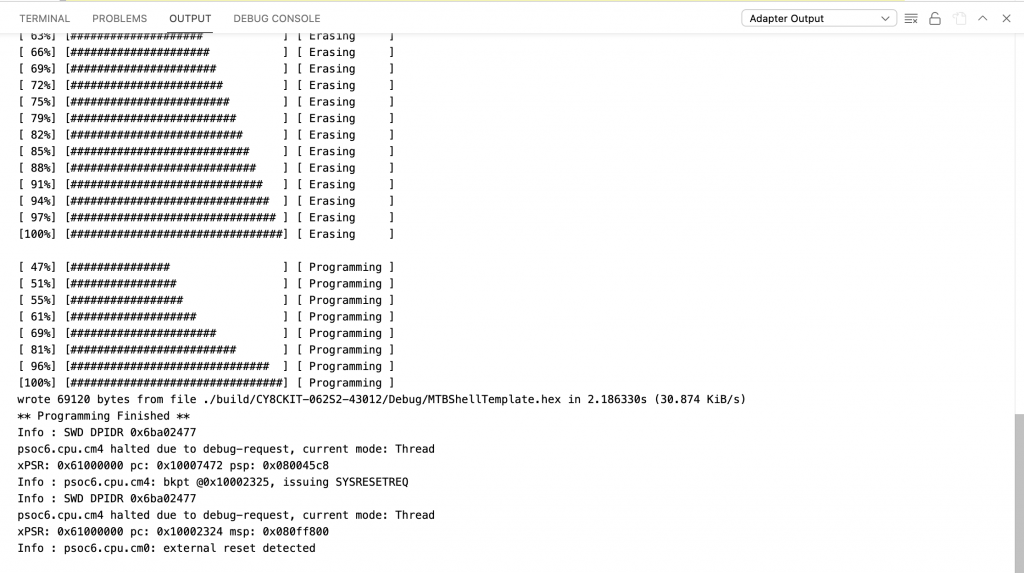
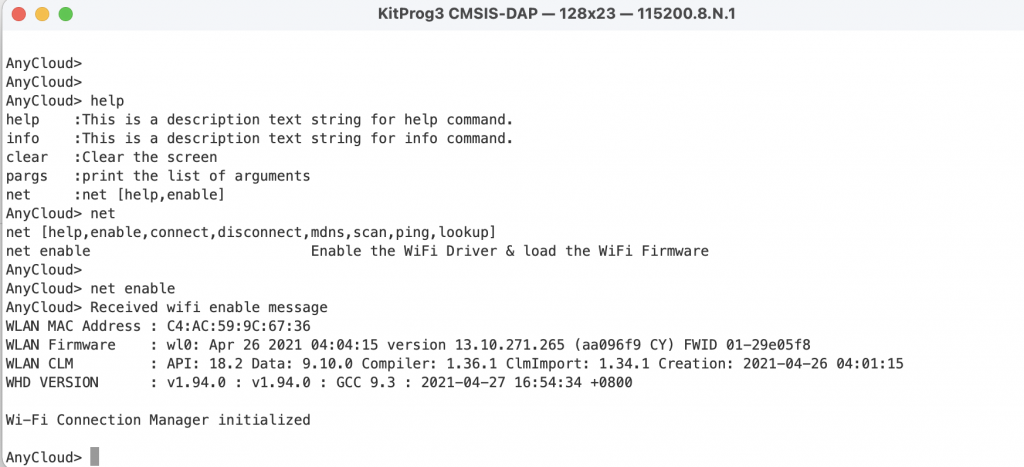
Program and test.  Now the “net enable” works.  Notice that it gives you the output about the wifi firmware being loaded into the chip.  Then it tells you that the chip is enabled and the connection manager is rolling.

In the next article I will create a new library of helper functions for wifi.

AnyCloud WiFi Template + WiFi Helper Library (Part 1): Introduction

Summary

The first article in a series that discusses building a new IoT project using Modus Toolbox and the AnyCloud SDK.  Specifically:

  1. The new-ish Error Logging library
  2. AnyCloud Wireless Connection Manager
  3. Creation of New Libraries and Template Projects
  4. Dual Role WiFi Access Point and Station using CYW43012
  5. MDNS

Story

I am working on a new implementation of my Elkhorn Creek IoT monitoring system.  In some of the previous articles I discussed the usage of the Influx Database and Docker as a new cloud backend.  To make this whole thing better I wanted to replace the Raspberry Pi (current system) with a PSoC 6 MCU and a CYW43012 WiFi Chip.  In order to do this, I need to make the PSoC 6 talk to the Influx Database using the WiFi and the Influx DB WebAPI.  I started to build this from my IoT Expert template, but quickly realized that I should make a template project with WiFi.

In this series of article I teach you how to use the Wireless Connection Manager, make new libraries and make new template projects.  Here is the agenda:

Article
(Part 1) Create Basic Project & Add Cypress Logging Functionality
(Part 2) Create New Thread to manage WiFi using the Wireless Connection Manager
(Part 3) Create a New Middleware Library with WiFi helper functions
(Part 4) Add WiFi Scan
Add WiFi Connect
Add WiFi Disconnect
Add WiFi Ping
Add Gethostbyname
Add MDNS
Add Status
Add StartAP
Make a new template project (update manifest)

Create Basic Project

Today I happen to have a CY8CKIT-062S2-43012 on my desk.

So that looks like a good place to start.  Pick that development kit in from the new project creator.

I want to start from my tried and true NT Shell, FreeRTOS Template.  If you use the filter window and type “iot” it will filter things down to just the IoT templates.  Notice that I selected that I want to get a “Microsoft Visual Studio Code” target workspace.

After clicking create you will get a new project.

Something weird happened.  Well actually something bad happened.  When I start Visual Studio Code I get the message that I have multiple workspace files.  Why is that?

So I pick the first one.

Now there is a problem.  In the Makefile for this project I find out that the “APPNAME” is MTBShellTemplate

# Name of application (used to derive name of final linked file).
APPNAME=MTBShellTemplate

By default when you run “make vscode” it will make a workspace file for you with the name “APPNAME.code-workspace”.  This has now created a problem for you.  Specifically, if you regenerate the workspace by running “make vscode” you will update the WRONG file.  When the new project creator runs the “make vscode” it uses the name you entered on that form, not the one in the Makefile.

To fix this, edit he Makefile & delete the old MTB…workspace.  Then re-run make vscode

APPNAME=IoTExpertWiFiTemplate

I have been checking in the *.code-workspace file, but that may not be exactly the right thing to do.  I am not sure.  Oh well.  Here is what you screen should look like now that you have Visual Studio Code going.

I always like to test things to make sure everything works before I start editing.  So, press the play button, then the green play button.

It should build and program the development kit.

Then stop at main.

Press play and your terminal should look something like this.  Notice that I typed “help” and “tasks”

Add the Cypress Logging Functionality

Sometime recently the Software team added a logging capability.  This seems like a good time to try that that.  Start the library browser by running “make modlibs”.  Then enable the “connectivity-utilities”.  For some silly reason that is where the logging functions were added.

If you look in the “mtb_shared” you will now the cy_log directory.

Then click on the “api_reference.html”

And open it.

Cool.  This gives you some insight into the capability.

A simple test will be to printout a “blink” message in sync with the default blinking led.  To do this, I modify the blink_task in main.c  Take the following actions

  1. Add the include “cy_log.h”
  2. Add the initialization call “cy_log_init”
  3. Printout a test message using “cy_log_msg”
  4. Fix the stack
#include "cyhal.h"
#include "cybsp.h"
#include "cy_retarget_io.h"
#include <stdio.h>
#include "FreeRTOS.h"
#include "task.h"
#include "usrcmd.h"
#include "cy_log.h"

volatile int uxTopUsedPriority ;
TaskHandle_t blinkTaskHandle;


void blink_task(void *arg)
{
    cyhal_gpio_init(CYBSP_USER_LED,CYHAL_GPIO_DIR_OUTPUT,CYHAL_GPIO_DRIVE_STRONG,0);

    for(;;)
    {
        cy_log_msg(CYLF_DEF,CY_LOG_INFO,"Blink Info\n");
    	cyhal_gpio_toggle(CYBSP_USER_LED);
    	vTaskDelay(500);
    }
}


int main(void)
{
    uxTopUsedPriority = configMAX_PRIORITIES - 1 ; // enable OpenOCD Thread Debugging

    /* Initialize the device and board peripherals */
    cybsp_init() ;
    __enable_irq();

    cy_retarget_io_init(CYBSP_DEBUG_UART_TX, CYBSP_DEBUG_UART_RX, CY_RETARGET_IO_BAUDRATE);

    cy_log_init(CY_LOG_INFO,0,0);


    // Stack size in WORDs
    // Idle task = priority 0
    xTaskCreate(blink_task, "blinkTask", configMINIMAL_STACK_SIZE*2,0 /* args */ ,0 /* priority */, &blinkTaskHandle);
    xTaskCreate(usrcmd_task, "usrcmd_task", configMINIMAL_STACK_SIZE*4,0 /* args */ ,0 /* priority */, 0);
    vTaskStartScheduler();
}

When you run this, you will get the message repeatedly coming on the screen (probably gonna-want-a delete this before you go on)

Now that we have a working project with logging, in the next article Ill add WiFi

A Standing Desk

Summary

The installation of the AITERMINAL Electric Standing Desk Frame Dual Motor Height Adjustable Desk Motorized Stand Up Desk-White (Frame Only).  Which is only relevant to IoT in that

  1. I worked on this rather than finishing the really cool article that is coming next week.\
  2. It allows me improved place to work

The Story

Last week in California I used a standup desk… which I enjoyed.  I have one at my office in Lexington as well.  But, if you remember from this picture, I don’t have a standing setup at home.

Since my desk is one solid top, I didn’t really know how I could make a change to standup.  But, one afternoon browsing on Amazon I found this:


Basically it is a stand-up-desk, but with no table top.  So I ordered it.


It came in an absolutely giant box.

With a few statistics on the side

The first thing to do is get out the “Modus Toolbox” thanks to my friends in Ukraine

So, my lab assistant got to it.

Then we made a disaster area, by removing all the crap on my desk.

After that we took the tabletop to the barn and ran a track saw on it.

Once the desk was removed… things were REALLY screwed up on the wall.

And the side cabinet.

Here is Nicholas installing the sawed off table top onto the desk.

Here is the desk back in place.  You can see that I have started repairing the drywall.

Which is always an ugly job.

Now that the wall is fixed, Nicholas worked to repair the networking infrastructure.

And here is back together, with the desk in the standing position

And a close up.

It is awesome because it is almost perfectly integrated into the old desk.  Notice that we trimmed about 5 inches off the back of the desk.

The Creek 3.0: Docker & InfluxDB

Summary

Instructions for installing InfluxDB2 in a docker container and writing a Python program to insert data.

Story

I don’t really have a long complicated story about how I got here.  I just wanted to replace my Java, MySQL, Tomcat setup with something newer.  I wanted to do it without writing a bunch of code.  It seemed like Docker + Influx + Telegraph + Grafana was a good answer.  In this article I install Influx DB on my new server using Docker.  Then I hookup my Creek data via a Python script.

Docker & InfluxDB

I have become a huge believer in using Docker, I think it is remarkable what they did.  I also think that using docker-compose is the correct way to launch new docker containers so that you don’t loose the secret sauce on the command line when doing a “docker run”.  Let’s get this whole thing going by creating a new docker-compose.yaml file with the description of our new docker container.  It is pretty simple:

  1. Specify the influxdb image
  2. Map port 8086 on the client and on the container
  3. Specify the initial conditions for the Influxdb – these are nicely documented in the installation instructions here.
  4. Create a volume
version: "3.3"  # optional since v1.27.0
services:
  influxdb:
    image: influxdb
    ports:
      - "8086:8086"
    environment:
      - DOCKER_INFLUXDB_INIT_MODE=setup
      - DOCKER_INFLUXDB_INIT_USERNAME=root
      - DOCKER_INFLUXDB_INIT_PASSWORD=password
      - DOCKER_INFLUXDB_INIT_ORG=creekdata
      - DOCKER_INFLUXDB_INIT_BUCKET=creekdata
    volumes:
      - influxdb2:/var/lib/influxdb2

volumes:
  influxdb2:

Once you have that file you can run “docker-compose up”… and wait … until everything gets pulled from the docker hub.

arh@spiff:~/influx-telegraf-grafana$ docker-compose up
Creating network "influx-telegraf-grafana_default" with the default driver
Creating volume "influx-telegraf-grafana_influxdb2" with default driver
Pulling influxdb (influxdb:)...
latest: Pulling from library/influxdb
d960726af2be: Pull complete
e8d62473a22d: Pull complete
8962bc0fad55: Pull complete
3b26e21cfb07: Pull complete
f77b907603e3: Pull complete
2b137bdfa0c5: Pull complete
7e6fa243fc79: Pull complete
3e0cae572c4f: Pull complete
9a27f9435a76: Pull complete
Digest: sha256:090ba796c2e5c559b9acede14fc7c1394d633fb730046dd2f2ebf400acc22fc0
Status: Downloaded newer image for influxdb:latest
Creating influx-telegraf-grafana_influxdb_1 ... done
Attaching to influx-telegraf-grafana_influxdb_1
influxdb_1  | 2021-05-19T12:37:14.866162317Z	info	booting influxd server in the background	{"system": "docker"}
influxdb_1  | 2021-05-19T12:37:16.867909370Z	info	pinging influxd...	{"system": "docker"}
influxdb_1  | 2021-05-19T12:37:18.879390124Z	info	pinging influxd...	{"system": "docker"}
influxdb_1  | 2021-05-19T12:37:20.891280023Z	info	pinging influxd...	{"system": "docker"}
influxdb_1  | ts=2021-05-19T12:37:21.065674Z lvl=info msg="Welcome to InfluxDB" log_id=0UD9wCAG000 version=2.0.6 commit=4db98b4c9a build_date=2021-04-29T16:48:12Z
influxdb_1  | ts=2021-05-19T12:37:21.068517Z lvl=info msg="Resources opened" log_id=0UD9wCAG000 service=bolt path=/var/lib/influxdb2/influxd.bolt
influxdb_1  | ts=2021-05-19T12:37:21.069293Z lvl=info msg="Bringing up metadata migrations" log_id=0UD9wCAG000 service=migrations migration_count=15
influxdb_1  | ts=2021-05-19T12:37:21.132269Z lvl=info msg="Using data dir" log_id=0UD9wCAG000 service=storage-engine service=store path=/var/lib/influxdb2/engine/data
influxdb_1  | ts=2021-05-19T12:37:21.132313Z lvl=info msg="Compaction settings" log_id=0UD9wCAG000 service=storage-engine service=store max_concurrent_compactions=3 throughput_bytes_per_second=50331648 throughput_bytes_per_second_burst=50331648
influxdb_1  | ts=2021-05-19T12:37:21.132325Z lvl=info msg="Open store (start)" log_id=0UD9wCAG000 service=storage-engine service=store op_name=tsdb_open op_event=start
influxdb_1  | ts=2021-05-19T12:37:21.132383Z lvl=info msg="Open store (end)" log_id=0UD9wCAG000 service=storage-engine service=store op_name=tsdb_open op_event=end op_elapsed=0.059ms
influxdb_1  | ts=2021-05-19T12:37:21.132407Z lvl=info msg="Starting retention policy enforcement service" log_id=0UD9wCAG000 service=retention check_interval=30m
influxdb_1  | ts=2021-05-19T12:37:21.132428Z lvl=info msg="Starting precreation service" log_id=0UD9wCAG000 service=shard-precreation check_interval=10m advance_period=30m
influxdb_1  | ts=2021-05-19T12:37:21.132446Z lvl=info msg="Starting query controller" log_id=0UD9wCAG000 service=storage-reads concurrency_quota=1024 initial_memory_bytes_quota_per_query=9223372036854775807 memory_bytes_quota_per_query=9223372036854775807 max_memory_bytes=0 queue_size=1024
influxdb_1  | ts=2021-05-19T12:37:21.133391Z lvl=info msg="Configuring InfluxQL statement executor (zeros indicate unlimited)." log_id=0UD9wCAG000 max_select_point=0 max_select_series=0 max_select_buckets=0
influxdb_1  | ts=2021-05-19T12:37:21.434078Z lvl=info msg=Starting log_id=0UD9wCAG000 service=telemetry interval=8h
influxdb_1  | ts=2021-05-19T12:37:21.434165Z lvl=info msg=Listening log_id=0UD9wCAG000 service=tcp-listener transport=http addr=:9999 port=9999
influxdb_1  | 2021-05-19T12:37:22.905008706Z	info	pinging influxd...	{"system": "docker"}
influxdb_1  | 2021-05-19T12:37:22.920976742Z	info	got response from influxd, proceeding	{"system": "docker"}
influxdb_1  | Config default has been stored in /etc/influxdb2/influx-configs.
influxdb_1  | User	Organization	Bucket
influxdb_1  | root	creekdata	creekdata
influxdb_1  | 2021-05-19T12:37:23.043336133Z	info	Executing user-provided scripts	{"system": "docker", "script_dir": "/docker-entrypoint-initdb.d"}
influxdb_1  | 2021-05-19T12:37:23.044663106Z	info	initialization complete, shutting down background influxd	{"system": "docker"}
influxdb_1  | ts=2021-05-19T12:37:23.044900Z lvl=info msg="Terminating precreation service" log_id=0UD9wCAG000 service=shard-precreation
influxdb_1  | ts=2021-05-19T12:37:23.044906Z lvl=info msg=Stopping log_id=0UD9wCAG000 service=telemetry interval=8h
influxdb_1  | ts=2021-05-19T12:37:23.044920Z lvl=info msg=Stopping log_id=0UD9wCAG000 service=scraper
influxdb_1  | ts=2021-05-19T12:37:23.044970Z lvl=info msg=Stopping log_id=0UD9wCAG000 service=tcp-listener
influxdb_1  | ts=2021-05-19T12:37:23.545252Z lvl=info msg=Stopping log_id=0UD9wCAG000 service=task
influxdb_1  | ts=2021-05-19T12:37:23.545875Z lvl=info msg=Stopping log_id=0UD9wCAG000 service=nats
influxdb_1  | ts=2021-05-19T12:37:23.546765Z lvl=info msg=Stopping log_id=0UD9wCAG000 service=bolt
influxdb_1  | ts=2021-05-19T12:37:23.546883Z lvl=info msg=Stopping log_id=0UD9wCAG000 service=query
influxdb_1  | ts=2021-05-19T12:37:23.548747Z lvl=info msg=Stopping log_id=0UD9wCAG000 service=storage-engine
influxdb_1  | ts=2021-05-19T12:37:23.548788Z lvl=info msg="Closing retention policy enforcement service" log_id=0UD9wCAG000 service=retention
influxdb_1  | ts=2021-05-19T12:37:29.740107Z lvl=info msg="Welcome to InfluxDB" log_id=0UD9wj2l000 version=2.0.6 commit=4db98b4c9a build_date=2021-04-29T16:48:12Z
influxdb_1  | ts=2021-05-19T12:37:29.751816Z lvl=info msg="Resources opened" log_id=0UD9wj2l000 service=bolt path=/var/lib/influxdb2/influxd.bolt
influxdb_1  | ts=2021-05-19T12:37:29.756974Z lvl=info msg="Checking InfluxDB metadata for prior version." log_id=0UD9wj2l000 bolt_path=/var/lib/influxdb2/influxd.bolt
influxdb_1  | ts=2021-05-19T12:37:29.757053Z lvl=info msg="Using data dir" log_id=0UD9wj2l000 service=storage-engine service=store path=/var/lib/influxdb2/engine/data
influxdb_1  | ts=2021-05-19T12:37:29.757087Z lvl=info msg="Compaction settings" log_id=0UD9wj2l000 service=storage-engine service=store max_concurrent_compactions=3 throughput_bytes_per_second=50331648 throughput_bytes_per_second_burst=50331648
influxdb_1  | ts=2021-05-19T12:37:29.757099Z lvl=info msg="Open store (start)" log_id=0UD9wj2l000 service=storage-engine service=store op_name=tsdb_open op_event=start
influxdb_1  | ts=2021-05-19T12:37:29.757149Z lvl=info msg="Open store (end)" log_id=0UD9wj2l000 service=storage-engine service=store op_name=tsdb_open op_event=end op_elapsed=0.051ms
influxdb_1  | ts=2021-05-19T12:37:29.757182Z lvl=info msg="Starting retention policy enforcement service" log_id=0UD9wj2l000 service=retention check_interval=30m
influxdb_1  | ts=2021-05-19T12:37:29.757187Z lvl=info msg="Starting precreation service" log_id=0UD9wj2l000 service=shard-precreation check_interval=10m advance_period=30m
influxdb_1  | ts=2021-05-19T12:37:29.757205Z lvl=info msg="Starting query controller" log_id=0UD9wj2l000 service=storage-reads concurrency_quota=1024 initial_memory_bytes_quota_per_query=9223372036854775807 memory_bytes_quota_per_query=9223372036854775807 max_memory_bytes=0 queue_size=1024
influxdb_1  | ts=2021-05-19T12:37:29.758844Z lvl=info msg="Configuring InfluxQL statement executor (zeros indicate unlimited)." log_id=0UD9wj2l000 max_select_point=0 max_select_series=0 max_select_buckets=0
influxdb_1  | ts=2021-05-19T12:37:30.056855Z lvl=info msg=Listening log_id=0UD9wj2l000 service=tcp-listener transport=http addr=:8086 port=8086
influxdb_1  | ts=2021-05-19T12:37:30.056882Z lvl=info msg=Starting log_id=0UD9wj2l000 service=telemetry interval=8h

After everything is rolling you can open up a web browser and go to “http://localhost:8086” and you should see something like this:  (I will sort out the http vs https in a later post – because I don’t actually know how to fix it right now.

Once you enter the account and password (that you configured in the docker-compose.yaml” you will see this screen and you are off to the races.

InfluxDB Basics

Before we go too much further lets talk about some of the basics of the Influx Database.  An Influx Database also called a “bucket” has the following built in columns:

  • _timestamp: The time for the data point stored in epoch nanosecond format (how’s that for some precision)
  • _measurement: A text string name for the a group of related datapoints
  • _field: A text string key for the datapoint
  • _value: The value of the datapoint

In addition you can add “ad-hoc” columns called “tags” which have a “key” and a “value”

Organization A group of users and the related buckets, dashboards and tasks
Bucket A database
Timestamp The time of the datapoint measured in epoch nanoseconds
Field A field includes a field key stored in the _field column and a field value stored in the _value column.
Field Set A field set is a collection of field key-value pairs associated with a timestamp.
Measurement A measurement acts as a container for tags fields and timestamps. Use a measurement name that describes your data.
Tag Key/Value pairs assigned to a datapoint.  They are used to index the datapoints (so searches are faster)

Here is a snapshot of the data in my Creek Influx database.  You can see that I have two fields

  • depth
  • temperature

I am saving all of the datapoints in the “elkhorncreek” _measurement.  And there are no tags (but I have ideas for that in the future)

InfluxDB Line Protocol

There are a number of different methods to insert data into the Influx DB.  Several of them rely on “Line Protocol“.  This is simply a text string formatted like this:

For my purposes a text string like this will insert a new datapoint into the “elkhorncreek” measurement with a depth of 1.85 fee and a temperature of 19c (yes we are a mixed unit household)

  • elkhorncreek depth=1.85,temperature=19.0

Python & InfluxDB

I know that I want to run a Python program on the Raspberry Pi which gets the sensor data via I2C and then writes it into the cloud using the InfluxAPI.  It turns out that when you log into you new Influx DB that there is a built in webpage which shows you exactly how to do this.  Click on “Data” then “sources” then “Python”

You will see a screen like this which has exactly the Python code you need (almost).

To make this code work on your system you need to install the influxdb-client library by running “pip install influxdb-client”

(venv) pi@iotexpertpi:~/influx-test $ pip install influxdb-client
Looking in indexes: https://pypi.org/simple, https://www.piwheels.org/simple
Collecting influxdb-client
Using cached https://files.pythonhosted.org/packages/6b/0e/5c5a9a2da144fae80b23dd9741175493d8dbeabd17d23e5aff27c92dbfd5/influxdb_client-1.17.0-py3-none-any.whl
Collecting urllib3>=1.15.1 (from influxdb-client)
Using cached https://files.pythonhosted.org/packages/09/c6/d3e3abe5b4f4f16cf0dfc9240ab7ce10c2baa0e268989a4e3ec19e90c84e/urllib3-1.26.4-py2.py3-none-any.whl
Collecting pytz>=2019.1 (from influxdb-client)
Using cached https://files.pythonhosted.org/packages/70/94/784178ca5dd892a98f113cdd923372024dc04b8d40abe77ca76b5fb90ca6/pytz-2021.1-py2.py3-none-any.whl
Collecting certifi>=14.05.14 (from influxdb-client)
Using cached https://files.pythonhosted.org/packages/5e/a0/5f06e1e1d463903cf0c0eebeb751791119ed7a4b3737fdc9a77f1cdfb51f/certifi-2020.12.5-py2.py3-none-any.whl
Collecting rx>=3.0.1 (from influxdb-client)
Using cached https://files.pythonhosted.org/packages/e2/a9/efeaeca4928a9a56d04d609b5730994d610c82cf4d9dd7aa173e6ef4233e/Rx-3.2.0-py3-none-any.whl
Collecting six>=1.10 (from influxdb-client)
Using cached https://files.pythonhosted.org/packages/d9/5a/e7c31adbe875f2abbb91bd84cf2dc52d792b5a01506781dbcf25c91daf11/six-1.16.0-py2.py3-none-any.whl
Requirement already satisfied: setuptools>=21.0.0 in ./venv/lib/python3.7/site-packages (from influxdb-client) (40.8.0)
Collecting python-dateutil>=2.5.3 (from influxdb-client)
Using cached https://files.pythonhosted.org/packages/d4/70/d60450c3dd48ef87586924207ae8907090de0b306af2bce5d134d78615cb/python_dateutil-2.8.1-py2.py3-none-any.whl
Installing collected packages: urllib3, pytz, certifi, rx, six, python-dateutil, influxdb-client
Successfully installed certifi-2020.12.5 influxdb-client-1.17.0 python-dateutil-2.8.1 pytz-2021.1 rx-3.2.0 six-1.16.0 urllib3-1.26.4
(venv) pi@iotexpertpi:~/influx-test $

Now write a little bit of code.  If you remember from the previous post I run a cronjob that gets the data from the I2C.  It will then run this program to do the insert of the data into the Influxdb.  Notice that I get the depth and temperature from the command line.   The “token” is an API key which you must include with requests to identify you are having permission to write into the database (more on this later).  The “data” variable is just a string formatted in “Influx Line Protocol”

import sys
from datetime import datetime
from influxdb_client import InfluxDBClient, Point, WritePrecision
from influxdb_client.client.write_api import SYNCHRONOUS
if len(sys.argv) != 3:
sys.exit("Wrong number of arguments")
# You can generate a Token from the "Tokens Tab" in the UI
token = "UvZvrrnk8yXvlVm1yrMmH2ZE706dZ14kpqSoE2u0COnDdqmQFTmIWPMjk0U2tO_GqmjzCupi_EaYP65RP4bELQ=="
org = "creekdata"
bucket = "creekdata"
client = InfluxDBClient(url="http://linux.local:8086", token=token)
write_api = client.write_api(write_options=SYNCHRONOUS)
data = f"elkhorncreek depth={sys.argv[1]},temperature={sys.argv[2]}"
write_api.write(bucket, org, data)
#print(data)

Now I update my getInsertData.sh shell script to run the Influx as well as the original MySQL insert.

#!/bin/bash
cd ~/influxdb
source venv/bin/activate
vals=$(python getData.py)
#echo $vals
python insertMysql.py $vals
python insertInflux.py $vals

InfluxDB Data Explorer

After a bit of time (for some inserts to happen) I go to the data explorer in the web interface.  You can see that I have a number of readings.  This is filtering for “depth”

This is filtering for “temperature”

Influx Tokens

To interact with an instance of the InfluxDB you will need an API key, which they call a token.  Press the “data” icon on the left side of the screen.  Then click “Tokens”.  You will see the currently available tokens, in this case just the original token.  You can create more tokens by pressing the blue + generate Token icon.

Clock on the token.  Then copy it to your clipboard.