Summary
This is the first article in a series that will discuss how to use the MBED OS file systems with Cypress SPI Nor Flash chips and PSoC 6.
Title
The Back Story & Making the LittleFS Work with the CY8CKIT_062_4343W
The Architecture of Filesystems in MBEDOS
SPI Nor Flash
SFDP
The MBED OS Quad SPI Driver
LittleFS
FATFS
MBED OS and POSIX Files
The Back Story
On a bunch of our development kits there is a SPI NOR Flash sitting right next to the PSoC 6. Which exact SPI flash depends on the exact generation of development kit. I have always wanted to use these chips, but had never had time to sort out how they work. And quite frankly we never made it very easy to use them because although they were connected, we didn’t provide much in the way of software support. However, with the advent of MBED OS at Cypress we were suddenly gifted with two file systems to use, LittleFS and FATFS.
This journey starts with an email note to the Applications manager in India (an awesome woman named Jaya)… “Hey, can you get someone to send me an example of the MBED OS flash file system on the CY8CPROTO_062_4343W.” A day or so later I got an email with an attached project and a “memo” that explained what to do. This exchange happened right before Embedded World in February and I was really busy. Finally, a couple of weeks ago I read the email and the instructions which started with “Break off the NOR Flash wing and solder….” If you look in the picture below you can see that at the top of the kit there is a breakaway wing (circled in green) that has a SPI Flash chip on it (circled in red).
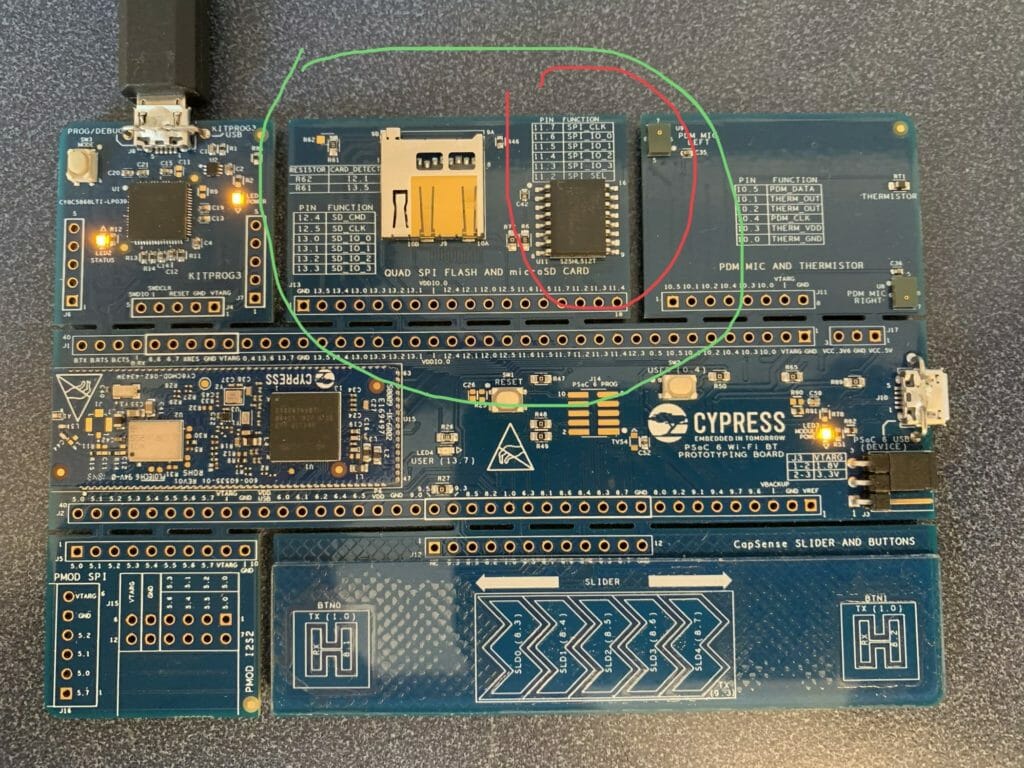
Honestly, I didn’t read any further than “.. break off the wing…”. So, I sent another note … “Uh… how about no. Why can’t I use the development kit without soldering?”… And these two emails were my first steps down the Embedded FileSystem & NOR Flash Rabbit Hole which is the subject of this series of articles.
Making the LittleFS Work with the CY8CKIT_062_4343W
I am going to start by giving you the step by step instructions to make the LittleFS work … and these instruction will only include a little bit of commentary on how it works. I will expand on the “how” in all of the follow on articles. To make it work you need to follow these steps:
- Clone the MBEDOS FileSystem Example
- Clone my QSPI driver path
- Then patch MBEDOS with the updated QSPI driver.
- Test
- Examine the Project
The first step in the process of running the example is to clone the MBED OS Example Project for Filesystems. To do this, run “mbed import mbed-os-example-filesystem”. As I noted above, the default MBED does not have the required drivers for the Quad SPI interface. Fortunately another excellent Applications engineer in India named Vaira built me a QSPI driver in advance of the actual official release from Cypress. I have put these drivers on the iotexpert github repository and you can get them with a “git clone git@github.com:iotexpert/MBED_QSPI_PATCHES.git”. Once you have them you can apply the patch by
- cd mbed-os-example-filesystem
- ../MBED_QSPI_PATCHES/patch-qspi-mbed.sh
The shell script is simple program that copies the driver files into the correct locations in your mbed-os directory in your current project. I will talk in detail about these files in a later article.
#!/bin/sh

cp ../MBED_QSPI_PATCHES/qspi_api.c ../MBED_QSPI_PATCHES/objects.h mbed-os/targets/TARGET_Cypress/TARGET_PSoC6
cp ../MBED_QSPI_PATCHES/targets.json mbed-os/targets
cp ../MBED_QSPI_PATCHES/PinNames.h mbed-os/targets/TARGET_Cypress/TARGET_PSOC6/TARGET_CY8CMOD_062_4343W/TARGET_CY8CPROTO_062_4343W/
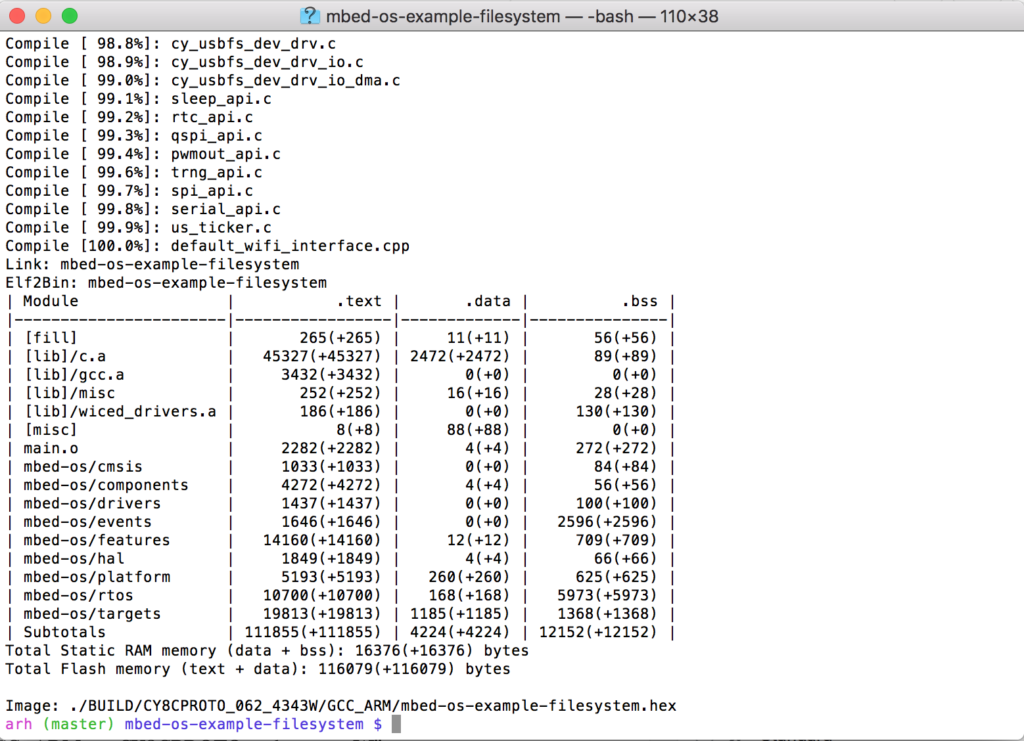
Here is what my terminal looks like after I run the import, clone and apply patches.

Next I will build the project “as-is” using “mbed compile -t GCC_ARM -m CY8CPROTO_062_4343W”
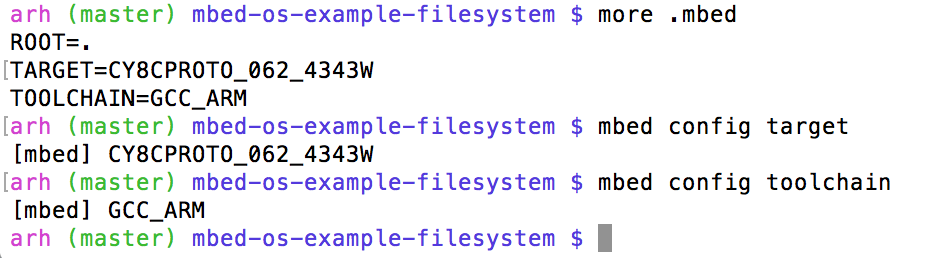
OK, the project looks like it builds with no problems (other than a very annoying boatload of warnings – I really wish people weren’t slobs). Running the compile also has the nice side effect of setting the default target and toolchain. You can see this by either looking at the “.mbed” file or by running “mbed config target” or “mbed config toolchain”. Here is what my terminal window looks like
Test
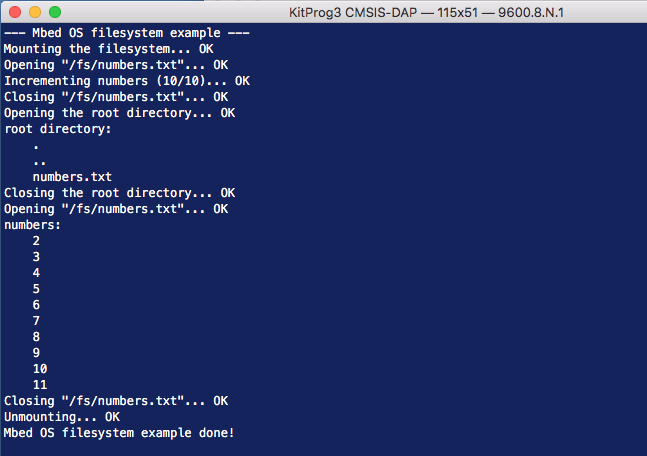
I generally like to test a project before I start making changes to it. I already compiled, so now, I program it into the board with either the Cypress Programmer or by running “mbed compile -f”. When you attach a serial program to the development kit you will get something like this:
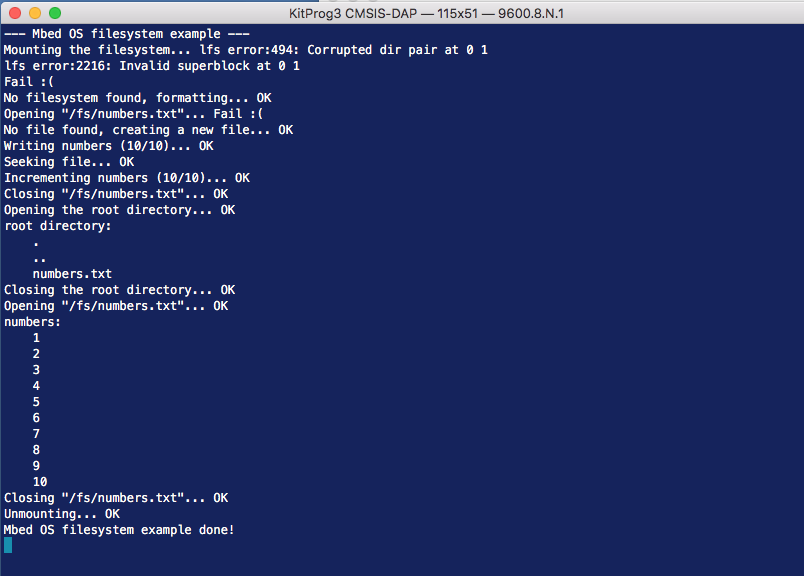
So, the project seems to work. When I run the project again (by pressing the reset button on the board), here is what I get:
But what is it doing? First, lets get the code into an editor where we can see what is happening:
Visual Studio Code
Recently, I have been using Visual Studio Code to view and edit my projects. To make that experience better, it is a good idea to “export” the project from the MBED CLI. This doesn’t change anything in your project, but it does create the files to make VSCODE work better. To do this run “mbed export -i vscode_gcc_arm -m CY8CPROTO_062_4343W –profile mbed-os/tools/profiles/debug.json”
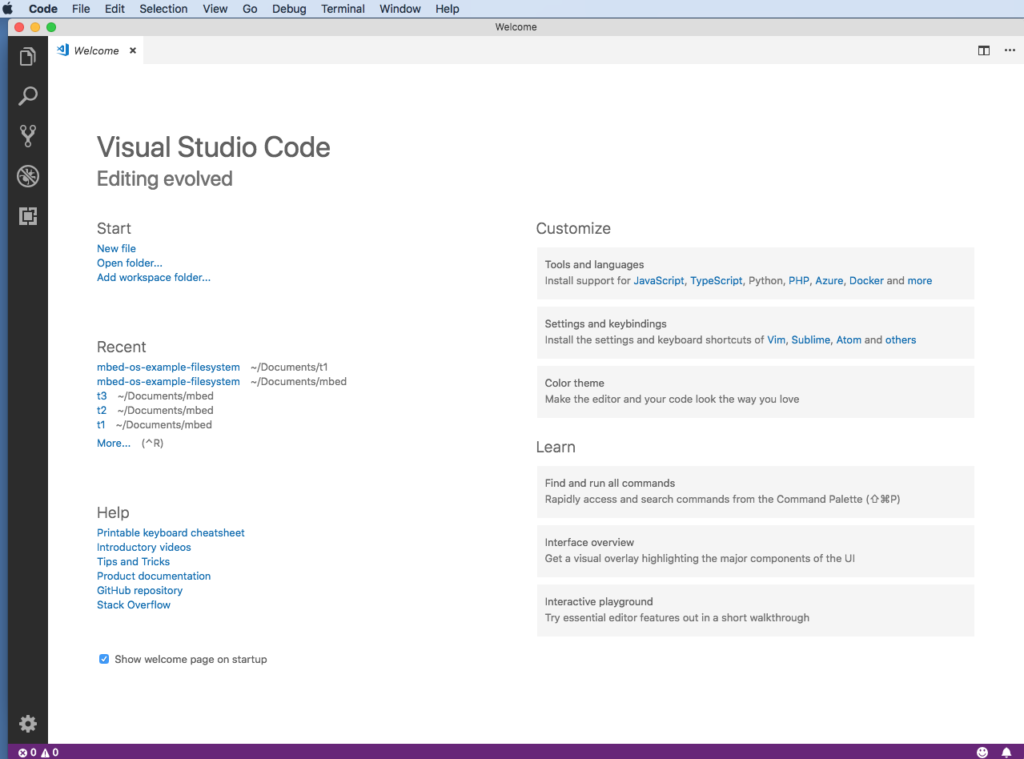
When you start VSCODE it will look something like this:
When I open the directory with my project with the “File -> Open …” menu
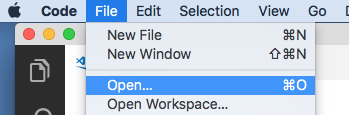
It will look like this:
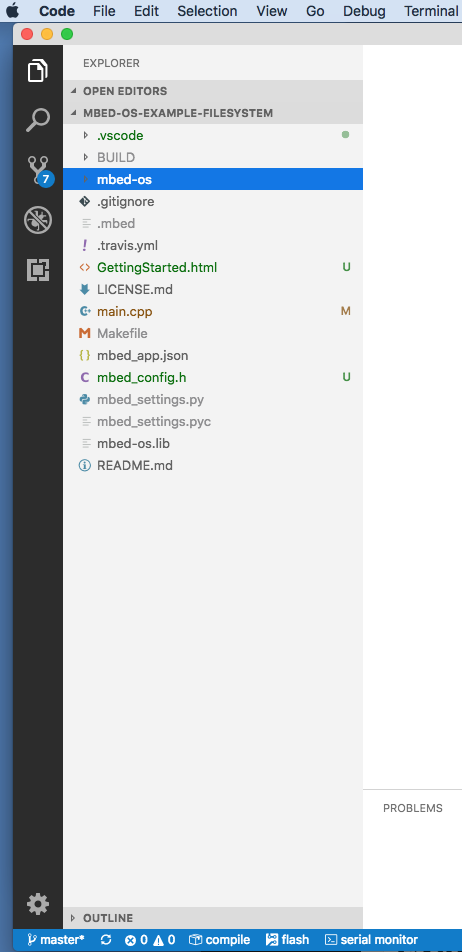
Examine the Project
Now click on main.cpp and your screen should look like this:
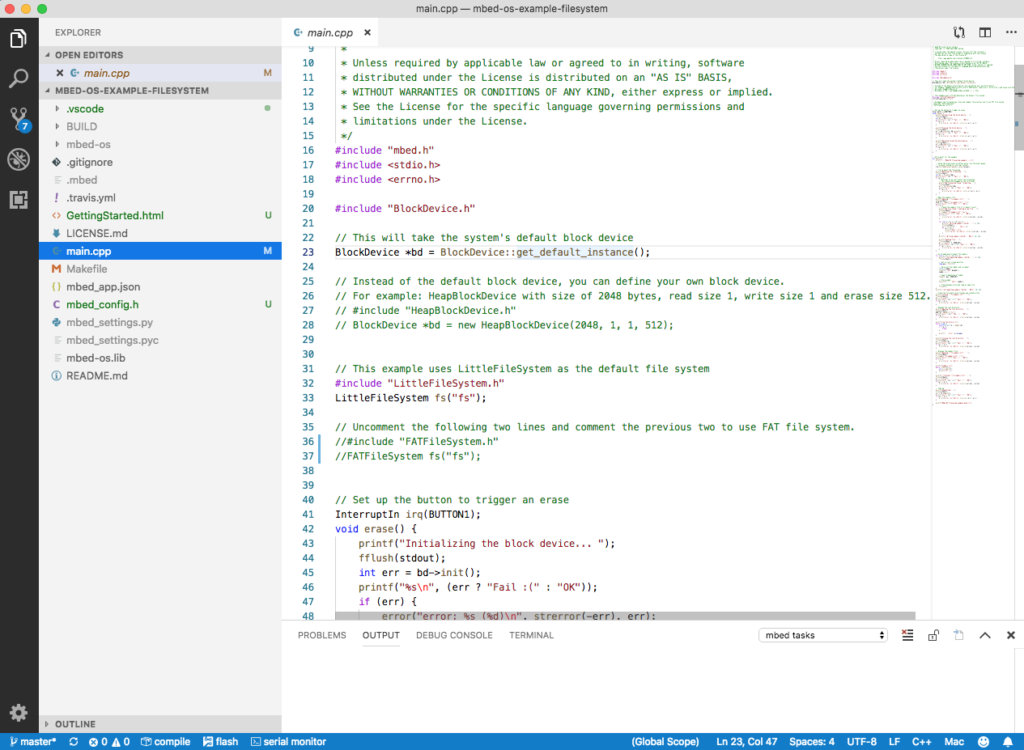
To make any of the MBED OS Filesystems work, they need to have a “BlockDevice” to read and write the media, meaning the SPI Flash or SD Card or … The project as it comes from ARM creates the BlockDevice on line 23 where it asks for the “default_instance”. Those configuration files which we patched MBED with earlier sets up the default instance to be the QSPI flash on the development kit (which I will explain in great detail in a later article).
After you have a BlockDevice, the next thing that you need is a FileSystem object. In this case on line 31-33 you can see that this project uses a LittleFileSystem. The argument to the LittleFileSystem object creation is the mount point (think Unix “/fs/”). The mount point is used by all of the POSIX APIs (open, close, read etc). I will talk more about POSIX in later article.
// This example uses LittleFileSystem as the default file system
#include "LittleFileSystem.h"
LittleFileSystem fs("fs");
Near the start of main, the first real thing that happens is that you need to “mount” the Filesystem onto the BlockDevice. This is done on line 80. The mount will return an non-zero error code if there is nothing on the SPI Flash or the SPI Flash is corrupted. If the mount fails, the program will try to create a filesystem by calling “reformat” on line 87. If that fails the “error” will halt the whole thing and blink the red light on the board.
    int err = fs.mount(bd);
    printf("%s\n", (err ? "Fail :(" : "OK"));
    if (err) {
        // Reformat if we can't mount the filesystem
        // this should only happen on the first boot
        printf("No filesystem found, formatting... ");
        fflush(stdout);
        err = fs.reformat(bd);
        printf("%s\n", (err ? "Fail :(" : "OK"));
        if (err) {
            error("error: %s (%d)\n", strerror(-err), err);
        }
    }
Once we have a Filesystem (object) and it is formatted, the project will try to open the file “/fs/numbers.txt” using the POSIX API “open” on line 97. The open specifics that it is to open the file for “read” and that it will append the “+”. If that operation fails, it will try to create the file on line 103.
 FILE *f = fopen("/fs/numbers.txt", "r+");
    printf("%s\n", (!f ? "Fail :(" : "OK"));
    if (!f) {
        // Create the numbers file if it doesn't exist
        printf("No file found, creating a new file... ");
        fflush(stdout);
        f = fopen("/fs/numbers.txt", "w+");
        printf("%s\n", (!f ? "Fail :(" : "OK"));
        if (!f) {
            error("error: %s (%d)\n", strerror(errno), -errno);
        }
If the file was opened for the first time, it will write the numbers 0-9 into the file using the loop (109) and fprintf (line 112). The file will have lines with 4 spaces followed by a number then a “\n”. This format was chosen to make the parsing easier later on in the program.
        for (int i = 0; i < 10; i++) {
            printf("\rWriting numbers (%d/%d)... ", i, 10);
            fflush(stdout);
            err = fprintf(f, "    %d\n", i);
            if (err < 0) {
                printf("Fail :(\n");
                error("error: %s (%d)\n", strerror(errno), -errno);
            }
        }
        printf("\rWriting numbers (%d/%d)... OK\n", 10, 10);
Once the file is initialized, you want the put the file point back to the start which is done with the “fseek” on line 122.
        printf("Seeking file... ");
        fflush(stdout);
        err = fseek(f, 0, SEEK_SET);
        printf("%s\n", (err < 0 ? "Fail :(" : "OK"));
        if (err < 0) {
            error("error: %s (%d)\n", strerror(errno), -errno);
        }
The main part of the program will start at the top, read the numbers and increment them, and write them back into the file. I am not really in love with this block of code… but I suppose that it is functional.
    // Go through and increment the numbers
    for (int i = 0; i < 10; i++) {
        printf("\rIncrementing numbers (%d/%d)... ", i, 10);
        fflush(stdout);

        // Get current stream position
        long pos = ftell(f);

        // Parse out the number and increment
        int32_t number;
        fscanf(f, "%d", &number);
        number += 1;

        // Seek to beginning of number
        fseek(f, pos, SEEK_SET);

        // Store number
        fprintf(f, "    %d\n", number);

        // Flush between write and read on same file
        fflush(f);
    }
    printf("\rIncrementing numbers (%d/%d)... OK\n", 10, 10);
Once all of the numbers are incremented and written back into the file, the last step is closing the file on line 156.
    // Close the file which also flushes any cached writes
    printf("Closing \"/fs/numbers.txt\"... ");
    fflush(stdout);
    err = fclose(f);
    printf("%s\n", (err < 0 ? "Fail :(" : "OK"));
    if (err < 0) {
        error("error: %s (%d)\n", strerror(errno), -errno);
    }
The next phase of the program is to do a directory listing using the POSIX directory APIs (opendir, readdir,closedir). This little block of code will print out all of the files in the “/fs” directory.
  // Display the root directory
    printf("Opening the root directory... ");
    fflush(stdout);
    DIR *d = opendir("/fs/");
    printf("%s\n", (!d ? "Fail :(" : "OK"));
    if (!d) {
        error("error: %s (%d)\n", strerror(errno), -errno);
    }

    printf("root directory:\n");
    while (true) {
        struct dirent *e = readdir(d);
        if (!e) {
            break;
        }

        printf("    %s\n", e->d_name);
    }

    printf("Closing the root directory... ");
    fflush(stdout);
    err = closedir(d);
    printf("%s\n", (err < 0 ? "Fail :(" : "OK"));
    if (err < 0) {
        error("error: %s (%d)\n", strerror(errno), -errno);
    }
Then they demonstrate opening the numbers.txt file and printing out the data.
    // Display the numbers file
    printf("Opening \"/fs/numbers.txt\"... ");
    fflush(stdout);
    f = fopen("/fs/numbers.txt", "r");
    printf("%s\n", (!f ? "Fail :(" : "OK"));
    if (!f) {
        error("error: %s (%d)\n", strerror(errno), -errno);
    }

    printf("numbers:\n");
    while (!feof(f)) {
        int c = fgetc(f);
        printf("%c", c);
    }

    printf("\rClosing \"/fs/numbers.txt\"... ");
    fflush(stdout);
    err = fclose(f);
    printf("%s\n", (err < 0 ? "Fail :(" : "OK"));
    if (err < 0) {
        error("error: %s (%d)\n", strerror(errno), -errno);
    }
And finally closing things up by unmounting the filesystem.
   // Tidy up
    printf("Unmounting... ");
    fflush(stdout);
    err = fs.unmount();
    printf("%s\n", (err < 0 ? "Fail :(" : "OK"));
    if (err < 0) {
        error("error: %s (%d)\n", strerror(-err), err);
    }

    printf("Mbed OS filesystem example done!\n");
Super Annoying Hard Code
All through this example program the number “10” is hardcoded. This is called a MAGIC NUMBER and in this particular case is not at all a good thing. Moreover, lines of code like this represent absolute insanity.
printf("\rIncrementing numbers (%d/%d)... OK\n", 10, 10);
Really… just don’t do this. Friends don’t let friends use magic numbers.
Erasing the FileSystem
Near the top of main you can see that they register an interrupt to create an event when the button on the development kit is pressed.
irq.fall(mbed_event_queue()->event(erase));
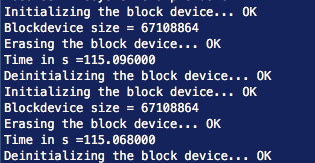
The erase function simply initializes the block device, calls erase and then de-inits the block device. This will cause the whole thing to begin anew when the kit is reset.
void erase() {
    printf("Initializing the block device... ");
    fflush(stdout);
    int err = bd->init();
    printf("%s\n", (err ? "Fail :(" : "OK"));
    if (err) {
        error("error: %s (%d)\n", strerror(-err), err);
    }

    printf("Erasing the block device... ");
    fflush(stdout);
    err = bd->erase(0, bd->size());
    printf("%s\n", (err ? "Fail :(" : "OK"));
    if (err) {
        error("error: %s (%d)\n", strerror(-err), err);
    }

    printf("Deinitializing the block device... ");
    fflush(stdout);
    err = bd->deinit();
    printf("%s\n", (err ? "Fail :(" : "OK"));
    if (err) {
        error("error: %s (%d)\n", strerror(-err), err);
    }
}
The first time I ran the erase, I thought that there was something wrong… and I ended up going through a big debug loop. The final step in the debug loop was being patient… which isn’t really in my wheelhouse. I added this little block of code which timed the erase operation.
    Timer t;
    t.start();
    err = bd->erase(0,bd->size());
    t.stop();

    printf("%s\n", (err ? "Fail :(" : "OK"));
    if (err) {
        error("error: %s (%d)\n", strerror(-err), err);
    }
    printf("Time in s =%f\n",((double)t.read_ms())/1000.0);
And it turns out the answer is 115.06 seconds. I am going to have to figure out why it takes so long.
The last thing to notice is that if you press the erase button while it is writing the files, Im pretty sure that something bad happens.
In the next articles I will examine this system in much much more detail. Again thanks to Jaya and Vaira for their excellent work.

No comment yet, add your voice below!