In the previous post, I introduced Bus Pirate V3 – specifically the Sparkfun version. After digging through things a little bit I decided to order the SeeedStudio V3 Bus Pirate. This version has exactly the same firmware, pinout etc as the Sparkfun version. However, there are a few good improvements in the SeeedStudio version.
First, the silkscreen on the SeeedStudio board is WAY better. There is no good excuse for having a bad silkscreen on your board. When you compare the two boards you can easily see the labels that clearly document the pins.
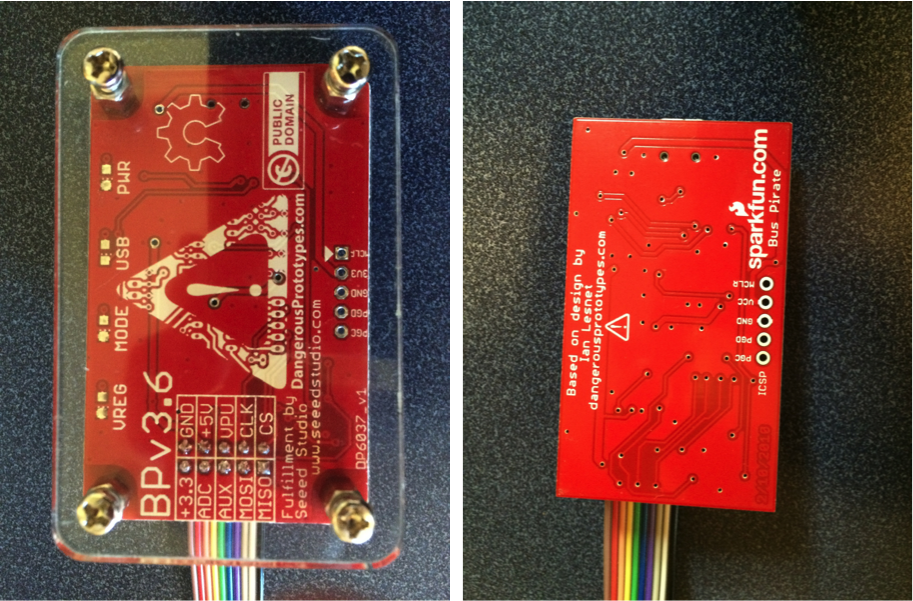
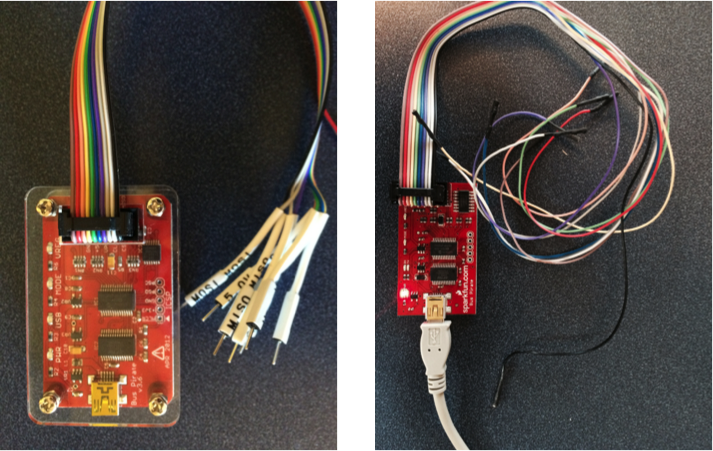
Second, the cable that you can get from SeeedStudio has beautiful heat shrink labels on the end of the cable. And, more importantly the colors match the pins on the board. In the picture the below the SparkFun cable colors are correct because I uncrimped the cable and fixed it as I described in the previous post.
And lastly, the SeeedStudio version is compatible with their acrylic case which is inexpensive and works well. It is just two pieces of acrylic that have been laser cut to fit the BP. Nice.
For my project I have:
- An FM24V10 FRAM from mounted onto a PSoC 4000 development kit from Cypress
- An ADXL345 3-Axis accelerometer mounted on an breakout board from Adafruit.
- An BMP180 Barometric pressure and temperature sensor on a breakout board from Adafruit
- A HDU-21D-F Humidity and temperature sensor on a breakout board from Adafruit
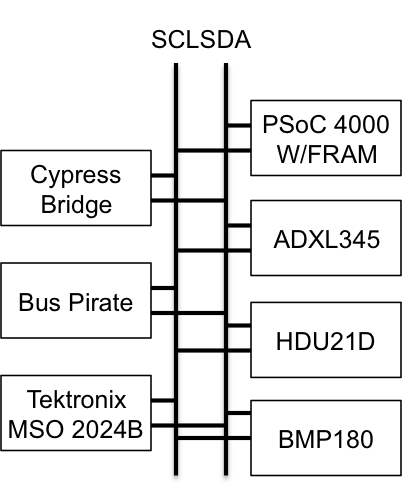
Here is the schematic:
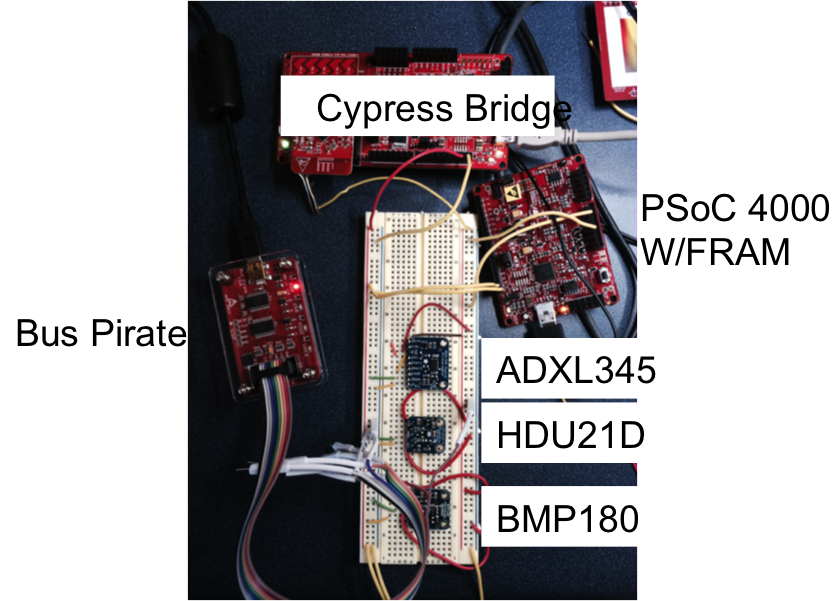
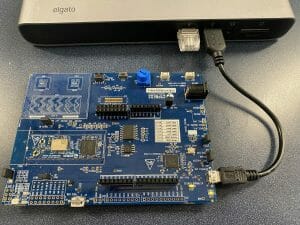
And, here is a picture of the crazy breadboard.
When you attach a terminal program – like Putty – to the usb serial port of the Bus Pirate, you are given a command prompt (press enter to get the prompt). The first prompt that you get is “HiZ” which indicates that all of the pins of the BP are in high impedance mode. Then, I issue the “m” command which tells the BP that I want to switch the mode. I select “4” to put the BP into I2C mode. I then select “4” to pick 400khz. Notice that the BP says “~400kz” which almost certainly means that the I2C is implemented with bit banging. Then I turn on the I2C pullup resistors using the “P” (capital P) which are on the BP board. In order for them to work you need to attach the “VPU” pin to either 3.3v or 5.0v. The last command that I issue is a macro, all the macros are enclosed in parenthesis. The macro that I issue is “(1)” which searches the I2C address space (addresses 1-127) and makes a list of all of the devices that respond.
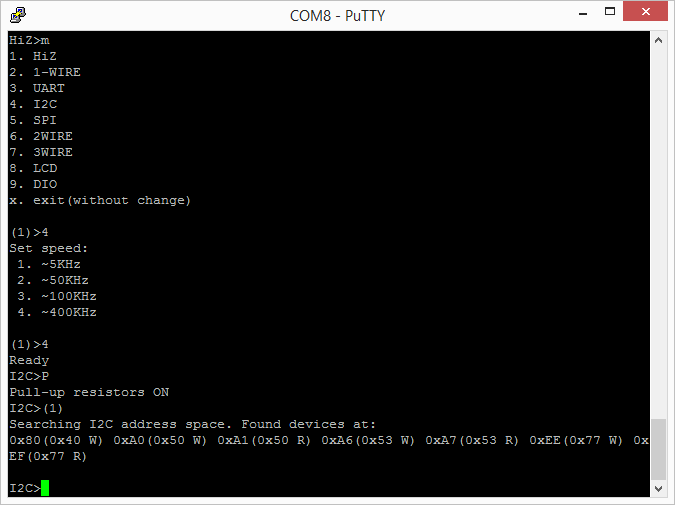
In my setup there are 4 I2C devices
| Device | 7-bit address | 8-bit read | 8-bit write |
|---|---|---|---|
| FRAM | 0x50 | 0xA1 | 0xA1 |
| ADXL345 | 0x53 | 0xA7 | 0xA6 |
| BMP180 | 0x77 | 0xEF | 0xEE |
| HTU21 | 0x40 | 0x81 | 0x80 |
In order to write to the FRAM you need to issue:
- An I2C Start – in BP that means “[“
- The 7-bit I2C address of the FRAM (0x50) and the write bit “0”. AKA 0xA0
- The two byte address of where you want to start writing data in the FRAM 0x00 and 0x00
- The data – in this case 9,8,7,6,5,4,3,2,1 (which means that locations 0-8 will contain 9..1)
- An I2C stop – in BP that means “]”
After issuing this sequence “[0xa0 0 0 9 8 7 6 5 4 3 2 1]” you can see the commands that are actually issueed on the I2C bus as well as the slave FRAM responding with “ACK”.

The second example which you can see in the above screen shot is to read from the FRAM. In order to do this you need to issue the following I2C commands
- An I2C Start – “[“
- The 7-bit I2C address of the FRAM (0x50) and the write bit “0”. AKA 0xA0 (left shift the 0x50 and or it with the read 0x00)
- The two by address of where you would like to read 0x00 and 0x00
- An I2C Stop – “]”
- An I2C Start (aka Restart) – “[“
- The 7-bit I2C address of the FRAM (0x50) and the read bit “1”. AKA 0xA1 (left shift the 0x50 and or it with the read 0x01)
- 5 reads
After issuing this sequence “[0xa0 0 0][0xa1 r:5]” you can see the commands that are actually issued on the I2C bus as well as the slave FRAM responding with the data in the FRAM and the “ACKs”.
In the next post I will introduce the V4 Bus Pirate.

No comment yet, add your voice below!