Summary
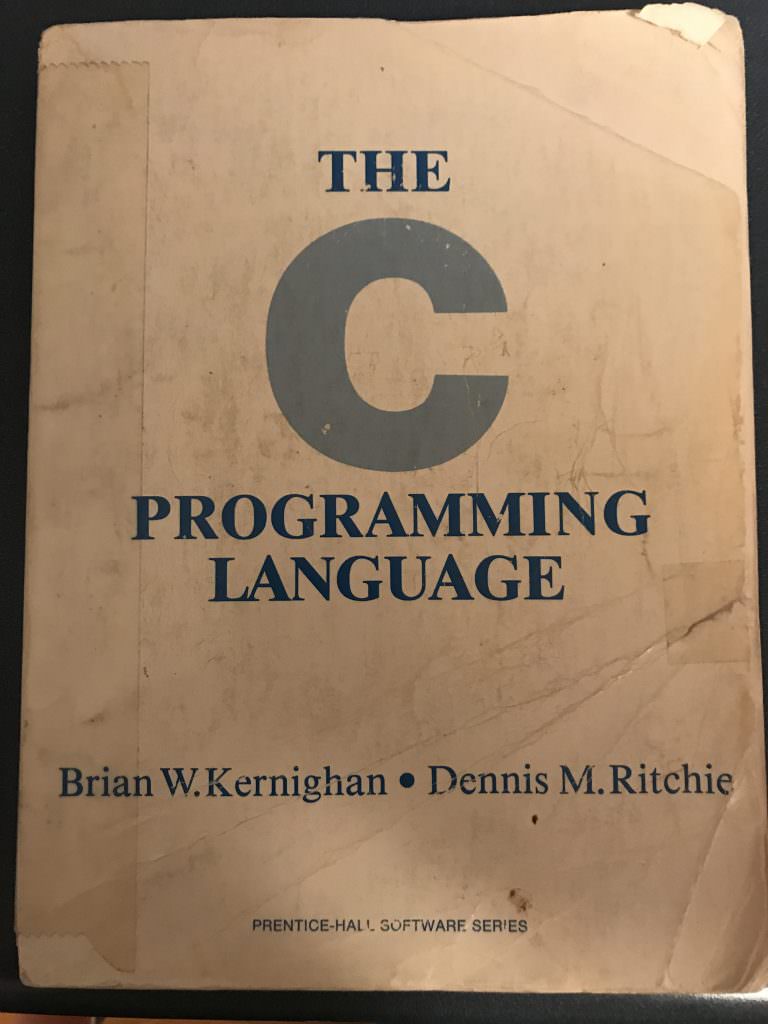
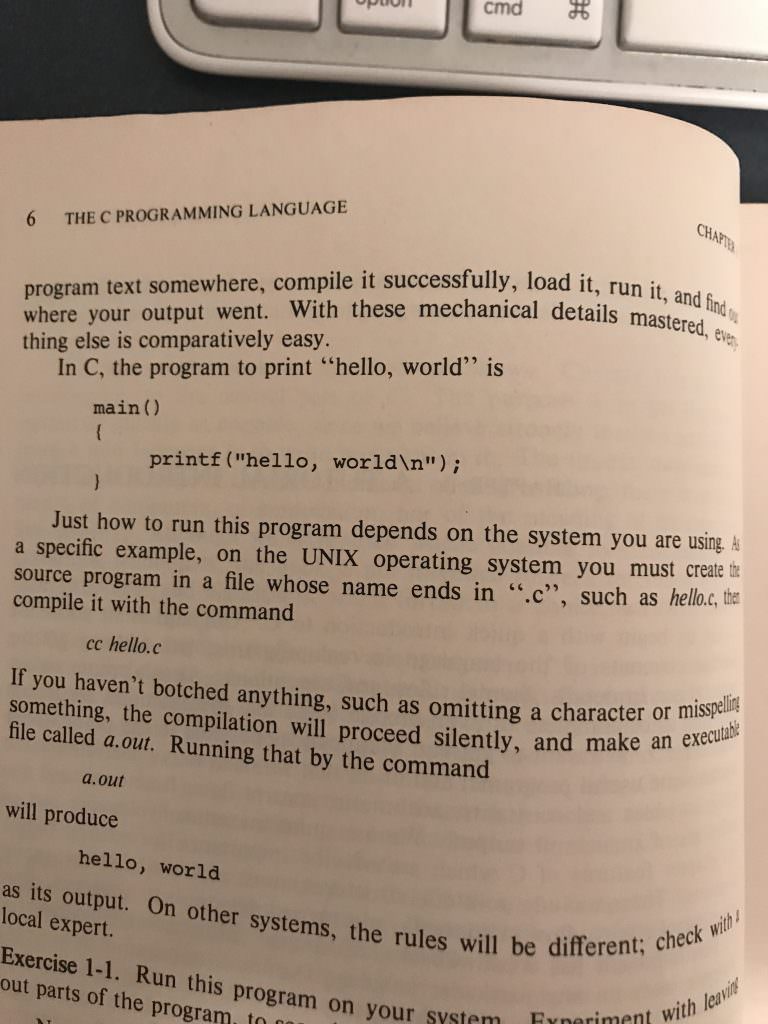
In 1978, Brian Kernighan and Dennis Ritchie published their iconic book “The C Programming Language”. For years this book was the de-facto standard for “C”, often referred to as “K&R”. On page 6 they created the archetypical “first program” for programmers, Hello World. This simple example has propagated into almost every programming language book since then. Here is a picture of my copy of K&R which I bought while I was in high school and have been carrying around for more than 30 years (obviously).
I teach people all over the world to program PSoC. The first program I show people is always the Blinking LED. The purpose of the Blinking LED is the same as Hello World, to show that you can make the whole development environment work correctly and make something happen. Invariably, anyone who has ever programmed C always asks me “How do I printf?” and I always have to answer “Well…ummm… you can… but sort of can’t.. ummm you need to use UART_UartPutString or something … umm blah blah”. It isn’t really very satisfying as an answer. So, back to K&R, here is hello world from page 6 above.
#include <stdio.h>

main()
{
    printf("hello, world\n");
}
If you try to run this program on a PSoC, it will compile, build and program. But, it won’t actually do anything. There are a number of reasons why PSoC printf doesn’t work correctly, and this article will show you how to overcome those problems.
To make PSoC printf work you need to do three things
- Create an output device with a UART, SPI or something
- Provide the code that PSoC printf needs to output to that device (compiler specific)
- Give enough memory to PSoC printf so that it doesn’t hang
Output Device
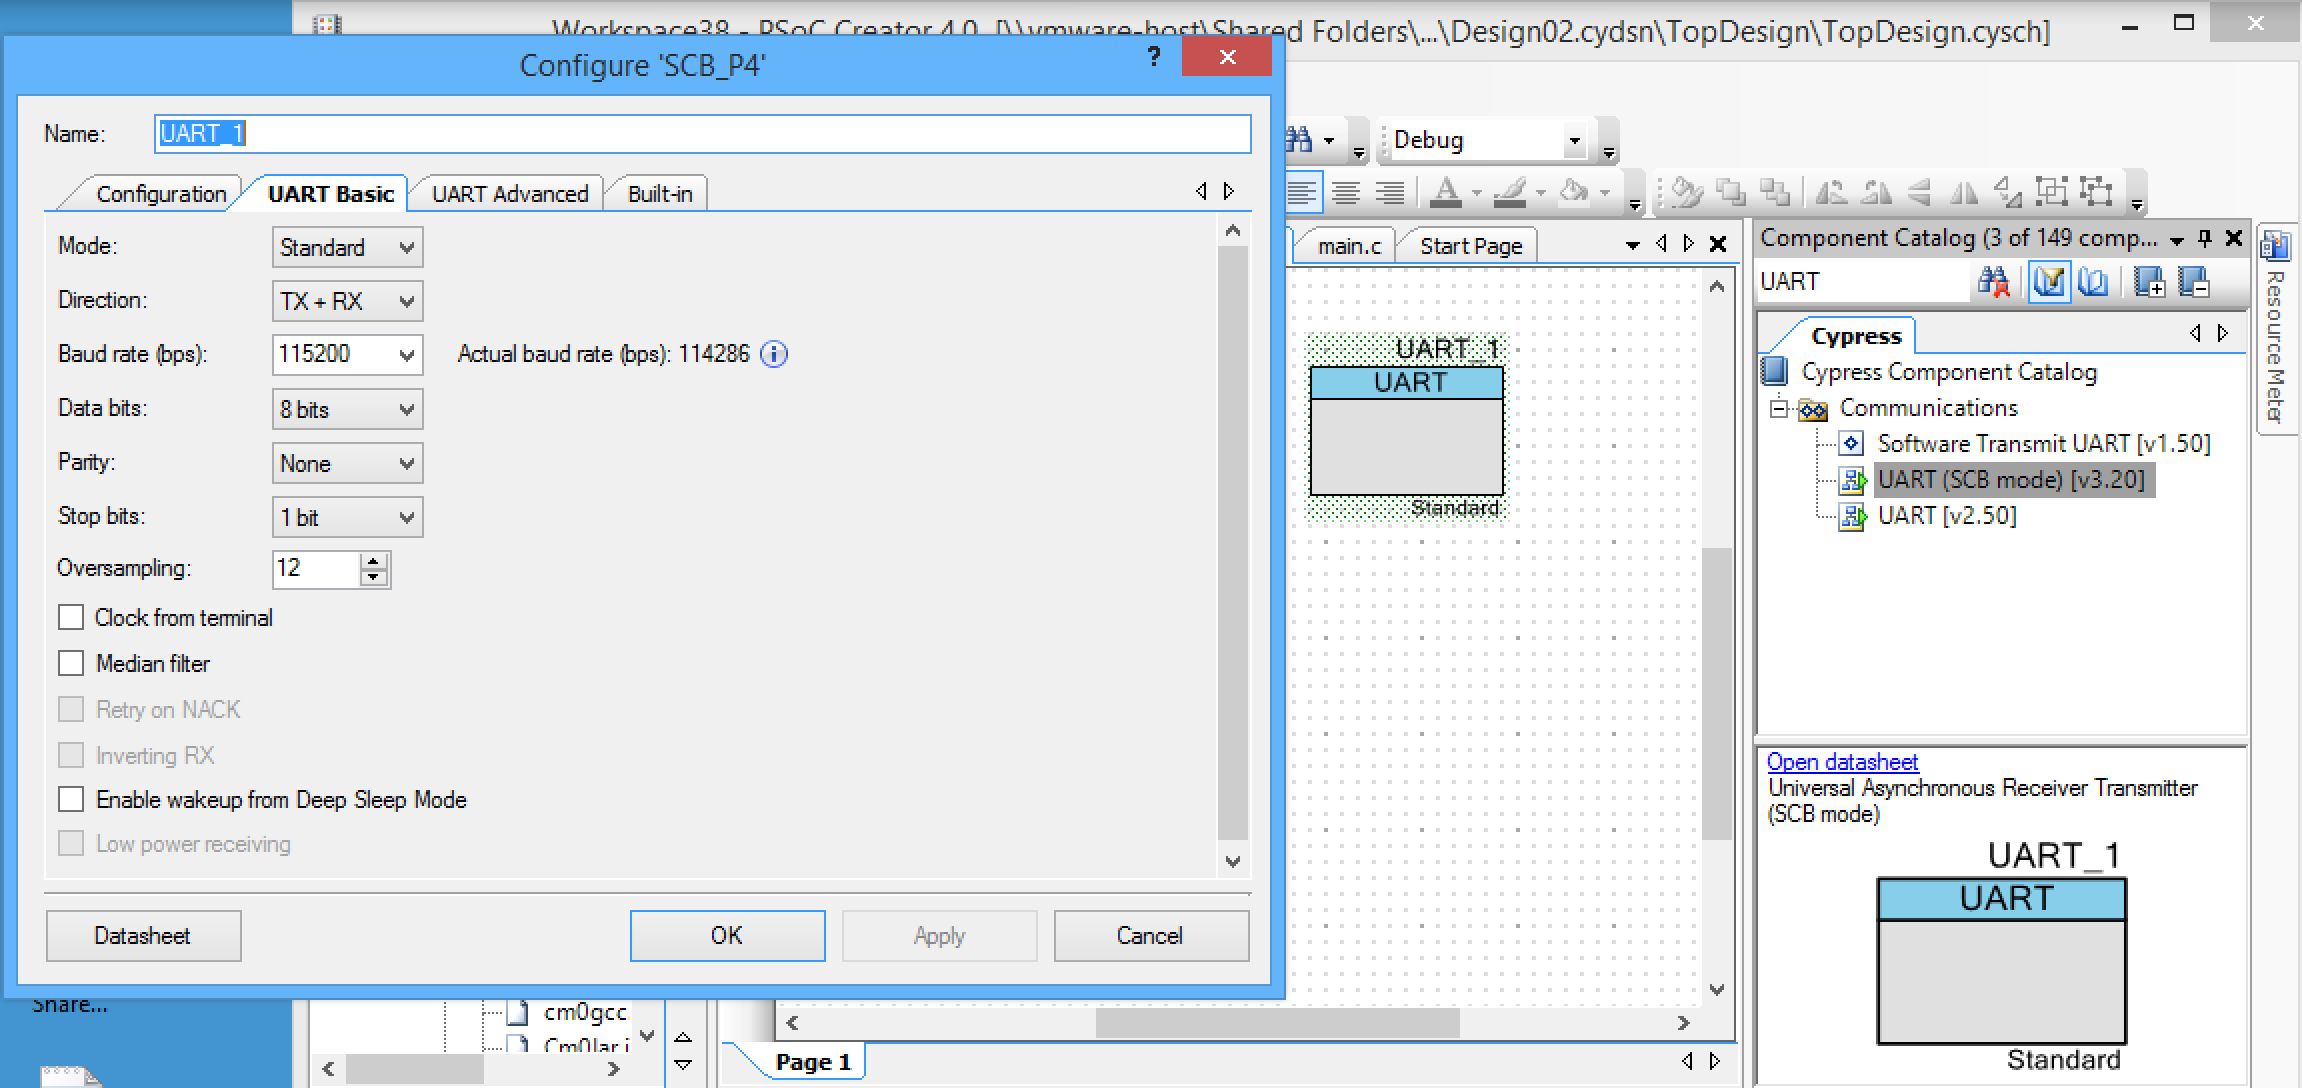
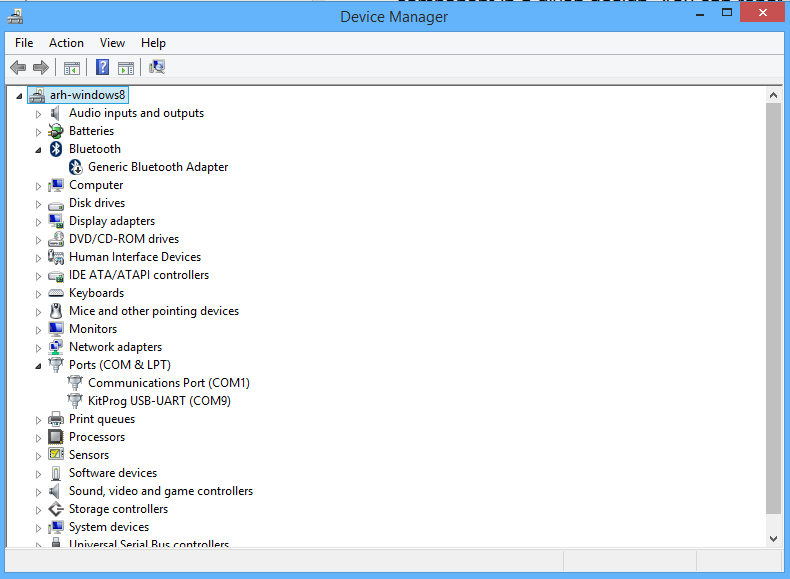
The most common output device in embedded programming is a Virtual Com Serial port on your computer. Almost all of the Cypress PSoC development kits have a “Kitprog” which serves as a USB <– –> UART bridge and will enumerate on your PC as a virtual com port. To make printf work place a UART and then attach it to the correct pins. In the picture below you can see that I chose an “SCB” a.k.a Serial Communication Block (of which most of the PSoC 4’s have at least two). Then I configured it to 115200 baud, 8/n/1 (this is the default configuration).
You can also use the “UART” or the “Software Transmit UART” or for that matter the SPI or I2C master… but those implementations will all be slightly different in that the API to output a character is a little bit different in all of them.
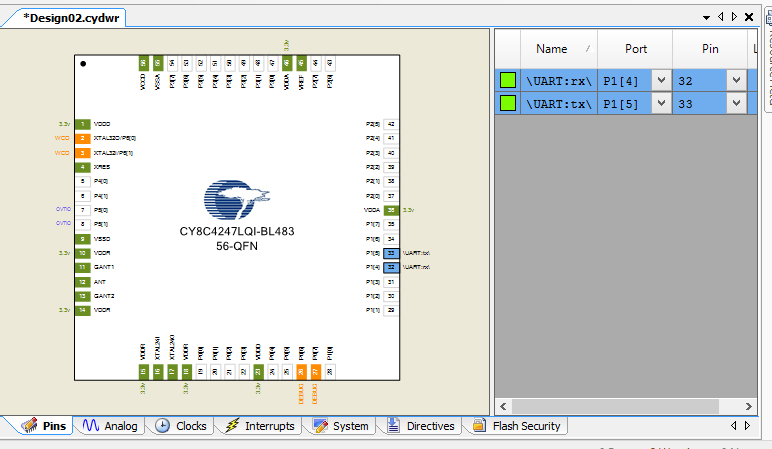
Next you need to attach the UART RX/TX to the correct pins on the development kit. All of our development kits have slightly different pin configurations. You can find the pins either on the back of the boards (see pictures) or in the user guide (available on our website).
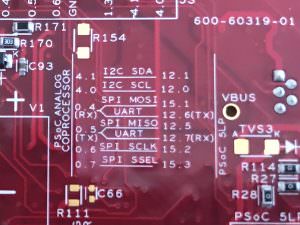
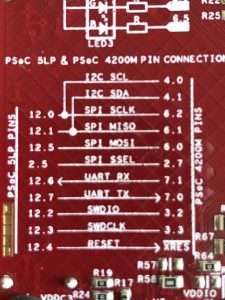
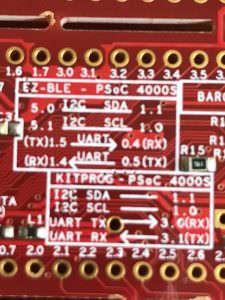
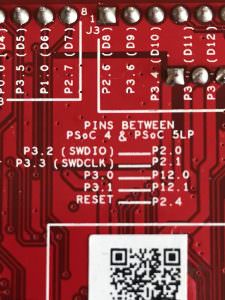
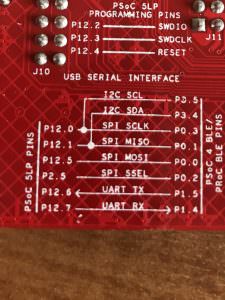
For this example I will choose the CY8CKIT-042BLE. From the picture above you can see that I need to assign RX/TX to P1.4 & P1.5
PSoC printf Code
In order for printf, to actually printf, the function needs to be able to output a character to the “screen”. Each of the three different compilers that Cypress supports (IAR, MDK and GCC) have slightly different implementations of printf. But you can just copy this code:
- Into your main.c
- or into some other .c which is part of your project (I frequently create a file called util.c)
Notice that you will need to change lines 27, 61 and 77 to have the name of your UART component (so that it can output the character)
#if defined(__ARMCC_VERSION)

/* For MDK/RVDS compiler revise fputc function for printf functionality */
struct __FILE
{
    int handle;
};

enum
{
    STDIN_HANDLE,
    STDOUT_HANDLE,
    STDERR_HANDLE
};

FILE __stdin = {STDIN_HANDLE};
FILE __stdout = {STDOUT_HANDLE};
FILE __stderr = {STDERR_HANDLE};

int fputc(int ch, FILE *file)
{
    int ret = EOF;

    switch( file->handle )
    {
        case STDOUT_HANDLE:
            UART_UartPutChar(ch);
            ret = ch ;
            break ;

        case STDERR_HANDLE:
            ret = ch ;
            break ;

        default:
            file = file;
            break ;
    }
    return ret ;
}

#elif defined (__ICCARM__)      /* IAR */

/* For IAR compiler revise __write() function for printf functionality */
size_t __write(int handle, const unsigned char * buffer, size_t size)
{
    size_t nChars = 0;

    if (buffer == 0)
    {
        /*
         * This means that we should flush internal buffers.  Since we
         * don't we just return.  (Remember, "handle" == -1 means that all
         * handles should be flushed.)
         */
        return (0);
    }

    for (/* Empty */; size != 0; --size)
    {
        UART_UartPutChar(*buffer++);
        ++nChars;
    }

    return (nChars);
}

#else  /* (__GNUC__)  GCC */

/* For GCC compiler revise _write() function for printf functionality */
int _write(int file, char *ptr, int len)
{
    int i;
    file = file;
    for (i = 0; i < len; i++)
    {
        UART_UartPutChar(*ptr++);
    }
    return len;
}


#endif  /* (__ARMCC_VERSION) */
Fix the Heap
If you run this program without giving printf more memory it will hang… and it won’t be obvious why it hung. The first time I had to figure it out, I used the debugger to attach to the running PSoC. When you do this, you will see a screen like this which gives you the nice hint that you are out of heap space.
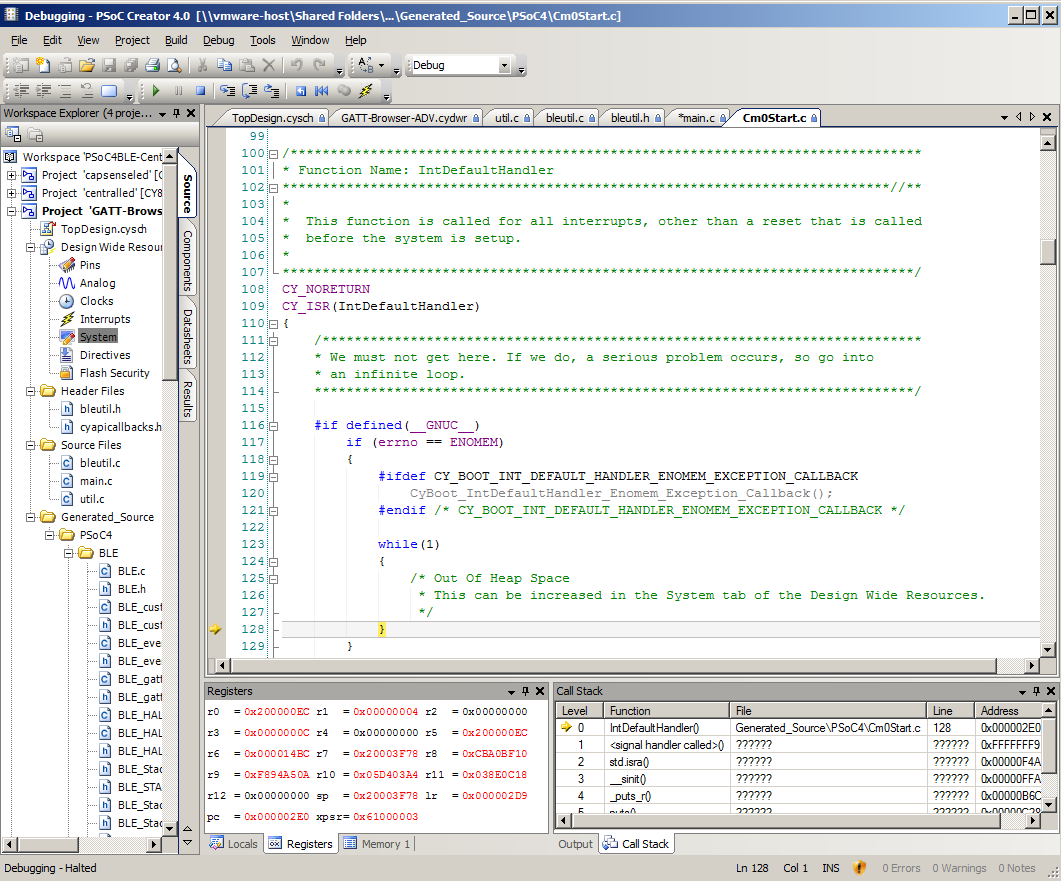
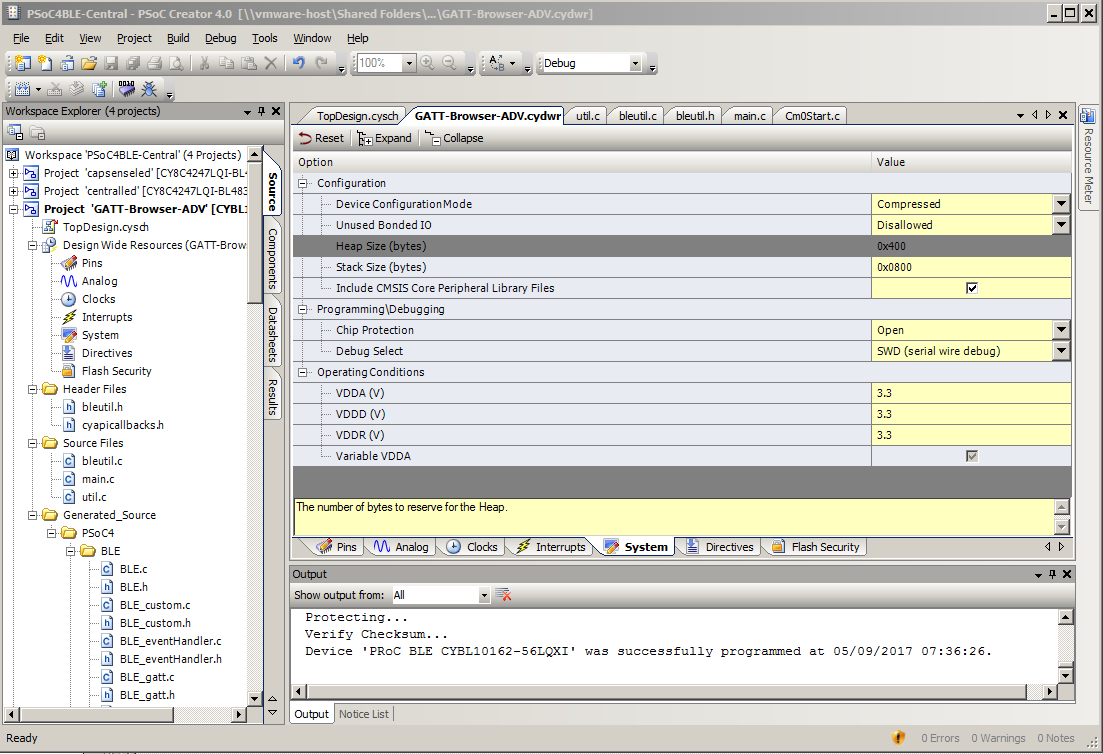
In order to fix the heap, go to the “System” tab of the Design Wide Resources and increase the heap size to at least 0x400.
Now it works
The final thing that you need to do is turn on the interrupts and start the UART. Here is the code:
main()
{
    CyGlobalIntEnable;
    UART_Start();
    printf("hello, world\n");
}
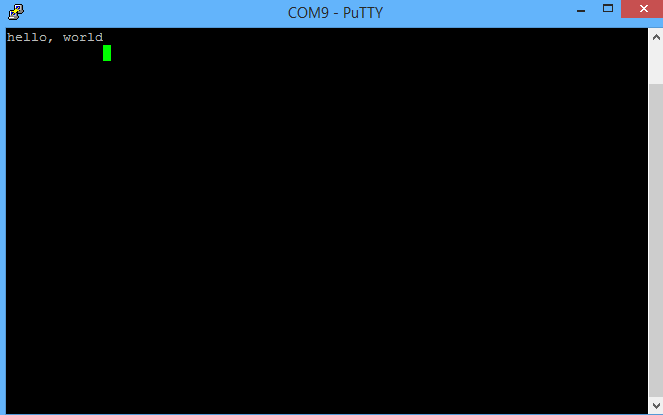
In order to see the output you need to run a serial program (I often use Putty) and attach to the correct “virtual com port” which you can find in the device manager (see the KitProg USB-UART (COM9).
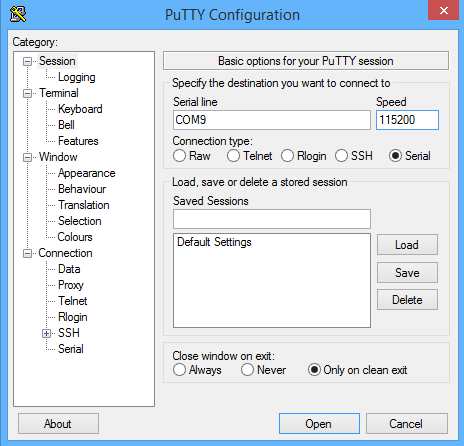
After programming you will see this.
That is excellent now we have caught up to K&R circa 1978!
You can read more in part two.
12 Comments
If for me, I will give up using this method ( too much memory), I will do like this:
#define DBG_ENABLE (1) ///< Enable DBG_PRINTF
#if DBG_ENABLE
#define DBG_PRINTF(format,…) dbg_printf(format,##__VA_ARGS__)
#else
#define DBG_PRINTF(…)
#endif
#define MAX_FORMAT_BUFFER_SIZE (255)
static uint8_t s_formatBuffer[MAX_FORMAT_BUFFER_SIZE];
void dbg_printf(char *format,…) /// MAX_FORMAT_BUFFER_SIZE)
iWriteNum = MAX_FORMAT_BUFFER_SIZE;
for(i=0;i<iWriteNum;i++)
{
UART_UartPutChar(s_formatBuffer[i]); ///< Uart_fucntion
}
}
void dbg_printf(char *format,…) /// MAX_FORMAT_BUFFER_SIZE)
iWriteNum = MAX_FORMAT_BUFFER_SIZE;
for(i=0;i<iWriteNum;i++)
{
UART_UartPutChar(s_formatBuffer[i]); ///< Uart_function
}
}
Do not know why, can not upload the complete code.
Send me the project to engineer@iotexpert.com and Ill explain it…. or if you like you can Guest post
Yes… memory is very much an issue with printf… actually two people have made commentary. Ill make a article and explain what you are saying… that is a good suggestion
Great book! I remember reading this in college. Also remember banging my head on the desk a lot trying to solve some of the problems.
They are/were a source of inspiration for me.
Thanks for this article… it was just what I need!
Ah… just found this:
https://iotexpert.com/2017/05/19/implementing-psoc-printf-part-deux/
Perhaps it should be listed in “Related Content”?
Good catch. Thanks.
Thank you very much. I search two days, why dosn’t work it. Reason: the heap was too small
Yup. Been there.
The key to solving all of this type of hang is using the debugger.