Designing low-power, cloud-connected IoT devices with PSoC® 6 MCU’s and WICED® Wi-Fi/Bluetooth
Summary
In this lesson we will start making the game. The first thing that it will need is a display and we will use the CY8CKIT-028-TFT. In order to talk to the display we will use a library built into WICED called ugui. That library needs a driver configuration which we will copy of out the code example we provide. Finally we will start building a thread called the “GameThread” which will actually make up the game.
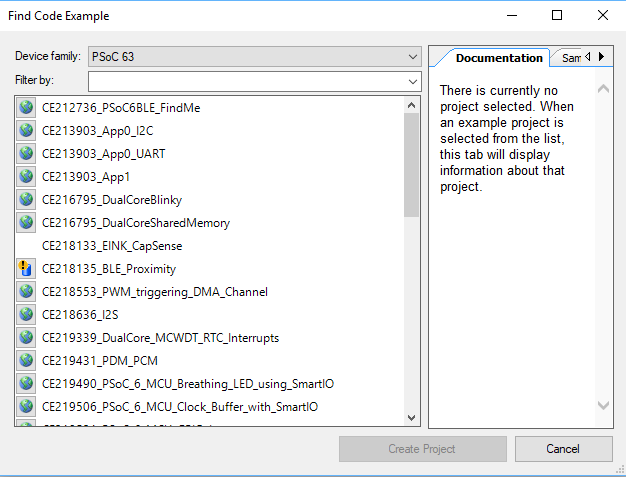
- Download CE222494_PSoC6_WICED_WiFi
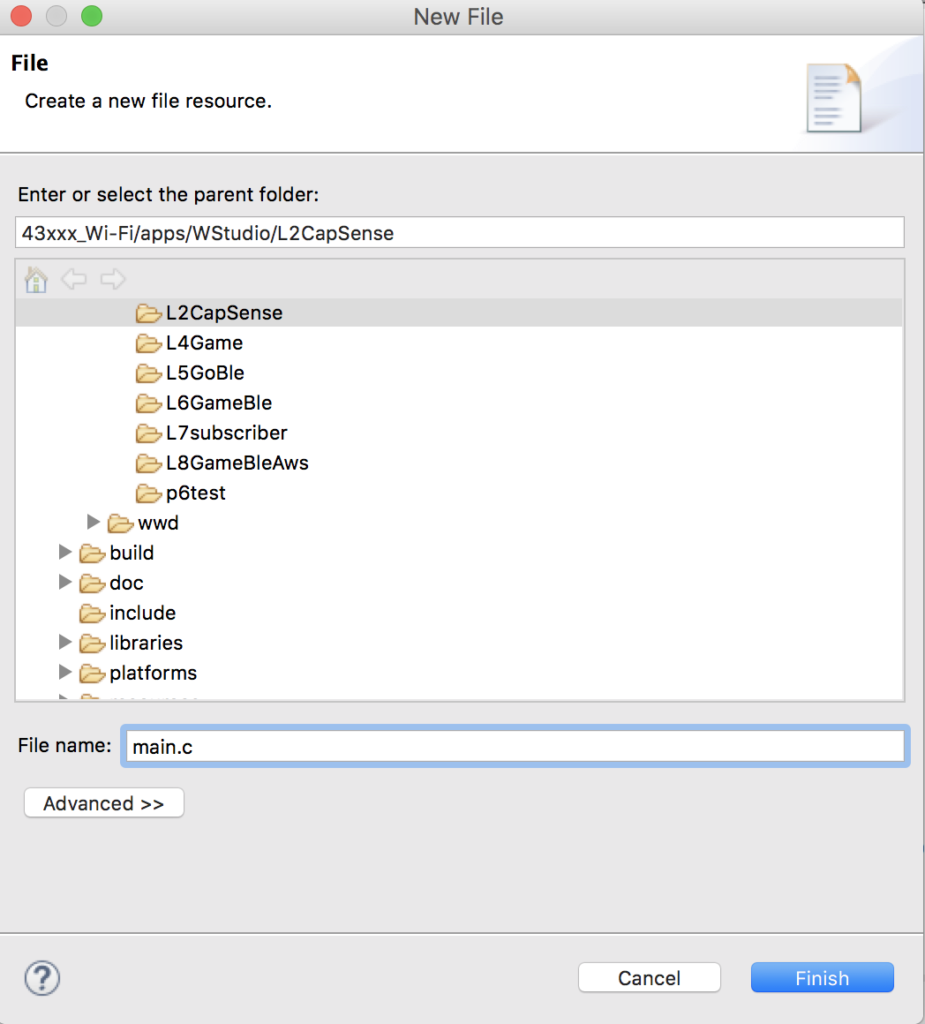
- Copy the L2CapSense into L3CapSenseTft
- Copy cy_tft_display.c/h into the project
- Make a file GameThread.h
- Make a file GameThread.c
- Rename L2CapSense.mk to be L3CapSenseTft.mk & Fix
- Update main.c
- Test
Download CE222494_PSoC6_WICED_WiFi
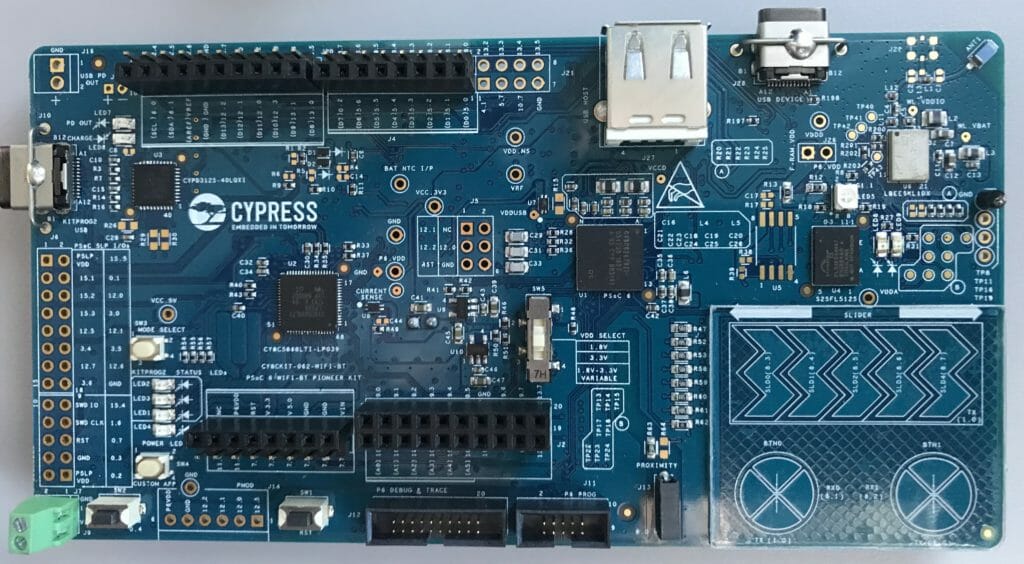
If you click on the CY8CKIT-062-WiFi-BT webpage you will find that there are a bunch of files which are associated with the development kit, including CY8CKIT-062-WiFi-BT PSoC® 6 WiFi-BT Pioneer Kit Code Examples.zip.
Download that folder, then copy the directory into your WICED Studio Apps/WStudio folder.
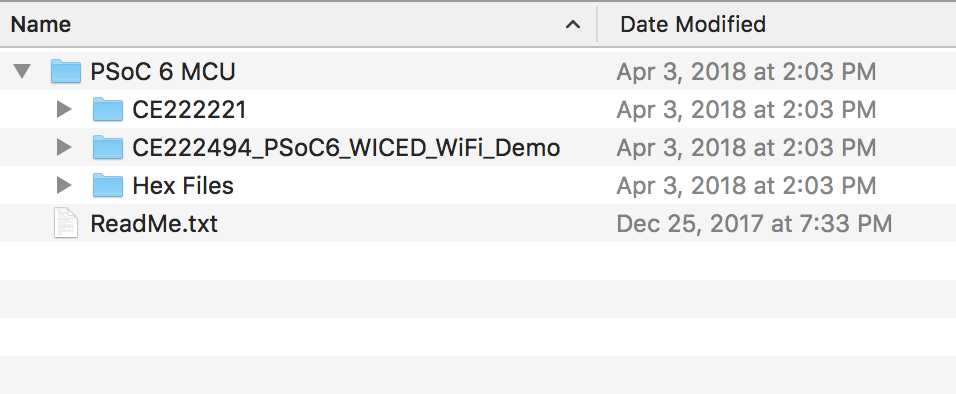
Once you do that it should look like this:

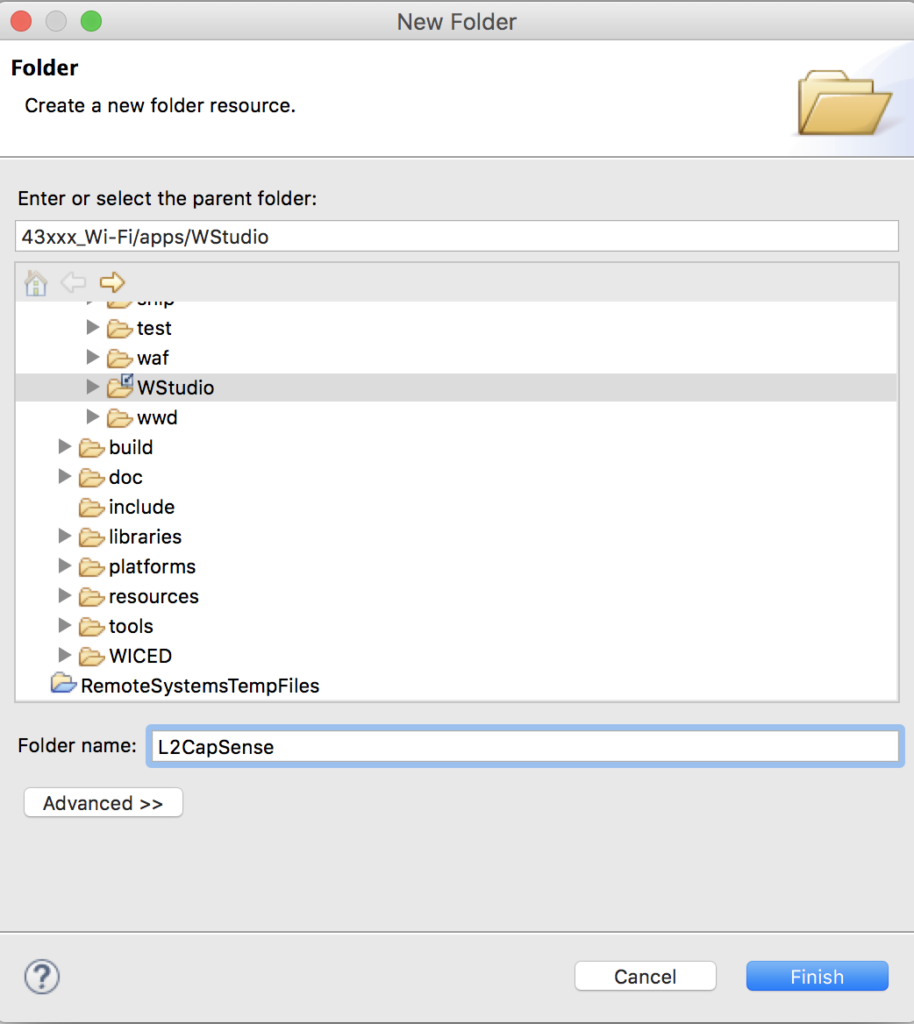
Copy L3CapSense into L3CapSenseTft
Now copy/paste the L2CapSense project into a new project called L3CapSenseTft
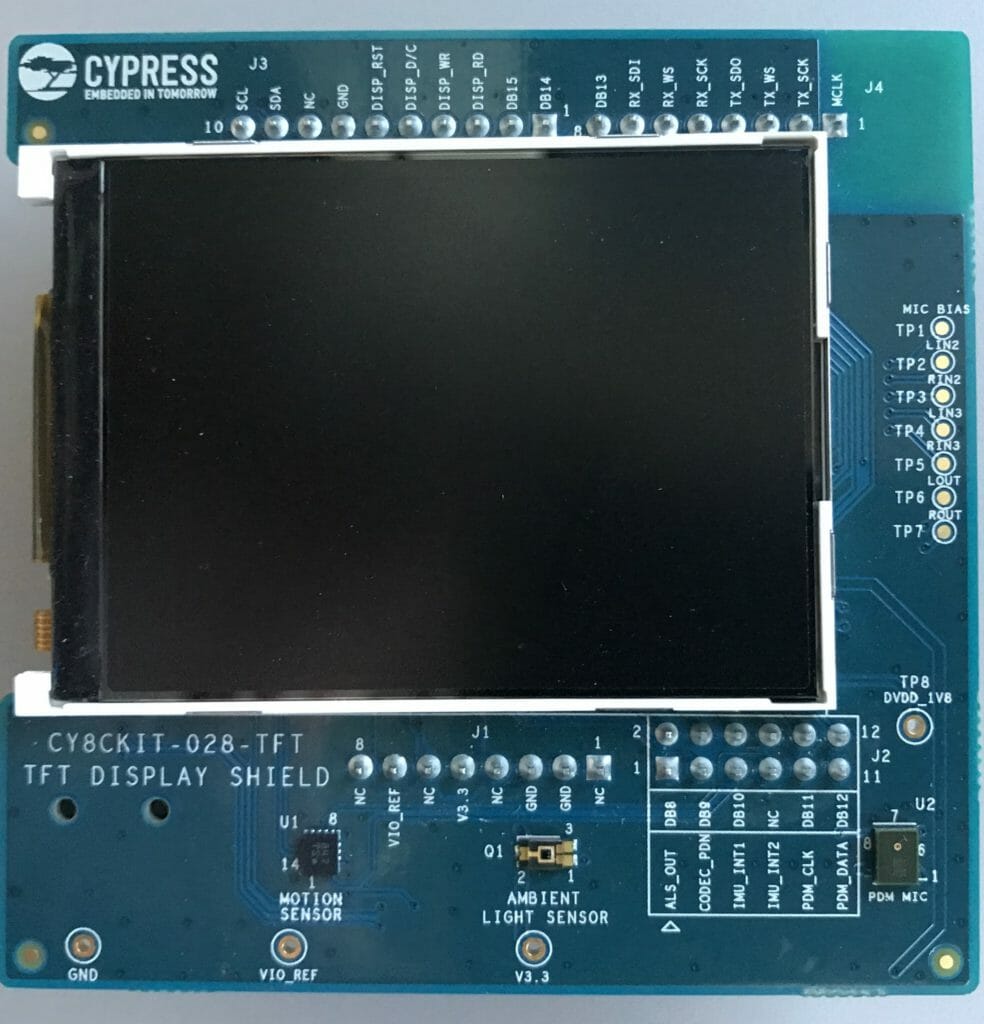
Copy cy_tft_display.c/h into the project
Open up the CE222494 code example directory and copy the two files cy_tft_display.c andcy_tft_display.c which are drivers for the ugui library and then paste them into your new project L3CapSenseTft.
Make a file GameThread.h
Create a new file called GamThread.h and a definition of the GameThread which will be used by the main.c to get the game thread going.
#pragma once
#include "wiced.h"

void gameThread(wiced_thread_arg_t arg);
Make a file GameThread.c
Now create a file called GameThread.c it will have 5 functions. Here is the whole file to make it simpler to copy and paste, but Ill explain each function one by one
#include "GameThread.h"
#include "cy_tft_display.h"
#define SCREEN_X (320)
#define SCREEN_Y (240)
static UG_GUI gui;
// ARH Function to put text in the center of a point (UG_PutString does upper left)
static void UG_PutStringCenter(uint32_t x, uint32_t y, uint32_t fontx, uint32_t fonty,char *string)
{
y = y - fonty/2;
x = x - (strlen(string)/2)*fontx;
if(strlen(string)%2)
x = x - fontx/2;
UG_PutString(x,y,string);
}
// Display the splash screen
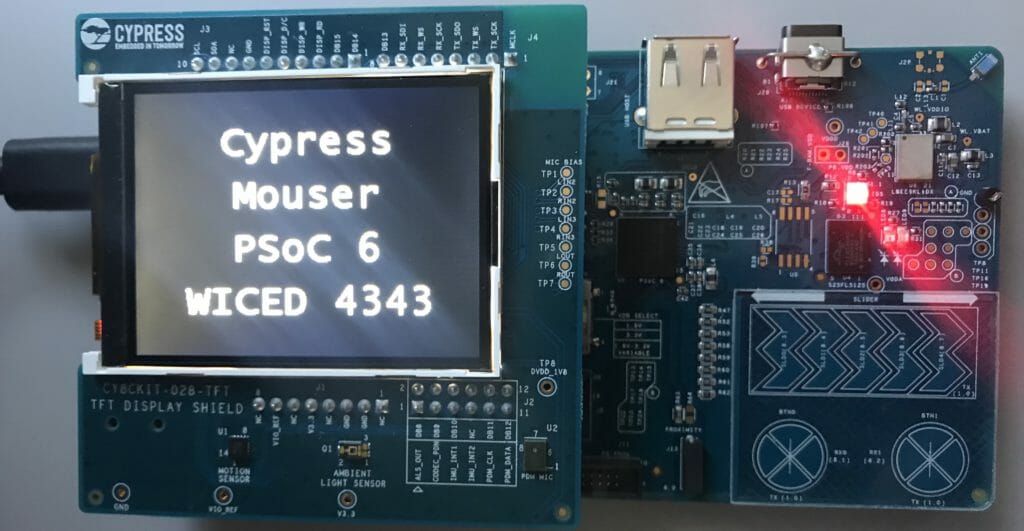
static void displaySplashScreen()
{
UG_FontSelect( &FONT_22X36 );
UG_PutStringCenter(SCREEN_X/2,SCREEN_Y/5,22,36,"Cypress");
UG_PutStringCenter(SCREEN_X/2,SCREEN_Y/5*2,22,36,"Mouser");
UG_PutStringCenter(SCREEN_X/2,SCREEN_Y/5*3,22,36,"PSoC 6");
UG_PutStringCenter(SCREEN_X/2,SCREEN_Y/5*4,22,36,"WICED 4343");
wiced_rtos_delay_milliseconds(2000);
}
// This function displays the start button message
static void displayStartButton()
{
UG_FontSelect(&FONT_12X20);
UG_PutStringCenter(SCREEN_X/2 , SCREEN_Y - 30 ,12,22, "Press B0 To Start");
}
// Display the Start Screen
static void displayStartScreen()
{
UG_FillScreen( C_BLACK );
UG_FontSelect( &FONT_22X36 );
UG_PutStringCenter(SCREEN_X/2,SCREEN_Y/2 -2 - 18 ,22,36,"Ready");
UG_PutStringCenter(SCREEN_X/2,SCREEN_Y/2 + 2 + 18 ,22,36,"Player 1");
displayStartButton();
}
// Main game thread
void gameThread(wiced_thread_arg_t arg)
{
Cy_TFT_Init(); // Init the TFT
UG_Init( &gui, Cy_TFT_displayDriver, SCREEN_X, SCREEN_Y ); // Connect the driver
UG_FillScreen( C_BLACK ); // Clear the screen
UG_SetBackcolor( C_BLACK );
UG_SetForecolor( C_WHITE );
displaySplashScreen();
displayStartScreen();
while(1)
{
wiced_rtos_delay_milliseconds(1000);
}
}
The main game thread function is: void gameThread(wiced_thread_arg_t arg). This function
- Initializes the TFT
- Initializes the UGUI library
- Clears the screen (by setting it all black)
- Sets the colors to draw white on black
- Displays the splash screen (which takes 2 seconds)
- Displays the start screen
- Waits until the end of time
// Main game thread
void gameThread(wiced_thread_arg_t arg)
{

    Cy_TFT_Init();                                             // Init the TFT
    UG_Init( &gui, Cy_TFT_displayDriver, SCREEN_X, SCREEN_Y ); // Connect the driver

    UG_FillScreen( C_BLACK );   // Clear the screen
    UG_SetBackcolor( C_BLACK );
    UG_SetForecolor( C_WHITE );

    displaySplashScreen();
    displayStartScreen();

    while(1)
    {
        wiced_rtos_delay_milliseconds(1000);
    }
}
The function displaySplashScreen simply sets the font, then draws 4 text strings, then waits for a few seconds… then moves on
// Display the splash screen
static void displaySplashScreen()
{
    UG_FontSelect( &FONT_22X36 );
    UG_PutStringCenter(SCREEN_X/2,SCREEN_Y/5,22,36,"Cypress");
    UG_PutStringCenter(SCREEN_X/2,SCREEN_Y/5*2,22,36,"Mouser");
    UG_PutStringCenter(SCREEN_X/2,SCREEN_Y/5*3,22,36,"PSoC 6");
    UG_PutStringCenter(SCREEN_X/2,SCREEN_Y/5*4,22,36,"WICED 4343");

    wiced_rtos_delay_milliseconds(2000);
}
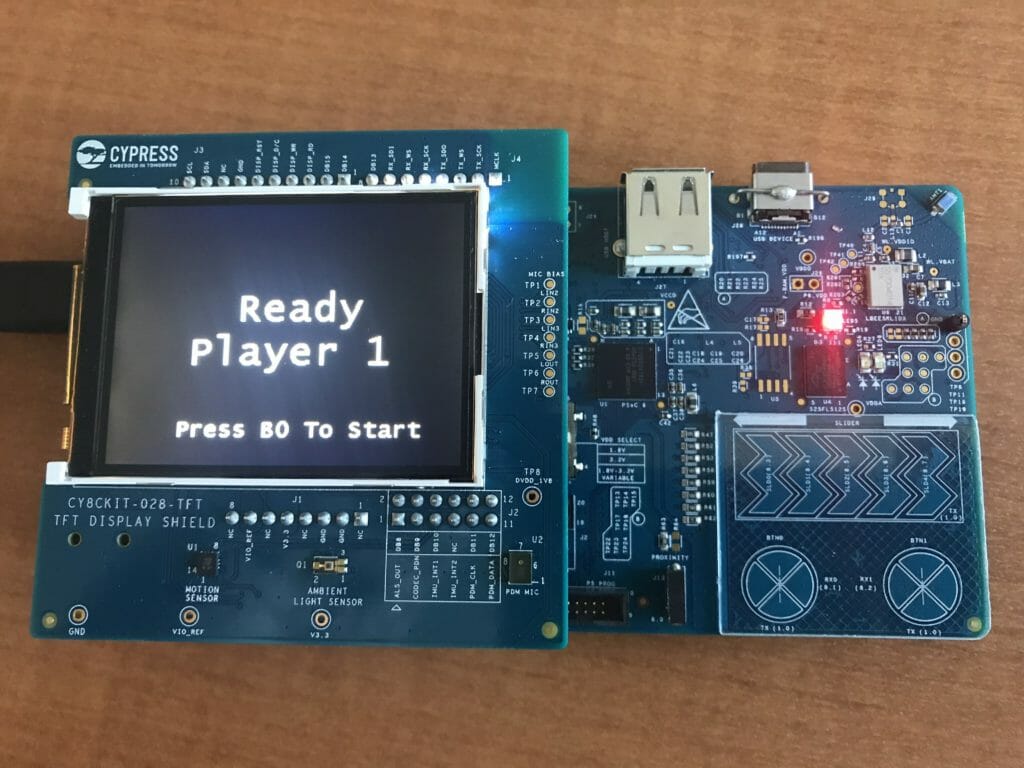
The displayStartScreen put the “Ready Player 1 on the screen” and then tells the user to press the B0 to start the game.
// This function displays the start button message
static void displayStartButton()
{
    UG_FontSelect(&FONT_12X20);
    UG_PutStringCenter(SCREEN_X/2 , SCREEN_Y - 30 ,12,22,  "Press B0 To Start");
}


// Display the Start Screen
static void  displayStartScreen()
{
    UG_FillScreen( C_BLACK );
    UG_FontSelect( &FONT_22X36 );
    UG_PutStringCenter(SCREEN_X/2,SCREEN_Y/2 -2 - 18 ,22,36,"Ready");
    UG_PutStringCenter(SCREEN_X/2,SCREEN_Y/2 + 2 + 18 ,22,36,"Player 1");
    displayStartButton();
}
The U8G_PutString function uses coordinates x and y to set the upper left of the text. For formatting purposes it is easier for me to think about the middle of the string. This function just calculates the upper left (x,y) given the middle center (x,y). To do this you need to also know the (x,y) size of the font.
static void UG_PutStringCenter(uint32_t x, uint32_t y, uint32_t fontx, uint32_t fonty,char *string)
// ARH Function to put text in the center of a point (UG_PutString does upper left)
static void UG_PutStringCenter(uint32_t x, uint32_t y, uint32_t fontx, uint32_t fonty,char *string)
{
    y = y - fonty/2;
    x = x - (strlen(string)/2)*fontx;
    if(strlen(string)%2)
        x = x - fontx/2;
    UG_PutString(x,y,string);
}
Rename L2CapSense.mk to be L3CapSenseTft.mk & Fix
To make this build we need to modify the makefile to know about the new thread as well as the tft driver. In addition we need to tell the linker to link with the graphics library.
NAME := App_WStudio_L3CapSenseTft

$(NAME)_SOURCES := 	main.c \
				CapSenseThread.c \
				GameThread.c \
				cy_tft_display.c


$(NAME)_COMPONENTS := graphics/ugui
Update main.c
In main.c I will:
- Include the GameThread.h
- Add a variable to hold the gameThreadHandle
- Then start the gameThread
#include "wiced.h"
#include "CapSenseThread.h"
#include "GameThread.h"

/******************************************************
 *                      Macros
 ******************************************************/

/******************************************************
 *                    Constants
 ******************************************************/

/******************************************************
 *                   Enumerations
 ******************************************************/

/******************************************************
 *                 Type Definitions
 ******************************************************/

/******************************************************
 *                    Structures
 ******************************************************/


/******************************************************
 *               Static Function Declarations
 ******************************************************/


/******************************************************
 *               Variable Definitions
 ******************************************************/

wiced_thread_t blinkThreadHandle;
wiced_thread_t capSenseThreadHandle;
wiced_thread_t gameThreadHandle;


/******************************************************
 *               Function Definitions
 ******************************************************/
void pdlBlinkThread(wiced_thread_arg_t arg)
{
     while(1)
     {
         Cy_GPIO_Inv(GPIO_PRT0,3);
         wiced_rtos_delay_milliseconds(500);
     }
}

void application_start( )
{
    wiced_init();
    WPRINT_APP_INFO(("Started Application\n"));
    wiced_rtos_create_thread(&blinkThreadHandle,7,"Blink Thread",pdlBlinkThread,500,0);
    wiced_rtos_create_thread(&capSenseThreadHandle,7,"CapSense Thread",capSenseThread,1024,0);
    wiced_rtos_create_thread(&gameThreadHandle,7,"game Thread",gameThread,4096,0);


}
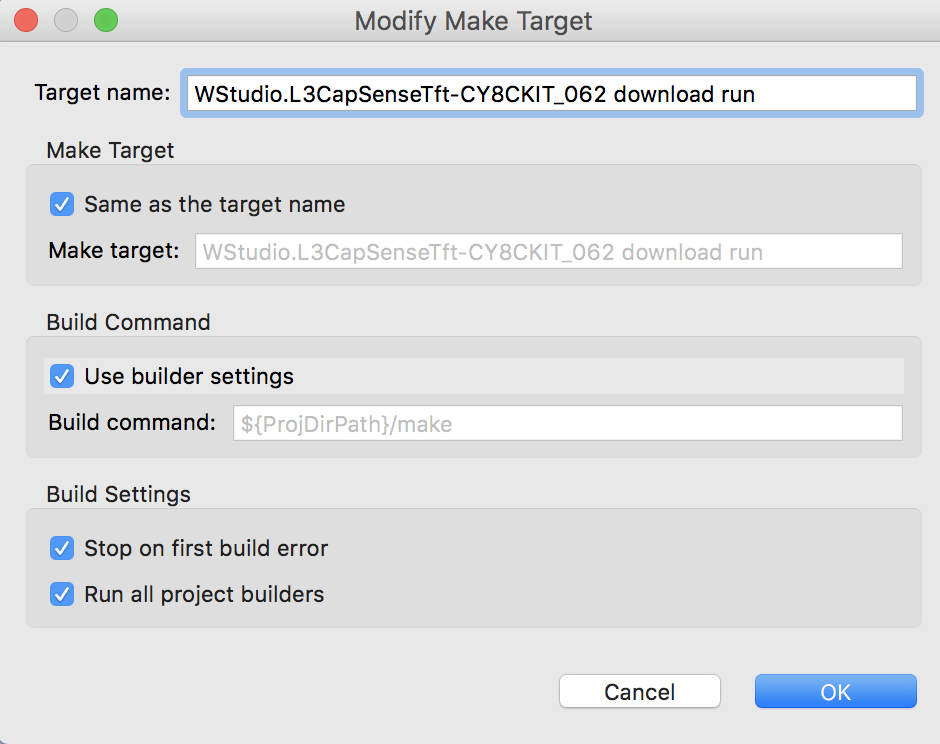
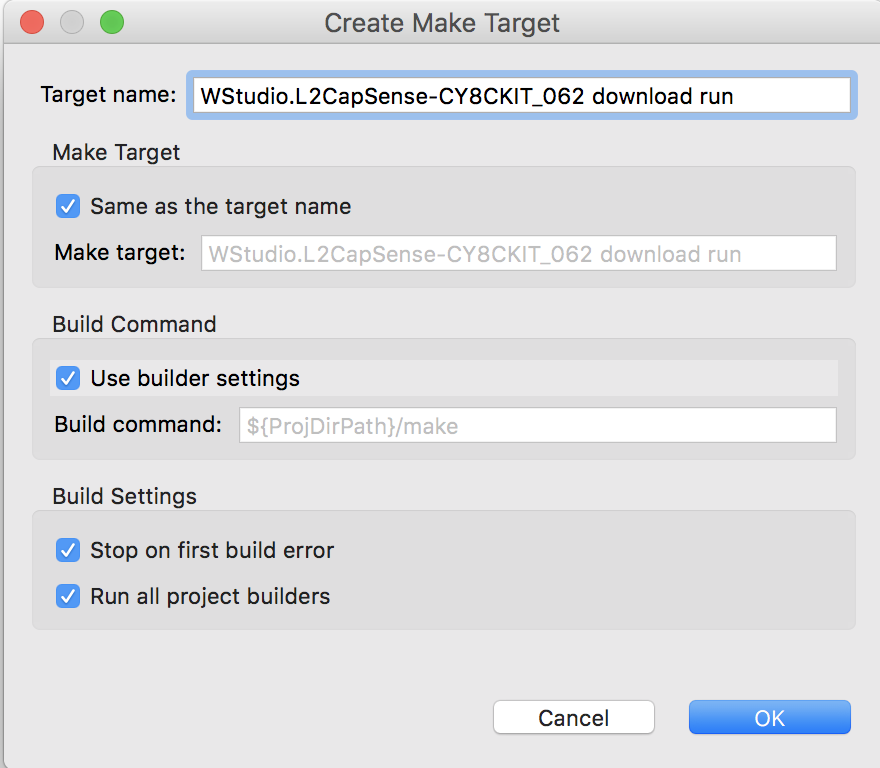
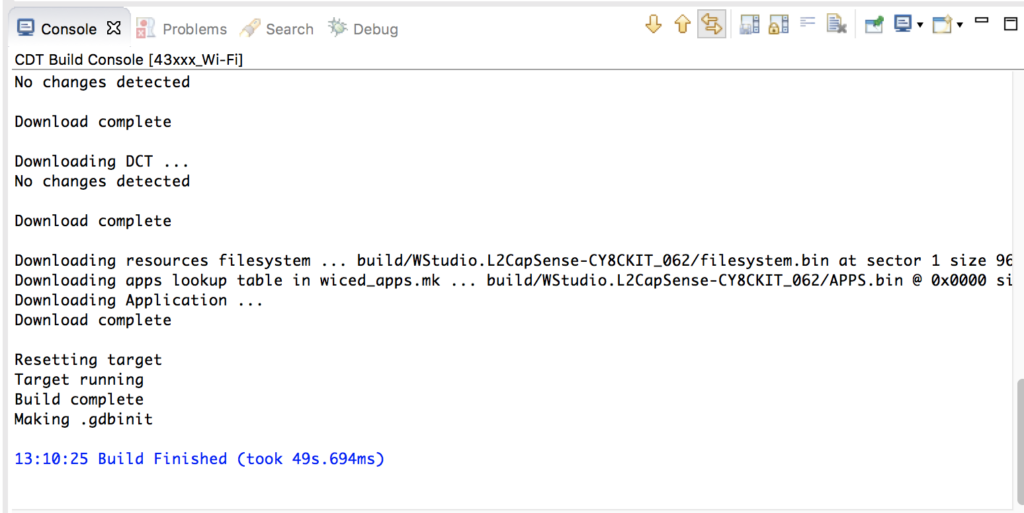
Test
Now it is ready to test. So create a Make Target, then Build and Program. Hopefully you are now Ready Player 1.


