Last week I had the supreme privilege of hosting the WICED WiFI + Bluetooth + Zigbee software team at my office in Kentucky. This included the overall manager for WICED software (a truly remarkable guy), the engineering managers for WiFI and Bluetooth, the head of applications for WICED as well as a bunch of the firmware guys. It occurred to me during the week that the people joining Cypress was the best part of the Broadcomm IOT acquisition. And that is saying something as I really like the products. Also at the summit were all of the software engineering leaders for PSoC (who I have worked with closely all of my career). Needless to say, it was a bunch of badass developers.
The purpose of the meeting was to introduce the PSoC team to WICED and then talk about the future roadmap for those products. Obviously I can’t talk to much about the 2nd part… well actually the only thing I can say is that it will be amazing as we will be able to offer PSoC with the power of WICED.
What I can talk about is the first part. So, I thought that I would show you one of the things that we did with WICED. First of all, WICED (Wireless Internet Connectivity for Embedded Devices) is the brand name that Cypress uses to describe all of the WiFi, Zigbee and Bluetooth chips and modules that were acquired from Broadcom/Avago. The other thing we call WICED is the WICED SDK which is used to mean Eclipse plus all of the tools (programer, plugins etc) plus the software library that is used to build products using the WICED chips and modules.
In the world of programming the first example is always “hello world”. In the world of MCUs the first example is always “blinking led”. It turns out that the first example in WiFi is “scan” to show that you can see all of the WiFi networks around you. The purpose of all of these examples is to prove that all of the tools can do their thing.
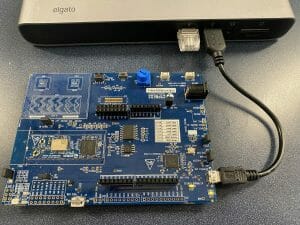
To start with they gave me this devkit, the BCM94343WWCD1_1 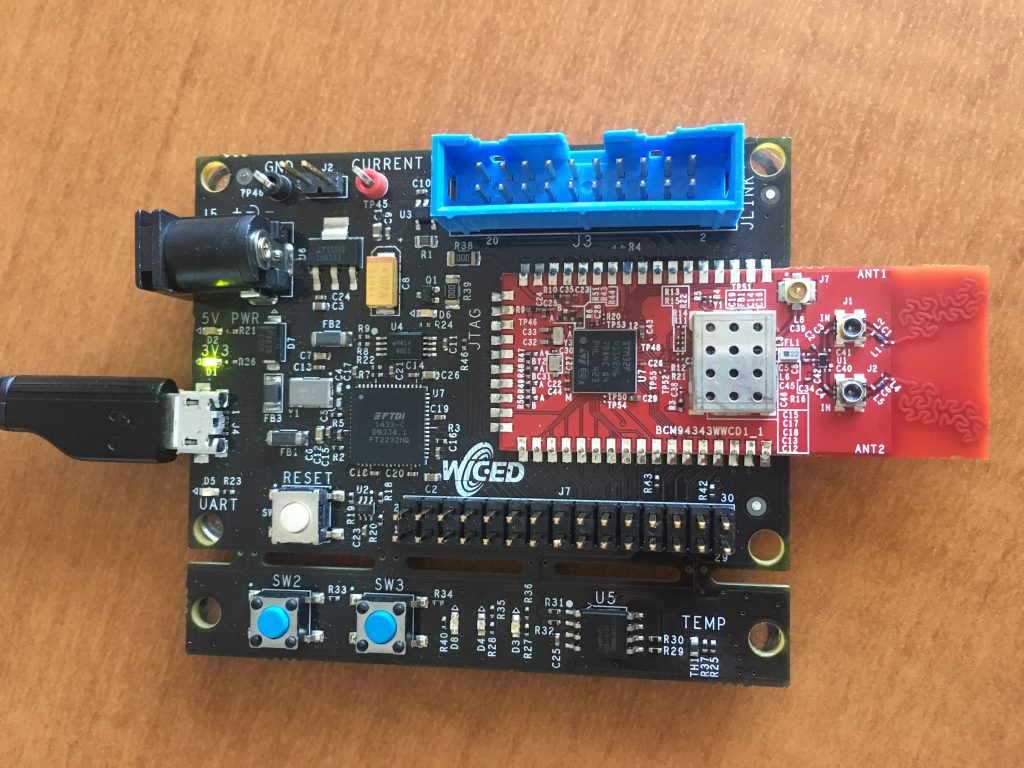
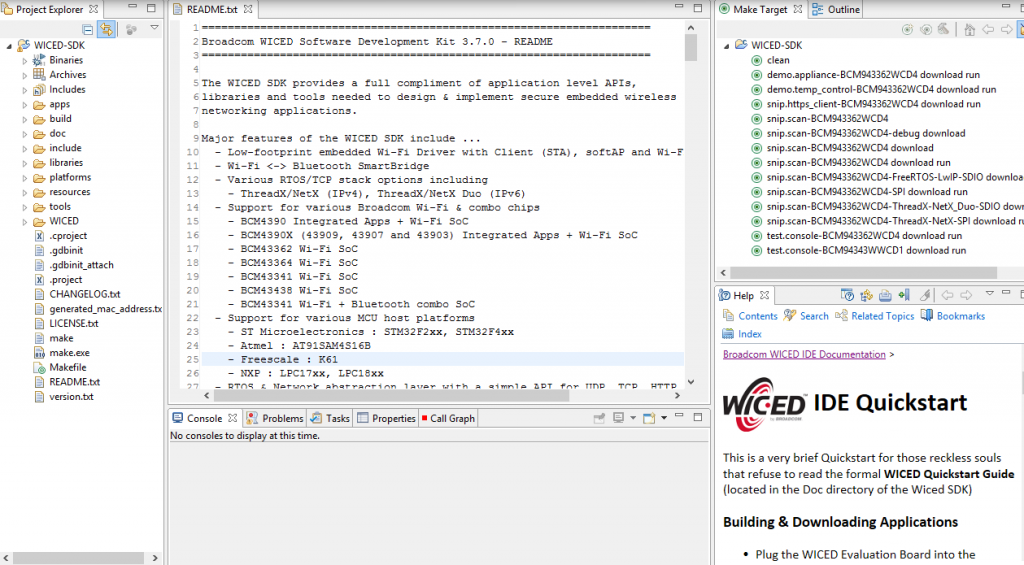
The first thing to do is install WICED 3.7. When you start WICED you will see a screen like this:
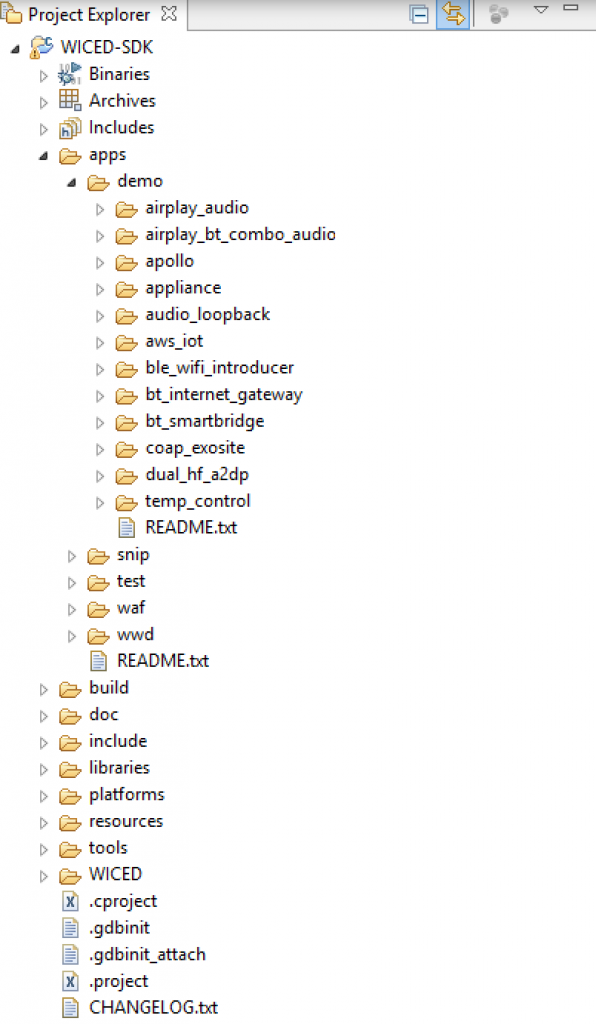
For the purposes of the first design there are two important things to see on this screen. First on the left side is the project explorer. It has all of the guts of WICED. As part of the installation we provide you a bunch of “apps”. These apps range from simple examples (in the snip folder) to full fledged production quality applications (in the demo folder)
- demo – full fledged applications
- snip – short example projects
- test – tools for debugging and testing wifi
- waf – WICED Application Framework support (like an OTA Bootloader)
- wwd – low level driver examples
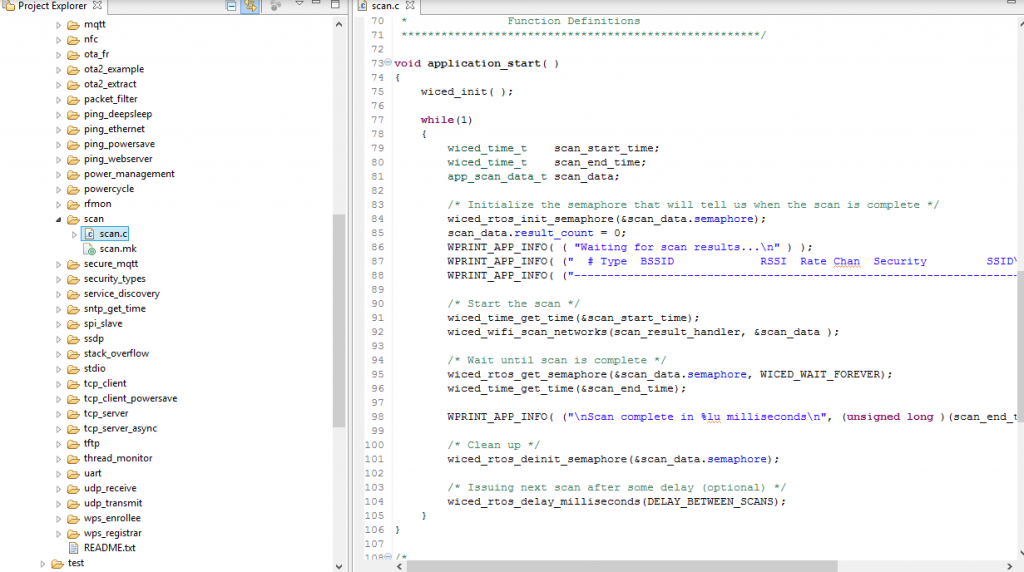
The example that I want to build is “scan” specifically “scan.c”. That can be found in the apps/snip/scan folder. In this screenshot you can see that I opened “scan.c”
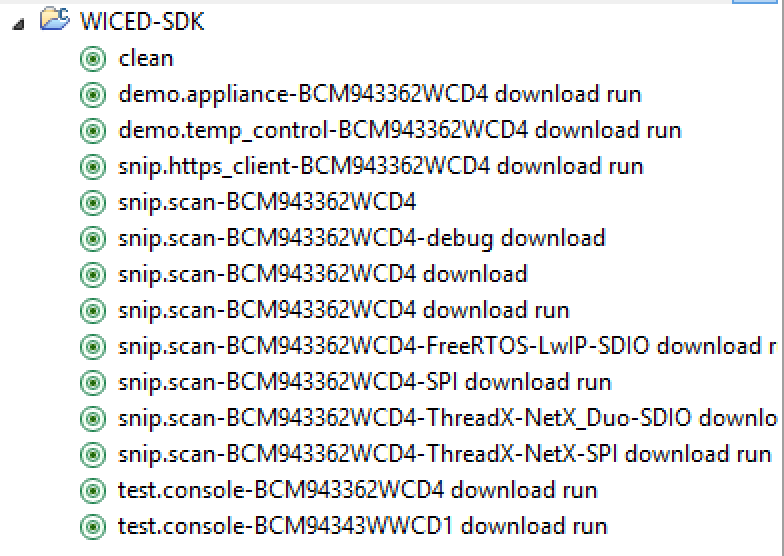
The next thing that you need to do is build a “make target”. The WICED team built a makefile that can seemingly do everything. The makefile uses the name of the make target to setup all of the options required to do the make. If you look on the right side of the screen you can see the currently existing targets:
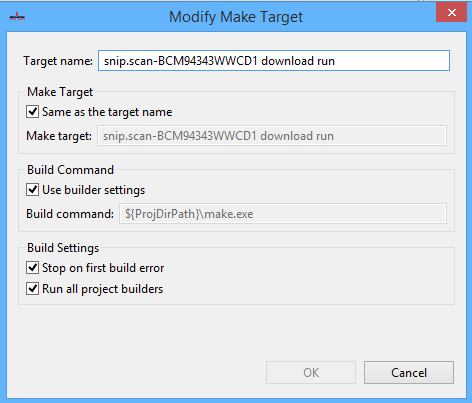
The easiest way to make a new target is to copy/paste a currently existing target. Then you can right click on the new target and edit it to get things setup correctly. The target name defines:
- snip – the directory
- scan – the subdirectory will the files (scan.c and scan.mk)
- BCM94343WWCD1 – the name of the devkit (you can see it on the picture of the devkit)
- download run – instructions to go ahead a boatload and start the app running
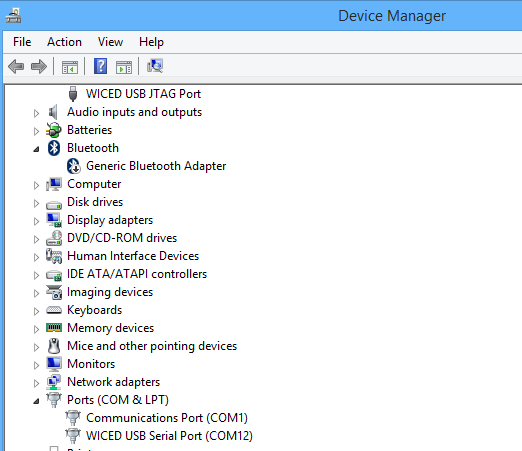
Next, I plug in the devkit. When it attachs, the devkit will enumerate as two USB devices
- WICED USB JTAG Port
- A serial port (in this case on COM12)
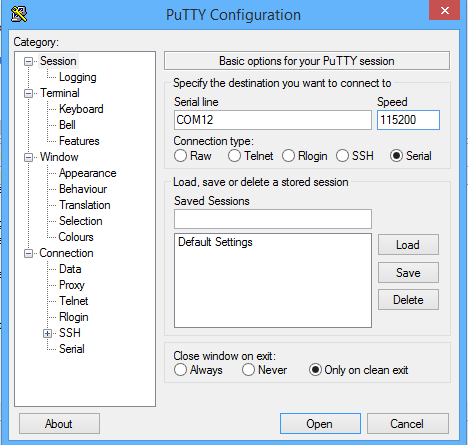
After I plug in the kit I run Putty and attach to COM12 at 115200 baud
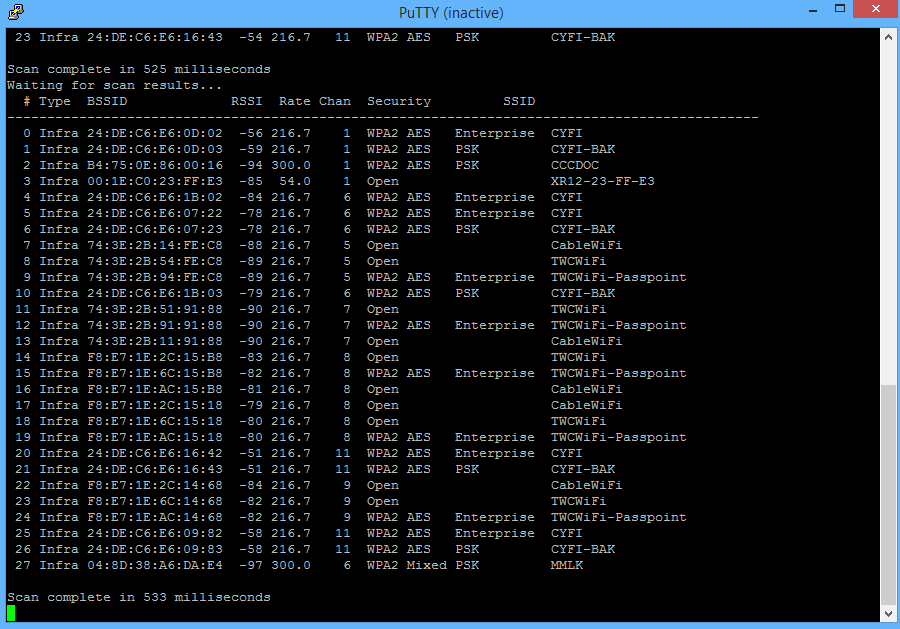
And finally, double click the make target to build, download and run. After it starts, the Putty screen fills up with all of the WiFI networks that are around me.
All of that was pretty easy to get going. Next lets see if I can actually do something. Last week I showed the guys the Elkhorn Creek Water Level monitoring project and I told them that by the end of this week I would put one of their devkits into that system, so the next several posts will be about that process. (I hope)
No comment yet, add your voice below!