MBED OS & PSoC 6 & SSD1306

Summary

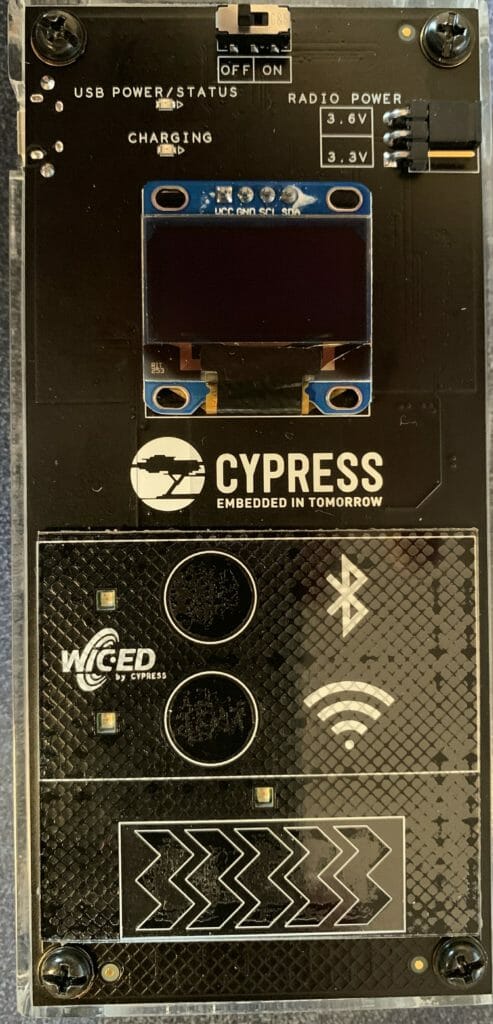
As I wrote about in the last article I have been working to get ready for Embedded World 2019 in a week and a bit.  For my demo, I will be handing out remote controls that have a 128×64 monochrome OLED display that is driven by an I2C SSD1306.  This whole board is controlled by a PSoC 6 & a 4343W WiFi / Bluetooth Combo.

This morning I started to port the U8G2 library to MBEDOS… but ran into some problems, so I i decided to see what ports were already out there.  I immediately found a port of the Adafruit_GFX library.  This article talks about using it on my CY8CPROTO_062_4343W board.  As part of this journey I also wanted to be able to draw the Cypress logo on the screen… so I had to figure out how to create a logo in a format that could be drawn on the screen.

I will follow these steps:

  1. Create a new project & add the Adafruit_GFX_library
  2. Create a main.cpp, configure the library and test
  3. Make a Cypress logo using GIMP
  4. Create a function to draw X11 bitmaps & test

Create a new project & add the Adafruit_GFX_library

The first step to get everything going by running

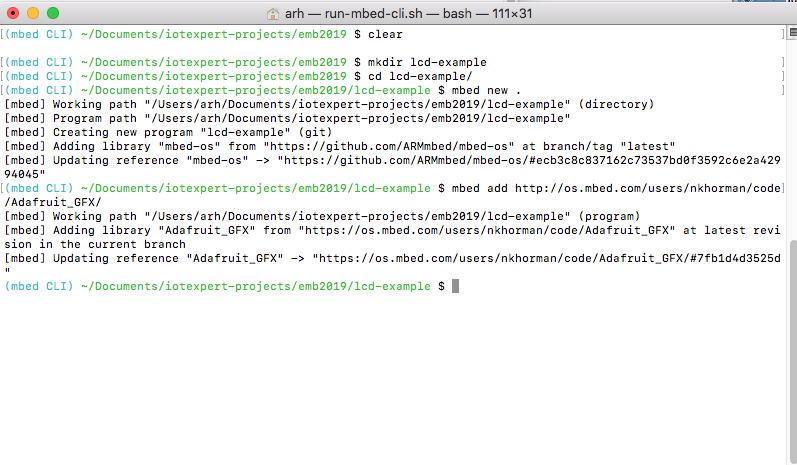
  1. mbed new .
  2. mbed add http://os.mbed.com/users/nkhorman/code/Adafruit_GFX/

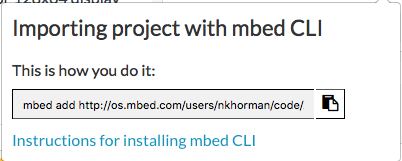
The way to figure out how to add the library is by going to the library webpage on the mbedos website.  Then clicking the arrow on “Import into Compiler” where you will see two options, “Import into Compiler” and “Import with mbed CLI”

When you select that option you will get a window that tells you the exact command to run.

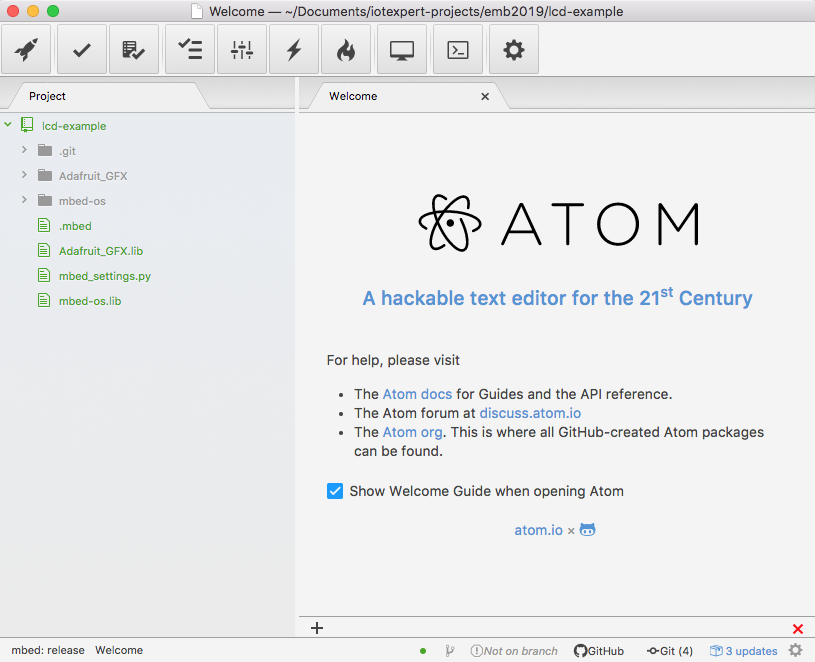
I have been using Atom as an editor (and sort of IDE).  When you open the lcd-example directory using Atom you will see your project including

  1. The mbed-os directory with all of the mbed stuff in it.
  2. The Adafruit_GFX library

Create a main.cpp, configure the library and test

The next step is to create a main.cpp.

  1. Setup the I2C.  In order to use the graphics library you need to setup a communication vehicle.  In my case that is an I2C bus that is connected to P6[0] and P6[1] on my development board.  Lines 6-15 create the communication class of I2CPreInit, configure it to 400kbs and connect the I2C master to P6[0]/P6[1]
  2. Line 16 actually setups up the graphics library and get it going.
  3. The main simply prints out some information about the display on lines 22-23
  4. Line 24 causes the current frame buffer to be displayed (more on this in a second)
  5. The main loop blinks the LED and prints a counter on the top of the screen.
#include "mbed.h"
#include "Adafruit_SSD1306.h"

DigitalOut myled(LED1);

class I2CPreInit : public I2C
{
public:
    I2CPreInit(PinName sda, PinName scl) : I2C(sda, scl)
    {
        frequency(400000);
        start();
    };
};
I2CPreInit gI2C(P6_1,P6_0);
Adafruit_SSD1306_I2c gOled2(gI2C,P0_2,0x78,64,128);

int main()
{   uint16_t x=0;

    printf("Started\n");
    printf("%ux%u OLED Display\r\n", gOled2.width(), gOled2.height());
    printf("Rotation = %u\n",gOled2.getRotation());
    gOled2.display();
    while(1)
    {
        x += 1;
        myled = !myled;
        gOled2.printf("%u\r",x);
        gOled2.display();
        wait(1.0);
    }
}

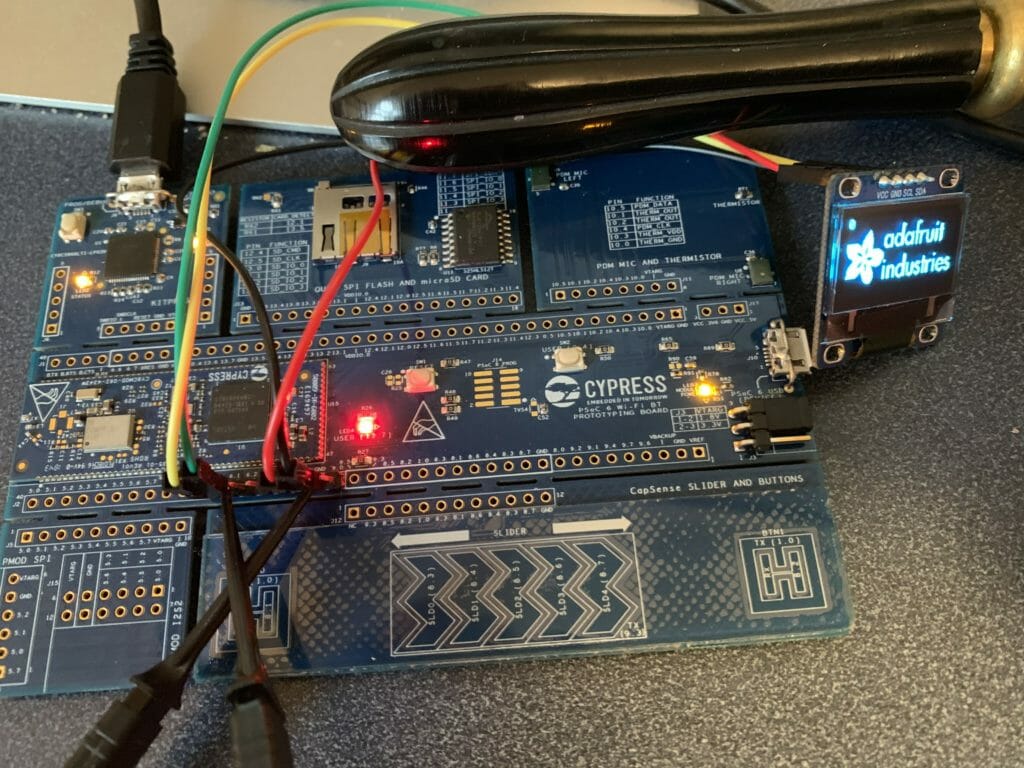
In order to build this thing I run “mbed compile -t GCC_ARM -m CY8CPROTO_062_4343w”.  When I run the project it looks like this:

There are several things to notice about this picture.  First, there is an Adafruit logo on the screen.  Where did this come from?  Simple on line 152 of Adafruit_ssd1306.cpp there is a function called “splash” which is called by the constructor.  The spash function just copies a bitmap into the frame buffer of the Adafruit_SSD1306 object.

void Adafruit_SSD1306::splash(void)
{
#ifndef NO_SPLASH_ADAFRUIT
	uint8_t adaFruitLogo[64 * 128 / 8] =
	{ 
		0x00, 0x00, 0x00, 0x00, 0x00, 0x00, 0x00, 0x00, 0x00, 0x00, 0x00, 0x00, 0x00, 0x00, 0x00, 0x00,

The constructor is in Adafruit_ssd1306.h on line 152

	Adafruit_SSD1306_I2c(I2C &i2c, PinName RST, uint8_t i2cAddress = SSD_I2C_ADDRESS, uint8_t rawHeight = 32, uint8_t rawWidth = 128)
	    : Adafruit_SSD1306(RST, rawHeight, rawWidth)
	    , mi2c(i2c)
	    , mi2cAddress(i2cAddress)
	    {
		    begin();
		    splash();
		    display();
	    };

And if you don’t want to have this splash screen you can uncomment the #define NO_SPLASH_ADAFRUIT in the file “Adafruit_GFC_Config.h”

#ifndef _ADAFRUIT_GFX_CONFIG_H_
#define _ADAFRUIT_GFX_CONFIG_H_

// Uncomment this to turn off the builtin splash
#define NO_SPLASH_ADAFRUIT

// Uncomment this to enable all functionality
//#define GFX_WANT_ABSTRACTS

// Uncomment this to enable only runtime font scaling, without all the rest of the Abstracts
//#define GFX_SIZEABLE_TEXT


#endif

The next thing to notice in the picture is that I have lead wires attached to the LCD pins… and those wires are attached to a logic analyzer because I typed the I2C incorrectly and I couldn’t figure out why they didn’t talk.  And finally notice my grandfathers magnifying glass which I use every day.

Make a Cypress logo using GIMP

For my project I am less interested in displaying Adafruits Logo and more interested in displaying Cypress’.  To do this I loaded up the Cypress logo in Gimp.

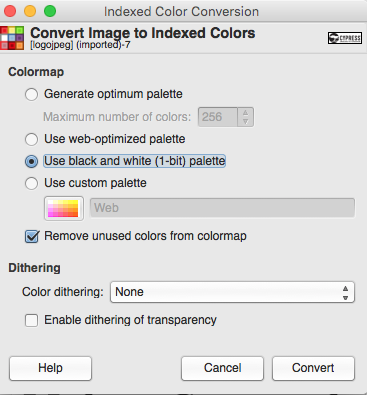
I then converted it to pure black and white using the “Image->Mode->Indexed…”

Then selected “black and white palette”

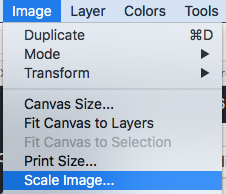
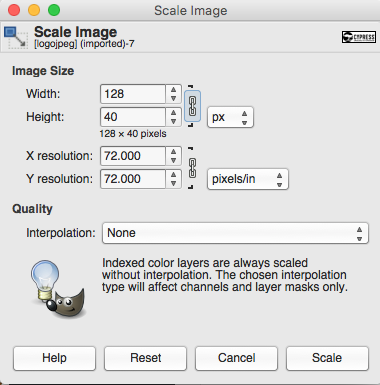
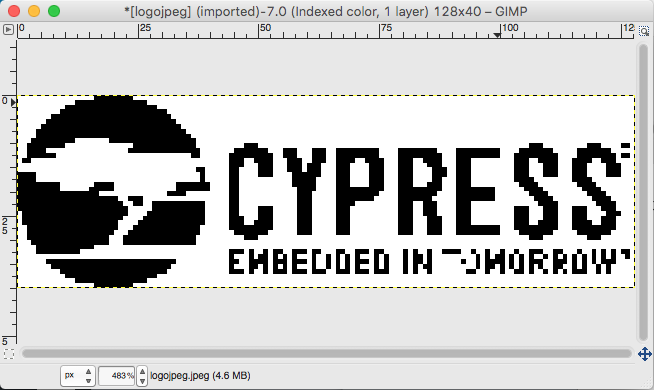
Then I scaled the image to 128×40 using the “Image->Scale Image”

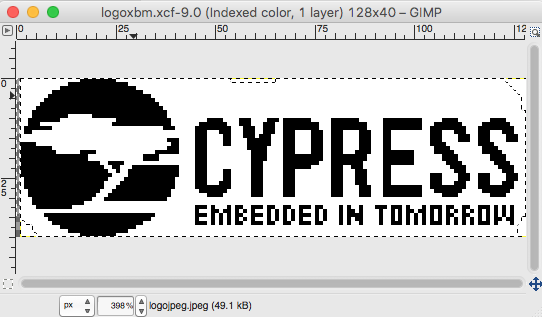
Unfortunately it made a bit of a mess of the logo during the scaling process… so I put my son to editing it.

Which looks like this after he was done.  Pretty good eh?

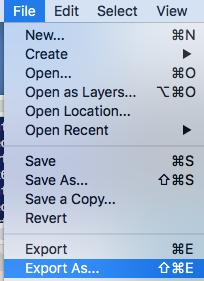
In order to use the image you need a “C program” version of it.  It turns out that there is a format called “X11” or “xbm” which is exactly that (a c-file).  You can read about the format on this website.  To get one of these files, just run “File->Export As”

Then give it a name with a “.xbm” on the end

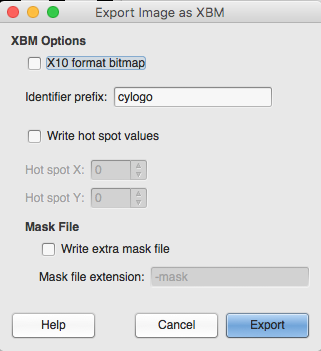
Make sure and “de-select the X10 format bitmap” (and older version of the xbm format)

When all that is said and done you will find the xbm file with goodness in it.  Here is the top of it.

#define cylogo_width 128
#define cylogo_height 40
static unsigned char cylogo_bits[] = {
   0x00, 0x00, 0xff, 0x01, 0x00, 0x00, 0x00, 0x00, 0x00, 0x00, 0x00, 0x00,
   0x00, 0x00, 0x00, 0x00, 0x00, 0xe0, 0xff, 0x0f, 0x00, 0x00, 0x00, 0x00,
   0x00, 0x00, 0x00, 0x00, 0x00, 0x00, 0x00, 0x00, 0x00, 0xf8, 0xff, 0x3f,
   0x00, 0x00, 0x00, 0x00, 0x00, 0x00, 0x00, 0x00, 0x00, 0x00, 0x00, 0x00,
   0x00, 0xfe, 0xff, 0xff, 0x00, 0x00, 0x00, 0x00, 0x00, 0x00, 0x00, 0x00,

The format of this file is unsigned 8-bit integers… each bit represents the bit of one pixel… in BIG ENDIAN!!!! format.  In other words this table will be 128×40/8 bytes long.

Create a function to draw X11 bitmaps & test

But how do we use this format?  Well, write a new function in the Adafruit library to draw X11 bitmaps.

First add the new function name to the class on line 168 of “Adafruit_GFX.h”

    virtual void drawX11BitMap(const uint8_t bitmap[],uint16_t bitMapWidth,uint16_t bitMapSize,uint16_t posX,uint16_t posY);

Then add the code.

// Write an X11 formatted bitmap to the screen at posX, posY
void Adafruit_GFX::drawX11BitMap(const uint8_t bitmap[],uint16_t bitMapWidth,uint16_t bitMapSize,uint16_t posX,uint16_t posY)
{
  int16_t x1 = posX;
  int16_t y1 = posY;

  for(unsigned int i=0;i<bitMapSize;i++)
  {
    uint8_t val = bitmap[i];

    for(int j=0;j<8;j++)
    {
        uint16_t pixColor;
        if(val>>j & 0x01)
          pixColor = 1;
        else
          pixColor = 0;

        drawPixel(x1,y1, pixColor);
        x1 = x1 + 1;
        if(x1 == posX + bitMapWidth)
        {
          x1 = posX;
          y1 = y1 + 1;
        }
    }
  }

This may not be the most beautiful code in the world… which I suppose makes it fit right in with some of the other stuff in this driver.  Oh well it works.

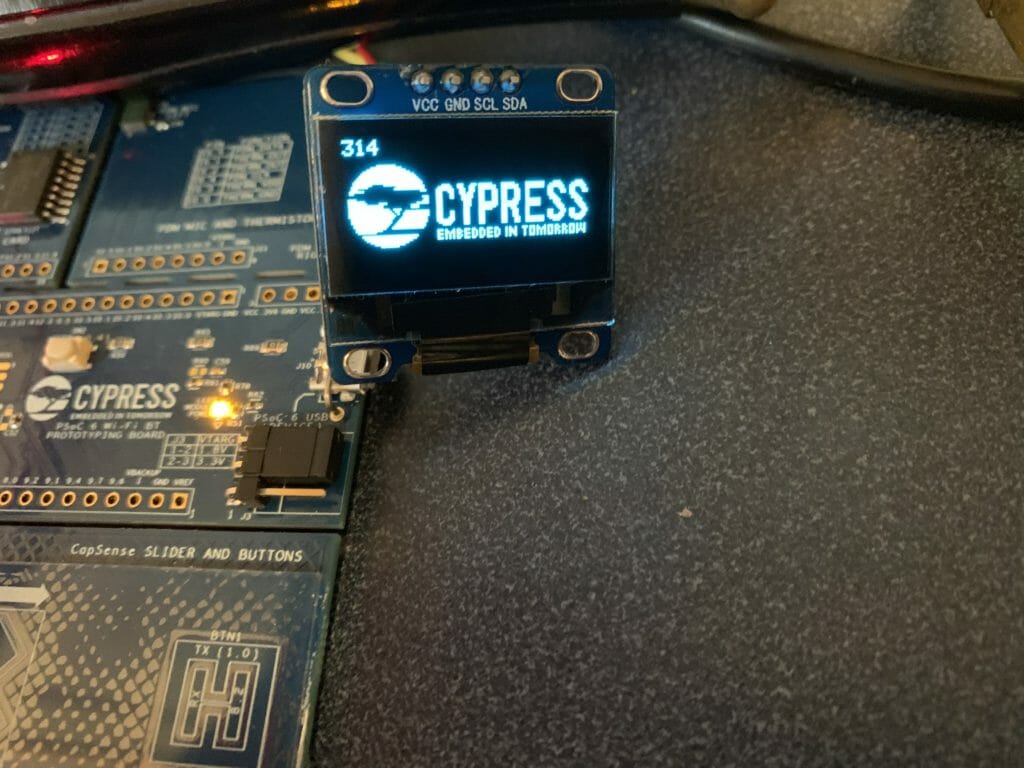
Once you have added the function to the library, lets test it to see if it can draw the logo.  First, copy the “cylogo.xbm” into the project and call it “cylogo.h”.  Then modify the “main.cpp” to use it.  Add an include of the “cylogo.h”.  Then on line 26, call the function to draw it at 0,(half way down the screen)

#include "mbed.h"
#include "Adafruit_SSD1306.h"
#include "cylogo.h"
DigitalOut myled(LED1);

class I2CPreInit : public I2C
{
public:
    I2CPreInit(PinName sda, PinName scl) : I2C(sda, scl)
    {
        frequency(400000);
        start();
    };
};
I2CPreInit gI2C(P6_1,P6_0);
Adafruit_SSD1306_I2c gOled2(gI2C,P0_2,0x78,64,128);

int main()
{   uint16_t x=0;

    printf("Started\n");
    printf("%ux%u OLED Display\r\n", gOled2.width(), gOled2.height());
    printf("Rotation = %u\n",gOled2.getRotation());


    gOled2.drawX11BitMap(cylogo_bits,cylogo_width,sizeof(cylogo_bits),0,(64-cylogo_height)/2);

    gOled2.display();

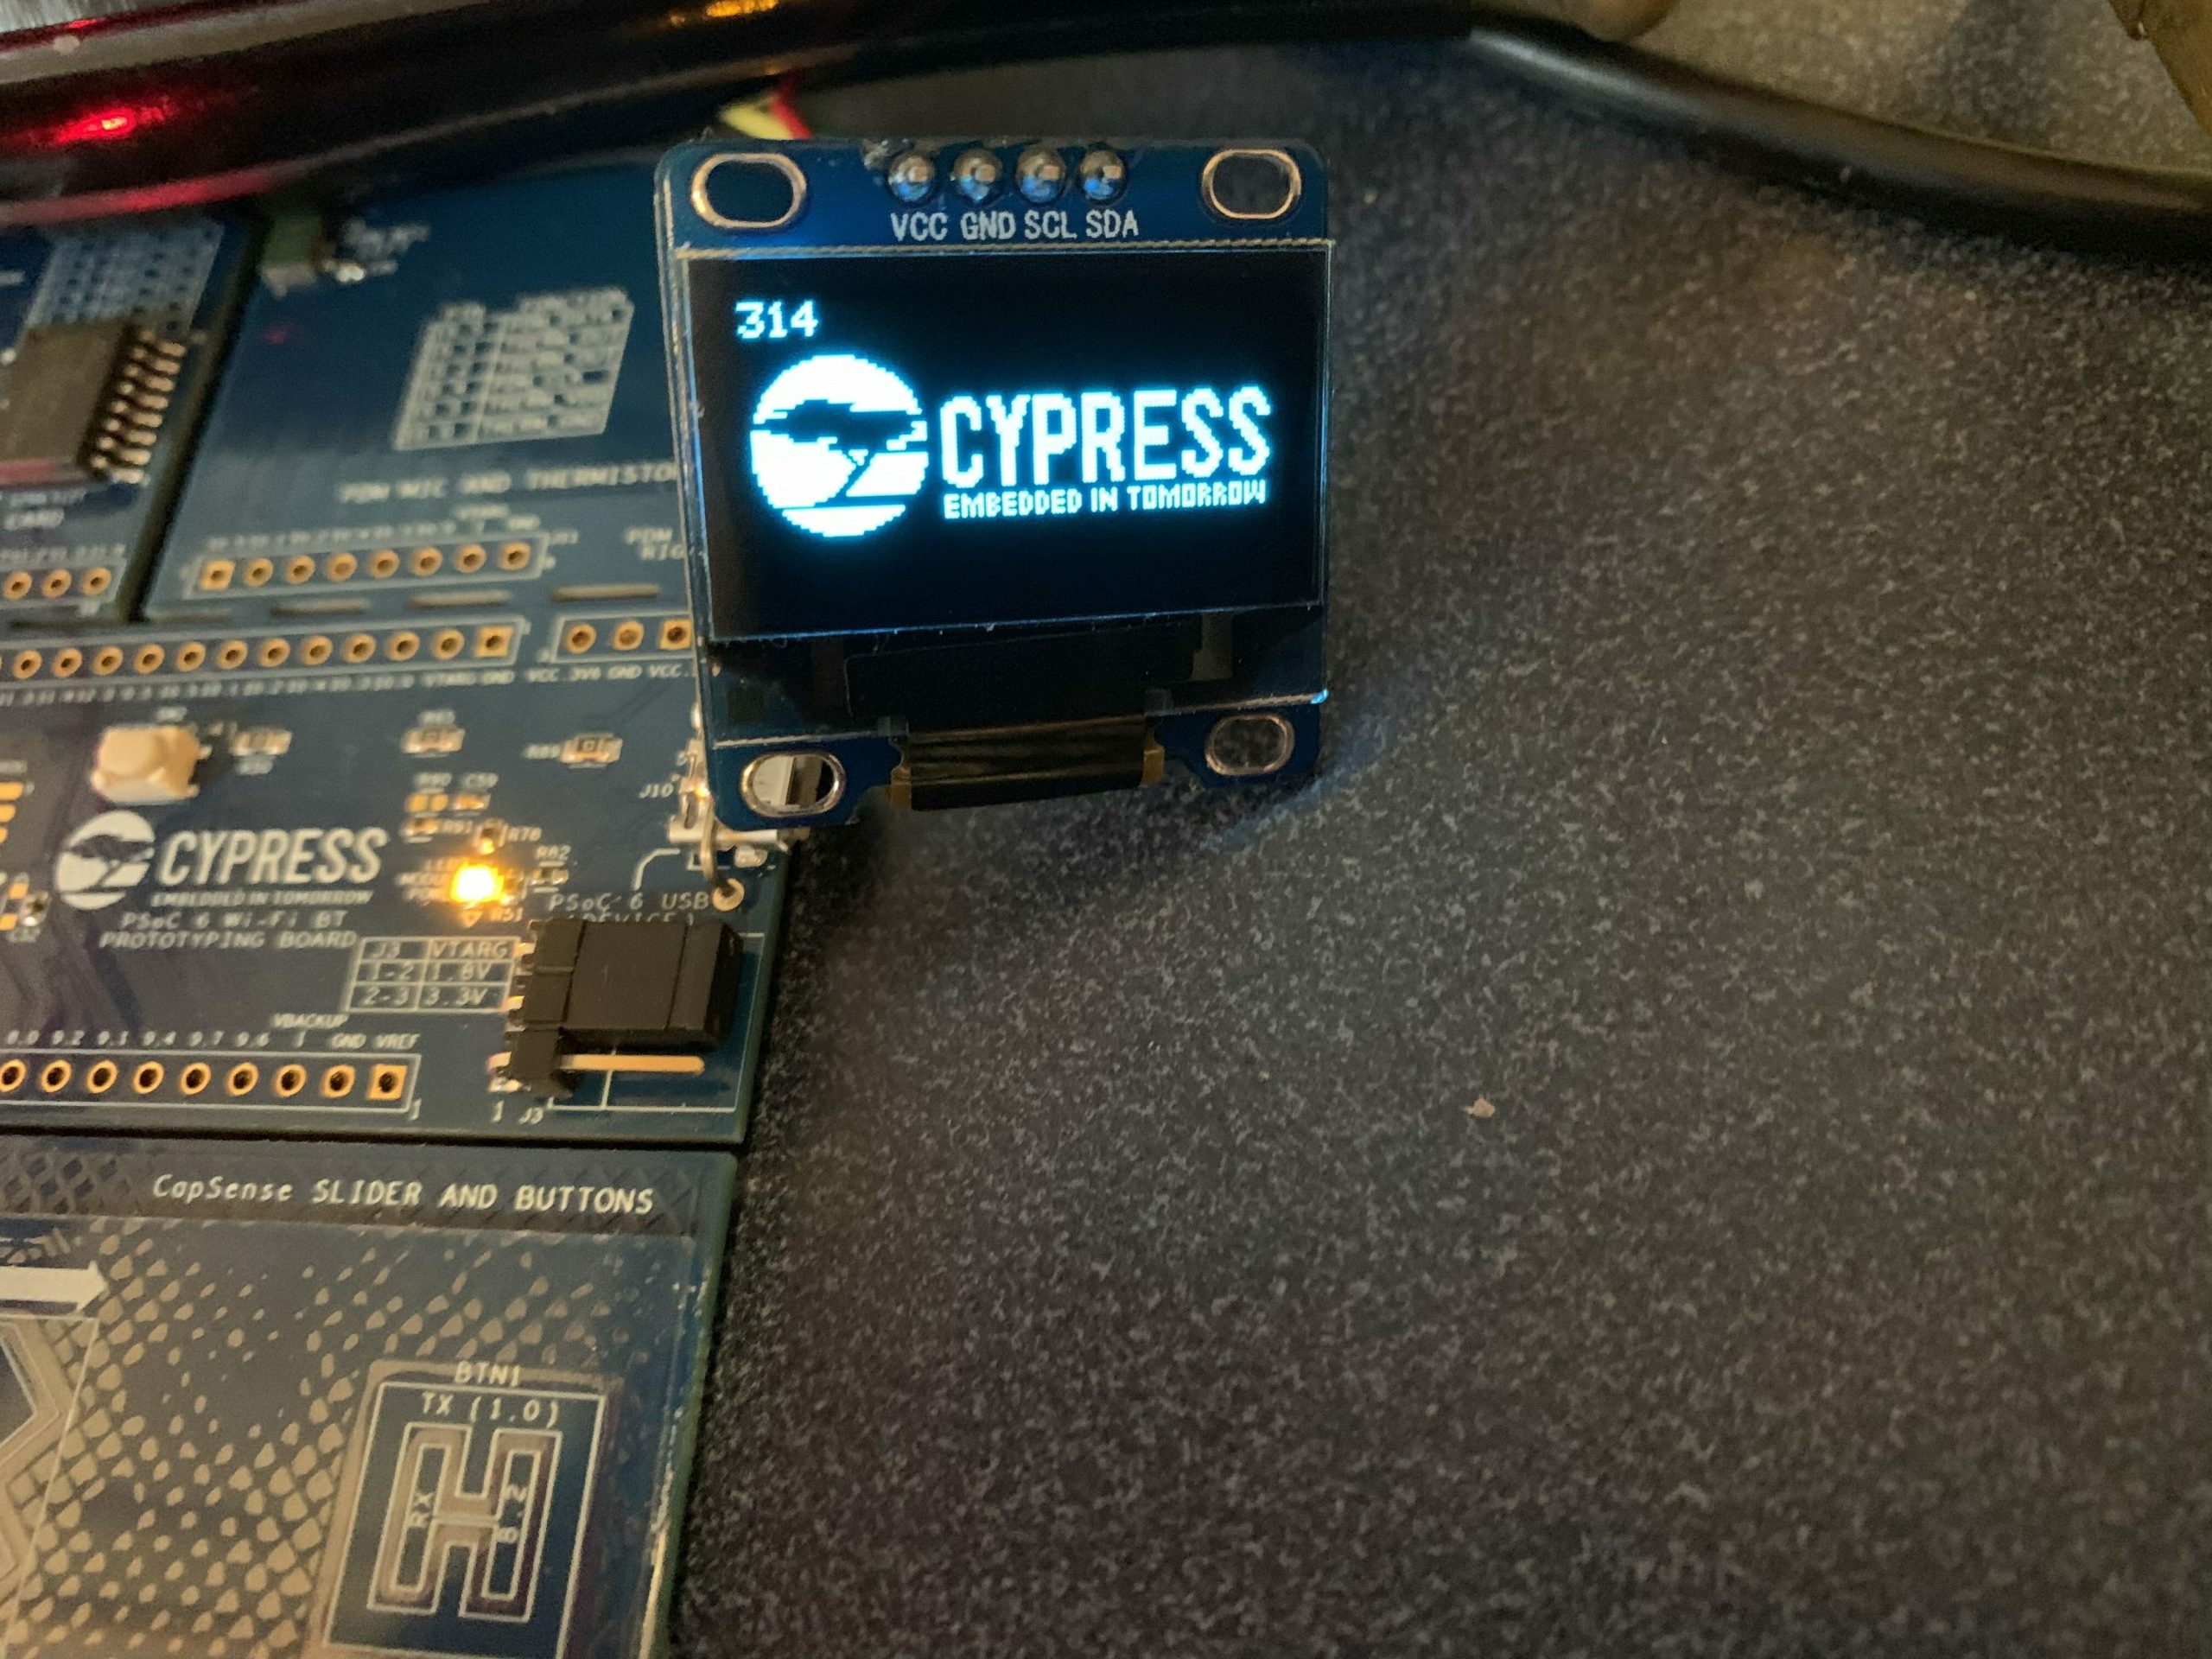
When you program this… everything seems to be good.

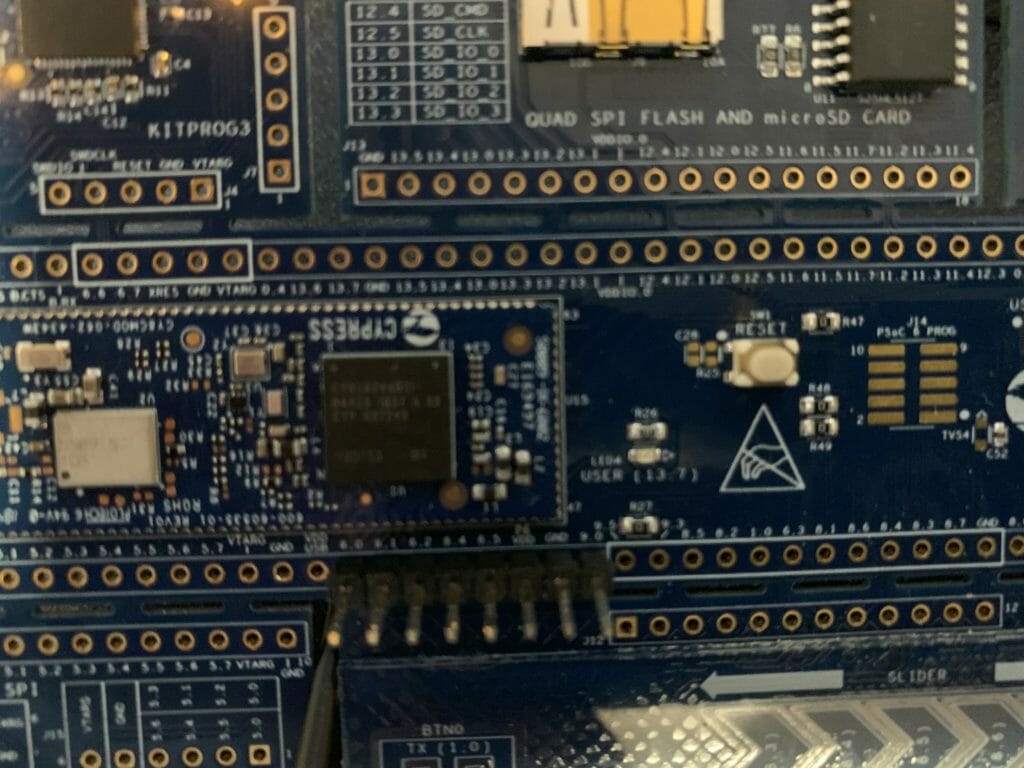
By the way if it isn’t clear by now, I did a solder in a male header onto the board so that I could attach the I2C wires for the display.
MBEDOS & BLE & PSoC 6 & CYW4343W

Summary

At the Embedded World Show in Germany in a couple of weeks I am going to be showing a crazy demo (more on this later) that uses MBED OS and BLE and WiFi and PSoC 6 and the 4343W.  Given how close things are and how new MBED OS is to me I figure that I had better get going sorting out the BLE interface.   This article and probably the next several are going to show my progress through the learning curve.

It turns out that in MBED OS, instead of using the Cypress BLE Host Stack I will be using the ARM Cordio BLE host stack talking via HCI to the Cypress BLE Controller stack running on the 4343W (a Bluetooth, BLE and WiFi combo chip).  At this point all of my experience with BLE has been with Cypress stacks, either the PSoC 4/6 BLE stack or with the Cypress IoT stacks e.g. the CYW20719.  Lot’s of new learning.  Add in that all of the code is in C++ and it makes for an adventure.

For this article I will show the steps to get an ARM BLE example going on the CY8CPROTO_062_4343W development kit.  This will involve.

  1. Importing the ARM MBEDOS BLE Examples
  2. Modifying them to support the Cypress Targets & Test
  3. Updating an example program in a few places to fix things that I don’t like.

Import ARM MBED OS BLE Examples

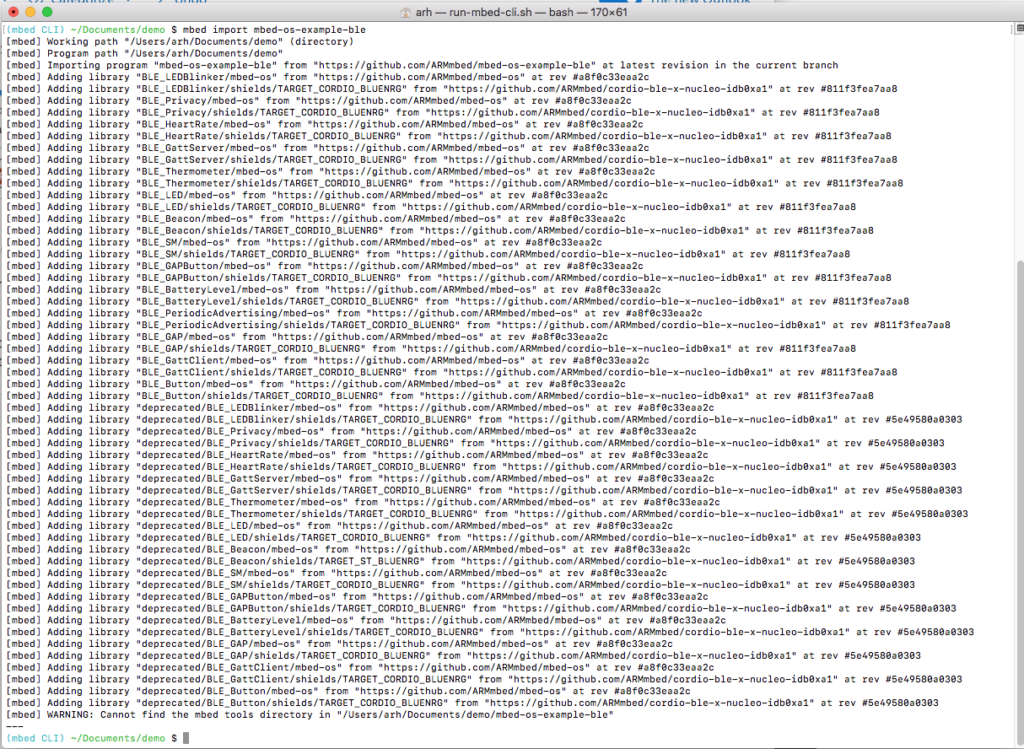
The first step is to make a clone of the ARM examples by running “mbed import mbed-os-example-ble”.  This will load a bunch of different example projects (as libraries)

Then, when you look at what you have after all of that mess, you can see 14 example programs with promising names.

When you look in the BLE_LED directory you will find a file “readme.md” which is a markdown formatted file.  You can view this file on the GitHub website for this example here.  The top of this one looks promising:

Modify and Test

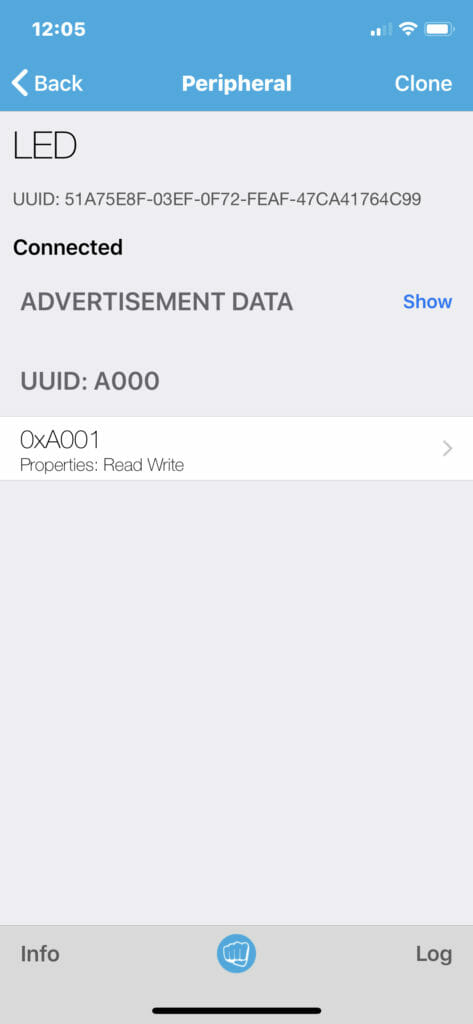
I decide that the example called “BLE_LED” looks like a good place to start.  This example is a simple peripheral that advertises it name.  When you connect to it there is a Service with UUID “0xA000” (unfortunately a 16-bit UUID… bad demo code) that Service has one characteristic with UUID 0xA001 (another 16-UUID … that isn’t nice … come on people… haven’t you read the spec?).  When you write a “1” to that characteristic the LED2 is supposed to turn on, and when you write a 0 the LED2 is supposed to turn off.

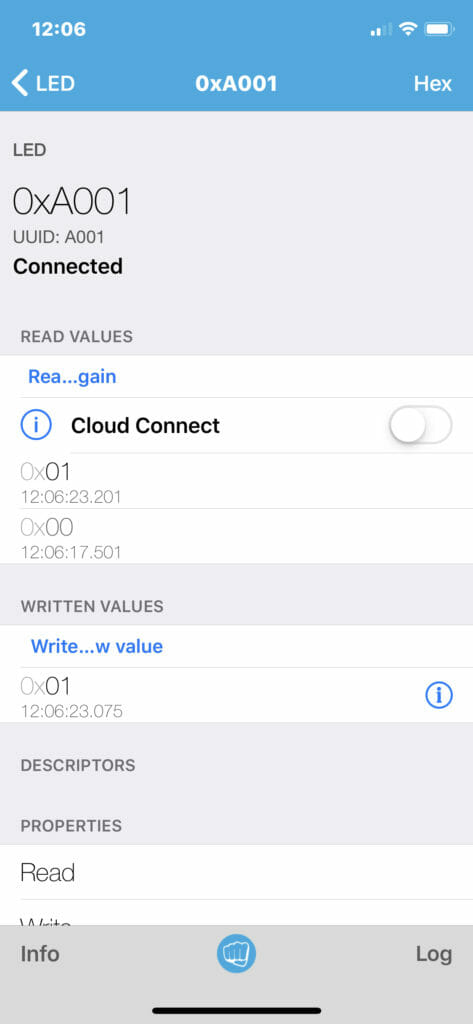
First, until the Cypress stuff is accepted into the main release, I need to update mbed-os to our targets) with “cd mbed-os ; mbed update master”.  To build this project Ill run “mbed compile -t GCC_ARM -m CY8CPROTO_062_4343W”.  When I program the the development kit, the LED starts blinking and I am able to see it using the GATT browser LightBlue Explorer.

But when I try to write a 1 to the 0xA001 characteristic nothing happens.

So, what gives? The answer is that on line 32 you can see that the authors as assuming that you have two LEDs (my development kit only has one.

        _alive_led(LED2, 1),
        _actuated_led(LED1, 0),

And on line 124 you can see a function that inverts the LED

void blink() {
        _alive_led = !_alive_led;
    }

which is triggered on line 47 to be called every 500ms

    void start() {
        _ble.gap().setEventHandler(this);

        _ble.init(this, &LEDDemo::on_init_complete);

        _event_queue.call_every(2000, this, &LEDDemo::blink);

        _event_queue.dispatch_forever();
    }

OK.  I am not loving this. I think that I should make some updates to this project.

Update

There are several things that I don’t like about this program or need to be fixed.

  1. Make the user LED2 be LED1 and fix the fact that it is active low.
  2. Change the UUIDs of the Service and Characteristic to be legal 128-bit UUIDs
  3. Make the stdio print out the status of the connection (instead of the blinking LED1)
  4. Make the baud rate of standard i/o be 115200 instead of 9600

First, fix the LED2 to be LED1.  Do this by commenting out all of the _alive_led code and switching the _actuated_led to be LED1.  Also set the state of the LED1 to 1 (meaning off because it is active low)

        //_alive_led(LED1, 1),
        _actuated_led(LED1, 1),

The author of the example code has a function called blink which is executed by the event queue every 500ms, comment out that function

/*
    void blink() {
        _alive_led = !_alive_led;
    }
*/

And don’t inject events into the queue to run the blink function

        //_event_queue.call_every(500, this, &LEDDemo::blink);

The LED on my board is active low… so instead of writing the value write the opposite of the value.

            _actuated_led = !*(params->data);

It is illegal in Bluetooth to use 16-bit UUIDs without first registering them with the Bluetooth SIG and having them be “Assigned numbers”.  The author of this example program violated the specification by assigning the LED service UUID of 0xA000 and the LED characteristic UUID of 0xA001.  This is super annoying and I am not willing to be a slob.  To fix this modify ledservice.h to declare the UUIDs as UUID type instead of uint16_ts

    //const static uint16_t LED_SERVICE_UUID              = 0xA000;
    //const static uint16_t LED_STATE_CHARACTERISTIC_UUID = 0xA001;

    const static UUID LED_SERVICE_UUID;
    const static UUID LED_STATE_CHARACTERISTIC_UUID;

Then initialize them in the main.cpp as 128-bit UUIDs using the const char * initializer.

const UUID LEDService::LED_SERVICE_UUID("21c04d09-c884-4af1-96a9-52e4e4ba195b");
const UUID LEDService::LED_STATE_CHARACTERISTIC_UUID("1e500043-6b31-4a3d-b91e-025f92ca9763");

The original code has a blinking LED.  Which I dont really like.  Typically, I like to blink the LED when the device is advertising, and make it be solid when there is a connection.  However, as I only have one LED on my board, and I have allocated it to be the “_actuated_led”, I will use the UART to print out status changes.  To do this, I update the “onDisconnectionComplete” and “onConnectionComplete” events to print out that fact to stdio.

    void onDisconnectionComplete(const ble::DisconnectionCompleteEvent&) {
        _ble.gap().startAdvertising(ble::LEGACY_ADVERTISING_HANDLE);
        printf("DisconnectionCompleteEvent\n");
    }

    void onConnectionComplete	(	const ble::ConnectionCompleteEvent & 	event	)
    {
      printf("onConnectionComplete\n");
    }

In order to set the stdio to use 115200 instead of 9600 you can change the default rate of the UART in the mbed_app.json.

  "CY8CPROTO_062_4343W": {
            "platform.stdio-baud-rate": 115200,
            "platform.default-serial-baud-rate": 115200
        },

Here is the final version of main.cpp

/* mbed Microcontroller Library
* Copyright (c) 2006-2013 ARM Limited
*
* Licensed under the Apache License, Version 2.0 (the "License");
* you may not use this file except in compliance with the License.
* You may obtain a copy of the License at
*
*     http://www.apache.org/licenses/LICENSE-2.0
*
* Unless required by applicable law or agreed to in writing, software
* distributed under the License is distributed on an "AS IS" BASIS,
* WITHOUT WARRANTIES OR CONDITIONS OF ANY KIND, either express or implied.
* See the License for the specific language governing permissions and
* limitations under the License.
*/
#include <events/mbed_events.h>
#include <mbed.h>
#include "ble/BLE.h"
#include "LEDService.h"
#include "pretty_printer.h"
const static char DEVICE_NAME[] = "LED";
static EventQueue event_queue(/* event count */ 10 * EVENTS_EVENT_SIZE);
//const UUID::LongUUIDBytes_t testbytes = { 0x21, 0xc0, 0x4d, 0x09, 0xc8, 0x84, 0x4a, 0xf1, 0x96, 0xa9, 0x52, 0xe4, 0xe4, 0xba, 0x19, 0x5b } ;
// {0x1e, 0x50, 0x00, 0x43, 0x6b, 0x31, 0x4a, 0x3d, 0xb9, 0x1e, 0x02, 0x5f, 0x92, 0xca, 0x97, 0x63}
//const UUID LEDService::LED_SERVICE_UUID(testbytes,UUID::MSB);
const UUID LEDService::LED_SERVICE_UUID("21c04d09-c884-4af1-96a9-52e4e4ba195b");
const UUID LEDService::LED_STATE_CHARACTERISTIC_UUID("1e500043-6b31-4a3d-b91e-025f92ca9763");
class LEDDemo : ble::Gap::EventHandler {
public:
LEDDemo(BLE &ble, events::EventQueue &event_queue) :
_ble(ble),
_event_queue(event_queue),
//_alive_led(LED1, 1),
_actuated_led(LED1, 1),
_led_uuid(LEDService::LED_SERVICE_UUID),
_led_service(NULL),
_adv_data_builder(_adv_buffer) { }
~LEDDemo() {
delete _led_service;
}
void start() {
_ble.gap().setEventHandler(this);
_ble.init(this, &LEDDemo::on_init_complete);
//_event_queue.call_every(500, this, &LEDDemo::blink);
_event_queue.dispatch_forever();
}
private:
/** Callback triggered when the ble initialization process has finished */
void on_init_complete(BLE::InitializationCompleteCallbackContext *params) {
if (params->error != BLE_ERROR_NONE) {
printf("Ble initialization failed.");
return;
}
_led_service = new LEDService(_ble, false);
_ble.gattServer().onDataWritten(this, &LEDDemo::on_data_written);
print_mac_address();
start_advertising();
}
void start_advertising() {
/* Create advertising parameters and payload */
ble::AdvertisingParameters adv_parameters(
ble::advertising_type_t::CONNECTABLE_UNDIRECTED,
ble::adv_interval_t(ble::millisecond_t(1000))
);
_adv_data_builder.setFlags();
_adv_data_builder.setLocalServiceList(mbed::make_Span(&_led_uuid, 1));
_adv_data_builder.setName(DEVICE_NAME);
/* Setup advertising */
ble_error_t error = _ble.gap().setAdvertisingParameters(
ble::LEGACY_ADVERTISING_HANDLE,
adv_parameters
);
if (error) {
printf("_ble.gap().setAdvertisingParameters() failed\r\n");
return;
}
error = _ble.gap().setAdvertisingPayload(
ble::LEGACY_ADVERTISING_HANDLE,
_adv_data_builder.getAdvertisingData()
);
if (error) {
printf("_ble.gap().setAdvertisingPayload() failed\r\n");
return;
}
/* Start advertising */
error = _ble.gap().startAdvertising(ble::LEGACY_ADVERTISING_HANDLE);
if (error) {
printf("_ble.gap().startAdvertising() failed\r\n");
return;
}
}
/**
* This callback allows the LEDService to receive updates to the ledState Characteristic.
*
* @param[in] params Information about the characterisitc being updated.
*/
void on_data_written(const GattWriteCallbackParams *params) {
if ((params->handle == _led_service->getValueHandle()) && (params->len == 1)) {
_actuated_led = !*(params->data);
}
}
/*
void blink() {
_alive_led = !_alive_led;
}
*/
private:
/* Event handler */
void onDisconnectionComplete(const ble::DisconnectionCompleteEvent&) {
_ble.gap().startAdvertising(ble::LEGACY_ADVERTISING_HANDLE);
printf("DisconnectionCompleteEvent\n");
}
void onConnectionComplete	(	const ble::ConnectionCompleteEvent & 	event	)
{
printf("onConnectionComplete\n");
}
private:
BLE &_ble;
events::EventQueue &_event_queue;
//DigitalOut _alive_led;
DigitalOut _actuated_led;
UUID _led_uuid;
LEDService *_led_service;
uint8_t _adv_buffer[ble::LEGACY_ADVERTISING_MAX_SIZE];
ble::AdvertisingDataBuilder _adv_data_builder;
};
/** Schedule processing of events from the BLE middleware in the event queue. */
void schedule_ble_events(BLE::OnEventsToProcessCallbackContext *context) {
event_queue.call(Callback<void()>(&context->ble, &BLE::processEvents));
}
int main()
{
printf("Example Bluetooth\n");
BLE &ble = BLE::Instance();
ble.onEventsToProcess(schedule_ble_events);
LEDDemo demo(ble, event_queue);
demo.start();
return 0;
}

And LEDService.h

/* mbed Microcontroller Library
* Copyright (c) 2006-2013 ARM Limited
*
* Licensed under the Apache License, Version 2.0 (the "License");
* you may not use this file except in compliance with the License.
* You may obtain a copy of the License at
*
*     http://www.apache.org/licenses/LICENSE-2.0
*
* Unless required by applicable law or agreed to in writing, software
* distributed under the License is distributed on an "AS IS" BASIS,
* WITHOUT WARRANTIES OR CONDITIONS OF ANY KIND, either express or implied.
* See the License for the specific language governing permissions and
* limitations under the License.
*/
#ifndef __BLE_LED_SERVICE_H__
#define __BLE_LED_SERVICE_H__
class LEDService {
public:
//const static uint16_t LED_SERVICE_UUID              = 0xA000;
//const static uint16_t LED_STATE_CHARACTERISTIC_UUID = 0xA001;
const static UUID LED_SERVICE_UUID;
const static UUID LED_STATE_CHARACTERISTIC_UUID;
LEDService(BLEDevice &_ble, bool initialValueForLEDCharacteristic) :
ble(_ble), ledState(LED_STATE_CHARACTERISTIC_UUID, &initialValueForLEDCharacteristic)
{
GattCharacteristic *charTable[] = {&ledState};
GattService         ledService(LED_SERVICE_UUID, charTable, sizeof(charTable) / sizeof(GattCharacteristic *));
ble.gattServer().addService(ledService);
}
GattAttribute::Handle_t getValueHandle() const
{
return ledState.getValueHandle();
}
private:
BLEDevice                         &ble;
ReadWriteGattCharacteristic<bool> ledState;
};
#endif /* #ifndef __BLE_LED_SERVICE_H__ */


Cypress & MBED OS

Summary

This morning I saw something exciting.  When I went to the ARM mbed-os GitHub site I saw the latest accepted merge commit was from vmedcy and it says something interesting.  “Add Cypress PSoC 6 Targets”.  I cannot even begin to describe how gratifying it is to see this commit.

But what does it mean?  Lets look.  I am using a Mac, so I simply install the MBED-CLI using the instructions found on the MBED CLI webpage.

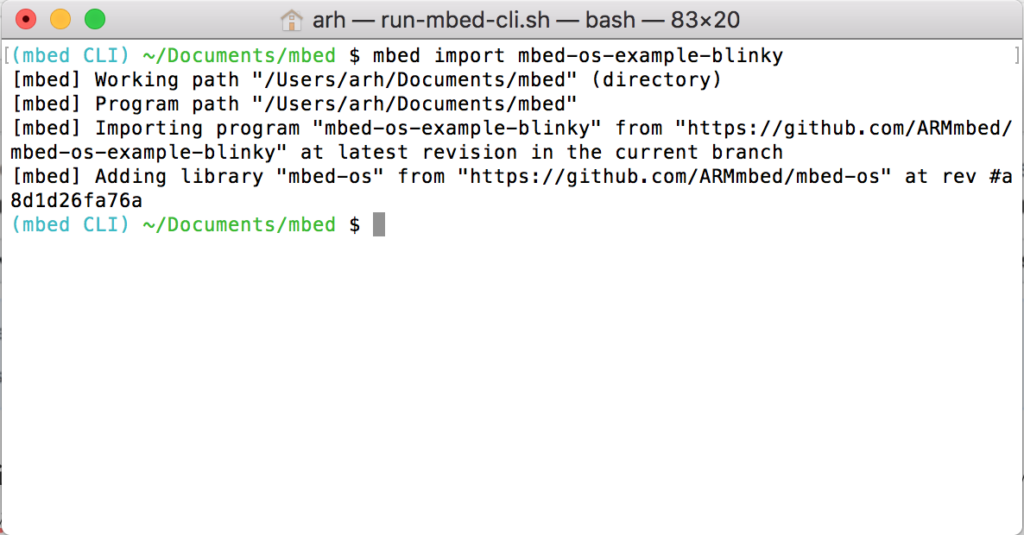
Like all good embedded people, the first thing to do is make sure that the toolchain and everything else works using a simple blinking LED project.  And, the easiest way to do this is to import the ARM example using: “mbed import mbed-os-example-blinky”.

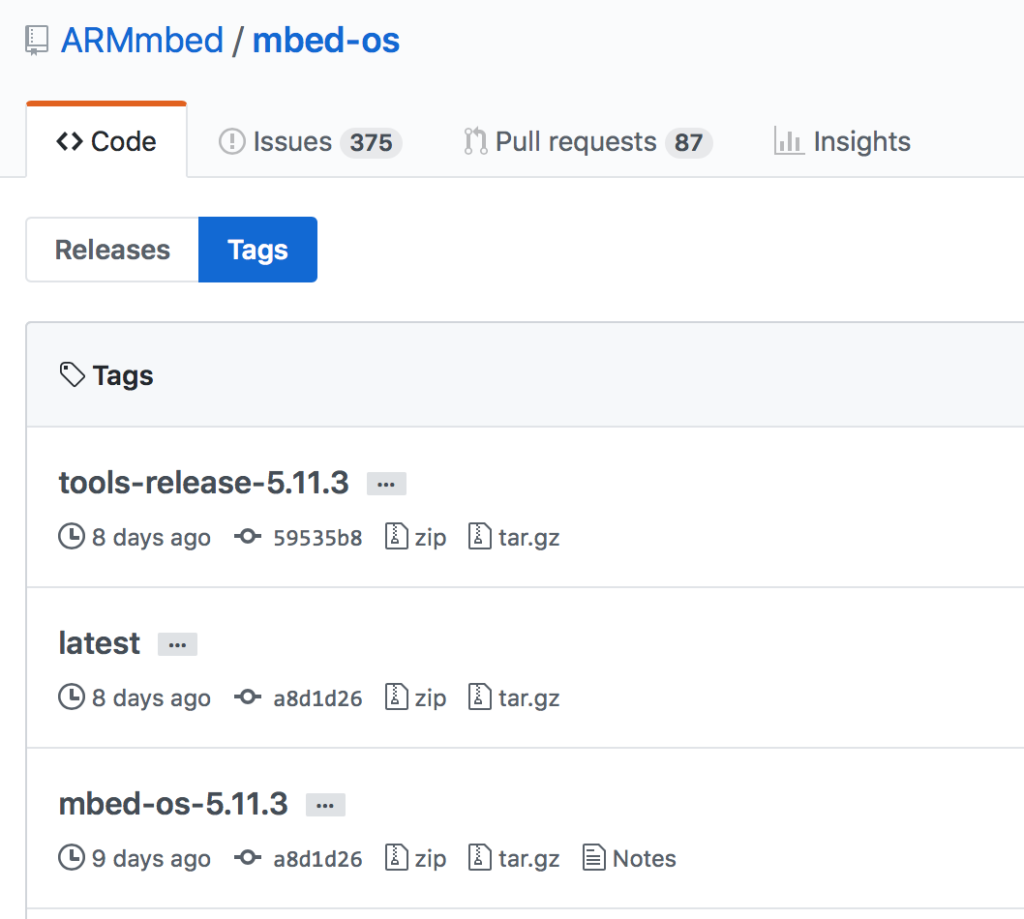
The current release of mbed-os is 5.11.3 which you can see on the Tags page of the mbed-os GitHub site.  Notice in the screenshot above that the commit number for mbed-os is “a8d1d2…”  which means that by default, when you import a project it gives you the “latest” version of mbed-os, which really means the latest official release.

But, I want to use the version that was accepted with the new Cypress stuff (which will become part of the official release starting with mbed-os-5.11.4).  I can do this by running “cd mbed-os” and “mbed update master”.  This will move the git repository to point at the head of the master branch, AKA the latest and greatest.  When I do that I get a version that looks like “32525…”

And when I look at the commit history in GitHub I can see the interesting commit has the same number.

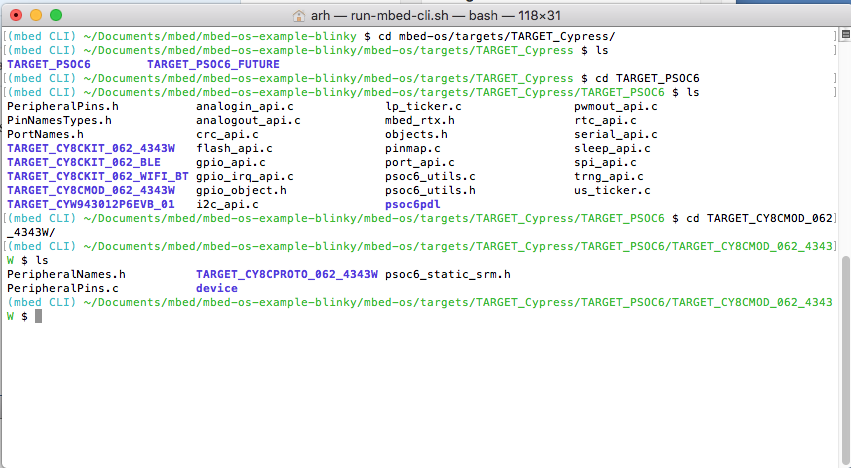
Now to the good stuff.  When I look in the targets directory I see that there is a TARGET_CYPRESS.  Where is see two targets:

  • TARGET_PSOC – the stuff that Cypress created
  • TARGET_PSOC6_FUTURE – a really cool target that Future Electronics created.

When when I look in the Cypress directory I see a bunch of my favorite Cypress PSoC 6 and WICED wireless development Kits.

  • TARGET_CY8CKIT_062_BLE
  • TARGET_CY8CKIT_062_4343W
  • TARGET_CY8CKIT_062_WIFI_BT
  • TARGET_CYW943012P6EVB_01
  • TARGET_CY8CMOD_062_4343W
  • TARGET_CY8CPROTO_062_4343W

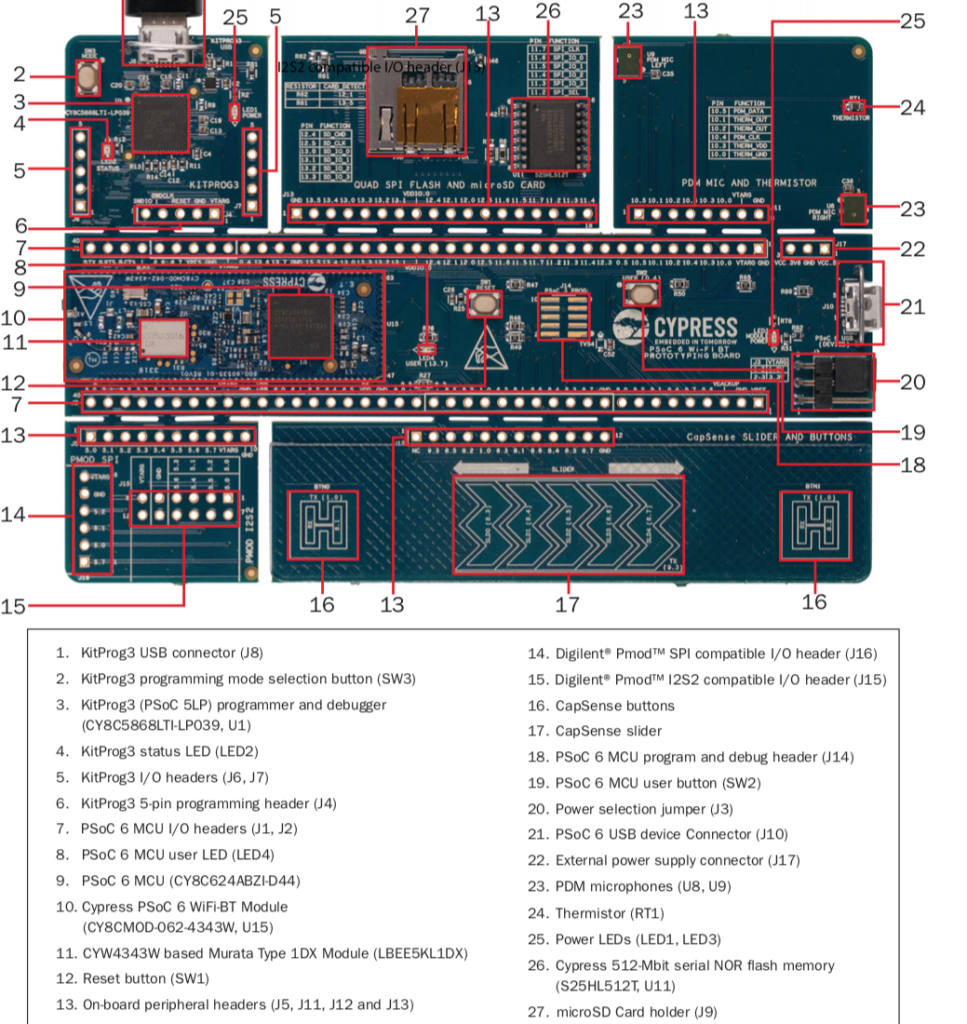
I happen to have a CY8CPROTO_062_4343W on my desk at home.  This kit has a bunch of cool stuff on it, but most importantly it a 4343W WiFi Bluetooth Combo chip and a PSoC 6 together.  Finally, A PSoC 6 2M (which is really called CY8C624ABZI-D44) and a WICED 4343W – a Dual Band 802.11n and Bluetooth 5.0 Combo.  Here is a picture from the development kit guide.

Now we have something to program.  Let’s look at the blinking LED example program.  It resides in the file “main.cpp” which is in the root directory of the “mbed-os-example-blinky”

/* mbed Microcontroller Library
* Copyright (c) 2018 ARM Limited
* SPDX-License-Identifier: Apache-2.0
*/
#include "mbed.h"
#include "stats_report.h"
DigitalOut led1(LED1);
#define SLEEP_TIME                  500 // (msec)
#define PRINT_AFTER_N_LOOPS         20
// main() runs in its own thread in the OS
int main()
{
SystemReport sys_state( SLEEP_TIME * PRINT_AFTER_N_LOOPS /* Loop delay time in ms */);
int count = 0;
while (true) {
// Blink LED and wait 0.5 seconds
led1 = !led1;
wait_ms(SLEEP_TIME);
if ((0 == count) || (PRINT_AFTER_N_LOOPS == count)) {
// Following the main thread wait, report on the current system status
sys_state.report_state();
count = 0;
}
++count;
}
}

This looks simple enough, but I am never a fan of “other” stuff in the blinking LED example.  So Ill trim it down to the most basic.

/* mbed Microcontroller Library
* Copyright (c) 2018 ARM Limited
* SPDX-License-Identifier: Apache-2.0
*/
#include "mbed.h"
DigitalOut led1(LED1);
#define SLEEP_TIME                  500 // (msec)
// main() runs in its own thread in the OS
int main()
{
while (true) {
// Blink LED and wait 0.5 seconds
led1 = !led1;
wait_ms(SLEEP_TIME);
}
}

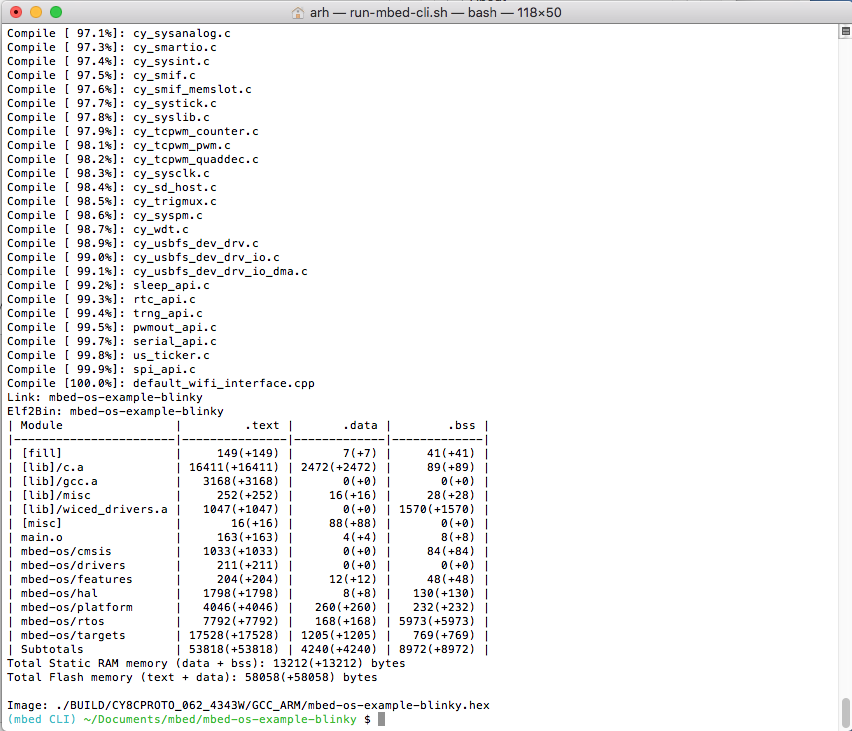
All-right, how do I compile this?  Well, run the mbed command line interface with “mbed compile -m CY8CPROTO_062_4343W -t GCC_ARM“… and after a bit of compiling you should end up with a window like this:


Now I have a “hex file”.  How do I program it?  There are three ways.

#1 You can add the “-f” option to the command line and it will “flash” the device after it gets done compiling using PyOCD.  In order to do this your development kit’s KitProg 3 must be in the DAPLink mode.  To get into this mode hold down the KitProg button for 2 seconds and the LED will turn off. (If the LED turns on that means you put the programmer into CMSIS-DAP mode, so hold down the button for 2 seconds again).  At the time of this writing the -f option doesn’t work in the released version of mbed-cli,  but that will be fixed shortly with an update to the program debug system in mbed (hopefully by the time you read this)

#2 Copy the hex file from the BUILD directory onto the Mass Storage device called “DAP Link” using the finder. (drag and drop).  To use this method your KitProg needs to be in DAPLink mode.  (so follow the steps above)

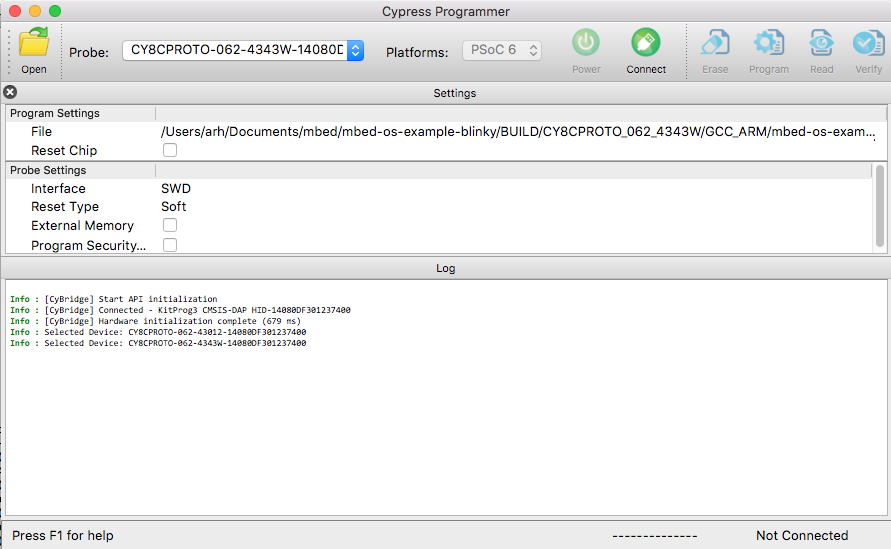
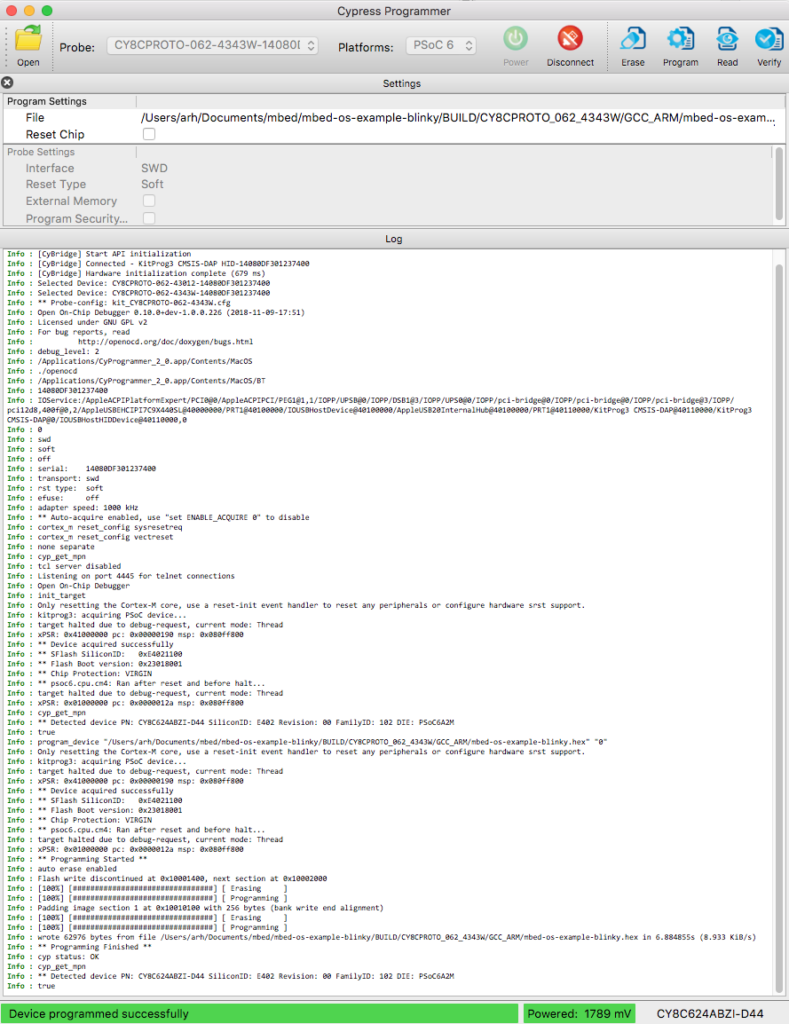
#3 Use the “Cypress Programmer” to program the flash.  You can download it for Windows, Mac or Linux from this link on cypress.com  When I run Cypress Programmer it looks like this:

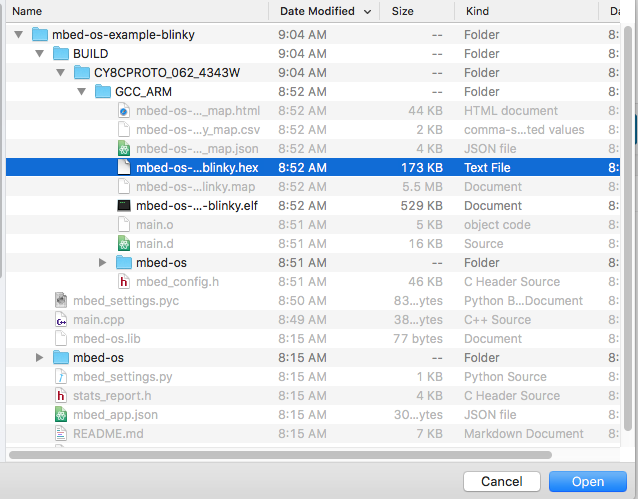
Open the hex file by pressing the “Open” button and navigating into the BUILD directory to find the hex file called “mbed-os-example-blinky.hex”

Then press “connect” and “program”

Nothing happens on my development kit?  So I press the reset button and now I get a blinking LED.  But why do I have to press reset?   Do you see the “Reset Chip” checkbox at the top of the “Program Settings” window?  That has to be clicked.  Now when you program, the debugger will reset the chip and you will be off to the races.

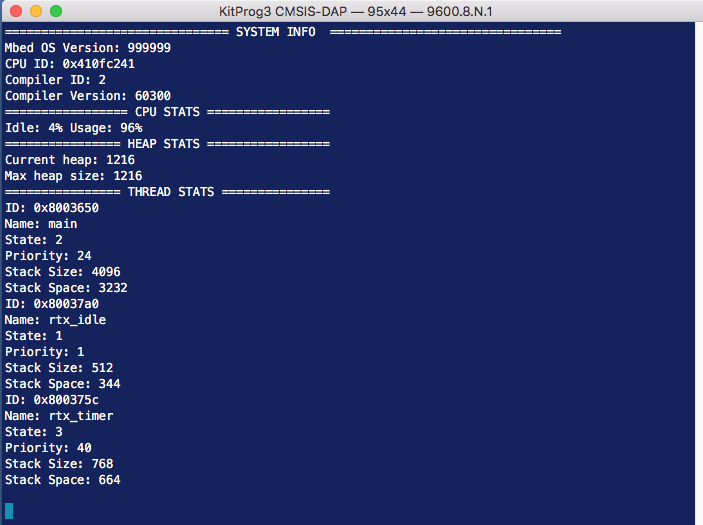
So, what was going on with the rest of that program that came by default?  If you attach a serial terminal to the devkit you will see that the blinky example program is putting out information about the RTOS.

It turns out the mbed-os is really an os… an operation system.  Actually it is a real time operating system that traces it genealogy to RTX, a product from the old Keil Corporation which was acquired by ARM…. a lot more on this later.

One final note that may cause confusion (I certainly have been confused).  There are four different modes of KitProg 3 (the programmer that is built into most of the Cypress development kits).

Mode LED Change modes
CMSIS-DAP BULK Solid LED Short button press toggles between BULK and HID
CMSIS-DAP HID Breathing LED Short button press toggles between BULK and HID
DAPLink LED Off Hold KitProg button for >2 seconds (gets in and out of this mode)
B00tloader Fast blinking LED hold reset button and plug in kit

In order to program from the command line using “mbed compile -f” you need to be in “DAPLink” mode.  In order to program with Cypress Programmer you need one of the CMSIS-DAP modes.