Particle Photon Configuration with Tinker Firmware

Summary

In the last article I wrote about using a CY3280 MBR3 Shield on a WICED WiFI 943907AEVAL1F development kit at the GE MegaHackathon.  In the next article I will show you the WICED HTTP firmware that I wrote to connect to the Particle Photon which they were using (I have written about Particle Photon before).  Obviously, I like Particle Photon because it is a WICED 43362 WiFi Radio.  In this article, I am going to show you how to get a Particle Photon going with the Tinker firmware.  Then test it with the iOS app, the web console and finally using CURL.  The CURL is just a mechanism to send HTTP Posts to the Tinker firmware, exactly what I will do in the next article on the WICED development kit.

Configure the Particle Photon

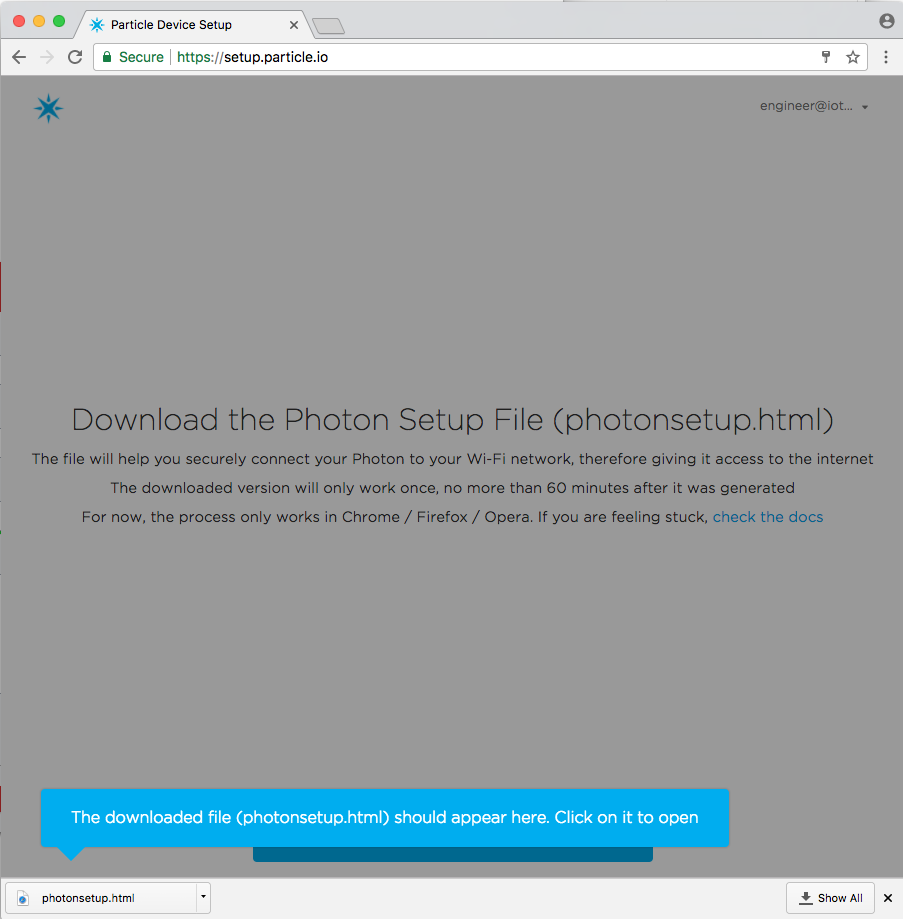
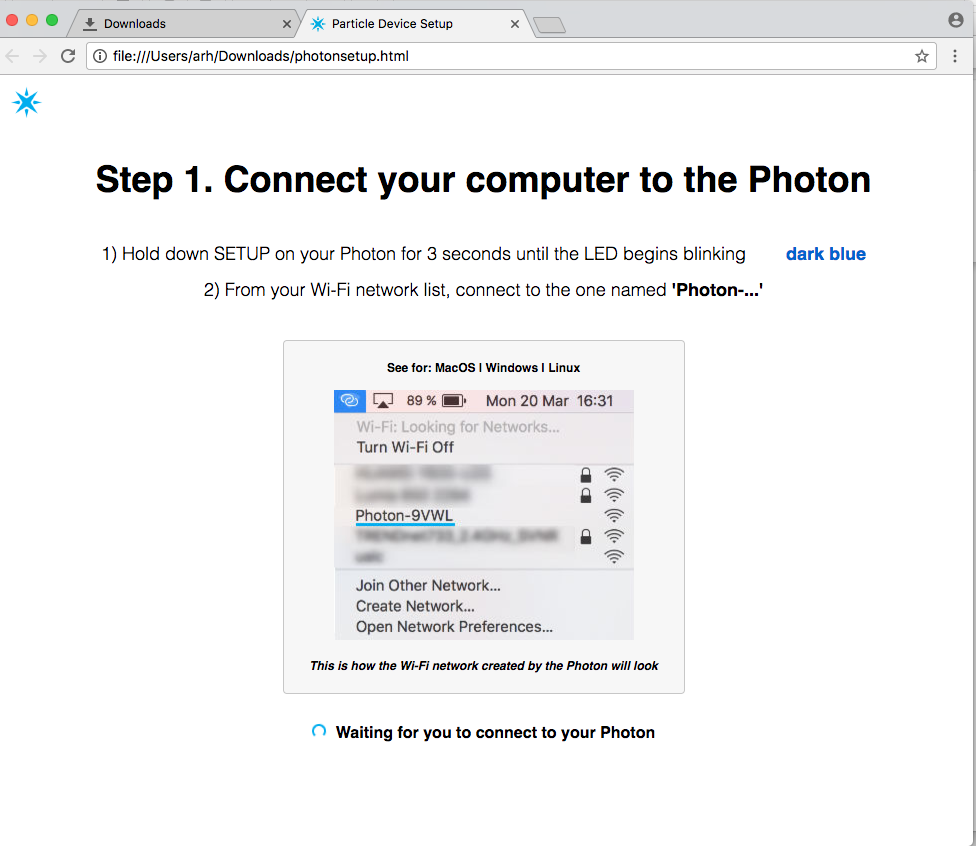
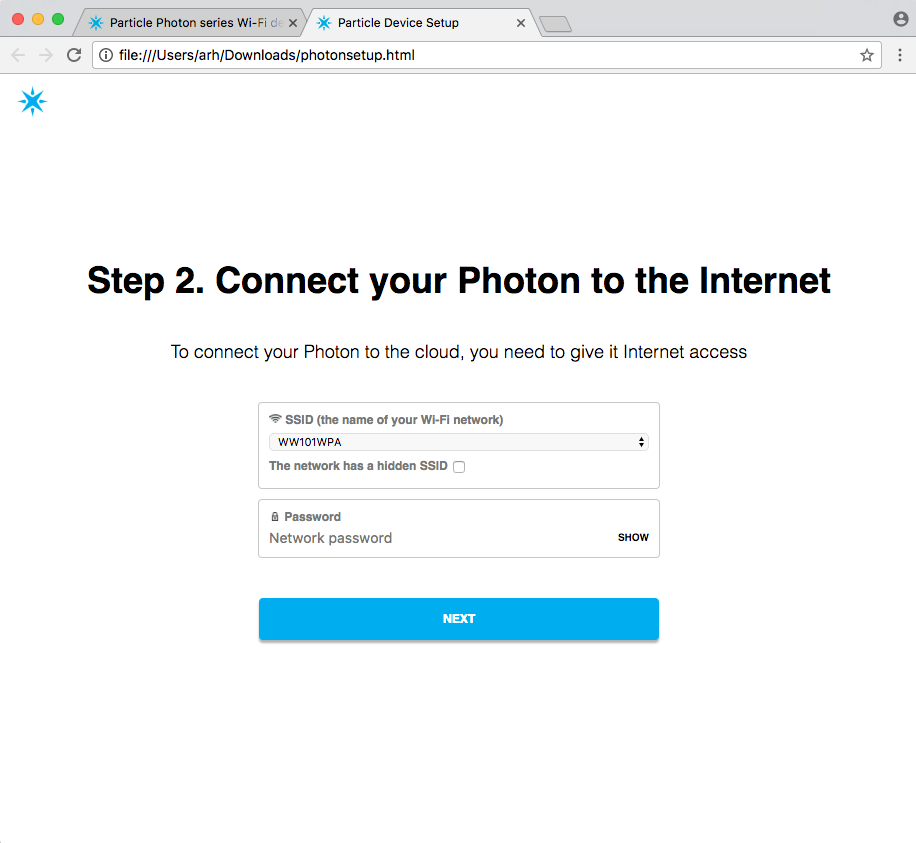
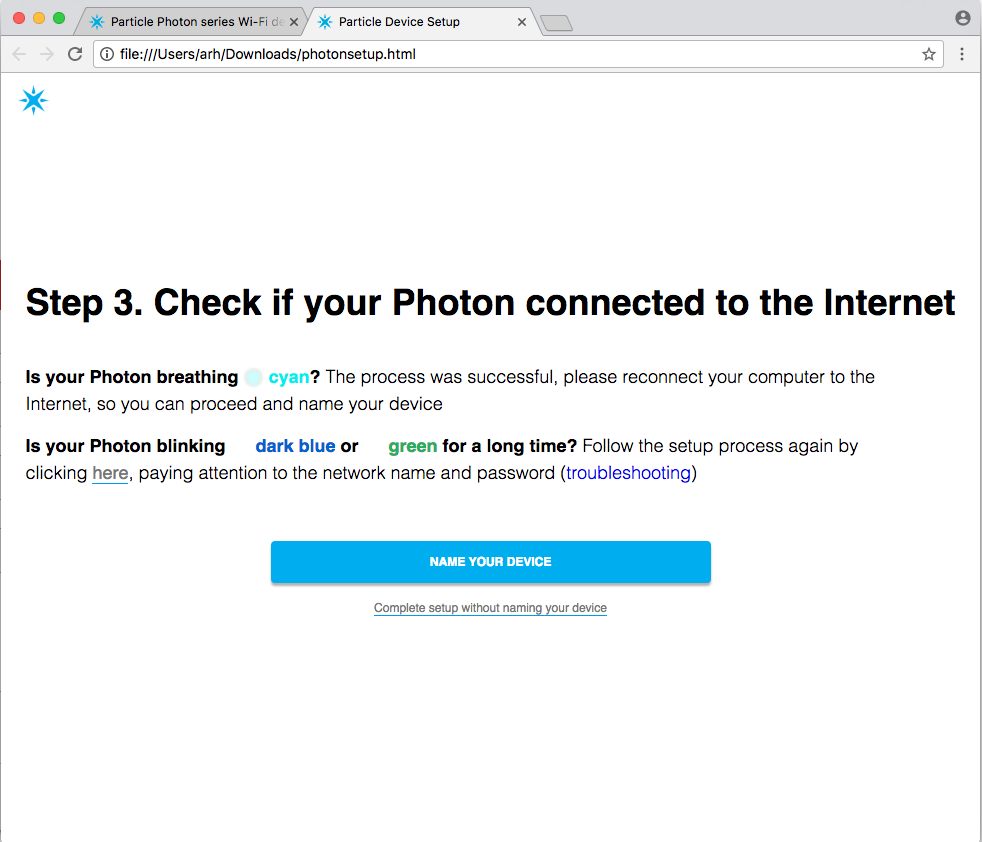
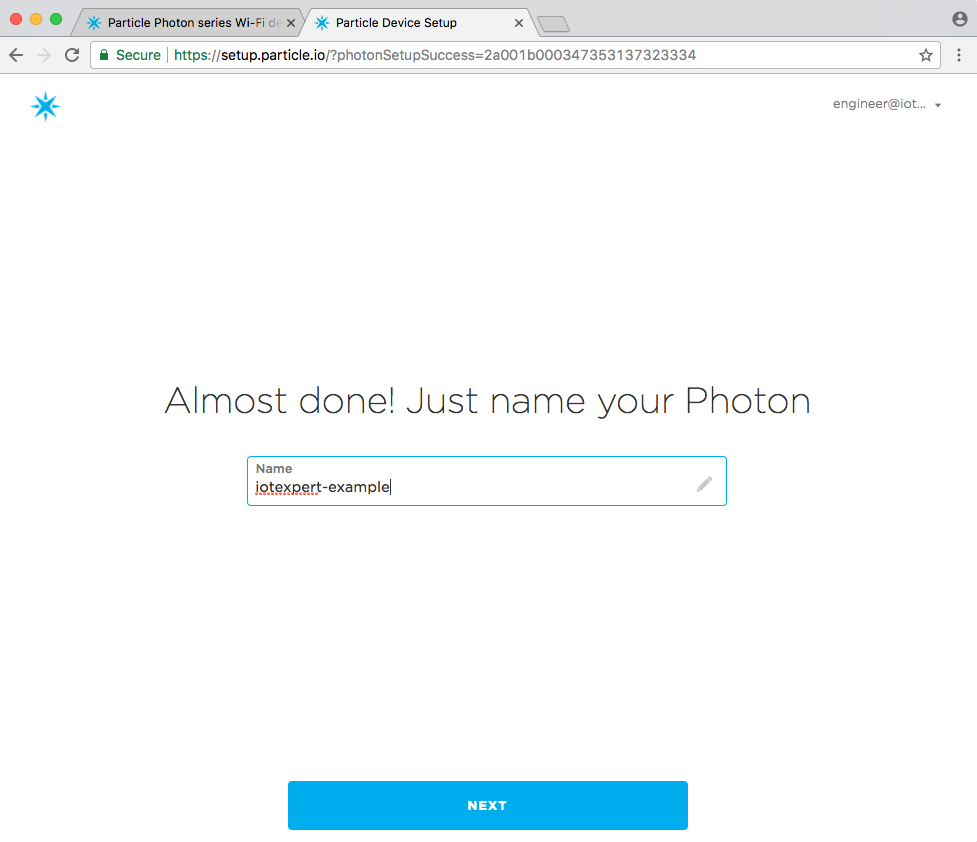
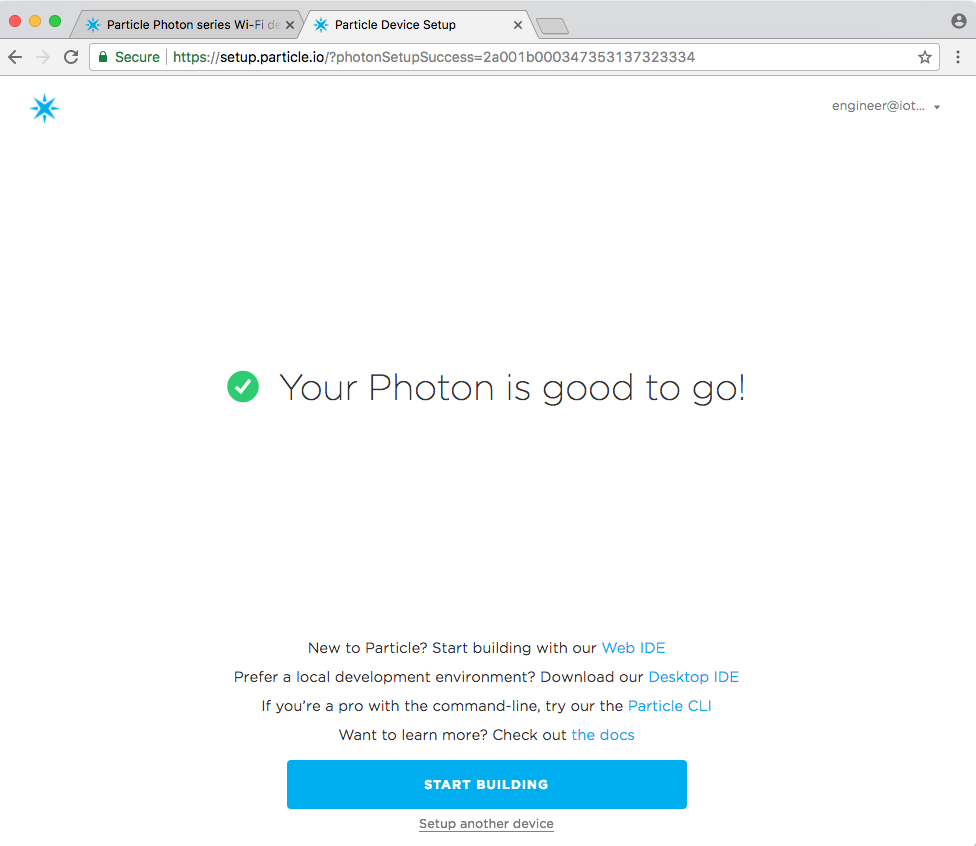
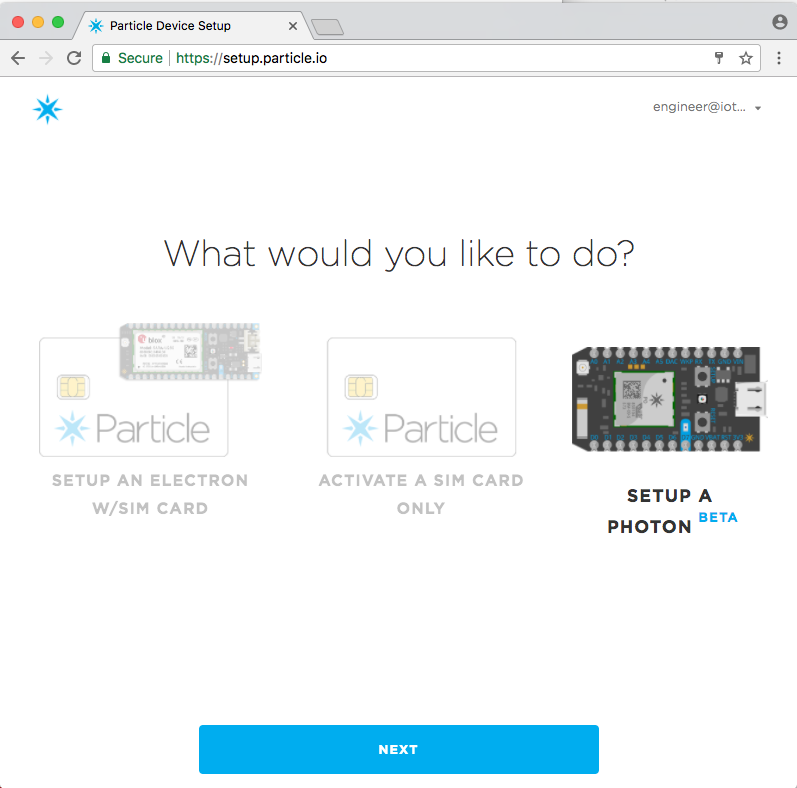
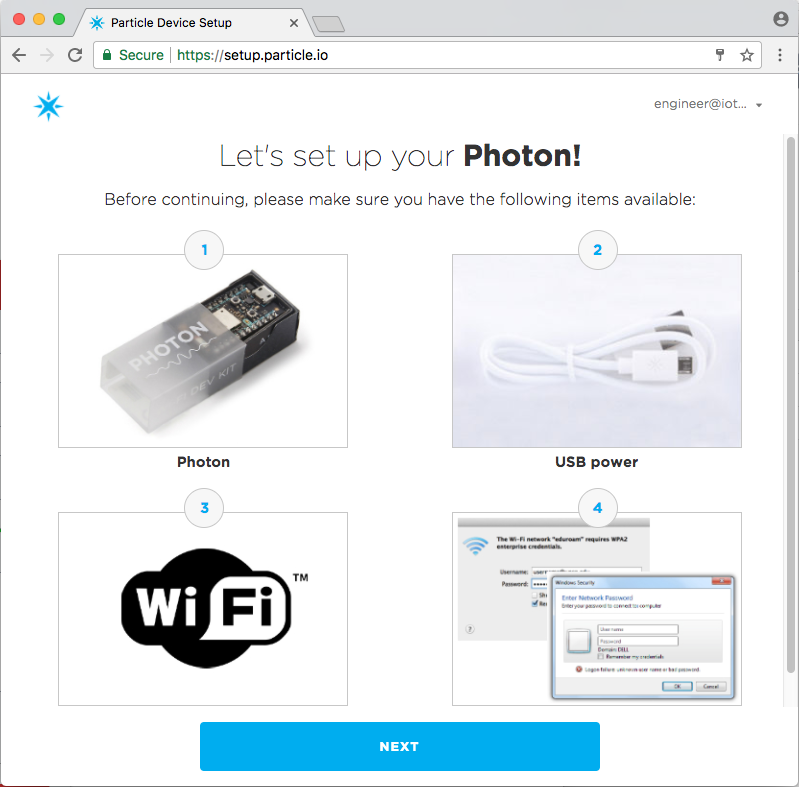
When you get a fresh Particle Photon out of the box you need to get it introduced to your WiFi network, and attached to your console.  To do this, start by going to setup.particle.io and following the process.

Particle Photon Configuration


Particle Photon Configuration

Particle Photon Configuration

Particle Photon Configuration

Particle Photon Configuration

Particle Photon Configuration


Particle Photon Configuration


Particle Photon Configuration

Testing with iPhone App

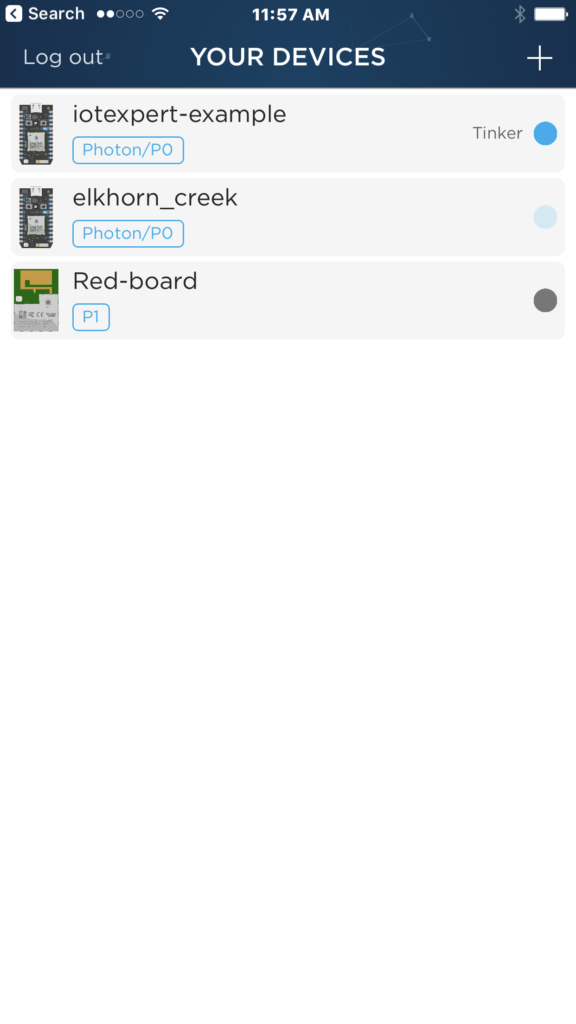
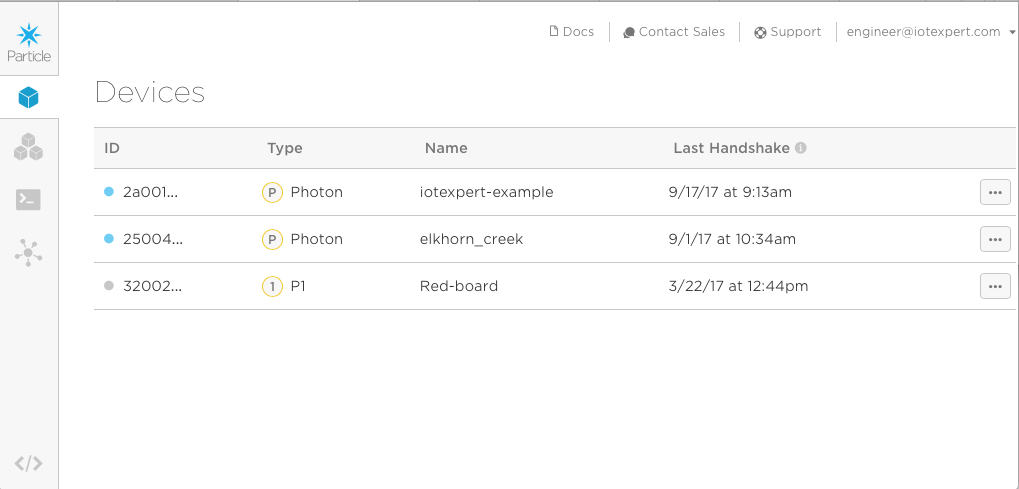
One you have “claimed” your Particle Photon and it is connected to the network, then you can talk to it with the Particle iOS app.  Here is what it looked like when I started the App on my phone.  You can see the device called “iotexpert-example” (remember that is what I named it from above).  The “Elkhorn_creek” Photon is the one that I wrote about in this article.

Particle Photon iOS App

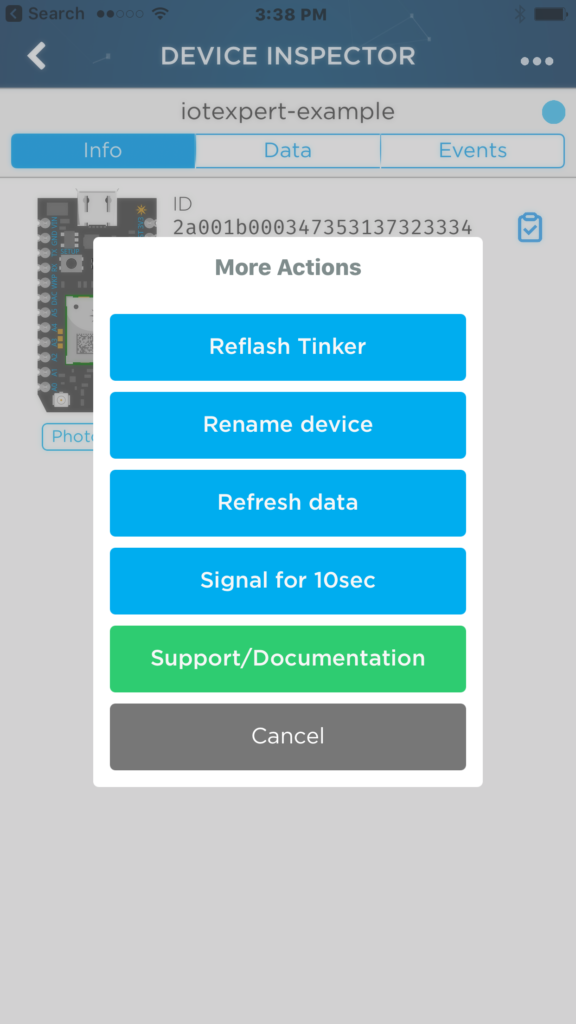
Although the console says that I have the Tinker Firmware on the app, I wanted to make sure, so I use the iOS App to re-flash the Tinker Firmware.  You can do this by clicking the new device, then press the little “…” at the top right of the screen.  Finally click “Reflash Tinker”. It is awesome how fast that happens.

Particle Photon iOS Flash Firmware

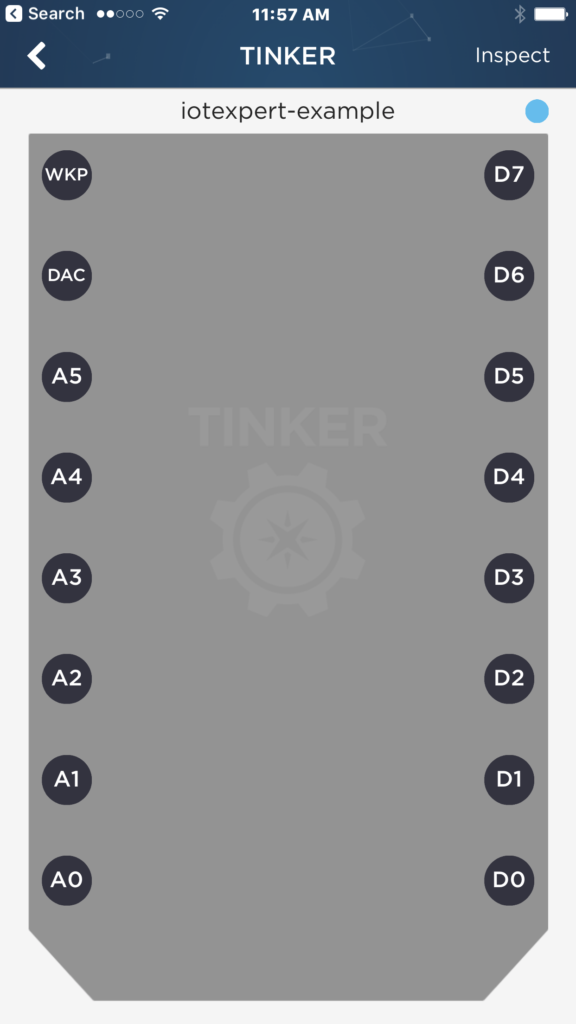
Once I am sure about the version of the Tinker firmware, I test to make sure that things are working correctly.  First I click on “D7”

Particle Photon iOS Tinker App

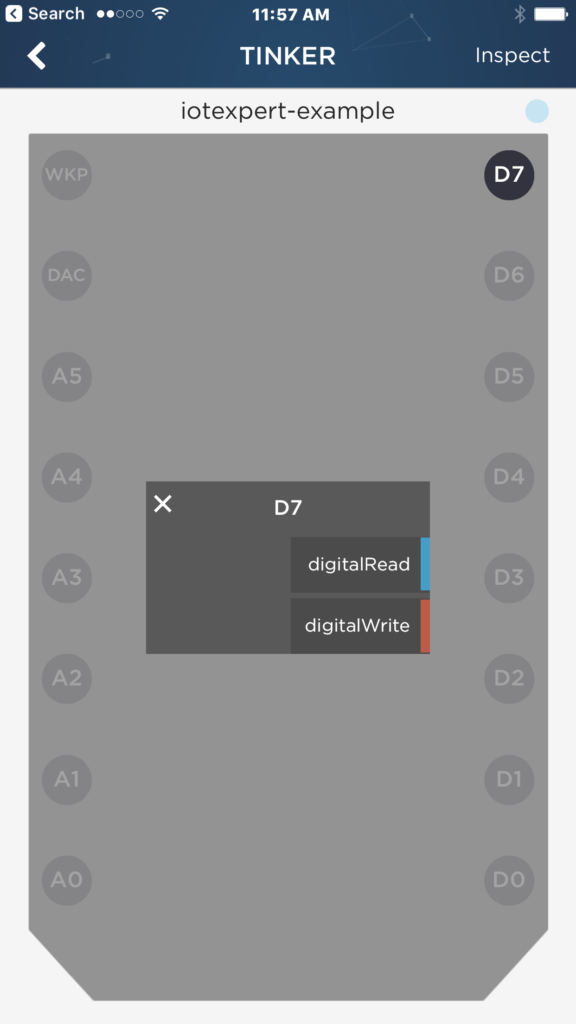
Which brings up this screen where you can select digitalRead and digitalWrite.

Particle Photon iOS Tinker App

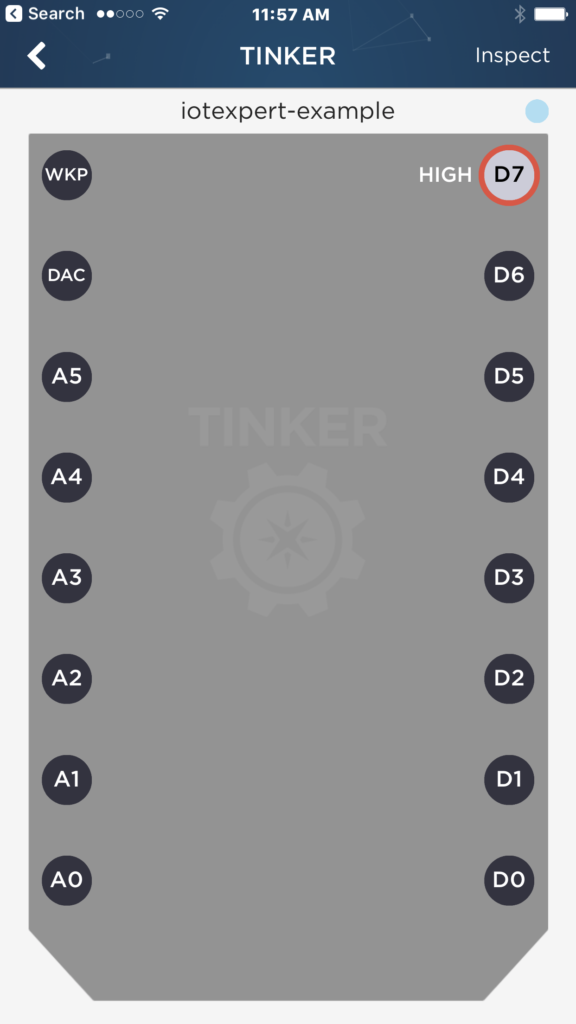
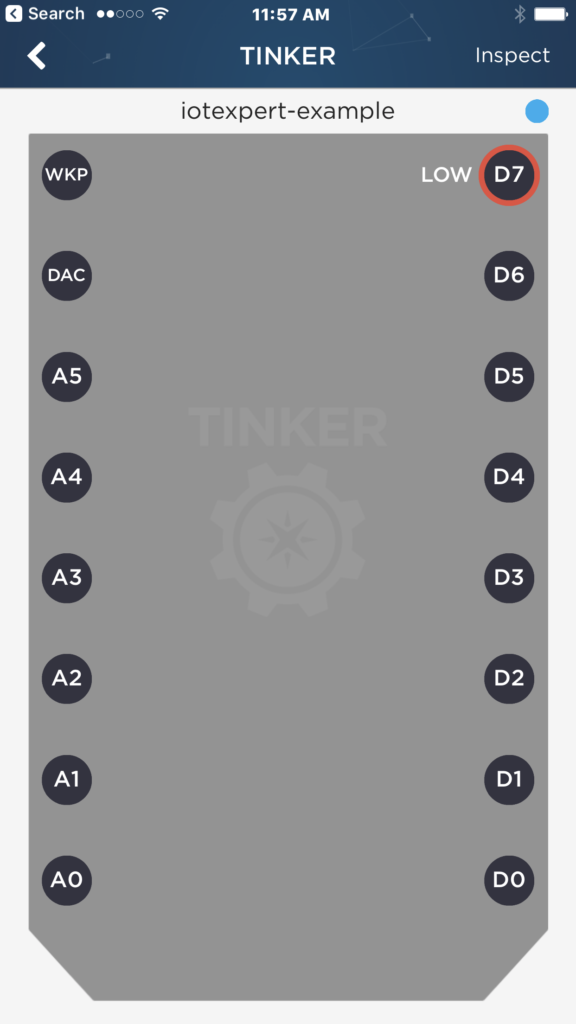
Then when you press the button it will switch from high to low and vice versa.

Particle Photon iOS Tinker App Particle Photon iOS Tinker App

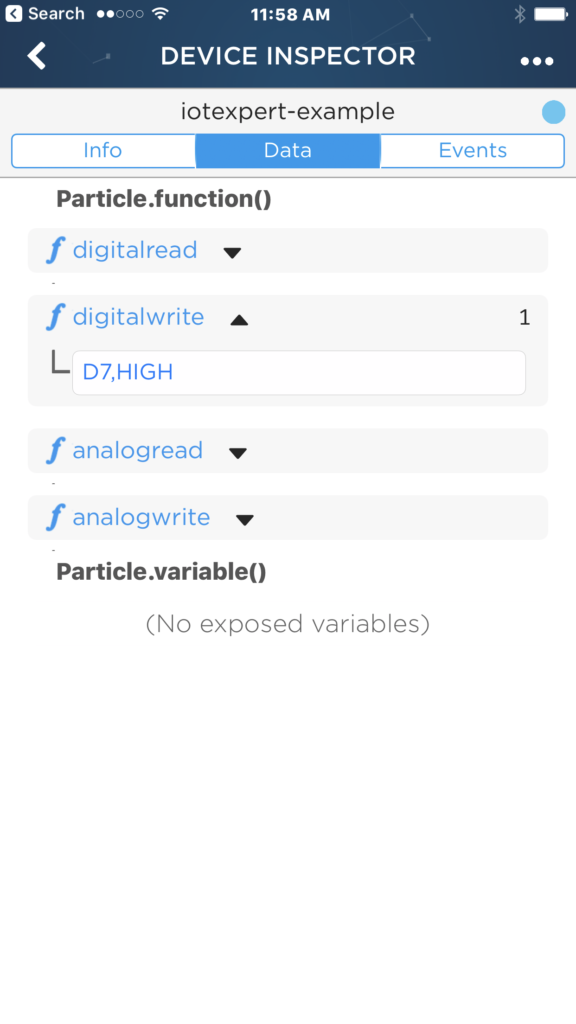
You can also call the API directly by pressing “inspect” then “Data”

Particle Photon iOS digitalwrite Data Function

Particle Photon Console

In addition to using the iOS App, you can also interact with the Photon using the console.

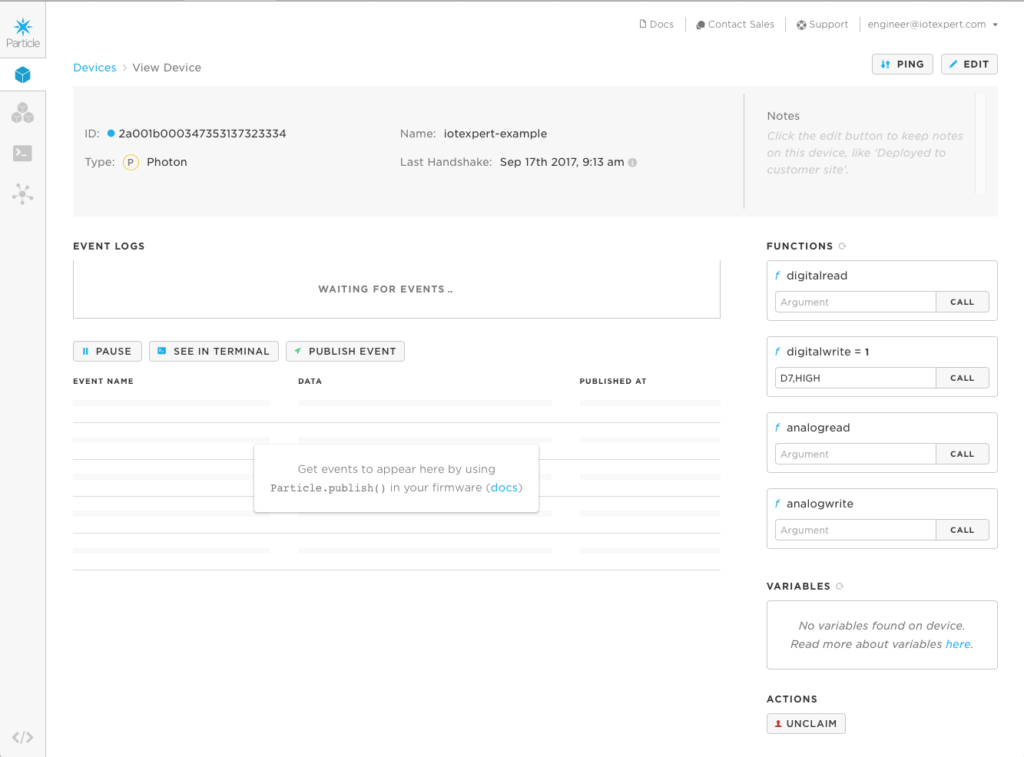
Particle Photon Console

When I click on the “iotexpert-example” it brings up this screen where I can run the Tinker firmware functions.  In this case I ran “digitialwrite” with “D7,HIGH” which turns on the LED on the Photon.

Particle Photon Console

Testing the Particle Photon with CURL

The Particle Cloud exposes an API which lets you send Restful API requests to specific devices.  The Unix tool CURL lets me type command line requests (which I will mimic in the next Article using WICED).  The first command that I send is and HTTP GET which will return a JSON document that describes the configuration on my Photon.

curl https://api.particle.io/v1/devices/iotexpert-example?access_token=1311f67269d6

You can see the device name etc in the JSON below.  It also shows that the Tinker firmware has four function built into it.

{  
   "id":"2a001b000347353137323334",
   "name":"iotexpert-example",
   "last_app":null,
   "last_ip_address":"69.23.226.142",
   "last_heard":"2017-09-17T15:38:56.406Z",
   "product_id":6,
   "connected":true,
   "platform_id":6,
   "cellular":false,
   "notes":null,
   "status":"normal",
   "current_build_target":"0.5.3",
   "variables":{  

   },
   "functions":[  
      "digitalread",
      "digitalwrite",
      "analogread",
      "analogwrite"
   ]
}

Then I can send a HTTP POST using Curl to turn on the D7 LED.

 curl https://api.spark.io/v1/devices/2a001b000347354/digitalwrite -d access_token=1311f67269d66b -d params=D7,HIGH

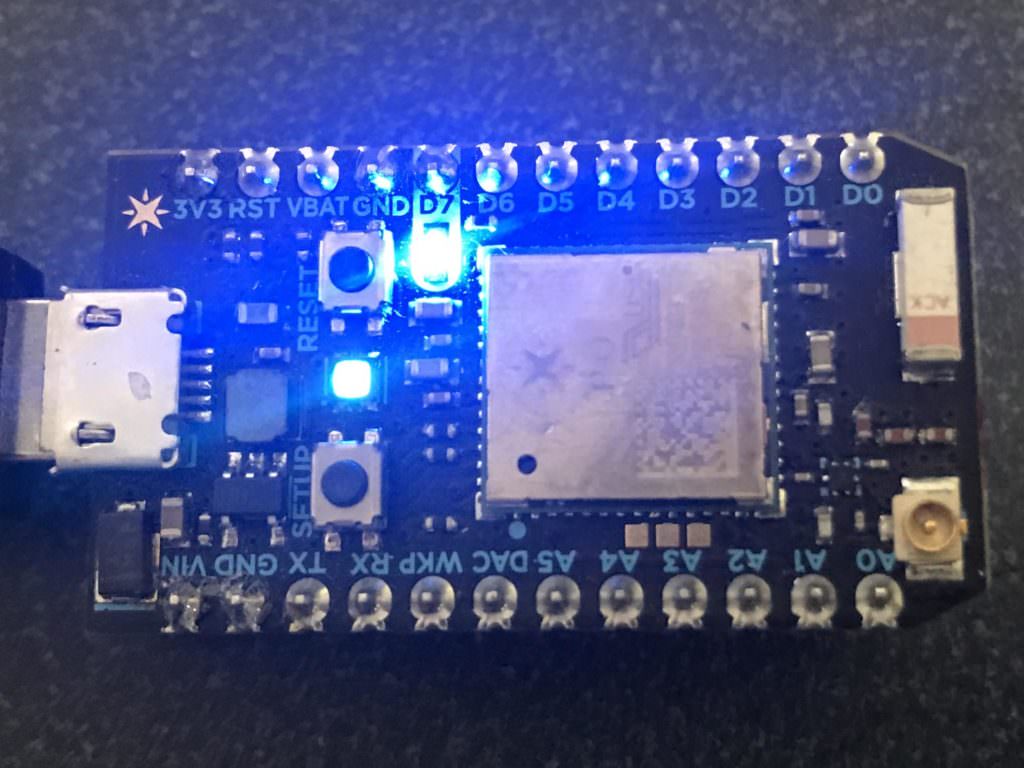
You can see the Blue LED right next to D7 turns on.

Particle Photon

Particle Photon Tinker App

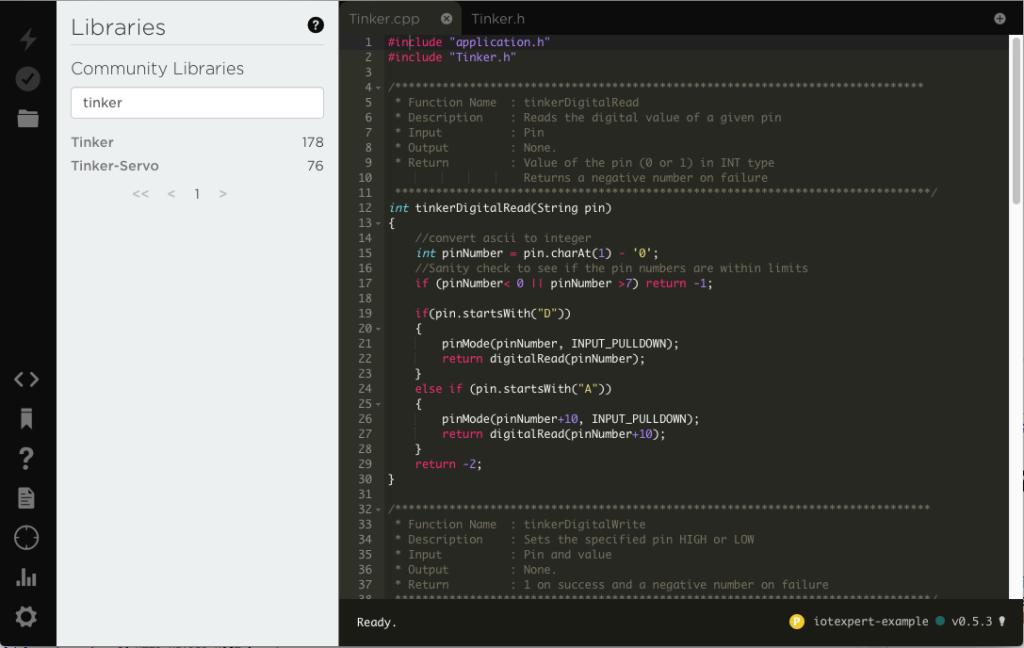
I wondered where the Tinker App API was documented?  It turns out that the App is available in Particle library.  You can search by typing “tinker”

The section of code that matters is here.  The function takes a “String” and parses it.  It demands that the 2nd character be a PIN number between 0 and 7.  The first character be a capital “D”.  Then you need to have a “HIGH” (in caps) or a “LOW” (in caps)

/*******************************************************************************
 * Function Name  : tinkerDigitalWrite
 * Description    : Sets the specified pin HIGH or LOW
 * Input          : Pin and value
 * Output         : None.
 * Return         : 1 on success and a negative number on failure
 *******************************************************************************/
int tinkerDigitalWrite(String command)
{
	bool value = 0;
	//convert ascii to integer
	int pinNumber = command.charAt(1) - '0';
	//Sanity check to see if the pin numbers are within limits
	if (pinNumber< 0 || pinNumber >7) return -1;

	if(command.substring(3,7) == "HIGH") value = 1;
	else if(command.substring(3,6) == "LOW") value = 0;
	else return -2;

	if(command.startsWith("D"))
	{
		pinMode(pinNumber, OUTPUT);
		digitalWrite(pinNumber, value);
		return 1;
	}
	else if(command.startsWith("A"))
	{
		pinMode(pinNumber+10, OUTPUT);
		digitalWrite(pinNumber+10, value);
		return 1;
	}
	else return -3;
}

In order to access the digitialwrite function via the network, they publish it (and some others).

/***
 * All the based tinker functions are registered. You can add you own code.
 ***/

// This #include statement was automatically added by the Spark IDE.
#include "Tinker.h"

void setup() {
	//Register all the Tinker functions
	Spark.function("digitalread", tinkerDigitalRead);
	Spark.function("digitalwrite", tinkerDigitalWrite);
	Spark.function("analogread", tinkerAnalogRead);
	Spark.function("analogwrite", tinkerAnalogWrite);
}

void loop() {
}

When I first thought about the Tinker firmware I thought that it must be reasonably complex.  But it is not because it takes advantage of the Particle cloud functionality.  All in all what they did is very elegant and simple..

Now that it looks like my Particle Photon is working, in the next article I will show you WICED firmware to read the CapSense buttons and then Turn On/Off the LED on the Photon.
Particle Photon: Elkhorn Creek Depth

Summary

In the previous article I showed you all of the components of the Particle Photon Ecosystem.  All that is cool.  But what can you build?  I have written extensively about the Elkhorn Creek in my backyard, and the system that I built to monitor the water level.  As part of that series of articles I explained that I have a 4-20ma current loop that turns pressure into water level read here .  In this article I will:

  • Attach the Photon to my Creek System Current Loop
  • Write the Firmware in the Particle Cloud IDE to publish W
  • Send events to the Particle Cloud & monitor
  • Use Webhooks to send the data to ThingSpeak.com

Attach Particle Photon to Creek System

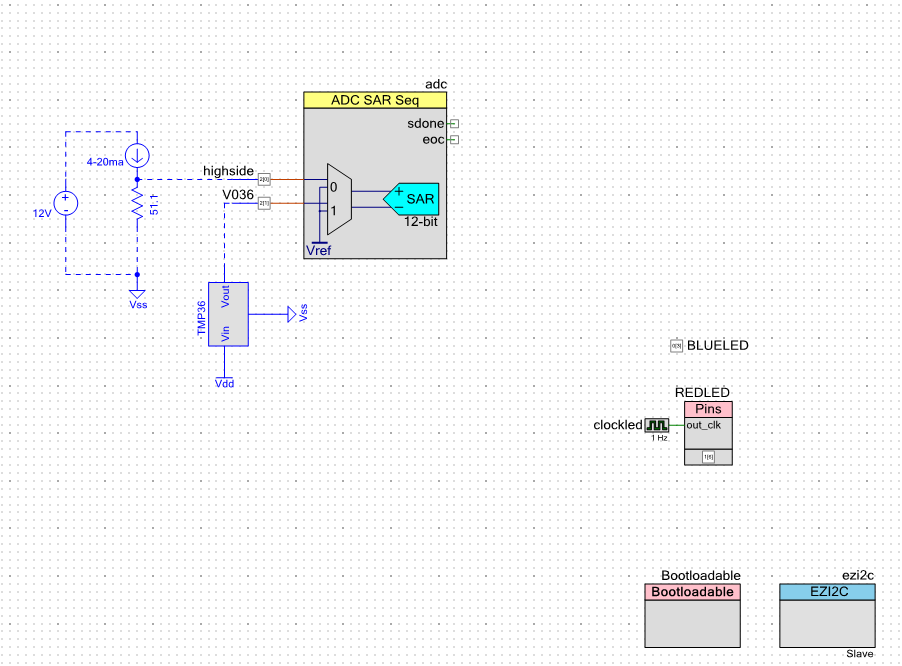
To interface to a 4-20mA current look you just attach it to a 51.1 ohm resistor to serve as a trans-impedence amplifier.  Here is the PSoC Creator schematic for the board:  Using this schematic, the system will generate a voltage between (51.1 Ohms * 4ma = 204.4mV) and (51.1Ohm * 20mA = 1022 mV).   This voltage can then be attached to an Analog To Digital Convertor, then converted digitally into a Pressure, then a water depth.

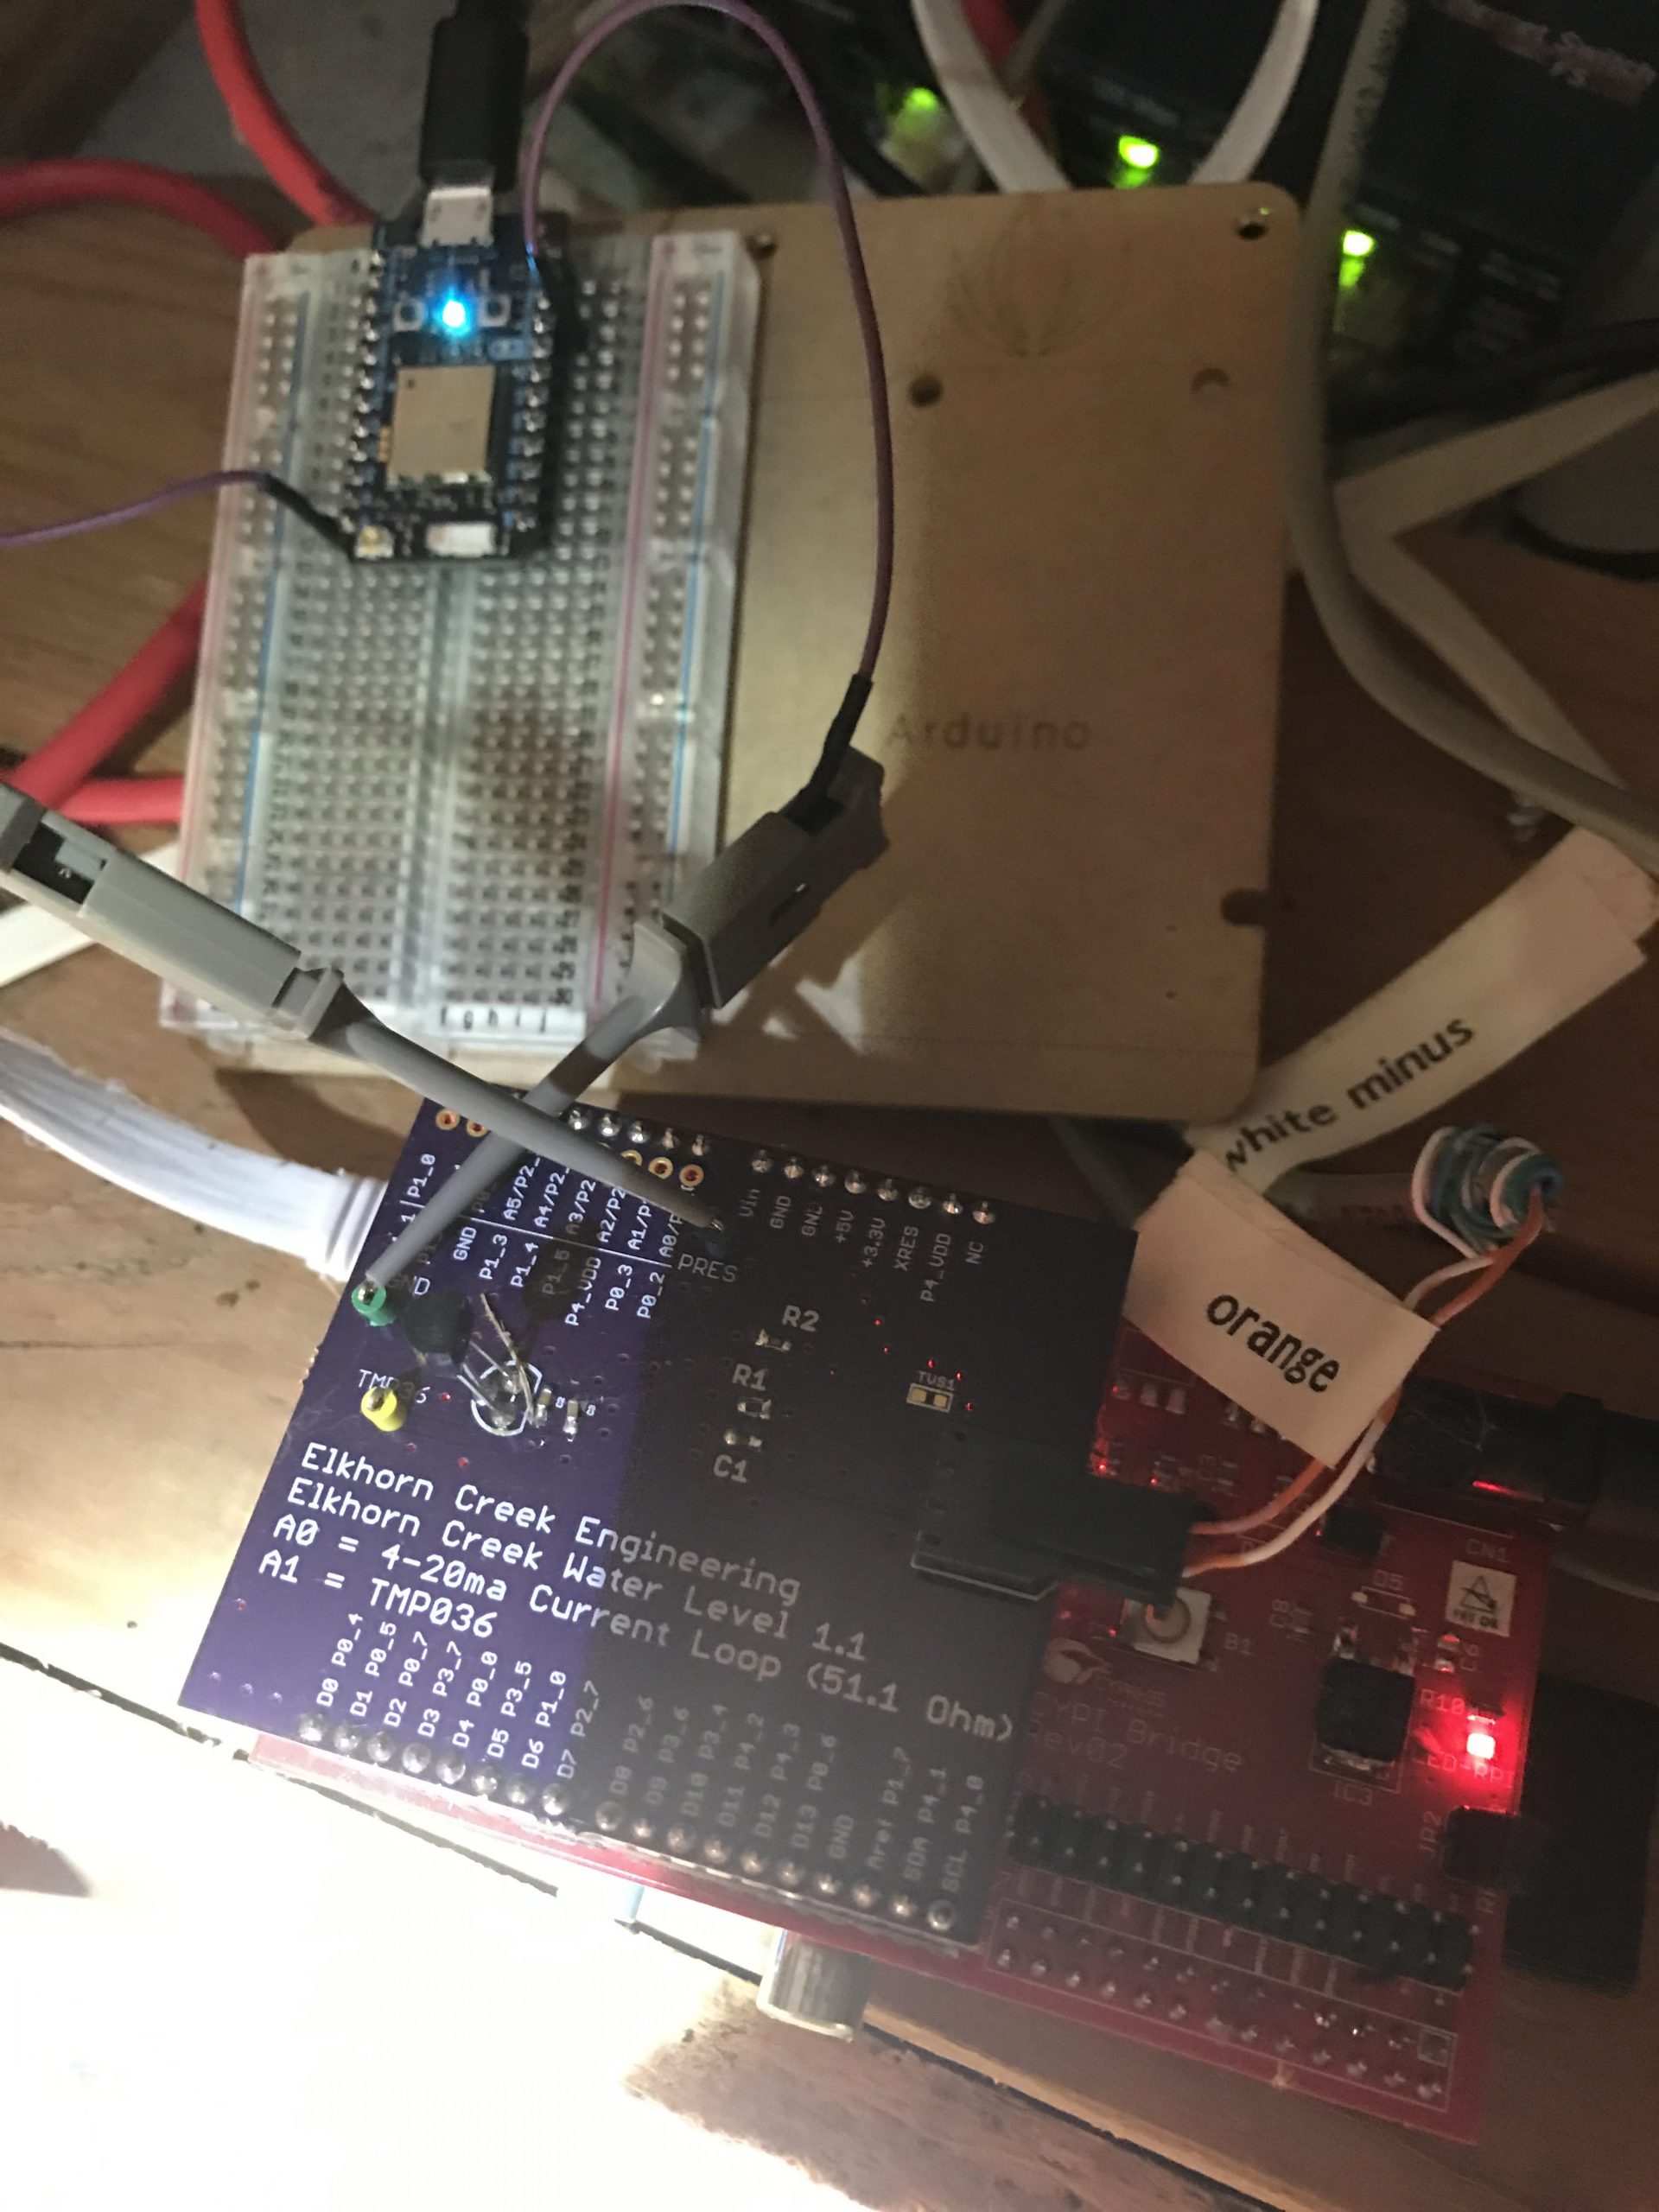
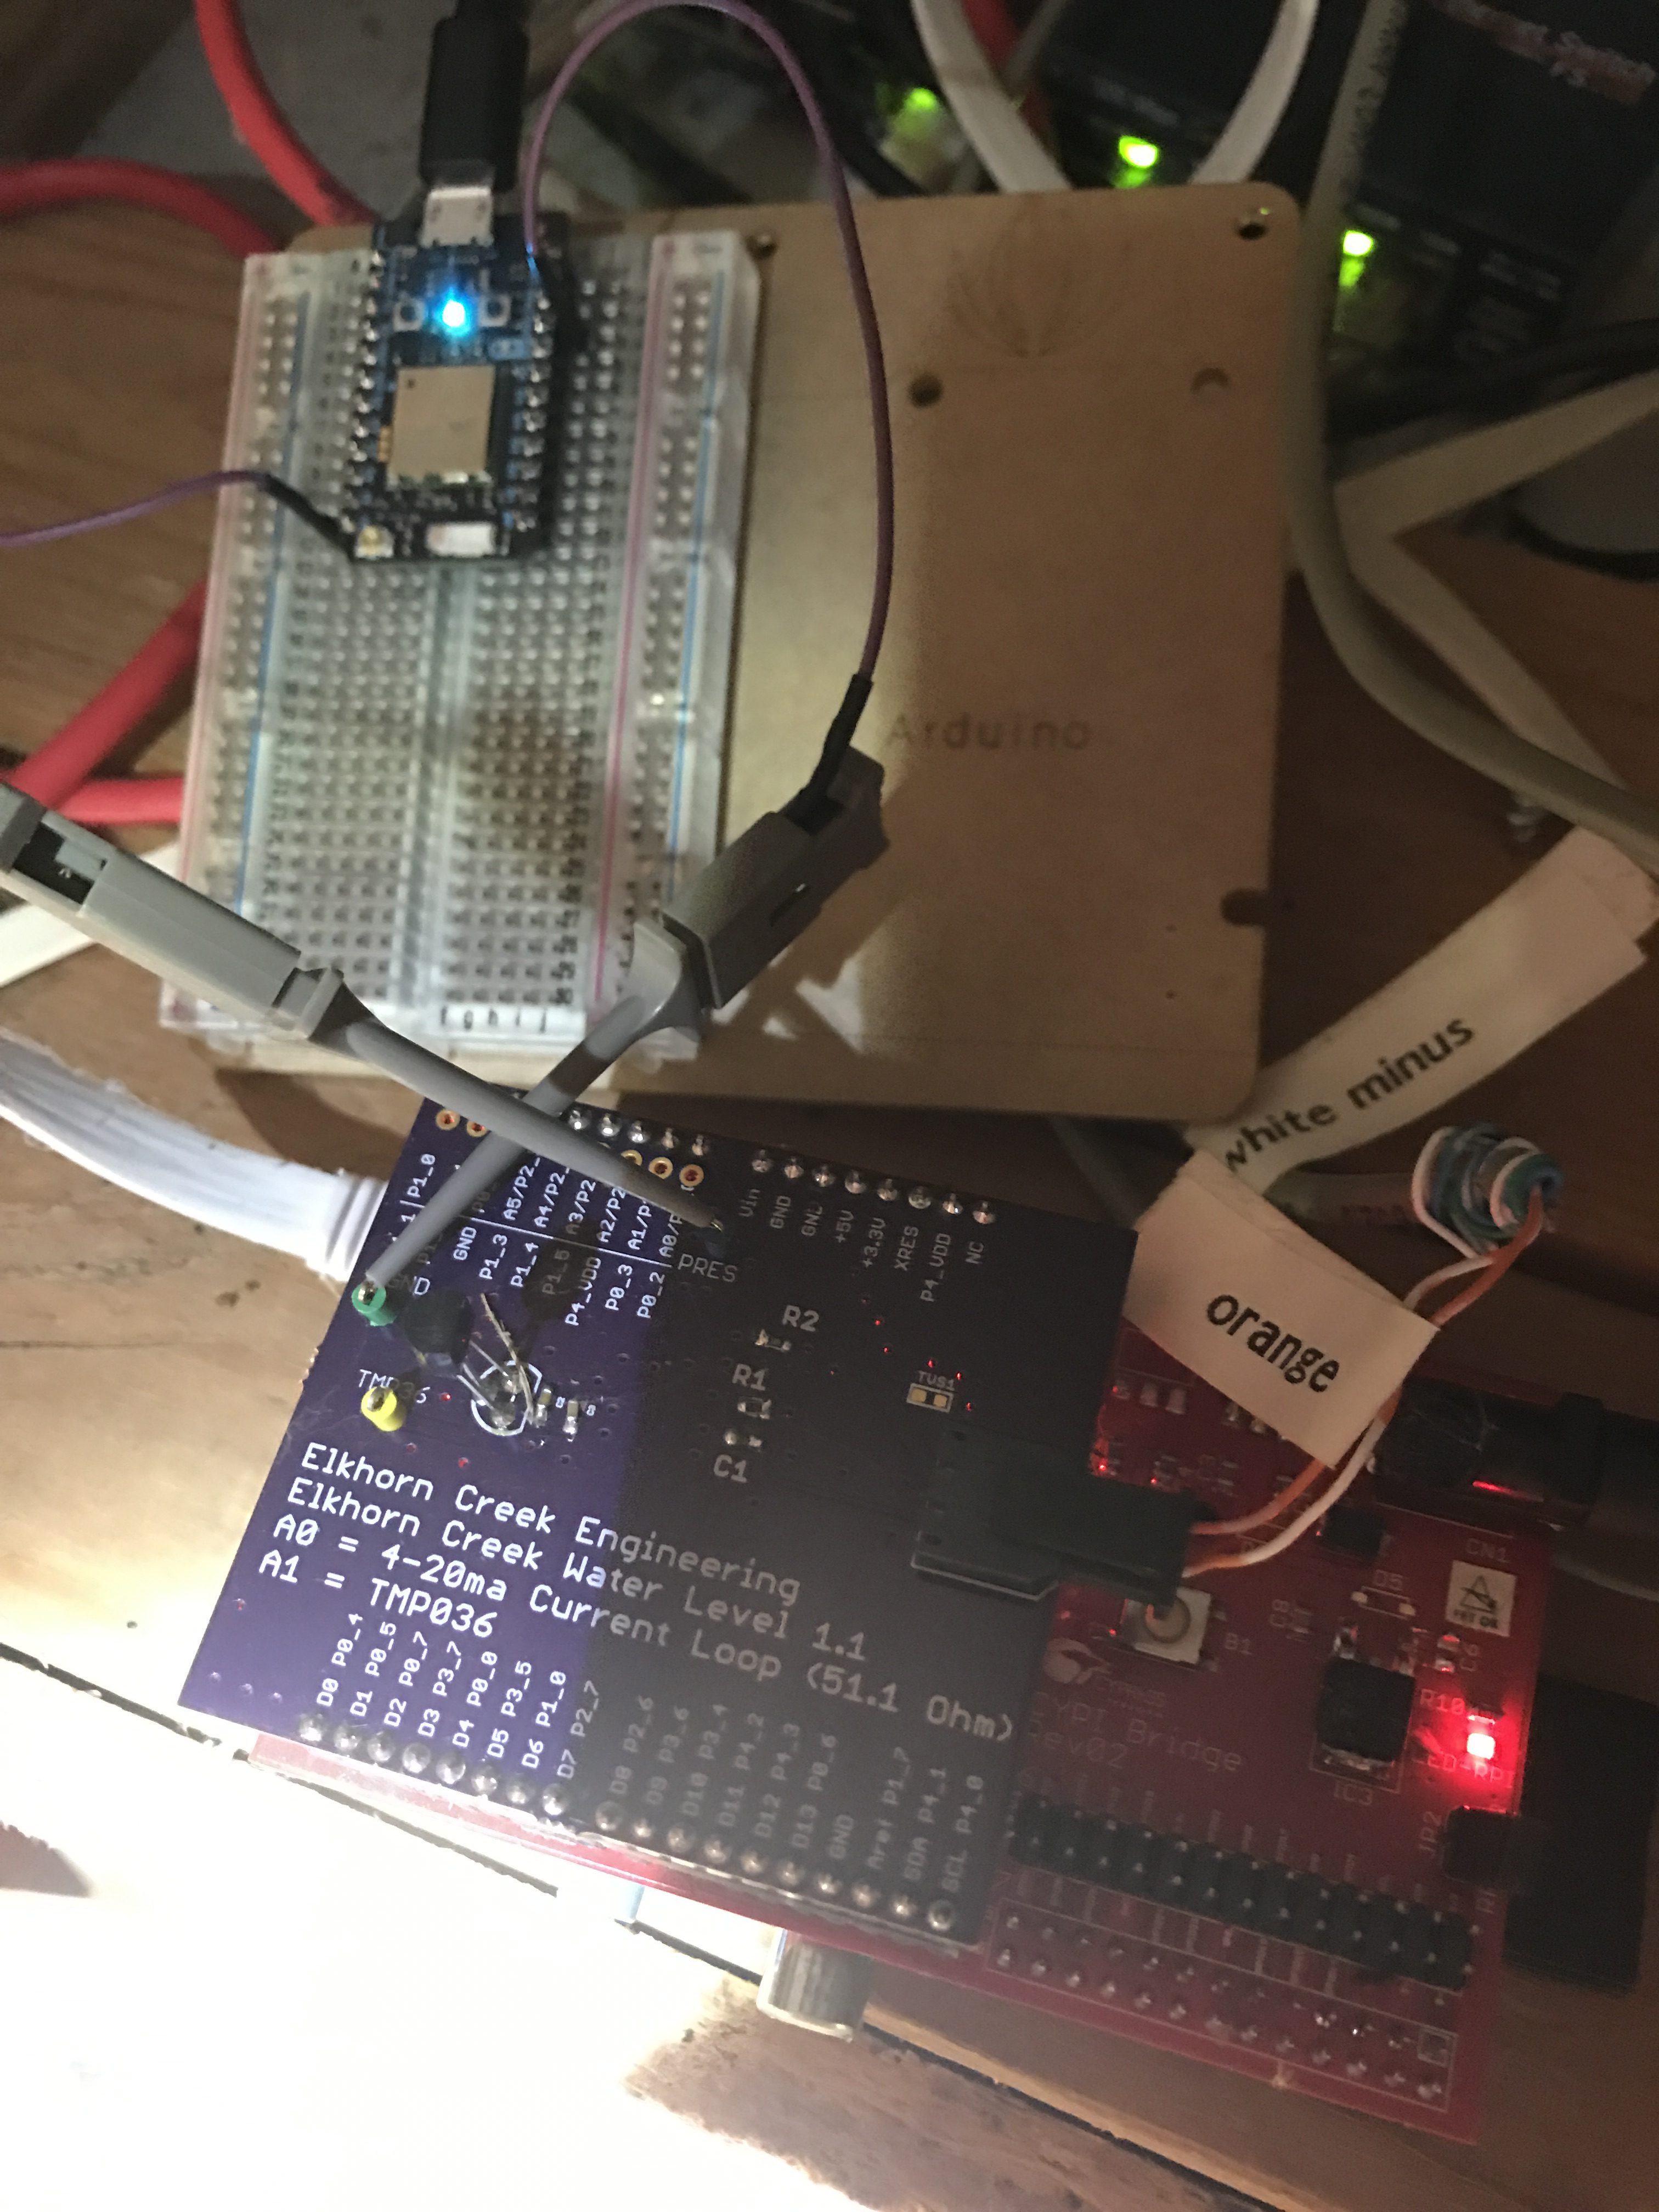
I decided that the easiest thing to do with the Particle Photon was to attach the pin A0 to the highside input.  This was easy as I put a loop on the Creek Board.  The loop is labeled “PRES”.  The picture is a bit ugly as I was standing in the dark in the rafters of my barn.  Sorry.

Particle Photon attached to Elkhorn Creek Water Level 1.1

Particle Photon Firmware

When you look at the main loop of the firmware, lines 23-40 it does three things

  • Reads the ADC voltage on Pin A0
  • Applies an Infinite Impulse Response Filter (IIR) with coefficients of 7/8 and 1/8.  This is low pass filter.
  • Turns the voltage into depth.  This is done by turning (4-20ma) into (0-15 psi) then PSI into Feet

Then, on lines 34-39, I use the system time to figure out if it is time to publish again.  I publish every “INTERVAL”.

In order to test the Particle Cloud interface to the Photon, I setup all of the intermediate calculation of depth as “Particle.variable”s which allows me to inspect them remotely.

uint32_t nextTime; // when do you want to publish the data again
const uint32_t INTERVAL = (5*60*1000); // every 5 minutes in milliseconds
const double  MVPERCOUNT = (3330.0/4096.0); // 3300mv and 2^12 counts
uint32_t current;
uint32_t filter=0;
double depth;
double percent;
double psi;
double voltage;
double percentTemp;

void setup() {
    nextTime =  millis() + INTERVAL;
    // setup variables so that they can be polled
    Particle.variable("filter",filter);
    Particle.variable("adc",current);
    Particle.variable("percent",percent);
    Particle.variable("voltage",voltage);
    Particle.variable("psi",psi);
    Particle.variable("depth",depth);
}

void loop() {
   
   char buff[128];
   
    current = analogRead(A0);
    filter = ((filter>>3) * 7) + (current>>3); // IIR Filter with 7/8 and 1/8 coeffecients
    voltage  = ((double)filter) * MVPERCOUNT; // Convert ADC to Milivolts
    percent = ( voltage - (51.1*4.0) ) / (51.1 * (20.0-4.0)); // 51.1 ohm resistor... 4-20ma 
    psi = percent * 15.0; // Range of pressure sensor
    depth = psi / 0.53; // Magic 0.53psi per foot

   if(millis() > nextTime)
   {
        sprintf(buff,"%.1f",depth);
        Particle.publish("CreekDepth",buff);
        nextTime = millis() + INTERVAL;
   }
}

Sending Events to the Particle Cloud & Monitor

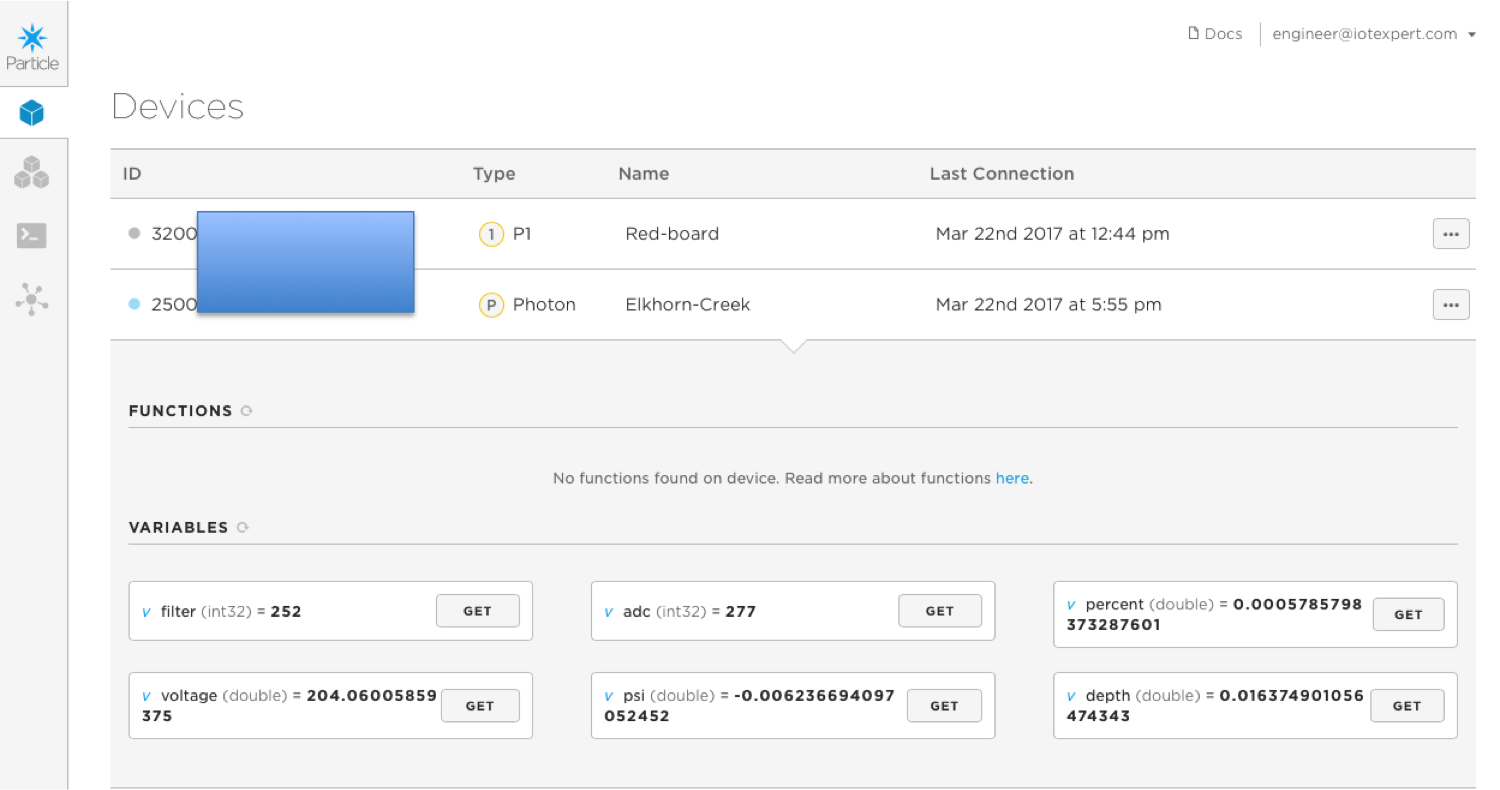
Once I flashed the firmware with the very cool Over-The-Air Bootloader, I go to the Particle Console and click on my device.  As soon as I do that I see the “Particle.variable”s that I defined in the firmware.  One by one I press “get” and after a second the data is displayed on the screen.  I am not exactly sure how the exactly works, but it is cool.

Particle Cloud Device Console

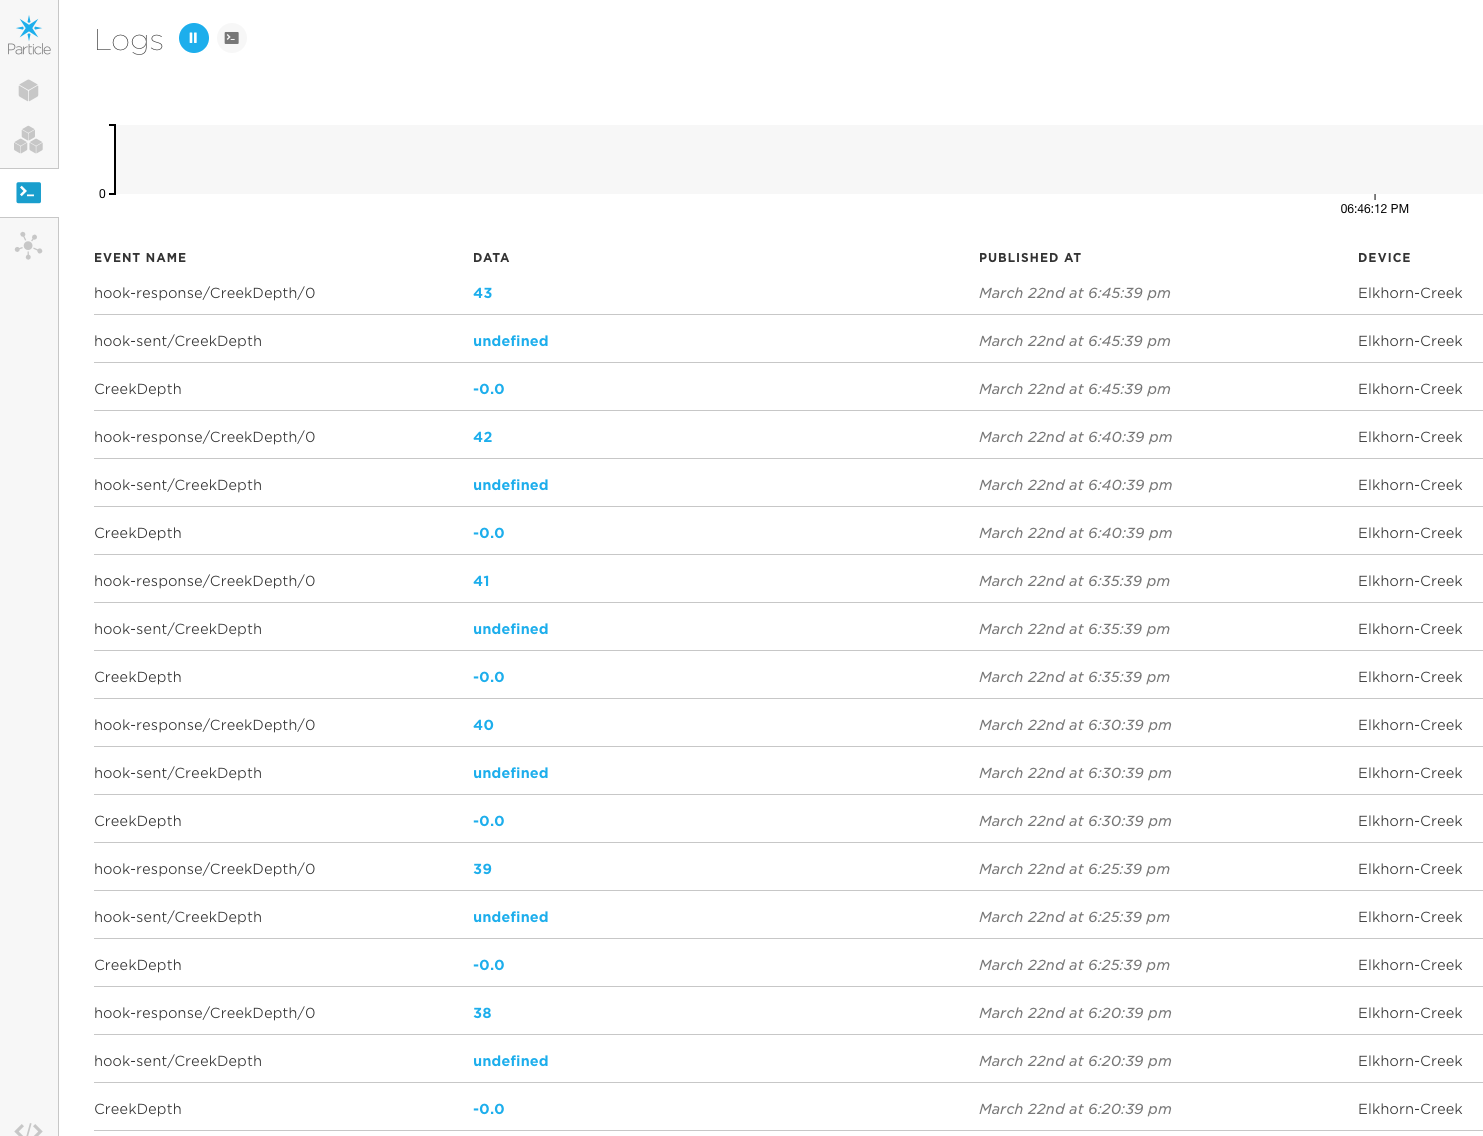
After inspecting the variables, I go the Logs page and look to see what the events are.  You can see that every 5 minutes (about) there is an event called “CreekDepth” with a -0.0 or so. That is good as it means that the Particle Photon is publishing regularly.  The answer is 0.0 (or about 0.0) as the Elkhorn Creek if not doing anything right now.  The other events are part of the web hook that I setup (and will talk about in the next section).

Particle Cloud Device Event Log

Using WebHooks to send data to ThingSpeak.com

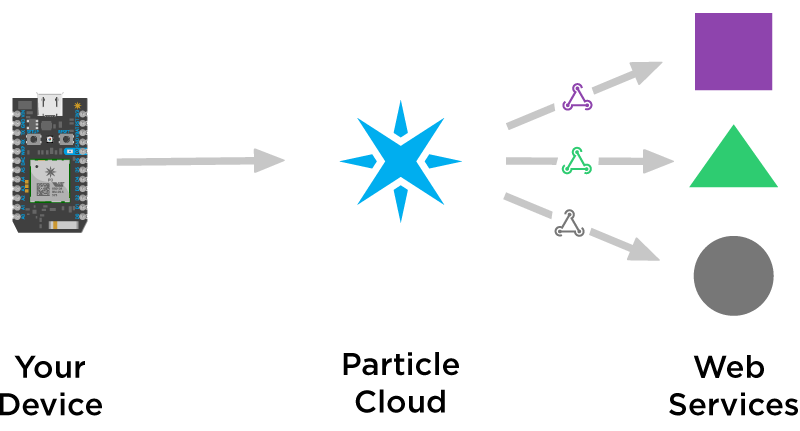
Unless I am missing something, the Particle Cloud does not store your actual data.  They do have a mechanism to take Events from your devices and trigger a “WebHook”.  This is basically a RESTFul API call to another cloud.

Particle Cloud Webhooks

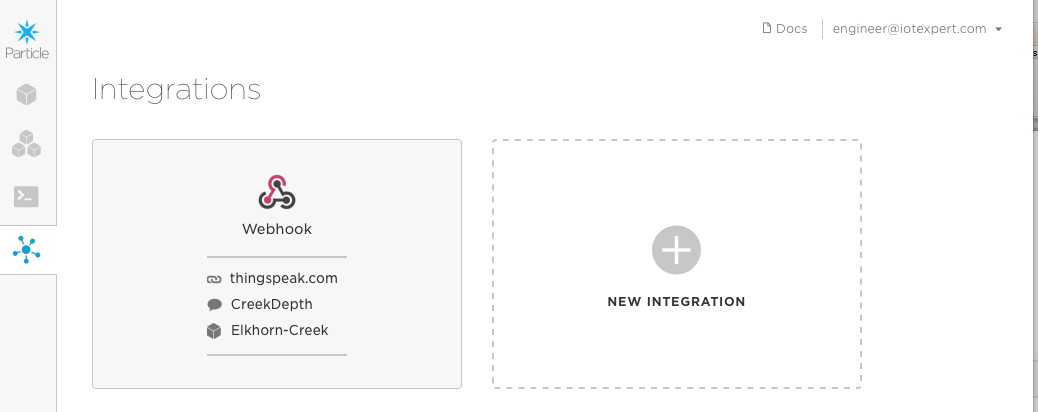
They call these “integrations” and you configure them on the Console.  When you press “Integrations” you end up with this screen which gives you the option of editing a current webhook or creating a new one.

Particle Cloud Integrations

When you click on “new integration” it gives you the option of connecting to Google, Microsoft Azure or Webhook.  I havent tried Google or Azure so for this article Ill stick with a Webhook.

Particle Cloud New Integration

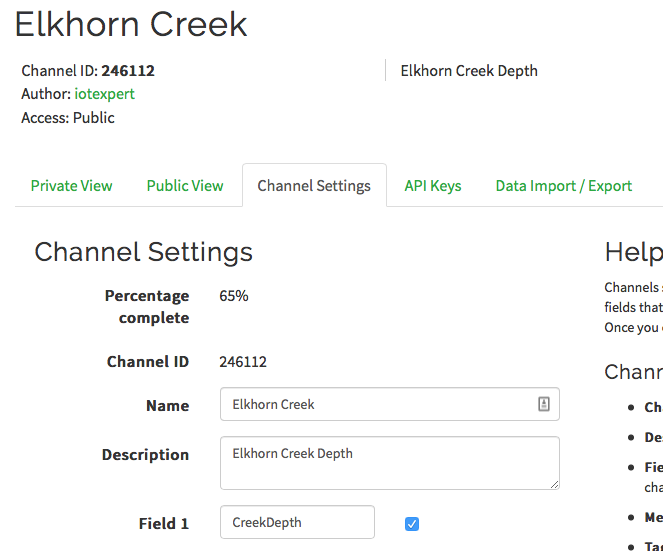
I started with a WebHook to the ThingSpeak Cloud (because they show a nice example in the documentation).  ThingSpeak is run by the MathWorks people (same as Matlab).  They call ThingSpeak “an open IoT with Matlab Analytics”.  OK sounds cool.  In order to use it to collect and display data I start by creating a new account.  Then I click on the “New Channel” button to create an “Elkhorn Creek Depth” channel.  On this screen I say that there will be only one field “CreekDepth”.

ThingSpeak Create New Channel

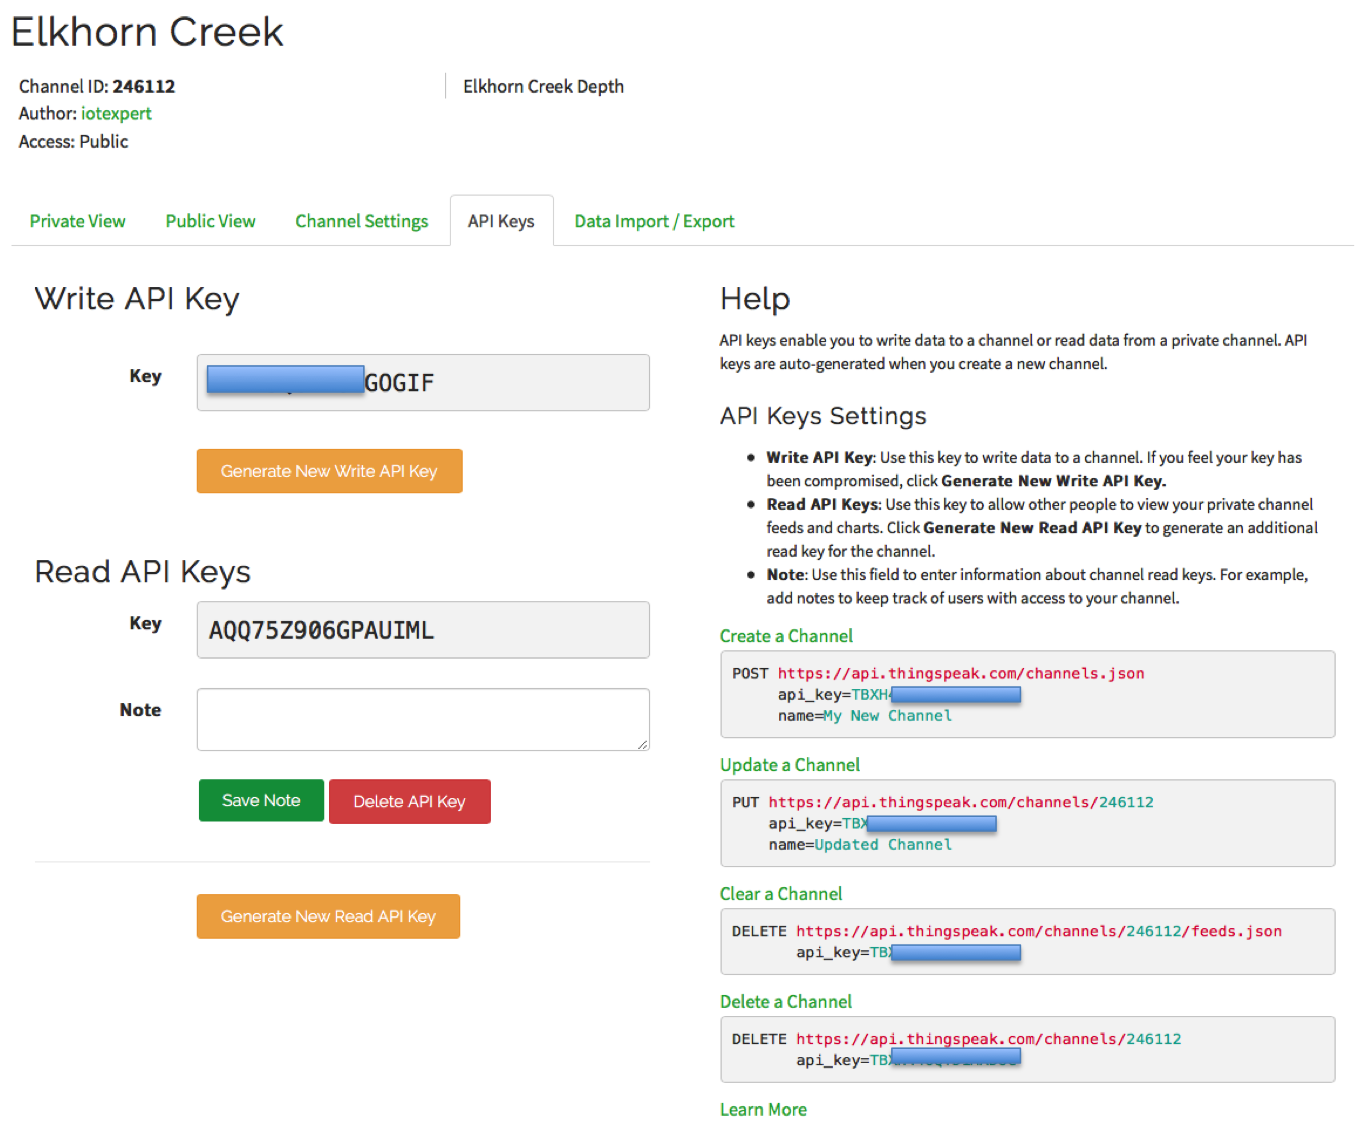
In order to write data into this channel you need to have the API keys which give your Restful API call the authority to write into the database.  Press “API Keys” and you will see this screen.

ThingSpeak Channel API Keys

Now that I have an active channel (and I know the channel number and API write key) I go back to the Particle Cloud Integrations tab and create a Webhook.

Particle Cloud Edit Integration

Each time the “CreekDepth” event occurs, the Particle Cloud will do an API call to the ThingSpeak cloud and insert the new data.  On the ThingSpeak Cloud there is a chart of the data, and a handy-dandy way to insert the chart into your webpage.  Here it is for the Elkhorn Creek showing the last 6 hours of data which is flat at the time of this writing, but maybe when you read this page it will be raining in Kentucky and you will see something interesting.

I guess at this point I have a number of questions which I will leave to the future:

  • Exactly what is the form of the request made to the ThingSpeak cloud?
  • What is the mapping between the event –> API Request
  • What is the protocol for Particle.variables?
  • How does the Microsoft integration work?
  • How does the Google integration work?
  • How do I save power on the Photon?

I suppose Ill leave these questions to future posts.  If you have other questions leave them as I comment and Ill take a crack at trying to figure them out.

Particle Photon: An Overview of the Particle Ecosystem

Summary

Over the last few days I have spent some time with the Particle Photon and looking around at the Particle Cloud, the Development Kits, the Documentation and Development Tools.  Fundamentally, Particle has built a very ambitious end-to-end cloud development platform.  I think that they have everything necessary to built a complete IoT solution into your system.  Obviously, I like them because they use a Cypress 43362 WICED WiFi chip as the core of their solution, but the rest is cool as well.  Particle also offers a cellular connectivity solution using uBlox, but I didn’t try that.  In this article I will give you a brief introduction to all of the components of their ecosystem including:

  • Particle Photon WiFi
  • Particle Photon Development Kits
  • Particle Photon Development Environment
  • Particle Photon Support Tools
  • Documentation
  • Particle Cloud Console

To develop with Particle you write your firmware in C++ with an Arduino library clone (many/most? of the APIs and libraries that you know and love are ported into the system).  The libraries also include a bunch of APIs for transferring actions and data to/from the cloud.  Once you have written the firmware you can flash you board either directly through the USB port or through the Cloud over-the-air bootloader (which works great)

Particle Photon WiFi

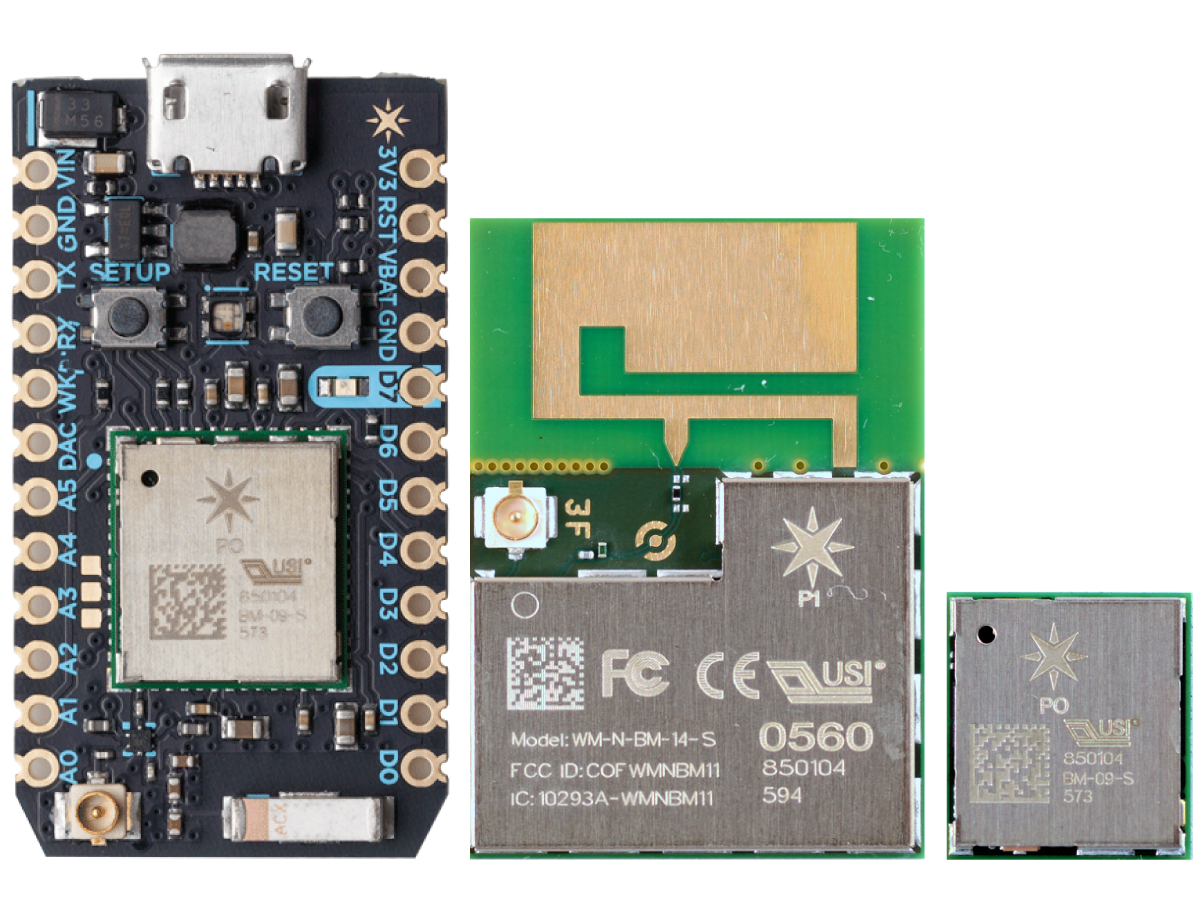
Particle makes two modules, called P0 ($10) and P1, ($12) which you can build into your system.  Both are FCC certified modules that use the Cypress 43362 WICED WiFi chip which is 2.4GHz 802.11a/b/g/n paired (unfortunately) with a STM MCU to run WICED & the Photon Environment.  Both of the modules are PCB circuit boards with QFN style pads on the bottom that let you solder them into your system.  The P0 is smaller (11mm x 12mm) but needs an antenna, and P1 is a bit bigger (28mm x 20mm) but has a PCB Antenna and SMA connector.  Here is a picture which I borrowed from the Particle Website.  The P0 is on the right, the P1 is in the middle, then on the left is a development kit with the P0 soldered into it.

Particle Photon WiFi

Particle Photon Development Kits

Photon makes essentially one basic development board (shown above on the left) as well as a bunch of different support boards and package deals.  The basic development kit is $19 and has a Photon P0, an antenna, an SMA connector for an external antenna, two buttons (reset and setup), one user LED, a USB programming/power connector and 100 mil center pins with the P0 pins broken out.  One very cool feature of the board is that the breakout pins are castellated on the side of the board so that you could solder it directly into your product.

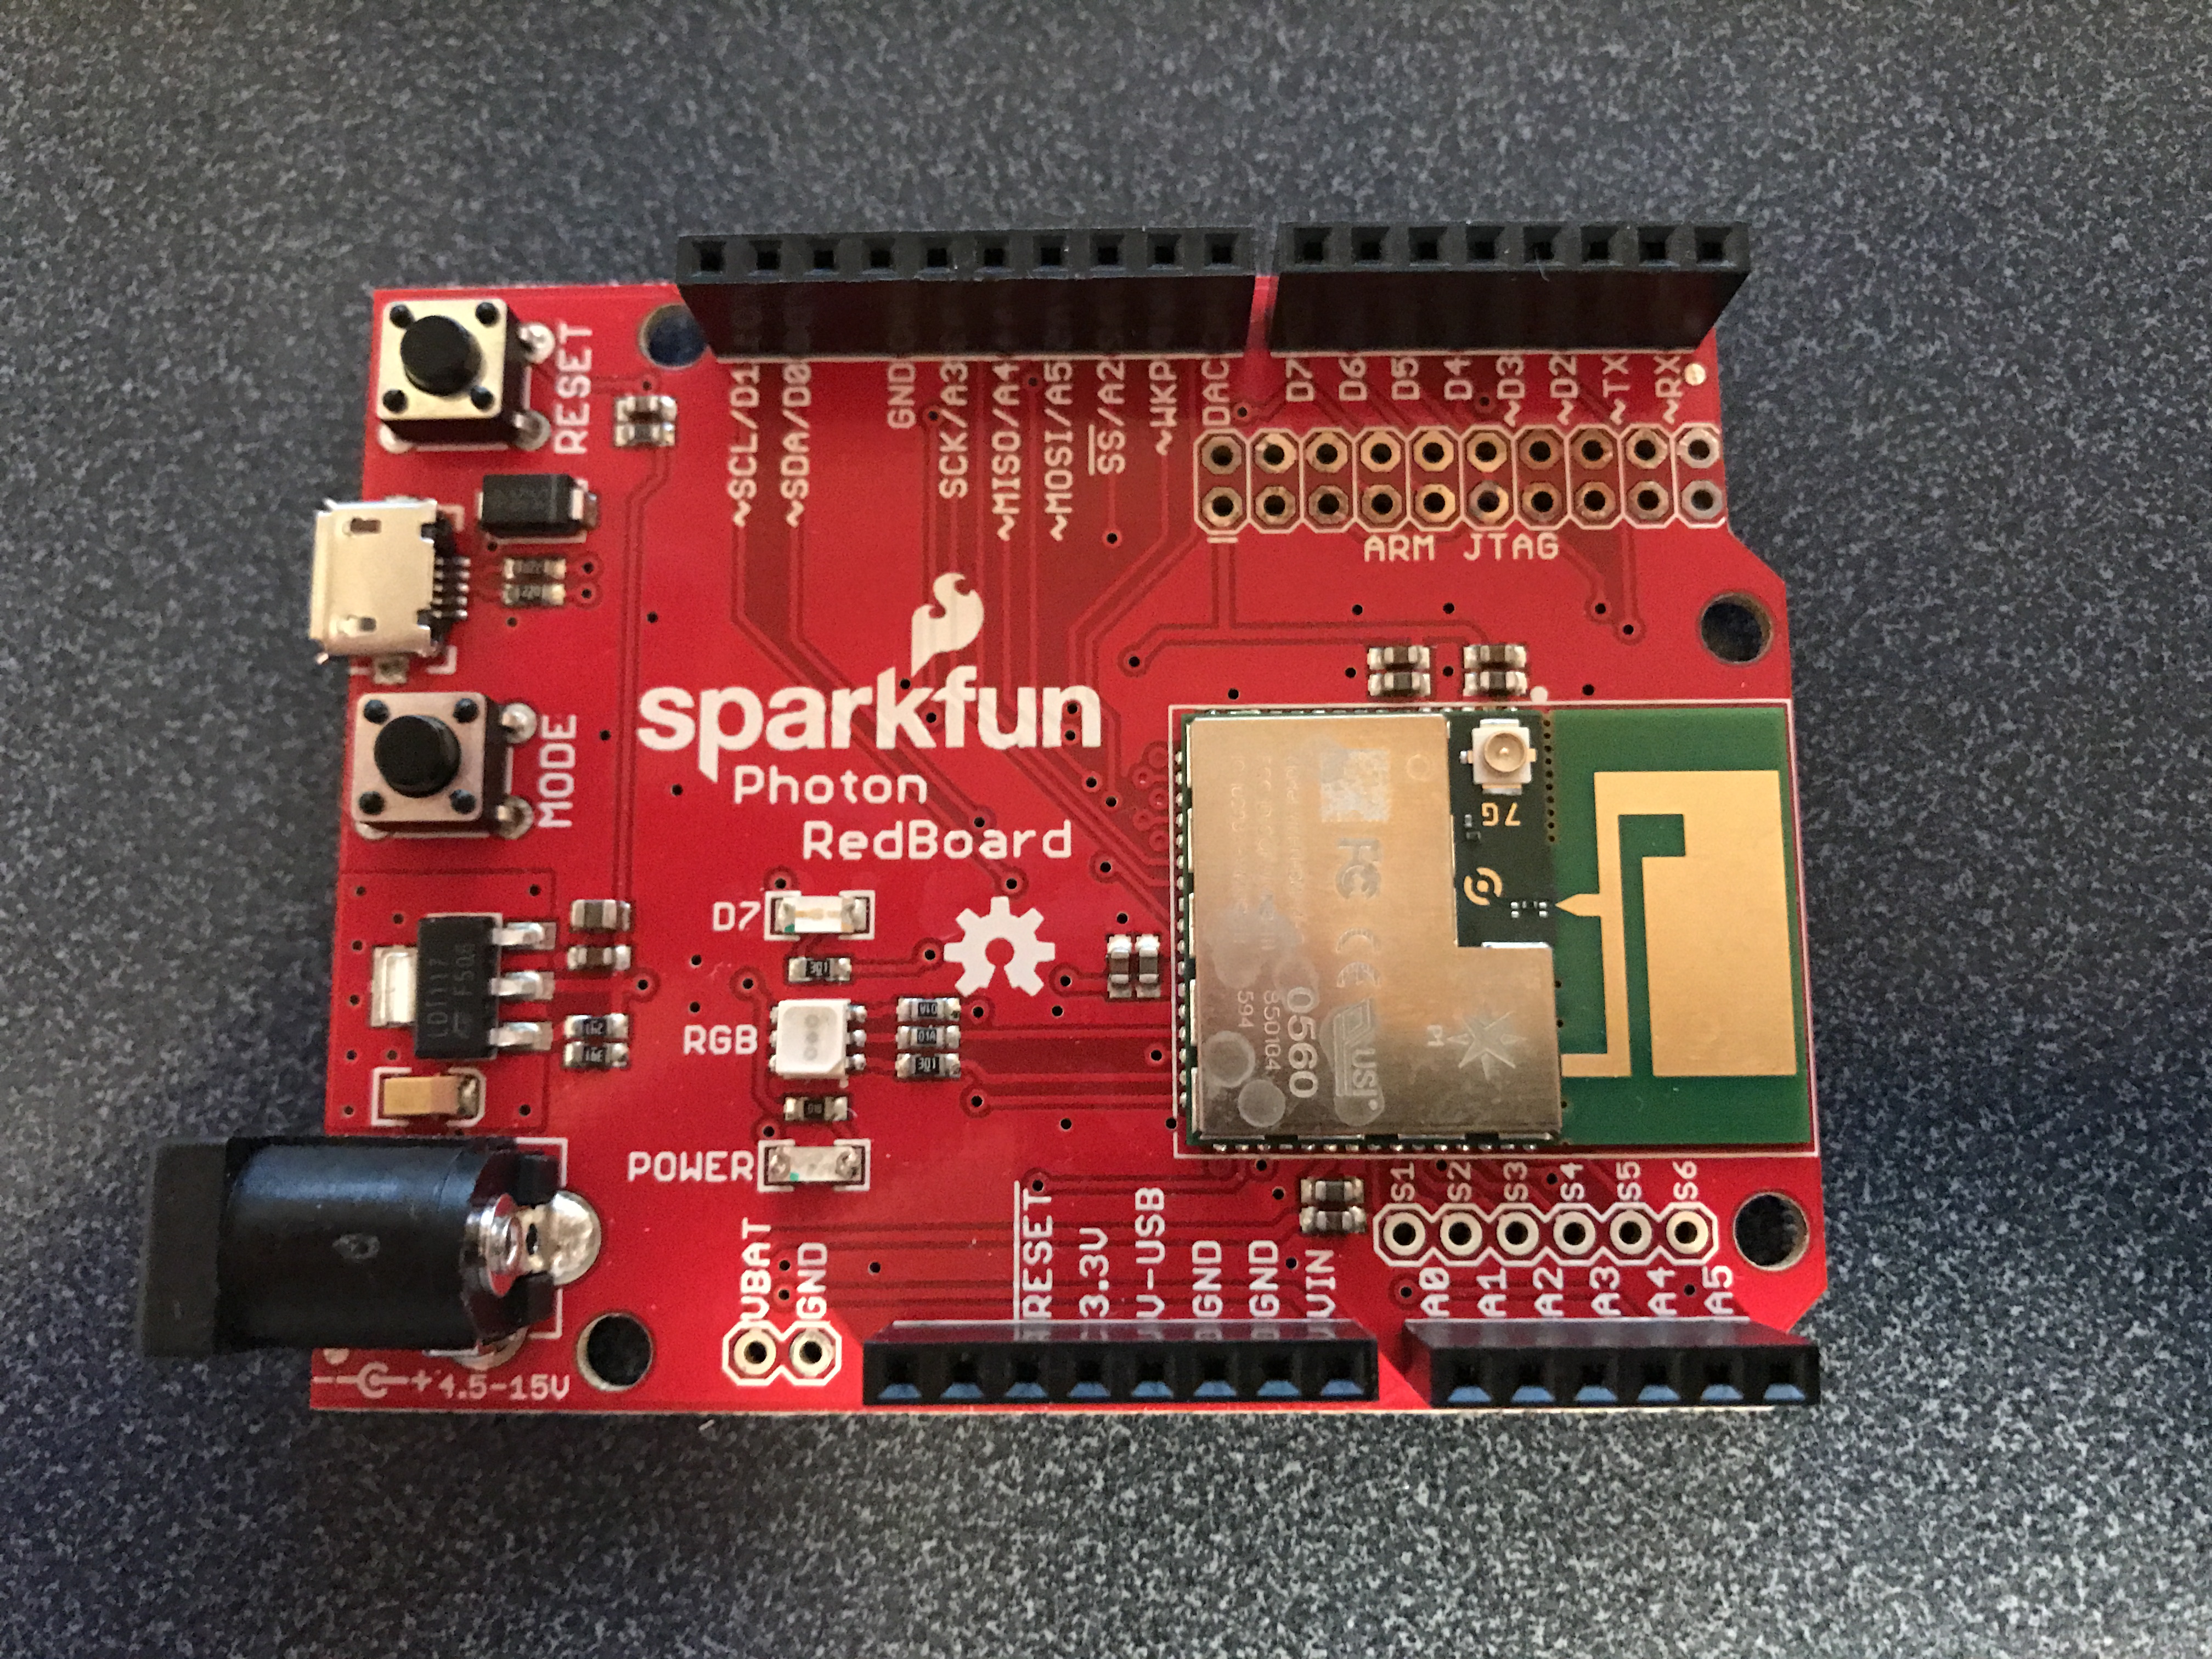
One of the boards that I ended up using was a (now obsolete) SparkFun kit that has a Photon P1 soldered into an Arduino footprint board:

Particle Photon WiFi - SparkFun RedBoard

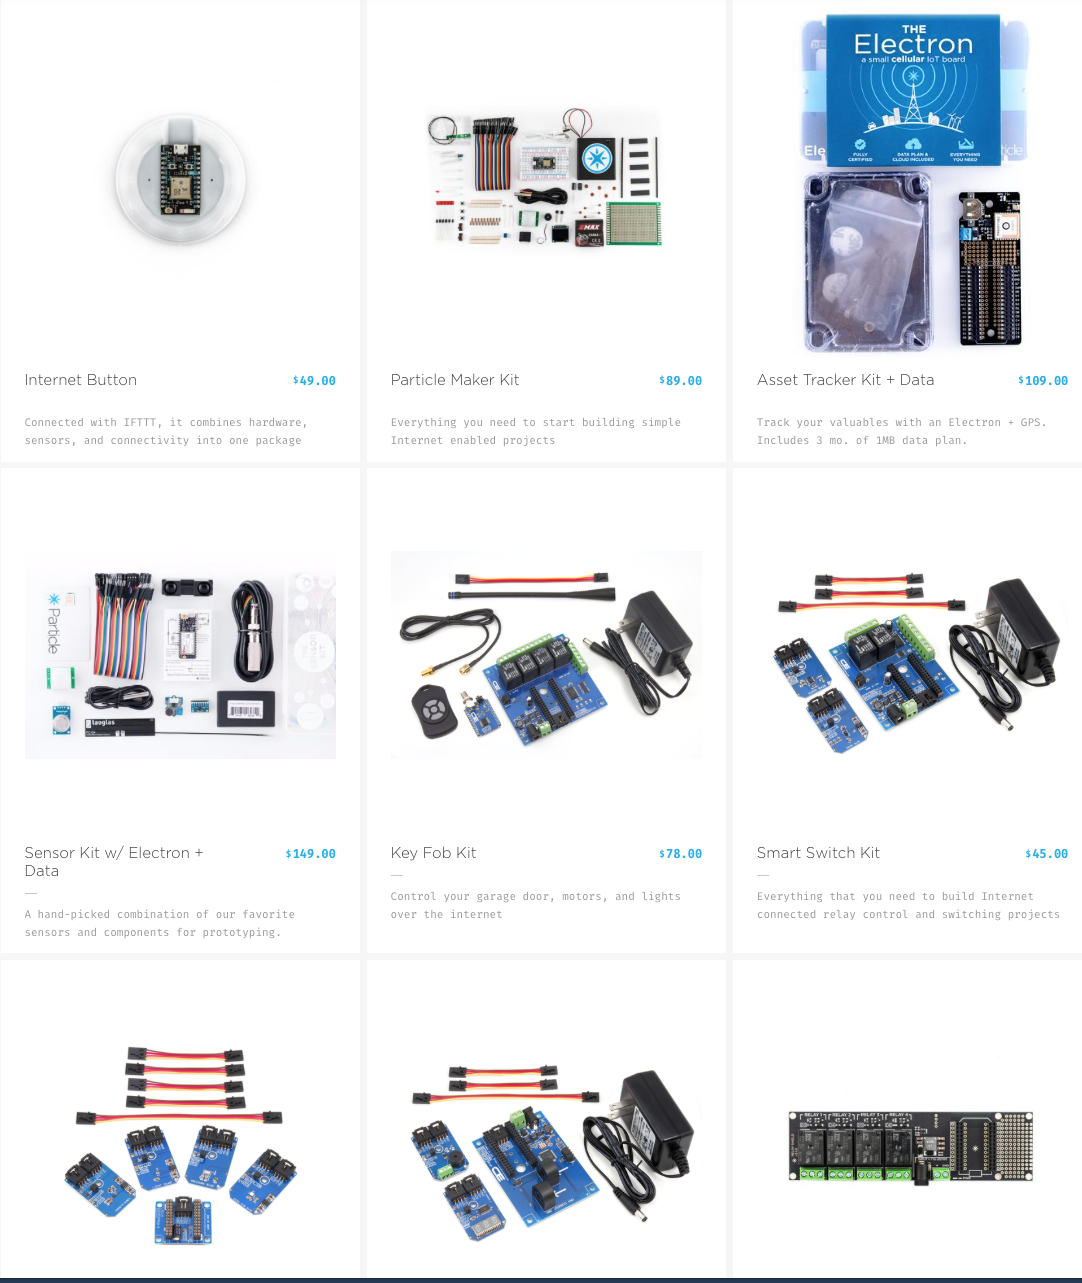
Here is a screenshot of many of the development kit packages you can buy directly from Photon:

Particle Photon WiFi Development Kits

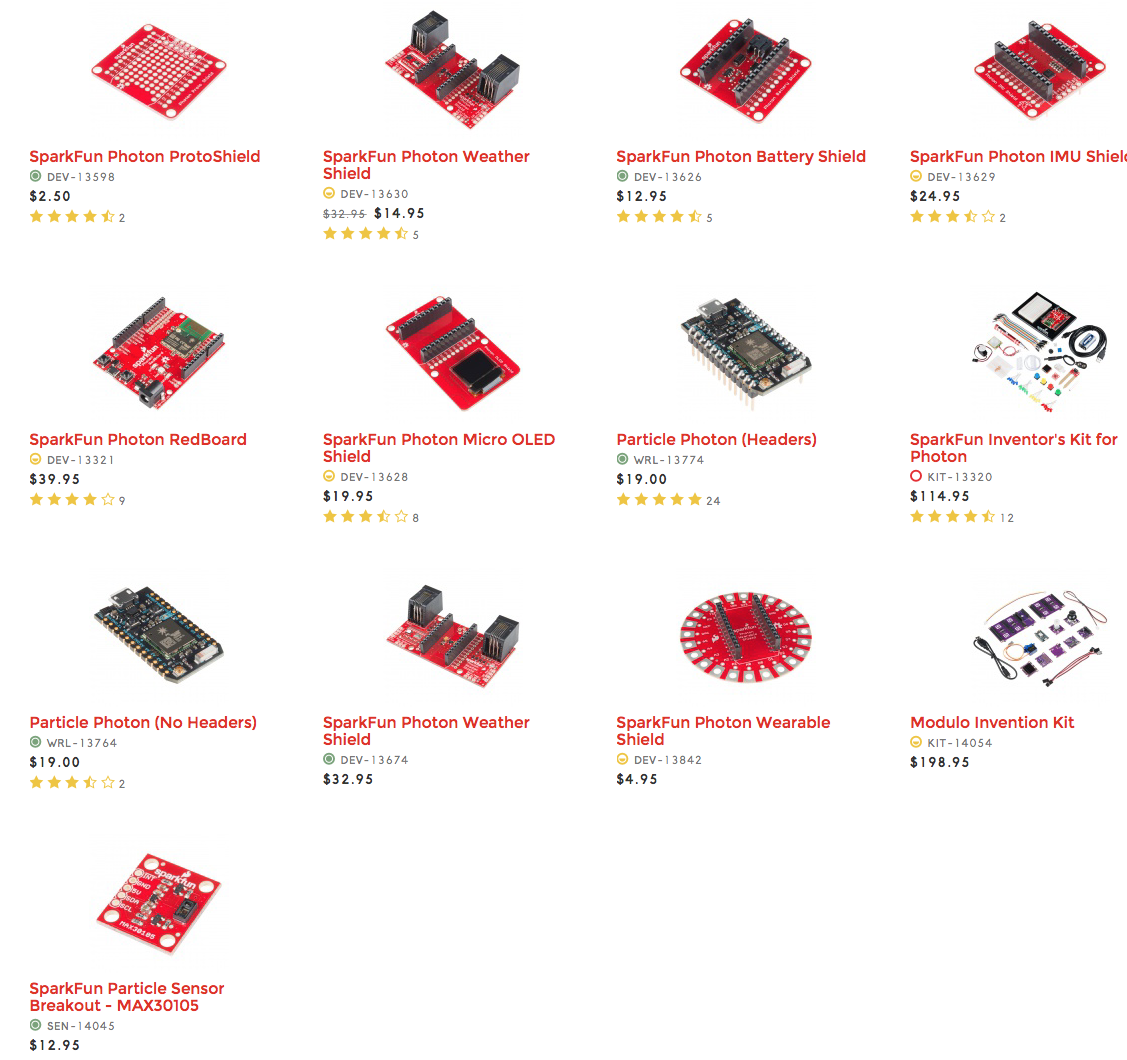
In addition there are several other makers of support boards including SparkFun, Adafruit and SeeedStudio.

SparkFun Photon Kits

Adafruit:

AdaFruit Photon Kit

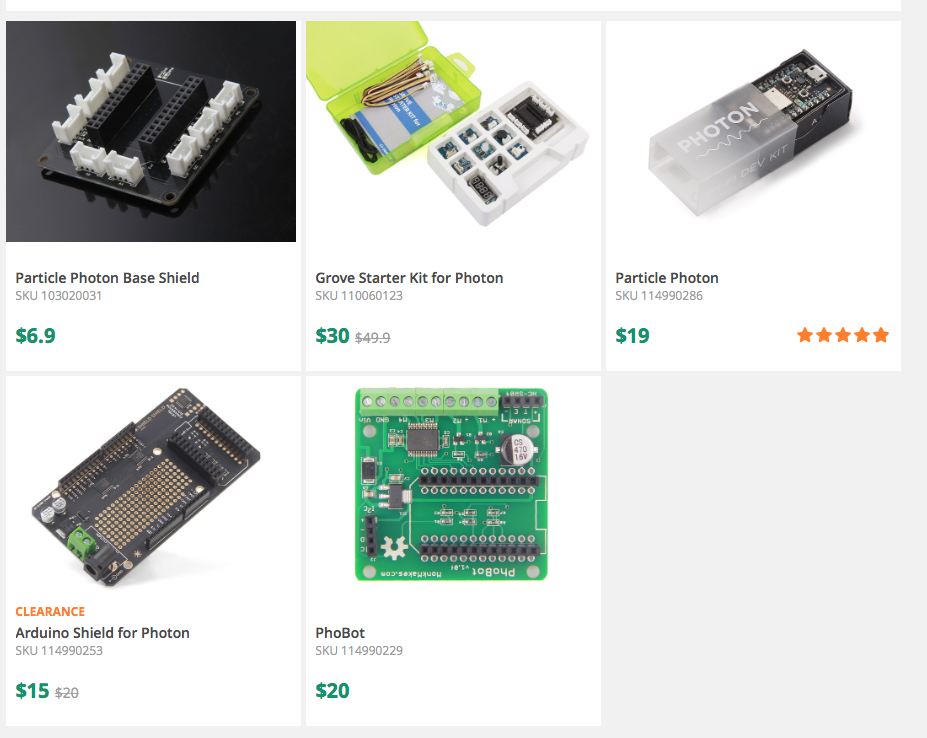
SeeedStudio:

SeeedStudio Photon Kits

Particle Photon Development Environment

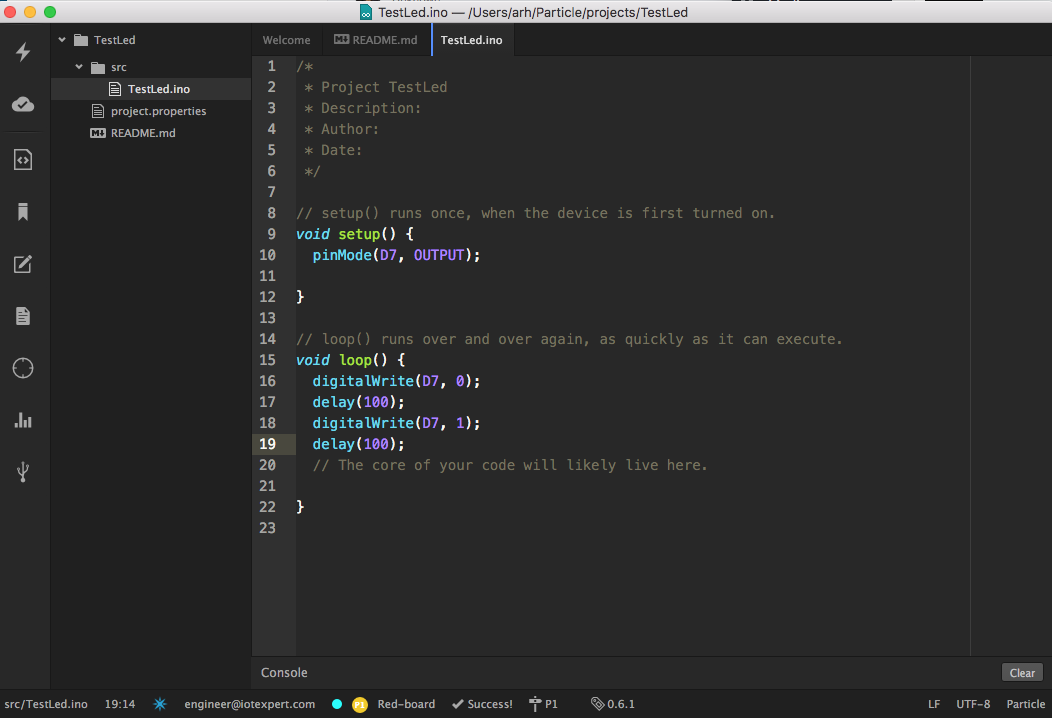
Particle offers two integrated development environments, one web based and one computer client based on Atom.  Both are approximately Arduino clones… and both work very well.

The web based environment includes a code editor, compiler, over-the-air flash utility. and library utility.  Here is screenshot of one of the programs that I was working on.
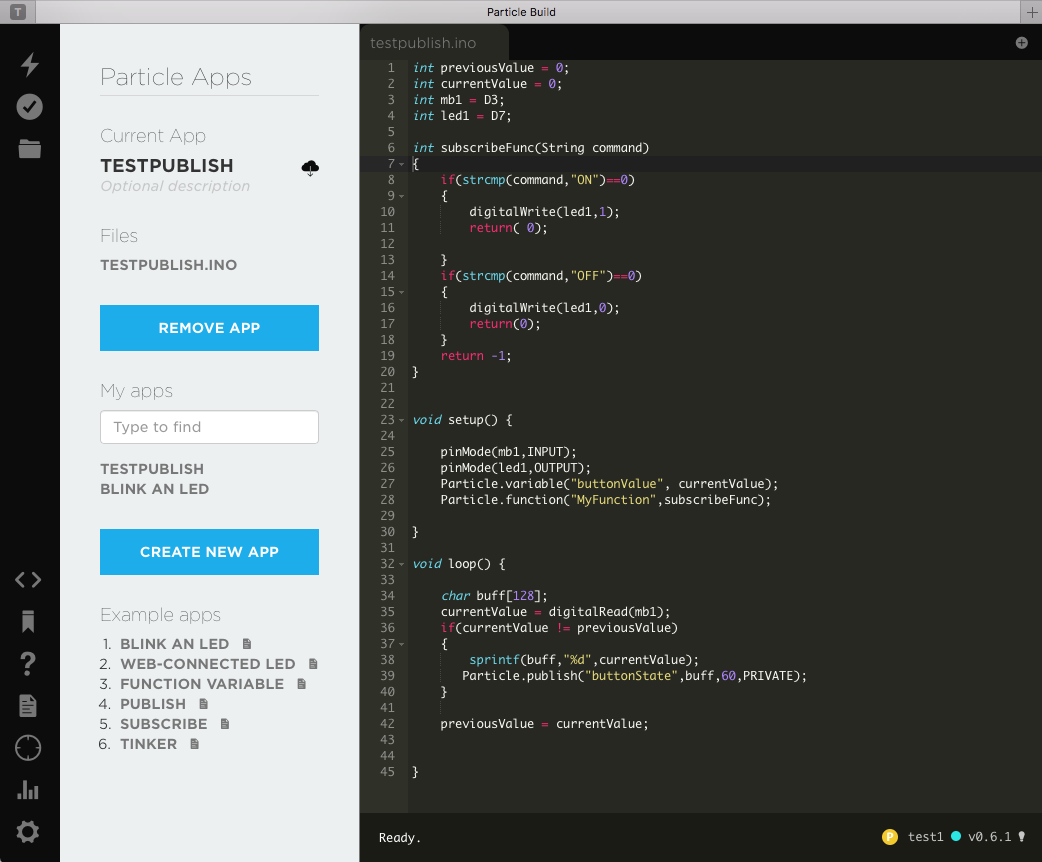
Particle Photon Cloud IDEAnd the desktop environment, which works on Windows, Mac and Linux, is very well integrated and “feels” just like the web environment.  I was amazed that as soon as I installed the tool it was connected to the Particle Cloud and to my devices.  I created a very simple blink the led program.  After I pressed the lightning bolt… 15 seconds later my board was bootloaded over the air.  Here is a screenshot from my Mac.
Particle Photon Desktop Client IDE

Particle Photon Support Tools

There are two sets of command line tools that you can use to interact with the Photons, dfu-util and the Particle-cli.

The first is “dfu-util”  which I didn’t know anything about until I started using the Photons.  DFU-UTIL is a USB bootloader host that allows you to update sections of the Photons firmware.  When I took my boards out of the box they had very old system firmware and things were not connecting correctly.  I ended up having to download new system firmware and then install it on the boards.  The instructions were on this website.

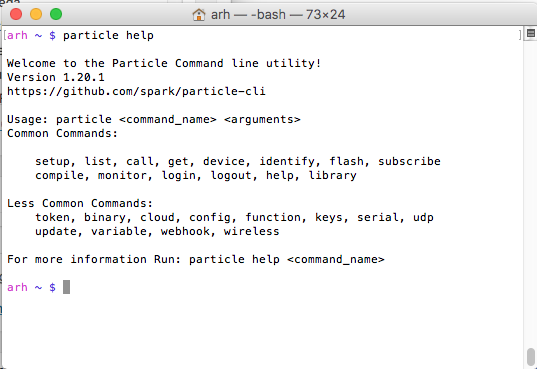
The second tool, called the Particle Command Line Interface is also really cool.   Once you install it you can upgrade firmware, send commands, read and write data, call functions etc on your devices.

Particle Command Line Interface

Documentation

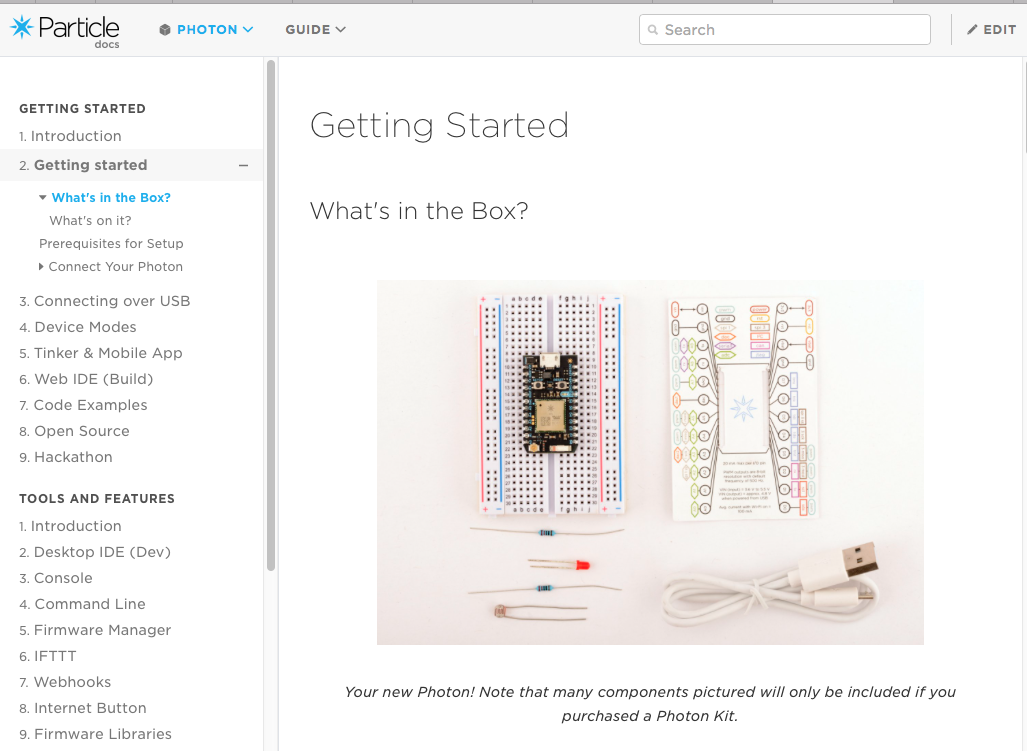
The bottom line is the documentation is outstanding, something that is a rare and wonderful thing in the business.  You can find it on their website.  Here is a screenshot of the first page.

Particle Photon Documentation

Particle Cloud

An IoT device isn’t worth much unless it is integrated with the cloud.  Particle provides a bunch of things in their cloud.  In addition they give you the ability to drive data and events into other clouds.  With the Particle Cloud you can

  1. From the cloud, read and write data from devices
  2. Push and retrieve data from your device to the cloud
  3. You can manage and provision devices
  4. You can flash new firmware OTA to your devices

There is a free tier for makers and experiments which includes up to about 25 devices and 250K transactions per month.  Beyond that they have several subscription levels.  In the screen shot below you can see my two devices (one called “Red-board” and one called “test1”).  With this interface I can query the device and run “functions” which are like remote procedure calls.

Particle Cloud

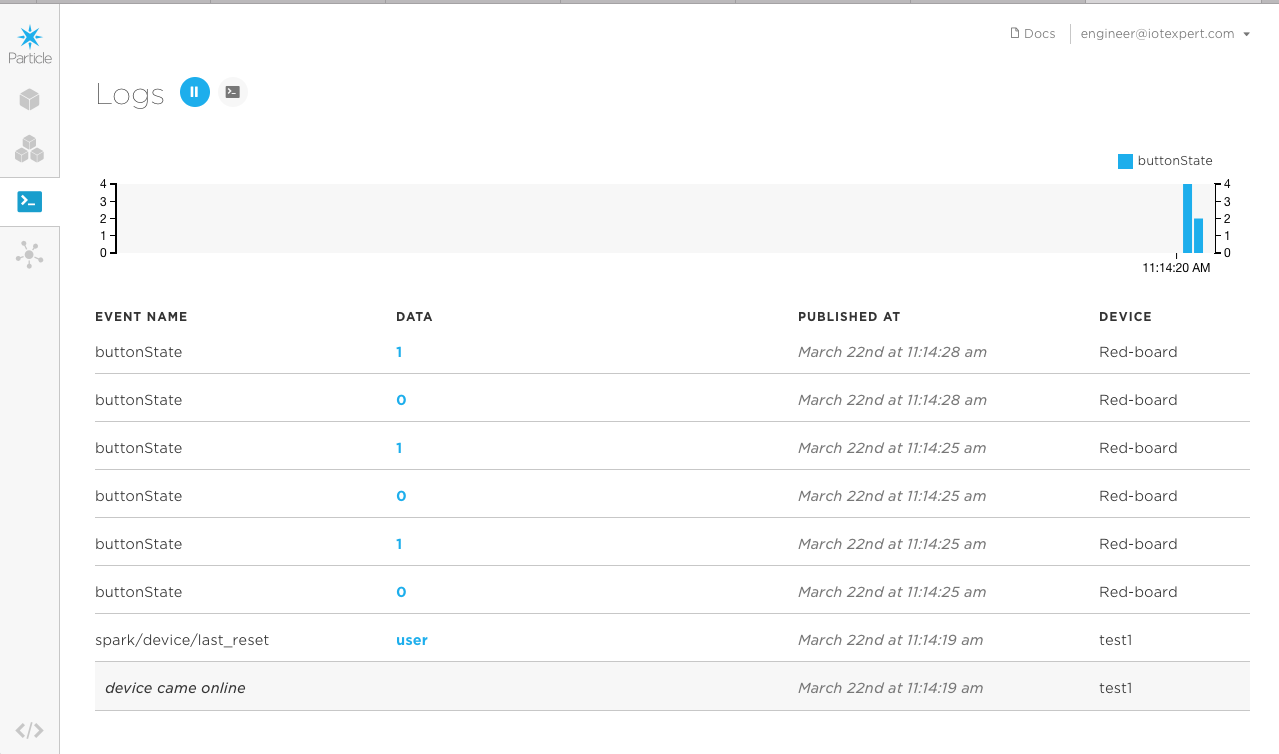
In the console log you can see all of the events pertaining to your device.  In the screenshot below you can see that I changed the state of the button a bunch of times on the “Red-board”.  You can also see where the “test1” board was reset and re-attached to the network.

Particle Cloud

In the next Particle post I will make something…. what?  Im not sure yet.  But Ill think of something.