Percepio Tracealyzer RTT Streamport – PSoC4200M

Summary

In the last article I showed you how to install the Percepio Tracealyzer into your PSoC FreeRTOS project using snapshot mode.   This mode is very convenient as it has little CPU impact and does not require a communication interface.  But your trace it is limited in record time by how much RAM you are willing to dedicate to the trace.   For me, this was not very much because I am using a small PSoC with limited RAM.  In this article I am going to show you how to use the Segger JLink RTT library to support the Tracealyzer RTT Streamport.  With this library built in, the RTOS events will be sent in real-time to the Pecepio Tracealyzer for analysis.

JLink Real Time Transfer (RTT) Library

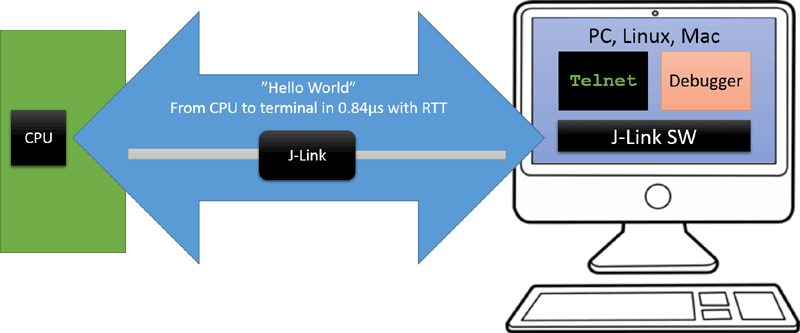
The engineers at Segger had a great idea.  Really great.  Given that they had direct access to the memory of the ARM M0 (for programming) that could be read and written without CPU intervention via the Coresite Debug Access Port, wouldn’t it be nice if there was a simple way to “send” and “receive” data without using another communication peripheral on the device.

So they built the Segger Real Time Transfer (RTT) Library which works with their JLink.  Here is a picture which I got from their website.

Segger JLink RTT

I will talk more about this library in a future article.

Installing the Percepio Tracealyzer RTT Streamport

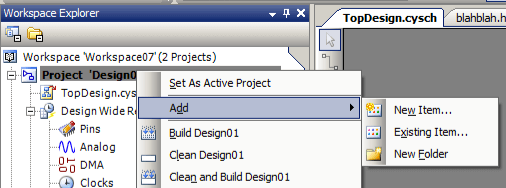
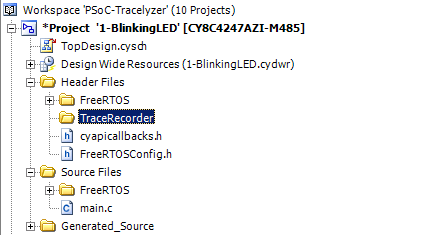
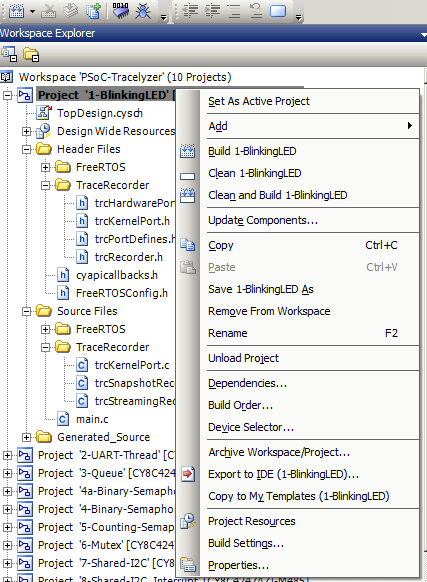
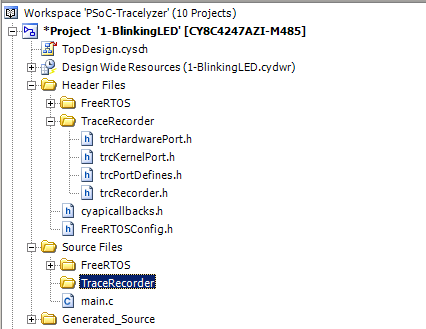
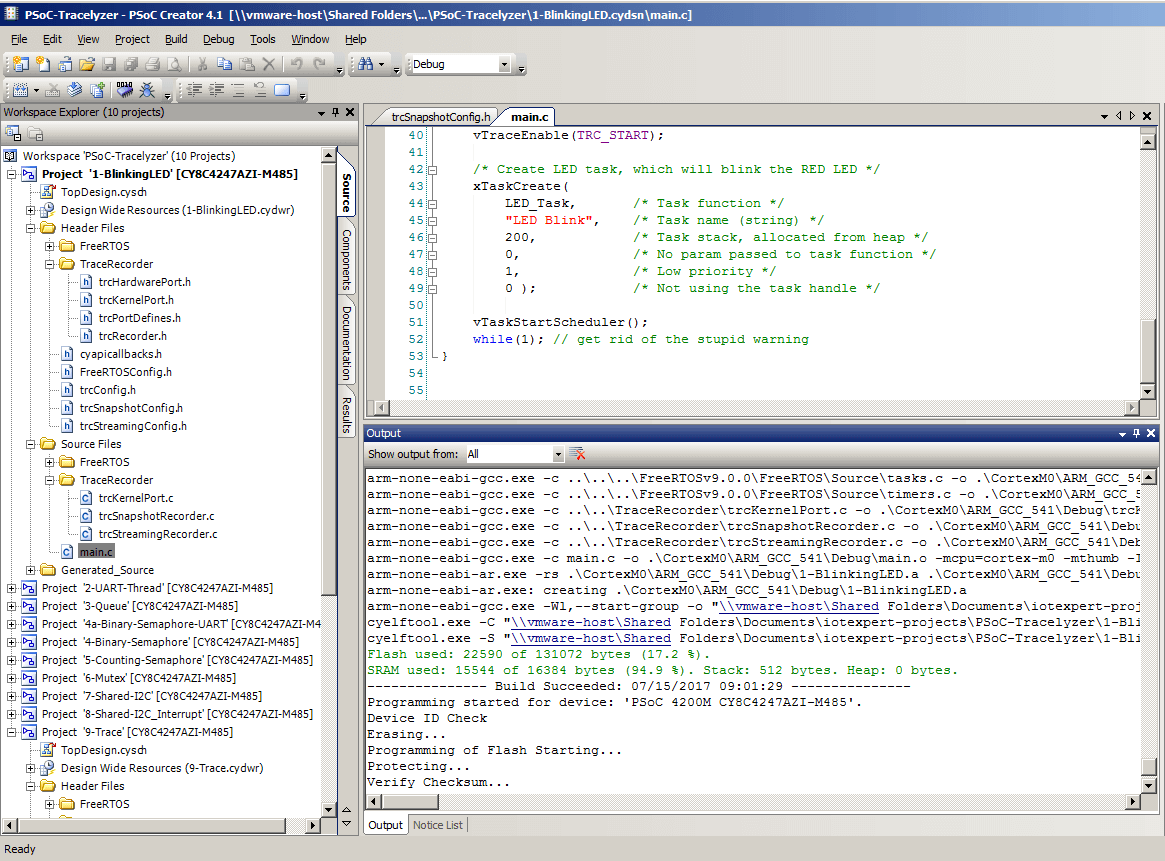
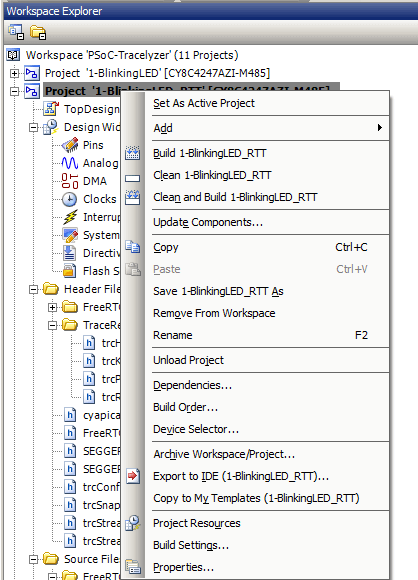
I decided to use a copy of the blinking led project (called 1-BlinkingLED) to start the new project.  To copy the project just use CTRL-C and CTRL-V then rename the project to 1-BlinkingLED_RTT.

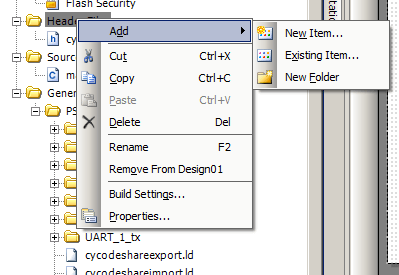
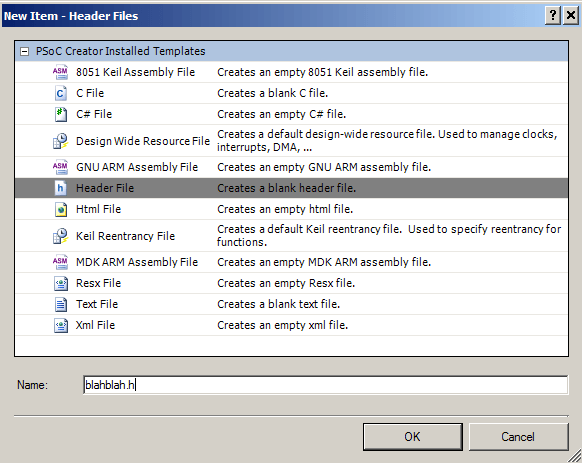
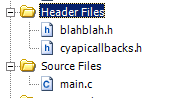
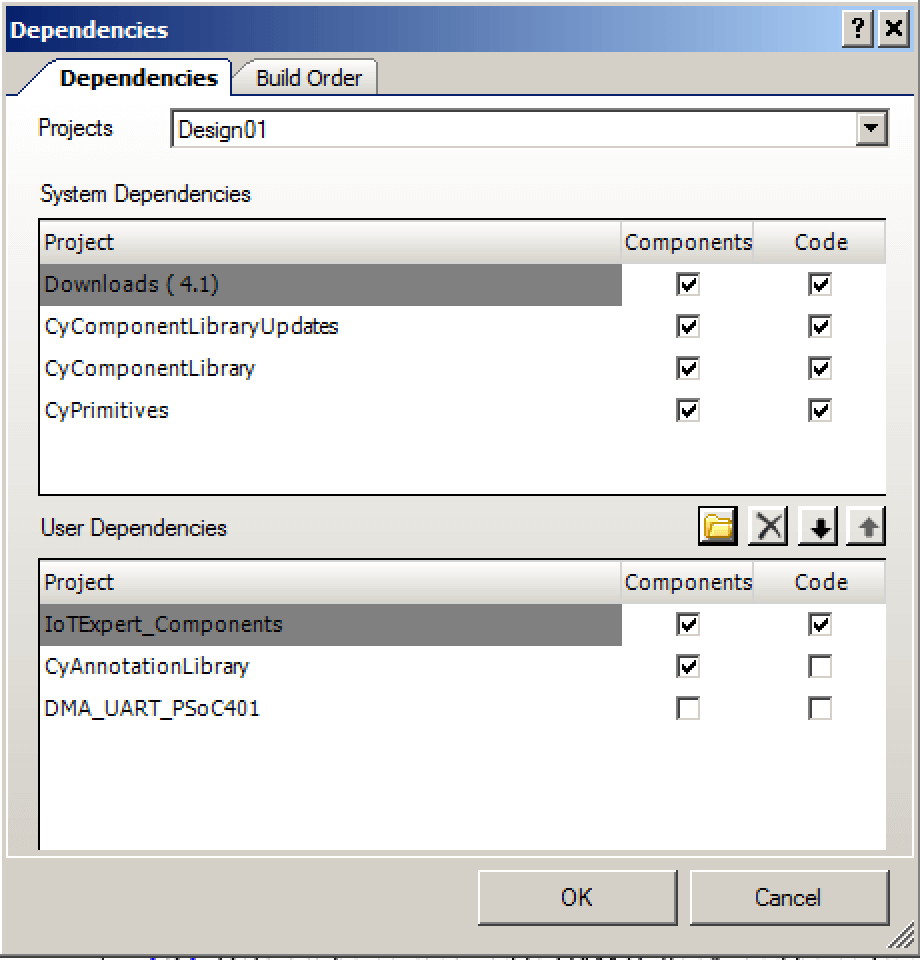
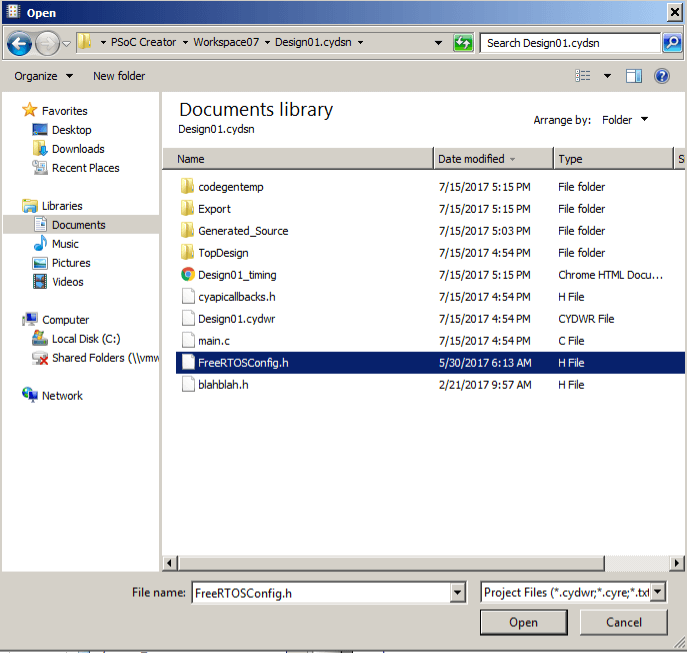
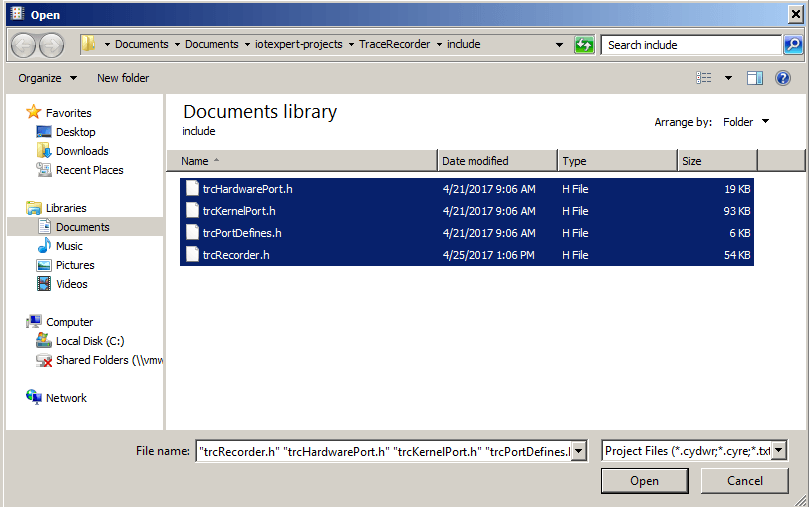
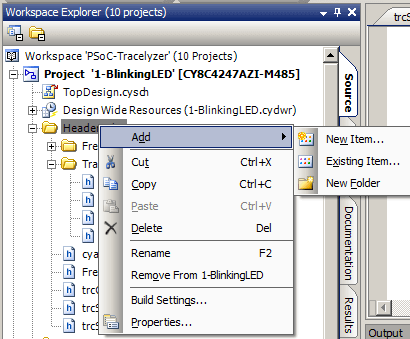
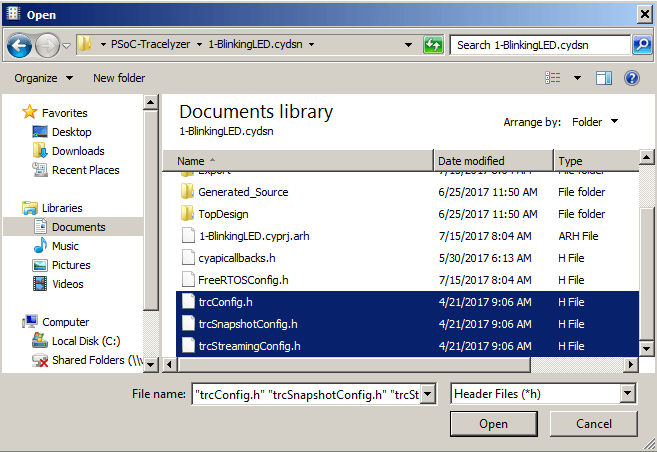
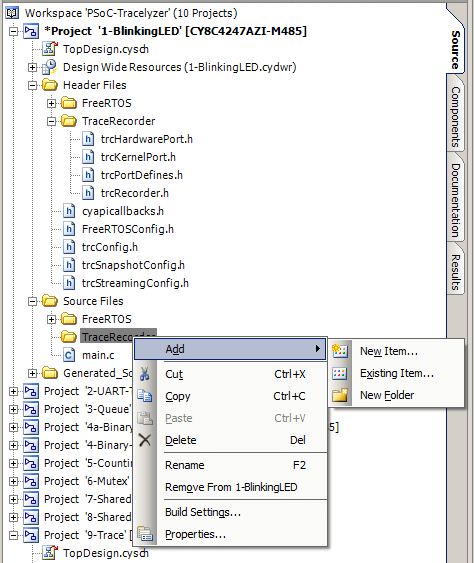
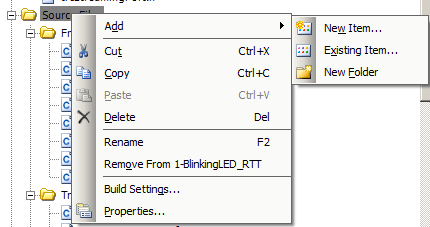
To make all of this work you need to add the streaming include files for the Tracealyzer RTT Streamport by right clicking “Add–>Exiting Item…”

PSoC Creator Add Existing

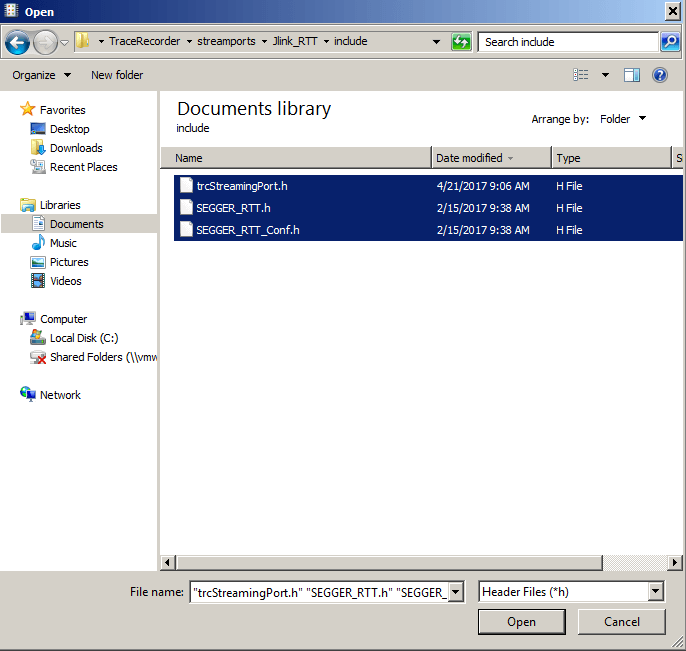
Then selecting “TraceRecorder–>streamports–>Jlink_RTT_include”

PSoC Creator Add Existing

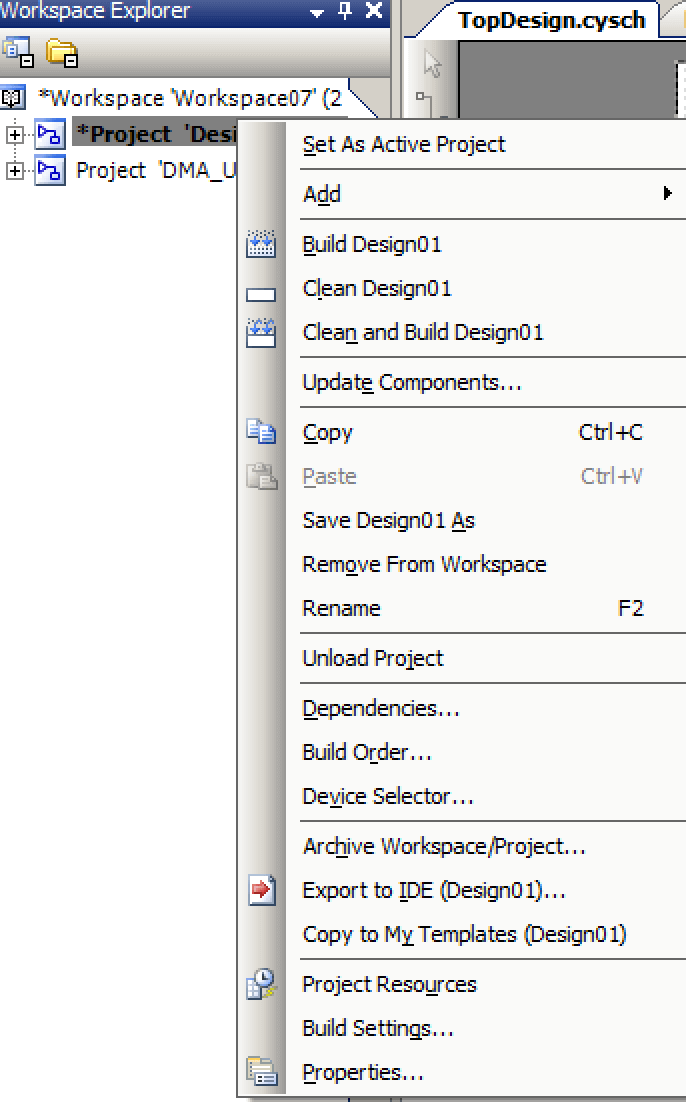
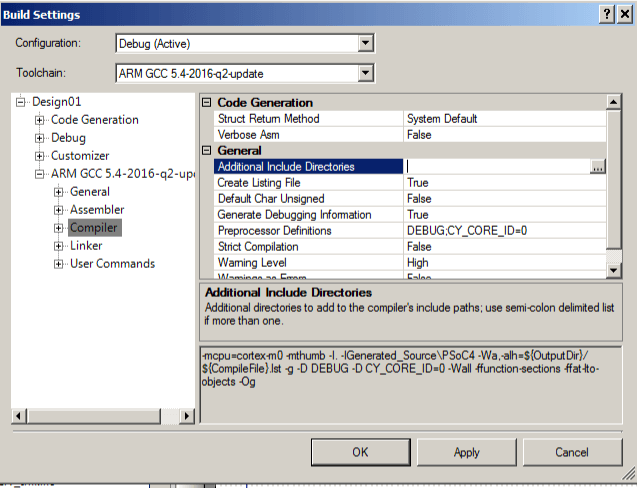
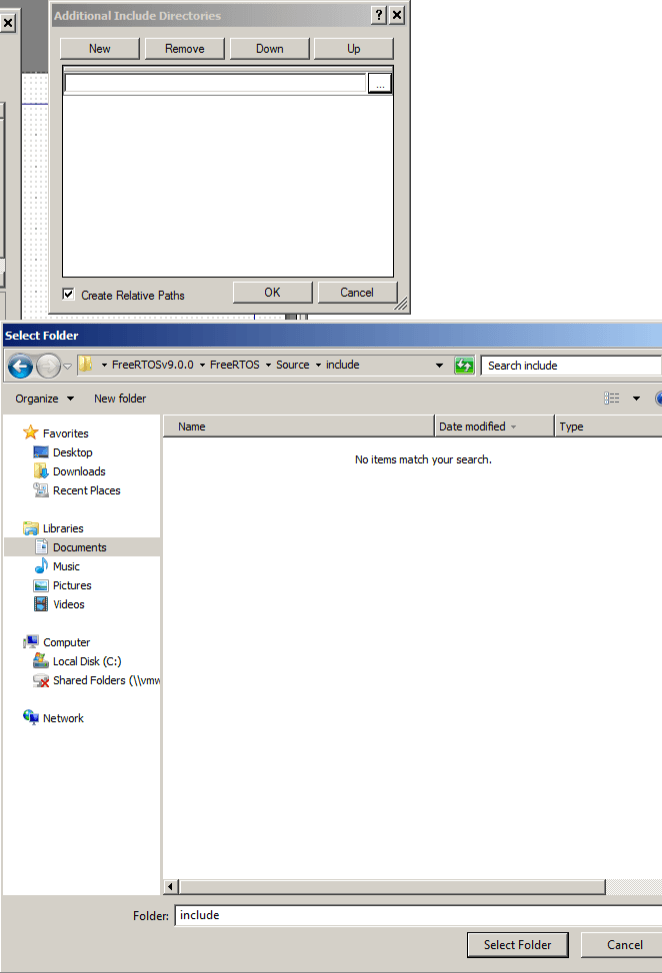
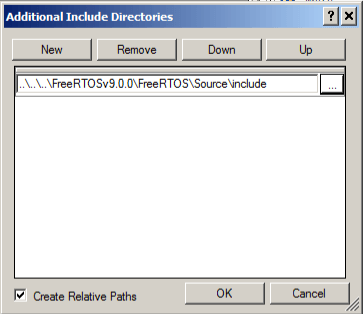
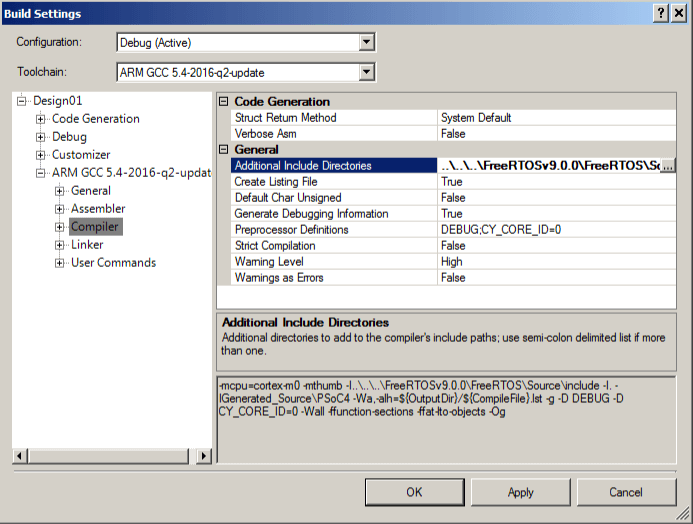
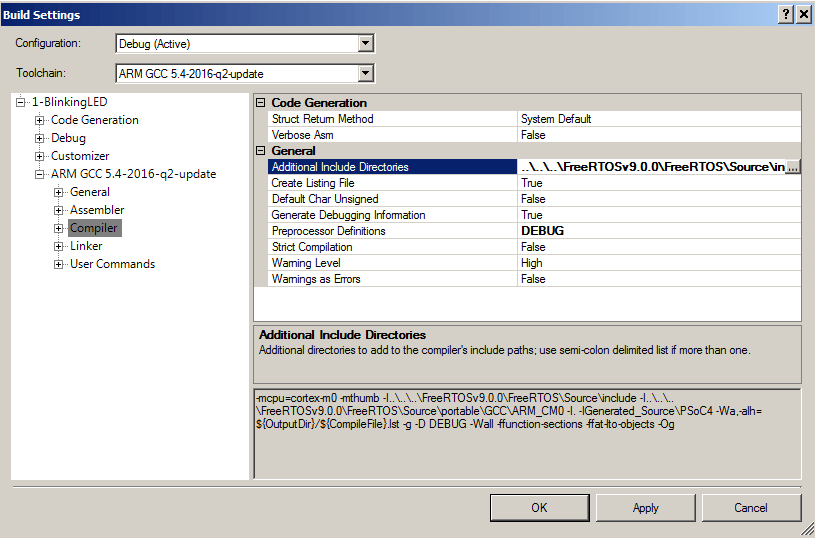
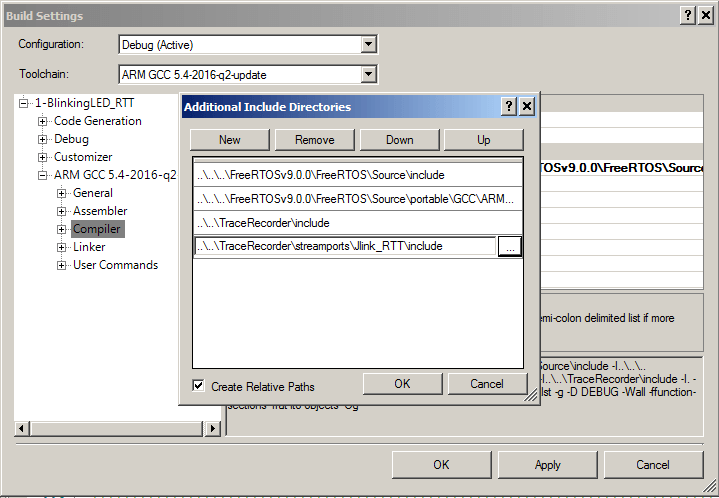
Next you need to update the include path for the project by right clicking on the project and selecting “Build Settings”

PSoC Creator Change Build Settings

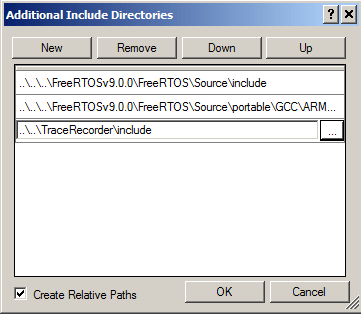
Then add the path to the TraceRecorder\streamports\JLink_RTT\include

PSoC Creator Update Include Path for Tracelyzer RTT Streamport

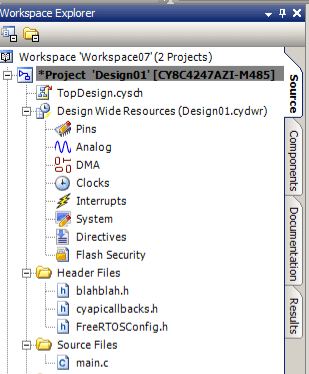
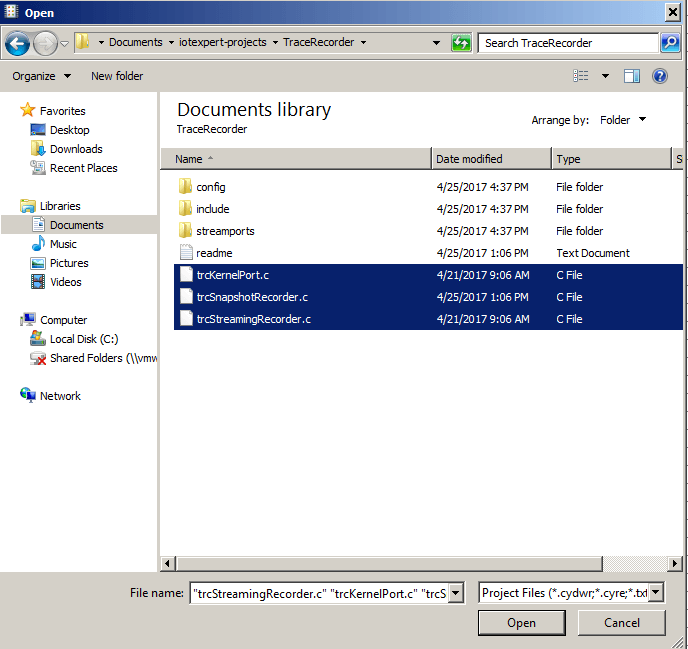
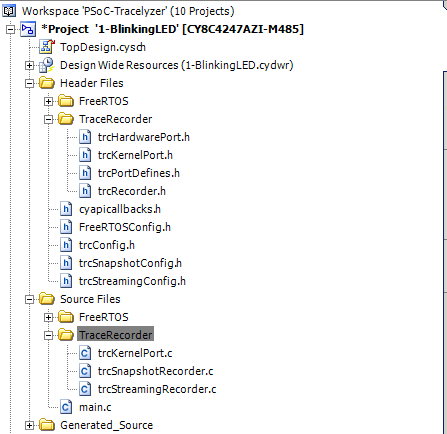
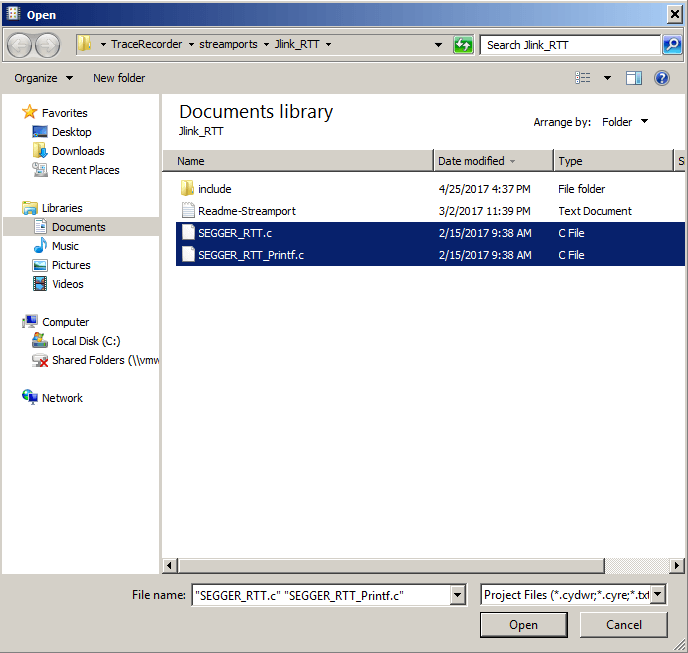
Next, add the .c files for the RTT library.

PSoC Creator - Add Tracelyzer RTT Streamport Library

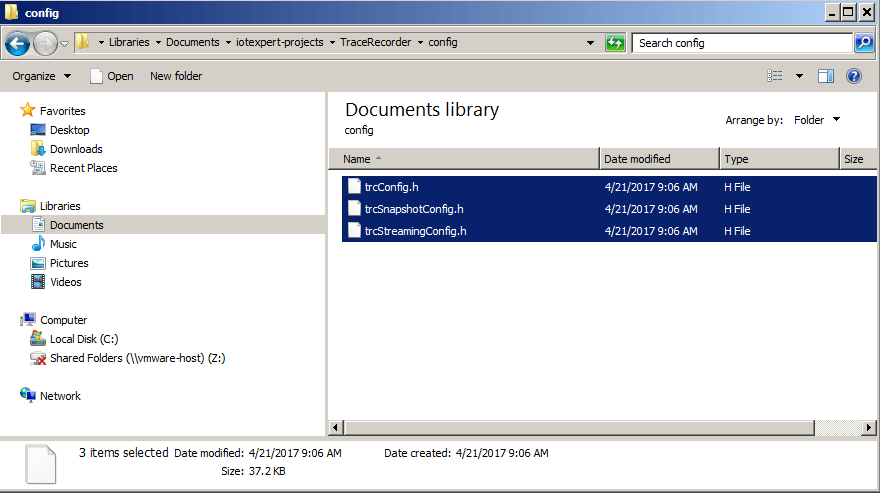
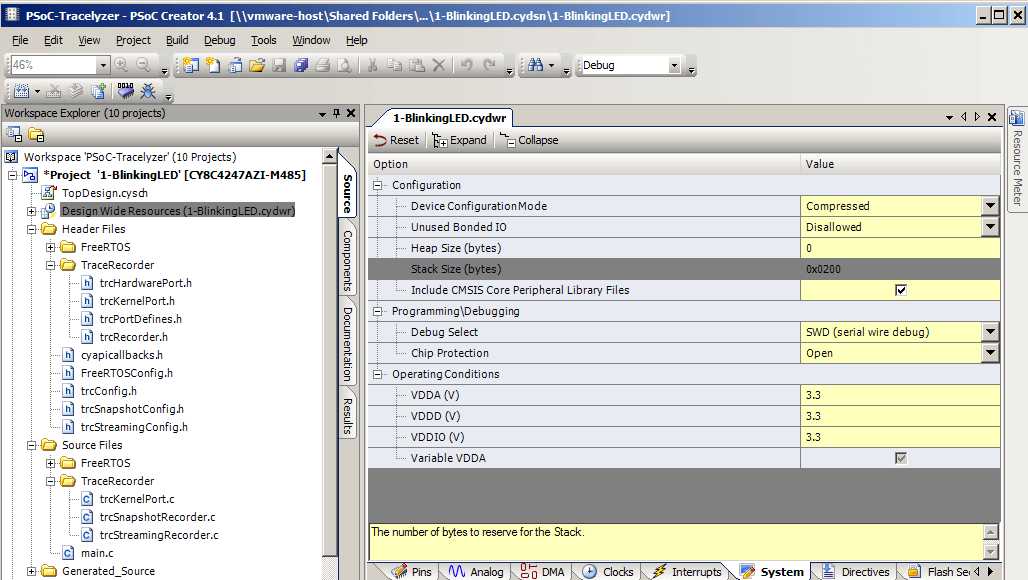
Now that all of the required files are part of your project, you need to modify the “trcConfig.h” to switch to the stream recording mode (line 102).

/*******************************************************************************
 * Configuration Macro: TRC_CFG_RECORDER_MODE
 *
 * Specify what recording mode to use. Snapshot means that the data is saved in
 * an internal RAM buffer, for later upload. Streaming means that the data is
 * transferred continuously to the host PC. 
 *
 * For more information, see http://percepio.com/2016/10/05/rtos-tracing/
 * and the Tracealyzer User Manual.
 *
 * Values:
 * TRC_RECORDER_MODE_SNAPSHOT
 * TRC_RECORDER_MODE_STREAMING
 ******************************************************************************/
//#define TRC_CFG_RECORDER_MODE TRC_RECORDER_MODE_SNAPSHOT
#define TRC_CFG_RECORDER_MODE TRC_RECORDER_MODE_STREAMING

My PSoC 4M only has 16K of SRAM.  So, I reduce the memory footprint of the streaming buffer by changing it to 1000 byte from 5000 bytes in trcStreamingPort.h.

/*******************************************************************************
 * Configuration Macro: TRC_CFG_RTT_BUFFER_SIZE_UP
 *
 * Defines the size of the "up" RTT buffer (target -> host) to use for writing
 * the trace data, for RTT buffer 1 or higher.
 *
 * This setting is ignored for RTT buffer 0, which can't be reconfigured
 * in runtime and therefore hard-coded to use the defines in SEGGER_RTT_Conf.h.
 *
 * Default buffer size for Tracealyzer is 5000 bytes. 
 *
 * If you have a stand-alone J-Link probe, the can be decreased to around 1 KB.
 * But integrated J-Link OB interfaces are slower and needs about 5-10 KB, 
 * depending on the amount of data produced.
 ******************************************************************************/
//#define TRC_CFG_RTT_BUFFER_SIZE_UP 5000
#define TRC_CFG_RTT_BUFFER_SIZE_UP 1000

Run Tracealyzer

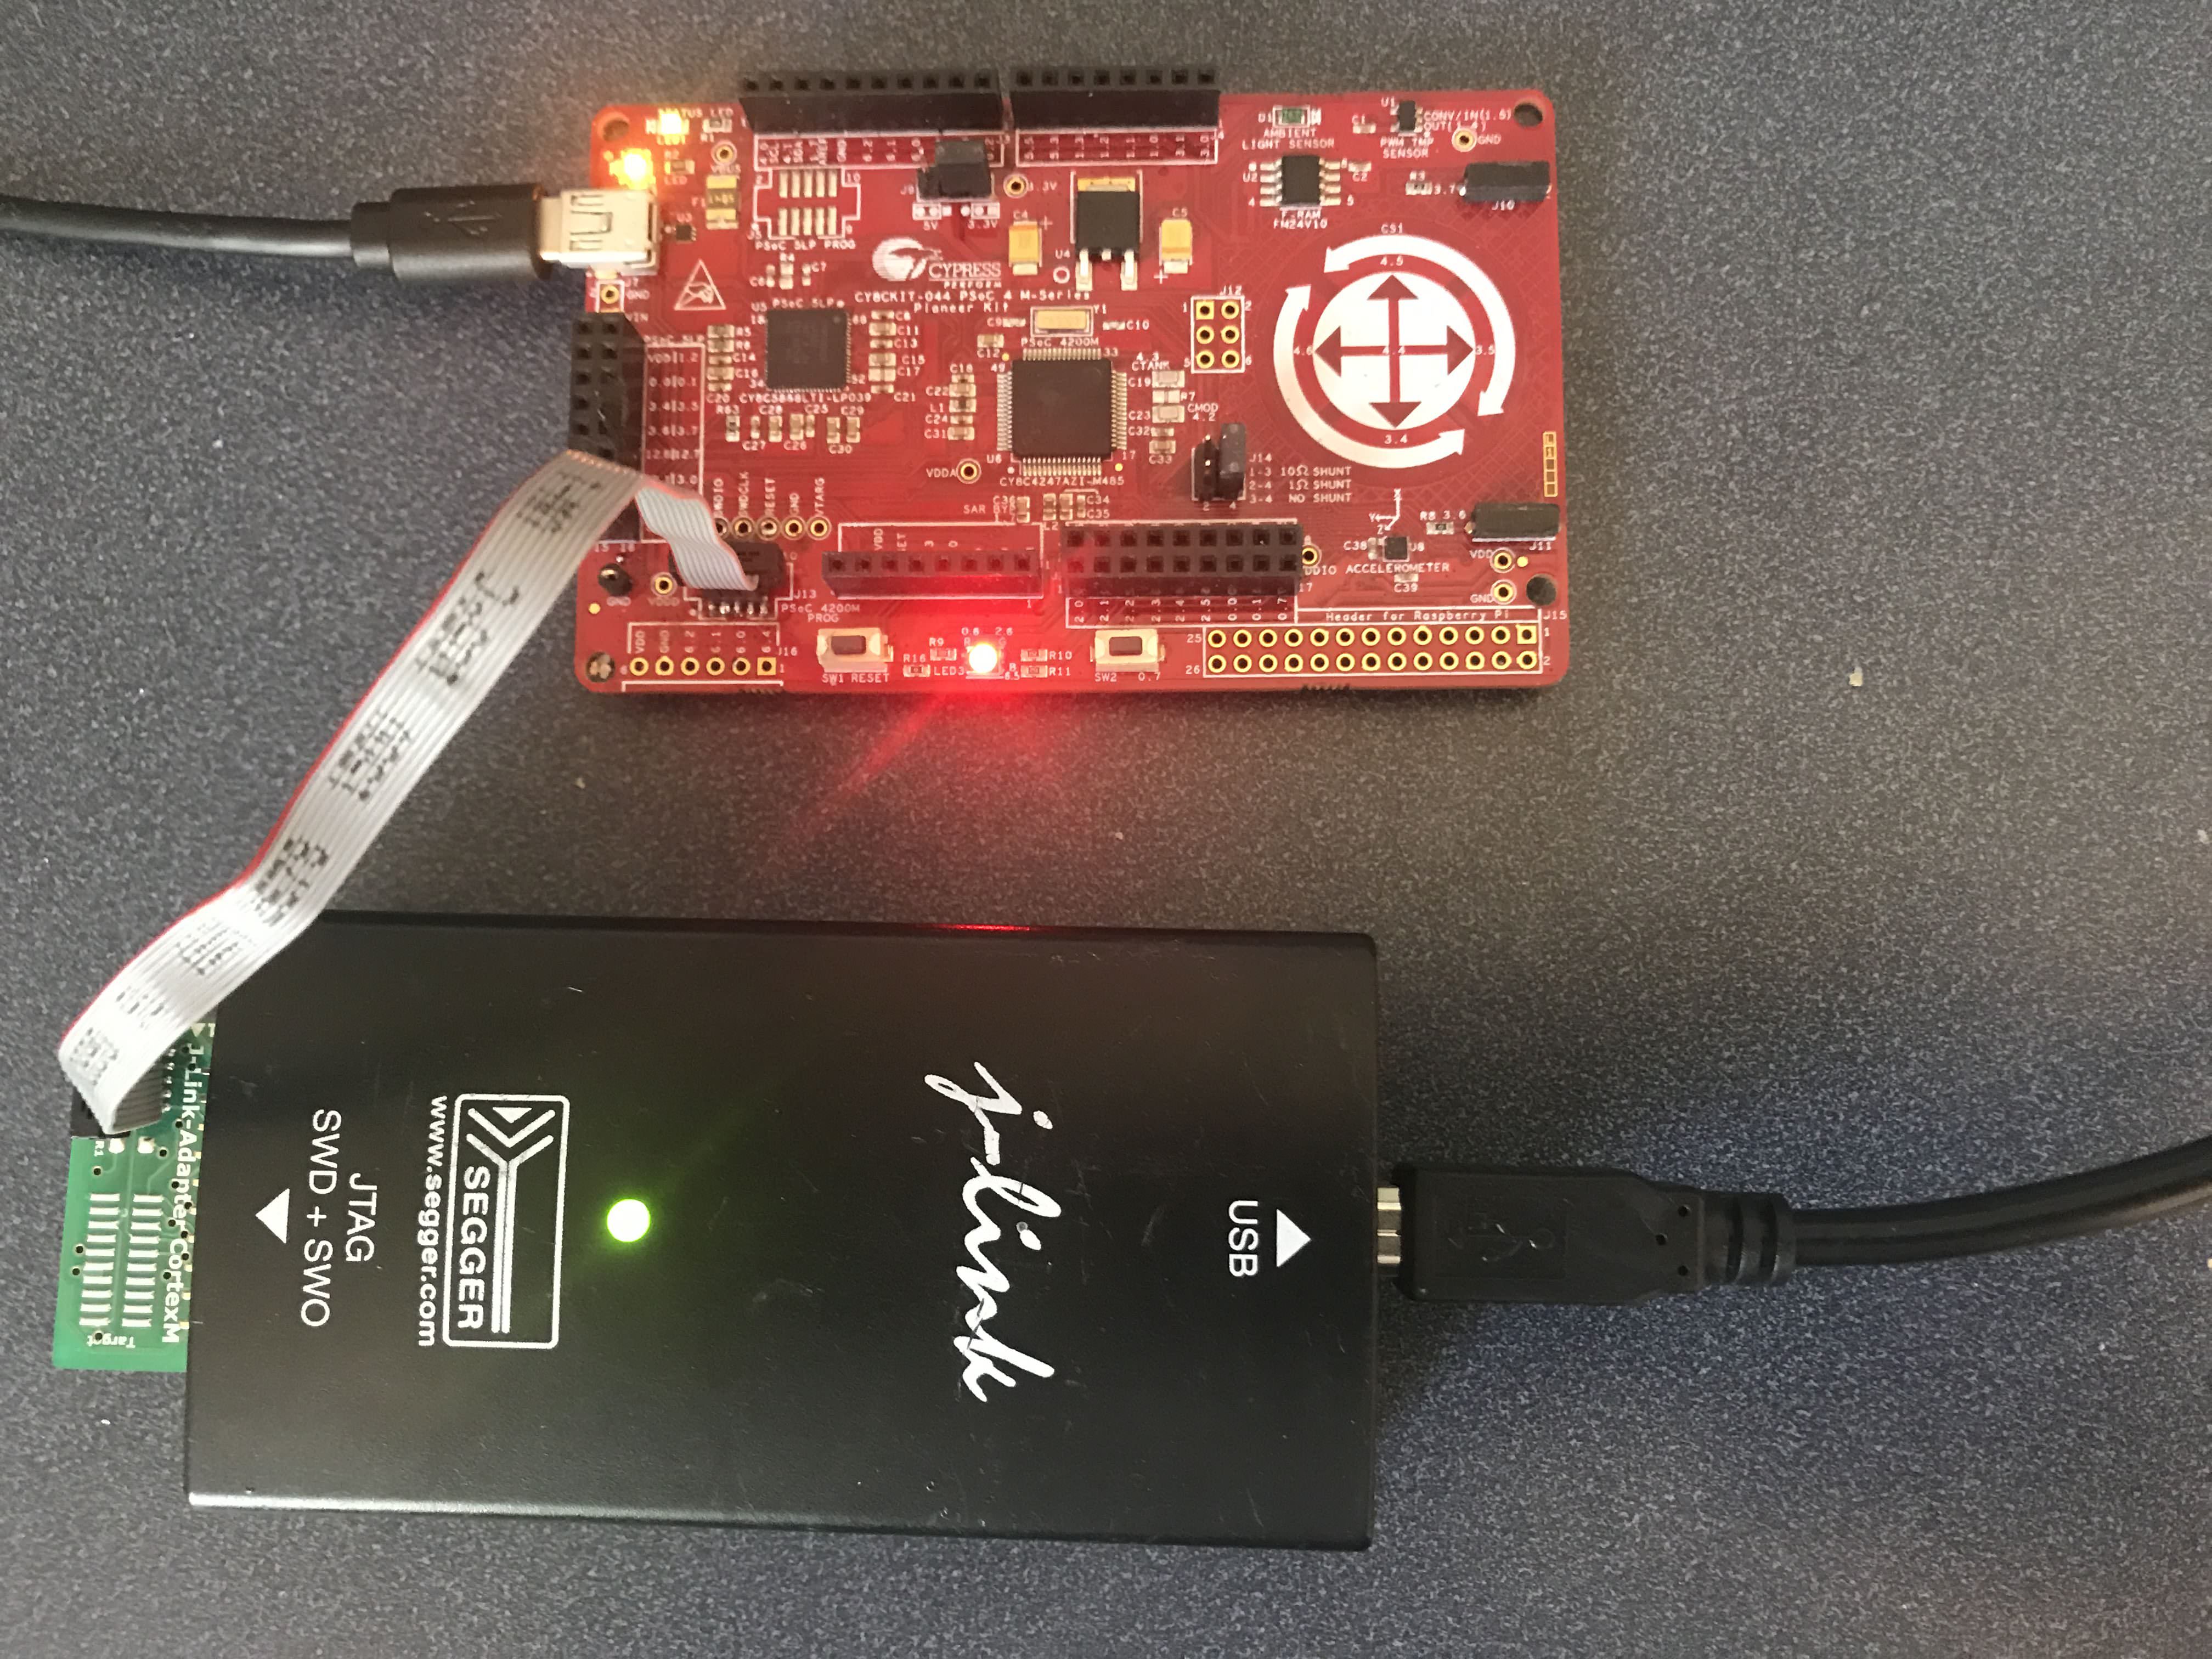
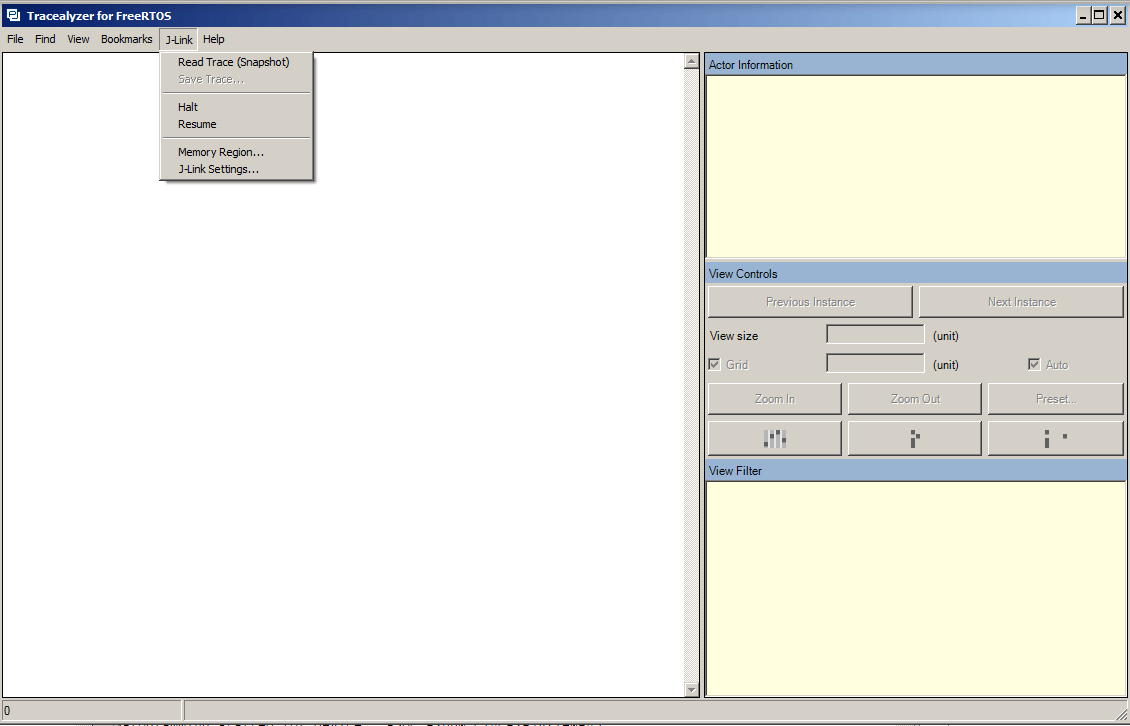
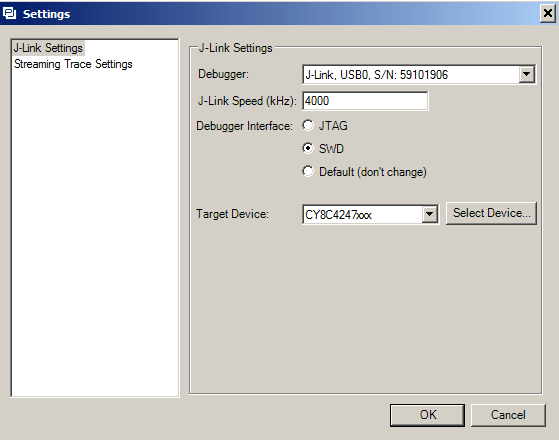
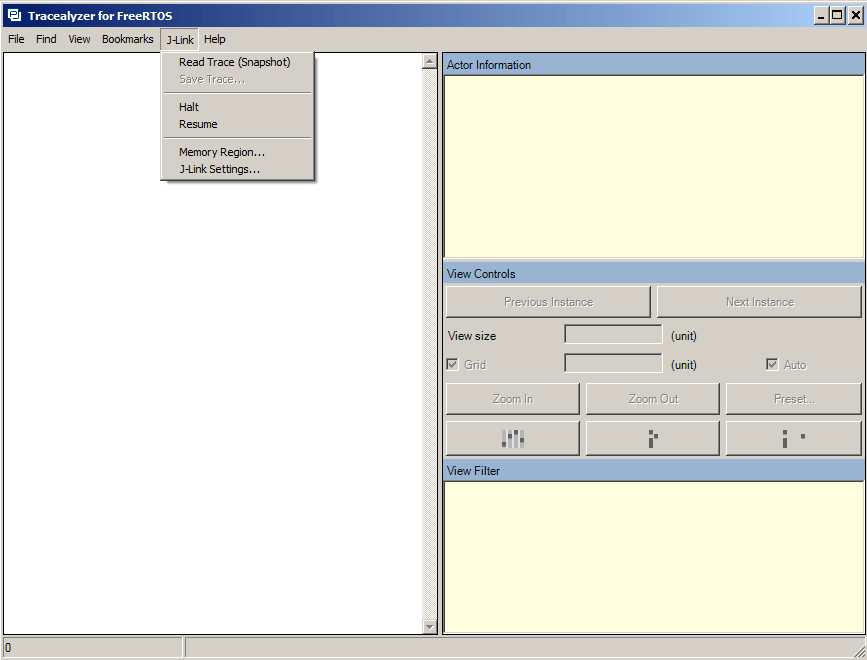
After the project is updated for the Tracealyzer RTT Streamport, I can program it into my CY8CKIT-044 development kit.  The next step is to start the Tracealyzer.  If you have previously run the program it will use your previous J-Link settings.  If you have not run it before then you need to setup the J-Link Settings

Percepio Tracelyzer

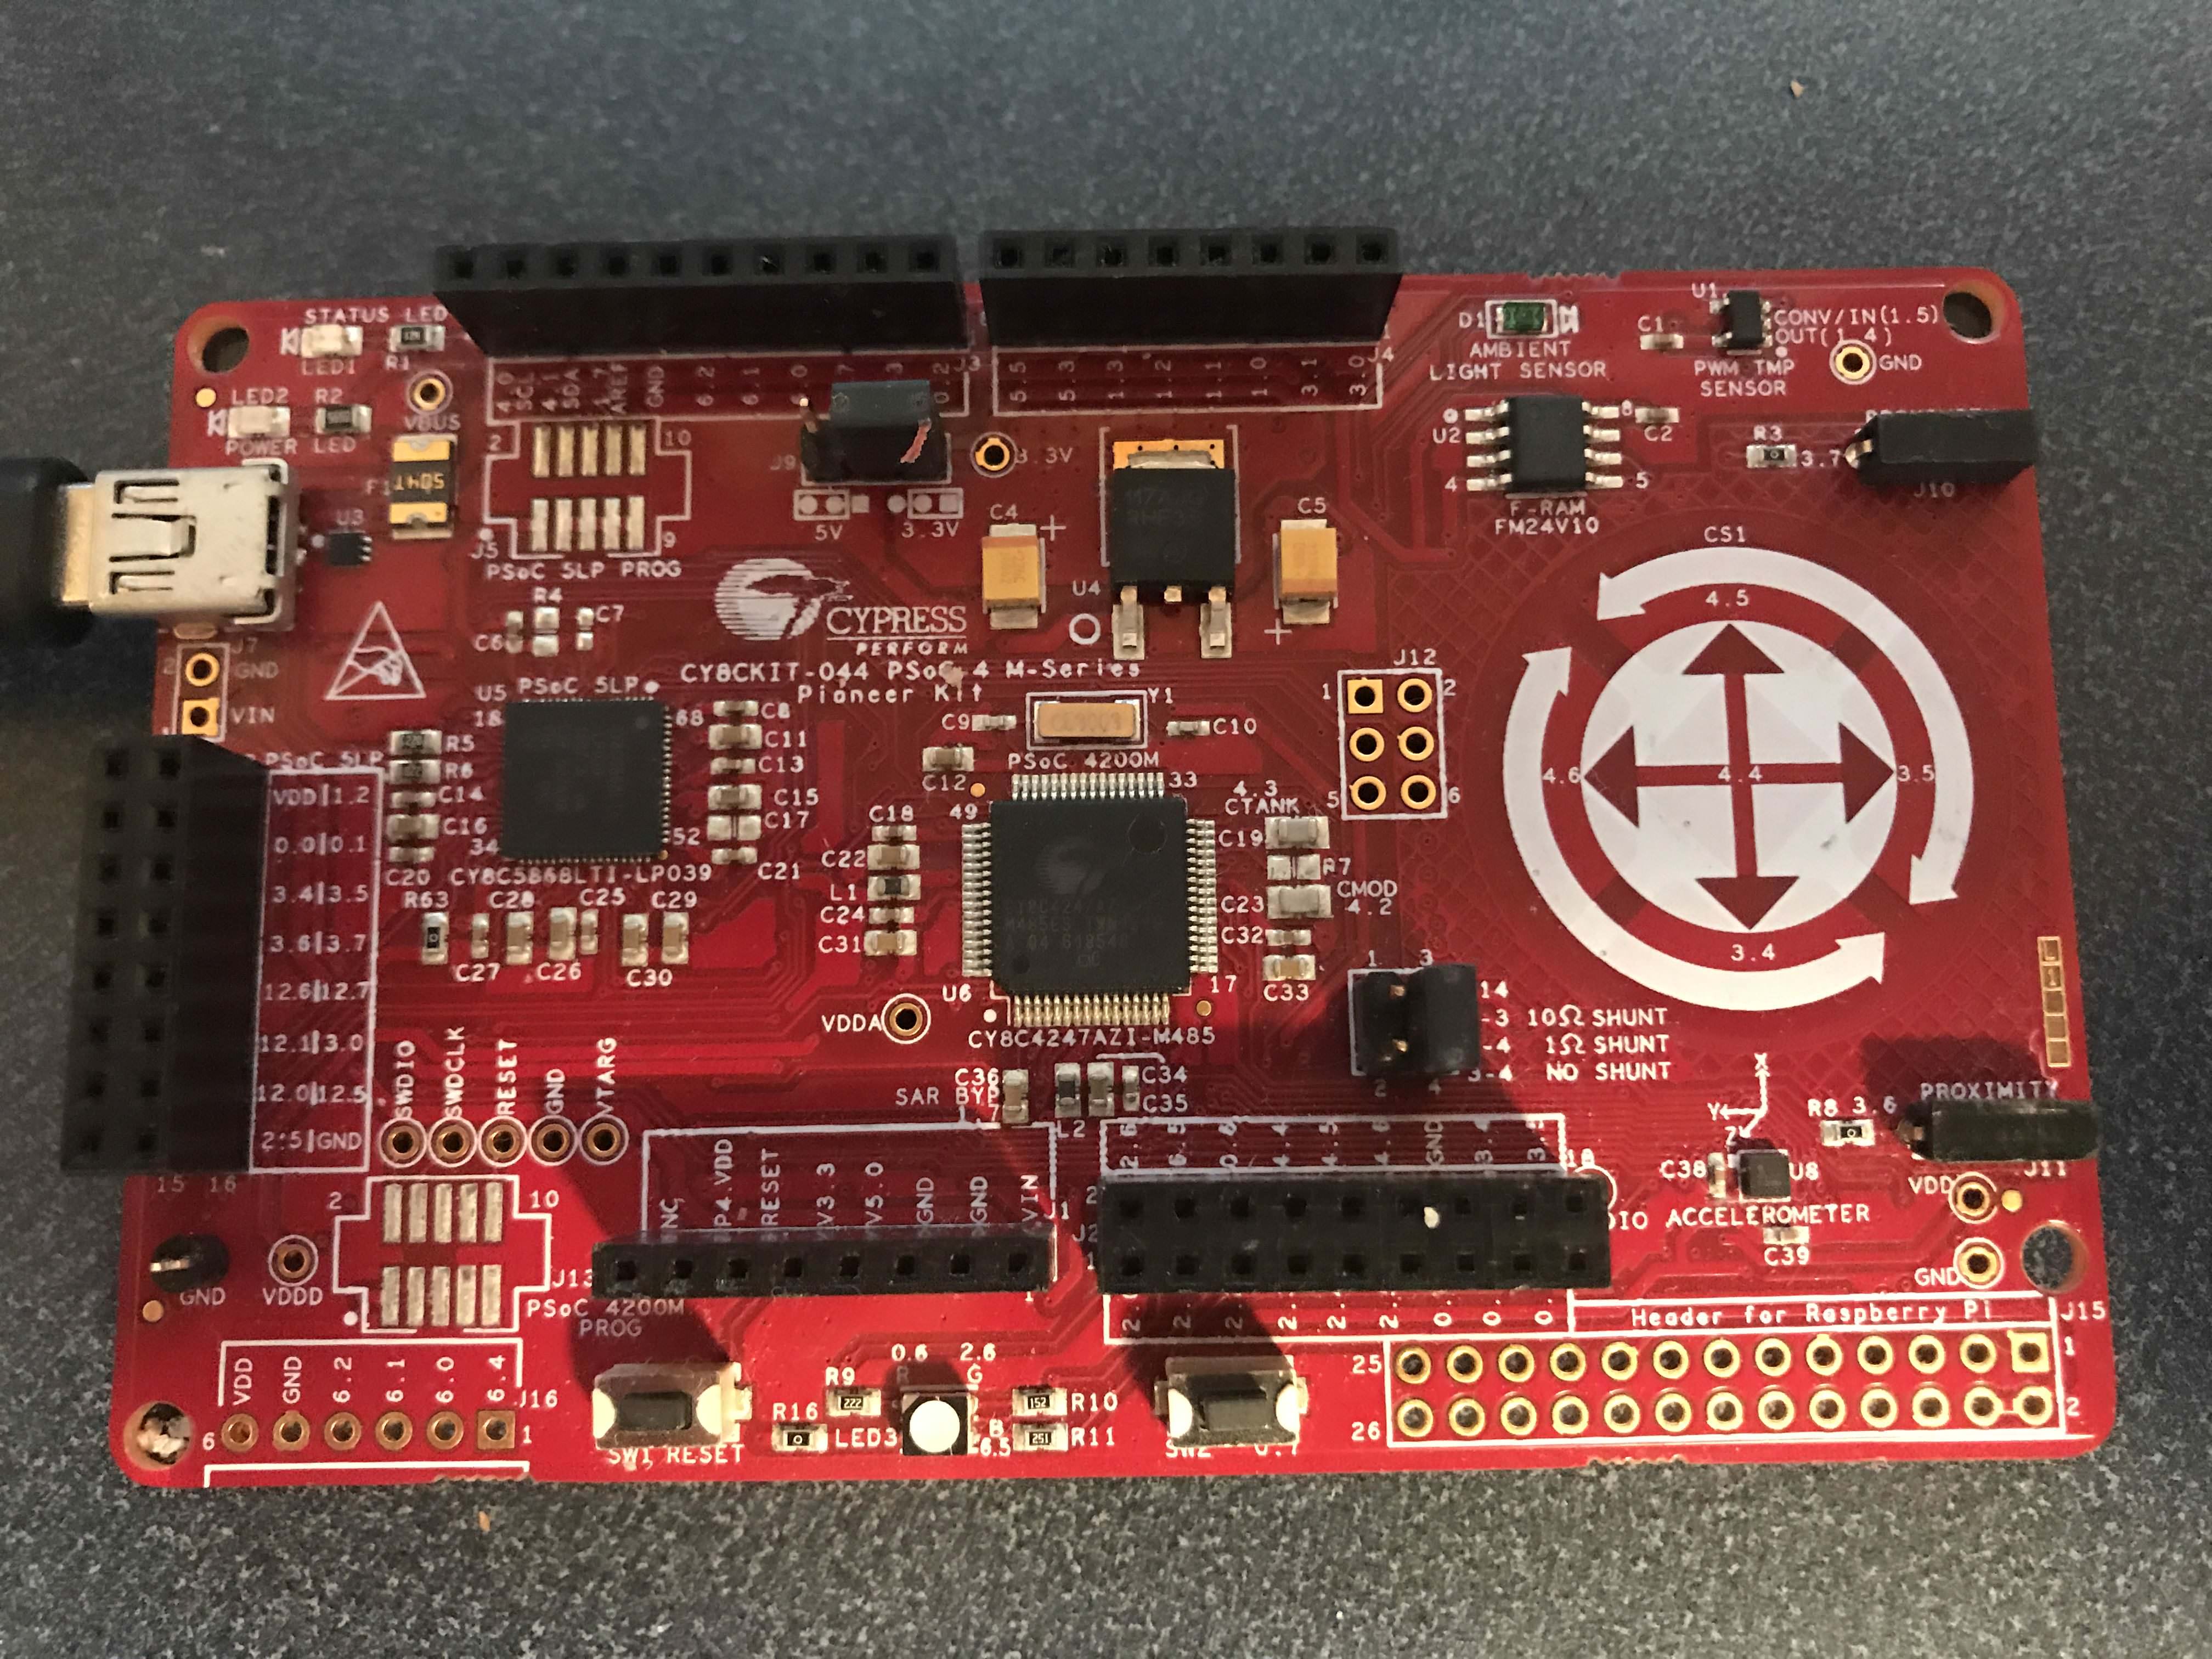
I am using a CY8CKIT-044 which has a CY8C4247xxx PSoC 4200M MCU onboard.

Configure JLink for Tracelyzer RTT Streamport

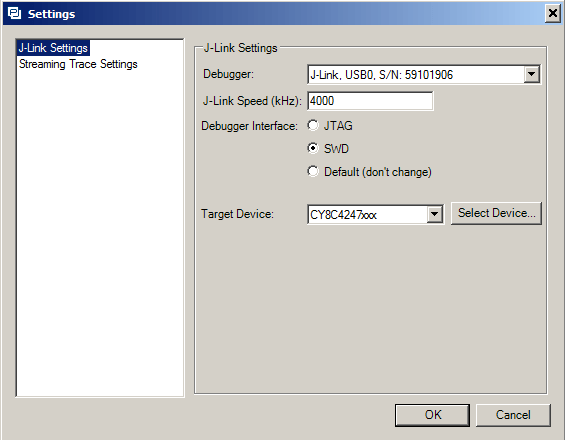
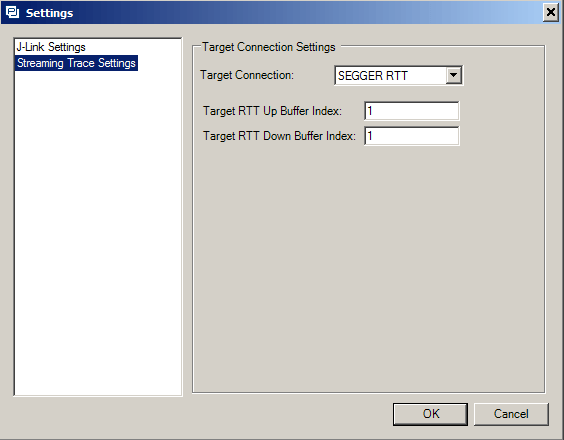
I use the default settings for the Segger RTT.

Tracelyzer RTT Streamport Stream Trace Settings

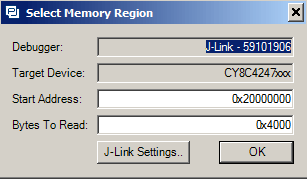
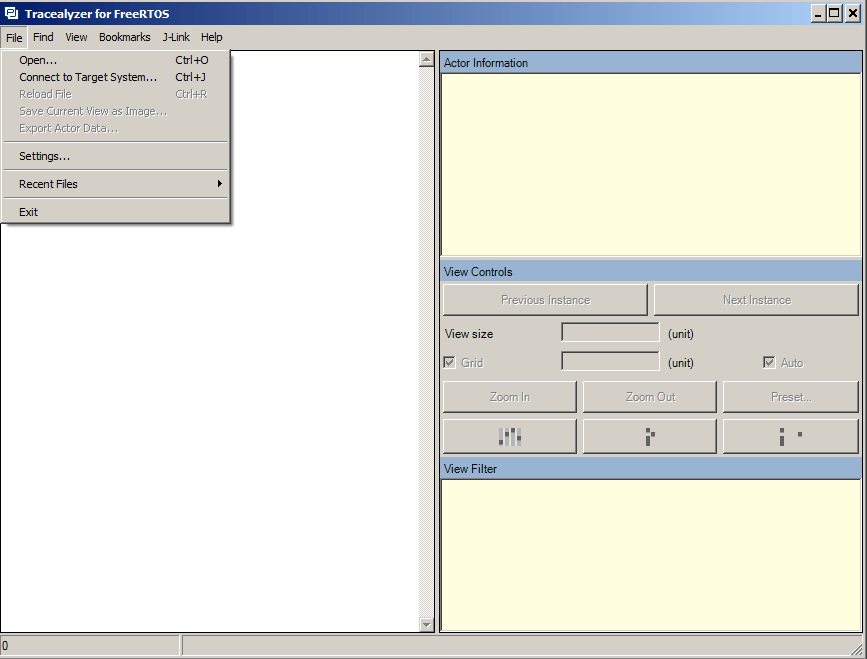
Once things are setup you can “Connect to Target System…”

Percepio Tracelyzer

Then click “Start Recording”

Percepio Tracelyzer

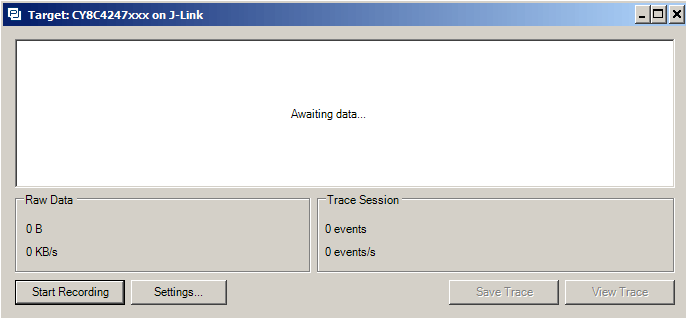
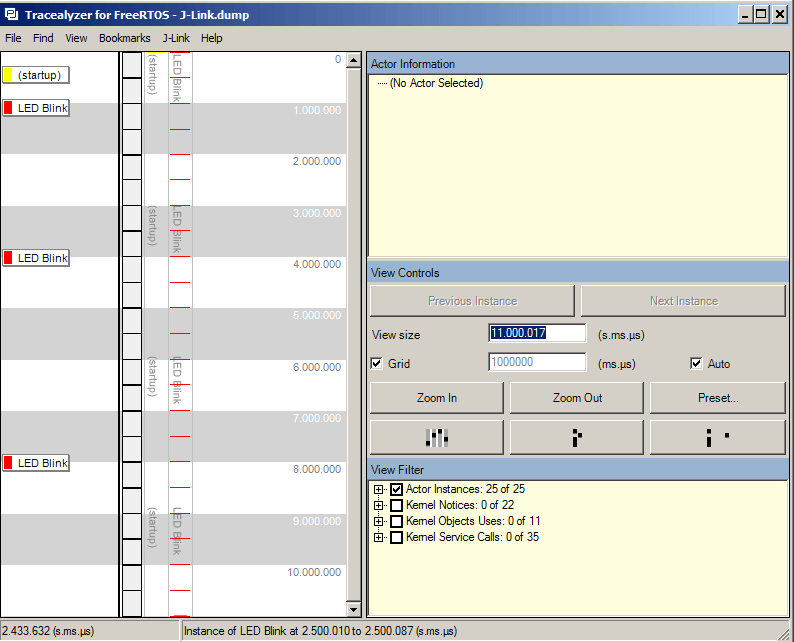
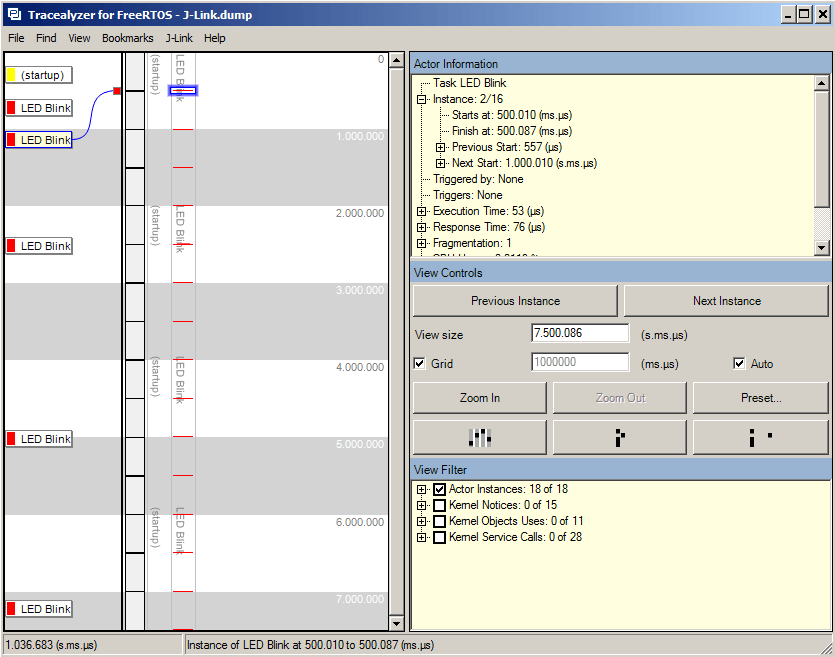
As you are recording the Tracealyzer shows the CPU usage.  In this case it is very close to 0% as all the program does is blink the LED and then sleep for 500ms.

Percepio Tracelyzer Recording

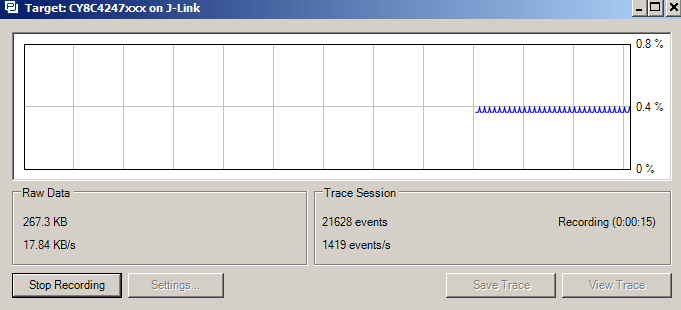
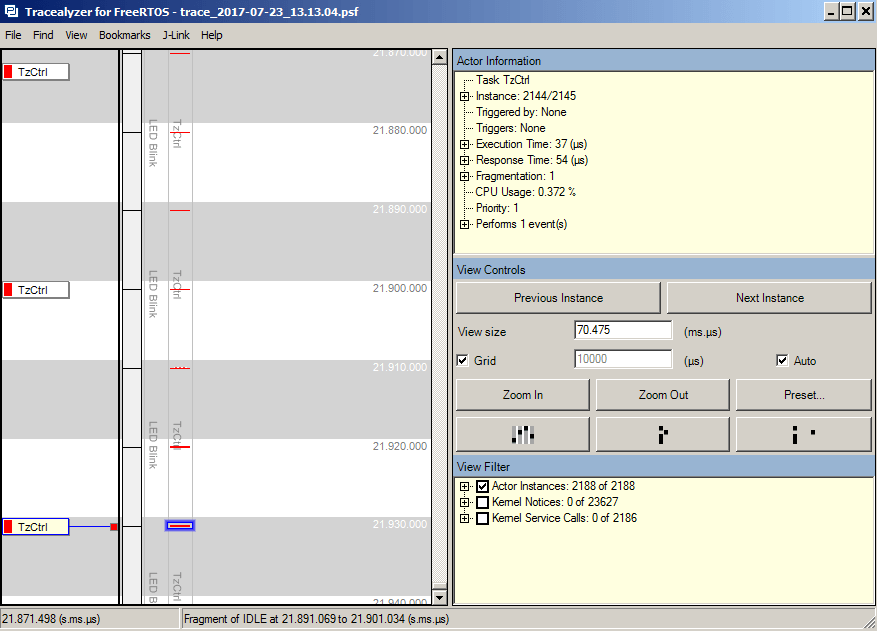
After I stop recording I can look at the trace.   The first thing to notice in this trace is that I can look at quite a bit more data.  In this case I recorded for about 22 seconds.

Percepio Tracelyzer

In the next article I am planning on doing a Streamport based on the PSoC UART which means I will not need to use a JLink.

As always you can find all of these projects on the IotExpert GitHub site or git@github.com:iotexpert/PSoC-Tracelyzer.git

Article Description
Percepio Tracealyzer & PSoC An Introduction to Percepio Tracealyzer on the Cypress PSoC
Percepio Tracealyzer RTT Streamport - PSoC4200M Make the JLINK RTT Library work with Tracealyzer
Percepio Tracealyzer PSoC UART Streamport Creating a UART Streamport
Percepio Tracealyzer - Analyzing the PSoC Tracealyzer Streamport Figure out what is broken in the UART Streamport
Percepio Tracealyzer - Using PSoC DMA to Fix the UART Streamport Implementing PSoC DMA to improve the CPU Utilization
Percepio Tracealyzer - Running on PSoC6 Porting the Percepio Tracealyzer to PSoC6

PSoC Creator Projects

Summary

When building a PSoC Creator project there are a number of “sources” of “source code” including:

  • Cypress PSoC Component Code from the Cypress Component Library (which end up in the Generated_Source directory)
  • Your C Source code files .h/.c e.g main.c
  • Your Components from your Component Library (which end up in the Generated Source Source directory)
  • Other Libraries of code (e.g. FreeRTOS or Percepio Tracelyzer)

There are (at least) five tools which need to “know” about where the source code for your project resides including:

  • Workspace Explorer (so you can browse the files and open the code in an editor)
  • PSoC Creator Code Editor (so Intellisense works correctly)
  • GCC Compiler
  • Linker
  • Debugger

Here is a video where I talk about the files structure of PSoC Creator Projects:

PSoC Creator takes care of so many of these details automatically for you, so I have not put much thought into how these things work.  But, in the last few months, I have been building projects that use FreeRTOS, which has made me contemplate how things go together.  This is the genesis of this Article.

Lets start with a blank project (which I created for the CY8CKIT-044).  When you make this project you can see that you get:

  • A Workspace (called Workspace07) that contains one project.  The name is just a default name + a number that Creator made for you.
  • A Project (called Design01)
  • A Schematic (called TopDesign.cysch)
  • Design Wide Resources (called Design01.cydwr)
  • A folder for Header Files which contains a file called cyapicallbacks.h
  • A folder for Source Files that contains main.c

PSoC Creator Blank Project

When you look at the disk you will see a directory at the top level called “Workspace07”.  This directory contains:

  • The workspace file called Workspace07.cywrk and a user specific settings file called Workspace07.cywrk.arh (the .arh is my windows login).  This binary file contains references to all of the projects that are part of the Workspace.  Plus other Workspace configuration.
  • A directory called “Design01.cydsn”.  This directory contains everything required for the project.

PSoC Creator files in Windows Explorer

When I look in the directory called “Design01.cydsn” I see

  • Design01.cyprj (an xml file that contains all of the information about the project)
  • Design01.cydwr (an xml file that contains all of the Design Wide Resource settings)
  • The two source files main.c and cyapicallbacks.h
  • A directory called “TopDesign”

PSoC Creator - Project Directory

In the TopDesign directory you will find the TopDesign.cysch which is the binary file of the schematic.

PSoC Creator - Top Design Directory

Now that we have accounted for all of the “basic” project stuff.  I will run “Generate Application” from the build menu.

Cypress PSoC Creator Components

After the Application Generation is done you will see a bunch of more stuff in the Workspace Explorer.  Specifically a new folder called “Generated_Source”.  In that folder you will see a folder called “PSoC4” that contains a bunch of files plus some more folders.  These folders are created by the application generation process to hold the source code for components including cy_boot, cy_dmac, and cy_lfclk.  But you say, “I didn’t place any components”, and that is true,  but PSoC Creator did this automatically for you when you made the project.  These source files are used to get the PSoC booted, the linker setup, the CMSIS core definitions etc.

PSoC Creator Workspace Explorer

When you look on the disk, you will see a completely different hierarchy than you see in the Workspace Explorer.  In fact you will see all of these files in a directory called “Generated_Source/PSoC4”.  This tells us something important.  The workspace explorer gives you hierarchy so that you can see the different files grouped together logically.  BUT this hierarchy is completely unrelated to how the build process works (more on this in a minute) or how the files reside on the disk.  DANGER DANGER WILL ROGERS!!!  (these Folders are actually called “Filter Folders” and you can read about them in the PSoC Help Topic “Creating Folders”)

PSoC Creator - Workspace Explorer Generated_Source

When you place a component in the schematic (e.g. a UART) and run the build again you will find more folders & files in the Generated_Source section of the Workspace Explorer

PSoC Creator - Workspace Explorer

But when you look in Generated_Source directory on the disk, you will find ALL of those files in one directory.

PSoC Creator - Generated_Source Directory

When you place a component, PSoC Creator takes the API from the Component Library, processes it, names it correctly, adds it to your “.cyprj” file so that the Workspace Explorer can see it, then copies the code into your Generated_Source directory.  You could edit it there, but if you do, you are at risk to having it overwritten the next time you build the project.  All of the configuration you do to a component gets turned into c-source that resides in the Generated_Source directory

When you delete a component, the related generated source code (e.g., UART_1.*) won’t be visible in Workspace Explorer, but IT STILL LIVES ON DISK. This is a consequence of our legacy “merge region” support.  The user may have edited the file and PSoC Creator doesn’t want to destroy those edits.  This can cause inconsistencies between what Workspace Explorer shows the user and what the compiler actually sees:

  • PSoC Creator will NOT compile any irrelevant .c files present in the file system.
  • However, the compiler WILL see any stale .h files that happen to be lying around when it processes #includes.

So, what is a merge region?  When PSoC Creator was originally created, it was recognized that there was occasionally need for a user to put code into a generated file e.g. an interrupt handler.  And we also wanted PSoC Creator to be able to regenerate that file.  If you look around in Generated_Source files, you will find sections of code that look like lines 27-30.  If you put code between those funny looking comments, it will not be blown away when you regenerate your application.  In other words PSoC Creator preserves all of the code in merge regions.  This mode has mostly be supplanted by the use of the “cyapicallbacks.h” functionality.

/*******************************************************************************
* Function Name: isr_1_Interrupt
********************************************************************************
*
* Summary:
*   The default Interrupt Service Routine for isr_1.
*
*   Add custom code between the START and END comments to keep the next version
*   of this file from over-writing your code.
*
*   Note You may use either the default ISR by using this API, or you may define
*   your own separate ISR through ISR_StartEx().
*
* Parameters:  
*   None
*
* Return:
*   None
*
*******************************************************************************/
CY_ISR(isr_1_Interrupt)
{
    #ifdef isr_1_INTERRUPT_INTERRUPT_CALLBACK
        isr_1_Interrupt_InterruptCallback();
    #endif /* isr_1_INTERRUPT_INTERRUPT_CALLBACK */ 

    /*  Place your Interrupt code here. */
    /* `#START isr_1_Interrupt` */

    /* `#END` */
}

Your Code in C Source Files (.h/.c)

All of the files in “Header Files” and “Source Files” are considered to be owned by you.  In other words, PSoC Creator will never make changes to those files.  PSoC Creator starts by giving you copies of two template files, main.c and cyapicallbacks.h.  These files are yours to edit and you are responsible for the contents.

If you are making a project that is to big to logically fit into just main.c you may want to split it up into multiple .c and .h file.  You can do this by adding .c and .h source files to your project.  Right click the “Header Files” folder (or “Source Files”) and select “New Item”

PSoC Creator - Add Existing Item

Then enter the name of the file and select the FileType (in this case I did “blahblah.h”)

PSoC Creator - Add New Item

After doing that I will have a new file in the Workspace Explorer

PSoC Creator - Workspace Explorer Header Files

Plus I will have the same file in the Design01.cydsn directory

PSoC Creator - Windows Explorer Top Project Directory

All of the files that I add by doing “New Item” will end up in the “right” folder and reside in the project directory on the disk.

Your Components

In PSoC Creator, it is possible to create your own Components.  You can read or watch videos about this process

After you have a library with Custom Components, you can add it as a dependency to your project by right clicking on the project and selecting “Dependencies …”  Then navigating to the .cyprj file with your components.  In this case I added the IoTExpert_PSoC_Components library

PSoC Creator - Add Existing

You can see that the “IoTExpert_Components” shows up in the User Dependencies

PSoC Creator - Project Dependencies

Once this is done you will see the new Component Libraries in the Component Catalog.

PSoC Creator - Custom Component Catalog

Components from your custom libraries act exactly the same as the Cypress Components.  Specifically, after you place a custom component in your schematic, when you build the project, it will process the source code, copy it into the “Generated_Source” directory, add the files to your WorkSpace Explorer etc.

A custom component is a good way to easily add a library of source code to your project.

3rd Party Libraries

The last class of source code comes from 3rd Party Libraries.  Classically, these libraries have one more more directories with .c, .h and .a (static libraries) files.  There are some of the files which you might want to modify to configure your version of the library, there are other files that you just need to be compiled into your project.  This situation leaves you with some choices.

  • You can copy all of the library files into your project directory (then add existing item)
  • You can copy some of the library files into your project directory and leave some of the files in the library directory
  • You can add references to the library files into your project

The main issue that you need to consider is Source Code Control – Version Management of your project.  If you copy the library files into your project directories, then you are sure that they won’t change out from underneath you.  BUT, if the library has a bug fix, then you won’t automatically get it.  It is often considered a best practice to have a “single source of truth”.  When you copy files into your project, you violate that principal.  This is a choice that you will need to grapple with.

This is probably best explained with a real example, FreeRTOS.  I have been using the hybrid model.  Specifically I copy the configuration files into my project, but leave the rest of FreeRTOS in my downloaded directory and use references in my PSoC Creator Project.  The process is:

  • In the Windows Explorer copy FreeRTOSConfig.h into my project directory
  • Right click the project and “Add Existing Item”

PSoC Creator - Add FreeRTOS

Then select “FreeRTOSConfig.h” from my project directory

PSoC Creator - Add FreeRTOS

After that you can see that “FreeRTOSConfig.h” is part of my project in the “Header Files” section

PSoC Creator - Project Explorer

I like the rest of the FreeRTOS Files to be part of the project but not actually copied into my project directory.  To do this, I add the required C-Files using the same technique of “Add Existing”  To make FreeRTOS work you need to add all of the C-Files and H-Files in:

  • FreeRTOS/Source/portable/GCC/ARM_CM0
  • FreeRTOS/Source/include
  • FreeRTOS/Source/
  • FreeRTOS/Source/portable/MemMang/heap_1.c

PSoC Creator will automatically take care of telling the compiler where to get the C-Files.  However, it will not take care of the H-Files.  In order to do this you need to change the build settings to add the path to all of the H-Files that you use.  Modify the build settings by right-clicking the project and selecting “Build Settings …”

PSoC Creator - Add FreeRTOS

Then selecting the “…” on Design01 –> Arm GCC … –> Compiler –> Additional Include Directories

\PSoC Creator - Add FreeRTOS Include Directories

Then press the “New” and then the “…” to browse to the directory you want to add.

PSoC Creator - Include Directories

Finally you will end up with a window that looks like this:

PSoC Creator - FreeRTOS Include Path

And when you look at the build options you will see the “-I..\..\..\FreeRTOSv9.0.0\FreeRTOS\Source\include” is added to the compiler options (look at the little window at the bottom)

PSoC Creator - Build Settings

Thank you to Nick from the PSoC Creator Team for reviewing my Article.  He is one of the lead technical genius’ that made PSoC Creator the bad-ass software that it is.

Percepio Tracealyzer & PSoC 4200M

Summary

As you have probably noticed, I have spent a significant amount of time in the last few months doing FreeRTOS projects.  One thing that I have been continuously frustrated about is a lack of analysis tools.  How much memory am I using?  How much stack and heap are free?  How long are tasks taking?  How do you get the priorities set right?  And on and on.  A couple of weeks ago I got an email from the guys at Percepio asking me if I wanted to try out the Percepio Tracealyzer.  I said yes… but that I was really busy and it was going to take a while for me to get to it.  So now I have… and this is the first article about the Percepio Tracealyzer.  Unfortunately the story involves me burning myself with a soldering iron but I suppose that isn’t their fault.

In this series of article’s I will instrument the FreeRTOS projects that I have been showing you with the Percepio Tracealyzer Recorder Library, then run the tool to see what is going on.  In this specific Article I will show you how to get the most basic Tracealyzer functionality going on a PSoC4200M.

Percepio Tracealyzer

The way that Percepio Tracelzer works is that you install a bit of code into your project called the Tracealyzer Recorder Library.   In streaming mode, the code creates a new task in FreeRTOS called “TzCtrl” which interacts with the FreeRTOS kernel to record all of the running task information into a communication link (e.g UART, SPI, JLINK RTT, etc.)  In snapshot mode, the kernel information is just written to an SRAM buffer inside of the PSoC.

This is the architecture picture from the Percepio website:

Percepio Tracelyzer Architecture

Updating CY8CKIT-044 PSoC4200M Development Kit

To make the Percepio Tracealyzer work you need to turn the “Snapshot or streaming” line from the picture above into a real connection.  In snapshot mode there are two ways (I think) that you can do it.

  1. You can stop the processor with the debugger, then write the region of memory with the trace buffer into an “.hex” or a “.bin” file.  Then read that file into Percepio Tracealyzer.  Unfortunately the debugger in PSoC Creator cannot create binary output files of regions of memory like that… so plan 1 is out the window
  2. You can attach a Segger JLINK to the PSoC via SWD.  Then, Tracealyzer knows how to talk to the JLink to read the memory.  This is what I am going to do for this Article.

One feature that is very cool about the Snapshot methodology is that Tracealyzer can search the output file and find the trace buffer.  The trace buffer data structure is marked by something that Tracealyzer can find.

When our very good devkit team team in India built the CY8CKIT-044 (which I have used and written about quite a bit), they installed a built in debugger/programmer called “KitProg“.  But they also understood that someone might want to connect some third part debugger like the JLINK.  So… they put the footprint for a 10-pin ARM debugging port onto the board. (see it in the lower left).  Actually if you look at the board, you can see two 10-pin footprints, the one at the top is connected to the PSoC5 (which serves as the KitProg).

CY8CKIT-044 PSoC 4200M Development Kit

Before I can use a JLINK I needed to do this … which unfortunately ended with me burning myself with the soldering iron… bad Alan.

CY8CKIT-044 PSoC 4200M Development Kit

Tracealyzer Snapshot Mode on Blinking LED Project

In a previous article I talked about the organization of PSoC Creator projects, specifically how to handle the situation where you want to include .h/.c files into your project but you don’t want to modify them.  This is exactly what I will do with the Percepio Tracealyzer Recorder Library.  The library has some files which I will want to leave intact and I will just make references to them in my project including trcKernelPort.h, trcPortDefines.h etc.  And there are some files which I will want to modify, which I will copy out of the Trace Recorder Library into my project for editing trcConfig.h, trcSnapShotConfig.h and trcStreamingConfig.h

To start the first Percepio Tracealyzer example I will use the basic “Snapshot Mode”.  There is good documentation on the Percepio Tracealyzer documentation website.  I will start by copying the PSoC Creator Workspace from the FreeRTOS articles from GitHub.  It has 9 projects in it, starting with the blinking led, going to a more complicated multi-thread project.  The next step is to download the FreeRTOS Tracealyzer library from the Perceio website into a parallel directory called “TraceRecorder”.

Make a new folder for the non-changing include files called “TraceRecorder” (for the files that I don’t want to change)

PSoC Creator Project Configuration

Next I will add the files that I don’t want to change to the project so that I can see them (meaning they are just referenced by PSoC Creator)

PSoC Creator Project Configuration - Add External Files

They reside in the directory TraceRecorder/include

PSoC Creator Project Configuration - Add External Files

Once I have the unchanging .h’s into my project, I need to add their directory to the include path.  To do this right-click on the project and select “Build Settings …”

PSoC Creator Project Configuration - Add External Files

Then click “Compiler” and then the “…” on the “Additional Include Directories” line

PSoC Creator Project Configuration - Compiler Options

Navigate until you get to TraceRecoder/include then press “Select Folder”

PSoC Creator Project Configuration - Update include path

Now your include path should look like this:

PSoC Creator Project Configuration - Include Path

Next, I want to copy the configuration files in the Windows Explorer to my project directory so that they become a changeable part of they project.  They reside in TraceRecorder/config (I just did a Ctrl-C to copy)

PSoC Creator Project Configuration - Add Trace Recorder Library

You want to paste them into your project directory

PSoC Creator Project Configuration - Add External Files

Then you need to add them to the project so that you can easily edit them by right clicking on the “Header Files” folder and selecting “Add–>Existing Item”

PSoC Creator Project Configuration - Add External Files

Then selecting them out of your project directory.

PSoC Creator Project Configuration - Add External Files

Now we need to add references to all of the .c files.  Start by making a new folder for the c-files called “TraceRecorder”

PSoC Creator Project Configuration - Add TraceRecorder

Then “Add–>Existing Item…”

PSoC Creator Project Configuration - Add External Files

Select the files from the TraceRecorder directory

PSoC Creator Project Configuration - Add TraceRecorder Files

Now your project should look like this

PSoC Creator Project Configuration - Project Configuration

Your project now has all of the necessary body parts so you next will modify the source files.  Start with modifying FreeRTOSConfig.h to include the TraceRecorder Library stuff.

/* Integrates the Tracealyzer recorder with FreeRTOS */
#if ( configUSE_TRACE_FACILITY == 1 )
#include "trcRecorder.h"
#endif

Then modify the trcConfig.h so that it has access to all of the CMSIS header files.

/******************************************************************************
 * Include of processor header file
 * 
 * Here you may need to include the header file for your processor. This is 
 * required at least for the ARM Cortex-M port, that uses the ARM CMSIS API.
 * Try that in case of build problems. Otherwise, remove the #error line below.
 *****************************************************************************/
//#error "Trace Recorder: Please include your processor's header file here and remove this line."
#include <project.h>

Then tell the TraceRecorder that we are using an ARM Cortex-M

/*******************************************************************************
 * Configuration Macro: TRC_CFG_HARDWARE_PORT
 *
 * Specify what hardware port to use (i.e., the "timestamping driver").
 *
 * All ARM Cortex-M MCUs are supported by "TRC_HARDWARE_PORT_ARM_Cortex_M".
 * This port uses the DWT cycle counter for Cortex-M3/M4/M7 devices, which is
 * available on most such devices. In case your device don't have DWT support,
 * you will get an error message opening the trace. In that case, you may 
 * force the recorder to use SysTick timestamping instead, using this define:
 *
 * #define TRC_CFG_ARM_CM_USE_SYSTICK
 *
 * For ARM Cortex-M0/M0+ devices, SysTick mode is used automatically.
 *
 * See trcHardwarePort.h for available ports and information on how to 
 * define your own port, if not already present.
 ******************************************************************************/
//#define TRC_CFG_HARDWARE_PORT TRC_HARDWARE_PORT_NOT_SET
#define TRC_CFG_HARDWARE_PORT TRC_HARDWARE_PORT_ARM_Cortex_M

Now, you need to modify the project’s stack and heap size setup

PSoC Creator Project Configuration - Design Wide Resources

The default snapshot buffer is to big to fit into PSoC SRAM, so I change the size to 400 records

/*******************************************************************************
 * TRC_CFG_EVENT_BUFFER_SIZE
 *
 * Macro which should be defined as an integer value.
 *
 * This defines the capacity of the event buffer, i.e., the number of records
 * it may store. Most events use one record (4 byte), although some events 
 * require multiple 4-byte records. You should adjust this to the amount of RAM
 * available in the target system.
 * 
 * Default value is 1000, which means that 4000 bytes is allocated for the
 * event buffer.
 ******************************************************************************/
#define TRC_CFG_EVENT_BUFFER_SIZE 400

Finally modify main to start the Trace Recorder (vTraceEnable on line 40)

int main(void)
{
    CyGlobalIntEnable; /* Enable global interrupts. */
    
    setupFreeRTOS();
    vTraceEnable(TRC_START);

    /* Create LED task, which will blink the RED LED */
    xTaskCreate(
        LED_Task,       /* Task function */
        "LED Blink",    /* Task name (string) */
        200,            /* Task stack, allocated from heap */
        0,              /* No param passed to task function */
        1,              /* Low priority */
        0 );            /* Not using the task handle */
      
    vTaskStartScheduler();
    while(1); // get rid of the stupid warning
}

Testing the Output

After all of the setup is done you can build and program the development kit.

PSoC Creator Program Project

Plug in the Segger J-Link

CY8CKIT-044 + JLINK

Start Tracealyzer then setup the J-Link (click on J-Link Settings…)

Percepio Tracelyzer

Select “Select Device…”

Percepio Tracelyzer - JLINK Settings

Filter the list to “cypress” then choose the “CY8C4247xxx” (which is the chip that is on the C8CKIT-044)

Percepio Tracelyzer - JLINK Settings Select Device

Then Select “Jink->Read Trace”

Percepio Tracelyzer - Read Trace

Accept the defaults (this window only is only brought up the first time)

Percepio Tracelyzer - JLINK Memory Region

Then you will end up with a screen like this.  Each stripe of white/gray is 1 second in time.  The yellow line is where the startup occurred.  The red lines are where the “LED Blink” task was running.  This seems to make sense as you get a tiny red line 2x/second (remember in the source code we have a 500ms delay so that makes sense).

Percepio Tracelyzer - Console

Next I press the reset button on the devkit and re-run the trace.  Then I click on the second red line and the window on the right gives me information about that task.  You can see that the task ran for 53uS and took 23uS to start (time taken up in the FreeRTOS scheduler and Percepio Tracealyzer Recorder Library)

Percepio Tracelyzer - Console

Conclusion

Obviously the snapshot mode is limited by the size of the RAM buffer that you allocate but it saves you the hardware resources and timing constraints that are required to stream FreeRTOS data.  In the next several articles I will show you how to:

  • Use Segger JLINK RTT streaming
  • Make a streaming port
  • Use some of the other screens in the Percepio Tracealyzer

As always you can find all of these projects on the IotExpert GitHub site or git@github.com:iotexpert/PSoC-Tracelyzer.git

Article Description
Percepio Tracealyzer & PSoC An Introduction to Percepio Tracealyzer on the Cypress PSoC
Percepio Tracealyzer RTT Streamport - PSoC4200M Make the JLINK RTT Library work with Tracealyzer
Percepio Tracealyzer PSoC UART Streamport Creating a UART Streamport
Percepio Tracealyzer - Analyzing the PSoC Tracealyzer Streamport Figure out what is broken in the UART Streamport
Percepio Tracealyzer - Using PSoC DMA to Fix the UART Streamport Implementing PSoC DMA to improve the CPU Utilization
Percepio Tracealyzer - Running on PSoC6 Porting the Percepio Tracealyzer to PSoC6

IoT Bar

Its not really IoT… but good for the soul.  Have patience… I have some good stuff coming next week.