For my next installation I decided to try automating the garage door opener. To do this I purchased:
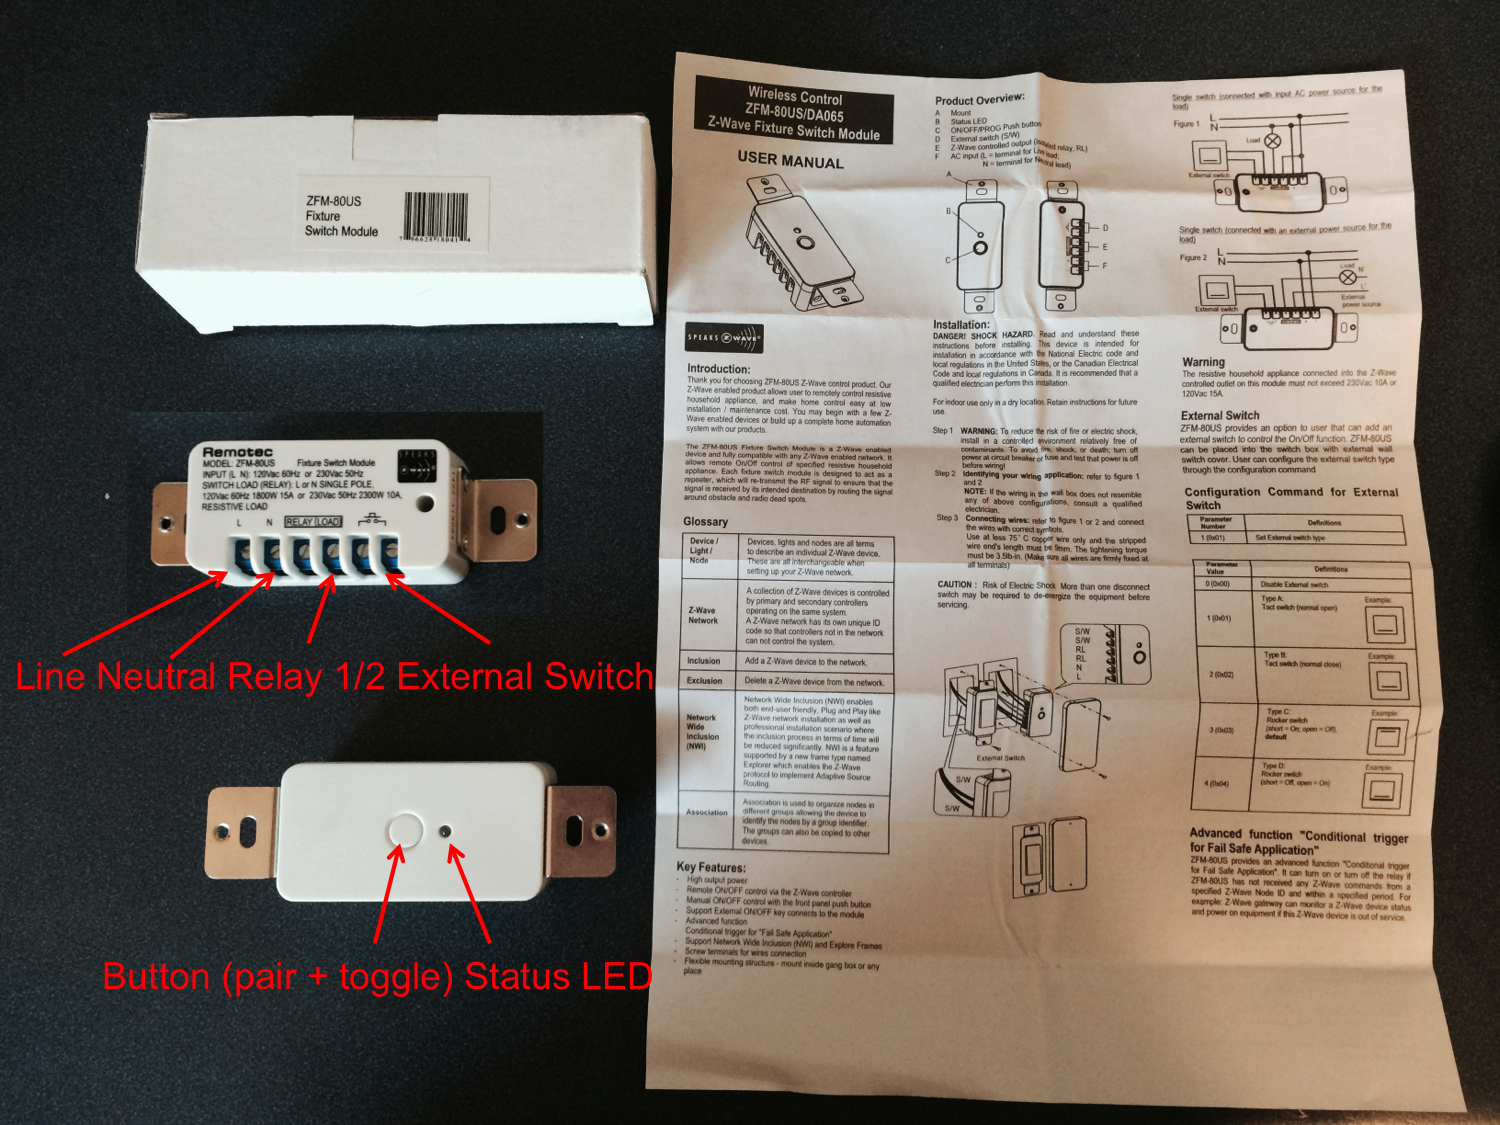
- ZFM-80US Fixture Switch Module
- Ecolink Garage Door Tilt Sensor
On at least one site it was stated that you should install a camera to monitor the garage door – specifically that you should look before you close the door. Ill leave that for another day. In my previous posts I described the installation of automated lights in my barn. I decided rather than try to sort out range extenders that I would install another HomeTroller something else that I plan to come back to.
The ZFM-80 is a cool little module. It has connections for:
- (L)ine and (N)eutral (to power the switch)
- The two connections for the internal relay
- Two connections for an external switch (you can connect a button to the switch to manually trigger the relay
The front of the switch has a status LED and a button that can serve to trigger the relay or to start pairing mode.
In my garage it was inconvenient to install the switch near the current garage door opener button so I decided to install it near the garage door opener power which was on the ceiling above the garage door opener. To do this I cut in an “old work” electric box. Whoever thought this type of box up was a clever person. If you have not used an old work box, start by cutting a hole in the drywall, then tighten the screws on the box which draws down two plastic clamps to hold the box in place. In order to make the switch work you need to provide it line voltage, in my case I put a wire between the plug next to my box and my box. I then attached the switch to two wires running the garage door by cutting the wires in half and shorting the relay connections to the wires.
The installation looks like this:
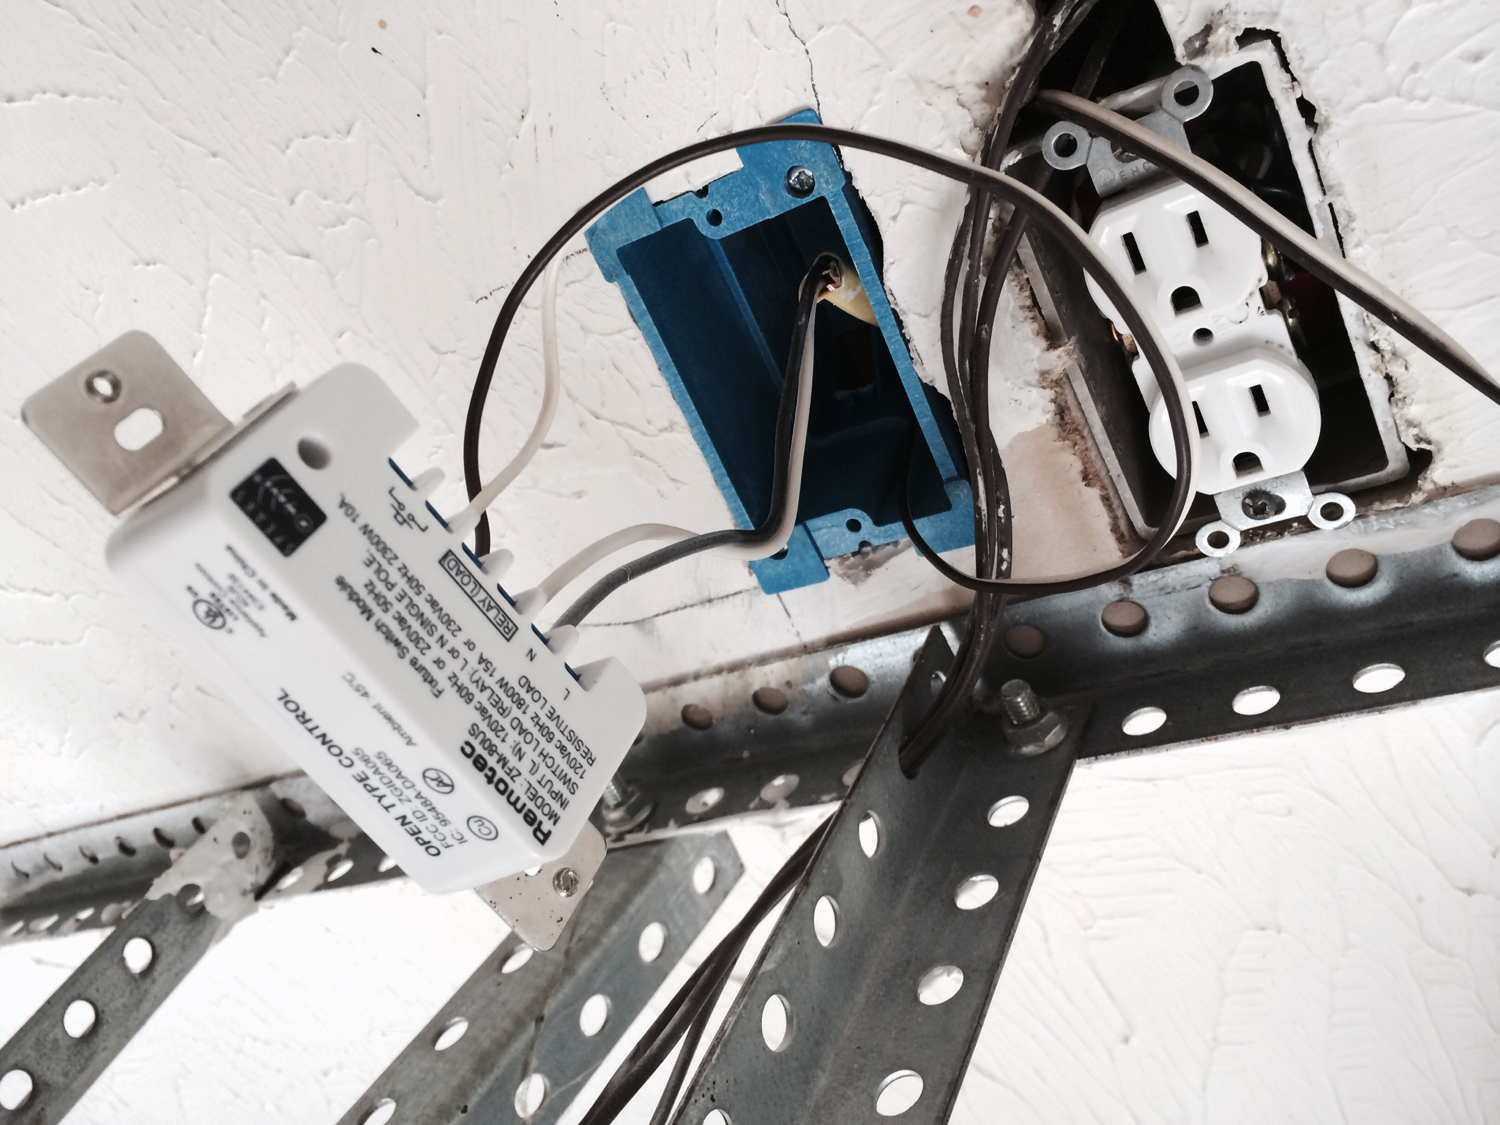
After that my son 10 year old son buttoned up the wires, box etc.

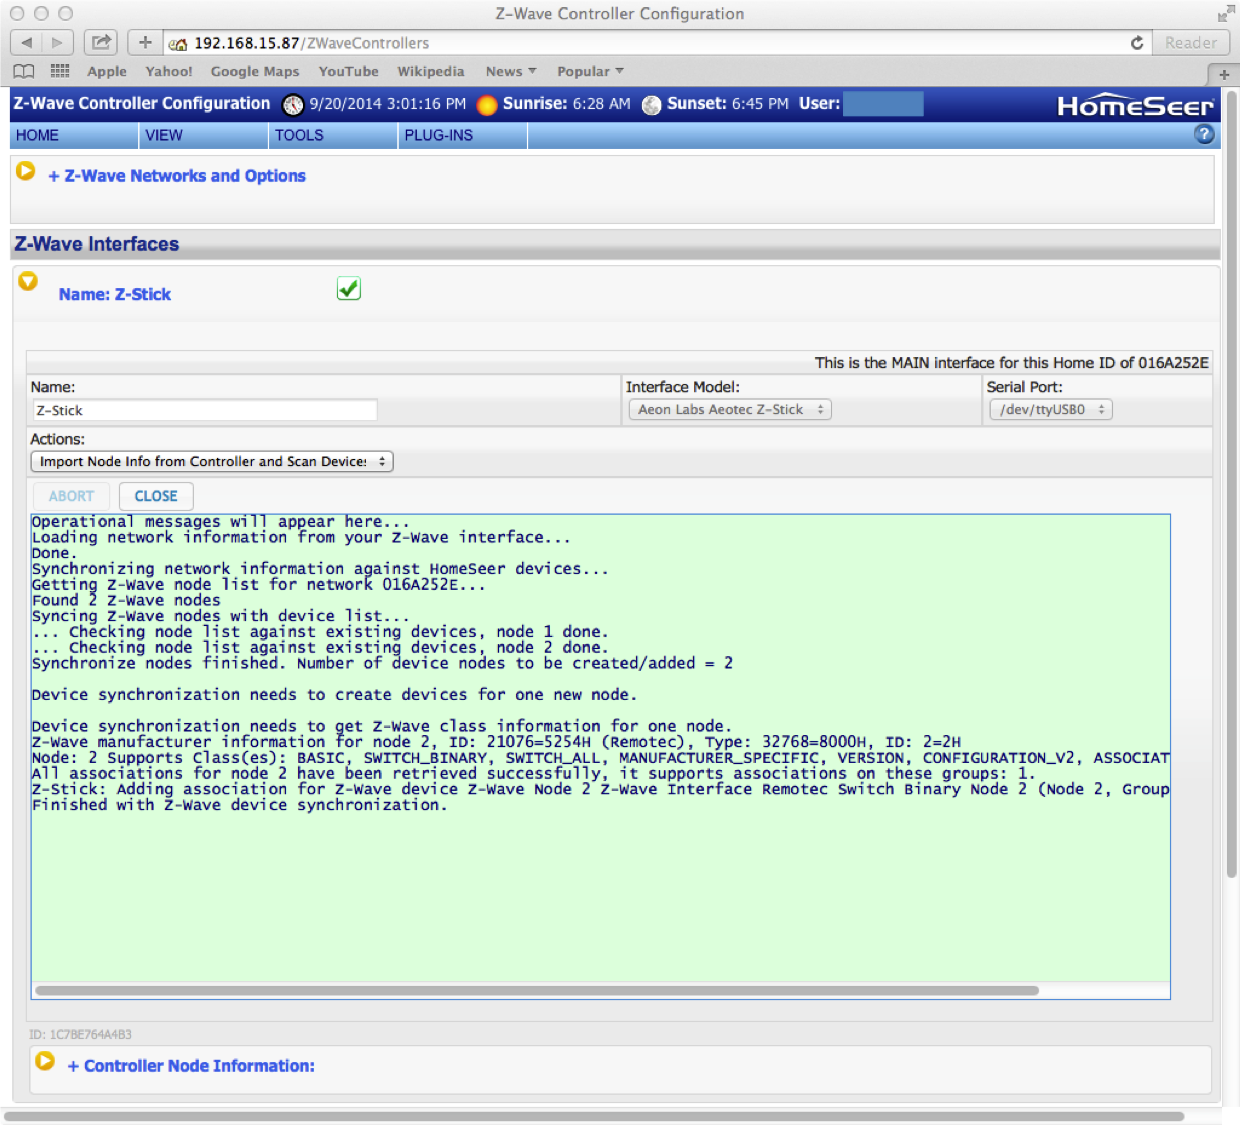
The last step is to bind the switch to your network. To do this:
1. Press the button on the Zstick (1 time). The blue light will start flashing at about 1Hz
2. Press the button on the Zwave fixture switch module. The Zstick will bind with the fixture module. The Zstick will blink rapidly for about 3 seconds, then go back to 1Hz blink rate. Press the button on the Zstick to end binding mode and then re-insert the Zstick into your HomeTroller.
3. Go the Plug-ins->Z-wave->Controller management. Then click the yellow arrow on next to the interface. Then select “import Node Info from Controller and Scan Devices”. This will import the binding information from the Zstick
After I completed the installation of the switch I then installed the tilt sensor. This is a simple battery powered device that send out a Zwave status each time it is “tiled” (either up or down). It does this with a little mercury? switch that contacts (or doesn’t) when the switch is rotate about 90 degrees. The sensor also reports its battery status. The documentation says that the battery will last up to 4-6 years. The physical installation is simple, just attach it to the top of your garage door with the sticky tape and two screws.

To connect this device to the network
1. Click the Zstick binding button
2. Insert the battery into the Tilt Sensor
3. The Zstick will flash quickly when it binds.
4. Click the Zstick button to take it out of binding mode and re-insert it into the RPi
5. Go the Plug-ins->Z-wave->Controller management. Then click the yellow arrow on next to the interface. Then select “import Node Info from Controller and Scan Devices”. This will import the binding information from the Zstick
The only trick that I found with this part of the installation is that the cover must be firmly on the tilt sensor or the LED will not go out and it wont work correctly.
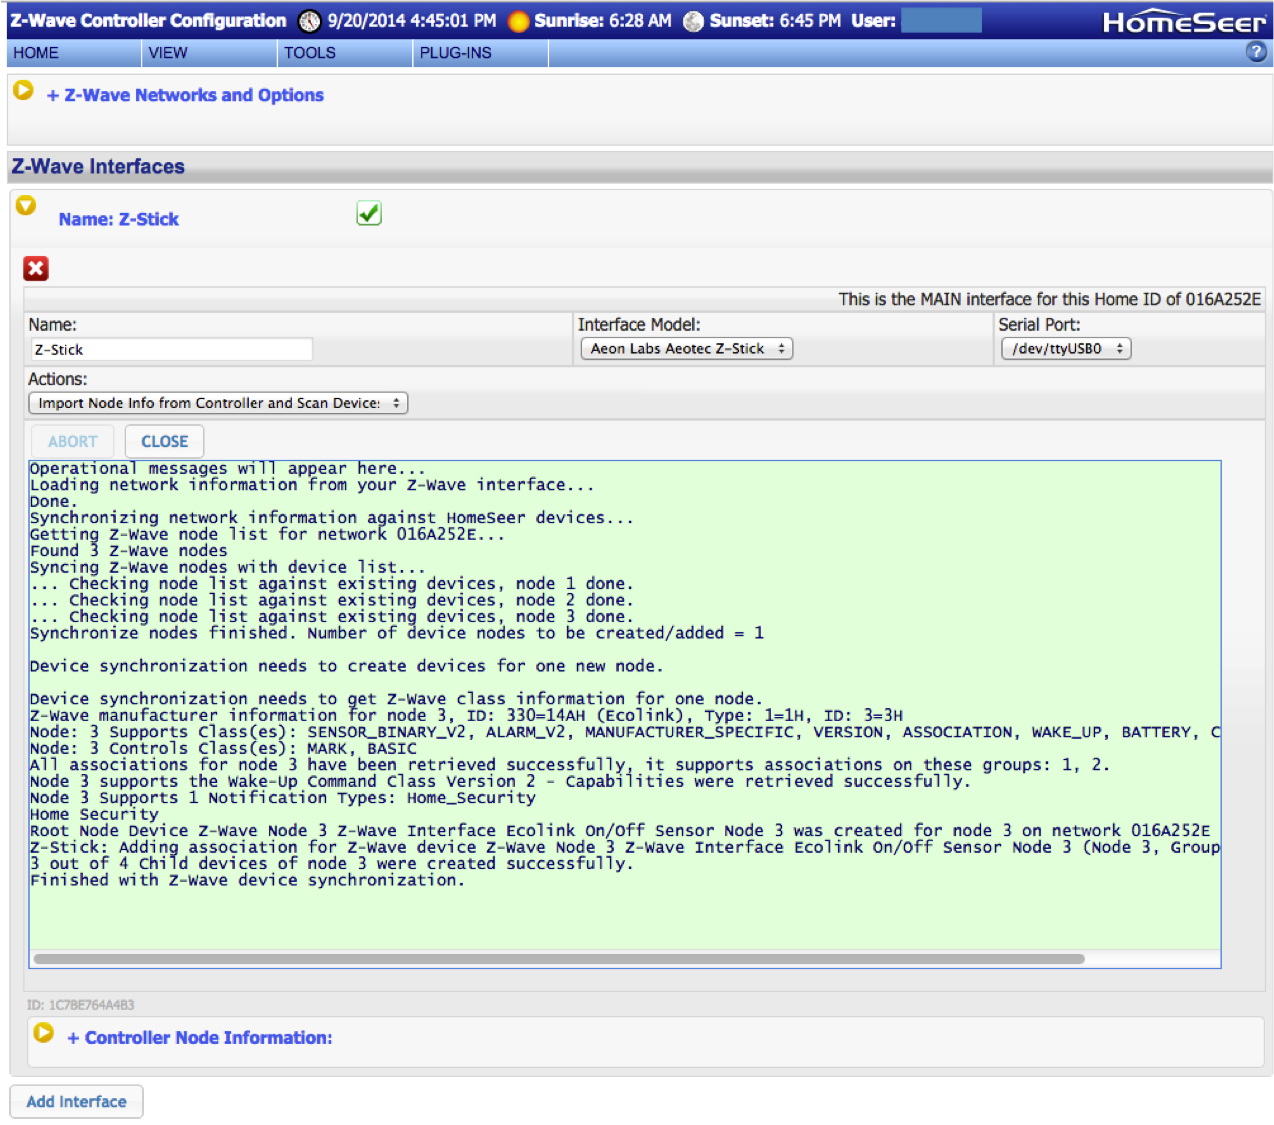
Once you have completed the two binding you will should have a device management screen that looks like this:
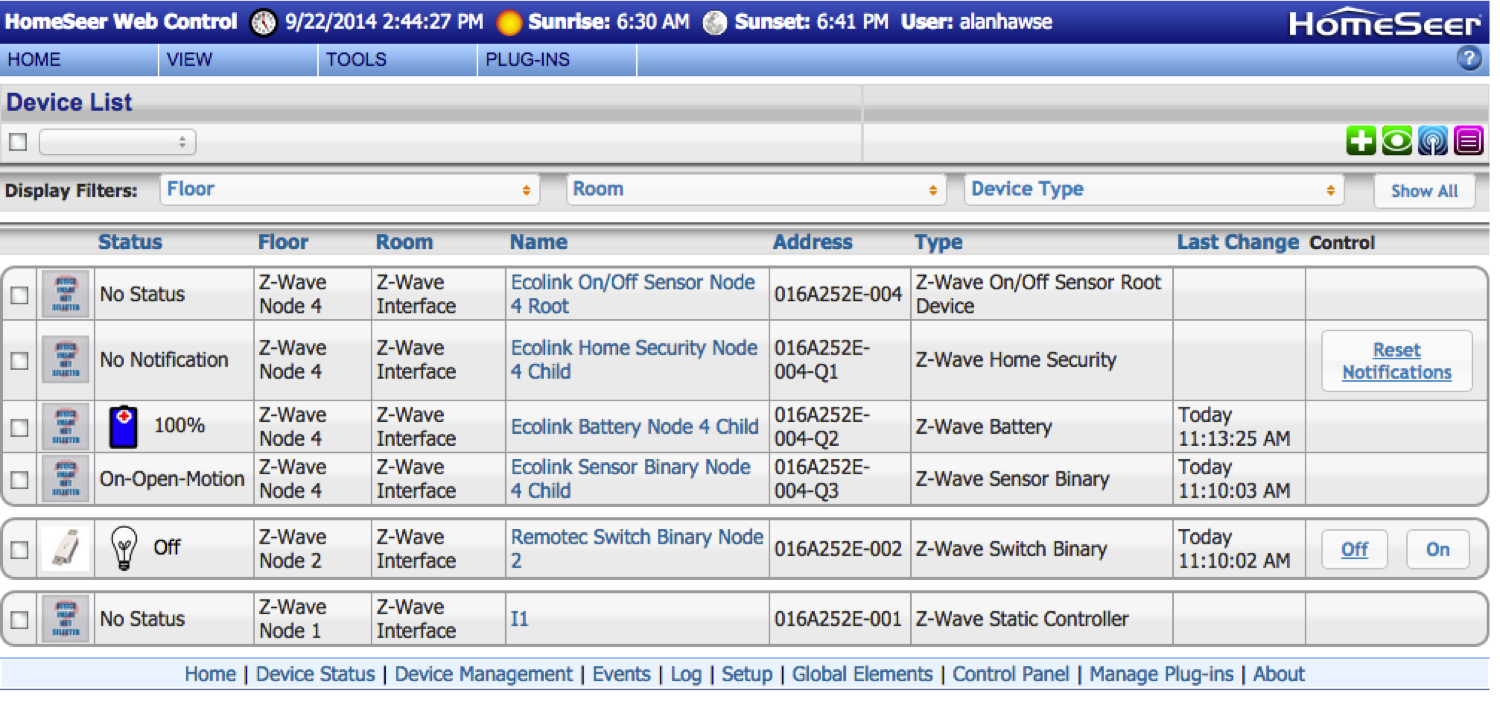
Notice that my tilt sensor is node-4. When I did the original import, the system got confused and I couldn’t figure out how to fix it. So, I deleted everything and re-imported the network configuration.
The last thing that you need to do to make this installation work correctly is to create an “event” to run the garage door. The problem is that when you “click” the switch it will toggle the relay. In order to operate the garage door you need to toggle it “on” to activate the opener, then you need to toggle it back to “off” in order to re-enable the door. To do this:
1. Go to the “View->Events” menu.
2. Click the green plus to add an event.
3. Name the event
3. Select If “This event is manually triggered”
4. Then “control a device”
5. Select your switch and set it to “on”
6. Click the green “plus” to add another step
7. Select “Then wait” and enter a few seconds (in my case I picked 5″
8. Click the green “plus” to add another step
9. Then “control a device”
10. Select your switch and set it to “off”
You should end up with an even that looks like this:
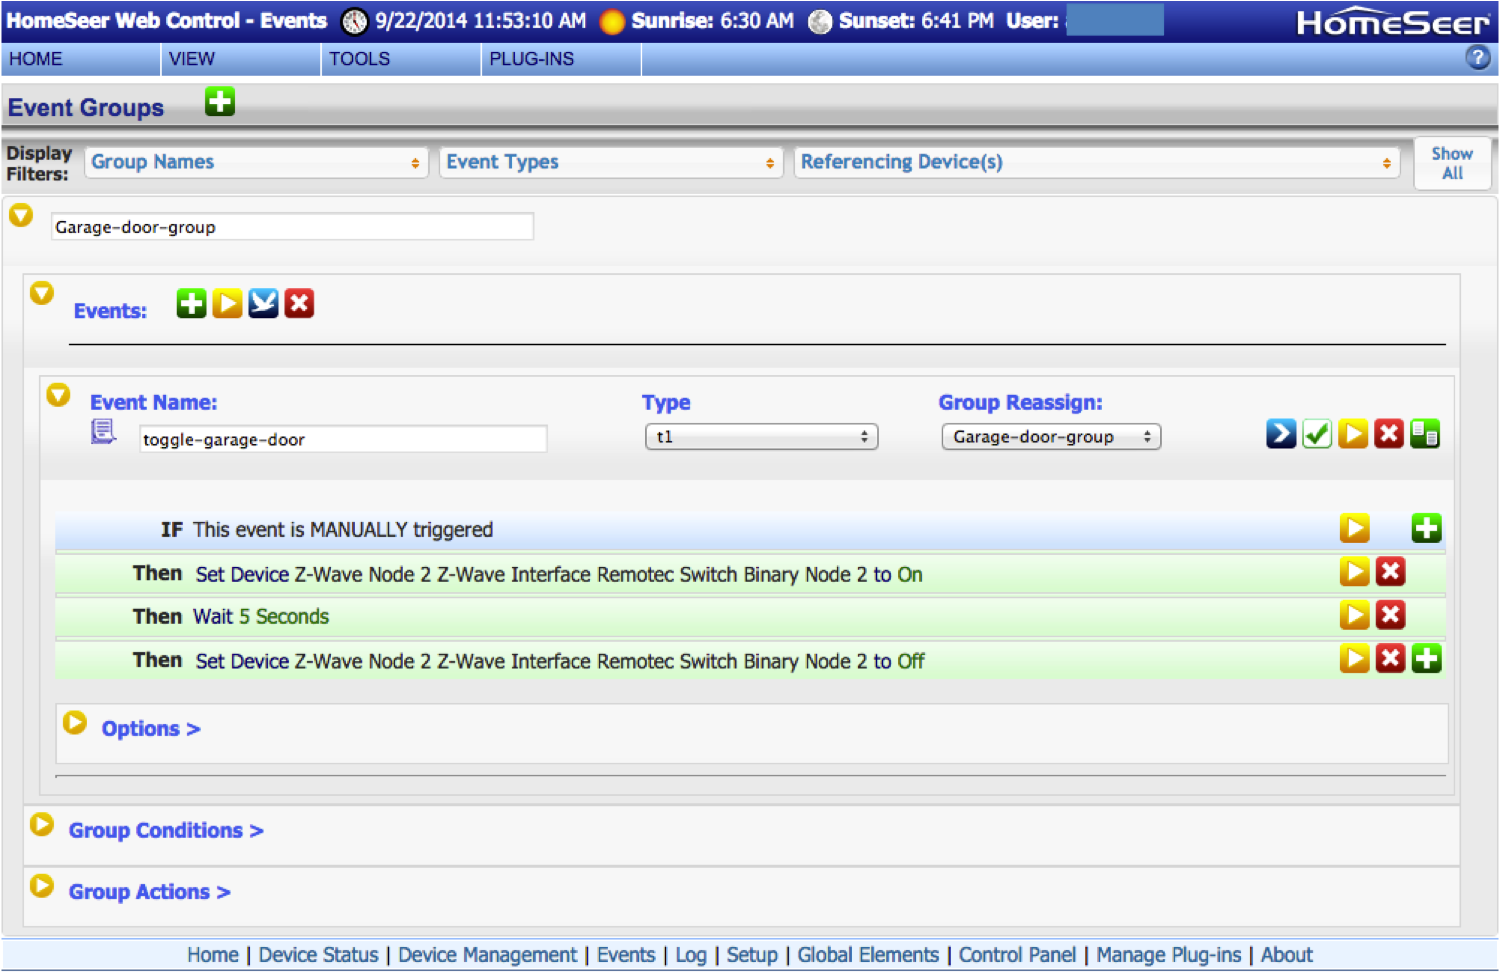
You can now run the even by pressing the “>” play button thing. I would like to be able to run this event from a simpler interface, but I don’t know how… for now anyway. Stay tuned.
Index
Description
Home Automation with Zwave and the HomeTroller Zee (Part 1)
An Introduction to Zwave
Home Automation with Zwave and the HomeTroller Zee (Part 2)
Installing HomeSeer
Home Automation with Zwave and the HomeTroller Zee (Part 3)
Installing the switches
Home Automation with Zwave and the HomeTroller Zee (Part 4)
Building the Zwave network
Home Automation with Zwave and the HomeTroller Zee (Part 5)
The HSTouch Server
Home Automation with Zwave and the HomeTroller Zee (Part 6)
Zwave in the garage
No comment yet, add your voice below!